key MINI Clubman 2010 User Guide
[x] Cancel search | Manufacturer: MINI, Model Year: 2010, Model line: Clubman, Model: MINI Clubman 2010Pages: 160, PDF Size: 2.58 MB
Page 44 of 160
Driving
42
Applying
The lever locks in position automatically.
Releasing
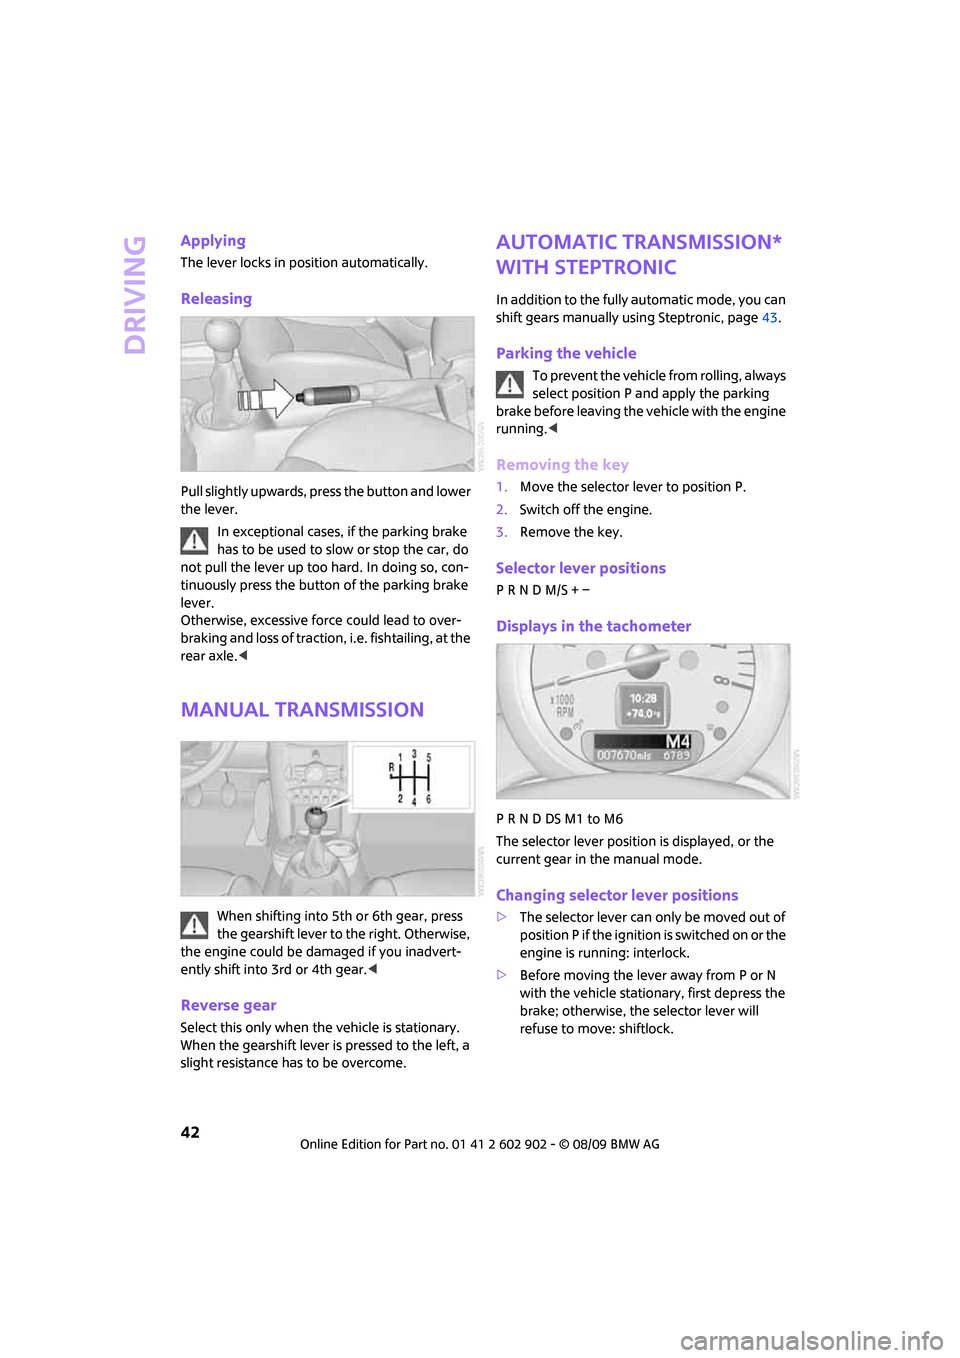
Pull slightly upwards, press the button and lower
the lever.
In exceptional cases, if the parking brake
has to be used to slow or stop the car, do
not pull the lever up too hard. In doing so, con-
tinuously press the button of the parking brake
lever.
Otherwise, excessive force could lead to over-
braking and loss of traction, i.e. fishtailing, at the
rear axle.<
Manual transmission
When shifting into 5th or 6th gear, press
the gearshift lever to the right. Otherwise,
the engine could be damaged if you inadvert-
ently shift into 3rd or 4th gear.<
Reverse gear
Select this only when the vehicle is stationary.
When the gearshift lever is pressed to the left, a
slight resistance has to be overcome.
Automatic transmission*
with Steptronic
In addition to the fully automatic mode, you can
shift gears manually using Steptronic, page43.
Parking the vehicle
To prevent the vehicle from rolling, always
select position P and apply the parking
brake before leaving the vehicle with the engine
running.<
Removing the key
1.Move the selector lever to position P.
2.Switch off the engine.
3.Remove the key.
Selector lever positions
P R N D M/S + –
Displays in the tachometer
P R N D DS M1 to M6
The selector lever position is displayed, or the
current gear in the manual mode.
Changing selector lever positions
>The selector lever can only be moved out of
position P if the ignition is switched on or the
engine is running: interlock.
>Before moving the lever away from P or N
with the vehicle stationary, first depress the
brake; otherwise, the selector lever will
refuse to move: shiftlock.
Page 51 of 160
REFERENCEAT A GLANCE CONTROLS DRIVING TIPS MOBILITY
49
Controls overview
Odometer, outside
temperature display,
clock
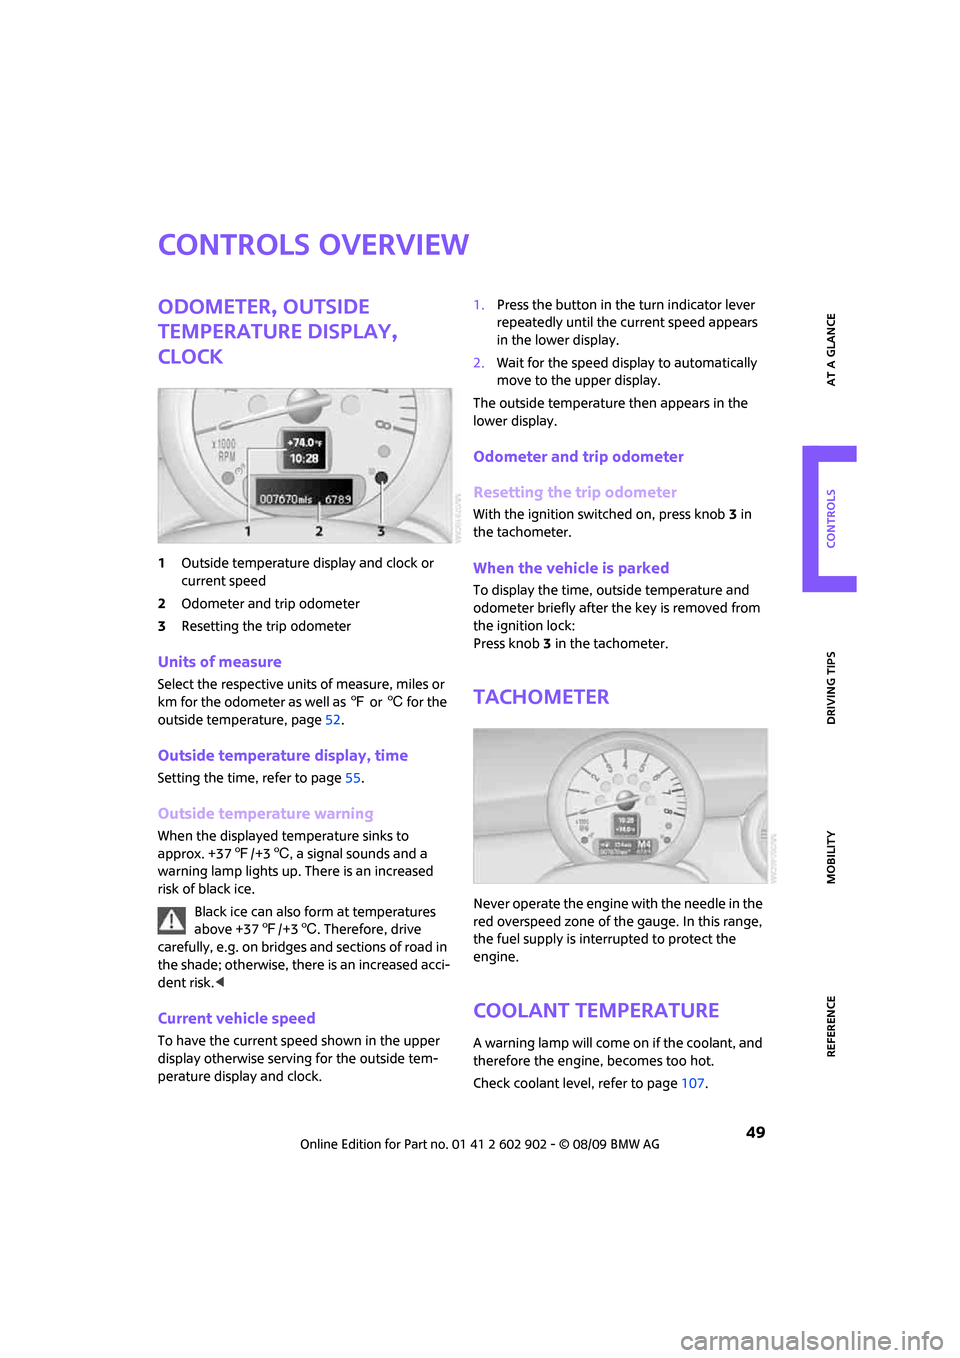
1Outside temperature display and clock or
current speed
2Odometer and trip odometer
3Resetting the trip odometer
Units of measure
Select the respective units of measure, miles or
km for the odometer as well as 7 or 6 for the
outside temperature, page52.
Outside temperature display, time
Setting the time, refer to page55.
Outside temperature warning
When the displayed temperature sinks to
approx. +377/+36, a signal sounds and a
warning lamp lights up. There is an increased
risk of black ice.
Black ice can also form at temperatures
above +377/+36. Therefore, drive
carefully, e.g. on bridges and sections of road in
the shade; otherwise, there is an increased acci-
dent risk.<
Current vehicle speed
To have the current speed shown in the upper
display otherwise serving for the outside tem-
perature display and clock.1.Press the button in the turn indicator lever
repeatedly until the current speed appears
in the lower display.
2.Wait for the speed display to automatically
move to the upper display.
The outside temperature then appears in the
lower display.
Odometer and trip odometer
Resetting the trip odometer
With the ignition switched on, press knob 3 in
the tachometer.
When the vehicle is parked
To display the time, outside temperature and
odometer briefly after the key is removed from
the ignition lock:
Press knob 3 in the tachometer.
Tachometer
Never operate the engine with the needle in the
red overspeed zone of the gauge. In this range,
the fuel supply is interrupted to protect the
engine.
Coolant temperature
A warning lamp will come on if the coolant, and
therefore the engine, becomes too hot.
Check coolant level, refer to page107.
Page 79 of 160
REFERENCEAT A GLANCE CONTROLS DRIVING TIPS MOBILITY
77
Practical interior accessories
Integrated universal
remote control*
The concept
The integrated universal remote control can
replace as many as three hand-held transmitters
for various remote-controlled devices, such as
garage and gate openers and lighting systems.
The integrated universal remote control regis-
ters and stores signals from the original hand-
held transmitters.
The signal of an original hand-held transmitter
can be programmed on one of the three mem-
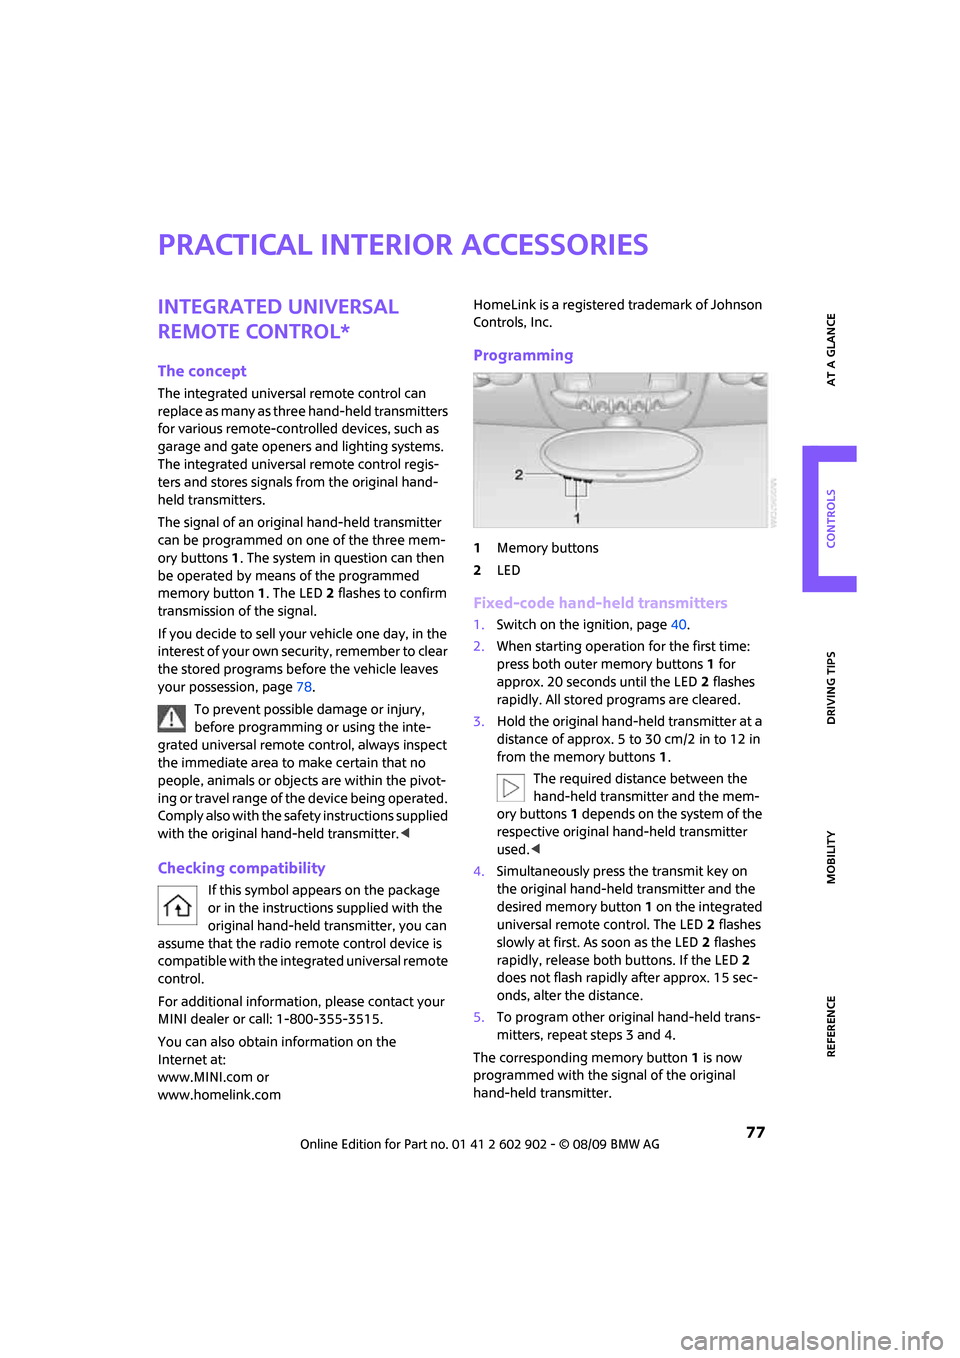
ory buttons1. The system in question can then
be operated by means of the programmed
memory button1. The LED2 flashes to confirm
transmission of the signal.
If you decide to sell your vehicle one day, in the
interest of your own security, remember to clear
the stored programs before the vehicle leaves
your possession, page78.
To prevent possible damage or injury,
before programming or using the inte-
grated universal remote control, always inspect
the immediate area to make certain that no
people, animals or objects are within the pivot-
ing or travel range of the device being operated.
Comply also with the safety instructions supplied
with the original hand-held transmitter.<
Checking compatibility
If this symbol appears on the package
or in the instructions supplied with the
original hand-held transmitter, you can
assume that the radio remote control device is
compatible with the integrated universal remote
control.
For additional information, please contact your
MINI dealer or call: 1-800-355-3515.
You can also obtain information on the
Internet at:
www.MINI.com or
www.homelink.comHomeLink is a registered trademark of Johnson
Controls, Inc.
Programming
1Memory buttons
2LED
Fixed-code hand-held transmitters
1.Switch on the ignition, page40.
2.When starting operation for the first time:
press both outer memory buttons1 for
approx. 20 seconds until the LED2 flashes
rapidly. All stored programs are cleared.
3.Hold the original hand-held transmitter at a
distance of approx. 5 to 30 cm/2 in to 12 in
from the memory buttons1.
The required distance between the
hand-held transmitter and the mem-
ory buttons1 depends on the system of the
respective original hand-held transmitter
used.<
4.Simultaneously press the transmit key on
the original hand-held transmitter and the
desired memory button 1 on the integrated
universal remote control. The LED 2 flashes
slowly at first. As soon as the LED2 flashes
rapidly, release both buttons. If the LED2
does not flash rapidly after approx. 15 sec-
onds, alter the distance.
5.To program other original hand-held trans-
mitters, repeat steps 3 and 4.
The corresponding memory button 1 is now
programmed with the signal of the original
hand-held transmitter.
Page 80 of 160
Practical interior accessories
78
You can operate the system with the engine
running or with the ignition switched on.
If the system fails to function even after
repeated programming, check whether
the original hand-held transmitter uses an alter-
nating-code system. To do so, either read the
instructions for the original hand-held transmit-
ter or hold down the programmed memory
button1 of the integrated universal remote con-
trol. If the LED2 on the integrated universal
remote control flashes rapidly and then remains
lit for about two seconds, the original hand-held
transmitter uses an alternating-code system. If it
uses an alternating-code system, program the
memory buttons1 as described under Alternat-
ing-code hand-held transmitters.<
Alternating-code hand-held
transmitters
To program the integrated universal remote
control, consult the operating instructions for
the device to be set. You will find information
there on the possibilities for synchronization or
programming of additional hand-held trans-
mitters.
When programming hand-held transmitters that
employ an alternating code, please observe the
following supplementary instructions:
Programming will be easier with the aid of
a second person.<
1.Park your vehicle within the range of the
remote-controlled device.
2.Program the integrated universal remote
control as described above in the section
Fixed-code hand-held transmitters.
3.Locate the button on the receiver of the
device to be set, e.g. on the drive unit.
4.Press the button on the receiver of the
device to be set. After step 4, you have
approx. 30 seconds for the next step 5.
5.Press the programmed memory button1 of
the integrated universal remote control
three times.
The corresponding memory button 1 is now
programmed with the signal of the original
hand-held transmitter.
Clearing stored programs
Press both outer memory buttons1 for approx.
20 seconds until the LED2 flashes: All stored
programs are cleared.
It is not possible to clear individual programs.
Reassigning individual programs
1.Hold the original hand-held transmitter at a
distance of approx. 5 to 30 cm/2 in to 12 in
from the memory buttons1.
The required distance between the
hand-held transmitter and the mem-
ory buttons1 depends on the system of
the respective original hand-held transmit-
ter used.<
2.Press the desired memory button1 of the
integrated universal remote control.
3.If the LED 2 flashes slowly after approx.
20 seconds, press the transmit key of the
original hand-held transmitter and release
both buttons as soon as the LED2 flashes
rapidly.
If the LED 2 does not flash rapidly after
approx. 15 seconds, alter the distance and
repeat this step.
Glove compartment
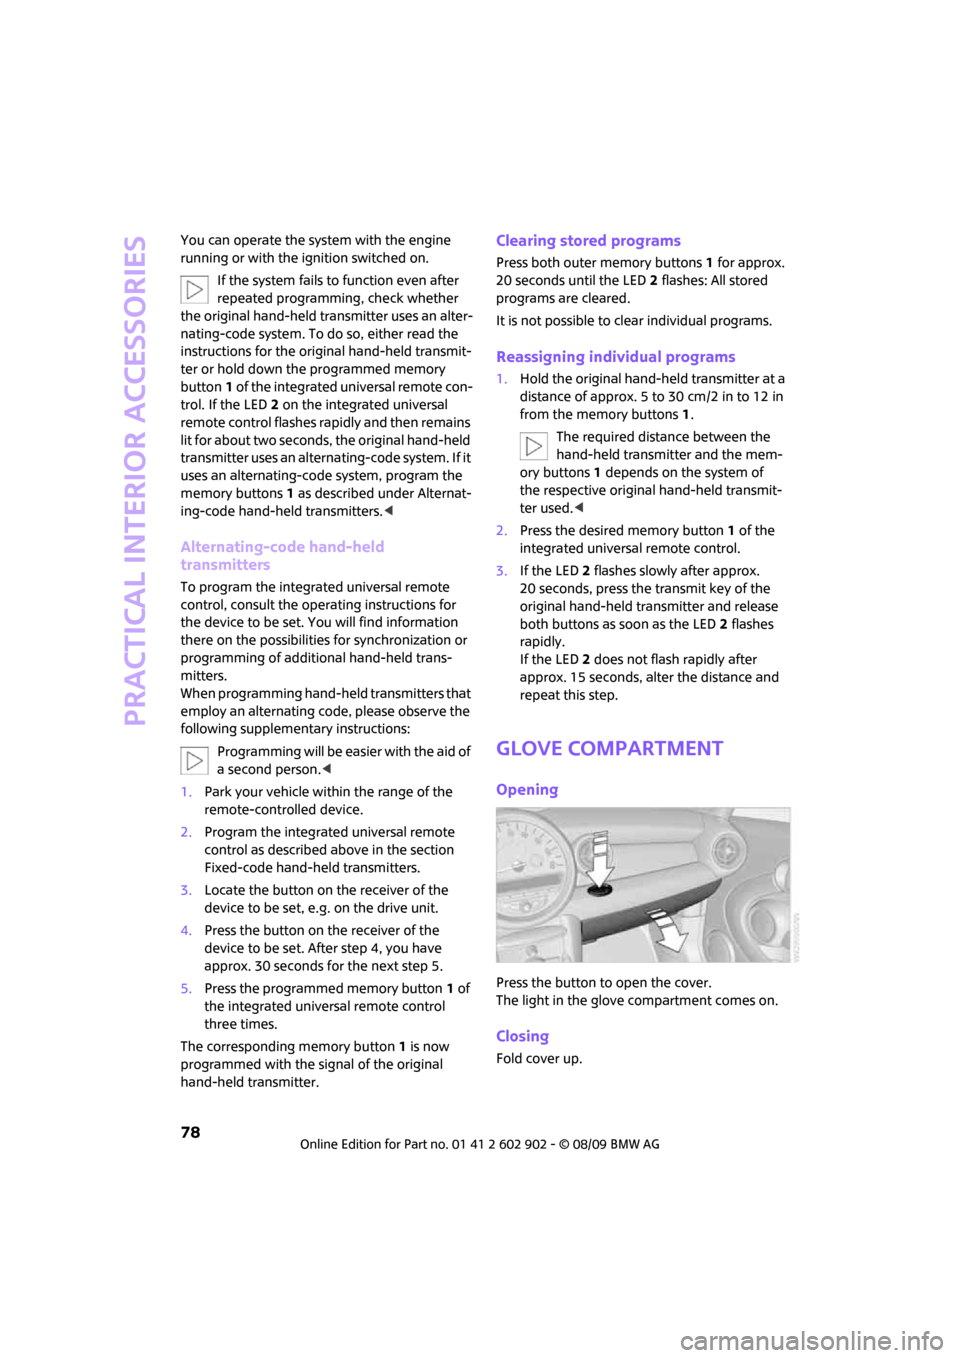
Opening
Press the button to open the cover.
The light in the glove compartment comes on.
Closing
Fold cover up.
Page 83 of 160
REFERENCEAT A GLANCE CONTROLS DRIVING TIPS MOBILITY
81
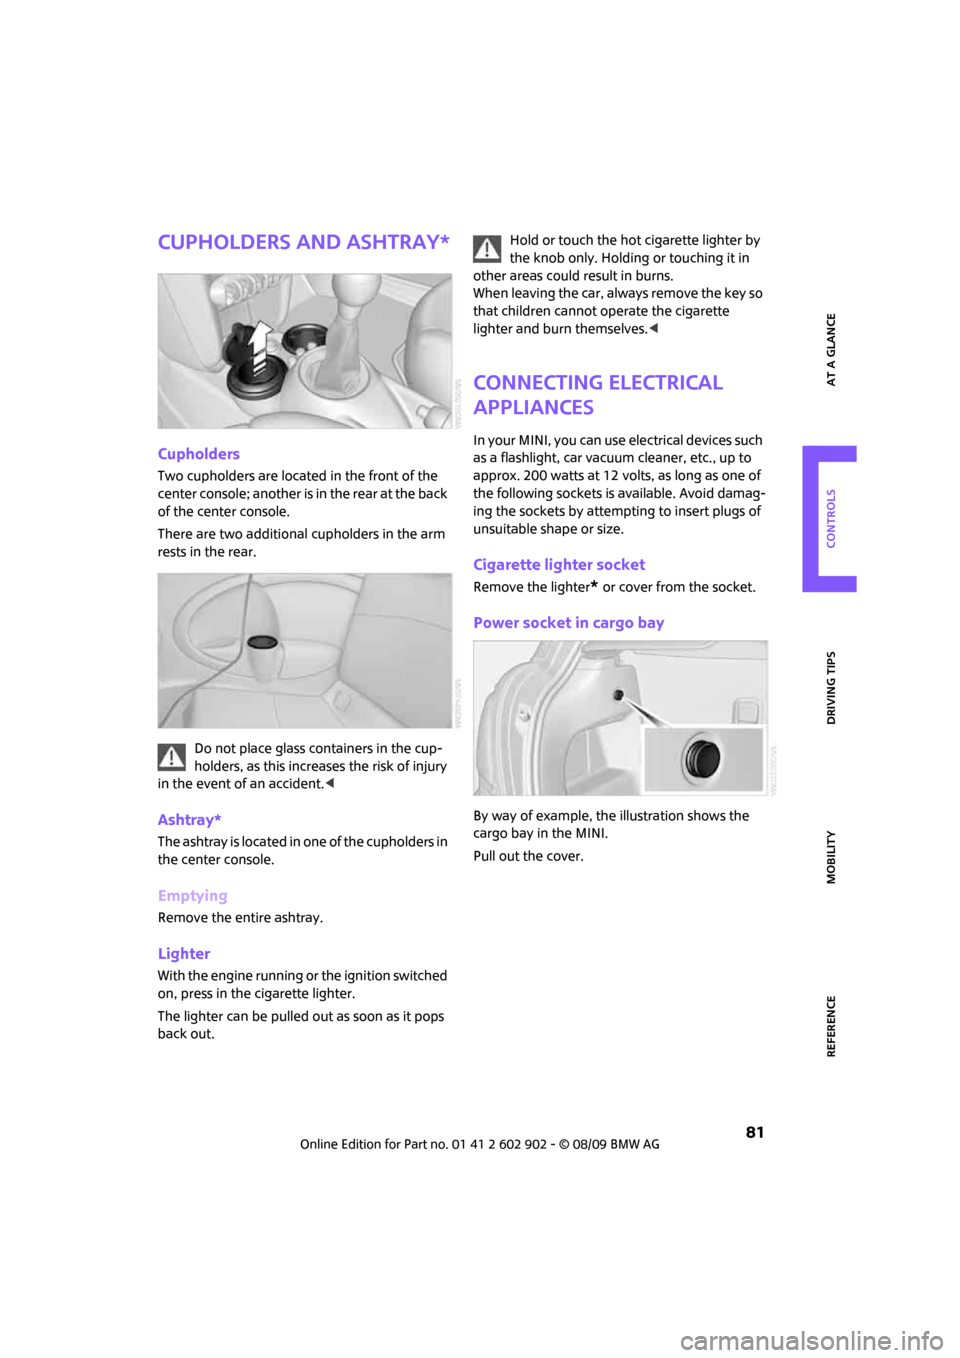
Cupholders and ashtray*
Cupholders
Two cupholders are located in the front of the
center console; another is in the rear at the back
of the center console.
There are two additional cupholders in the arm
rests in the rear.
Do not place glass containers in the cup-
holders, as this increases the risk of injury
in the event of an accident.<
Ashtray*
The ashtray is located in one of the cupholders in
the center console.
Emptying
Remove the entire ashtray.
Lighter
With the engine running or the ignition switched
on, press in the cigarette lighter.
The lighter can be pulled out as soon as it pops
back out.Hold or touch the hot cigarette lighter by
the knob only. Holding or touching it in
other areas could result in burns.
When leaving the car, always remove the key so
that children cannot operate the cigarette
lighter and burn themselves.<
Connecting electrical
appliances
In your MINI, you can use electrical devices such
as a flashlight, car vacuum cleaner, etc., up to
approx. 200 watts at 12 volts, as long as one of
the following sockets is available. Avoid damag-
ing the sockets by attempting to insert plugs of
unsuitable shape or size.
Cigarette lighter socket
Remove the lighter* or cover from the socket.
Power socket in cargo bay
By way of example, the illustration shows the
cargo bay in the MINI.
Pull out the cover.
Page 149 of 160
REFERENCEAT A GLANCE CONTROLS DRIVING TIPS MOBILITY
147
Bottle holders, refer to
Cupholders81
Brake Assist58
Brake fluid, refer to Service
requirements53
Brake lamps
– replacing bulbs117
Brake pads, breaking in84
Brake rotors85
– brakes84
– breaking in84
Brake system84
– breaking in84
– disc brakes85
– MINI Maintenance
System108
Brakes
– ABS58
– breaking in84
– MINI Maintenance
System108
– parking brake41
– service requirements53
Brakes, refer to Braking
safely85
Breakdown service, refer to
Roadside Assistance124
Break-in period84
Breaking in the clutch84
Bulb changing, refer to Lamps
and bulbs114
Button for starting the
engine40
Buttons on the steering
wheel11
C
California Proposition 65
warning5
Can holders, refer to
Cupholders81
Capacities144
Car battery, refer to Vehicle
battery123
Car care110
Car key, refer to Keys/remote
controls20Car phone
– installation location, refer to
Center armrest79
– refer to separate Owner's
Manual
Car wash, care110
Car washes110
Care110
– car washes110
– car-care products110
– CD/DVD drives113
– external110
– high-pressure washers111
– internal112
– leather112
– manual washing111
– upholstery and fabrics112
– windows111
– wiper blades111
Cargo area
– capacity144
Cargo bay86
– Comfort Access28
– doors, refer to Splitdoor25
– lamp70
– opening from outside26
– trunk lid, refer to Splitdoor25
Cargo bay doors, refer to
Splitdoor25
Cargo bay, expanding86
Cargo bay lamp70
Cargo bay partition net, refer
to Partition net87
Cargo loading87
– securing cargo88
– stowing cargo88
– vehicle86
Cargo, securing88
Carpets, care112
Catalytic converter, refer to
Hot exhaust system84
Center armrest79
Center brake lamp118
Center console, refer to
Around the center
console14Central locking system21
– Comfort Access27
– from inside24
– from outside21
Changing bulbs114
Changing wheels121
Chassis number, refer to
Engine compartment106
Check Control55
Child restraint systems37
Child seats37
Child-restraint fixing system
LATCH38
Chrome parts, care111
Chrome parts, refer to
Care110
Cigarette lighter81
Cleaning headlamps46
– washer fluid47
Clock49
– 12h/24h mode52
– setting time55
Closing
– from inside24
– from outside21
Clothes hooks80
Clubdoor25
Cockpit10
Cold start, refer to Starting the
engine41
Comfort Access27
– replacing the battery29
Comfort access
– what to observe before
entering a car wash28
Comfort area, refer to Around
the center console14
Compartment for remote
control, refer to Ignition
lock40
Computer50
Condensation, refer to When
the vehicle is parked85
Condition Based Service
CBS108
Configuring settings, refer to
Personal Profile20
Confirmation signals for
vehicle locking/unlocking22
Page 150 of 160
From A to Z
148
Connecting vacuum cleaner,
refer to Connecting electrical
appliances81
Consumption indicator
– average fuel consumption50
Consumption, refer to Average
fuel consumption50
Control Display
– settings51
Controls and displays10
Convenient access, refer to
Comfort Access27
Convenient operation
– windows22
Convenient start, refer to
Starting the engine41
Coolant107
– checking level107
– filling107
Coolant temperature49
Cooling fluid, refer to
Coolant107
Cooling, maximum75
Copyright2
Cruising range50
Cupholders81
Curb weight, refer to
Weights144
Current fuel consumption50
D
Dashboard instruments, refer
to Displays12
Dashboard lighting, refer to
Instrument lighting70
Dashboard, refer to Cockpit10
Data142
– capacities144
– dimensions143
– engine142
– weights144
Data recorders109
Date
– setting55
Daytime running lights68
DBC Dynamic Brake Control,
refer to Brake Assist58Deactivating front passenger
airbags65
Deadlocking, refer to
Locking22
Defect
– door lock24
– fuel filler flap94
Defogging windows74,75
Defrost position, refer to
Defrosting windows74,75
Defrosting windows74,75
Defrosting windows and
removing condensation
– air conditioner74
– automatic climate control75
Differential, breaking in84
Digital clock49
Dimensions143
Dipstick, engine oil106
Directional indicators, refer to
Turn signals44
Displacement, refer to Engine
data142
Display lighting, refer to
Instrument lighting70
Displays12
– instrument combination12
Displays and controls10
Displays, care113
Disposal
– of coolant107
– remote control battery29
– vehicle battery123
Distance remaining to service,
refer to Service
requirements53
Distance warning, refer to Park
Distance Control PDC57
Diving stability control
systems57
Door
– rear, refer to Clubdoor25
Door key, refer to Integrated
key/remote control
20
Door lock24
Door lock, confirmation
signals22Doors, manual operation24
DOT Quality Grades101
Double doors, refer to
Splitdoor25
Drinks holders, refer to
Cupholders81
Drive-off assistant, refer to Hill
Assist59
Driving dynamics control, refer
to Sport button60
Driving lamps, refer to Parking
lamps/low beams67
Driving notes84
Driving off on inclines, refer to
Hill Assist59
Driving through water85
Driving tips, refer to Driving
notes84
Dry air, refer to Cooling
function76
DTC Dynamic Traction Control
DTC59
Dynamic Brake Control DBC,
refer to Brake Assist58
Dynamic Stability Control
DSC58
Dynamic Traction Control59
E
Electrical malfunction
– door lock24
– fuel filler flap94
Electronic brake-force
distribution58
Electronic Stability Program
ESP, refer to Dynamic
Stability Control DSC58
Emergency operation, refer to
Manual operation
– door lock24
– fuel filler flap94
– transmission lock, automatic
transmission44
Emergency services, refer to
Roadside Assistance124
Page 152 of 160
From A to Z
150
Glove compartment78
Grills, refer to Air vents72
Gross vehicle weight, refer to
Weights144
H
Halogen lamps
– replacing bulb115
Handbrake, refer to Parking
brake41
Hands-free system14
Hazard warning flashers14
Head airbags65
Head restraints33
– sitting safely31
Headlamp control,
automatic67
Headlamp flasher44
– indicator lamp11,128
Headlamps
– replacing bulb115
Headlamps, care111
Heated
– mirrors35
– rear window73,75
– seats34
Heating72
– mirrors35
– rear window73,75
– seats34
Heavy loads, refer to Stowing
cargo88
Height adjustment
– seats32
– steering wheel36
Height, refer to
Dimensions143
High beams69
– headlamp flasher69
– indicator lamp128
– replacing bulb115
High water, refer to Driving
through water85
Hill Assist59
Hills85
Holders for cups81
Homepage4Horn10
Hot exhaust system84
Hydroplaning84
I
Ice warning49
Icy roads, refer to Outside
temperature warning49
Ignition40
– switched off40
– switched on40
Ignition key position 1, refer to
Radio readiness40
Ignition key position 2, refer to
Ignition on40
Ignition key, refer to
Integrated key/remote
control20
Ignition lock40
Imprint2
Indicator and warning
lamps13,128
– Tire Pressure Monitor TPM63
Indicator lighting, refer to
Instrument lighting70
Individual air distribution74
Individual settings, refer to
Personal Profile20
Inflation pressure monitoring,
refer to Tire Pressure Monitor
TPM62
Initializing
– Flat Tire Monitor FTM60
– glass sunroof, electric30
Instrument cluster, refer to
Displays12
Instrument lighting70
Instrument panel, refer to
Cockpit10
Instrument panel, refer to
Displays12
Integrated key20
Integrated universal remote
control77
Interior lamps70
– remote control23Interior rearview mirror35
– automatic dimming
feature35
Interlock42
Intermittent mode of the
wipers45
Internet page4
J
Jacking points122
Jets, refer to Window washer
nozzles47
Jumpering, refer to Jump-
starting124
Jump-starting124
K
Key Memory, refer to Personal
Profile20
Key, refer to Keys/remote
controls20
Keyless go, refer to Comfort
Access27
Keyless opening and closing,
refer to Comfort Access27
Kickdown43
– automatic transmission with
Steptronic43
Knock control95
L
Lamps and bulbs, replacing
bulbs114
Lamps, refer to Parking lamps/
Low beams67
Lashing eyes, refer to Securing
cargo88
LATCH child-restraint fixing
system38
Leather care112
LEDs light-emitting diodes115
Length, refer to
Dimensions143
Level load floor87
License plate lamp
– bulb replacement118
Page 153 of 160
REFERENCEAT A GLANCE CONTROLS DRIVING TIPS MOBILITY
151
Light switch67
Light-alloy wheels, care112
Light-emitting diodes
LEDs115
Lighter81
– socket81
Lighting
– lamps and bulbs114
– of the instruments70
– of vehicle, refer to Lamps67
Limit138
Load87
Load securing equipment,
refer to Securing cargo88
Lock buttons of doors, refer to
Locking24
Locking
– adjusting confirmation
signal22
– from inside24
– from outside22
– without remote control, refer
to Comfort Access27
Locking and unlocking doors
– confirmation signals22
– from inside24
– from outside21
Low beams67
– automatic67
– replacing bulb115
Lower back support, refer to
Lumbar support32
Luggage compartment doors,
refer to Splitdoor25
Luggage compartment
partition net, refer to
Partition net87
Luggage rack, refer to Roof-
mounted luggage rack89
Lumbar support32
M
M+S tires, refer to Winter
tires104
Maintenance, refer to Service
Booklet
Maintenance system108Malfunction warnings, refer to
Check Control55
Manual air distribution74
Manual mode
– automatic transmission with
Steptronic43
Manual operation
– door lock24
– fuel filler flap94
– transmission lock, automatic
transmission44
Manual transmission42
Manual washing111
Master key, refer to Integrated
key/remote control20
Maximum cooling75
Maximum speed
– with winter tires104
Medical assistance, refer to
First aid pouch124
Microfilter
– for air conditioner74
– for automatic climate
control76
– MINI Maintenance
System108
Microfilter/activated-charcoal
filter
– MINI Maintenance
System108
Microphone for telephone14
MINI Internet page4
MINI Maintenance System108
Mirror dimming feature35
Mirrors35
– exterior mirrors35
– heating35
– interior rearview mirror35
Mobile phone
– installation location, refer to
Center armrest79
– refer to separate Owner's
Manual
Mobile phone, installation
location, refer to Center
armrest79
Mobile phone, refer to the
separate Owner's Manual
Mobility System118Modifications, technical, refer
to For your own safety5
Monitoring system for tire
pressures, refer to Flat Tire
Monitor60
Multifunction switch
– refer to Turn signals/
headlamp flasher44
– refer to Wiper system45
Multifunctional steering
wheel, refer to Buttons on
the steering wheel11
N
Neck support, refer to Head
restraints33
Nets, refer to Storage
compartments80
New tires103
Number of cylinders, refer to
Engine data142
Nylon rope, refer to Tow
rope126
O
OBD socket, refer to Socket for
Onboard Diagnosis108
Octane ratings, refer to Fuel
specifications95
Odometer49
Oil consumption106
Oil level106
Oil, refer to Engine oil106
Oil types107
Old batteries, refer to
Disposal123
Onboard vehicle tool kit114
Opening and closing
– Comfort Access27
– from inside24
– from outside21
– using the door lock24
– via the remote control21
Opening and unlocking
– from inside24
Opening/closing the
splitdoor26
Page 154 of 160
From A to Z
152
Outlets
– refer to Ventilation76
Outlets, refer to Air vents72
Output, refer to Engine
data142
Outside temperature
display49
– changing unit of measure52
– on onboard computer52
Outside-air mode
– automatic climate control75
Overheated engine, refer to
Coolant temperature49
P
Paintwork, care111
Park Distance Control PDC57
Parking
– vehicle41
Parking aid, refer to Park
Distance Control PDC57
Parking brake41
Parking lamps, replacing
bulb116
Parking lamps/low beams67
Partition net87
Parts and accessories, refer to
Your individual vehicle4
Pathway lighting67
Personal Profile20
Pinch protection system
– windows30
Plastic parts, care112
Pollen
– refer to Microfilter for air
conditioner74
– refer to Microfilter/activated-
charcoal filter for automatic
climate control76
Power failure123
Power windows30
Power windows, refer to
Windows30
Pressure monitoring of tires,
refer to Tire Pressure Monitor
TPM62
Pressure monitoring, tires60
– Flat Tire Monitor60Pressure, tires96
Protective function, refer to
Pinch protection system
– windows30
Puncture
– Flat Tire Monitor60
R
Radio key, refer to Integrated
key/remote control20
Radio position, refer to Radio
readiness40
Radio readiness40
– switched off40
– switched on40
Rain sensor46
Range, refer to Cruising
range50
Reading lamps70
Rear door, refer to
Clubdoor25
Rear doors, refer to
Splitdoor25
Rear double doors, refer to
Splitdoor25
Rear fog lamp70
– indicator lamp128
– replacing bulb118
Rear lamps
– bulb replacement117
Rear lamps, refer to Tail
lamps117
Rear seat backrest, folding86
Rear seats
– folding the backrests86
Rear window heating73,75
Rearview mirror, refer to
Mirrors35
Recirculated-air mode73,75
Recirculation of air, refer to
Recirculated-air
mode73,75
Reclining seat, refer to
Backrest32
Refueling94Releasing
– bonnet105
Remote control20
– battery renewal29
– Comfort Access27
– garage door opener77
– malfunctions23,28
– service data108
– splitdoor23
Replacement remote
control20
Replacing bulbs, refer to
Lamps and bulbs114
Replacing tires, refer to New
wheels and tires103
Reporting safety defects6
Reserve warning, refer to Fuel
gauge50
Reservoir for washer
systems
47
Restraint systems
– for children37
– refer to Safety belts34
Reverse gear
– automatic transmission with
Steptronic43
– manual transmission42
Roadside Assistance124
Roadside parking lamps69
– replacing bulb116
Roadworthiness test, refer to
Service requirements53
Roof load capacity144
Roof-mounted luggage
rack89
Rope, refer to Tow-starting,
towing away126
RSC Runflat System
Component, refer to Run-flat
tires103
Rubber parts, care111
Runflat System Component
RSC, refer to Run-flat
tires103
Run-flat tires103
– flat tire61
– new tires103
– tire inflation pressure96
– winter tires104