display MINI Clubman 2011 (Mini Connected) Owner's Guide
[x] Cancel search | Manufacturer: MINI, Model Year: 2011, Model line: Clubman, Model: MINI Clubman 2011Pages: 256, PDF Size: 3.75 MB
Page 58 of 256
CONTROLSControls overview
56
Controls overview
Tachometer
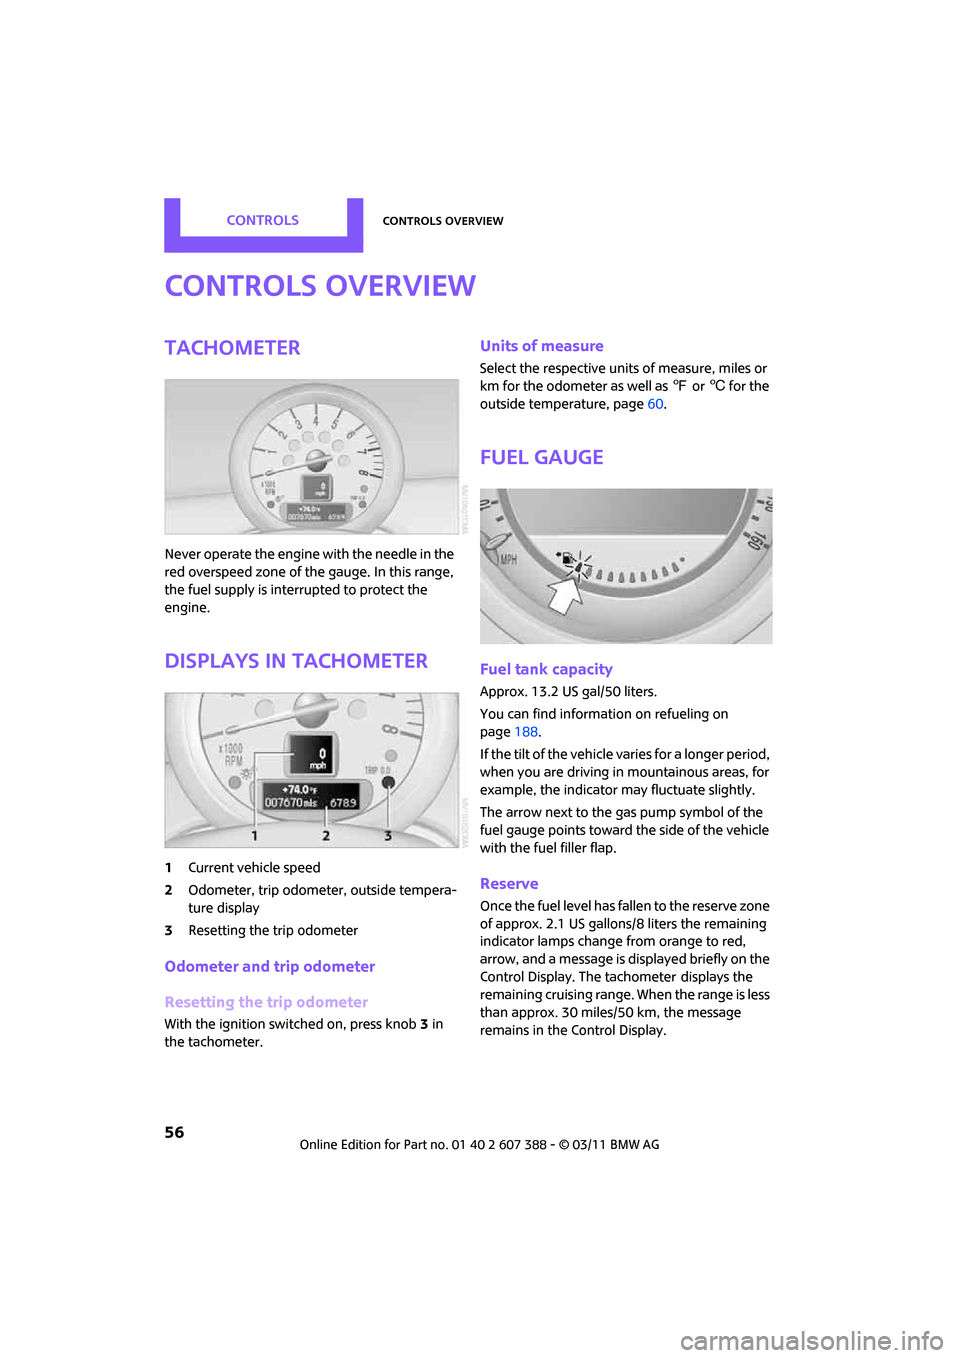
Never operate the engine with the needle in the
red overspeed zone of the gauge. In this range,
the fuel supply is interrupted to protect the
engine.
Displays in tachometer
1Current vehicle speed
2 Odometer, trip odometer, outside tempera-
ture display
3 Resetting the trip odometer
Odometer and trip odometer
Resetting the trip odometer
With the ignition switched on, press knob 3 in
the tachometer.
Units of measure
Select the respective unit s of measure, miles or
km for the odometer as well as 7 or 6 for the
outside temperature, page 60.
Fuel gauge
Fuel tank capacity
Approx. 13.2 US gal/50 liters.
You can find information on refueling on
page 188.
If the tilt of the vehicle varies for a longer period,
when you are driving in mountainous areas, for
example, the indicator may fluctuate slightly.
The arrow next to the gas pump symbol of the
fuel gauge points toward the side of the vehicle
with the fuel filler flap.
Reserve
Once the fuel level has fallen to the reserve zone
of approx. 2.1 US gallons/8 liters the remaining
indicator lamps change from orange to red,
arrow, and a message is displayed briefly on the
Control Display. The tachometer
displays the
remaining cruising range. When the range is less
than approx. 30 miles/50 km, the message
remains in the Control Display.
Page 59 of 256
Controls overviewCONTROLS
57
If the range displayed is less than
30 miles/50 km, be sure to refuel; other-
wise, engine functions are not guaranteed and
damage could occur. <
With a dynamic driving st yle, e.g. rapid corner-
ing, engine functions are not always assured.
Computer*
Displays in tachometer
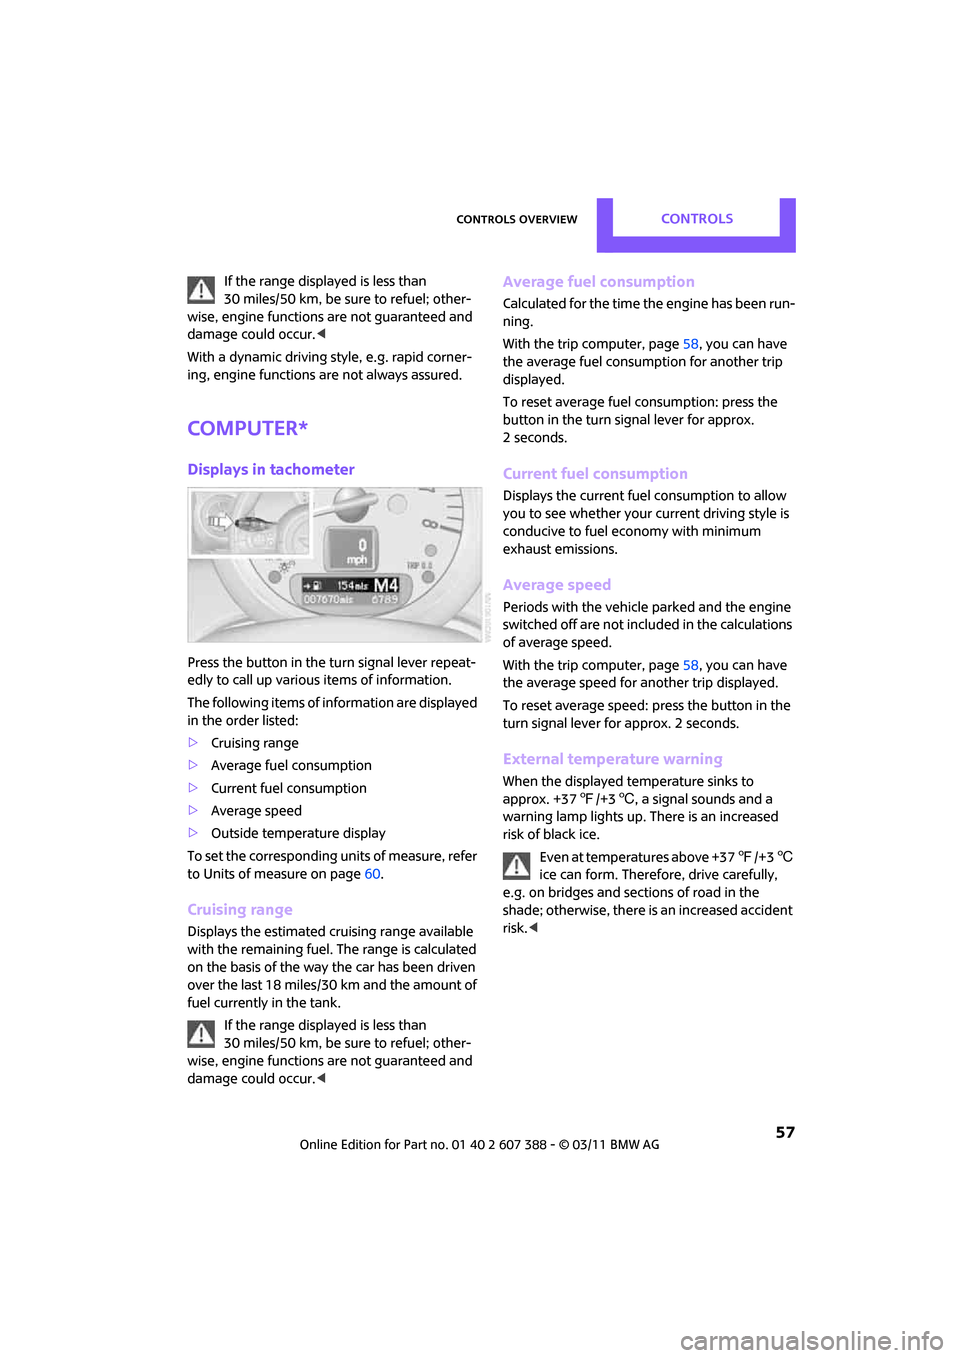
Press the button in the turn signal lever repeat-
edly to call up various items of information.
The following items of information are displayed
in the order listed:
> Cruising range
> Average fuel consumption
> Current fuel consumption
> Average speed
> Outside temperature display
To set the corresponding units of measure, refer
to Units of measure on page 60.
Cruising range
Displays the estimated cruising range available
with the remaining fuel. The range is calculated
on the basis of the way the car has been driven
over the last 18 miles/30 km and the amount of
fuel currently in the tank.
If the range displayed is less than
30 miles/50 km, be sure to refuel; other-
wise, engine functions are not guaranteed and
damage could occur. <
Average fuel consumption
Calculated for the time the engine has been run-
ning.
With the trip computer, page 58, you can have
the average fuel consumption for another trip
displayed.
To reset average fuel consumption: press the
button in the turn signal lever for approx.
2 seconds.
Current fuel consumption
Displays the current fuel consumption to allow
you to see whether your current driving style is
conducive to fuel economy with minimum
exhaust emissions.
Average speed
Periods with the vehicle parked and the engine
switched off are not includ ed in the calculations
of average speed.
With the trip computer, page 58, you can have
the average speed for another trip displayed.
To reset average speed: press the button in the
turn signal lever for approx. 2 seconds.
External temperature warning
When the displayed temperature sinks to
approx. +37 7/+3 6, a signal sounds and a
warning lamp lights up. There is an increased
risk of black ice.
Even at temperatures above +37 7/+3 6
ice can form. Therefore, drive carefully,
e.g. on bridges and sections of road in the
shade; otherwise, there is an increased accident
risk. <
Page 60 of 256
CONTROLSControls overview
58
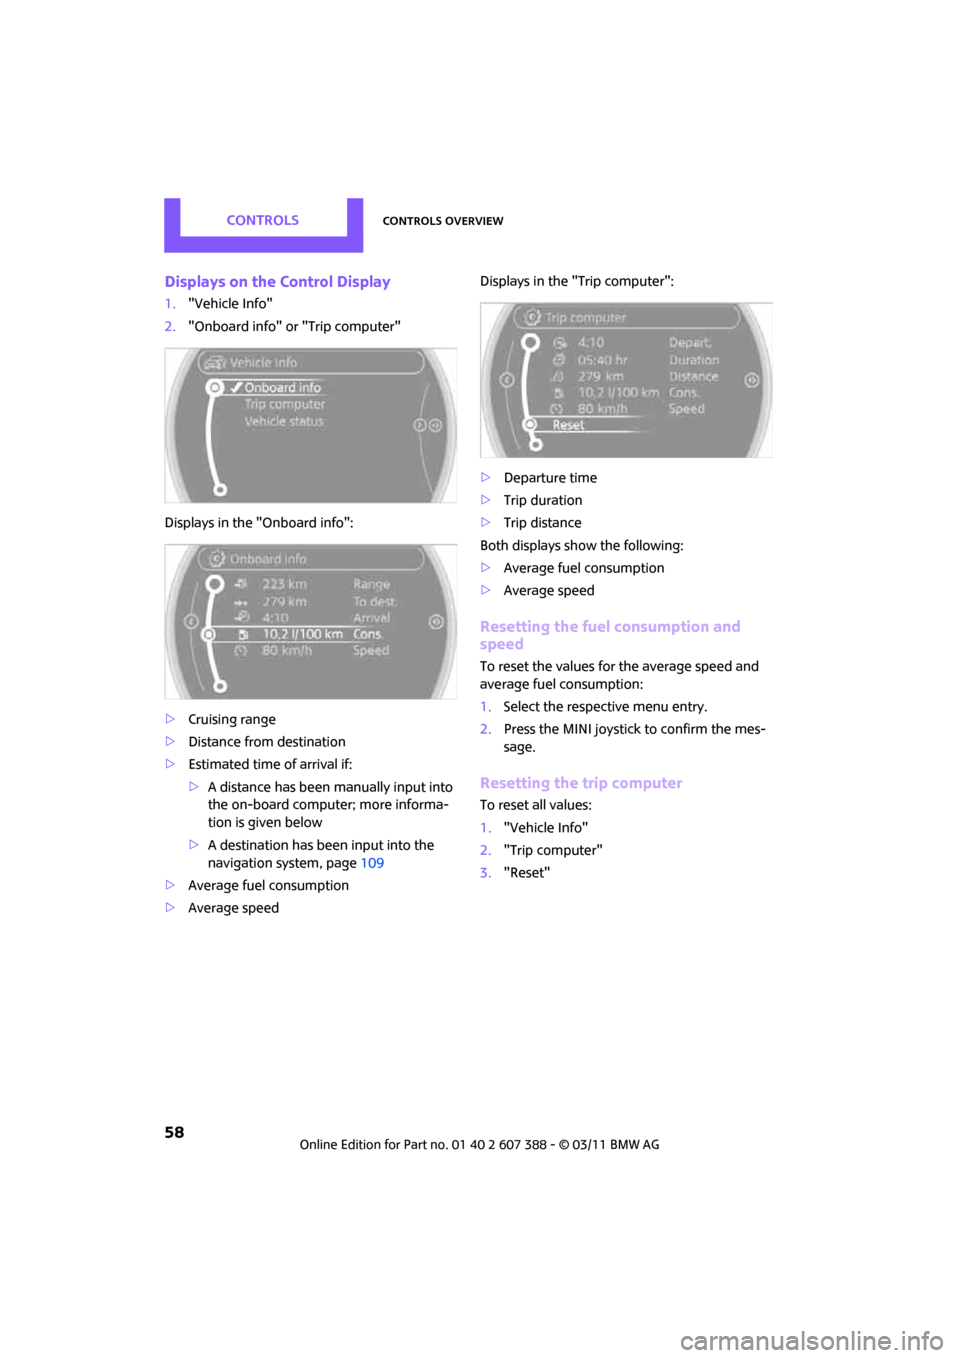
Displays on the Control Display
1."Vehicle Info"
2. "Onboard info" or "Trip computer"
Displays in the "Onboard info":
> Cruising range
> Distance from destination
> Estimated time of arrival if:
>A distance has been manually input into
the on-board computer; more informa-
tion is given below
> A destination has been input into the
navigation system, page 109
> Average fuel consumption
> Average speed Displays in the "Trip computer":
>
Departure time
> Trip duration
> Trip distance
Both displays show the following:
> Average fuel consumption
> Average speed
Resetting the fuel consumption and
speed
To reset the values for the average speed and
average fuel consumption:
1.Select the respective menu entry.
2. Press the MINI joystick to confirm the mes-
sage.
Resetting the trip computer
To reset all values:
1."Vehicle Info"
2. "Trip computer"
3. "Reset"
Page 61 of 256
Controls overviewCONTROLS
59
Settings and information
Operating principle
Certain settings and information are only avail-
able when the ignition is switched on, the vehi-
cle is at a standstill and the doors are closed.
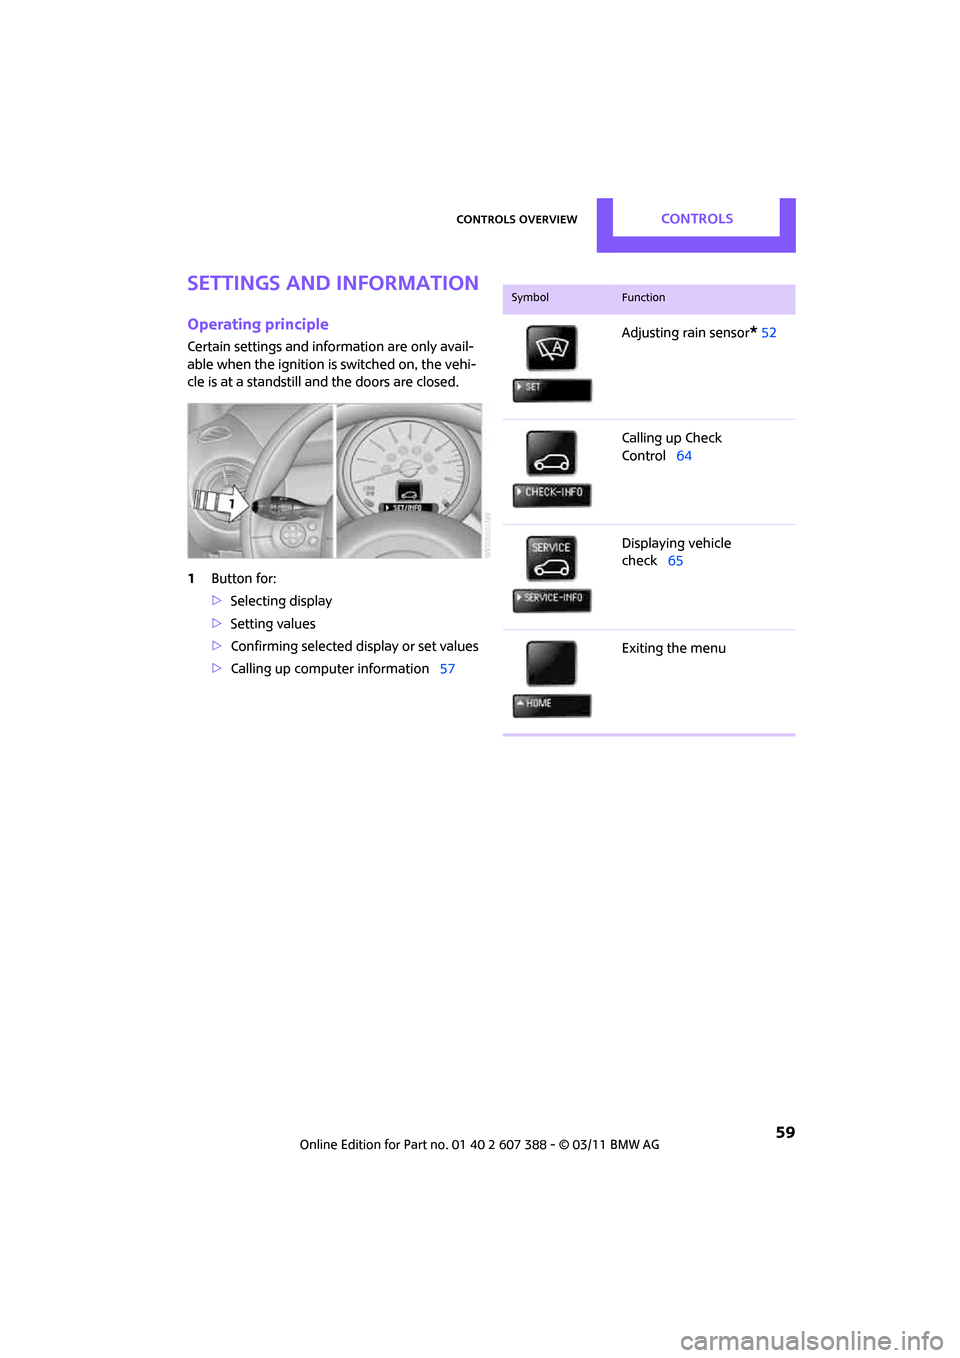
1Button for:
>Selecting display
> Setting values
> Confirming selected display or set values
> Calling up computer information 57
SymbolFunction
Adjusting rain sensor*52
Calling up Check
Control 64
Displaying vehicle
check 65
Exiting the menu
Page 62 of 256
CONTROLSControls overview
60
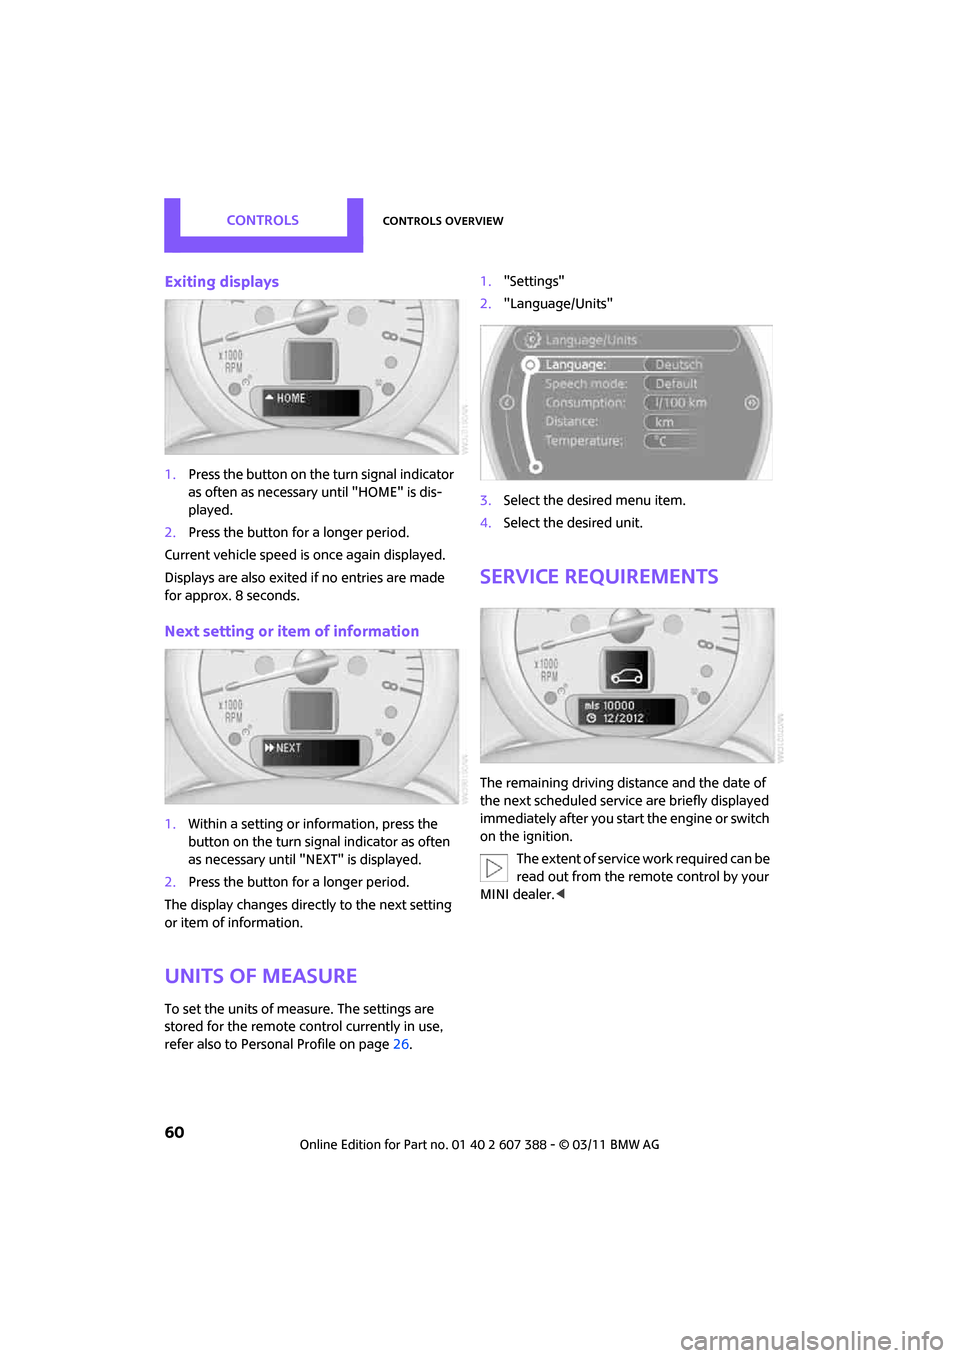
Exiting displays
1.Press the button on the turn signal indicator
as often as necessary until "HOME" is dis-
played.
2. Press the button for a longer period.
Current vehicle speed is once again displayed.
Displays are also exited if no entries are made
for approx. 8 seconds.
Next setting or item of information
1. Within a setting or information, press the
button on the turn signal indicator as often
as necessary until "NEXT" is displayed.
2. Press the button for a longer period.
The display changes direct ly to the next setting
or item of information.
Units of measure
To set the units of measure. The settings are
stored for the remote co ntrol currently in use,
refer also to Personal Profile on page 26.1.
"Settings"
2. "Language/Units"
3. Select the desired menu item.
4. Select the desired unit.
Service requirements
The remaining driving distance and the date of
the next scheduled service are briefly displayed
immediately after you start the engine or switch
on the ignition.
The extent of service work required can be
read out from the remote control by your
MINI dealer. <
Page 63 of 256
Controls overviewCONTROLS
61
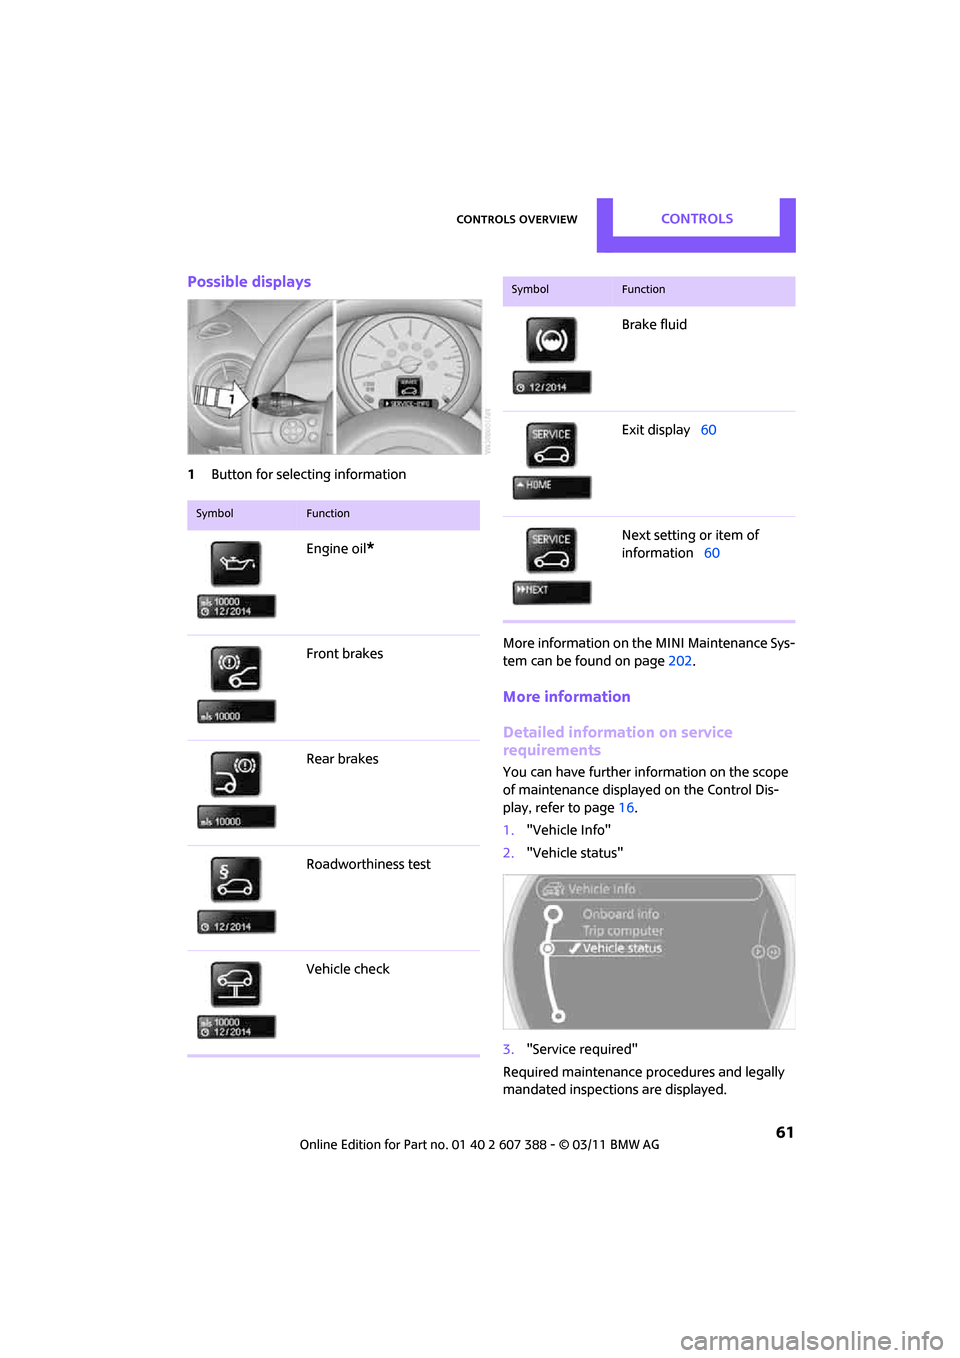
Possible displays
1Button for select ing information
More information on the MINI Maintenance Sys-
tem can be found on page 202.
More information
Detailed information on service
requirements
You can have further information on the scope
of maintenance displayed on the Control Dis-
play, refer to page 16.
1. "Vehicle Info"
2. "Vehicle status"
3. "Service required"
Required maintenance procedures and legally
mandated inspections are displayed.
SymbolFunction
Engine oil*
Front brakes
Rear brakes
Roadworthiness test
Vehicle check
Brake fluid
Exit display 60
Next setting or item of
information 60
SymbolFunction
Page 64 of 256
CONTROLSControls overview
62
You can request more detailed information on
every entry:
Select an entry and press the MINI joystick.
To exit from the menu:
Move the MINI joystick toward the left. A list of
selected maintenance work and legally required
inspections, if necessary, is displayed.
Symbols
No service is currently required.
The deadline for service or a legally man-
dated inspection is approaching. Please
schedule a service appointment.
The service deadline has already passed.
Entering deadlines for legally required
inspections*
Make sure the date on the Control Display is
always set correctly, page 63; otherwise, the
effectiveness of Condition Based Service CBS is
not ensured.
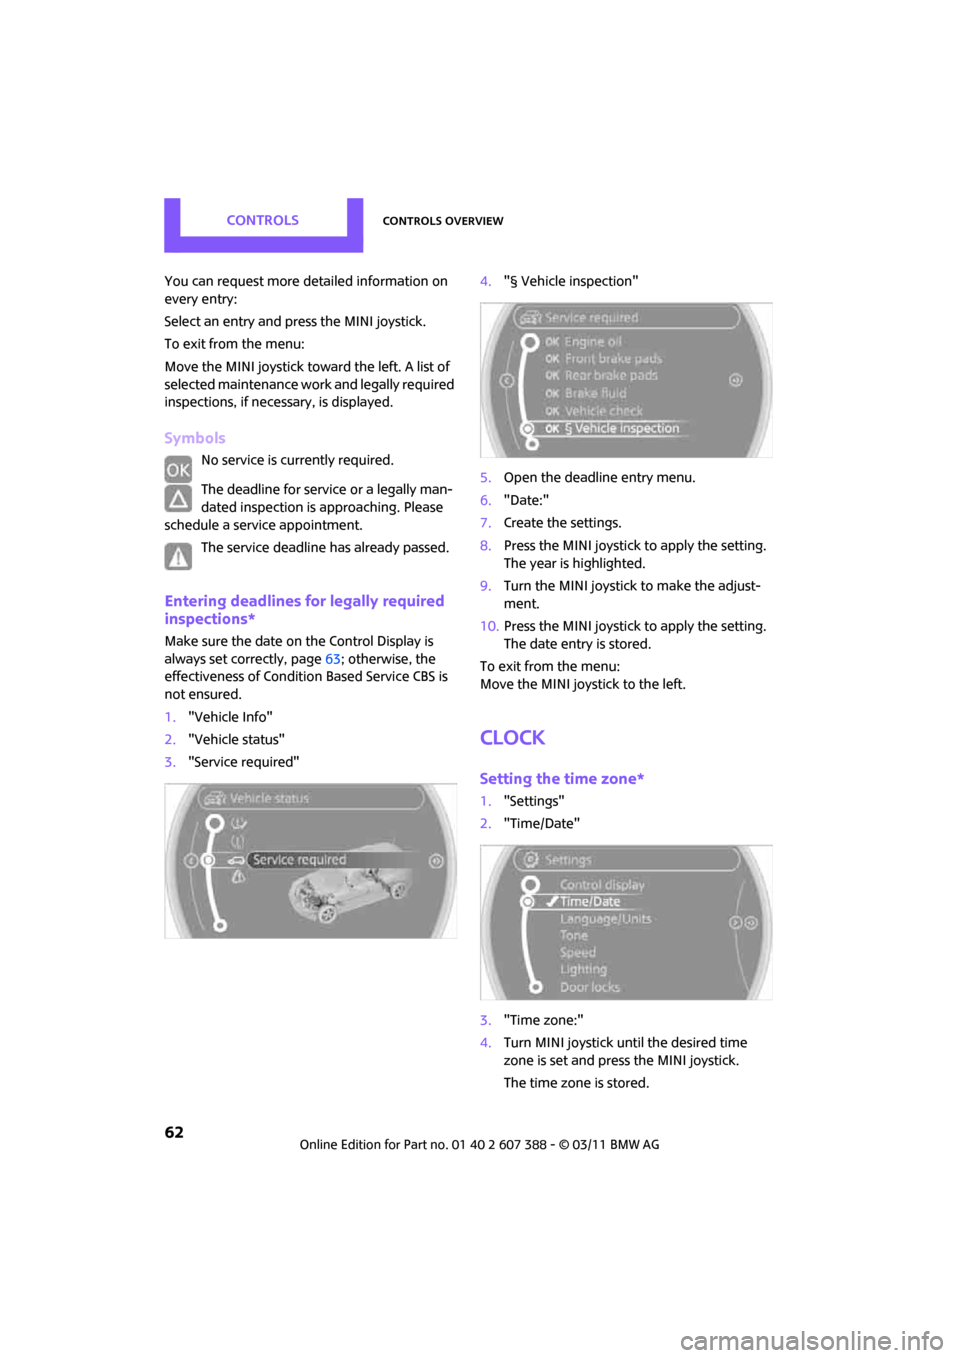
1. "Vehicle Info"
2. "Vehicle status"
3. "Service required" 4.
"§ Vehicle inspection"
5. Open the deadline entry menu.
6. "Date:"
7. Create the settings.
8. Press the MINI joystick to apply the setting.
The year is highlighted.
9. Turn the MINI joystick to make the adjust-
ment.
10. Press the MINI joystick to apply the setting.
The date entry is stored.
To exit from the menu:
Move the MINI joystick to the left.
Clock
Setting the time zone*
1. "Settings"
2. "Time/Date"
3. "Time zone:"
4. Turn MINI joystick until the desired time
zone is set and press the MINI joystick.
The time zone is stored.
Page 65 of 256
Controls overviewCONTROLS
63
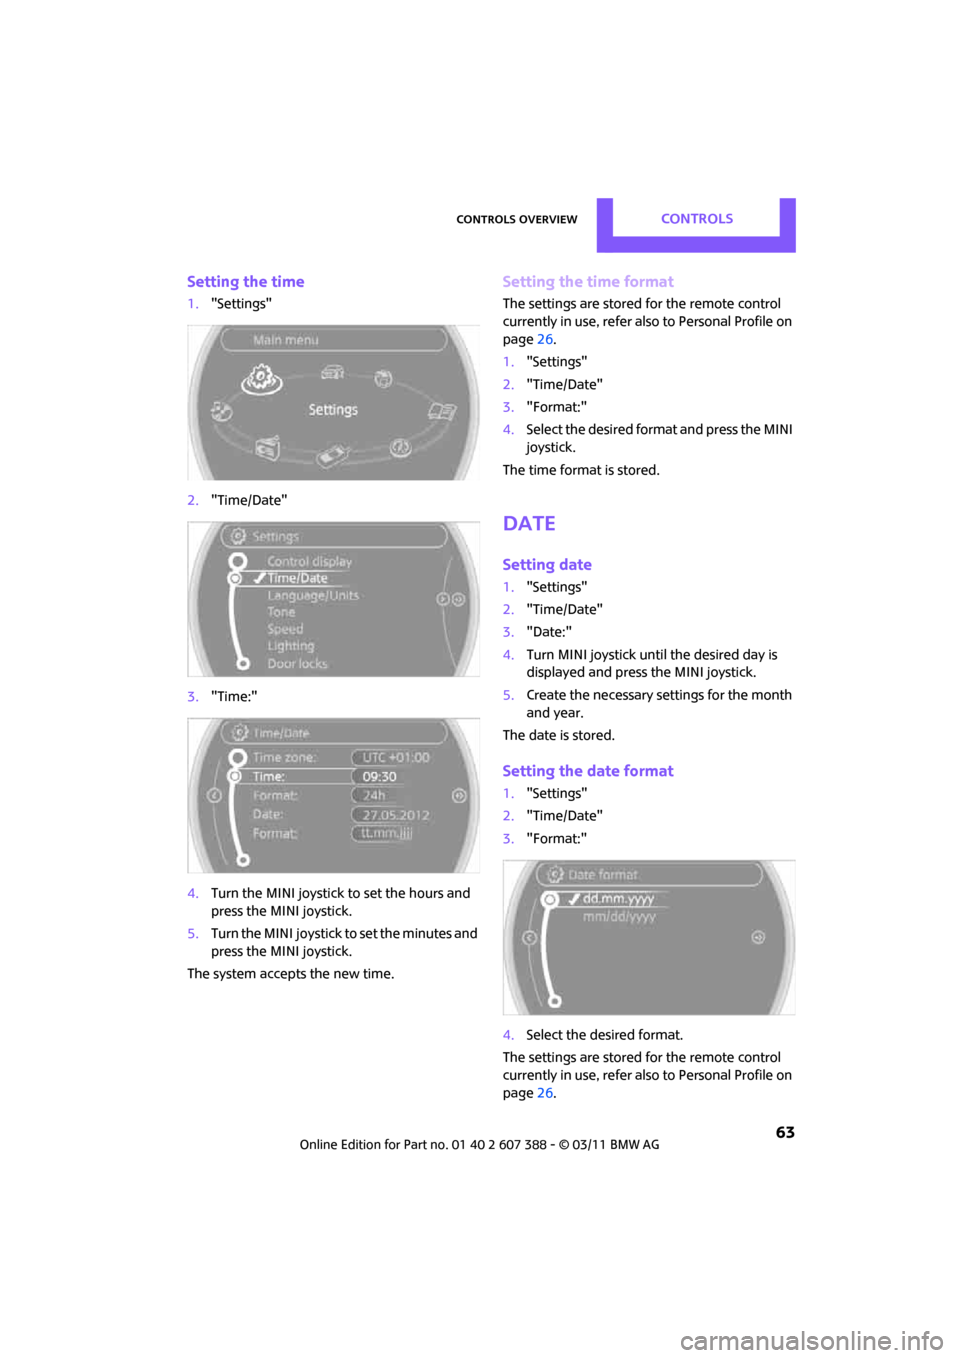
Setting the time
1."Settings"
2. "Time/Date"
3. "Time:"
4. Turn the MINI joystick to set the hours and
press the MINI joystick.
5. Turn the MINI joystick to set the minutes and
press the MINI joystick.
The system accepts the new time.
Setting the time format
The settings are stored for the remote control
currently in use, refer also to Personal Profile on
page 26.
1. "Settings"
2. "Time/Date"
3. "Format:"
4. Select the desired format and press the MINI
joystick.
The time format is stored.
Date
Setting date
1. "Settings"
2. "Time/Date"
3. "Date:"
4. Turn MINI joystick until the desired day is
displayed and press the MINI joystick.
5. Create the necessary settings for the month
and year.
The date is stored.
Setting the date format
1. "Settings"
2. "Time/Date"
3. "Format:"
4. Select the desired format.
The settings are stored for the remote control
currently in use, refer also to Personal Profile on
page 26.
Page 66 of 256
CONTROLSControls overview
64
Check Control
The concept
The Check Control monitors vehicle functions
and alerts you to any malfunctions in the sys-
tems monitored. Check Control messages
involve indicator and warning lamps in the dis-
play and, in some circumstances, an acoustic
signal as well as text messages at the bottom of
the Control Display.
Indicator and warning lamps
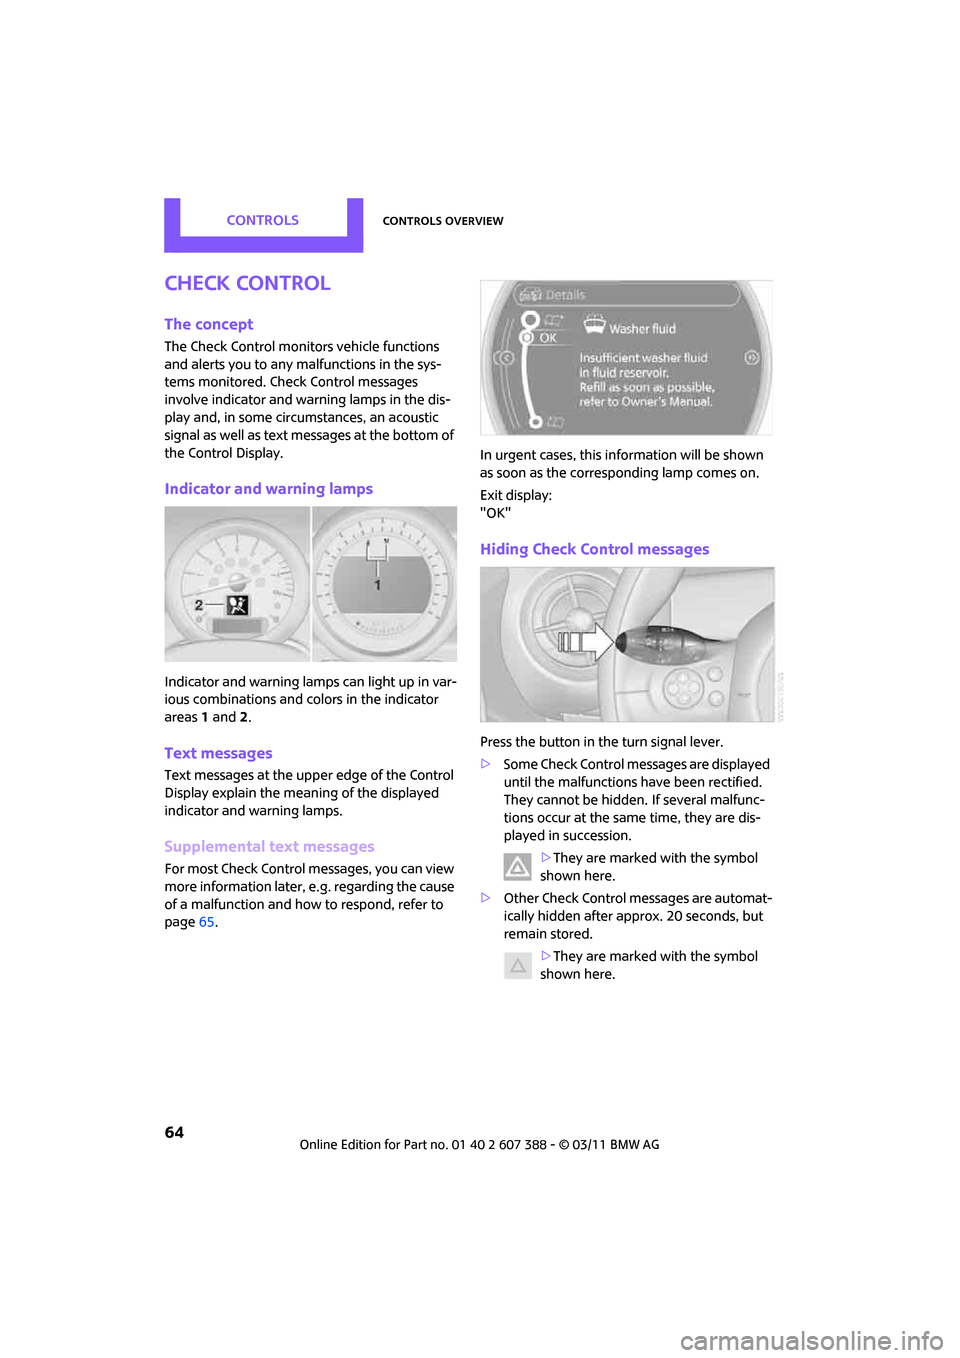
Indicator and warning lamps can light up in var-
ious combinations and colors in the indicator
areas 1 and 2.
Text messages
Text messages at the uppe r edge of the Control
Display explain the mean ing of the displayed
indicator and warning lamps.
Supplemental text messages
For most Check Control messages, you can view
more information later, e.g. regarding the cause
of a malfunction and how to respond, refer to
page 65. In urgent cases, this information will be shown
as soon as the corresponding lamp comes on.
Exit display:
"OK"
Hiding Check Control messages
Press the button in th
e turn signal lever.
> Some Check Control messages are displayed
until the malfunctions have been rectified.
They cannot be hidden. If several malfunc-
tions occur at the same time, they are dis-
played in succession.
>They are marked with the symbol
shown here.
> Other Check Control messages are automat-
ically hidden after approx. 20 seconds, but
remain stored.
>They are marked with the symbol
shown here.
Page 67 of 256
Controls overviewCONTROLS
65
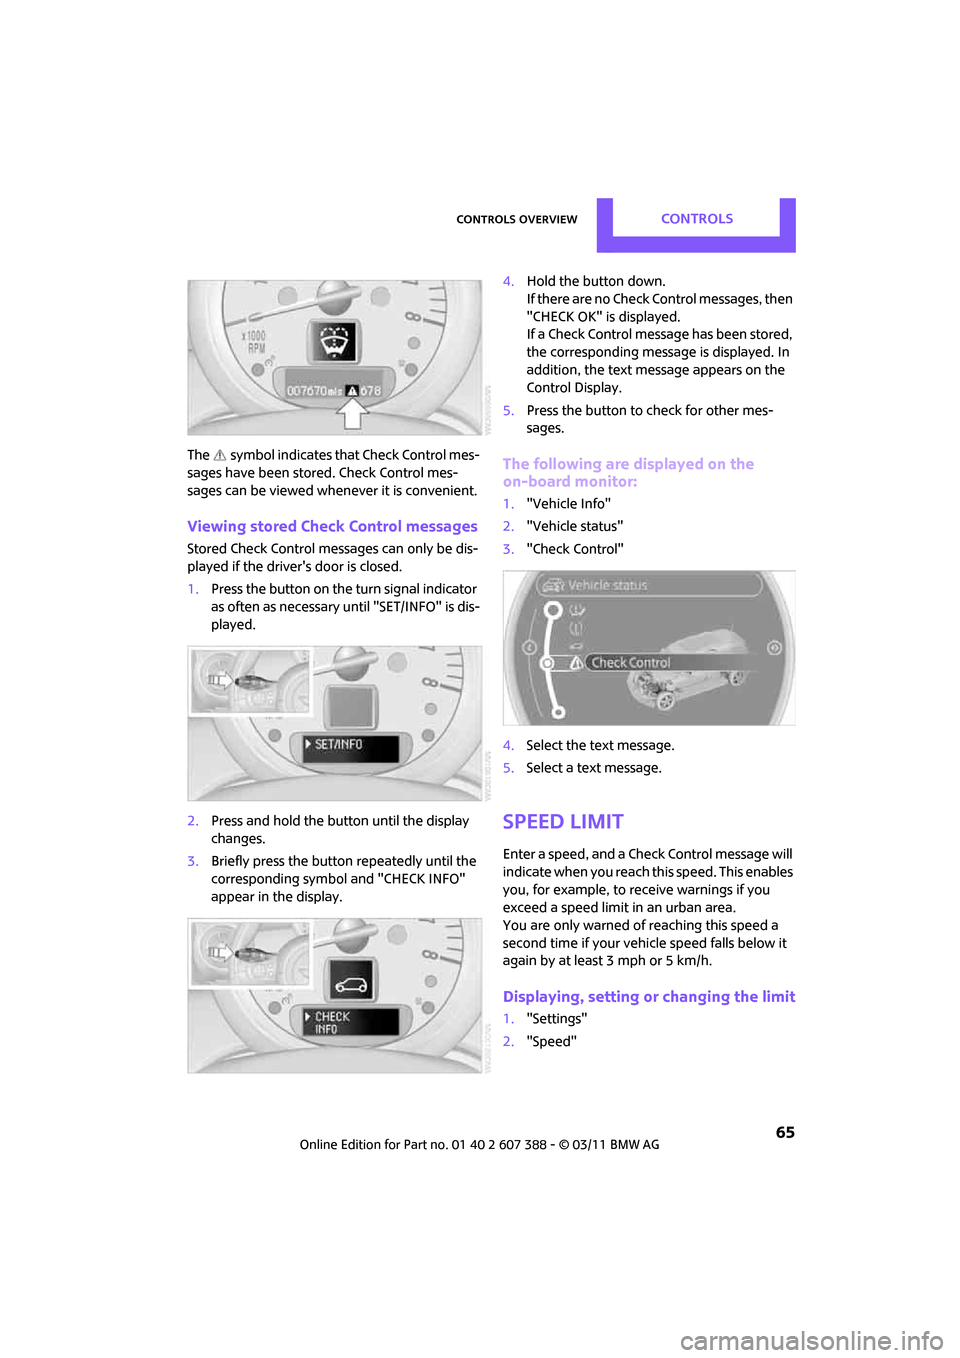
The symbol indicates that Check Control mes-
sages have been stored. Check Control mes-
sages can be viewed when ever it is convenient.
Viewing stored Check Control messages
Stored Check Control messages can only be dis-
played if the driver's door is closed.
1.Press the button on the turn signal indicator
as often as necessary until "SET/INFO" is dis-
played.
2. Press and hold the butt on until the display
changes.
3. Briefly press the button repeatedly until the
corresponding symbol and "CHECK INFO"
appear in the display. 4.
Hold the button down.
If there are no Check Control messages, then
"CHECK OK" is displayed.
If a Check Control messa ge has been stored,
the corresponding message is displayed. In
addition, the text message appears on the
Control Display.
5. Press the button to check for other mes-
sages.
The following are displayed on the
on-board monitor:
1."Vehicle Info"
2. "Vehicle status"
3. "Check Control"
4. Select the text message.
5. Select a text message.
Speed limit
Enter a speed, and a Check Control message will
indicate when you reach this speed. This enables
you, for example, to receive warnings if you
exceed a speed limit in an urban area.
You are only warned of reaching this speed a
second time if your vehicle speed falls below it
again by at least 3 mph or 5 km/h.
Displaying, setting or changing the limit
1. "Settings"
2. "Speed"