steering wheel adjustment MINI Clubman 2011 Owner's Manual (Mini Connected)
[x] Cancel search | Manufacturer: MINI, Model Year: 2011, Model line: Clubman, Model: MINI Clubman 2011Pages: 256, PDF Size: 3.75 MB
Page 39 of 256

AdjustmentsCONTROLS
37
Adjustments
Sitting safely
The ideal sitting position can make a vital contri-
bution to relaxed, fatigue-free driving. In con-
junction with the safety belts, the head restraints
and the airbags, the seated position has a major
influence on your safety in the event of an acci-
dent. To ensure that th e safety systems operate
with optimal efficiency, we strongly urge you to
observe the instructions contained in the follow-
ing section.
For additional information on transporting chil-
dren safely, refer to page 43.
Airbags
Always maintain an adequate distance
between yourself and the airbags. Always
grip the steering wheel on the rim, with your
hands in the 3 o'clock and 9 o'clock positions, to
minimize the risk of inju ry to the hands or arms
in the event of the airbag being triggered off.
No one and nothing should come between the
airbags and the seat occupant.
Do not use the cover of the front airbag on the
front passenger side as a storage area. Ensure
that the front passenger is correctly seated, e.g.
that no feet or legs are propped against the
dashboard. Otherwise, leg injury could result if
the front airbag suddenly deployed.
Make sure that occupa nts keep their heads
away from the side airbag and do not lean
against the head-level airbag; otherwise injuries
can occur when the airbag is triggered. <
Even if you follow all the instructions, injuries
resulting from contact with airbags cannot be
fully excluded, depending on the circumstances.
The ignition and inflation noise may provoke a
mild hearing loss in ex tremely sensitive individ-
uals. This effect is usually only temporary.
For airbag locations and additional information
on airbags, refer to page 78.
Head restraint
A correctly adjusted head restraint reduces the
risk of neck injury in the event of an accident.
Adjust the head rest raint in such a way
that its center is at approx. ear level. Oth-
erwise, there is an increased risk of injury in the
event of an accident. <
Head restraints, refer to page 39.
Safety belt
Before every drive, make sure that all occupants
wear their safety belts. Airbags complement the
safety belt as an additi onal safety device, but
they do not represent a substitute.
Number of safety belts
Never allow more th an one person to
wear a single safety belt. Never allow
infants or small children to ride in a passenger's
lap.
Make sure that the belt in the lap area sits low
across the hips and does not press against the
abdomen. The safety belt must not rest against
the throat, run across sh arp edges, pass over
hard or fragile objects or be pinched. Fasten the
safety belt so that it is pulled taut across the lap
and shoulder, fitting the body snugly without
any twists. Otherwise, the belt could slide over
the hips in the event of a frontal collision and
injure the abdomen. Avoid wearing bulky cloth-
ing and regularly pull the belt in the upper-body
area taut; otherwise, its restraining effect could
be impaired. <
Safety belts, refer to page 40.
Page 44 of 256

CONTROLSAdjustments
42
For proper function:
>Keep the photosensors clean
> Do not cover the area between the interior
rearview mirror and the windshield
> Do not place stickers or decals on the wind-
shield in front of the mirror.
Steering wheel
Adjustments
Do not adjust the steering wheel position
while the car is in motion; otherwise, there
is a risk of accident du e to an unexpected move-
ment. <
1. Fold the lever down.
2. Move the steering wheel to the preferred
distance and angle to suit your seated posi-
tion.
3. Swing the lever back up.
Do not use force to swing the lever
back up; otherwise, the mechanism
will be damaged. <
Page 171 of 256
Mobile phone preparation BluetoothCommunications
169
The telephone connection quality is low.
>Depending on the mobile phone, it is possi-
ble to adjust the strength of the Bluetooth
signal.
> Insert the mobile phone into the snap-in
adapter
* or place it in the vicinity of the cen-
ter console.
> Adjust the volume of the microphone and
speaker separately.
If you have gone through all items in the list and
still cannot activate the desired function please
contact the Hotline or your MINI dealer.
Operation
Adjusting volume
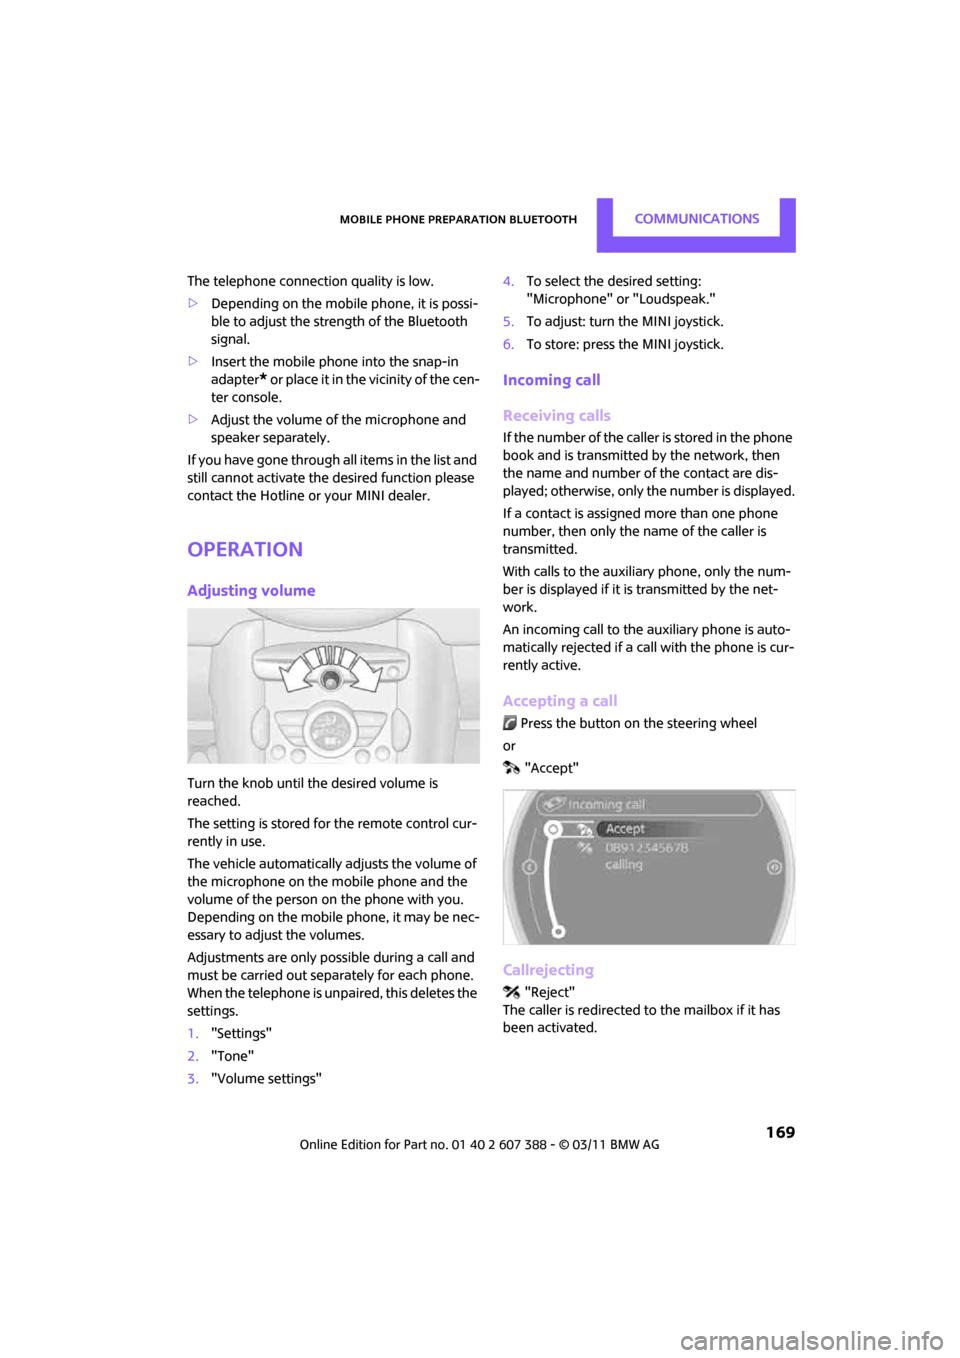
Turn the knob until the desired volume is
reached.
The setting is stored for the remote control cur-
rently in use.
The vehicle automatically adjusts the volume of
the microphone on the mobile phone and the
volume of the person on the phone with you.
Depending on the mobile phone, it may be nec-
essary to adjust the volumes.
Adjustments are only possible during a call and
must be carried out sepa rately for each phone.
When the telephone is unpaired, this deletes the
settings.
1. "Settings"
2. "Tone"
3. "Volume settings" 4.
To select the desired setting:
"Microphone" or "Loudspeak."
5. To adjust: turn the MINI joystick.
6. To store: press the MINI joystick.
Incoming call
Receiving calls
If the number of the caller is stored in the phone
book and is transmitted by the network, then
the name and number of the contact are dis-
played; otherwise, only the number is displayed.
If a contact is assigned more than one phone
number, then only the name of the caller is
transmitted.
With calls to the auxiliary phone, only the num-
ber is displayed if it is transmitted by the net-
work.
An incoming call to the auxiliary phone is auto-
matically rejected if a ca ll with the phone is cur-
rently active.
Accepting a call
Press the button on the steering wheel
or
"Accept"
Callrejecting
"Reject"
The caller is redirected to the mailbox if it has
been activated.
Page 187 of 256
MINI ConnectedCommunications
185
Using MINI Connected
After successful connection of the mobile phone
to the vehicle and activation of MINI Connected,
the applications are displayed on the Control
Display and can be operated using the MINI joy-
stick.
Volume adjustments can be made using the
buttons on the steering wheel, refer to page10,
or using the volume control knob on the radio,
refer to page 130.
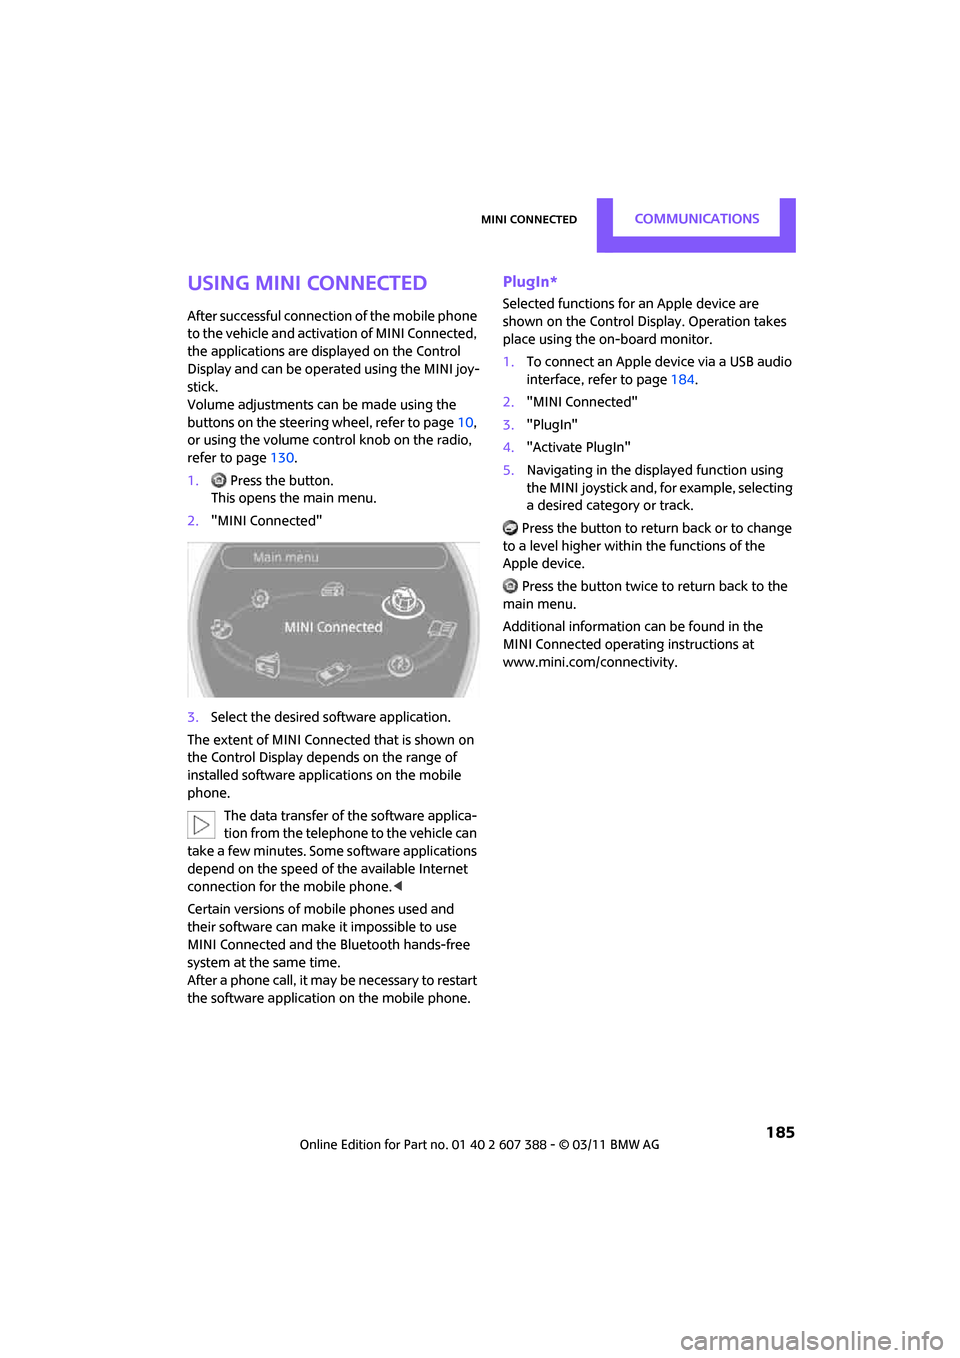
1. Press the button.
This opens the main menu.
2. "MINI Connected"
3. Select the desired software application.
The extent of MINI Connected that is shown on
the Control Display depends on the range of
installed software applic ations on the mobile
phone.
The data transfer of the software applica-
tion from the telephone to the vehicle can
take a few minutes. Some software applications
depend on the speed of the available Internet
connection for the mobile phone.<
Certain versions of mo bile phones used and
their software can make it impossible to use
MINI Connected and the Bluetooth hands-free
system at the same time.
After a phone call, it may be necessary to restart
the software application on the mobile phone.
PlugIn*
Selected functions for an Apple device are
shown on the Control Display. Operation takes
place using the on-board monitor.
1. To connect an Apple device via a USB audio
interface, refer to page 184.
2. "MINI Connected"
3. "PlugIn"
4. "Activate PlugIn"
5. Navigating in the displayed function using
the MINI joystick and, for example, selecting
a desired category or track.
Press the button to return back or to change
to a level higher within the functions of the
Apple device.
Press the button twice to return back to the
main menu.
Additional information can be found in the
MINI Connected operating instructions at
www.mini.com/connectivity.
Page 245 of 256
Everything from A to ZREFERENCE
243
Gear shifting
– automatic transmission49
– manual transmission 48
Gearshift lever
– automatic transmission with Steptronic 49
– manual transmission 48
General driving notes 98
Glass roof, electric 35
– convenient operation 28,29
– opening, closing 35
– remote control 28
– tilting 35
Glove compartment 92
GPS navigation, refer to Navigation system 108
Grills, refer to Air vents 85
Gross vehicle weight, refer to Weights 228
H
Halogen lamps
– replacing bulb 210
Handbrake, refer to Parking
brake 48
Hands-free device Bluetooth 154
Hands-free system 14,161 ,173
Hazard warning flashers 14
HD Radio 133
Head airbags 78
Head Light, refer to Adaptive Light Control 82
Head restraints 39
– sitting safely 37
Headlamp control, automatic 81
Headlamp flasher 51
– indicator lamp 11,13
Headlamp glass lens 209
Headlamps
– replacing bulb 210
Headlamps, care 205Heated
– mirrors
41
– rear window 86,88
– seats 40
Heating 85
– mirrors 41
– rear window 86,88
– seats 40
Heavy loads, refer to Stowing cargo 103
Height adjustment
– seats 38
– steering wheel 42
Height, refer to Dimensions 227
High beams 83
– headlamp flasher 83
– indicator lamp 13
– replacing bulb 210
High water, refer to Driving through water 99
Highway, refer to Route
criteria 118
Hill Assist 71
Hills 99
Holders for cups 94
Homepage 4
Hood 198
Horn 10
Hot exhaust system 98
Hydro
planing 99
I
IBOC, refer to HD Radio 133
iDrive
– status information 19
Ignition 46
– switched off 47
– switched on 46
Ignition key position 1, refer to Radio readiness 46
Ignition key position 2, refer to Ignition on 46
Ignition key, refer to
Integrated key/remote
control 26 Ignition lock
46
Imprint 2
Incoming call 157,169
Indicator and warning
lamps 13
– Tire Pressure Monitor TPM 75
Indicator lighting, refer to
Instrument lighting 83
Individual air distribution 87
Individual settings, refer to
Personal Profile 26
Inflation pressure monitoring, refer to Tire Pressure Monitor
TPM 74
Information
– on another location 112
– on current position 112
– on destination location 112
Initializing
– Flat Tire Monitor FTM 72
– glass roof, electric 35
– radio, refer to Station,
storing 133
Instructions for navigation system, refer to Voice
instructions 122
Instrument cluster, refer to Displays 12
Instrument lighting 83
Instrument pane l, refer to
Cockpit 10
Instrument pane l, refer to
Displays 12
Integrated key 26
Integrated universal remote control 90
Interactive map 114
Interesting destination for navigation 112
Interior lamps 84
– remote control 28
Interior rearview mirror 41
– automatic dimming feature 41
Interlock 49
Intermittent mode of the wipers 51
Page 247 of 256
Everything from A to ZREFERENCE
245
Microfilter/activated-charcoal filter
– MINI Maintenance System 202
MINI Connected 184
MINI Internet page 4
MINI joystick, refer to On-
board computer 16
MINI Maintenance System 202
Mirror dimming feature 41
Mirrors 41
– exterior mirrors 41
– heating 41
– interior rearview mirror 41
Mobile phone
– adjusting volume 157,169
– connecting, refer to Mobile phone, pairing 154,164
– installation location, refer to
Center armrest 93
– pairing 154,164
– refer to separate Owner's
Manual
– What to do if… 156,168
Mobile phone, installation
location, refer to Center
armrest 93
Mobile phone preparation
Bluetooth 164
Mobile phone, refer to
separate Owner's Manual
Mobility System 213
Modifications, te chnical, refer
to For your own safety 5
Monitor, refer to MINI controls with navigation 16
Monitoring system for tire pressures, refer to Flat Tire
Monitor 71
Multifunction switch
– refer to Turn signals/ headlamp flasher 51
– refer to Wiper system 51
Multifunctional steering wheel, refer to Buttons on
the steering wheel 11N
Navigation
– storing current position 111
Navigation data 108
Navigation destination
– entering manually 109,115
– home address 112
Navigation instructions, refer to Switching voice
instructions on/off 122
Navigation system 108
– address book 111
– bypassing a route section 119
– continuing route
guidance 118
– destination entry 109
– dynamic route guidance 125
– entering a destination manually 109,115
– opening 108
– planning a trip 116
– route list 119
– selecting destination via
map 114
– selecting route criteria 118
– special destinations 112
– starting route guidance 118
– terminating route
guidance 118
– voice instructions 122
– volume adjustment 122
Neck support, refer to Head restraints 39
Nets, refer to Storage
compartments 93
New tires 196
North-facing map 120
Notes 182
Number of cylinders, refer to Engine data 226
Number of safety belts 37
Nylon rope, refer to Tow rope 221
O
OBD socket, refer to Socket for
On-Board Diagnosis 203
Octane ratings, refer to Fuel specifications 189
Odometer 56
Office 177
– current office 177
– What to do if… 183
Oil consumption 199
Oil level 199
Oil, refer to Engine oil 199
Oil types 200
Old batteries, refer to Disposal 217
On-board computer 16
– adjusting brightness 67
– changing language 66
– menu guidance 17
– operating principles 16
– overview 16
Onboard vehicle toolkit 208
Opening and closing
– Comfort Access 33
– from inside 30
– from outside 27
– using the door lock 29
– using the remote control 27
Opening and unlocking
– from inside 30
Opening/closing the Split Rear Barn Doors 31
Options, selecting for navigation 118
Orientation menu, refer to
Main menu 17
Outlets
– refer to Ventilation 89
Outlets, refer to Air vents 85
Output, refer to Engine data 226
Outside-air mode
– automatic climate control 88
Overheated engine, refer to
Coolant temperature 201
Page 250 of 256
REFERENCEEverything from A to Z
248
Side windows, refer to Windows 35
Signal horn, refer to Horn 10
Sitting safely 37
– airbags 37
– safety belts 37
– with head restraint 37
Size, refer to Dimensions 227
Sliding/tilt sunroof
– refer to Glass roof, electric 35
Slot for remote control 46
Smokers' package, refer to Ashtray 94
Snap-in adapter
– inserting/removing 175
– use 164
Snap-in adapter, refer to Center armrest storage
compartment 93
Snow chains 197
Socket for On-Board Diagnosis OBD 203
Socket, refer to Connecting electrical appliances 94
Software update 149
Space-saver spare tire
– changing tires 215
– inflation pressure 190
Spare wheel, refer to Space- saver spare tire 215
Speaking, refer to Voice instructions from navigation
system 122
Special destinations 112
Special oils, refer to Approved engine oils 200
Speed 226
– with winter tires 197
Speed limit 65
– setting 65
Speed limit warning, refer to Speed limit 65
Speed volume 131
Speedo, refer to Speedometer 12
Speedometer 12 Split Rear Barn Doors
31
– opening from outside 31
– unlocking with remote control 28
Split rear seat backrest, refer to Expanding the cargo
area 100
Sport button 71
Stability contro l, refer to
Driving stability control
systems 69
Start/Stop button 46
– starting the engine 47
– switching off the engine 47
Starting assistance, refer to Jump-starting 219
Starting, refer to Starting the engine 47
Sta
rting the engine
– Start/Stop button 46
Start-off assistance, refer to
– DSC 69
– Hill Assist 71
State/province, for navigation 109
Station, selecting
– radio 132
Status information on the
Control Display 19
Status of this Owner's Manual
at time of printing 5
Steering wheel 42
– adjustment 42
– buttons on steering wheel 11
– lock 46
– shift paddles 50
Steptronic, refer to Automatic transmission with
Steptronic 48
Storage area
– cargo area 100
Storage compartment, front
passenger side 93
Storage compartments 93
Storage space
– storage compartments 93Storing a destination in the
address book 111
Storing the vehicle 207
Storing tires 197
Stowage, refer to Storage compartments 93
Summer tires, refer to Wheels
and tires 190
SW, waveband 132
Switches, refer to Cockpit 10
Switching off
– engine 47
Switching off the engine
– Start/Stop button 46
Switching on
– audio 130
– CD player 130
– radio 130
Switching the cooling function
on and off 89
Symbols 4
– status information 19
T
Tachometer56
Tail lamp, refer to Tail lamps 212
– replacing bulb 212
Tail lamps 212
Tank volume, refer to Capacities 229
Target cursor for
navigation 114
Tasks 181
Technical data 226
Technical modifications 5
Telephone
– hands-free system 161,173
– installation lo cation, refer to
Center armrest 93
– refer to sepa rate Owner's
Manual
– voice commands 173