check engine MINI Clubman 2014 Owner's Manual
[x] Cancel search | Manufacturer: MINI, Model Year: 2014, Model line: Clubman, Model: MINI Clubman 2014Pages: 210, PDF Size: 5.12 MB
Page 15 of 210
Indicator/warning lamps
The concept
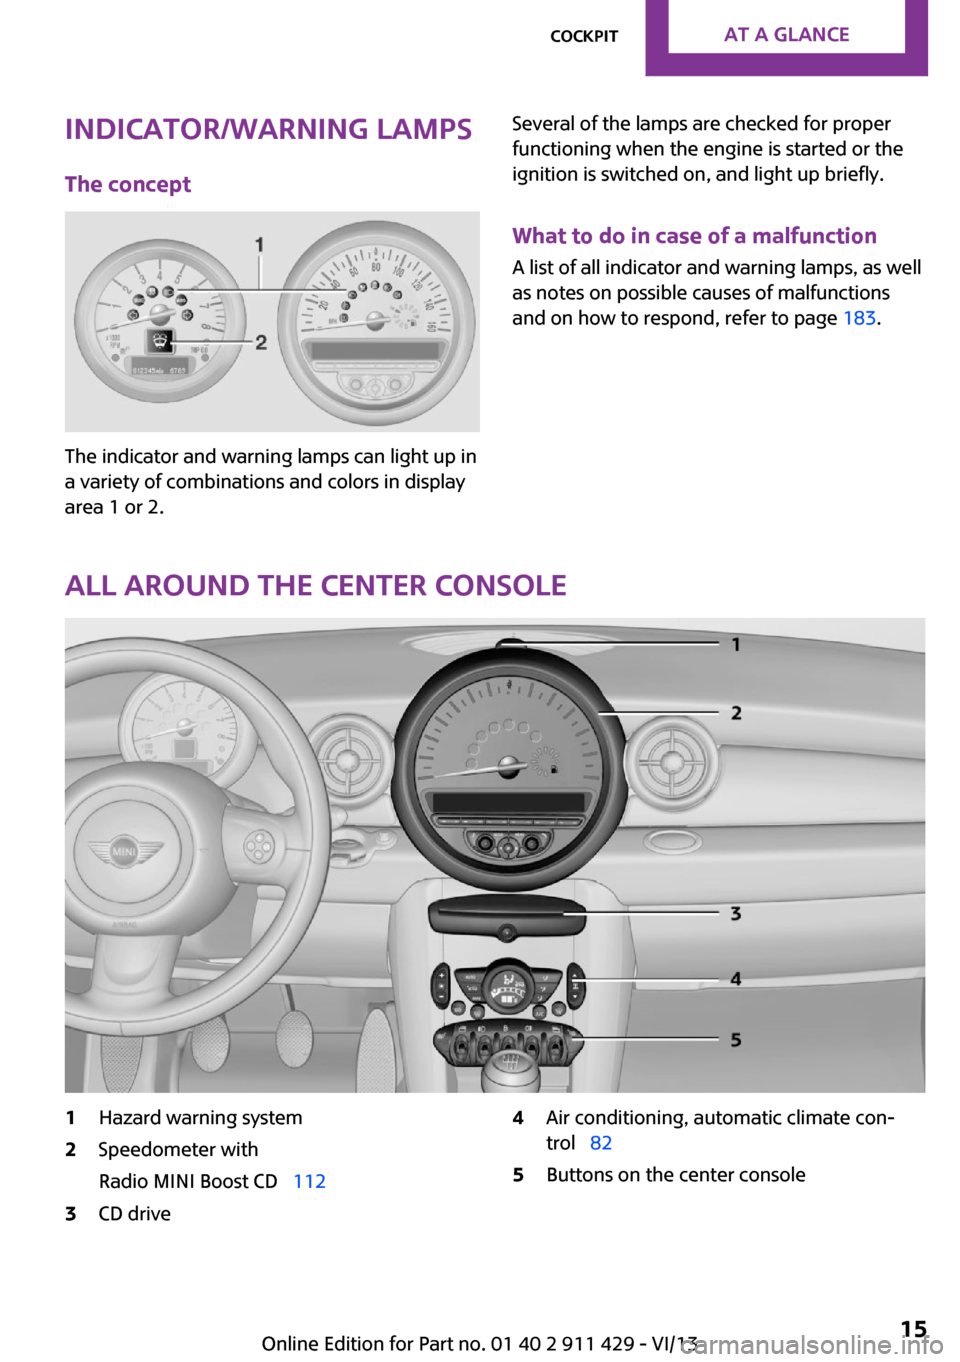
The indicator and warning lamps can light up in
a variety of combinations and colors in display
area 1 or 2.
Several of the lamps are checked for proper
functioning when the engine is started or the
ignition is switched on, and light up briefly.
What to do in case of a malfunction
A list of all indicator and warning lamps, as well
as notes on possible causes of malfunctions
and on how to respond, refer to page 183.
All around the center console
1Hazard warning system2Speedometer with
Radio MINI Boost CD 1123CD drive4Air conditioning, automatic climate con‐
trol 825Buttons on the center consoleSeite 15CockpitAt a glance15
Online Edition for Part no. 01 40 2 911 429 - VI/13
Page 28 of 210
MINI
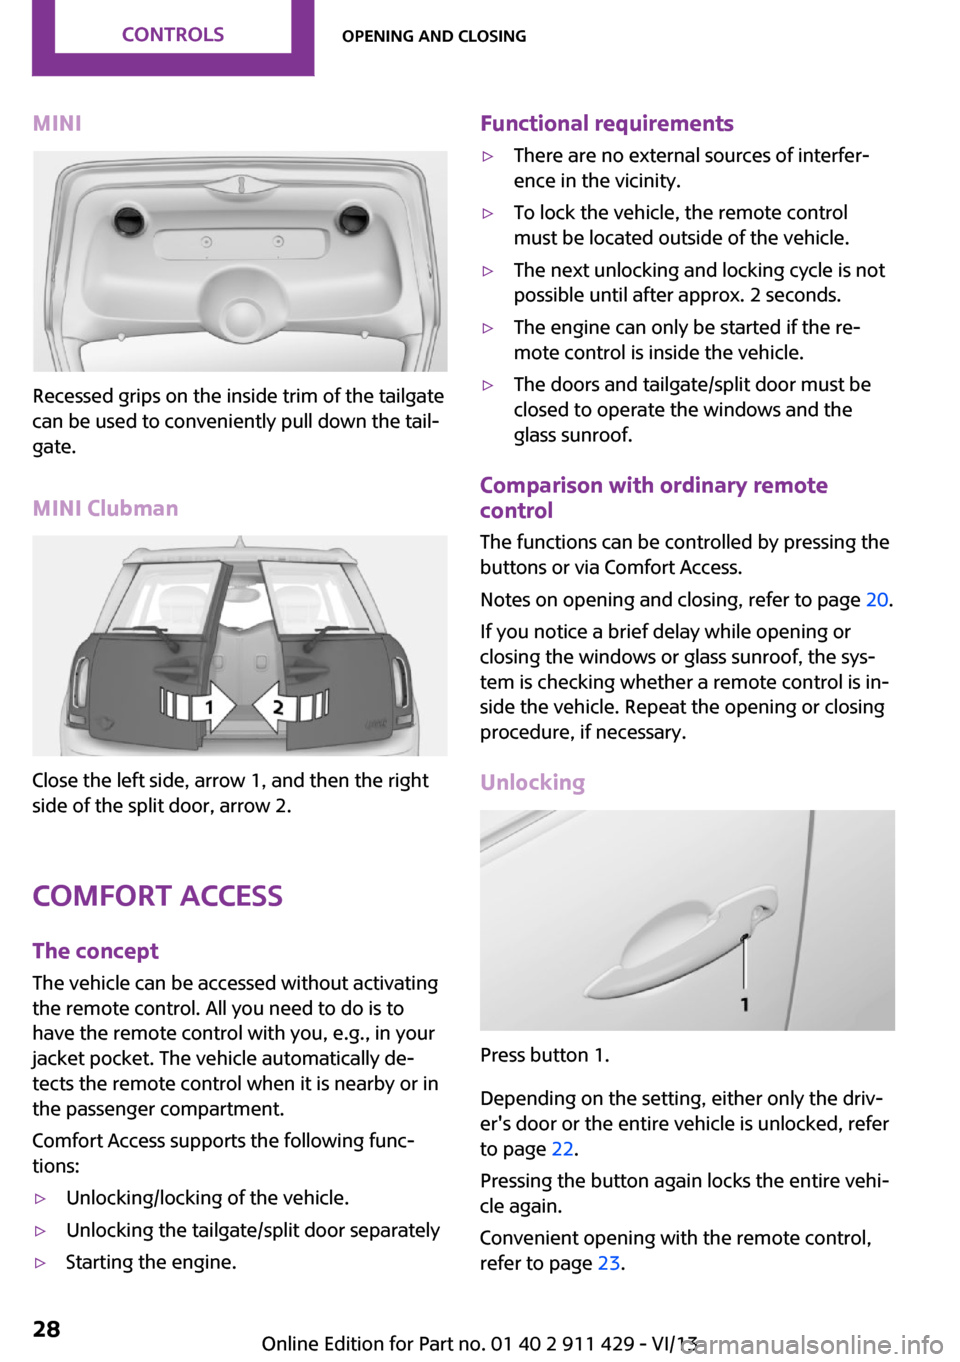
Recessed grips on the inside trim of the tailgate
can be used to conveniently pull down the tail‐
gate.
MINI Clubman
Close the left side, arrow 1, and then the right
side of the split door, arrow 2.
Comfort Access The concept
The vehicle can be accessed without activating the remote control. All you need to do is to
have the remote control with you, e.g., in your
jacket pocket. The vehicle automatically de‐
tects the remote control when it is nearby or in
the passenger compartment.
Comfort Access supports the following func‐
tions:
▷Unlocking/locking of the vehicle.▷Unlocking the tailgate/split door separately▷Starting the engine.Functional requirements▷There are no external sources of interfer‐
ence in the vicinity.▷To lock the vehicle, the remote control
must be located outside of the vehicle.▷The next unlocking and locking cycle is not
possible until after approx. 2 seconds.▷The engine can only be started if the re‐
mote control is inside the vehicle.▷The doors and tailgate/split door must be
closed to operate the windows and the
glass sunroof.
Comparison with ordinary remote
control
The functions can be controlled by pressing the
buttons or via Comfort Access.
Notes on opening and closing, refer to page 20.
If you notice a brief delay while opening or
closing the windows or glass sunroof, the sys‐
tem is checking whether a remote control is in‐
side the vehicle. Repeat the opening or closing
procedure, if necessary.
Unlocking
Press button 1.
Depending on the setting, either only the driv‐
er's door or the entire vehicle is unlocked, refer
to page 22.
Pressing the button again locks the entire vehi‐
cle again.
Convenient opening with the remote control,
refer to page 23.
Seite 28ControlsOpening and closing28
Online Edition for Part no. 01 40 2 911 429 - VI/13
Page 29 of 210
Locking
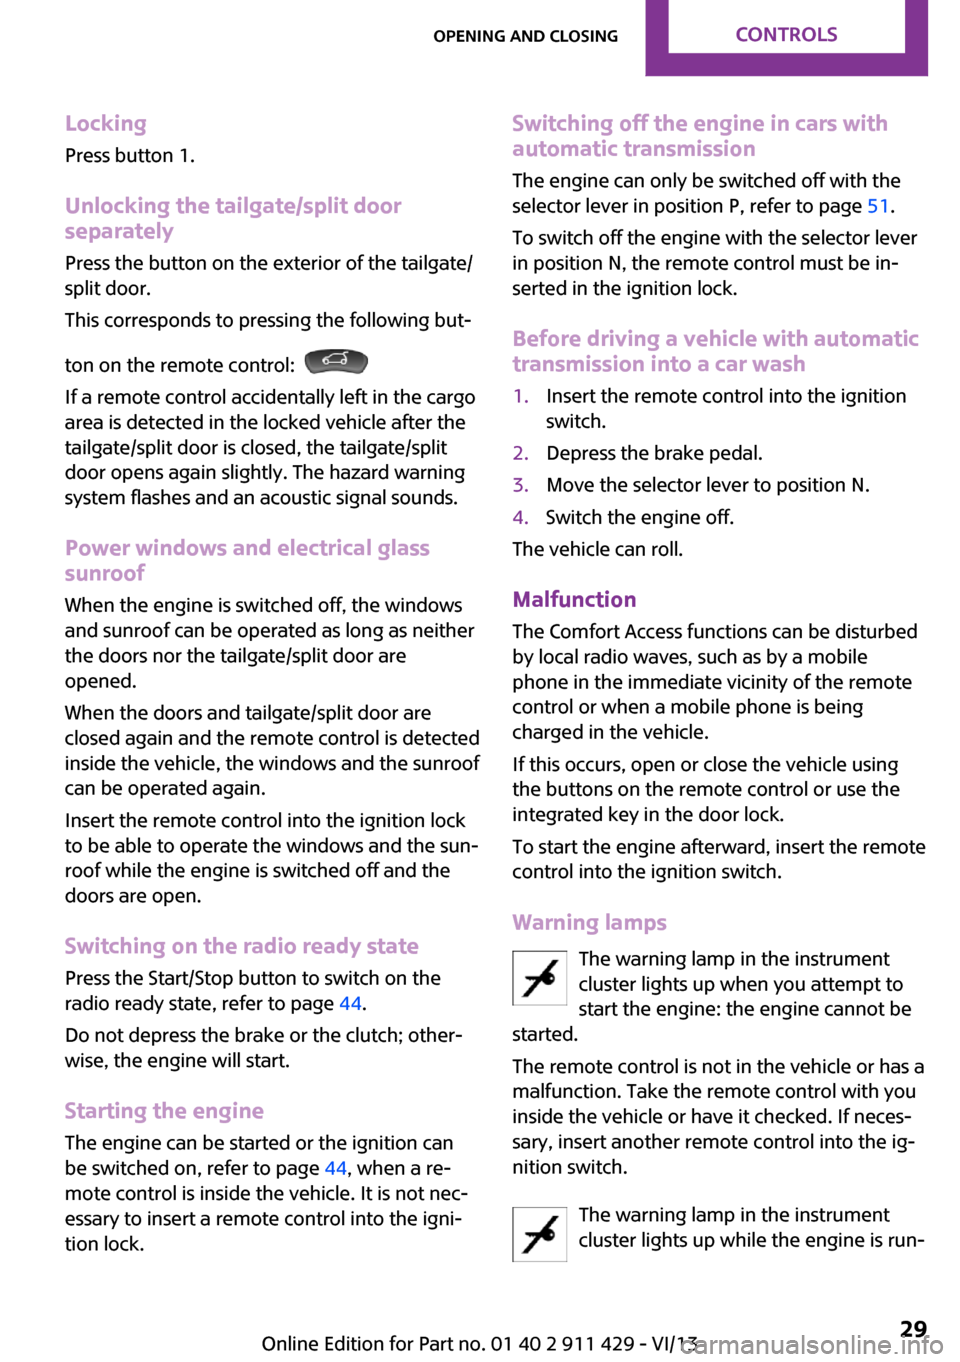
Press button 1.
Unlocking the tailgate/split door separately
Press the button on the exterior of the tailgate/
split door.
This corresponds to pressing the following but‐
ton on the remote control:
If a remote control accidentally left in the cargo
area is detected in the locked vehicle after the
tailgate/split door is closed, the tailgate/split
door opens again slightly. The hazard warning
system flashes and an acoustic signal sounds.
Power windows and electrical glass
sunroof
When the engine is switched off, the windows
and sunroof can be operated as long as neither
the doors nor the tailgate/split door are
opened.
When the doors and tailgate/split door are
closed again and the remote control is detected
inside the vehicle, the windows and the sunroof
can be operated again.
Insert the remote control into the ignition lock
to be able to operate the windows and the sun‐
roof while the engine is switched off and the
doors are open.
Switching on the radio ready state Press the Start/Stop button to switch on the
radio ready state, refer to page 44.
Do not depress the brake or the clutch; other‐
wise, the engine will start.
Starting the engine The engine can be started or the ignition can
be switched on, refer to page 44, when a re‐
mote control is inside the vehicle. It is not nec‐
essary to insert a remote control into the igni‐
tion lock.
Switching off the engine in cars with
automatic transmission
The engine can only be switched off with the
selector lever in position P, refer to page 51.
To switch off the engine with the selector lever
in position N, the remote control must be in‐
serted in the ignition lock.
Before driving a vehicle with automatic
transmission into a car wash1.Insert the remote control into the ignition
switch.2.Depress the brake pedal.3.Move the selector lever to position N.4.Switch the engine off.
The vehicle can roll.
Malfunction The Comfort Access functions can be disturbed
by local radio waves, such as by a mobile
phone in the immediate vicinity of the remote
control or when a mobile phone is being
charged in the vehicle.
If this occurs, open or close the vehicle using
the buttons on the remote control or use the
integrated key in the door lock.
To start the engine afterward, insert the remote
control into the ignition switch.
Warning lamps The warning lamp in the instrument
cluster lights up when you attempt to
start the engine: the engine cannot be
started.
The remote control is not in the vehicle or has a
malfunction. Take the remote control with you
inside the vehicle or have it checked. If neces‐
sary, insert another remote control into the ig‐
nition switch.
The warning lamp in the instrument
cluster lights up while the engine is run‐
Seite 29Opening and closingControls29
Online Edition for Part no. 01 40 2 911 429 - VI/13
Page 55 of 210
Tachometer
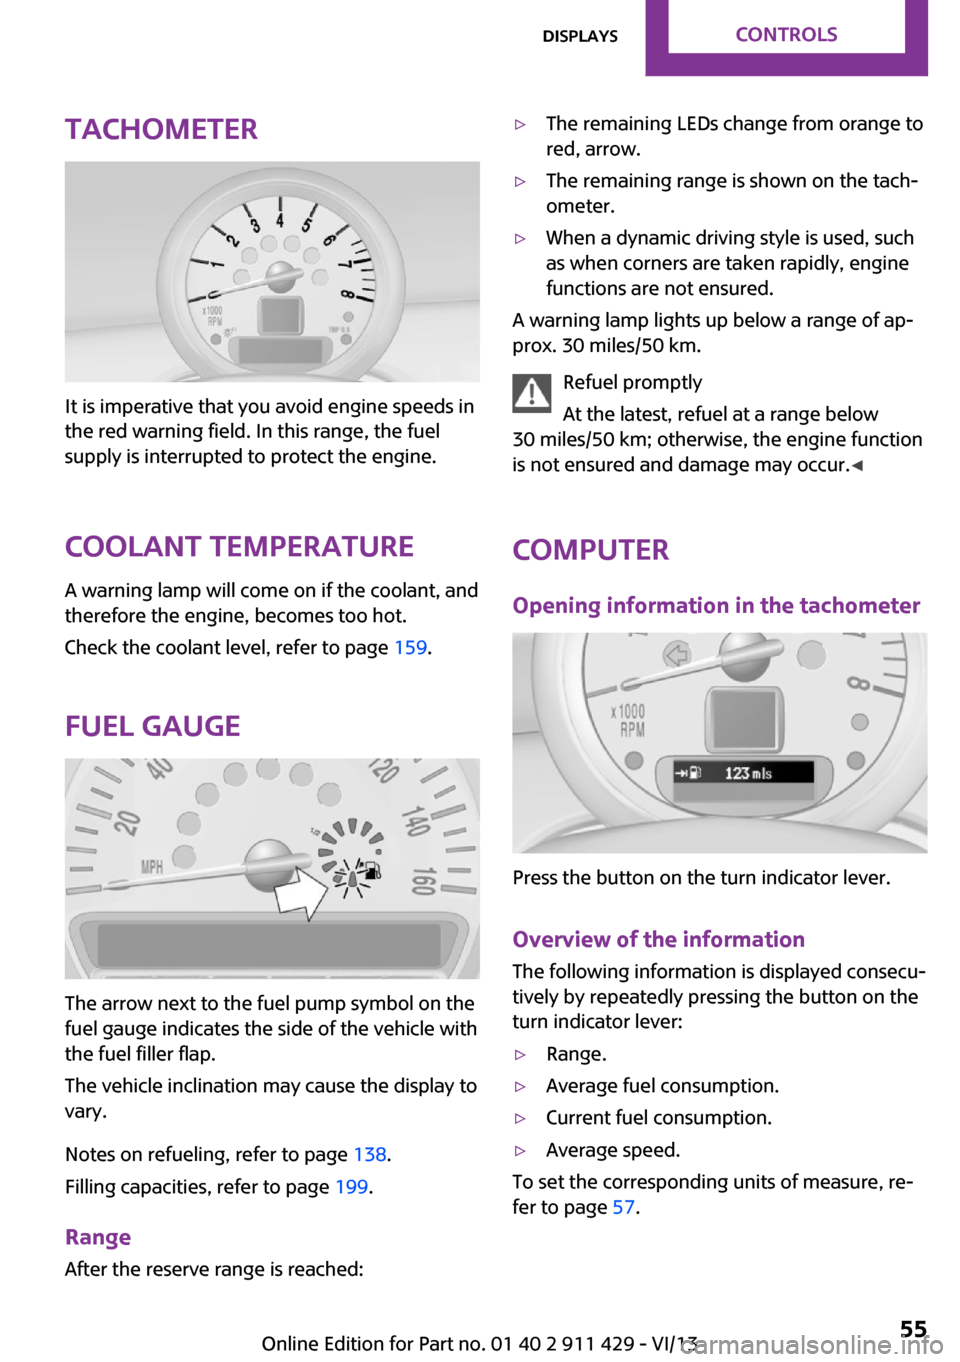
It is imperative that you avoid engine speeds in
the red warning field. In this range, the fuel
supply is interrupted to protect the engine.
Coolant temperature A warning lamp will come on if the coolant, and
therefore the engine, becomes too hot.
Check the coolant level, refer to page 159.
Fuel gauge
The arrow next to the fuel pump symbol on the
fuel gauge indicates the side of the vehicle with
the fuel filler flap.
The vehicle inclination may cause the display to
vary.
Notes on refueling, refer to page 138.
Filling capacities, refer to page 199.
Range After the reserve range is reached:
▷The remaining LEDs change from orange to
red, arrow.▷The remaining range is shown on the tach‐
ometer.▷When a dynamic driving style is used, such
as when corners are taken rapidly, engine
functions are not ensured.
A warning lamp lights up below a range of ap‐
prox. 30 miles/50 km.
Refuel promptly
At the latest, refuel at a range below
30 miles/50 km; otherwise, the engine function
is not ensured and damage may occur. ◀
Computer
Opening information in the tachometer
Press the button on the turn indicator lever.
Overview of the information
The following information is displayed consecu‐
tively by repeatedly pressing the button on the
turn indicator lever:
▷Range.▷Average fuel consumption.▷Current fuel consumption.▷Average speed.
To set the corresponding units of measure, re‐
fer to page 57.
Seite 55DisplaysControls55
Online Edition for Part no. 01 40 2 911 429 - VI/13
Page 56 of 210
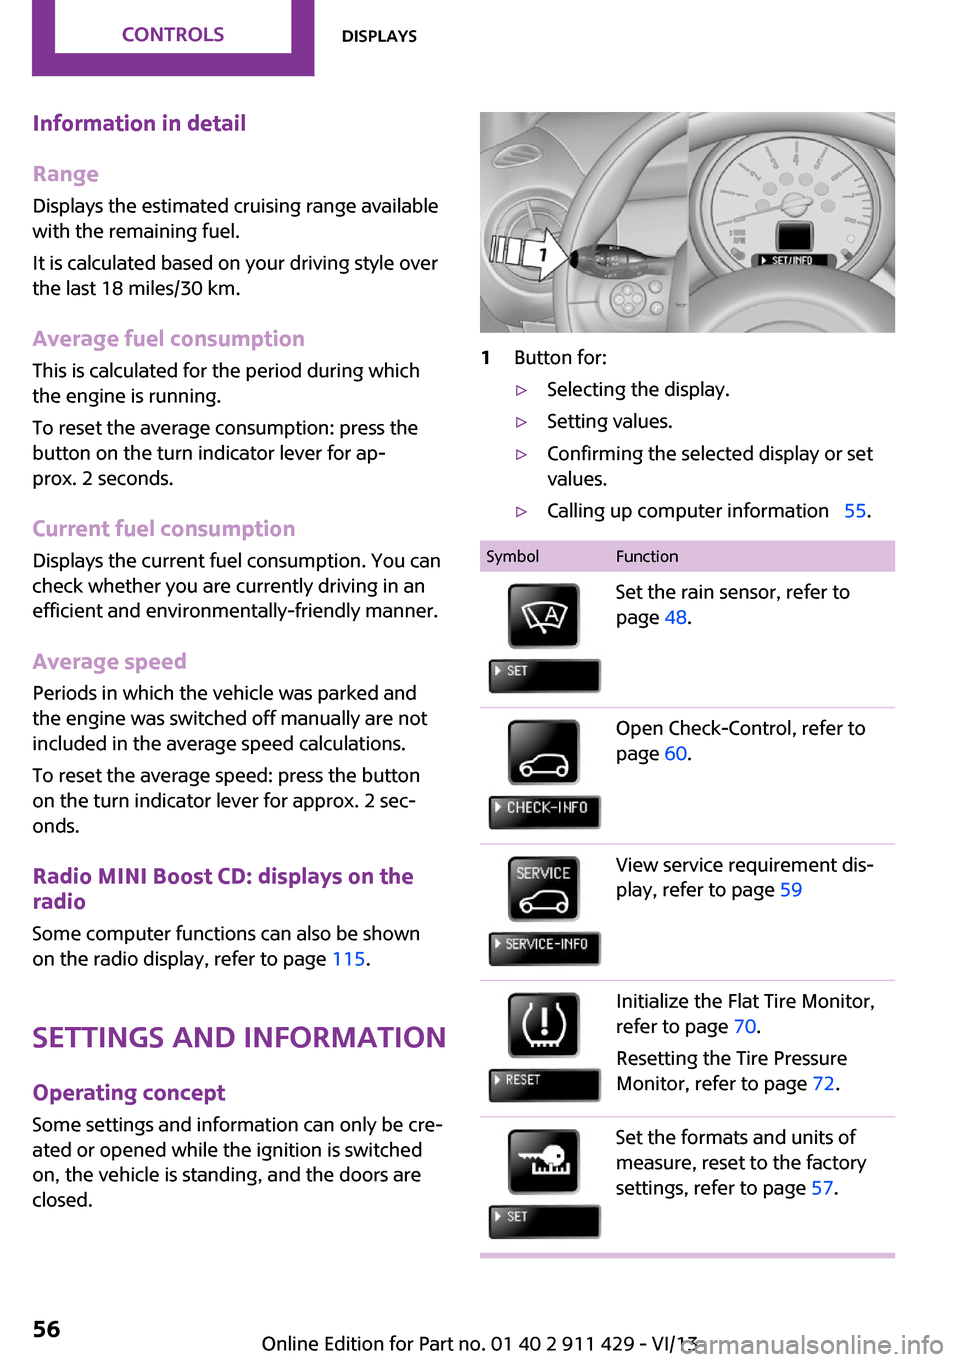
Information in detail
Range
Displays the estimated cruising range available
with the remaining fuel.
It is calculated based on your driving style over
the last 18 miles/30 km.
Average fuel consumption This is calculated for the period during which
the engine is running.
To reset the average consumption: press the
button on the turn indicator lever for ap‐
prox. 2 seconds.
Current fuel consumption Displays the current fuel consumption. You can
check whether you are currently driving in an
efficient and environmentally-friendly manner.
Average speed Periods in which the vehicle was parked and
the engine was switched off manually are not
included in the average speed calculations.
To reset the average speed: press the button
on the turn indicator lever for approx. 2 sec‐
onds.
Radio MINI Boost CD: displays on the
radio
Some computer functions can also be shown
on the radio display, refer to page 115.
Settings and information Operating conceptSome settings and information can only be cre‐
ated or opened while the ignition is switched
on, the vehicle is standing, and the doors are
closed.1Button for:▷Selecting the display.▷Setting values.▷Confirming the selected display or set
values.▷Calling up computer information 55.SymbolFunctionSet the rain sensor, refer to
page 48.Open Check-Control, refer to
page 60.View service requirement dis‐
play, refer to page 59Initialize the Flat Tire Monitor,
refer to page 70.
Resetting the Tire Pressure
Monitor, refer to page 72.Set the formats and units of
measure, reset to the factory
settings, refer to page 57.Seite 56ControlsDisplays56
Online Edition for Part no. 01 40 2 911 429 - VI/13
Page 59 of 210
Service requirements
The remaining driving distance and the date of
the next scheduled service are displayed briefly
immediately after you start the engine or
switch on the ignition.
The current service requirements can be read
out from the remote control by the service spe‐
cialist.
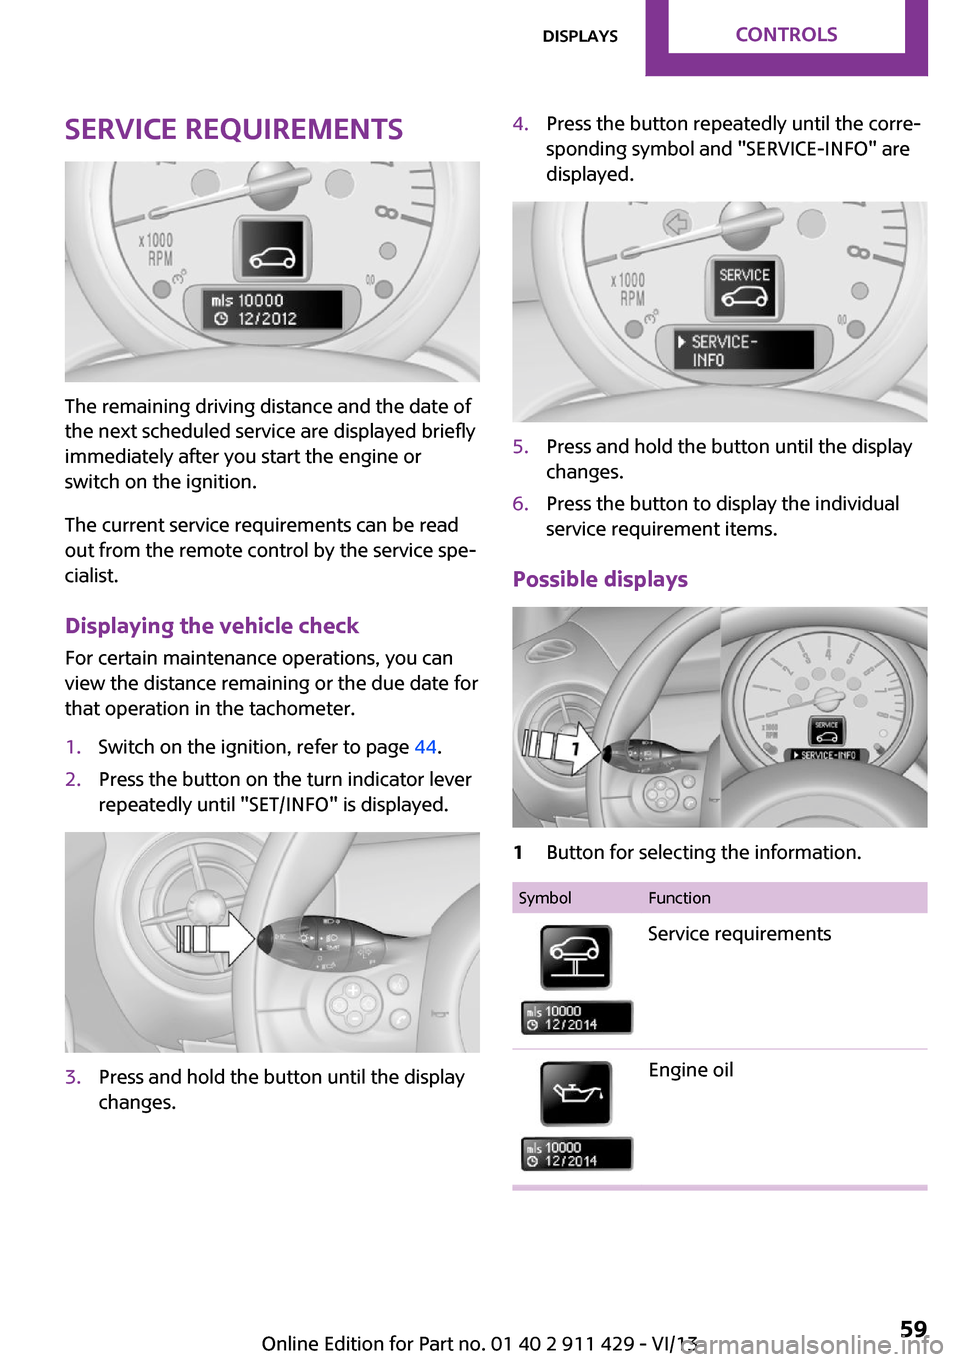
Displaying the vehicle check
For certain maintenance operations, you can
view the distance remaining or the due date for
that operation in the tachometer.
1.Switch on the ignition, refer to page 44.2.Press the button on the turn indicator lever
repeatedly until "SET/INFO" is displayed.3.Press and hold the button until the display
changes.4.Press the button repeatedly until the corre‐
sponding symbol and "SERVICE-INFO" are
displayed.5.Press and hold the button until the display
changes.6.Press the button to display the individual
service requirement items.
Possible displays
1Button for selecting the information.SymbolFunctionService requirementsEngine oilSeite 59DisplaysControls59
Online Edition for Part no. 01 40 2 911 429 - VI/13
Page 60 of 210
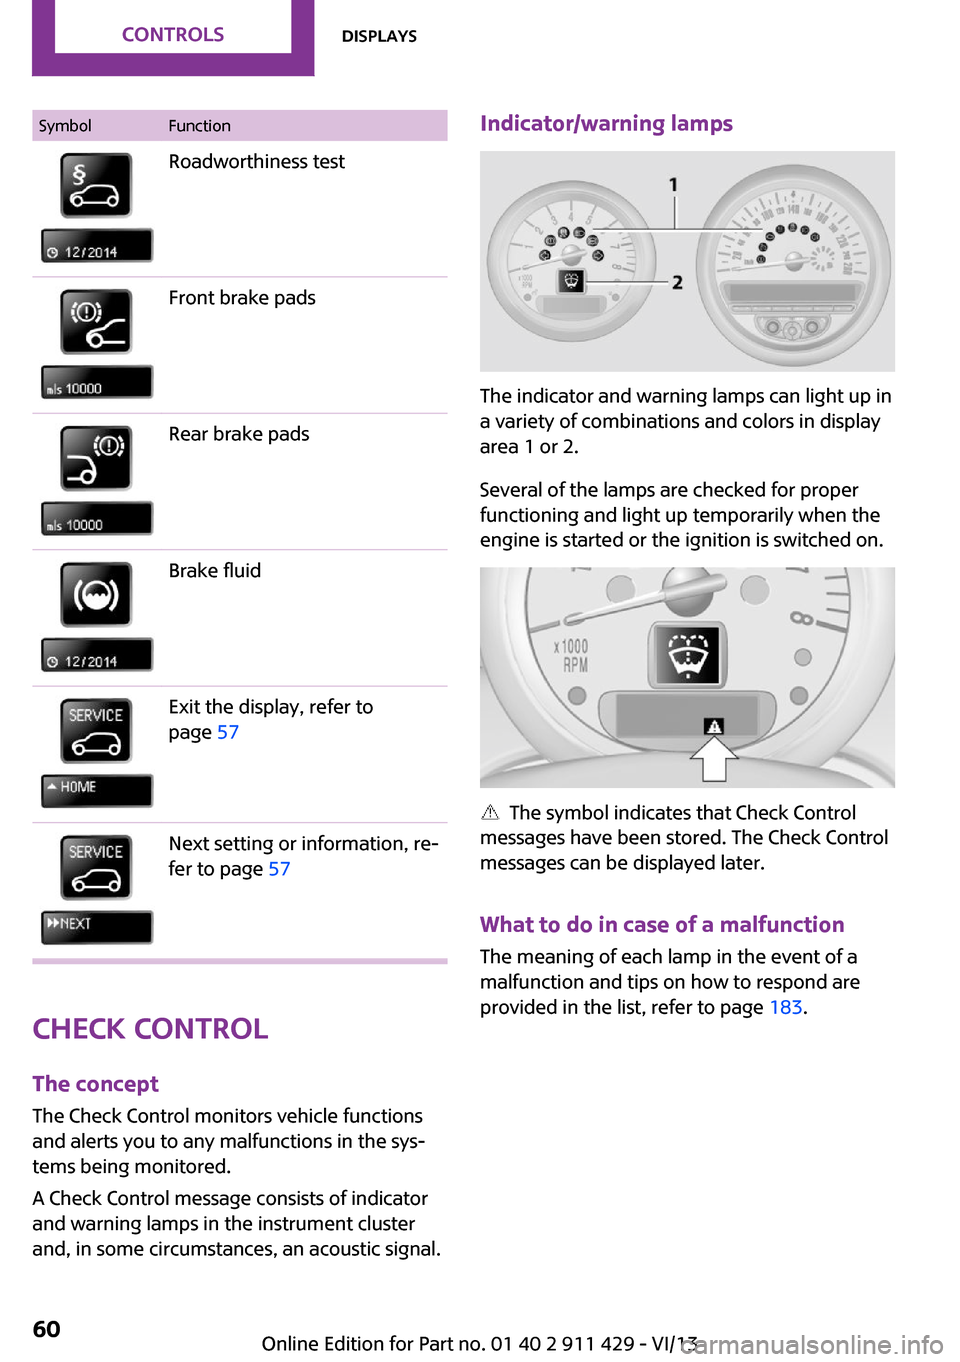
SymbolFunctionRoadworthiness testFront brake padsRear brake padsBrake fluidExit the display, refer to
page 57Next setting or information, re‐
fer to page 57
Check Control
The concept
The Check Control monitors vehicle functions
and alerts you to any malfunctions in the sys‐
tems being monitored.
A Check Control message consists of indicator
and warning lamps in the instrument cluster
and, in some circumstances, an acoustic signal.
Indicator/warning lamps
The indicator and warning lamps can light up in
a variety of combinations and colors in display
area 1 or 2.
Several of the lamps are checked for proper
functioning and light up temporarily when the
engine is started or the ignition is switched on.
The symbol indicates that Check Control
messages have been stored. The Check Control
messages can be displayed later.
What to do in case of a malfunction
The meaning of each lamp in the event of a
malfunction and tips on how to respond are
provided in the list, refer to page 183.
Seite 60ControlsDisplays60
Online Edition for Part no. 01 40 2 911 429 - VI/13
Page 70 of 210
Functional requirementsThe system must have been initialized when
the tire inflation pressure was correct; other‐
wise, reliable signaling of a flat tire is not en‐
sured.
Initialize the system after each correction of the
tire inflation pressure and after every tire or
wheel change.
System limits Sudden tire damage
Sudden serious tire damage caused by
external influences cannot be indicated in ad‐
vance. ◀
A natural, even pressure loss in all four tires
cannot be detected. Therefore, check the tire
inflation pressure regularly.
The system could be delayed or malfunction in
the following situations:▷When the system has not been initialized.▷When driving on a snowy or slippery road
surface.▷Sporty driving style: slip in the drive wheels,
high lateral acceleration.▷When driving with snow chains.
When the vehicle is driven with a compact
wheel, refer to page 171, the Flat Tire Monitor
is not functional.
InitializationThe initialization process adopts the set infla‐
tion tire pressures as reference values for the
detection of a flat tire. Initialization is started by
confirming the inflation pressures.
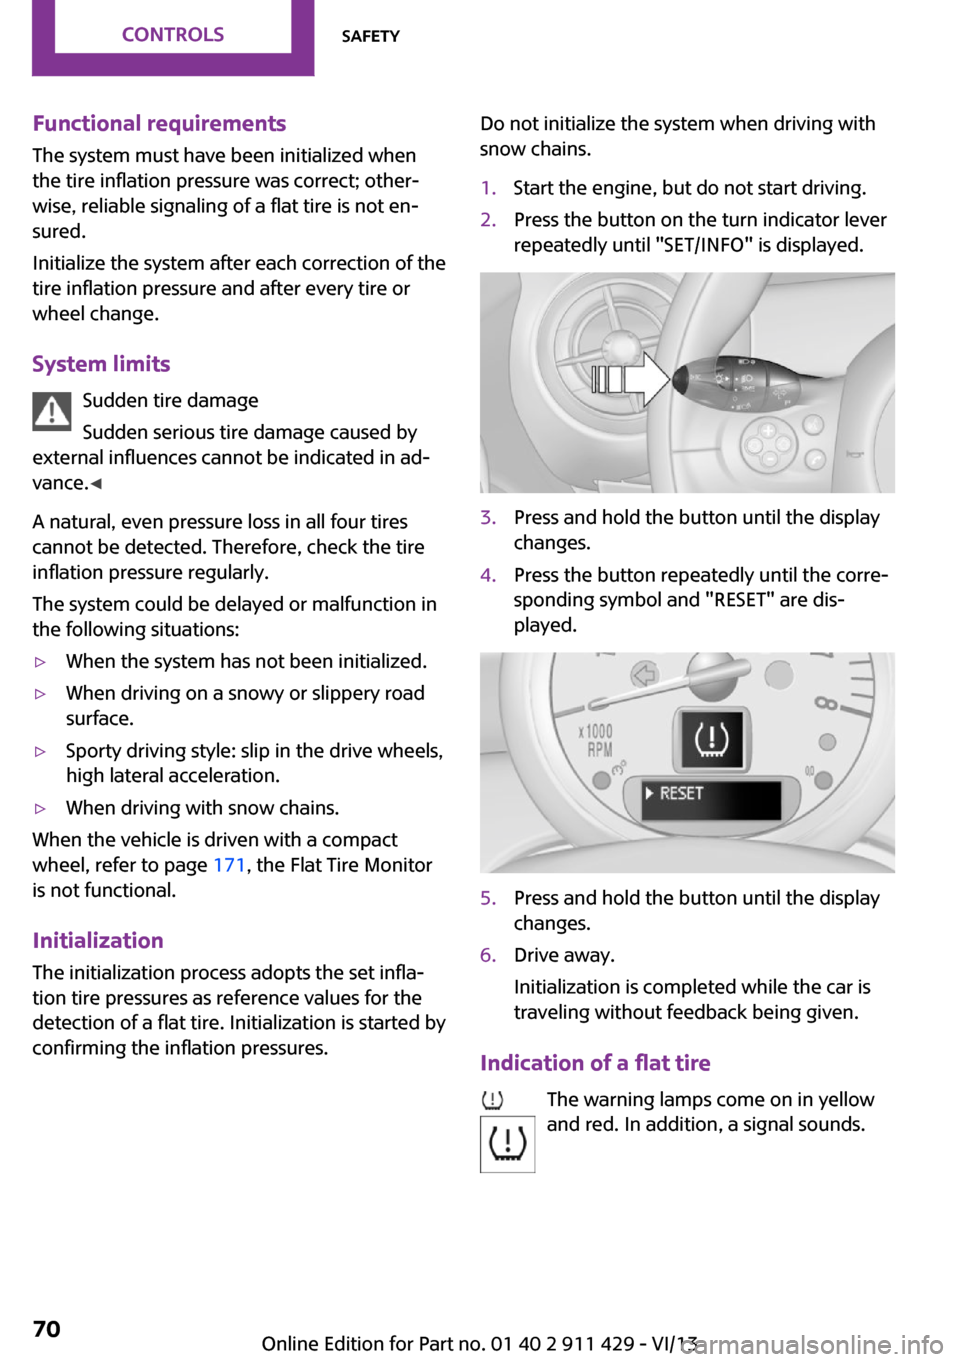
Do not initialize the system when driving with
snow chains.1.Start the engine, but do not start driving.2.Press the button on the turn indicator lever
repeatedly until "SET/INFO" is displayed.3.Press and hold the button until the display
changes.4.Press the button repeatedly until the corre‐
sponding symbol and "RESET" are dis‐
played.5.Press and hold the button until the display
changes.6.Drive away.
Initialization is completed while the car is
traveling without feedback being given.
Indication of a flat tire
The warning lamps come on in yellow
and red. In addition, a signal sounds.
Seite 70ControlsSafety70
Online Edition for Part no. 01 40 2 911 429 - VI/13
Page 81 of 210
Avoid driving quickly with PDC
PDC is a parking aid that can display ob‐
jects when the vehicle approaches them slowly,
as is the case during parking maneuvers. Avoid
driving toward an object quickly as the system
may then be too late in issuing a warning for
technical reasons. ◀
Automatic operation
The system is activated after approx. one sec‐ ond when reverse gear or selector lever posi‐
tion R is engaged while the engine is running or
the ignition is switched on. Await this short pe‐
riod before setting the vehicle into motion.
Signal tones
The closer the vehicle is to the object, the
shorter the intervals become. If the distance to
a detected object is less than approx.
12 in/30 cm, a continuous tone is sounded.
If the distance remains constant, for example
when driving parallel to a wall, the signal tone
is stopped after approx. 3 seconds.
Volume
The signal tone volume can be adjusted.
Radio MINI Boost CD, refer to page 114.
System limits Check the traffic situation as well
PDC cannot serve as a substitute for the
driver's personal judgment of the traffic situa‐
tion. Check the traffic situation around the ve‐
hicle with your own eyes. Otherwise, an acci‐
dent could result from road users or objects
located outside of the PDC detection range.
Loud noises from outside and inside the vehicle
may prevent you from hearing the PDC's signal
tone. ◀Malfunction
The warning lamp lights up. PDC is mal‐functioning or has failed. Have the sys‐
tem checked.
To ensure full functionality of the sensors, keep
the sensors clean and free of ice. When using
high-pressure washers, do not spray the sen‐
sors for long periods and maintain a distance of
at least 12 in/30 cm.Seite 81Driving comfortControls81
Online Edition for Part no. 01 40 2 911 429 - VI/13
Page 108 of 210
Saving fuelVehicle equipment
This chapter describes all series equipment as
well as country-specific and special equipment
offered for this model series.Therefore, it also
describes equipment that may not be found in
your vehicle, for instance due to the selected
special equipment or the country version. This
also applies to safety-related functions and sys‐
tems.
General information Your vehicle contains advanced technology for
the reduction of fuel consumption and emis‐
sions.
Fuel consumption depends on a number of dif‐
ferent factors. The implementation of certain
measures, driving style and regular mainte‐ nance can have an influence on fuel consump‐
tion and on the environmental impact.
Remove unnecessary cargo Additional weight increases fuel consumption.
Remove attached parts following use Remove unneeded auxiliary mirrors, roof or
rear luggage racks after use.
Attached parts on the vehicle impair the aero‐
dynamics and increase the fuel consumption.
Close both windows Open windows causes higher air resistance and
thus increases fuel consumption.
Check the tire inflation pressure
regularly
Check and, if necessary, correct the tire infla‐
tion pressure, refer to page 142, at least twice
a month and before starting on a long trip.Low tire inflation pressure increases rolling re‐
sistance and thus raises fuel consumption and
tire wear.
Drive away without delayDo not wait for the engine to warm-up while
the vehicle remains stationary. Start driving
right away, but at moderate engine speeds.
This is the fastest way for the cold engine to
reach its operating temperature.
Look well ahead when driving Avoid unnecessary acceleration and braking. To
achieve this, maintain a suitable distance to the
vehicle driving ahead of you.
Driving smoothly and looking ahead reduces
fuel consumption.
Avoid high engine speeds Use 1st gear to get the vehicle in motion. Be‐
ginning with 2nd gear, accelerate rapidly. When
accelerating, shift up before reaching high en‐
gine speeds.
When you reach the desired speed, shift into
the highest applicable gear and drive with the
engine speed as low as possible and at a con‐
stant speed.
As a rule: driving at low engine speeds lowers
fuel consumption and reduces wear.
Use coasting conditions
When approaching a red light, take your foot
off the accelerator and coast to a halt in the
highest applicable gear.
On a downhill slope, take your foot off the ac‐
celerator and coast in a suitable gear.
The flow of fuel is interrupted while coasting.Seite 108Driving tipsSaving fuel108
Online Edition for Part no. 01 40 2 911 429 - VI/13