sport mode MINI Clubman 2016 Owner's Manual (Mini Connected)
[x] Cancel search | Manufacturer: MINI, Model Year: 2016, Model line: Clubman, Model: MINI Clubman 2016Pages: 246, PDF Size: 5.21 MB
Page 45 of 246
Split soors with the alarm system
switched on
The split doors can be opened even when the
alarm system is switched on.
After the split doors are closed, they are locked
and monitored again when the doors are
locked. The hazard warning system flashes
once.
Panic mode
You can trigger the alarm system if you find
yourself in a dangerous situation.
Press button on the remote control for
at least 3 seconds.
To switch off the alarm: press any button.
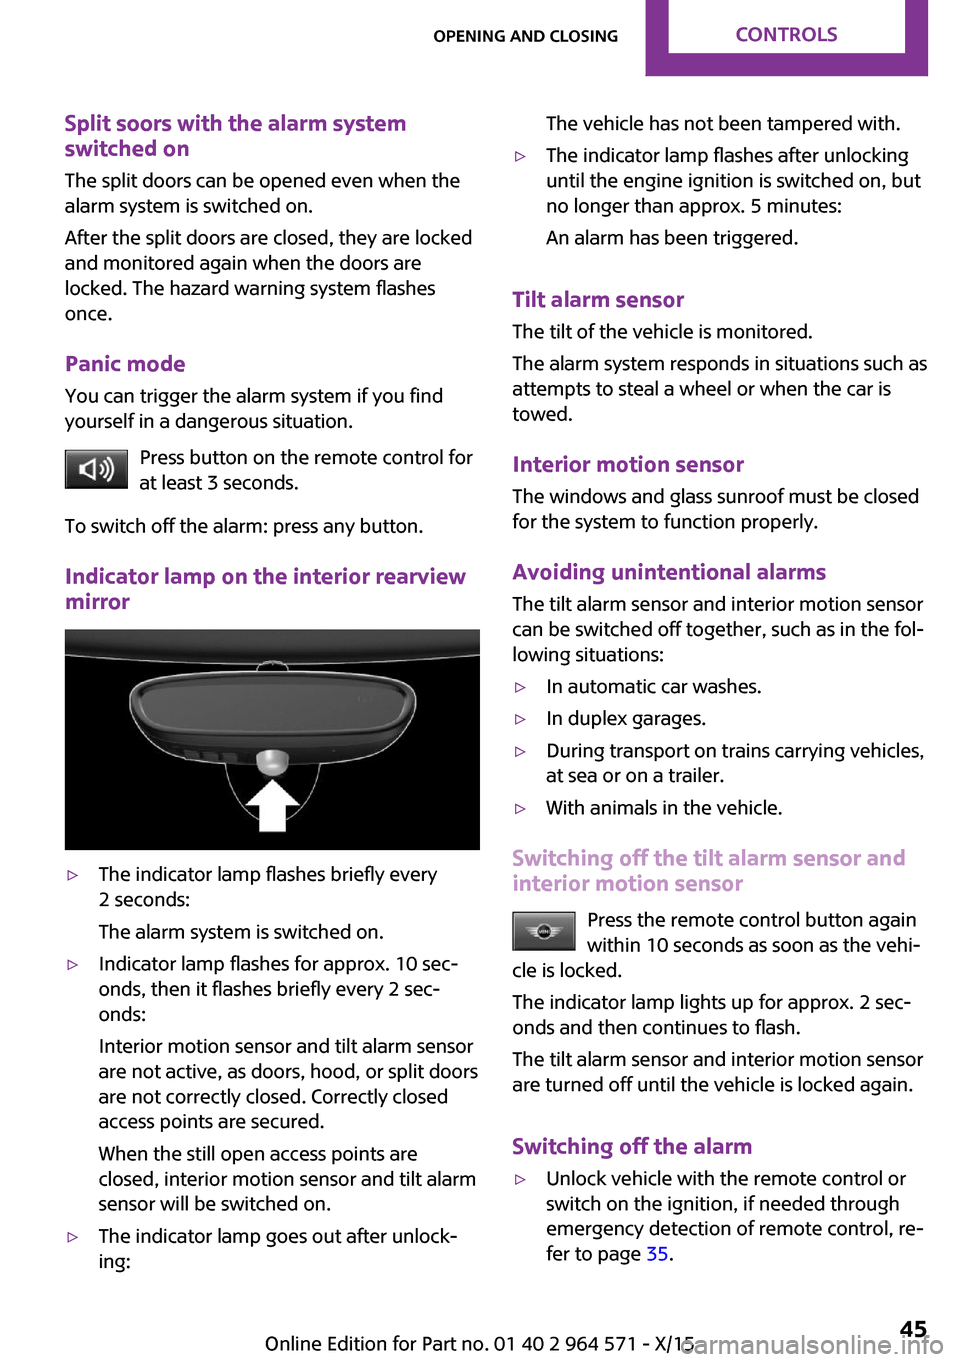
Indicator lamp on the interior rearview
mirror
▷The indicator lamp flashes briefly every
2 seconds:
The alarm system is switched on.
▷Indicator lamp flashes for approx. 10 sec‐
onds, then it flashes briefly every 2 sec‐
onds:
Interior motion sensor and tilt alarm sensor
are not active, as doors, hood, or split doors
are not correctly closed. Correctly closed
access points are secured.
When the still open access points are
closed, interior motion sensor and tilt alarm
sensor will be switched on.
▷The indicator lamp goes out after unlock‐
ing:
The vehicle has not been tampered with.▷The indicator lamp flashes after unlocking
until the engine ignition is switched on, but
no longer than approx. 5 minutes:
An alarm has been triggered.
Tilt alarm sensor
The tilt of the vehicle is monitored.
The alarm system responds in situations such as
attempts to steal a wheel or when the car is
towed.
Interior motion sensor
The windows and glass sunroof must be closed
for the system to function properly.
Avoiding unintentional alarms
The tilt alarm sensor and interior motion sensor
can be switched off together, such as in the fol‐
lowing situations:
▷In automatic car washes.▷In duplex garages.▷During transport on trains carrying vehicles,
at sea or on a trailer.
▷With animals in the vehicle.
Switching off the tilt alarm sensor and
interior motion sensor
Press the remote control button again
within 10 seconds as soon as the vehi‐
cle is locked.
The indicator lamp lights up for approx. 2 sec‐
onds and then continues to flash.
The tilt alarm sensor and interior motion sensor
are turned off until the vehicle is locked again.
Switching off the alarm
▷Unlock vehicle with the remote control or
switch on the ignition, if needed through
emergency detection of remote control, re‐
fer to page 35.
Seite 45Opening and closingCONTROLS45
Online Edition for Part no. 01 40 2 964 571 - X/15
Page 53 of 246
Switching on
Press button once for each tempera‐
ture level.
The maximum temperature is reached when
three LEDs are lit.
If the trip is continued within approx. 15 mi‐
nutes, the seat heating is activated automati‐
cally with the temperature selected last.
When GREEN Mode, refer to page 169, is acti‐
vated, the heater output is reduced.
Switching off
Press and hold the button, until the
LEDs are no longer illuminated.
Safety belts
Number of safety belts
The vehicle is fitted with five safety belts to en‐
sure occupant safety. However, they can only
offer protection when adjusted correctly.
The two outer safety belt buckles, integrated
into the rear seat, are for passengers sitting on
the left and right.
The center safety belt buckle of the rear seat is
solely intended for the person sitting in the
middle.
General information
Always make sure that safety belts are being
worn by all occupants before driving off.
For the occupants' safety the belt locking
mechanism triggers early. Slowly guide the
safety belt out of the holder when applying it.
If needed, disengage the safety belt in the rear
from the belt buckle on the side.
Although airbags enhance safety by providing
added protection, they are not a substitute for
safety belts.
Information
WARNING
If the safety belt is used by more than
one person, the protective effect of the safety
belt cannot be ensured anymore. There is risk
of injuries or danger to life. Do not allow more
than one person to wear a single safety belt. In‐
fants and children are not allowed in an occu‐
pant's lap, but must be transported and respec‐
tively secured in designated child restraint
systems.◀
WARNING
The protective effect of the safety belts
can be limited or lost when safety belts are fas‐
tened incorrectly. An incorrectly fastened safety
belt can cause additional injuries, for example
in the event of an accident or during braking
and evasive maneuvers. There is risk of injuries
or danger to life. Make sure that all occupants
are wearing safety belts correctly.◀
WARNING
With a rear backrest that is not locked,
the protective function of the middle safety belt
is not guaranteed. There is risk of injuries or
danger to life. If you are using the middle safety
belt, lock the wider rear backrest.◀
Correct use of safety belts
▷Wear the safety belt twist-free and as tight
to your body as possible over your lap and
shoulders.
▷Wear the safety belt deep on your hips over
your lap. The safety belt may not press on
your stomach.
▷Do not wear the safety belt on your throat,
rub it on sharp edges, guide it or jam it in
across hard or fragile objects.
▷Avoid thick clothing.▷Re-tighten the safety belt frequently up‐
ward around your upper body.
Seite 53AdjustingCONTROLS53
Online Edition for Part no. 01 40 2 964 571 - X/15
Page 76 of 246
Sport program and manual mode M/S
Activating the sport program
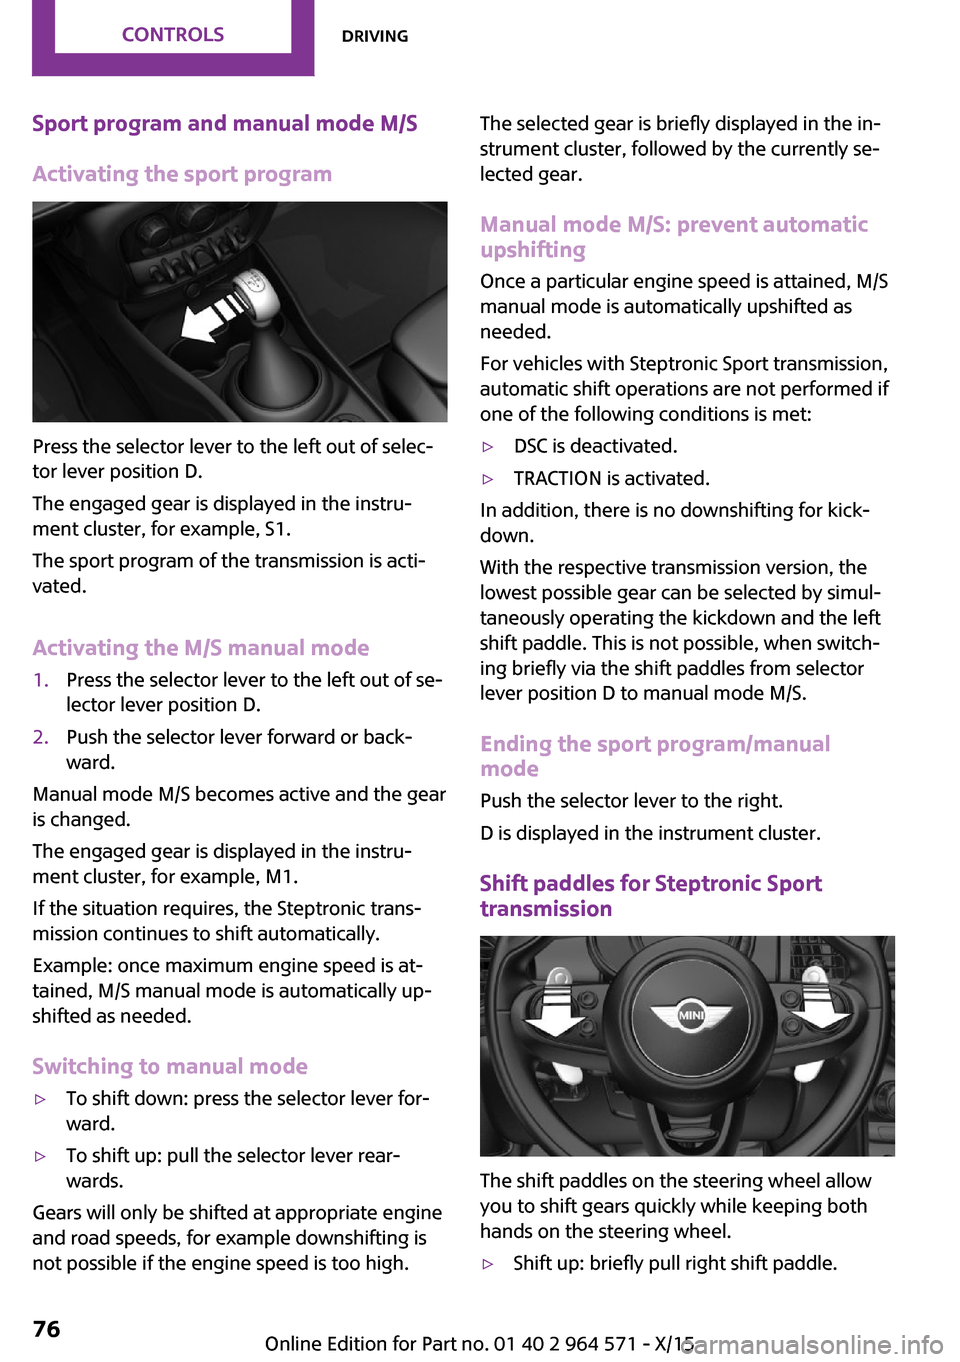
Press the selector lever to the left out of selec‐
tor lever position D.
The engaged gear is displayed in the instru‐
ment cluster, for example, S1.
The sport program of the transmission is acti‐
vated.
Activating the M/S manual mode
1.Press the selector lever to the left out of se‐
lector lever position D.
2.Push the selector lever forward or back‐
ward.
Manual mode M/S becomes active and the gear
is changed.
The engaged gear is displayed in the instru‐
ment cluster, for example, M1.
If the situation requires, the Steptronic trans‐
mission continues to shift automatically.
Example: once maximum engine speed is at‐
tained, M/S manual mode is automatically up‐
shifted as needed.
Switching to manual mode
▷To shift down: press the selector lever for‐
ward.
▷To shift up: pull the selector lever rear‐
wards.
Gears will only be shifted at appropriate engine
and road speeds, for example downshifting is
not possible if the engine speed is too high.
The selected gear is briefly displayed in the in‐
strument cluster, followed by the currently se‐
lected gear.
Manual mode M/S: prevent automatic
upshifting
Once a particular engine speed is attained, M/S
manual mode is automatically upshifted as
needed.
For vehicles with Steptronic Sport transmission,
automatic shift operations are not performed if
one of the following conditions is met:
▷DSC is deactivated.▷TRACTION is activated.
In addition, there is no downshifting for kick‐
down.
With the respective transmission version, the
lowest possible gear can be selected by simul‐
taneously operating the kickdown and the left
shift paddle. This is not possible, when switch‐
ing briefly via the shift paddles from selector
lever position D to manual mode M/S.
Ending the sport program/manual
mode
Push the selector lever to the right.
D is displayed in the instrument cluster.
Shift paddles for Steptronic Sport
transmission
The shift paddles on the steering wheel allow
you to shift gears quickly while keeping both
hands on the steering wheel.
▷Shift up: briefly pull right shift paddle.Seite 76CONTROLSDriving76
Online Edition for Part no. 01 40 2 964 571 - X/15
Page 77 of 246
▷Shift down: briefly pull left shift paddle.▷The lowest possible gear can be selected by
pulling and holding the left shift paddle.
Gears will only be shifted at appropriate engine
and road speeds, for example downshifting is
not possible if the engine speed is too high.
The selected gear is briefly displayed in the in‐
strument cluster, followed by the current gear.
If the shift paddles on the steering wheel are
used to shift gears in automatic mode, the
transmission temporarily switches to manual
mode.
In the manual mode, after conservative driving
for a certain amount of time or if there has
been no acceleration or shifting of the shift
paddles within a certain amount of time, the
transmission switches back to automatic mode.
It is possible to switch into the automatic mode:
▷Pull and hold right shift paddle.
or
▷In addition to the briefly pulled right shift
paddle, briefly pull the left shift paddle.
Displays in the instrument cluster
The selector lever position is dis‐
played, for example: P.
Manually release the transmission lock
Should the selector lever be blocked in selector
lever position P despite the ignition being
turned on, the brake being depressed and the
unlock button being pressed, the transmission
lock can be manually canceled:
Before unlocking the transmission lock man‐
ually, set the parking brake to prevent the vehi‐
cle from rolling away.
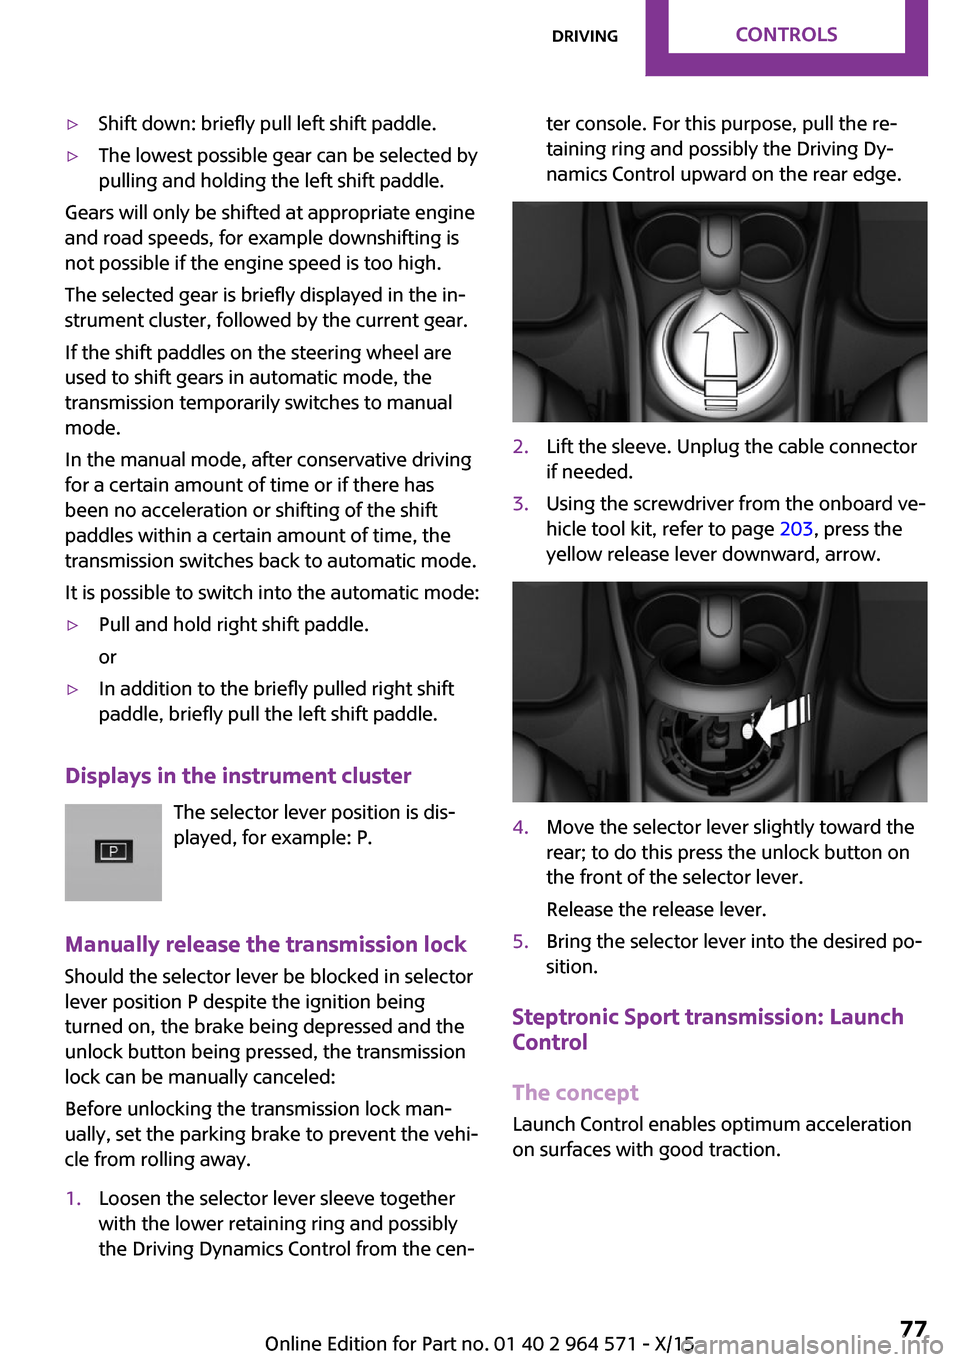
1.Loosen the selector lever sleeve together
with the lower retaining ring and possibly
the Driving Dynamics Control from the cen‐
ter console. For this purpose, pull the re‐
taining ring and possibly the Driving Dy‐
namics Control upward on the rear edge.
2.Lift the sleeve. Unplug the cable connector
if needed.
3.Using the screwdriver from the onboard ve‐
hicle tool kit, refer to page 203, press the
yellow release lever downward, arrow.
4.Move the selector lever slightly toward the
rear; to do this press the unlock button on
the front of the selector lever.
Release the release lever.
5.Bring the selector lever into the desired po‐
sition.
Steptronic Sport transmission: Launch
Control
The concept
Launch Control enables optimum acceleration
on surfaces with good traction.
Seite 77DrivingCONTROLS77
Online Edition for Part no. 01 40 2 964 571 - X/15
Page 78 of 246
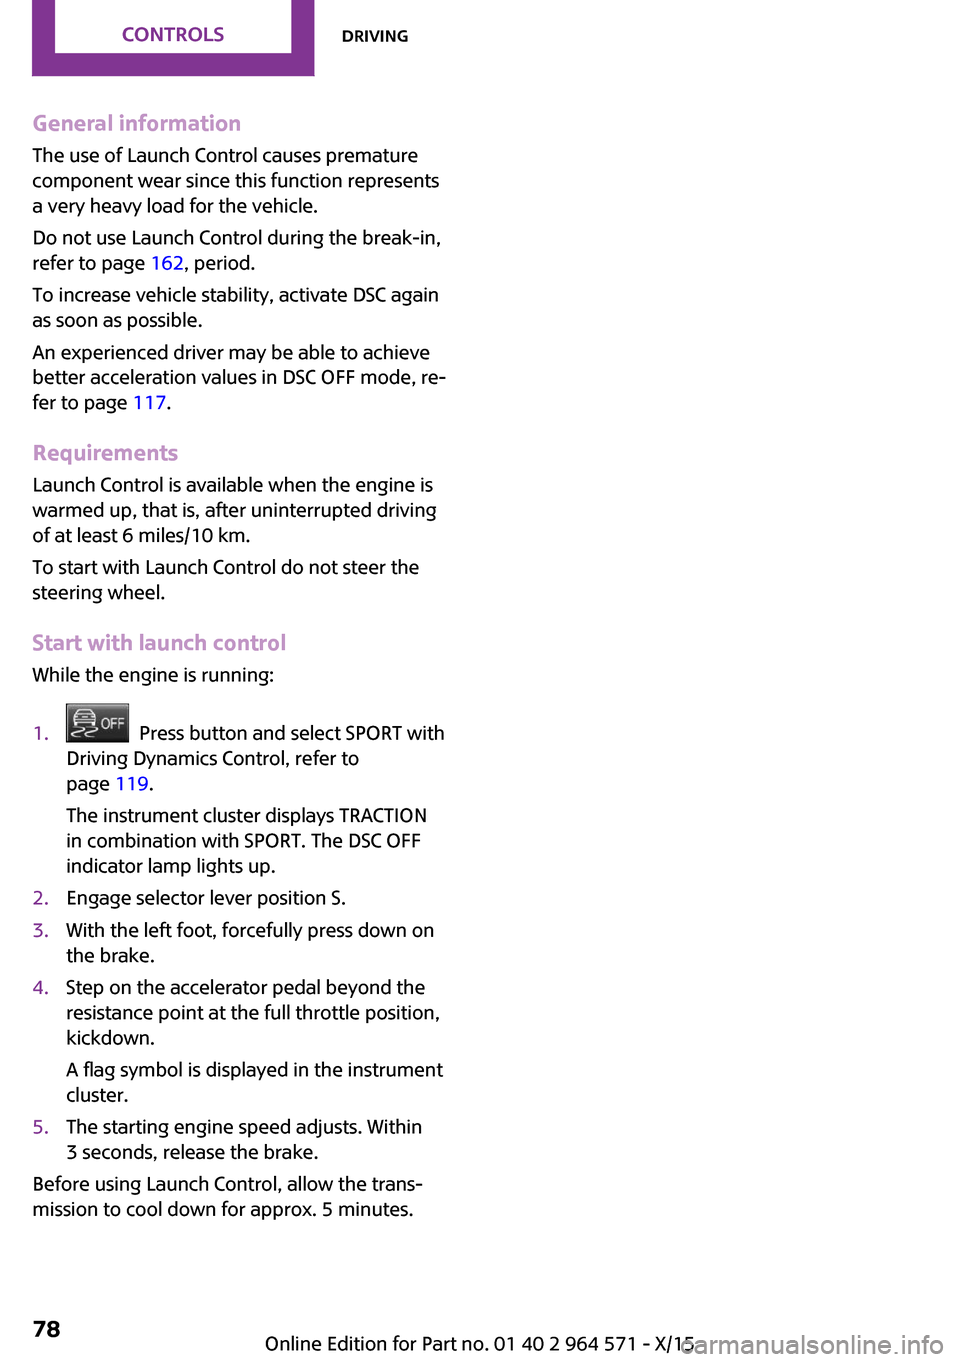
General information
The use of Launch Control causes premature
component wear since this function represents
a very heavy load for the vehicle.
Do not use Launch Control during the break-in,
refer to page 162, period.
To increase vehicle stability, activate DSC again
as soon as possible.
An experienced driver may be able to achieve
better acceleration values in DSC OFF mode, re‐
fer to page 117.
Requirements
Launch Control is available when the engine is
warmed up, that is, after uninterrupted driving
of at least 6 miles/10 km.
To start with Launch Control do not steer the
steering wheel.
Start with launch control
While the engine is running:
1. Press button and select SPORT with
Driving Dynamics Control, refer to
page 119.
The instrument cluster displays TRACTION
in combination with SPORT. The DSC OFF
indicator lamp lights up.
2.Engage selector lever position S.3.With the left foot, forcefully press down on
the brake.
4.Step on the accelerator pedal beyond the
resistance point at the full throttle position,
kickdown.
A flag symbol is displayed in the instrument
cluster.
5.The starting engine speed adjusts. Within
3 seconds, release the brake.
Before using Launch Control, allow the trans‐
mission to cool down for approx. 5 minutes.
Seite 78CONTROLSDriving78
Online Edition for Part no. 01 40 2 964 571 - X/15
Page 118 of 246
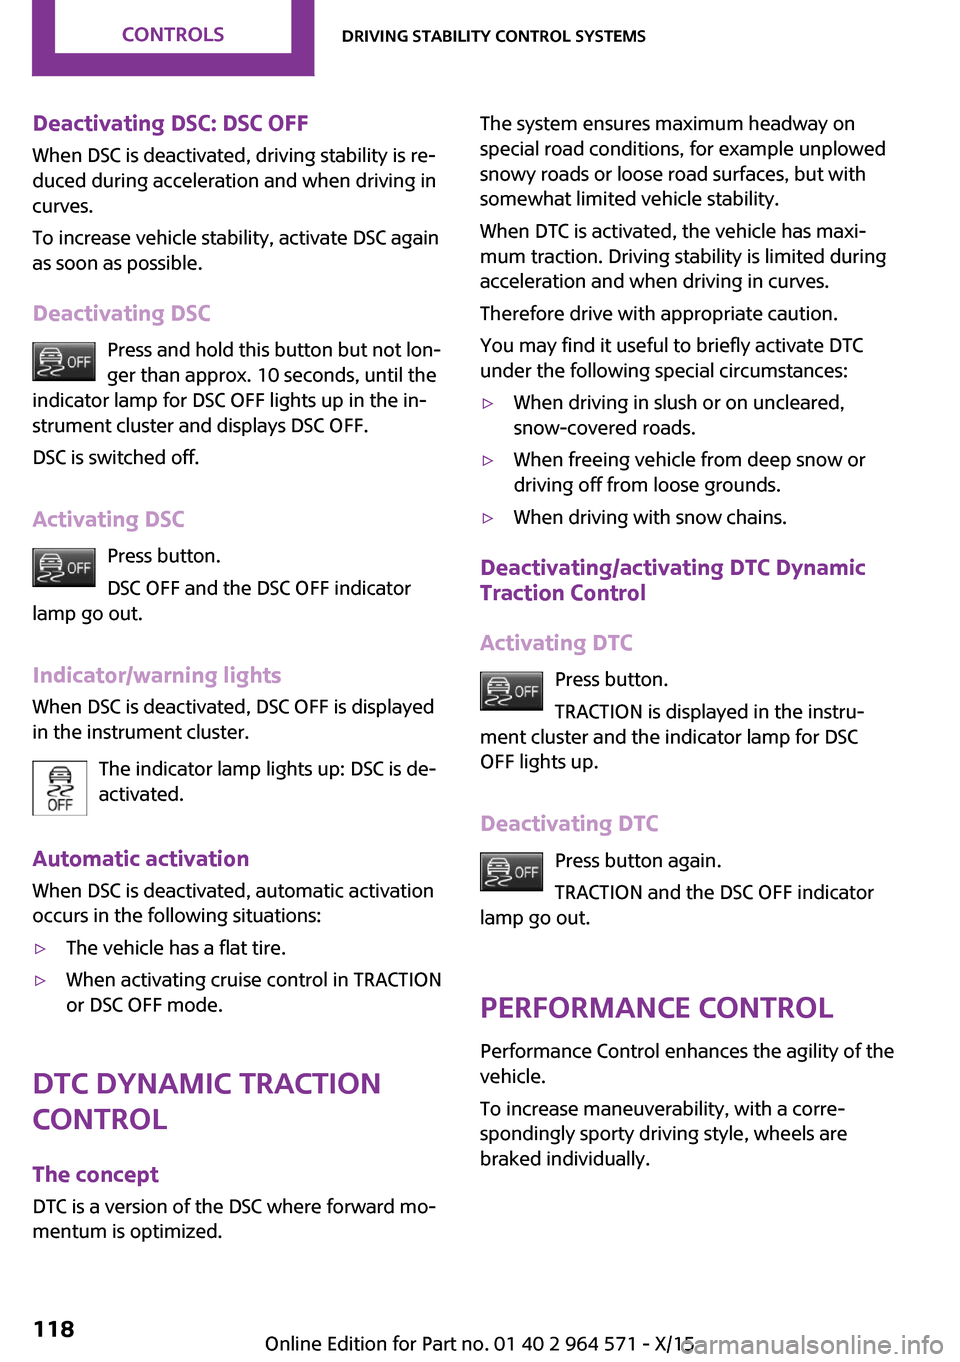
Deactivating DSC: DSC OFF
When DSC is deactivated, driving stability is re‐
duced during acceleration and when driving in
curves.
To increase vehicle stability, activate DSC again
as soon as possible.
Deactivating DSC
Press and hold this button but not lon‐
ger than approx. 10 seconds, until the
indicator lamp for DSC OFF lights up in the in‐
strument cluster and displays DSC OFF.
DSC is switched off.
Activating DSC
Press button.
DSC OFF and the DSC OFF indicator
lamp go out.
Indicator/warning lights
When DSC is deactivated, DSC OFF is displayed
in the instrument cluster.
The indicator lamp lights up: DSC is de‐
activated.
Automatic activation
When DSC is deactivated, automatic activation
occurs in the following situations:
▷The vehicle has a flat tire.▷When activating cruise control in TRACTION
or DSC OFF mode.
DTC Dynamic Traction
Control
The concept
DTC is a version of the DSC where forward mo‐
mentum is optimized.
The system ensures maximum headway on
special road conditions, for example unplowed
snowy roads or loose road surfaces, but with
somewhat limited vehicle stability.
When DTC is activated, the vehicle has maxi‐
mum traction. Driving stability is limited during
acceleration and when driving in curves.
Therefore drive with appropriate caution.
You may find it useful to briefly activate DTC
under the following special circumstances:
▷When driving in slush or on uncleared,
snow-covered roads.
▷When freeing vehicle from deep snow or
driving off from loose grounds.
▷When driving with snow chains.
Deactivating/activating DTC Dynamic
Traction Control
Activating DTC
Press button.
TRACTION is displayed in the instru‐
ment cluster and the indicator lamp for DSC
OFF lights up.
Deactivating DTC
Press button again.
TRACTION and the DSC OFF indicator
lamp go out.
Performance Control
Performance Control enhances the agility of the
vehicle.
To increase maneuverability, with a corre‐
spondingly sporty driving style, wheels are
braked individually.
Seite 118CONTROLSDriving stability control systems118
Online Edition for Part no. 01 40 2 964 571 - X/15
Page 119 of 246

Dynamic Damping Con‐
trol
The concept
The tuning of the suspension can be changed
with the system.
Programs
The system offers several different programs.
Select the programs via the Driving Dynamics
Control, refer to page 119.
MID/GREEN
Balanced tuning of the shock absorbers for
more comfort.
SPORT
Consistently sporty tuning of the shock absorb‐
ers for greater driving agility.
Driving Dynamics Con‐
trol
The concept
The Driving Dynamics Control helps to fine-
tune the vehicle's settings and features. Choose
between three different programs. Driving Dy‐
namics Control will activate the particular pro‐
gram.
Operating the programs
Driving Dynamics ControlProgramMID
GREEN
SPORT
MID
For balanced tuning.
With each starting operation, MID is activated
using the Start/Stop button.
GREEN
GREEN, refer to page 169, provides consistent
tuning to maximize range.
Activating GREEN
Turn Driving Dynamics Control to the right until
GREEN is displayed in the instrument cluster.
Configuring GREEN
Via the Driving Dynamics Control
1.Activate GREEN.2."Configure GREEN"3.Configure the program.
This configuration is retrieved when GREEN is
activated.
Via onboard monitor:
1. "Settings"2."GREEN Mode"
or
1. "Settings"2."Driving mode"3."Configure GREEN"
Configure the program.
This configuration is retrieved when GREEN is
activated.
SPORT
Consistently sporty tuning of the drivetrain for
greater driving agility.
With the appropriate equipment, the tuning of
the suspension also changes and SPORT can be
individually configured.
The configuration is stored for the profile cur‐
rently used.
Seite 119Driving stability control systemsCONTROLS119
Online Edition for Part no. 01 40 2 964 571 - X/15
Page 120 of 246

Activating SPORT
Turn Driving Dynamics Control to the left until
SPORT is displayed in the instrument cluster.
Configuring SPORT
Depending on your vehicle's optional features,
when the display is activated on the Control
Display, the SPORT driving mode can be config‐
ured for individual specifications.
Activating SPORT.
Select "Configure SPORT".
Configure the program.
SPORT can also be configured before it is acti‐
vated:
1. "Settings"2."Driving mode"3."Configure SPORT"
This configuration is retrieved when SPORT is
activated.
Configuring driving program
Settings can be made for the following driving
programs in Driving mode:
▷GREEN, refer to page 119.▷SPORT, refer to page 119.
Displays
Program selection
With Driving Dynamics Control
turned on a list of programs is
displayed and can be selected.
Selected program
The instrument cluster displays
the selected program.
Display on the onboard monitor
Program changes can be displayed on the on‐
board monitor.
1. "Settings"2."Control display"3."Driving mode info"
Drive-off assistant
The concept
This system supports driving off on inclines. The
parking brake is not required.
Driving off with the drive-off assistant
1.Hold the vehicle in place with the foot
brake.
2.Release the foot brake and drive off with‐
out delay.
After the foot brake is released, the vehicle is
held in place for approx. 2 seconds.
For vehicles with respective equipment ver‐
sions, the possible holding duration amounts to
2 minutes.
Seite 120CONTROLSDriving stability control systems120
Online Edition for Part no. 01 40 2 964 571 - X/15
Page 238 of 246
Direction indicator, see Turn
signals 70
Display, electronic, instrument
cluster 80
Display, engine tempera‐
ture 89
Display lighting, see Instru‐
ment lighting 99
Displays 79
Displays, cleaning 224
Disposal, coolant 200
Disposal, vehicle battery 214
Distance control, see PDC 129
Distance to destination 89
Divided screen view, split
screen 23
Door lock, see Remote con‐
trol 34
Drive mode, GREEN
Mode 169
Drive-off assistant 120
Drive-off assistant, see
DSC 117
Driving Dynamics Control 119
Driving Excitement, SPORT 90
Driving instruction, GREEN
Mode 171
Driving instructions, break-
in 162
Driving mode 119
Driving notes, general 163
Driving stability control sys‐
tems 117
Driving style analysis 173
Driving tips 163
DSC Dynamic Stability Con‐
trol 117
DTC Dynamic Traction Con‐
trol 118
Dynamic Damping Con‐
trol 119
Dynamic Stability Control
DSC 117
Dynamic Traction Control
DTC 118
E
Electronic displays, instrument
cluster 80
Electronic oil measure‐
ment 195
Electronic Stability Program
ESP, see DSC 117
Emergency detection, remote
control 35
Emergency release, fuel filler
flap 178
Emergency start function, en‐
gine start 35
Emergency wheel, compact
wheel, see Emergency
wheel 212
Energy Control 85
Engine, automatic Start/Stop
function 66
Engine, automatic switch-
off 66
Engine compartment 193
Engine compartment, working
in 193
Engine coolant 199
Engine idling when driving,
coasting 172
Engine oil 195
Engine oil, adding 196
Engine oil additives 197
Engine oil change 197
Engine oil filler neck 196
Engine oil types, alterna‐
tive 197
Engine oil types, suitable 197
Engine start during malfunc‐
tion 35
Engine start, jump-start‐
ing 216
Engine start, see Starting the
engine 65
Engine stop 65
Engine temperature, dis‐
play 89
Entering a car wash 221
Equipment, interior 146
Error displays, see Check Con‐
trol 80
ESP Electronic Stability Pro‐
gram, see DSC 117
Exchanging wheels/tires 187
Exhaust system 163
Exterior mirror, automatic
dimming feature 58
Exterior mirrors 57
External start 216
External temperature dis‐
play 84
External temperature warn‐
ing 84
Eyes for securing cargo 166
F
Failure message, see Check
Control 80
False alarm, see Unintentional
alarm 45
Fan, see Air flow 140, 143
Favorites buttons, onboard
monitor 24
Filler neck for engine oil 196
Fine wood, care 223
First-aid kit 216
Flat tire, changing wheels 212
Flat Tire Monitor FTM 108
Flat tire, repairing 188
Flat tire, Tire Pressure Monitor
TPM 104
Flat tire, warning
lamp 105, 108
Flooding 163
Floor carpet, care 224
Floor mats, care 224
Fogged up windows 141
Folding back rear seat back‐
rests 153
Fold-out position, windshield
wipers 73
Foot brake 163
Front airbags 101
Seite 238REFERENCEEverything from A to Z238
Online Edition for Part no. 01 40 2 964 571 - X/15
Page 242 of 246
Rear window de‐
froster 141, 144
Recirculated-air filter 144
Recirculated-air
mode 140, 143
Recommended fuel
grade 180
Recommended tire
brands 187
Refueling 178
Remaining range 85
Remote control/key 34
Remote control, blocking 35
Remote control, malfunc‐
tion 39
Remote control, replacing the
battery 34
Remote control, univer‐
sal 146
Replacement fuse 214
Replacing parts 203
Replacing the battery, remote
control 34
Replacing wheels/tires 187
Reporting safety malfunc‐
tions 10
RES CNCL button, see camera-
based cruise control 121
RES CNCL button, see Cruise
control 127
Reserve warning, see
Range 85
Reset, Tire Pressure Monitor
TPM 105
Retaining straps, securing
cargo 166
Retreaded tires 187
Roadside parking lights 97
RON recommended fuel
grade 180
Roofliner 17
Roof load capacity 229
Roof-mounted luggage
rack 166
RSC Run Flat System Compo‐
nent, see Run-flat tires 188
Rubber components,
care 223
Run-flat tires 188
S
Safe braking 163
Safety belt reminder for driv‐
er's seat and front passenger
seat 54
Safety belts 53
Safety belts, care 224
Safety switch, windows 47
Safety systems, airbags 101
Saving fuel 168
Screen, refer to Control Dis‐
play 18
Screwdriver 203
Sealant 189
Seat and mirror memory 56
Seat belts, see Safety belts 53
Seat heating, front 52
Seating position for chil‐
dren 60
Seats 50
Selection list in instrument
cluster 88
Selector lever, Steptronic
transmission 75
Sensors, care 224
Service and warranty 8
Service requirements, Condi‐
tion Based Service CBS 201
Service requirements, dis‐
play 85
SET button, see camera-based
cruise control 121
SET button, see Cruise con‐
trol 127
Settings, locking/unlocking 43
Settings, mirrors 57
Settings on Control Display 91
Settings, storing for seat, mir‐
ror 56
Shift paddles on the steering
wheel 76
Side airbag 101
Signaling, horn 14
Signals when unlocking 44
Sitting safely 50
Size 228
Slide/tilt glass roof 47
Snow chains 192
Socket 150
Socket, OBD Onboard Diag‐
nostics 202
Spare fuse 214
Spare tire, see Emergency
wheel 212
Speed, average 89
Speed limit detection, on‐
board computer 89
Speed limiter, display 86
Speed Limit Information 86
Speed warning 91
Split Doors 40
Split doors via remote con‐
trol 38
Split screen 23
Sport displays 90
SPORT program, Dynamic
Driving Control 119
Sport program, transmis‐
sion 76
Stability control systems 117
Standard view, Head-up Dis‐
play 94
Start/stop, automatic func‐
tion 66
Start/Stop button 64
Start function during malfunc‐
tion 35
Starting the engine 65
Status control display,
tires 105
Status information, onboard
monitor 23
Status of Owner's Manual 7
Steering wheel, adjusting 59
Steptronic Sport transmission,
see Steptronic transmis‐
sion 75
Seite 242REFERENCEEverything from A to Z242
Online Edition for Part no. 01 40 2 964 571 - X/15