maintenance MINI Convertible 2009 Owner's Manual
[x] Cancel search | Manufacturer: MINI, Model Year: 2009, Model line: Convertible, Model: MINI Convertible 2009Pages: 176, PDF Size: 2.82 MB
Page 5 of 176
REFERENCEAT A GLANCE CONTROLS DRIVING TIPS MOBILITY
3
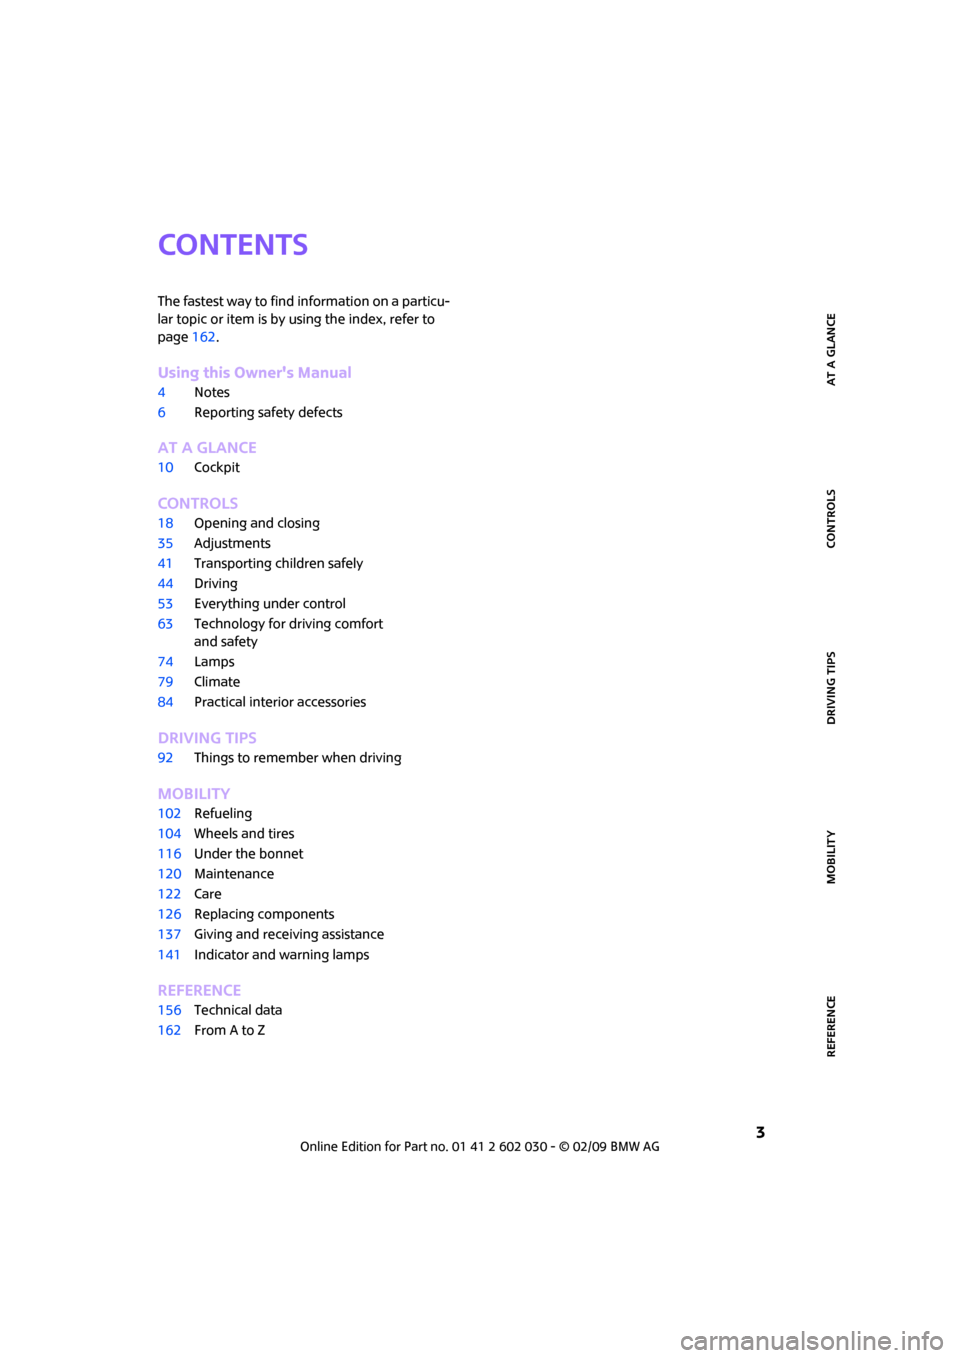
CONTENTS
The fastest way to find information on a particu-
lar topic or item is by using the index, refer to
page162.
Using this Owner's Manual
4Notes
6Reporting safety defects
AT A GLANCE
10Cockpit
CONTROLS
18Opening and closing
35Adjustments
41Transporting children safely
44Driving
53Everything under control
63Technology for driving comfort
and safety
74Lamps
79Climate
84Practical interior accessories
DRIVING TIPS
92Things to remember when driving
MOBILITY
102Refueling
104Wheels and tires
116Under the bonnet
120Maintenance
122Care
126Replacing components
137Giving and receiving assistance
141Indicator and warning lamps
REFERENCE
156Technical data
162From A to Z
Page 6 of 176
Notes
4
Notes
Using this Owner's
Manual
We have tried to make all the information in this
Owner's Manual easy to find. The fastest way to
find specific topics is to refer to the detailed
index at the back of the manual. If you wish to
gain an initial overview of your vehicle, you will
find this in the first chapter.
Should you wish to sell your MINI at some time in
the future, remember to hand over this Owner's
Manual to the new owner; it is an important part
of the vehicle.
Additional sources of information
Should you have any other questions, your MINI
Dealer will be glad to advise you at any time.
You can find more information about the MINI,
for example on its technology, on the Internet at
www.MINI.com.
Symbols used
Indicates precautions that must be fol-
lowed precisely in order to avoid the pos-
sibility of personal injury and serious damage to
the vehicle.<
Indicates information that will assist you in
gaining the optimum benefit from your
vehicle and enable you to care more effectively
for your vehicle.<
Refers to measures that can be taken to
help protect the environment.<
*Indicates special equipment, country-specific
equipment and optional accessories, as well as
equipment and functions not yet available at the
time of printing.
Symbols on vehicle components
Indicates that you should consult the rele-
vant section of this Owner's Manual for
information on a particular part or assembly.
The individual vehicle
The manufacturer of your MINI is the Bayerische
Motoren Werke Aktiengesellschaft, BMW AG.
When you ordered your MINI, you chose various
items of equipment. This Owner's Manual
describes the entire array of options and equip-
ment that the manufacturer of your MINI makes
available with a specific model range.
Bear in mind that the manual may contain infor-
mation on accessories and equipment that you
have not specified for your own vehicle. Sections
describing options and special equipment are
marked by asterisks
* to assist you in identifying
possible differences between the descriptions in
this manual and your own vehicle's equipment.
If your MINI features equipment not described in
this Owner's Manual, observe the enclosed Sup-
plementary Owner's Manuals.
Editorial notice
The manufacturer pursues a policy of continu-
ous, ongoing development that is conceived to
ensure that MINI vehicles continue to embody
the highest quality and safety standards com-
bined with advanced, state-of-the-art technol-
ogy. For this reason, it is possible in exceptional
cases that features described in this Owner's
Manual could differ from those on your vehicle.
For your safety
Maintenance and repair
Advanced technology, e.g. the use of
modern materials and powerful electron-
Page 7 of 176
REFERENCEAT A GLANCE CONTROLS DRIVING TIPS MOBILITY
5
ics, requires specially adapted maintenance and
repair methods. Therefore, have the necessary
work on your MINI only carried out by a MINI
Dealer or a workshop that has specially trained
personnel working in accordance with the spec-
ifications of the MINI manufacturer. If this work
is not carried out properly, there is a danger
of subsequent damage and related safety
hazards.<
Parts and accessories
For your own safety, use genuine parts
and accessories approved by the manu-
facturer of the MINI.
When you purchase accessories tested
and approved by the manufacturer of the MINI
and Original MINI Parts, you simultaneously
acquire the assurance that they have been thor-
oughly tested by the manufacturer of the MINI
to ensure optimum performance when installed
on your vehicle.
The manufacturer of the MINI warrants these
parts to be free from defects in material and
workmanship.
The manufacturer of the MINI will not accept any
liability for damage resulting from installation of
parts and accessories not approved by the man-
ufacturer of the MINI.
The manufacturer of the MINI cannot test every
product made by other manufacturers to verify
if it can be used on a MINI safely and without risk
to either the vehicle, its operation, or its occu-
pants.
Original MINI Parts, MINI Accessories and other
products approved by the manufacturer of the
MINI, together with professional advice on using
these items, are available from all MINI Dealers.
Installation and operation of non-MINI
approved accessories such as alarms, radios,
amplifiers, radar detectors, wheels, suspension
components, brake dust shields, telephones,
including operation of any mobile phone from
within the vehicle without using an externally
mounted antenna, or transceiver equipment, for
instance, CBs, walkie-talkies, ham radios or sim-
ilar accessories, may cause extensive damage to
the vehicle, compromise its safety, interfere with the vehicle's electrical system or affect the valid-
ity of the MINI Limited Warranty. See your MINI
Dealer for additional information.<
Maintenance, replacement, or repair of
the emission control devices and systems
may be performed by any automotive repair
establishment or individual using any certified
automotive part.<
California Proposition 65 warning
California law requires us to issue the following
warning:
Engine exhaust and a wide variety of
automobile components and parts,
including components found in the interior fur-
nishings in a vehicle, contain or emit chemicals
known to the State of California to cause cancer
and birth defects and reproductive harm. In
addition, certain fluids contained in vehicles and
certain products of component wear contain or
emit chemicals known to the State of California
to cause cancer and birth defects or other repro-
ductive harm.
Battery posts, terminals and related accessories
contain lead and lead compounds. Wash your
hands after handling.
Used engine oil contains chemicals that have
caused cancer in laboratory animals. Always
protect your skin by washing thoroughly with
soap and water.<
Service and warranty
We recommend that you read this publication
thoroughly.
Your MINI is covered by the following wa-
ranties:
>New Vehicle Limited Warranty
>Rust Perforation Limited Warranty
>Federal Emissions System Defect Warranty
>Federal Emissions Performance Warranty
>California Emission Control System Limited
Warranty
Detailed information about these warranties is
listed in the Service and Warranty Information
Page 61 of 176
REFERENCEAT A GLANCE CONTROLS DRIVING TIPS MOBILITY
59
The extent of service work required can be
read out from the remote control by your
MINI Dealer.<
Displaying vehicle check
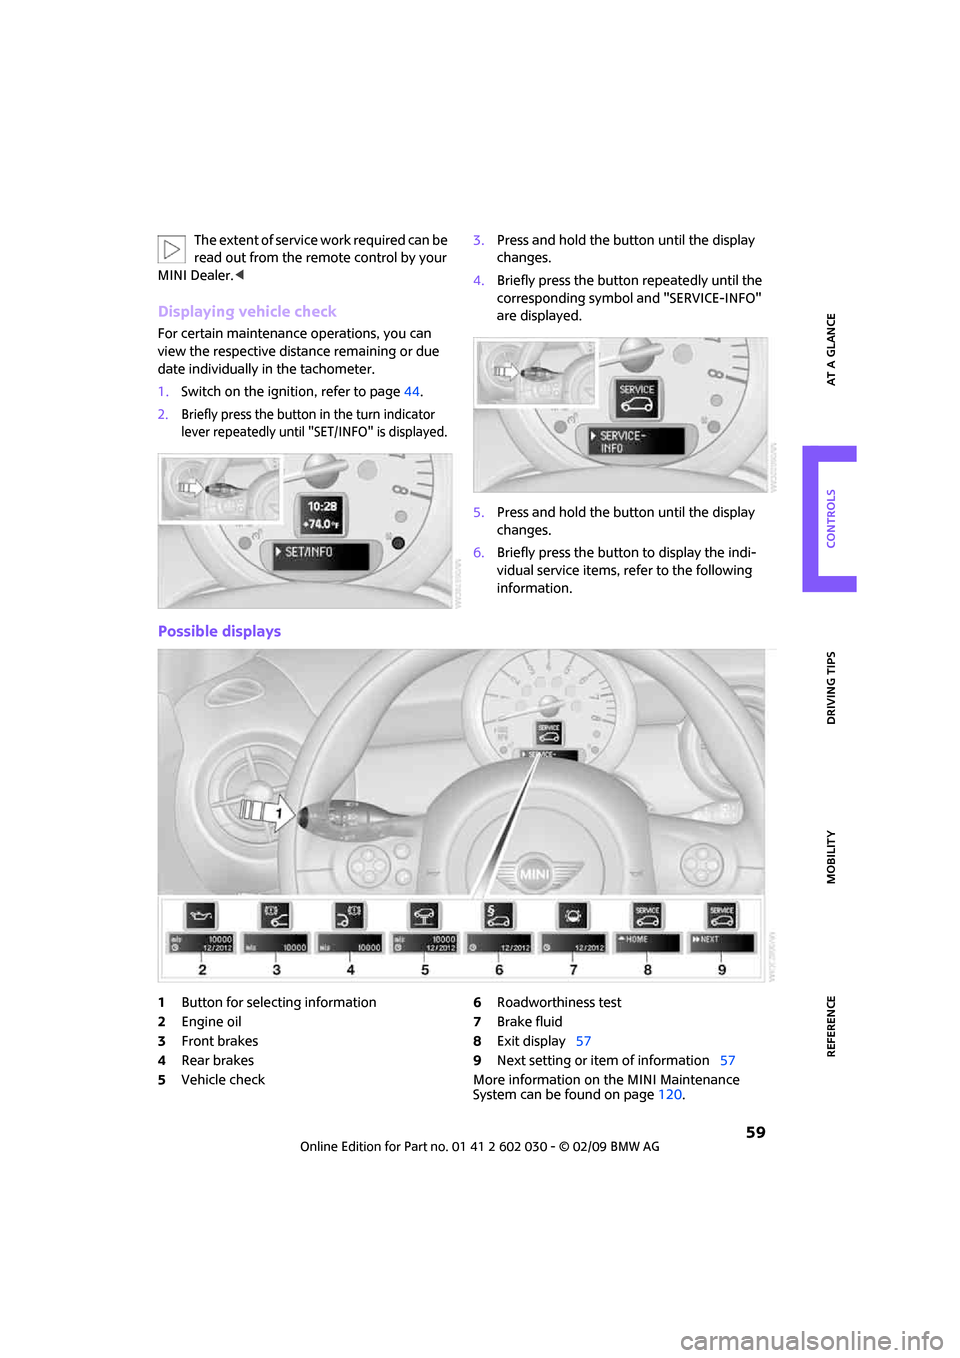
For certain maintenance operations, you can
view the respective distance remaining or due
date individually in the tachometer.
1.Switch on the ignition, refer to page44.
2.Briefly press the button in the turn indicator
lever repeatedly until "SET/INFO" is displayed.
3.Press and hold the button until the display
changes.
4.Briefly press the button repeatedly until the
corresponding symbol and "SERVICE-INFO"
are displayed.
5.Press and hold the button until the display
changes.
6.Briefly press the button to display the indi-
vidual service items, refer to the following
information.
Possible displays
1Button for selecting information
2Engine oil
3Front brakes
4Rear brakes
5Vehicle check6Roadworthiness test
7Brake fluid
8Exit display57
9Next setting or item of information57
More information on the MINI Maintenance
System can be found on page120.
Page 72 of 176

Technology for driving comfort and safety
70
Declaration according to
NHTSA/FMVSS 138 Tire Pressure
Monitoring Systems
Each tire, including the spare, should be
checked monthly when cold and inflated to the
inflation pressure recommended by the vehicle
manufacturer on the vehicle placard or tire infla-
tion pressure label. If your vehicle has tires of a
different size than the size indicated on the vehi-
cle placard or tire inflation pressure label, you
should determine the proper tire inflation pres-
sure for those tires. As an added safety feature,
your vehicle has been equipped with a tire pres-
sure monitoring system TPMS that illuminates a
low tire pressure telltale when one or more of
your tires are significantly under-inflated.
Accordingly, when the low tire pressure telltale
illuminates, you should stop and check your tires
as soon as possible, and inflate them to the
proper pressure. Driving on a significantly
under-inflated tire causes the tire to overheat
and can lead to tire failure. Underinflation also
reduces fuel efficiency and tire tread life, and
may affect the vehicle's handling and stopping
ability. Please note that the TPMS is not a substi-
tute for proper tire maintenance, and it is the
driver's responsibility to maintain correct tire
pressure, even if underinflation has not reached
the level at which the TPMS low tire pressure tell-
tale illuminates.
The TPMS malfunction indicator is combined
with the low tire pressure telltale. When the sys-
tem detects a malfunction, the telltale will flash
for approximately one minute and then remain
continuously lit. This sequence will continue
upon subsequent vehicle startups as long as the
malfunction exists. When the malfunction indi-
cator is illuminated, the system may not be able
to detect or signal low tire pressure as intended.
TPMS malfunctions may occur for a variety of
reasons, including the installation of replace-
ment or alternate tires or wheels on the vehicle
that prevent the TPMS from functioning prop-
erly. Always check the TPMS malfunction telltale
after replacing one or more tires or wheels on
your vehicle to ensure that the replacement or
alternate tires and wheels allow the TPMS to
continue to function properly.
Page 83 of 176
REFERENCEAT A GLANCE CONTROLS DRIVING TIPS MOBILITY
81
Air distribution
Direct the flow of air to the win-
dows , to the upper body area
or to the footwell . Interme-
diate settings are possible.
Windshield heating*
The windshield heating is switched
off automatically after a short time.
Defrosting windows and removing
condensation
1.Set air flow rate to the maximum level.
2.Set air distribution to position .
Condensation is removed from the windows more quickly when the cooling function
* is
also activated.
3.Set to the highest temperature, red.
4.Deactivate recirculated-air mode.
5.Turn on windshield heating if necessary.
6.Turn on rear window defroster if necessary.
Microfilter
The microfilter captures dust and pollen. The
microfilter is changed by your MINI Dealer dur-
ing routine maintenance work.
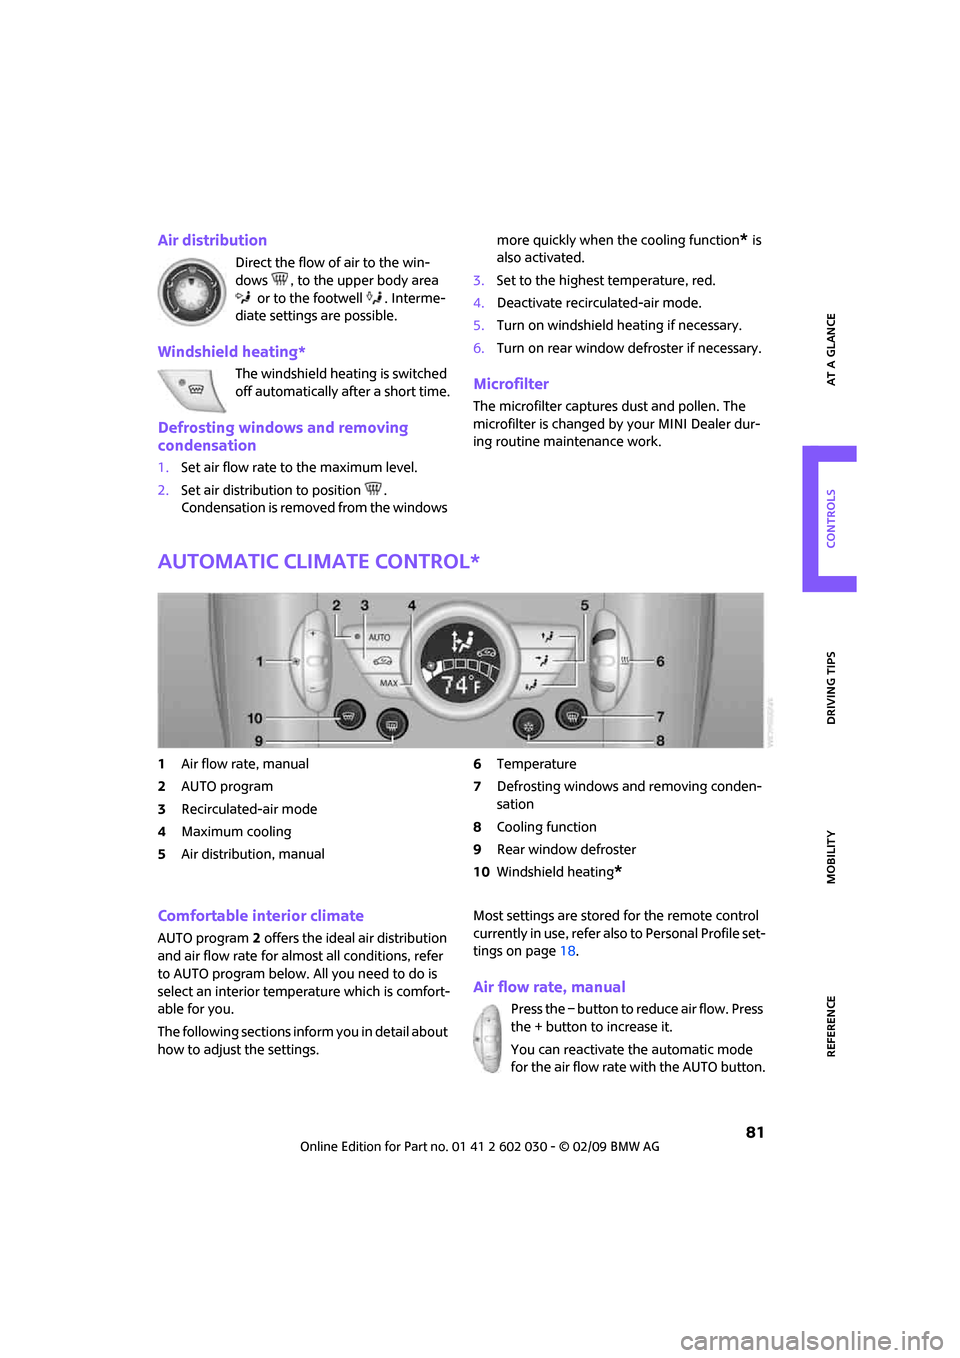
Automatic climate control*
1Air flow rate, manual
2AUTO program
3Recirculated-air mode
4Maximum cooling
5Air distribution, manual6Temperature
7Defrosting windows and removing conden-
sation
8Cooling function
9Rear window defroster
10Windshield heating
*
Comfortable interior climate
AUTO program2 offers the ideal air distribution
and air flow rate for almost all conditions, refer
to AUTO program below. All you need to do is
select an interior temperature which is comfort-
able for you.
The following sections inform you in detail about
how to adjust the settings.Most settings are stored for the remote control
currently in use, refer also to Personal Profile set-
tings on page18.
Air flow rate, manual
Press the – button to reduce air flow. Press
the + button to increase it.
You can reactivate the automatic mode
for the air flow rate with the AUTO button.
Page 85 of 176

REFERENCEAT A GLANCE CONTROLS DRIVING TIPS MOBILITY
83
The windshield heating* is switched on auto-
matically.
Windshield heating*
The windshield heating is switched
off automatically after a certain
time.
Cooling function
When the cooling function is on,
the air is cooled, dried, then
reheated according to the temper-
ature setting. This function is only
available while the engine is running.
The cooling function helps prevent condensa-
tion on the windows or removes it quickly.
Depending on the weather, the windshield may
fog over briefly when the engine is started. The
recirculated-air mode may be switched on auto-
matically.
The cooling function is automatically switched
on along with the AUTO program. The passenger
compartment can only be cooled while the
engine is running.
Microfilter/activated-charcoal filter
The microfilter captures dust and pollen. The
activated-charcoal filter provides additional pro-
tection by filtering gaseous pollutants from the
outside air. Your MINI Dealer replaces this com-
bined filter as a standard part of your scheduled
maintenance.
You can call up further information in the service
requirements display, page58.
Ventilation
1Knob for continuous opening and closing
2Jet for direction of air flow
Opening/closing
Turn the knob.
Direction of air flow
Swivel the entire jet.
Page 100 of 176

Things to remember when driving
98
You can find the applicable data under Weights
on page159.
Saving fuel
Fuel consumption depends on a number of dif-
ferent factors. The implementation of certain
measures, your driving style and regular mainte-
nance can have an influence on fuel consump-
tion and on the environmental impact.
Remove unnecessary cargo
Additional weight increases fuel consumption.
Remove attached parts no longer in use
Remove auxiliary mirrors, roof- or rear-mounted
luggage racks whenever you are not using
them.
Attached parts on the vehicle affect its aerody-
namics and increase fuel consumption.
Check tire inflation pressure regularly
Check and, if necessary, correct tire inflation
pressure at least twice a month and before start-
ing on a long trip.
Low inflation pressure increases rolling resis-
tance and thus leads to greater fuel consump-
tion and tire wear.
Drive off immediately
Do not wait for the engine to warm up while the
vehicle remains stationary. Start driving right
away, but at moderate engine speeds. This is the
fastest way for the cold engine to reach its oper-
ating temperature.
Think ahead while driving
Avoid unnecessary acceleration and braking by
maintaining a suitable distance to the vehicle
driving ahead.
Driving smoothly and anticipating impending
traffic situations reduces fuel consumption.
Avoid high engine speeds
Use first gear only for driving off. In second and
higher gears, accelerate smoothly to a suitable
engine and road speed. In doing so, avoid high
engine speeds and shift up early.
When you reach your desired traveling speed,
shift to the highest suitable gear and drive at
constant speed.
As a rule: driving at low engine speeds lowers
fuel consumption and reduces wear.
Coasting
When approaching a red traffic light, take your
foot off the accelerator and let the vehicle coast
to a halt in the highest suitable gear.
On a downhill gradient, take your foot off the
accelerator and let the vehicle coast in a suit-
able gear.
Fuel supply is shut off automatically when the
vehicle is coasting.
Switch off the engine during
lengthy stops
Switch off the engine when stopping for lengthy
periods, e.g. at traffic lights, railroad crossings or
in traffic congestions.
Have the vehicle serviced
Have your vehicle serviced regularly to achieve
good economy and a long vehicle life. The man-
ufacturer of your MINI recommends having the
vehicle serviced by a MINI Dealer. Also note the
MINI Maintenance System, page120.
Page 105 of 176

REFERENCEAT A GLANCE CONTROLS DRIVING TIPS MOBILITY
103
When refueling, insert the filler nozzle com-
pletely into the filler pipe. Avoid lifting the filler
nozzle while filling the tank, as that would lead
to
>premature pump shutoff
>reduced efficiency of the fuel-vapor recov-
ery system.
The fuel tank is full when the filler nozzle clicks
off the first time.
Fuel tank capacity
If the range displayed is less than
30 miles/50 km, be sure to refuel; other-
wise engine functions are not guaranteed and
damage could occur.<
Approx. 13.2 US gallons/50 liters, including the
reserve capacity of 2.1 US gallons/8 liters.
Fuel specifications
Do not use leaded gasoline, otherwise
permanent damage to the catalytic con-
verter will result.
Do not fill the tank with E85, i.e. fuel containing
85% ethanol, nor with FlexFuel. Otherwise, the
engine and fuel supply system will be dam-
aged.<
Required fuel
Super Premium gasoline/AKI 91
This gasoline is highly recommended.
However, you may also use gasoline with less
AKI. The minimum AKI Rating is:
>Cooper S, John Cooper Works: 89
>Cooper: 87
If you use gasoline with this minimum AKI Rat-
ing, the engine may produce knocking sounds
when starting at high outside temperatures. This
has no effect on the engine life.
Do not use any gasoline below the speci-
fied minimum fuel grade. Otherwise the
engine could be damaged.<
Use high-quality brands
Field experience has indicated significant differ-
ences in fuel quality: volatility, composition,
additives, etc., among gasolines offered for sale
in the United States and Canada. Fuels contain-
ing up to and including 10 % ethanol or other
oxygenates with up to 2.8 % oxygen by weight,
that is, 15 % MTBE or 3 % methanol plus an
equivalent amount of co-solvent, will not void
the applicable warranties with respect to defects
in materials or workmanship.
The use of poor-quality fuels may result in
drivability, starting and stalling problems
especially under certain environmental condi-
tions such as high ambient temperature and
high altitude.
Should you encounter drivability problems
which you suspect could be related to the fuel
you are using, we recommend that you respond
by switching to a recognized high-quality brand
such as gasoline that is advertised as Top Tier
Detergent Gasoline.
Failure to comply with these recommendations
may also result in unscheduled maintenance.<
Page 106 of 176
Wheels and tires
104
Wheels and tires
Tire inflation pressures
Information for your safety
It is not merely the tires' service life, but also
driving comfort and, to a great extent, driving
safety that depend on the condition of the
tires and the maintenance of the specified tire
pressure.
Checking pressure
Check the tire inflation pressure regularly
and correct it, if necessary: at least twice a
month and before starting long trips. If you fail
to observe this precaution you may be driving
on tires with incorrect tire pressures, a condition
that can not only compromise your vehicle's
driving stability, but also lead to tire damage and
the risk of an accident. Do not drive with
deflated, i.e. flat tires, except when using Run-
Flat Tires. A flat tire will seriously impair your
vehicle's handling and braking response.
Attempts to drive on a flat tire can lead to loss of
control over the vehicle.<
Check the tire inflation pressures only on cold
tires. This means after a maximum of 1.25 miles/
2 km driving or when the vehicle has been
parked for at least 2 hours. When tires are warm,
the tire inflation pressure is higher.
After adjusting the tire inflation pressure,
reinitialize the flat tire monitor, page66,
or reset the tire pressure control, page68.<
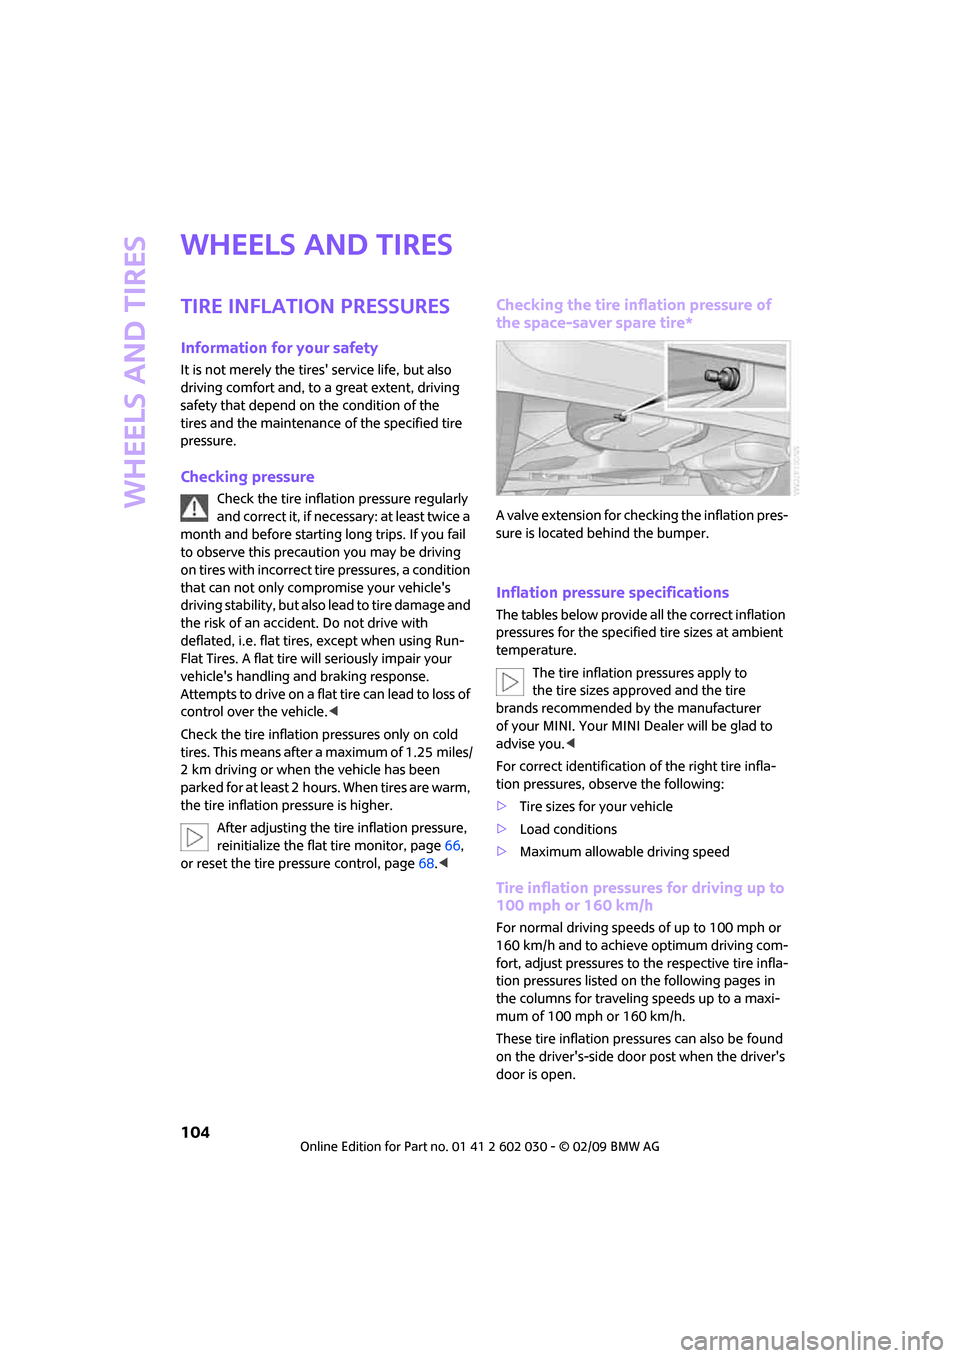
Checking the tire inflation pressure of
the space-saver spare tire*
A valve extension for checking the inflation pres-
sure is located behind the bumper.
Inflation pressure specifications
The tables below provide all the correct inflation
pressures for the specified tire sizes at ambient
temperature.
The tire inflation pressures apply to
the tire sizes approved and the tire
brands recommended by the manufacturer
of your MINI. Your MINI Dealer will be glad to
advise you.<
For correct identification of the right tire infla-
tion pressures, observe the following:
>Tire sizes for your vehicle
>Load conditions
>Maximum allowable driving speed
Tire inflation pressures for driving up to
100 mph or 160 km/h
For normal driving speeds of up to 100 mph or
160 km/h and to achieve optimum driving com-
fort, adjust pressures to the respective tire infla-
tion pressures listed on the following pages in
the columns for traveling speeds up to a maxi-
mum of 100 mph or 160 km/h.
These tire inflation pressures can also be found
on the driver's-side door post when the driver's
door is open.