traction control MINI COOPER 2003 Owners Manual
[x] Cancel search | Manufacturer: MINI, Model Year: 2003, Model line: COOPER, Model: MINI COOPER 2003Pages: 148, PDF Size: 3.17 MB
Page 5 of 148
3
OVERVIEW REPAIRS OPERATION CONTROLS DATA INDEX
Driving:
Ignition lock45
Starting the engine46
Switching off the engine47
Parking brake47
Manual transmission48
Continuously Variable automatic Trans-
mission (CVT)49
Parking lamps/Low beams52
Turn signal indicator/Headlamp
flasher52
Instrument lighting53
Fog lamps53
Interior lamps53
Light-emitting diodes54
Washer/wiper system54
Cruise control56
Everything under control:
Odometer58
Tachometer58
Fuel gauge58
Coolant temperature gauge59
Service interval display60
Clock60
Computer60
Technology for safety and driving
convenience:
Automatic Stability Control plus Traction
(ASC+T)62
Dynamic Stability Control (DSC)63
Flat Tire Monitor64
Park Distance Control (PDC)66
Controlling the climate for pleasant
driving:
Air conditioning system67
Automatic climate control70
Interior conveniences:
Glove compartment73
Ashtray/Beverage holder73
Cigarette lighter/12 V power supply73
Loading and transporting cargo:
Cargo area cover74
Foldable rear backrest74
Loading cargo75
Roof-mounted luggage rack76
Operation, care, maintenance
Special operating instructions:
Break-in procedures80
General driving notes81
Refueling82
Fuel specifications83
Antilock Brake System (ABS)83
Brake system84
Wheels and tires:
Tire inflation pressure85
Tire condition87
Tire replacement87
Wheel and tire combinations89
Winter tires89
Snow chains90
ba.book Seite 3 Montag, 5. August 2002 8:09 20
ProCarManuals.com
Page 19 of 148
17
OVERVIEW REPAIRS OPERATION CONTROLS DATA INDEX
INDICATOR AND WARNING LAMPS
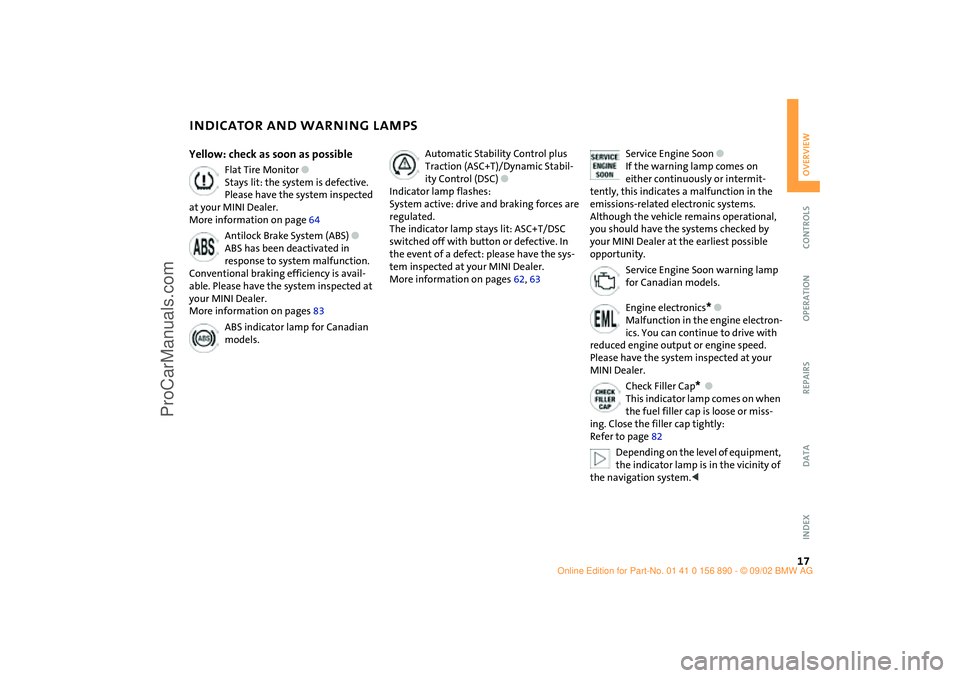
Yellow: check as soon as possible
Flat Tire Monitor
●
Stays lit: the system is defective.
Please have the system inspected
at your MINI Dealer.
More information on page 64
Antilock Brake System (ABS)
●
ABS has been deactivated in
response to system malfunction.
Conventional braking efficiency is avail-
able. Please have the system inspected at
your MINI Dealer.
More information on pages 83
ABS indicator lamp for Canadian
models.
Automatic Stability Control plus
Traction (ASC+T)/Dynamic Stabil-
ity Control (DSC)
●
Indicator lamp flashes:
System active: drive and braking forces are
regulated.
The indicator lamp stays lit: ASC+T/DSC
switched off with button or defective. In
the event of a defect: please have the sys-
tem inspected at your MINI Dealer.
More information on pages 62, 63
Service Engine Soon
●
If the warning lamp comes on
either continuously or intermit-
tently, this indicates a malfunction in the
emissions-related electronic systems.
Although the vehicle remains operational,
you should have the systems checked by
your MINI Dealer at the earliest possible
opportunity.
Service Engine Soon warning lamp
for Canadian models.
Engine electronics
*
●
Malfunction in the engine electron-
ics. You can continue to drive with
reduced engine output or engine speed.
Please have the system inspected at your
MINI Dealer.
Check Filler Cap
*
●
This indicator lamp comes on when
the fuel filler cap is loose or miss-
ing. Close the filler cap tightly:
Refer to page 82
Depending on the level of equipment,
the indicator lamp is in the vicinity of
the navigation system.
<
ba.book Seite 17 Montag, 5. August 2002 8:09 20
ProCarManuals.com
Page 45 of 148

43
OVERVIEW REPAIRS OPERATIONCONTROLS DATA INDEX
TRANSPORTING CHILDREN SAFELYChild seat securityAll of the rear belt retractors and the front
passenger's safety belt can be locked for
mounting and securing child-restraint
systems.
Information regarding this is located near
the buckle latch of each safety belt.
To lock the belt Pull the entire length of the belt from the
belt retractor. Allow the reel to retract the
belt somewhat and engage the buckle,
then tighten the belt against the child-res-
traint system.
The retraction mechanism is now locked. To unlock the belt Release the buckle, remove the child-
restraint system and allow the belt retrac-
tor to reel the belt completely in.
LATCH child-restraint systemOpen the cover.
The illustration is an example showing the
mounts for the LATCH, Lower Anchors and
Tethers for CHildren, child-restraint moun-
ting system at the right rear.
The system is also available at the left rear
position.
Canadian models only:
The LATCH anchorage points are identified
by buttons, see illustration.
Always follow all manufacturer's
instructions and observe all safety
precautions when installing the LATCH
child-restraint system.<
ba.book Seite 43 Montag, 5. August 2002 8:09 20
ProCarManuals.com
Page 49 of 148

47
OVERVIEW REPAIRS OPERATIONCONTROLS DATA INDEX
SWITCHING OFF THE ENGINE PARKING BRAKE
You should never remove the ignition
key when the vehicle is in motion, as
the steering lock could engage.
When you leave the vehicle, always remove
the ignition key and engage the steering
lock.
When you park on downward slopes,
engage the parking brake.<
Manual transmissionTurn the ignition key to position 1 or 0.Continuously Variable automatic
Transmission (CVT)*Engage selector lever position P, turn the
ignition key to position 1 or 0.
The parking brake is designed primarily to
prevent the vehicle from rolling when it is
parked. It operates against the rear wheels.To engageLever automatically locks in position.
The warning lamp in the instrument cluster
comes on when the ignition key is in
position 2, see page 16.To release1. Pull up slightly
2. Press the button
3. Push the lever downwards.
If, in exceptional circumstances, it
should be necessary to engage the
parking brake while the vehicle is in
motion, do not pull the lever with excessive
pressure. Keep your thumb pressed against
the release button while carefully pulling
the lever up to apply moderate pressure.
Excessive pressure can lead to overbraking
and loss of traction, i.e. fishtailing, at the
rear axle.
The brake lamps do not come on when the
parking brake is engaged.
Vehicles with manual transmission:
Always engage the parking brake when
parking on hills and inclined surfaces, as
first gear or reverse may not provide ade-
quate resistance to rolling.
Vehicles with CVT:
Place the selector lever in P.<
ba.book Seite 47 Montag, 5. August 2002 8:09 20
ProCarManuals.com
Page 64 of 148

62
AUTOMATIC STABILITY CONTROL PLUS TRACTION (ASC+T)
*
The concept
This system optimizes vehicle stability and
traction, especially when just starting off,
when accelerating or when cornering.
ASC+T recognizes the danger present in
traction loss and will increase driving sta-
bility and traction by reducing the engine's
output and, if necessary, by applying the
brakes to the front wheels. ASC+T is opera-
tional each time you start the engine.
The laws of physics cannot be
repealed, even with ASC+T. An appro-
priate driving style always remains the
responsibility of the driver. Avoid using the
additional safety margin provided by the
system as an excuse for taking unnecessary
risks.
Do not make any modifications to the
ASC+T system. Allow only authorized tech-
nicians to perform service procedures on
the ASC+T.<
Indicator lamp
The indicator lamp on the instru-
ment cluster will go out shortly
after the ignition has been
switched on, see pages 16, 17.
If the indicator lamp flashes:
ASC+T controls the drive and braking
forces.
If the indicator lamp fails to go out
after the engine is started, or if it
comes on during normal driving and stays
on:
The system is defective or was turned off
using the button.
The described stabilizing operations are no
longer available.
You can, however, drive the vehicle nor-
mally without ASC+T.
In the event of a malfunction, please see
your MINI Dealer, see pages 16, 17.<
Switch off the ASC+TBriefly press the switch.
The indicator lamp stays lit.
When driving with snow chains or to "rock
free" in snow, it can be helpful to switch off
the ASC+T for a brief period.
To maintain vehicle stability, always
drive with the ASC+T switched on
whenever possible.
ba.book Seite 62 Montag, 5. August 2002 8:09 20
ProCarManuals.com
Page 65 of 148

63
OVERVIEW REPAIRS OPERATIONCONTROLS DATA INDEX
DYNAMIC STABILITY CONTROL (DSC)
*
The concept
This system maintains driving stability
even in critical driving situations.
The system optimizes vehicle stability dur-
ing acceleration and when starting from a
full stop, as well as optimizing traction. In
addition, it recognizes unstable vehicle
conditions, such as understeering or over-
steering, and, as far as is possible within
the laws of physics, helps keep the vehicle
on a steady course by reducing the rpms
and by brake applications to the individual
wheels.
The DSC is operational every time you start
the engine. DSC contains the functions
Antilock Brake System (ABS), Electronic
Brake Force Distribution (EBD), and ASC+T.
The laws of physics cannot be
repealed, even with DSC. An appro-
priate driving style always remains the
responsibility of the driver. We therefore
urge you to avoid using the additional
safety margin of the system as an excuse
for taking risks.
Do not make any modifications to the DSC
system. Allow only authorized technicians
to perform service procedures on the
DSC.<
Indicator lamp
The indicator lamp on the instru-
ment cluster will go out shortly
after the ignition has been
switched on, see pages 16, 17.
If the indicator lamp flashes:
DSC controls the drive and braking forces.
If the indicator lamp fails to go out
after the engine is started, or if it
comes on during normal driving and stays
on:
The system is defective or was turned off
using the button.
The described stabilizing operations are no
longer available.
The vehicle will remain completely opera-
tional, however, without DSC.
In the event of a malfunction, please see
your MINI Dealer, see pages 16, 17.<
To switch off the DSCBriefly press the switch.
The indicator lamp stays lit.
When driving with snow chains, it may be
effective to switch off the DSC for a brief
period.
To maintain stability, always drive
with the DSC switched on whenever
possible.
ba.book Seite 63 Montag, 5. August 2002 8:09 20
ProCarManuals.com
Page 89 of 148

87
OVERVIEW REPAIRSOPERATIONCONTROLS DATA INDEX
TIRE CONDITION TIRE REPLACEMENTTire tread/tire damageInspect your tires frequently for tread wear,
signs of damage and for foreign objects
lodged in the tread. Check the tread depth.
The tread depth should not fall below1/8 in / 3 mm.
Below
1/8 in / 3 mm tread pattern depth,
there is an increased risk of hydroplaning,
even at relatively moderate speeds and
with only small amounts of water on the
road.
Wear indicators in the tread-groove base,
see arrow, are spread around the circum-
ference of the tire and are marked on the
side wall of the tire with TWI – Tread Wear
Indicator. The indicators in the tread indi-
cate at 1/16 in / 1.6 mm tread depth that
the legally permitted wear limit has been
reached.
Never continue to drive with a flat,
pressureless tire, except with Run Flat
tires. A pressureless, flat tire greatly
impairs steering and braking response, and
can lead to complete loss of control over
the vehicle. Avoid overloading the vehicle
so that the permitted load on the tires is
not exceeded. Overloading can lead to
overheating and increases the rate at
which damage develops inside the tires.
The ultimate result can assume the form of
a sudden air loss.
Unusual vibrations while driving, caused
for example by driving over a curb or simi-
lar, can indicate wheel or tire damage or
other damage to the vehicle. This is also
true for irregularities in the vehicle's han-
dling characteristics, such as a pronounced
tendency to pull to the left or right. Should
this occur, respond by immediately reduc-
ing your speed. Proceed carefully to the
nearest MINI Dealer or professional tire
center, or have the vehicle towed there to
have its wheels and/or tires inspected or
controlled. Tire damage – up to and includ-
ing blowouts – can endanger the lives of
both the vehicle occupants and other road
users.<
To maintain good handling and vehicle
response, use only tires of a single tread
configuration from a single manufacturer.
The manufacturer of your MINI tests and
approves wheel and tire combinations.
Do not use retreaded tires, since driv-
ing safety may be impaired. This is
due to the possible variations in casing
structures and, in some cases, to their
extreme age, which can lead to a decrease
in their durability.
Temperature A B C
All passenger car tires must conform
to Federal Safety Requirements in
addition to these grades.<
ba.book Seite 87 Montag, 5. August 2002 8:09 20
ProCarManuals.com
Page 90 of 148
88
TIRE REPLACEMENT Tread wearThe tread wear grade is a comparative rat-
ing based on the wear rate of the tire when
tested under controlled conditions on a
specified government test course.
For example, a tire graded 150 would wear
one and one-half – 1 γ – times as well on
the government course as a tire graded
100. The relative performance of tires
depends upon the actual conditions of their
use, however, and may depart significantly
from the norm due to variations in driving
habits, service practices and differences in
road characteristics and climate.TractionThe traction grades, from highest to lowest,
are AA, A, B, and C.
Those grades represent the tire's ability to
stop on wet pavement as measured under
controlled conditions on specified govern-
ment test surfaces of asphalt and concrete.
A tire marked C may have poor traction per-
formance.
The traction grade assigned to this
tire is based on straight-ahead brak-
ing traction tests, and does not include
acceleration, cornering, hydroplaning, or
peak traction characteristics.<
TemperatureThe temperature grades are A
– the highest
– B and C, representing the tire's resistance
to the generation of heat and its ability to
dissipate heat when tested under con-
trolled conditions on a specified indoor lab-
oratory test wheel.
Sustained high temperature can cause the
material of the tire to degenerate and
reduce tire life, and excessive temperature
can lead to a sudden flat tire. The grade C
corresponds to a level of performance
which all passenger car tires must meet
under the Federal Motor Vehicle Safety
Standard No. 109. Grades B and A represent
higher levels of performance on the labora-
tory test wheel than the minimum required
by law.
The temperature grade for this tire is
established for a tire that is properly
inflated and not overloaded. Excessive
speed, underinflation, or excessive loading,
either separately or in combination, can
cause heat buildup and possible tire fai-
lure.<
Uniform Tire Quality Grading Quality grades can be found where applica-
ble on the tire sidewall between tread
shoulder and maximum section width.
For example:
Treadwear 200
Traction AA
Temperature ATire age The date on which the tire was manufac-
tured is indicated by the code on the side-
wall:
DOT ... 1202 indicates that the tire was
manufactured in Week 12 of the year 2002.
The manufacturer of your MINI recom-
mends replacing all tires – including the
space-saver tire, regardless of actual wear –
after 6 years at the latest.Run Flat tires
For replacement, use only Run Flat
tires, as in the event of a flat tire
there is no space-saver spare tire.
You will recognize Run Flat tires by a circu-
lar symbol containing the letters RSC on
the side of the tire, see pages 85, 116.<
ba.book Seite 88 Montag, 5. August 2002 8:09 20
ProCarManuals.com
Page 91 of 148
89
OVERVIEW REPAIRSOPERATIONCONTROLS DATA INDEX
WHEEL AND TIRE COMBINATIONS WINTER TIRESThe right choiceThe factory-approved normal and Run Flat
tires are matched to your vehicle and have
been selected to provide optimum safety
and driving comfort if used properly.
The manufacturer of your MINI rec-
ommends never mounting wheels
and tires that have not been specifically
approved by the manufacturer for use on
your particular model. Although other
wheels and tires may theoretically have the
same dimensions, variations in factors such
as manufacturing tolerances can result in
contact between tire and bodywork, ulti-
mately leading to serious accidents. The
manufacturer of your MINI cannot evaluate
non-approved wheels and tires to deter-
mine if they are suited for use, and there-
fore cannot ensure the operating safety of
the vehicle if they are fitted.<
The manufacturer of your MINI has tested
certain tire brands in each size, categorized
them as safe for use on the road, and
approved them. Contact your MINI Dealer
for more details.
The correct wheel and tire combina-
tion affects various systems that
would otherwise be impaired, e.g. ABS,
ASC+T and DSC. For this reason, use only
tires of the same manufacture and tread
configuration. In the event of a flat tire, for
example, remount the approved wheel and
tire combination as soon as possible.<
StorageStore tires in a cool, dry place, protecting
them against light whenever possible.
Protect the tires against contact with oil,
grease and fuel.
Choosing the right tireThe manufacturer of your MINI recom-
mends winter tires – M+S radial tires – for
driving in adverse winter road conditions.
While so-called all-season tires with M+S
designation provide better winter traction
than summer tires with the load ratings S,
T, H, V, W, they do not achieve the perfor-
mance of winter tires.
In the interest of safe tracking and steering
response, install winter tires made by the
same manufacturer having the same tread
configuration on all four wheels.
Before purchasing winter tires, check
whether your MINI is fitted with Run Flat
tires. You will recognize Run Flat tires by a
circular symbol containing the letters RSC
on the side of the tire, see page 116. In this
case, use only Run Flat tires, as in the event
of a flat tire there is no space-saver spare
tire.
Any MINI Dealer will be glad to advise you
on the selection of the right winter tires for
the relevant operating conditions.
ba.book Seite 89 Montag, 5. August 2002 8:09 20
ProCarManuals.com
Page 138 of 148
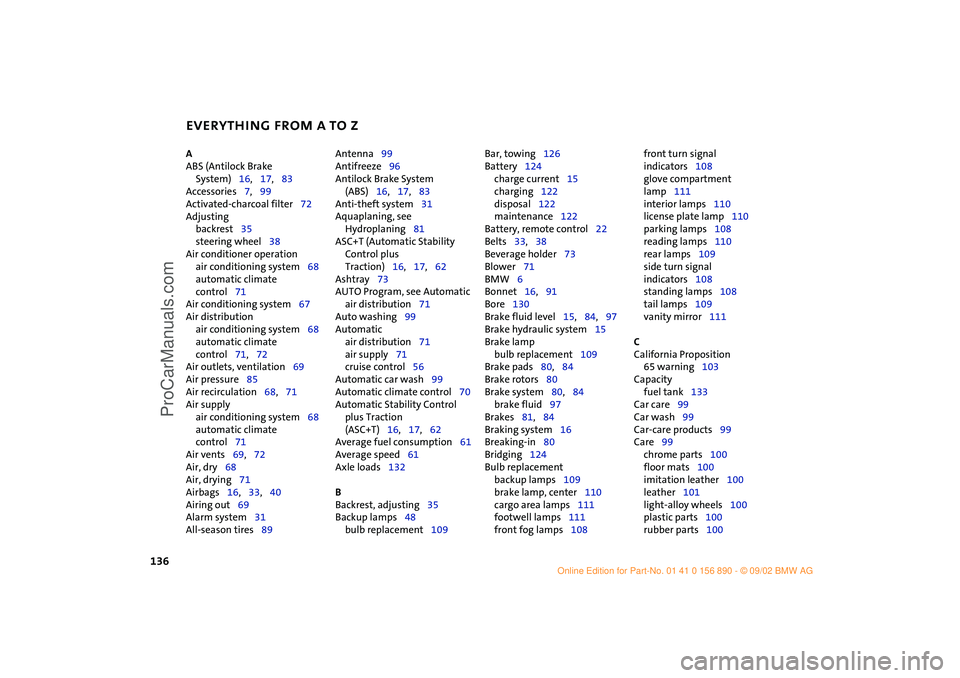
EVERYTHING FROM A TO Z
136
A
ABS (Antilock Brake
System)16,17,83
Accessories7,99
Activated-charcoal filter72
Adjusting
backrest35
steering wheel38
Air conditioner operation
air conditioning system68
automatic climate
control71
Air conditioning system67
Air distribution
air conditioning system68
automatic climate
control71,72
Air outlets, ventilation69
Air pressure85
Air recirculation68,71
Air supply
air conditioning system68
automatic climate
control71
Air vents69,72
Air, dry68
Air, drying71
Airbags16,33,40
Airing out69
Alarm system31
All-season tires89 Antenna99
Antifreeze96
Antilock Brake System
(ABS)16,17,83
Anti-theft system31
Aquaplaning, see
Hydroplaning81
ASC+T (Automatic Stability
Control plus
Traction)16,17,62
Ashtray73
AUTO Program, see Automatic
air distribution71
Auto washing99
Automatic
air distribution71
air supply71
cruise control56
Automatic car wash99
Automatic climate control70
Automatic Stability Control
plus Traction
(ASC+T)16,17,62
Average fuel consumption61
Average speed61
Axle loads132
B
Backrest, adjusting35
Backup lamps48
bulb replacement109 Bar, towing126
Battery124
charge current15
charging122
disposal122
maintenance122
Battery, remote control22
Belts33,38
Beverage holder73
Blower71
BMW6
Bonnet16,91
Bore130
Brake fluid level15,84,97
Brake hydraulic system15
Brake lamp
bulb replacement109
Brake pads80,84
Brake rotors80
Brake system80,84
brake fluid97
Brakes81,84
Braking system16
Breaking-in80
Bridging124
Bulb replacement
backup lamps109
brake lamp, center110
cargo area lamps111
footwell lamps111
front fog lamps108 front turn signal
indicators108
glove compartment
lamp111
interior lamps110
license plate lamp110
parking lamps108
reading lamps110
rear lamps109
side turn signal
indicators108
standing lamps108
tail lamps109
vanity mirror111
C
California Proposition
65 warning103
Capacity
fuel tank133
Car care99
Car wash99
Car-care products99
Care99
chrome parts100
floor mats100
imitation leather100
leather101
light-alloy wheels100
plastic parts100
rubber parts100
Hilfsrahmen für Querverweise
ba.book Seite 136 Montag, 5. August 2002 8:09 20
ProCarManuals.com