clock MINI COOPER 2003 Owners Manual
[x] Cancel search | Manufacturer: MINI, Model Year: 2003, Model line: COOPER, Model: MINI COOPER 2003Pages: 148, PDF Size: 3.17 MB
Page 5 of 148

3
OVERVIEW REPAIRS OPERATION CONTROLS DATA INDEX
Driving:
Ignition lock45
Starting the engine46
Switching off the engine47
Parking brake47
Manual transmission48
Continuously Variable automatic Trans-
mission (CVT)49
Parking lamps/Low beams52
Turn signal indicator/Headlamp
flasher52
Instrument lighting53
Fog lamps53
Interior lamps53
Light-emitting diodes54
Washer/wiper system54
Cruise control56
Everything under control:
Odometer58
Tachometer58
Fuel gauge58
Coolant temperature gauge59
Service interval display60
Clock60
Computer60
Technology for safety and driving
convenience:
Automatic Stability Control plus Traction
(ASC+T)62
Dynamic Stability Control (DSC)63
Flat Tire Monitor64
Park Distance Control (PDC)66
Controlling the climate for pleasant
driving:
Air conditioning system67
Automatic climate control70
Interior conveniences:
Glove compartment73
Ashtray/Beverage holder73
Cigarette lighter/12 V power supply73
Loading and transporting cargo:
Cargo area cover74
Foldable rear backrest74
Loading cargo75
Roof-mounted luggage rack76
Operation, care, maintenance
Special operating instructions:
Break-in procedures80
General driving notes81
Refueling82
Fuel specifications83
Antilock Brake System (ABS)83
Brake system84
Wheels and tires:
Tire inflation pressure85
Tire condition87
Tire replacement87
Wheel and tire combinations89
Winter tires89
Snow chains90
ba.book Seite 3 Montag, 5. August 2002 8:09 20
ProCarManuals.com
Page 32 of 148

30
SLIDING/TILT SUNROOF
*
ROLLER SUN BLIND
*
Manual opening and closing
In the event of an electrical malfunction,
you can also operate the sliding/tilt sun-
roof manually:
1. Push the clock towards the interior and
remove
2. Use an Allen wrench to turn the sliding/
tilt sunroof in the desired direction.
1Opening1. Press the button in the handle, see
arrow 1.
The cap is unlocked
2. Guide the roller sun blind towards the
back.2Closing1. Use the handle to pull the roller sun
blind forwards
2. Engage the handle in the device, see
arrow 2.
ba.book Seite 30 Montag, 5. August 2002 8:09 20
ProCarManuals.com
Page 35 of 148

33
OVERVIEW REPAIRS OPERATIONCONTROLS DATA INDEX
SAFE SEATING POSITIONThe ideal seating position can make a vital
contribution to relaxed, fatigue-free driv-
ing. Together with the safety belts and air-
bags, the seating position plays an impor-
tant role in providing occupants with
maximum levels of passive safety in an
accident. To ensure that the safety systems
operate with optimal efficiency, we
strongly urge you to observe the instruc-
tions contained in the following section.
For supplementary information on trans-
porting children, refer to page 41.
Sitting safely with airbags
Always maintain an adequate dis-
tance between yourself and all of the
airbags. Always hold the steering wheel by
the rim with the hands at the 9 and
3 o'clock positions to keep any chance of
injury to hands or arms to an absolute min-
imum, should the airbag be deployed. No
one and nothing is to come between the
airbags and the seat occupant. Never use
the front passenger airbag cover as a sto-
rage surface for objects of any kind, or as a
support for legs or feet, as this will increase
the risk of injury in a collision severe
enough in which the airbag will deploy.<
For airbag locations and additional infor-
mation on airbags, refer to page 40.
Safe with safety belts
Never allow more than one person to
wear a single safety belt. Never allow
infants or small children to ride in a passen-
ger's lap. Avoid twisting the belt while rout-
ing it firmly across the hips and shoulder,
wear it as snugly against your body as pos-
sible. Do not allow the belt to rest against
hard or fragile objects. Do not route the
belt across your neck, or run it across sharp
edges. Be sure that the belt does not
become caught or jammed.
Avoid wearing bulky clothing that prevents
the belt from fitting properly, and pull on
the belt periodically to retension it over
your shoulders. In the event of a frontal
impact, a loose lap belt could slide over the
hips, leading to abdominal injury. In addi-
tion, the safety belt's restraint effective-
ness is reduced if the belt is worn loosely.
Expectant mothers should always wear
their safety belts, taking care to position
the lap belt against the lower hips, where it
will not exert pressure against the abdomi-
nal area.<
For information on using the safety belts,
refer to page 38.
ba.book Seite 33 Montag, 5. August 2002 8:09 20
ProCarManuals.com
Page 62 of 148

60
SERVICE INTERVAL DISPLAY CLOCK COMPUTER
*
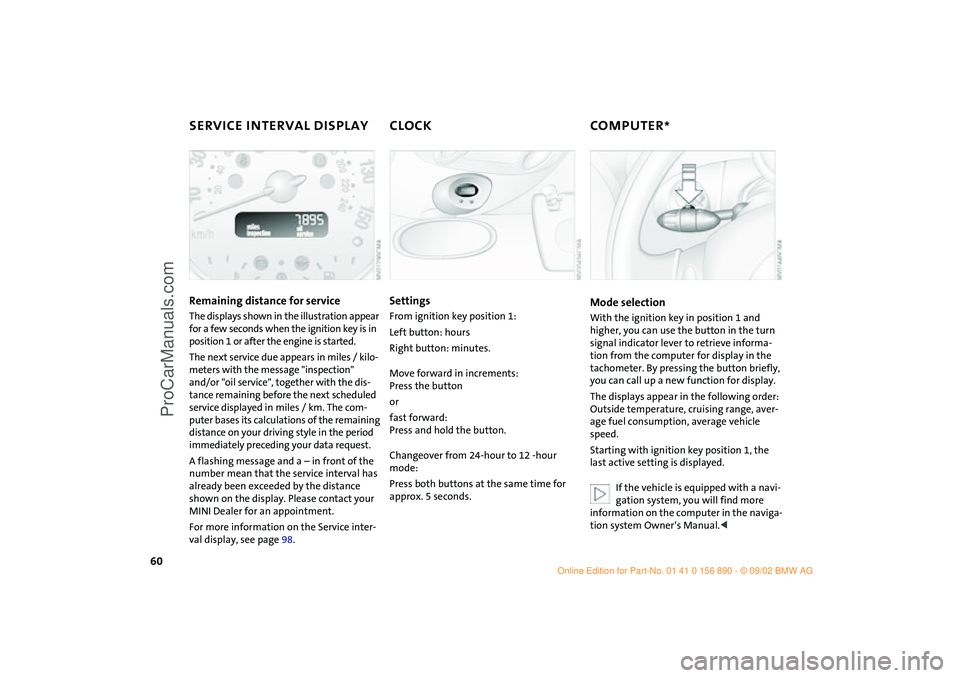
Remaining distance for service
The displays shown in the illustration appear
for a few seconds when the ignition key is in
position 1 or after the engine is started.
The next service due appears in miles / kilo-
meters with the message "inspection"
and/or "oil service", together with the dis-
tance remaining before the next scheduled
service displayed in miles / km. The com-
puter bases its calculations of the remaining
distance on your driving style in the period
immediately preceding your data request.
A flashing message and a – in front of the
number mean that the service interval has
already been exceeded by the distance
shown on the display. Please contact your
MINI Dealer for an appointment.
For more information on the Service inter-
val display, see page 98.
SettingsFrom ignition key position 1:
Left button: hours
Right button: minutes.
Move forward in increments:
Press the button
or
fast forward:
Press and hold the button.
Changeover from 24-hour to 12 -hour
mode:
Press both buttons at the same time for
approx. 5 seconds.
Mode selectionWith the ignition key in position 1 and
higher, you can use the button in the turn
signal indicator lever to retrieve informa-
tion from the computer for display in the
tachometer. By pressing the button briefly,
you can call up a new function for display.
The displays appear in the following order:
Outside temperature, cruising range, aver-
age fuel consumption, average vehicle
speed.
Starting with ignition key position 1, the
last active setting is displayed.
If the vehicle is equipped with a navi-
gation system, you will find more
information on the computer in the naviga-
tion system Owner‘s Manual.<
ba.book Seite 60 Montag, 5. August 2002 8:09 20
ProCarManuals.com
Page 84 of 148

82
REFUELING
Always switch off the engine before
refueling. If you do not, fuel cannot
be filled into the tank and the "Service
Engine Soon" lamp may come on.<
1. Open the fuel filler door
2. Turn the filler cap counterclockwise
3. Put the filler cap in the bracket attached
to the fuel filler door.
Always observe all applicable precau-
tions and regulations when handling
fuels. Never carry spare fuel containers in
your vehicle. Whether empty or full, these
containers can leak, cause an explosion,
and lead to fire in the event of a collision.<
Simple and environmentally friendly
Always observe all safety precautions
posted at the service station when
handling fuel.<
When refueling, insert the filler nozzle
completely into the filler pipe. Pulling the
nozzle out of the pipe during refueling
>results in premature pump shutoff
>will reduce the effect of the fuel vapor
recovery system on the pump.
As long as the filler nozzle is used properly,
the fuel tank is full whenever the nozzle
shuts off the first time.
Close tank:
1. Put on filler cap
2. Turn filler cap clockwise until it clicks
3. Close fuel filler door.
Fuel tank capacity:
approx. 13.2 gallons / 50 liters, of which
approx. 2.1 gallons / 8 liters are reserve
capacity.
Close the filler cap carefully after
refueling until a click is heard.
While closing, be sure not to squeeze the
strap which is fastened to the filler cap.
US models only:
A loose or missing cap will activate the
message CHECK FILLER CAP in the Check
Control* or the Check Filler Cap lamp
*.<
Do not drive until the fuel tank is
totally empty, otherwise engine oper-
ations are not guaranteed and damage
could occur.<
ba.book Seite 82 Montag, 5. August 2002 8:09 20
ProCarManuals.com
Page 99 of 148

97
OVERVIEW REPAIRSOPERATIONCONTROLS DATA INDEX
COOLANT BRAKE FLUIDTo add coolant
MINI COOPER:
1. Slowly open the cap by pulling at the tab
to allow accumulated pressure to
escape.
2. Pull open the cap completely.
3. If the coolant is low, slowly add coolant
until the correct level is reached – do not
overfill.
MINI COOPER S:
1. Open the cap by turning it slightly coun-
terclockwise to allow accumulated pres-
sure to escape.
2. Unscrew and open the cap completely.
3. If the coolant is low, slowly add coolant
until the correct level is reached – do not
overfill.
The coolant is made up of water and an
antifreeze with corrosion resistance. The
mixture ratio of 50 to 50 must be kept the
entire year due to the required anti-corro-
sion property. No other additives are
required.
Replace the coolant every three years.
Warning lamp
If the brake warning lamp comes
on with the parking brake released:
The brake fluid level is too low, see
page 15.
Brake warning lamp for Canadian
models.
Adding brake fluidTo add brake fluid or to determine and cor-
rect the cause of brake fluid loss, consult
your MINI Dealer. Your MINI Dealer is famil-
iar with the specifications for factory-
approved brake fluids – DOT 4.
Brake fluid loss may result in extended
brake pedal travel. If this occurs, refer to
the information on page 84.
Brake fluid is hygroscopic, that is, it
absorbs moisture from the air over
time.
In order to ensure the brake system's safety
and reliability, have the brake fluid
changed every two years by a MINI Dealer,
see also the Service and Warranty Informa-
tion Booklet for US models or the Warranty
and Service Guide Booklet for Canadian
models. Brake fluid is toxic and also dam-
ages vehicle paintwork. Always store brake
fluid in tightly-closed original containers
kept well away from the reach of children.
Do not spill the brake fluid and do not fill
the brake fluid reservoir beyond the MAX
mark. The brake fluid could ignite upon
contact with hot engine parts and cause
serious burns.<
Comply with the applicable environ-
mental laws regulating the disposal
of brake fluid.<
ba.book Seite 97 Montag, 5. August 2002 8:09 20
ProCarManuals.com
Page 139 of 148

EVERYTHING FROM A TO Z
137
OVERVIEW REPAIRS OPERATION CONTROLS DATA INDEX
safety belts100
upholstery material99
wiper blades100
wood parts100
Cargo
stowing75
Cargo area75
cover74
lamps53,111
opening, remote control
volume132
Caring for your vehicle99
Carpets100
Cassette player, see separate
Owner's Manual
CD changer, see separate
Owner's Manual
CD player, see separate
Owner's Manual
Center high-mount brake lamp
bulb replacement110
Central locking
system23,26
Changing battery, remote
control22
Changing bulbs107
Changing lamps107
Changing tire
space-saver spare tire112
tire change
set112,117,121 Checking oil level94
Checking tire inflation
pressure121
Child seat41
Child seat fastening system
LATCH43
Child-restraint systems41
Chrome parts100
Cigarette lighter73
socket73
Cleaning headlamps99
Cleaning rear window55
Cleaning windshield55
Clock60
Closing
from inside26
from outside23
Clothes hooks81
Clutch80
Cockpit12
Combination of wheels/
tires89
Compact Disc player, see
separate Owner's Manual
Compression ratio130
Compressor118,120
Computer60
average fuel
consumption61
average speed61 cruising range61
outside temperature61
Condensation68,71
Consumption61
Consumption display, see
Fuel gauge58
Continuously Variable
automatic Transmission
(CVT)49
electronic transmission
control module EP51
gear display51
ignition45
interlock45
manual mode50
parking50
reverse gear50
selector lever shift-
lock45,49
shiftlock49
sport program50
towing127
transmission
malfunction51
Control elements12
Convenience opening
from inside26
Convenience operation
sliding/tilt sunroof25,29
windows25 Coolant96
level96
thermometer59
Cooling68,71
Copyright2
Cosmetic mirror, see
Vanity mirror39
Cruise control18,19,56
Cruising range61
Cup holder, see Beverage
holder73
Curb weight132
Currency of the Owner's
Manual7
CVT (Continuously Variable
automatic Transmission)49
Cylinders130
D
Dashboard12
Data
dimensions131
engine130
technical130
weight132
Daytime driving lamps52
Deep water, see Water on
roadways81
Defrost setting69
ba.book Seite 137 Montag, 5. August 2002 8:09 20
ProCarManuals.com