MINI COOPER 2005 Manual Online
Manufacturer: MINI, Model Year: 2005, Model line: COOPER, Model: MINI COOPER 2005Pages: 165, PDF Size: 4.64 MB
Page 81 of 165

79
OVERVIEW REPAIRS OPERATIONCONTROLS DATA INDEX
AUTOMATIC CLIMATE CONTROL
*
Automatic air distribution and volume
Automatic program (AUTO):
Indicator lamp lights up.
Automatic adjustment of the air distribu
-
tion and volume, and adaptation of the
specified temperatures to external influ
-
ences, i.e. outside temperature and sun
-
light.In the automatic program (AUTO), the air
conditioning is activated automatically. To
create a pleasant air climate, the air tem
-
perature coming from the vents in the
upper body area is lower than the air tem
-
perature in the footwell.Air volume/Blower
Switching automatic climate control
off/on
Air volume/Blower.
Press the left or right half of the
button. The air volume varies. Automatic
adjustment of the air volume is deacti
-
vated.Switching air conditioner on/off.
Press the left half of the button while the
blower is at the lowest setting. The blower,
heating and air conditioning are switched
off. All displays go out.
Switch the automatic climate control back
on by pressing any button.Air conditioning
Indicator lamp lights up.
The air is cooled and dehumidified
and, depending on the temperature set
-
ting, rewarmed.In the automatic program (AUTO), the air
conditioning is activated automatically. After the engine has started, the wind
-
shield can temporarily fog over. In the air
conditioning mode, there is less condensa
-
tion on the windows.
When the air conditioning is on, con
-
densation is formed which then exits
under the vehicle. Traces of condensed
water on the ground are therefore nor
-
mal.
-
cle is blocked. indicator lamp lights
up.
The air within the vehicle is recirculated.In the automatic program (AUTO) in hot
weather conditions, the recirculated air
mode is activated temporarily to enable
faster cooling.
The indicator lamp for the recirculated air
button is not lit.
The recirculated air mode should not be constantly used over a longer period of
time, as the air quality in the vehicle's interior
will otherwise gradually deteriorate. If the
windows fog up in the recirculated air mode,
turn the recirculated air mode off and if nec
-
essary increase the air supply.
<
Rear window defroster and windshield
heating*
Indicator lamp lights up.
As long as the indicator lamp is lit,
the window heater is operating.
The heater switches off automatically after a
short time. Temperature
Tap or turn the wheel in the appro
-
priate direction to change the tem
-
perature step by step.The figures in the display provide a
general indication of interior temperature.
When you start the vehicle, the system
ensures that the selected temperature is
achieved as quickly as possible and then main
-
tained.
ProCarManuals.com
Page 82 of 165

80
AUTOMATIC CLIMATE CONTROL
*
Permanent heating with maximum power output at temperature selec
-
tion HI. Permanent cooling at LO. With the
setting at HI, the recirculated air mode can
-
not be switched on.
Indicator lamp lights up.
Ice and condensation are rapidly removed
from the rear window, windshield and side
windows.Condensation is removed from the win
-
dows more quickly when the air condition
-
ing is also activated.
The rear window defroster/windshield
heating are switched on automatically.
They can be switched off again via the
respective button.Individual air distribution
Combine the air distribution your
-
self. Automatic adjustment of the
air distribution is deactivated.
It is not possible to distribute air
simultaneously toward the win
-
dows and toward the upper body area.
You can switch the unit from 7 to 6 by pressing the buttons for air
conditioning and air distribution toward
the footwell at the same time.<
Microfilter/Activated-charcoal filterThe microfilter removes dust and pollen
from the incoming or recirculated air. The
activated-charcoal filter provides addi
-
tional protection by filtering gaseous pol
-
lutants from the outside air.
Your MINI Dealer replaces this combined
filter as a standard part of your scheduled
maintenance. A substantial reduction in
the air supply indicates that the filter must
be replaced before scheduled maintenance.
Draft-free ventilation Air supply for the upper body area:Button
1: air outlets can be opened and
closed by turning.
The points indicate the position in each
case.Vent
2: change the direction of the airflow
by swiveling.
ProCarManuals.com
Page 83 of 165

81
OVERVIEW REPAIRS OPERATIONCONTROLS DATA INDEX
GLOVE COMPARTMENT
ASHTRAY, DRINKS HOLDERS
To open:Pull the handle.
The light goes on.To close:Fold the door up.
To prevent injury in the event of an accident, close the glove compart
-
ment immediately after use.<
VentilationTurn the rotary switch to a horizontal posi
-
tion:The vents are open.Turn the rotary switch to a vertical position,
arrow:The vents are closed.
Depending on the temperature set
-
ting of the air conditioning or the
automatic climate control, high tempera
-
tures may result in the glove compart
-
ment.<
AshtrayThe ashtray is located in one of the bever
-
age holders in the center console.In the rear, an ashtray can also be fitted in
the beverage holder at the end of the cen
-
ter console.Beverage holders There are two beverage holders at the front
of the center console. Another is located at
the end of the center console in the rear.
Do not place any glass containers in the beverage holders, as this
increases the risk of injury in the event of
an accident.<
ProCarManuals.com
Page 84 of 165

82
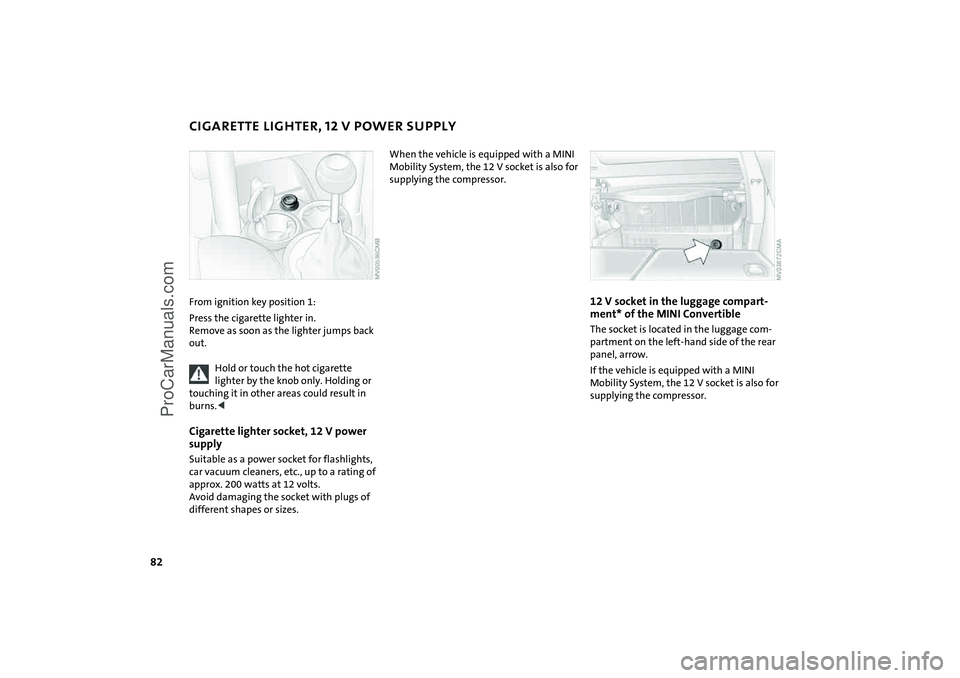
CIGARETTE LIGHTER, 12 V POWER SUPPLY From ignition key position
1:
Press the cigarette lighter in.
Remove as soon as the lighter jumps back
out.
Hold or touch the hot cigarette lighter by the knob only. Holding or
touching it in other areas could result in
burns.<
Cigarette lighter socket, 12 V power
supply Suitable as a power socket for flashlights,
car vacuum cleaners, etc., up to a rating of
approx. 200
watts at 12
volts.
Avoid damaging the socket with plugs of
different shapes or sizes.
When the vehicle is equipped with a MINI
Mobility System, the 12 V socket is also for
supplying the compressor.
12 V socket in the luggage compart
-
ment* of the MINI
Convertible
The socket is located in the luggage com
-
partment on the left-hand side of the rear
panel, arrow.If the vehicle is equipped with a MINI
Mobility System, the 12 V socket is also for
supplying the compressor.
ProCarManuals.com
Page 85 of 165

83
OVERVIEW REPAIRS OPERATIONCONTROLS DATA INDEX
INTEGRATED UNIVERSAL REMOTE CONTROL
*
The conceptThe integrated universal remote control
takes the place of up to three different con
-
trol devices for different radio-remote-con
-
trolled systems such as gate openers and
household alarm systems. The integrated
universal remote control detects and learns
the signal transmitted by the original con
-
trol device.The signal of an original control device can
be programmed onto one of the three
memory buttons
1. The system in question
can then be operated by means of the pro
-
grammed memory button
1. Signal trans
-
mission is indicated by indicator lamp
2.
If you decide to sell your vehicle one day, in
the interest of your own security, remem
-
ber to delete the programs before the vehi
-
cle leaves your possession, refer to page
84.
While programming is in progress and before operating any pro
-
grammed system by remote control using
the integrated universal remote control,
make sure that the movement area of the
system in question is clear of people, ani
-
mals and inanimate obstructions, in order
to avoid possible injury or damage. Also
comply with the safety precautions issued
for the original control device.<
Checking compatibility
If this symbol is depicted on the packaging or in the operating
instructions of the original control
device, it is safe to assume that the remote-
controlled system is compatible with the
integrated universal remote control.If you have additional questions, please consult your MINI center or
call 1-800-355-3515.
You can also visit these websites:
www.miniusa.com or
www.homelink.com.
HomeLink is a registered trademark owned
by Johnson Controls, Inc.<
Programming1 Memory buttons2 Indicator lamp Fixed-code control device1. Switch on the ignition2. During initial operation: press and hold
both outer buttons
1 approx. 20 seconds
until indicator lamp 2 flashes. This clears
all three memory buttons
1
3. Hold the original control device approx.
2 to 8
in / 5 to 20
cm away from memory
buttons
1.
The required distance between the control device and memory
buttons 1 may vary, depending on the
system of the original control device in
question.<
ProCarManuals.com
Page 86 of 165

84
INTEGRATED UNIVERSAL REMOTE CONTROL
*
4. Simultaneously press the command but
-
ton of the original control device and the
desired memory button
1 on the inte
-
grated universal remote control. The
indicator lamp
2 begins to flash slowly.
Release both buttons when indicator
lamp
2 starts flashing rapidly. If indica
-
tor lamp
2 does not start to flash rapidly
after approx. 15
seconds, change the dis
-
tance between the two devices
5. Repeat steps 3 and 4 to program other
original control devices. The corresponding memory button
1 is
now programmed with the signal of the
original control device.
The system can be operated as soon as the
ignition is switched on.
If the system cannot be operated after repeated attempts at program
-
ming, check whether the original control
device is equipped with an alternating-
code system. You can either check the oper
-
ating instructions of the original control
device for this information, or you can
press and hold down the programmed
memory button
1 of the integrated univer
-
sal remote control. If indicator lamp
2 of
the integrated universal remote control
flashes rapidly for a brief period and then
remains on for approx. two seconds, the
original control device is equipped with an
alternating-code system. In this case, the
memory buttons
1 are programmed as
described for an alternating-code control
device.<
Alternating-code control deviceYou will need to refer to the operating
instructions of the system in question in
order to program the integrated universal
remote control. Read through the operat
-
ing instructions for information on syn
-
chronization.
Observe the following additional instruc
-
tions when you program an alternating-
code control device:
You will find programming easier if you have the assistance of a second
person.<
1. Park your vehicle within range of the
radio-remote-controlled device2. Program the integrated universal
remote control as described above in the
section on fixed-code programming3. Locate the button on the receiver of the
target device, for example on the upper
part of the drive
4. Press the button on the receiver of the
target device. Once you have completed
step
4, you have approx. 30 seconds to
complete step
5
5. Press the programmed memory
button
1 of the integrated universal
remote control three times.
The corresponding memory button
1 is
now programmed with the signal of the
original control device.
Consult your MINI Dealer if you have any questions.<
Deleting memory buttons It is not possible to delete individual mem
-
ory buttons
1. To delete all three memory
buttons
1 at the same time, however, per
-
form the following steps:Press and hold both outer buttons
1 of the
integrated universal remote control for
approx. 20 seconds until indicator lamp
2
flashes.
ProCarManuals.com
Page 87 of 165

85
OVERVIEW REPAIRS OPERATIONCONTROLS DATA INDEX
LUGGAGE COMPARTMENT IN THE MINILuggage compartment cover When the tailgate is opened, the luggage
compartment cover is also raised.
Never place any heavy or hard objects on the luggage compartment cover;
otherwise occupants could be injured dur
-
ing braking maneuvers.<
RemovalTo load bulky luggage, the compartment
cover can be removed. 1. Remove the retaining straps on the tail
-
gate
2. Pull the luggage compartment cover out
towards the rear.
Foldable rear backrest 1. Pull lever2. Fold the rear backrest forwards.
When folding the backrest back into its original position, always ensure
that the catch engages securely. A loose
backrest might fail to prevent cargo from
entering the passenger compartment dur
-
ing sudden braking or evasive maneuvers,
posing a potential hazard to occupants.<
ProCarManuals.com
Page 88 of 165

86
LUGGAGE COMPARTMENT IN THE MINI CONVERTIBLE
LOADING CARGO
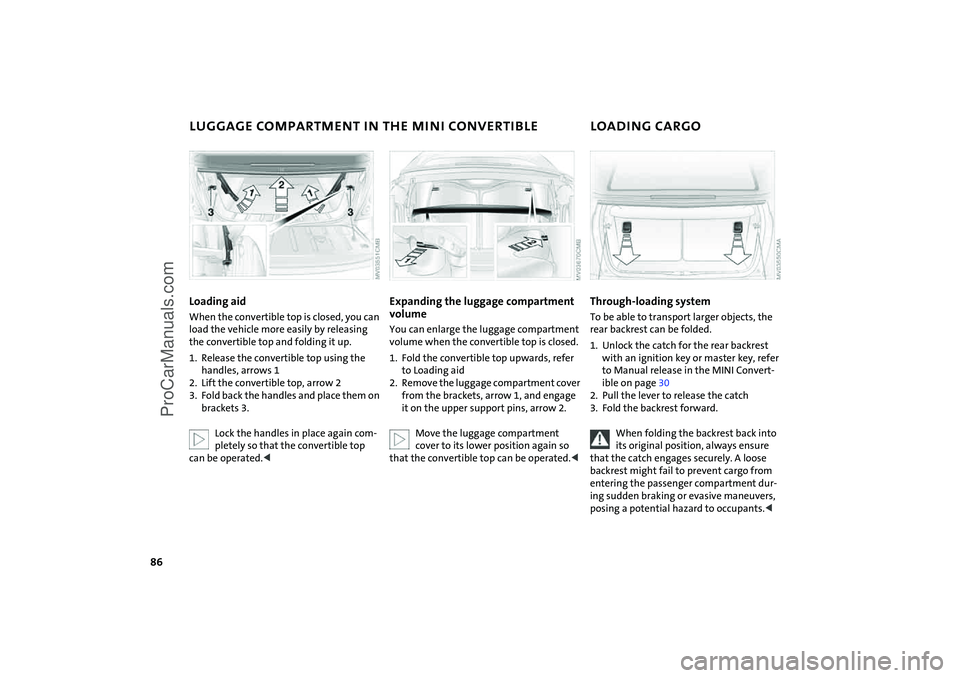
Loading aidWhen the convertible top is closed, you can
load the vehicle more easily by releasing
the convertible top and folding it up.1. Release the convertible top using the
handles, arrows 12. Lift the convertible top, arrow 23. Fold back the handles and place them on
brackets
3.
Lock the handles in place again com
-
pletely so that the convertible top
can be operated.<
Expanding the luggage compartment volumeYou can enlarge the luggage compartment
volume when the convertible top is closed. 1. Fold the convertible top upwards, refer
to Loading aid2. Remove the luggage compartment cover
from the brackets, arrow 1, and engage
it on the upper support pins, arrow 2.
Move the luggage compartment cover to its lower position again so
that the convertible top can be operated.<
Through-loading system To be able to transport larger objects, the
rear backrest can be folded.1. Unlock the catch for the rear backrest
with an ignition key or master key, refer
to Manual release in the MINI Convert
-
ible on page
30
2. Pull the lever to release the catch3. Fold the backrest forward.
When folding the backrest back into its original position, always ensure
that the catch engages securely. A loose
backrest might fail to prevent cargo from
entering the passenger compartment dur
-
ing sudden braking or evasive maneuvers,
posing a potential hazard to occupants.<
ProCarManuals.com
Page 89 of 165

87
OVERVIEW REPAIRS OPERATIONCONTROLS DATA INDEX
LOADING CARGO
Avoid overloading the vehicle so that the permitted load on the tires is not
exceeded. Overloading can lead to over
-
heating and damage inside the tires.
Depending on the circumstances, this can
result in sudden air loss.<
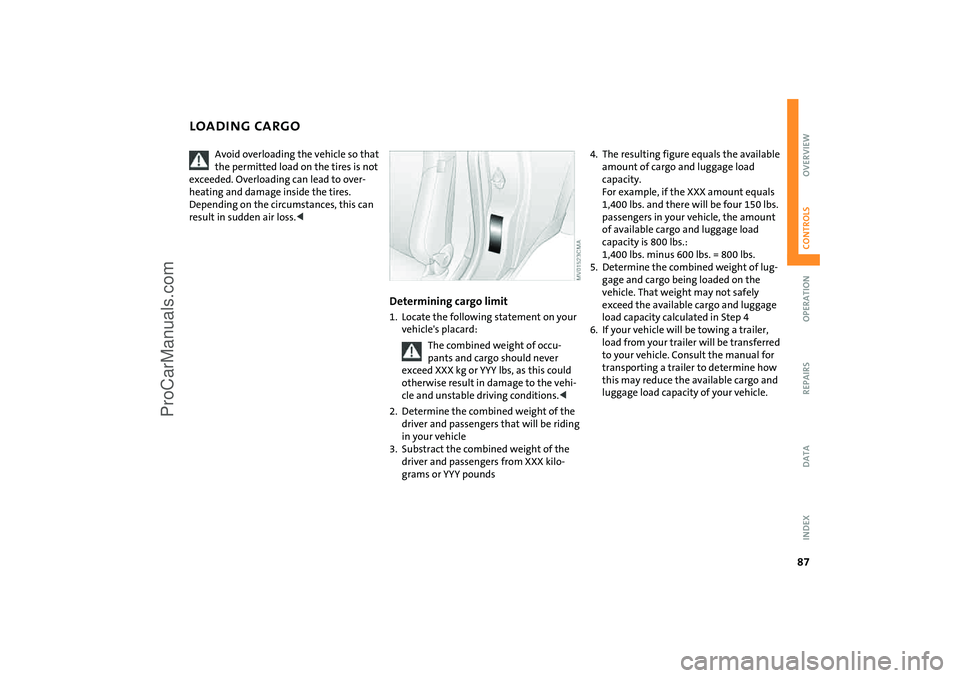
Determining cargo limit1. Locate the following statement on your
vehicle's placard:
The combined weight of occu
-
pants and cargo should never
exceed XXX
kg or YYY
lbs, as this could
otherwise result in damage to the vehi
-
cle and unstable driving conditions.<
2. Determine the combined weight of the
driver and passengers that will be riding
in your vehicle3. Substract the combined weight of the
driver and passengers from XXX kilo
-
grams or YYY
pounds
4. The resulting figure equals the available
amount of cargo and luggage load
capacity.
For example, if the XXX amount equals
1,400 lbs. and there will be four 150
lbs.
passengers in your vehicle, the amount
of available cargo and luggage load
capacity is 800
lbs.:
1,400
lbs. minus 600
lbs. = 800
lbs.
5. Determine the combined weight of lug
-
gage and cargo being loaded on the
vehicle. That weight may not safely
exceed the available cargo and luggage
load capacity calculated in Step
4
6. If your vehicle will be towing a trailer,
load from your trailer will be transferred
to your vehicle. Consult the manual for
transporting a trailer to determine how
this may reduce the available cargo and
luggage load capacity of your vehicle.
ProCarManuals.com
Page 90 of 165

88
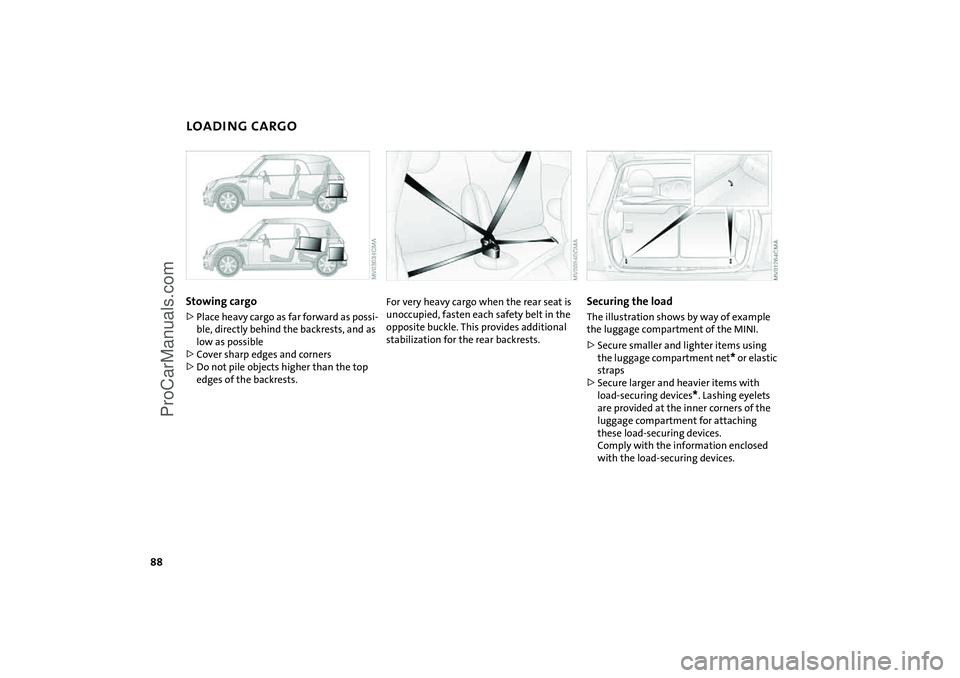
LOADING CARGOStowing cargo >Place heavy cargo as far forward as possi
-
ble, directly behind the backrests, and as
low as possible>Cover sharp edges and corners>Do not pile objects higher than the top
edges of the backrests.
For very heavy cargo when the rear seat is unoccupied, fasten each safety belt in the
opposite buckle. This provides additional
stabilization for the rear backrests.
Securing the load The illustration shows by way of example
the luggage compartment of the MINI.>Secure smaller and lighter items using
the luggage compartment net
* or elastic
straps
>Secure larger and heavier items with
load-securing devices
*. Lashing eyelets
are provided at the inner corners of the
luggage compartment for attaching
these load-securing devices.
Comply with the information enclosed
with the load-securing devices.
ProCarManuals.com