stop start MINI COOPER 2009 Owners Manual
[x] Cancel search | Manufacturer: MINI, Model Year: 2009, Model line: COOPER, Model: MINI COOPER 2009Pages: 160, PDF Size: 2.84 MB
Page 13 of 160
REFERENCE
AT A GLANCE CONTROLS DRIVING TIPS MOBILITY
11
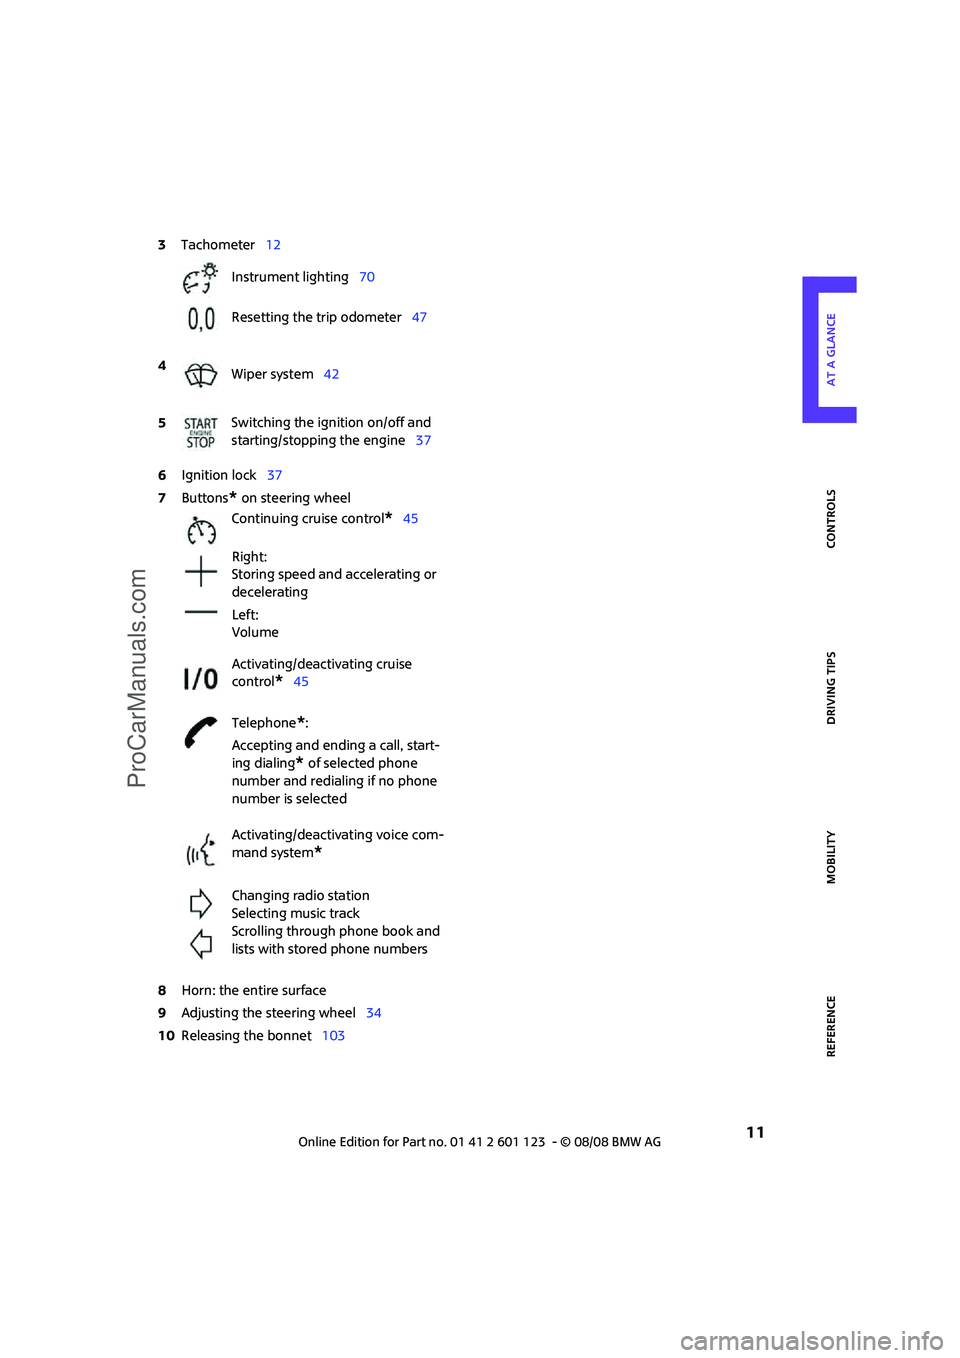
6Ignition lock37
7Buttons
* on steering wheel
8Horn: the entire surface
9Adjusting the steering wheel34
10Releasing the bonnet103 3Tachometer12
Instrument lighting70
Resetting the trip odometer47
4
Wiper system42
5Switching the ignition on/off and
starting/stopping the engine37
Continuing cruise control
*45
Right:
Storing speed and accelerating or
decelerating
Left:
Volume
Activating/deactivating cruise
control
*45
Telephone
*:
Accepting and ending a call, start-
ing dialing
* of selected phone
number and redialing if no phone
number is selected
Activating/deactivating voice com-
mand system
*
Changing radio station
Selecting music track
Scrolling through phone book and
lists with stored phone numbers
ProCarManuals.com
Page 28 of 160
Opening and closing
26
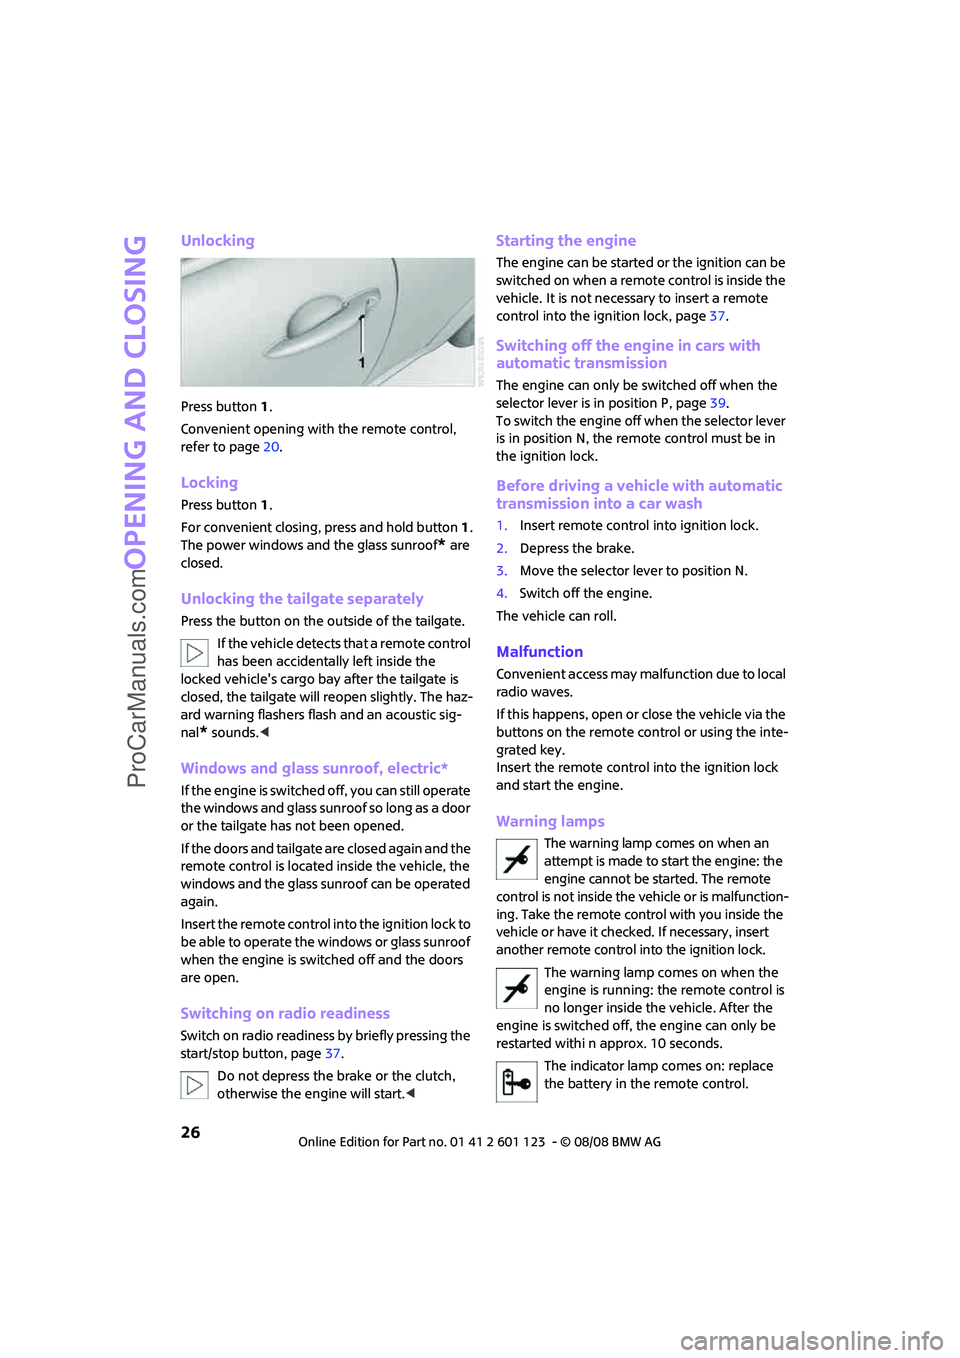
Unlocking
Press button 1.
Convenient opening with the remote control,
refer to page20.
Locking
Press button 1.
For convenient closing, press and hold button 1.
The power windows and the glass sunroof
* are
closed.
Unlocking the tailgate separately
Press the button on the outside of the tailgate.
If the vehicle detects that a remote control
has been accidentally left inside the
locked vehicle's cargo bay after the tailgate is
closed, the tailgate will reopen slightly. The haz-
ard warning flashers flash and an acoustic sig-
nal
* sounds.<
Windows and glass sunroof, electric*
If the engine is switched off, you can still operate
the windows and glass sunroof so long as a door
or the tailgate has not been opened.
If the doors and tailgate are closed again and the
remote control is located inside the vehicle, the
windows and the glass sunroof can be operated
again.
Insert the remote control into the ignition lock to
be able to operate the windows or glass sunroof
when the engine is switched off and the doors
are open.
Switching on radio readiness
Switch on radio readiness by briefly pressing the
start/stop button, page37.
Do not depress the brake or the clutch,
otherwise the engine will start.<
Starting the engine
The engine can be started or the ignition can be
switched on when a remote control is inside the
vehicle. It is not necessary to insert a remote
control into the ignition lock, page37.
Switching off the engine in cars with
automatic transmission
The engine can only be switched off when the
selector lever is in position P, page39.
To switch the engine off when the selector lever
is in position N, the remote control must be in
the ignition lock.
Before driving a vehicle with automatic
transmission into a car wash
1.Insert remote control into ignition lock.
2.Depress the brake.
3.Move the selector lever to position N.
4.Switch off the engine.
The vehicle can roll.
Malfunction
Convenient access may malfunction due to local
radio waves.
If this happens, open or close the vehicle via the
buttons on the remote control or using the inte-
grated key.
Insert the remote control into the ignition lock
and start the engine.
Warning lamps
The warning lamp comes on when an
attempt is made to start the engine: the
engine cannot be started. The remote
control is not inside the vehicle or is malfunction-
ing. Take the remote control with you inside the
vehicle or have it checked. If necessary, insert
another remote control into the ignition lock.
The warning lamp comes on when the
engine is running: the remote control is
no longer inside the vehicle. After the
engine is switched off, the engine can only be
restarted withi n approx. 10 seconds.
The indicator lamp comes on: replace
the battery in the remote control.
ProCarManuals.com
Page 39 of 160
REFERENCEAT A GLANCE CONTROLS DRIVING TIPS MOBILITY
37
Driving
Ignition lock
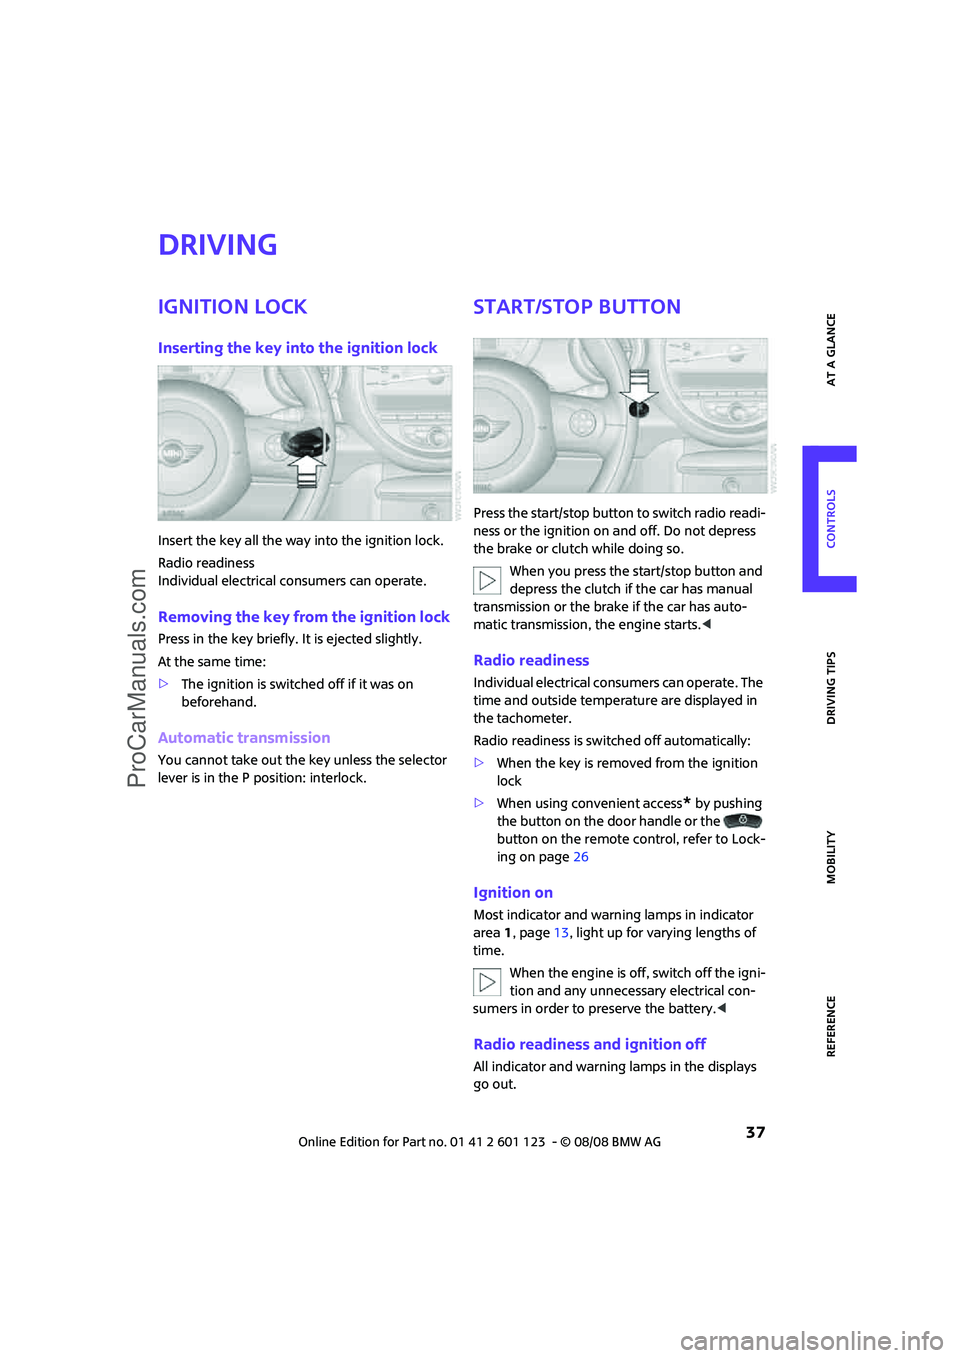
Inserting the key into the ignition lock
Insert the key all the way into the ignition lock.
Radio readiness
Individual electrical consumers can operate.
Removing the key from the ignition lock
Press in the key briefly. It is ejected slightly.
At the same time:
>The ignition is switched off if it was on
beforehand.
Automatic transmission
You cannot take out the key unless the selector
lever is in the P position: interlock.
Start/stop button
Press the start/stop button to switch radio readi-
ness or the ignition on and off. Do not depress
the brake or clutch while doing so.
When you press the start/stop button and
depress the clutch if the car has manual
transmission or the brake if the car has auto-
matic transmission, the engine starts.<
Radio readiness
Individual electrical consumers can operate. The
time and outside temperature are displayed in
the tachometer.
Radio readiness is switched off automatically:
>When the key is removed from the ignition
lock
>When using convenient access
* by pushing
the button on the door handle or the
button on the remote control, refer to Lock-
ing on page26
Ignition on
Most indicator and warning lamps in indicator
area 1, page13, light up for varying lengths of
time.
When the engine is off, switch off the igni-
tion and any unnecessary electrical con-
sumers in order to preserve the battery.<
Radio readiness and ignition off
All indicator and warning lamps in the displays
go out.
ProCarManuals.com
Page 40 of 160
Driving
38
The ignition automatically turns off* when the
driver's door is opened. Pressing the start/stop
button again switches the ignition back on.
The ignition is not switched off in situations such
as the following:
>The clutch or brake is depressed
>The low beams are switched on
Starting the engine
Do not allow the engine to run in enclosed
spaces; otherwise inhalation of the nox-
ious exhaust gases can lead to unconsciousness
and death. Exhaust gases contain carbon mon-
oxide, an odorless and colorless, but highly toxic
gas. Never leave an unattended vehicle with the
engine running, otherwise such a vehicle repre-
sents a potential safety hazard.
Before leaving the car while the engine is run-
ning, place the transmission in neutral or move
the selector lever to position P and forcefully
apply the parking brake to prevent the car from
moving.<
Avoid frequent starting in quick succes-
sion or repeated start attempts in which
the engine does not start. Otherwise, the fuel is
not burned or inadequately burned and there is
a danger of overheating and damaging the cat-
alytic converter.<
Do not let the engine warm up with the vehicle
at a standstill. Move off immediately at a moder-
ate engine speed.
When starting the engine, do not depress the
accelerator pedal.
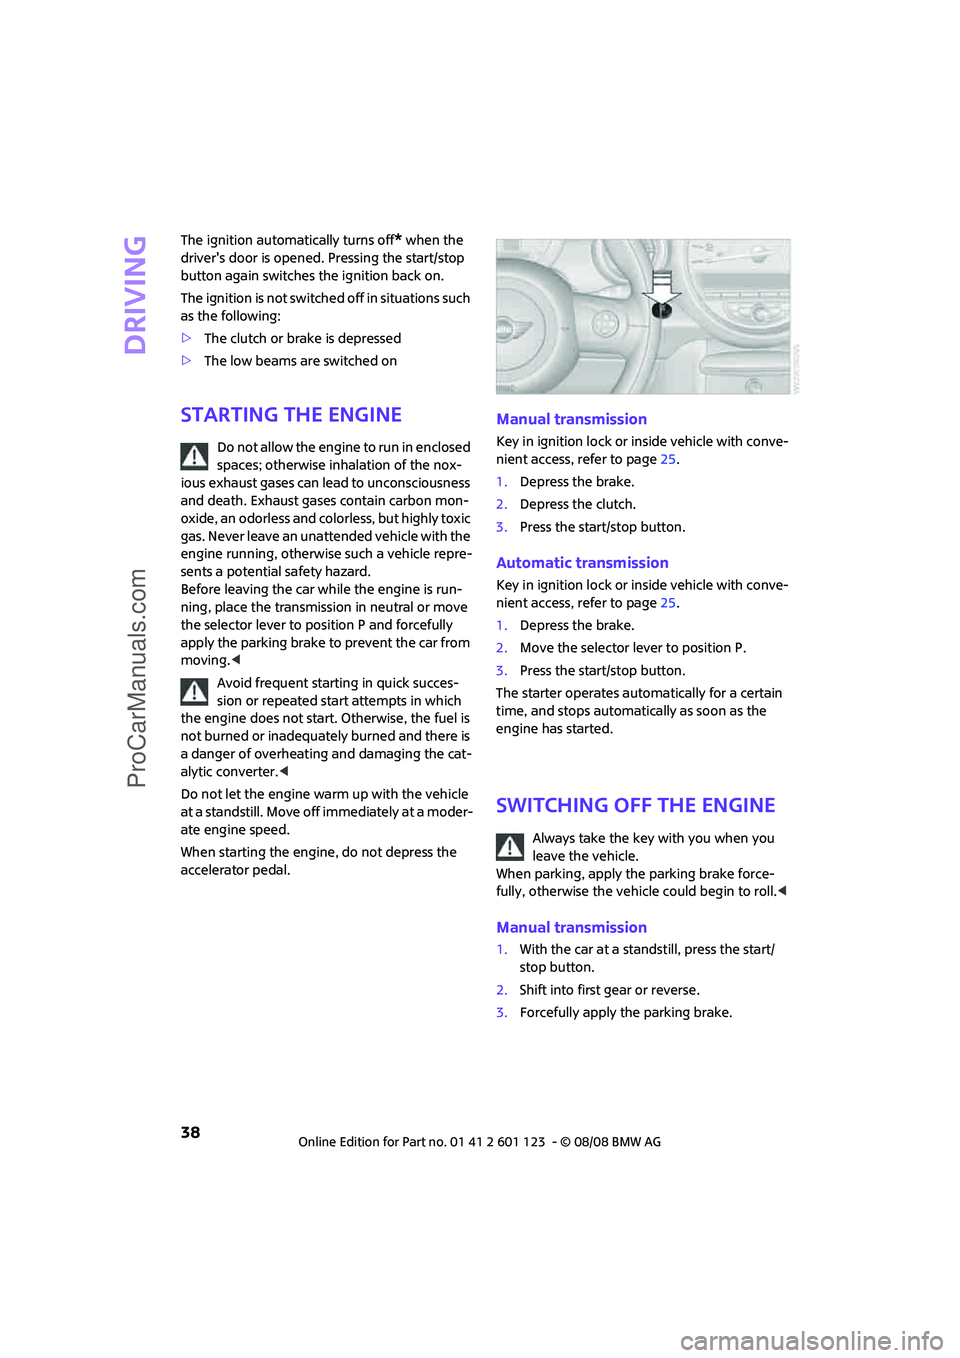
Manual transmission
Key in ignition lock or inside vehicle with conve-
nient access, refer to page25.
1.Depress the brake.
2.Depress the clutch.
3.Press the start/stop button.
Automatic transmission
Key in ignition lock or inside vehicle with conve-
nient access, refer to page25.
1.Depress the brake.
2.Move the selector lever to position P.
3.Press the start/stop button.
The starter operates automatically for a certain
time, and stops automatically as soon as the
engine has started.
switching off the Engine
Always take the key with you when you
leave the vehicle.
When parking, apply the parking brake force-
fully, otherwise the vehicle could begin to roll.<
Manual transmission
1.With the car at a standstill, press the start/
stop button.
2.Shift into first gear or reverse.
3.Forcefully apply the parking brake.
ProCarManuals.com
Page 41 of 160
REFERENCEAT A GLANCE CONTROLS DRIVING TIPS MOBILITY
39
Automatic transmission
1.With the car at a standstill, move the selector
lever to position P.
2.Press the start/stop button.
3.Forcefully apply the parking brake.
Parking brake
The parking brake is primarily intended to pre-
vent the vehicle from rolling while parked; it
brakes the rear wheels.
Applying
The lever locks in position automatically.
Releasing
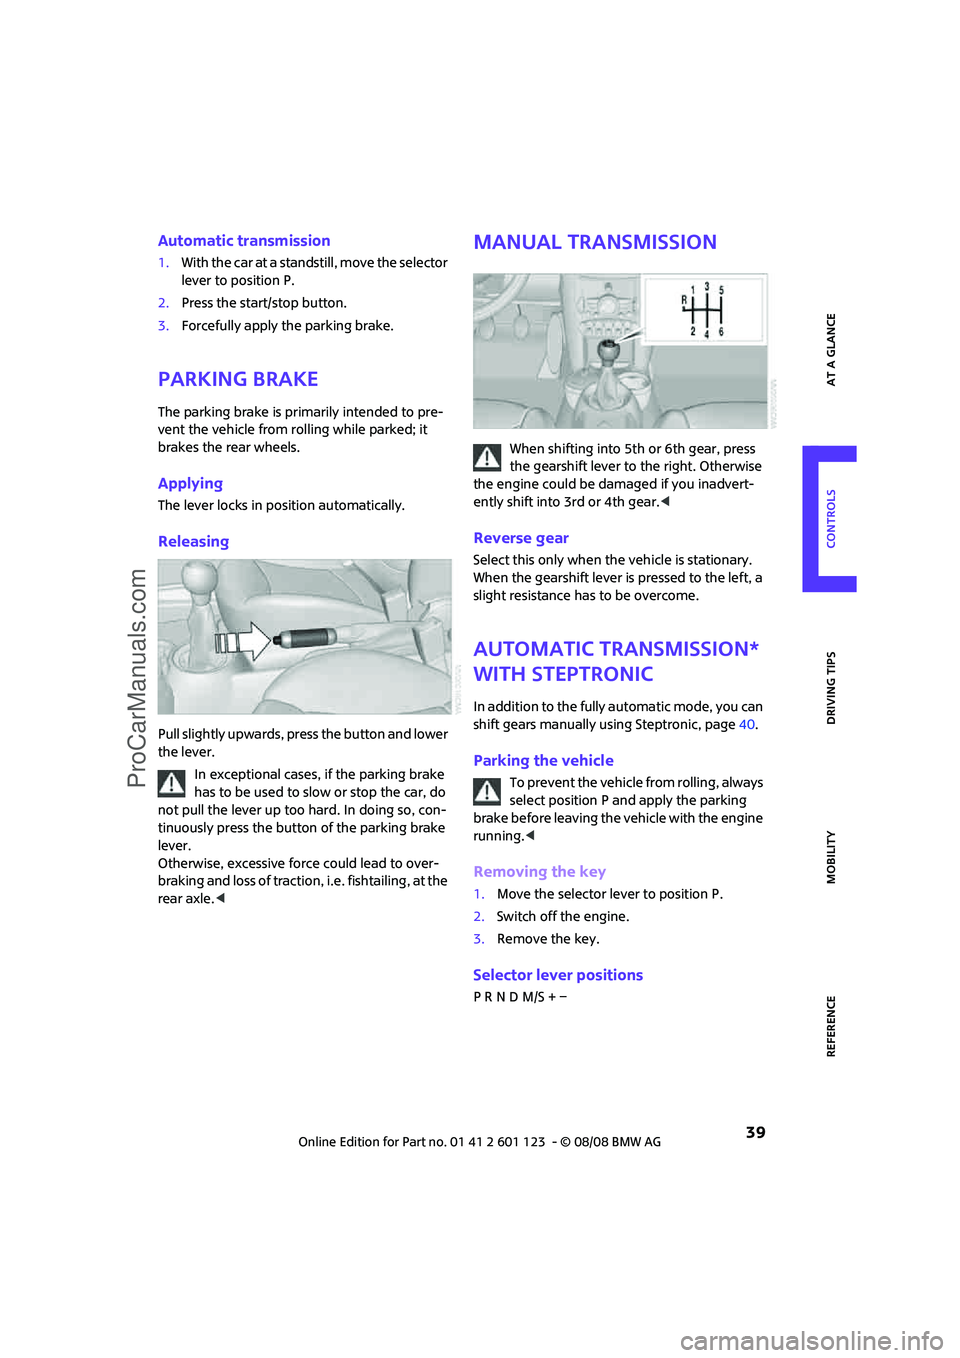
Pull slightly upwards, press the button and lower
the lever.
In exceptional cases, if the parking brake
has to be used to slow or stop the car, do
not pull the lever up too hard. In doing so, con-
tinuously press the button of the parking brake
lever.
Otherwise, excessive force could lead to over-
braking and loss of traction, i.e. fishtailing, at the
rear axle.<
Manual transmission
When shifting into 5th or 6th gear, press
the gearshift lever to the right. Otherwise
the engine could be damaged if you inadvert-
ently shift into 3rd or 4th gear.<
Reverse gear
Select this only when the vehicle is stationary.
When the gearshift lever is pressed to the left, a
slight resistance has to be overcome.
Automatic transmission*
with Steptronic
In addition to the fully automatic mode, you can
shift gears manually using Steptronic, page40.
Parking the vehicle
To prevent the vehicle from rolling, always
select position P and apply the parking
brake before leaving the vehicle with the engine
running.<
Removing the key
1.Move the selector lever to position P.
2.Switch off the engine.
3.Remove the key.
Selector lever positions
P R N D M/S + –
ProCarManuals.com
Page 62 of 160
Technology for driving comfort and safety
60
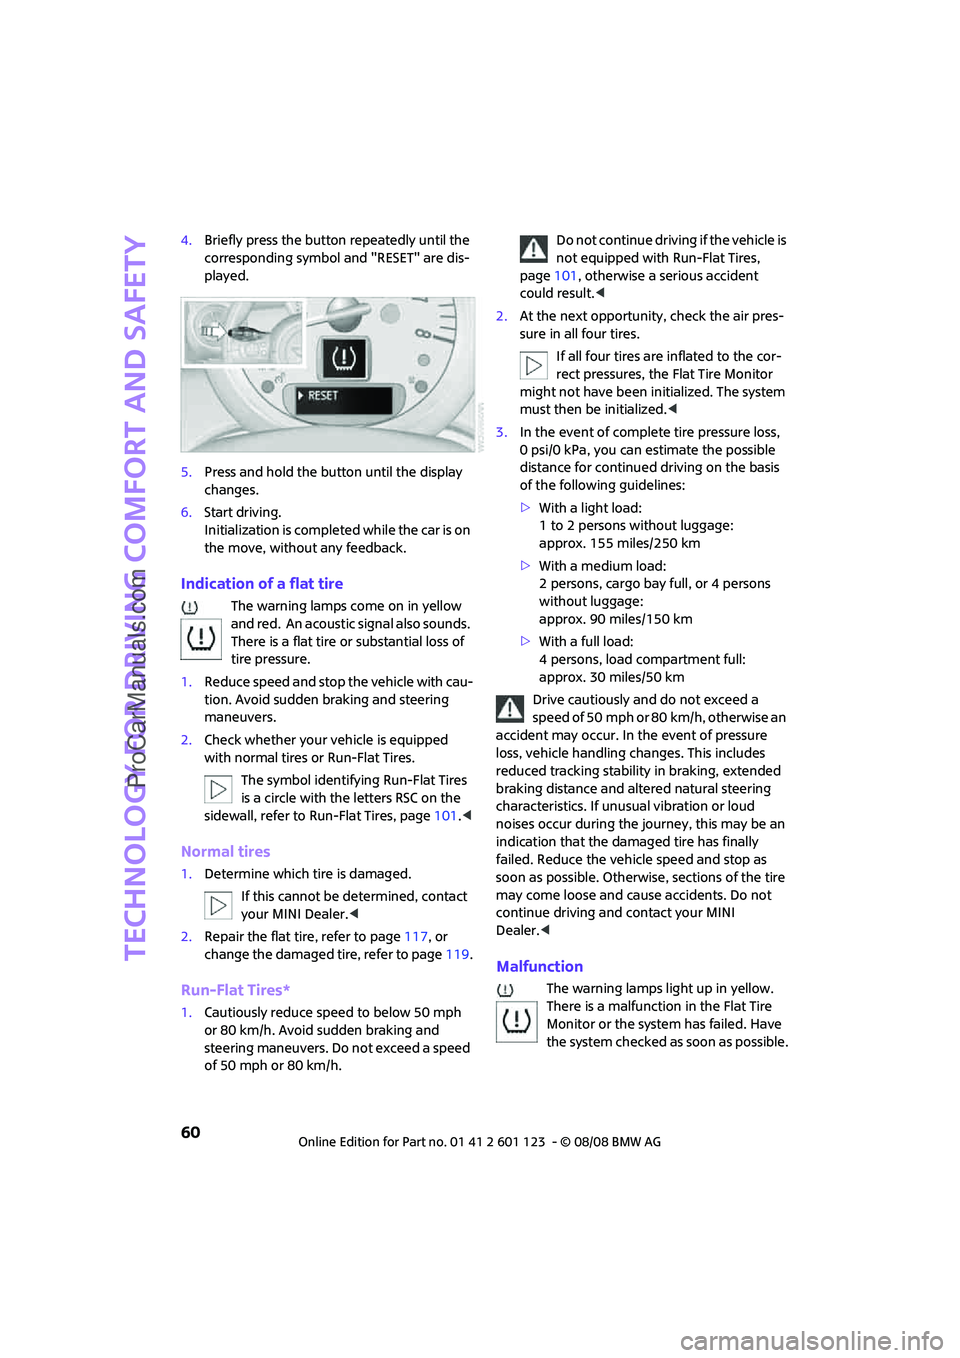
4.Briefly press the button repeatedly until the
corresponding symbol and "RESET" are dis-
played.
5.Press and hold the button until the display
changes.
6.Start driving.
Initialization is completed while the car is on
the move, without any feedback.
Indication of a flat tire
The warning lamps come on in yellow
and red. An acoustic signal also sounds.
There is a flat tire or substantial loss of
tire pressure.
1.Reduce speed and stop the vehicle with cau-
tion. Avoid sudden braking and steering
maneuvers.
2.Check whether your vehicle is equipped
with normal tires or Run-Flat Tires.
The symbol identifying Run-Flat Tires
is a circle with the letters RSC on the
sidewall, refer to Run-Flat Tires, page101.<
Normal tires
1.Determine which tire is damaged.
If this cannot be determined, contact
your MINI Dealer.<
2.Repair the flat tire, refer to page117, or
change the damaged tire, refer to page119.
Run-Flat Tires*
1.Cautiously reduce speed to below 50 mph
or 80 km/h. Avoid sudden braking and
steering maneuvers. Do not exceed a speed
of 50 mph or 80 km/h.Do not continue driving if the vehicle is
not equipped with Run-Flat Tires,
page101, otherwise a serious accident
could result.<
2.At the next opportunity, check the air pres-
sure in all four tires.
If all four tires are inflated to the cor-
rect pressures, the Flat Tire Monitor
might not have been initialized. The system
must then be initialized.<
3.In the event of complete tire pressure loss,
0 psi/0 kPa, you can estimate the possible
distance for continued driving on the basis
of the following guidelines:
>With a light load:
1 to 2 persons without luggage:
approx. 155 miles/250 km
>With a medium load:
2 persons, cargo bay full, or 4 persons
without luggage:
approx. 90 miles/150 km
>With a full load:
4 persons, load compartment full:
approx. 30 miles/50 km
Drive cautiously and do not exceed a
speed of 50 mph or 80 km/h, otherwise an
accident may occur. In the event of pressure
loss, vehicle handling changes. This includes
reduced tracking stability in braking, extended
braking distance and altered natural steering
characteristics. If unusual vibration or loud
noises occur during the journey, this may be an
indication that the damaged tire has finally
failed. Reduce the vehicle speed and stop as
soon as possible. Otherwise, sections of the tire
may come loose and cause accidents. Do not
continue driving and contact your MINI
Dealer.<
Malfunction
The warning lamps light up in yellow.
There is a malfunction in the Flat Tire
Monitor or the system has failed. Have
the system checked as soon as possible.
ProCarManuals.com
Page 64 of 160
Technology for driving comfort and safety
62
6.Start driving.
After driving a few minutes, the set inflation
pressures in the tires are accepted as the tar-
get values to be monitored. The system
reset is completed during your drive, and
c a n b e i n t e r r u p t e d a t a n y t i m e . W h e n d r i v i n g
resumes, the reset is continued automati-
cally. The indicator lamp goes out after the
system reset is completed.
Message for low tire inflation pressure
The warning lamps come on in yellow
and red. An acoustic signal also sounds.
There is a flat tire or substantial loss of
tire pressure.
1.Reduce speed and stop the vehicle with cau-
tion. Avoid sudden braking and steering
maneuvers.
2.Check whether your vehicle is equipped
with normal tires or Run-Flat Tires.
The symbol identifying Run-Flat Tires
is a circle with the letters RSC on the
sidewall, refer to the Owner's Manual for Ve-
hicle.<
Normal tires
1.Determine which tire is damaged.
If this cannot be determined, contact
your MINI Dealer.<
2.Repair the flat tire or change the damaged
tire, refer to page119.
Run-Flat Tires*
1.Cautiously reduce speed to below 50 mph/
80 km/h. Avoid sudden braking and steering
maneuvers. Do not exceed a speed of
50 mph/80 km/h.
Do not continue driving if the vehicle is
not equipped with Run-Flat Tires, oth-
erwise a serious accident could result.<
2.In the event of complete tire pressure loss,
0 psi/0 kPa, you can estimate the possible distance for continued driving on the basis
of the following guidelines:
>With a light load:
1 to 2 persons without luggage:
approx. 155 miles/250 km
>With a medium load:
2 persons, cargo bay full, or 4 persons
without luggage:
approx. 90 miles/150 km
>With a full load:
4 persons, load compartment full:
approx. 30 miles/50 km
Drive cautiously and do not exceed a
speed of 50 mph/80 km/h, otherwise an
accident may occur. In the event of pressure
loss, vehicle handling changes. This includes
reduced tracking stability in braking, extended
braking distance and altered natural steering
characteristics. If unusual vibration or loud
noises occur during the journey, this may be an
indication that the damaged tire has finally
failed. Reduce the vehicle speed and stop as
soon as possible. Otherwise, sections of the
tire may come loose and cause accidents. Do
not continue driving and contact your MINI
Dealer.<
Malfunction
The small warning lamp flashes in yel-
low and then lights up continuously; the
larger warning lamp comes on in yel-
low.
On the onboard monitor, the tires are shown in
gray and a message appears. No punctures can
be detected.
This type of message is shown in the following
situations:
>If there is a malfunction
Have the system checked.
>If a wheel without TPM electronics has been
mounted
>If TPM is temporarily malfunctioning due to
other systems or devices using the same
radio frequency.
ProCarManuals.com
Page 65 of 160
REFERENCEAT A GLANCE CONTROLS DRIVING TIPS MOBILITY
63
Message for unsuccessful system reset
Both warning lamps come on in yellow.
The system is not reset after a tire has
been changed, for example.
Check the tire inflation pressure and
reset the system, refer to the Owner's Manual
for Vehicle.
Declaration according to NHTSA/
FMVSS 138 Tire Pressure Monitoring
Systems
Each tire, including the spare, should be
checked monthly when cold and inflated to the
inflation pressure recommended by the vehicle
manufacturer on the vehicle placard or tire infla-
tion pressure label. If your vehicle has tires of a
different size than the size indicated on the vehi-
cle placard or tire inflation pressure label, you
should determine the proper tire inflation pres-
sure for those tires. As an added safety feature,
your vehicle has been equipped with a tire pres-
sure monitoring system TPMS that illuminates a
low tire pressure telltale when one or more of
your tires are significantly under-inflated.
Accordingly, when the low tire pressure telltale
illuminates, you should stop and check your tires
as soon as possible, and inflate them to the
proper pressure. Driving on a significantly
under-inflated tire causes the tire to overheat
and can lead to tire failure. Underinflation also
reduces fuel efficiency and tire tread life, and
may affect the vehicle's handling and stopping
ability. Please note that the TPMS is not a substi-
tute for proper tire maintenance, and it is the
driver's responsibility to maintain correct tire
pressure, even if underinflation has not reached
the level at which the TPMS low tire pressure tell-
tale illuminates.The TPMS malfunction indicator is combined
with the low tire pressure telltale. When the sys-
tem detects a malfunction, the telltale will flash
for approximately one minute and then remain
continuously lit. This sequence will continue
upon subsequent vehicle startups as long as the
malfunction exists. When the malfunction indi-
cator is illuminated, the system may not be able
to detect or signal low tire pressure as intended.
TPMS malfunctions may occur for a variety of
reasons, including the installation of replace-
ment or alternate tires or wheels on the vehicle
that prevent the TPMS from functioning prop-
erly. Always check the TPMS malfunction telltale
after replacing one or more tires or wheels on
your vehicle to ensure that the replacement or
alternate tires and wheels allow the TPMS to
continue to function properly.
ProCarManuals.com
Page 72 of 160

Lamps
70
Fog lamps*
1Fog lamps*
2Rear fog lamp*
Press the respective switch to turn the lamps on/off.
Fog lamps*
The parking lamps or low beams must be
switched on for the fog lamps to operate. The
green indicator lamp comes on when the fog
lamps are switched on.
Depending on your vehicle's equipment, the fog
lamps are switched off when you activate the
headlamp flasher or switch on the high beams.
If the automatic headlamp control is acti-
vated, the low beams will come on auto-
matically when you switch on the fog lamps.<
Rear fog lamp*
The low beams or parking lamps with fog lamps
must be switched on. The yellow indicator lamp
comes on when the rear fog lamp is switched on.
Instrument lighting
You can adjust the brightness of the instrument
lighting only when the parking lamps or the low
beams are on.
Increasing brightness
Press and hold the button until the desired
brightness is reached.
Reducing brightness
Press the button briefly.
The brightness decreases every time the button
is pressed briefly.
Interior lamps
The interior lamps, the footwell lamps* and the
cargo bay lamp are controlled automatically.
To avoid draining the battery, all lamps
inside the car are switched off about
8 minutes after the ignition is switched off, refer
to Start/stop button on page37.<
Switching interior lamps on/off manually
To switch the interior lamps on/off.
Press the switch.
To switch off the interior lamps permanently,
press the button for about 3 seconds.
Reading lamps*
To switch the reading lamps on and off.
Press the switch.
ProCarManuals.com
Page 91 of 160

REFERENCEAT A GLANCE CONTROLS DRIVING TIPS MOBILITY
89
Remove unnecessary cargo
Additional weight increases fuel consumption.
Remove attached parts no longer in use
Remove auxiliary mirrors, roof- or rear-mounted
luggage racks whenever you are not using
them.
Attached parts on the vehicle affect its aerody-
namics and increase fuel consumption.
Check tire inflation pressure regularly
Check and, if necessary, correct tire inflation
pressure at least twice a month and before start-
ing on a long trip.
Low inflation pressure increases rolling resis-
tance and thus leads to greater fuel consump-
tion and tire wear.
Drive off immediately
Do not wait for the engine to warm up while the
vehicle remains stationary. Start driving right
away, but at moderate engine speeds. This is the
fastest way for the cold engine to reach its oper-
ating temperature.
Think ahead while driving
Avoid unnecessary acceleration and braking by
maintaining a suitable distance to the vehicle
driving ahead.
Driving smoothly and anticipating impending
traffic situations reduces fuel consumption.
Avoid high engine speeds
Use first gear only for driving off. In second and
higher gears, accelerate smoothly to a suitable
engine and road speed. In doing so, avoid high
engine speeds and shift up early.
When you reach your desired traveling speed,
shift to the highest suitable gear and drive at
constant speed.
As a rule: driving at low engine speeds lowers
fuel consumption and reduces wear.
Coasting
When approaching a red traffic light, take your
foot off the accelerator and let the vehicle coast
to a halt in the highest suitable gear.
On a downhill gradient, take your foot off the
accelerator and let the vehicle coast in a suitable
gear.
Fuel supply is shut off automatically when the
vehicle is coasting.
Switch off the engine during lengthy
stops
Switch off the engine when stopping for lengthy
periods, e.g. at traffic lights, railroad crossings or
in traffic congestions.
Have the vehicle serviced
Have your vehicle serviced regularly to achieve
good economy and a long vehicle life. The man-
ufacturer of your MINI recommends having the
vehicle serviced by a MINI Dealer. Also note the
MINI Maintenance System, page107.
ProCarManuals.com