tailgate MINI COOPER 2009 Owners Manual
[x] Cancel search | Manufacturer: MINI, Model Year: 2009, Model line: COOPER, Model: MINI COOPER 2009Pages: 160, PDF Size: 2.84 MB
Page 21 of 160
REFERENCEAT A GLANCE CONTROLS DRIVING TIPS MOBILITY
19
>Settings for the displays on the onboard
monitor, in the speedometer and in the
tachometer.
>12h/24h mode of the clock, refer to For-
mats and units of measure50
>Date format, refer to Formats and units
of measure50
>Units of measure for fuel consumption,
distance covered/remaining distances
and temperature, refer to Formats and
units of measure50
>Light settings:
>Pathway lighting67
>Daytime running lamps68
>Automatic climate control
*: AUTO program,
activating/deactivating cooling function and
automatic recirculated-air control, setting
temperature, air flow rate and
distribution74
>Entertainment:
>Audio volume, refer to separate Owner's
Manual
>Speed-dependent volume, refer to sepa-
rate Owner's Manual
Central locking system
The concept
The central locking system is ready for operation
whenever the driver's door is closed.
The system simultaneously engages and
releases the locks on the following:
>Doors
>Tailgate
>Fuel filler door
Operating from outside
>Via the remote control
>Via the door lock
*
>In cars with convenient access*, via the door
handles on the driver's and passenger's
sidesThe anti-theft system is also operated at the
same time. It prevents the doors from being
unlocked using the lock buttons or door han-
dles. The remote control can also be used to
switch on/off the welcome lamps and interior
lamps. The alarm system
* is also activated or
deactivated (page24).
Operating from inside
Button for central locking system, page22.
In the event of a sufficiently severe accident, the
central locking system unlocks automatically. In
addition, the hazard warning flashers and inte-
rior lamps come on.
Opening and closing:
from outside
Persons or animals in a parked vehicle
could lock the doors from the inside. Take
the key with you when you leave the vehicle so
that the vehicle can be opened from the out-
side.<
Using the remote control
Unlocking
Press the button.
The welcome lamps and interior lamps come on.
Unlocking mode
You can also set which parts of the car are
unlocked. The setting is stored for the remote
control in use.
ProCarManuals.com
Page 23 of 160

REFERENCEAT A GLANCE CONTROLS DRIVING TIPS MOBILITY
21
4.Briefly press the button repeatedly until the
symbol and "SET" are displayed.
5.Press and hold the button until the display
changes.
6.Briefly press the button to select, arrow:
> Confirmation signal during unlocking
> Confirmation signal during locking
7.Press and hold the button until the display
changes.
8.Briefly press the button to select:
>
The hazard warning flashers light up
during unlocking/locking.
>
An acoustic signal sounds during
unlocking/locking.
>
The hazard warning flashers light up and
an acoustic signal
* sounds during
unlocking/locking.
>
The function is deactivated.
9.Press and hold the button until the display
changes. The setting is stored.
Switching on interior lamps
While the car is locked:
Press the button.
You can also use this function to locate your
vehicle in parking garages, etc.
Unlocking the tailgate
Press the button.
When it is opened, the tailgate swings
upward and outward to the rear. Ensure
that there is sufficient clearance.
To prevent accidentally locking yourself out, do
not place the key down in the cargo bay. If the
tailgate was locked before opening, it will be
locked again after it is closed.
Before and after each trip, check that the tail-
gate has not been inadvertently unlocked.<
Malfunctions
The remote control may malfunction due to
local radio waves. If this occurs, unlock and lock
the car at the door lock with the integrated key.
If the car can no longer be locked with a remote
control, the battery in the remote control is dis-
charged. Use this remote control during an
extended drive; this will recharge the battery,
page18.
For US owners only
The transmitter and receiver units comply with
part 15 of the FCC/Federal Communications
Commission regulations. Operation is governed
by the following:
FCC ID:
LX8766S
LX8766E
LX8CAS
Compliance statement:
This device complies with part 15 of the FCC
Rules. Operation is subject to the following two
conditions:
>This device must not cause harmful interfer-
ence, and
>This device must accept any interference
received, including interference that may
cause undesired operation.
ProCarManuals.com
Page 25 of 160

REFERENCEAT A GLANCE CONTROLS DRIVING TIPS MOBILITY
23
Automatic locking
You can also set the situations in which the car
locks. The setting is stored for the remote con-
trol in use.
1.Switch on the ignition, refer to page37.
2.Briefly press the button in the turn indicator
lever repeatedly until "SET/INFO" is dis-
played.
3.Press and hold the button until the display
changes.
4.Briefly press the button repeatedly until the
symbol and "SET" are displayed.
5.Press and hold the button until the display
changes.
6.Briefly press the button repeatedly until the
display shows the illustrated symbol, arrow.7.Press and hold the button until the display
changes.
8.Briefly press the button to select:
>
The central locking system automatically
locks the vehicle after some time if no
door has been opened.
>
The central locking system automatically
locks the vehicle as soon as you drive off.
>
The central locking system automatically
locks the vehicle after some time if no
door has been opened, or as soon as you
drive off.
>
The central locking system remains
unlocked.
9.Press and hold the button until the display
changes. The setting is stored.
Tailgate
To avoid damage, make sure there is suf-
ficient clearance before opening the tail-
gate.<
Opening
In some national-market versions, the tail-
gate cannot be unlocked using the remote
control unless the vehicle is unlocked first.<
Press the button in the handle, arrow, or the
button of the remote control, for an
extended period. The tailgate is unlocked and
can be opened.
ProCarManuals.com
Page 26 of 160
Opening and closing
24
Closing
Make sure that the closing path of the tail-
gate is clear, otherwise injuries may
occur.<
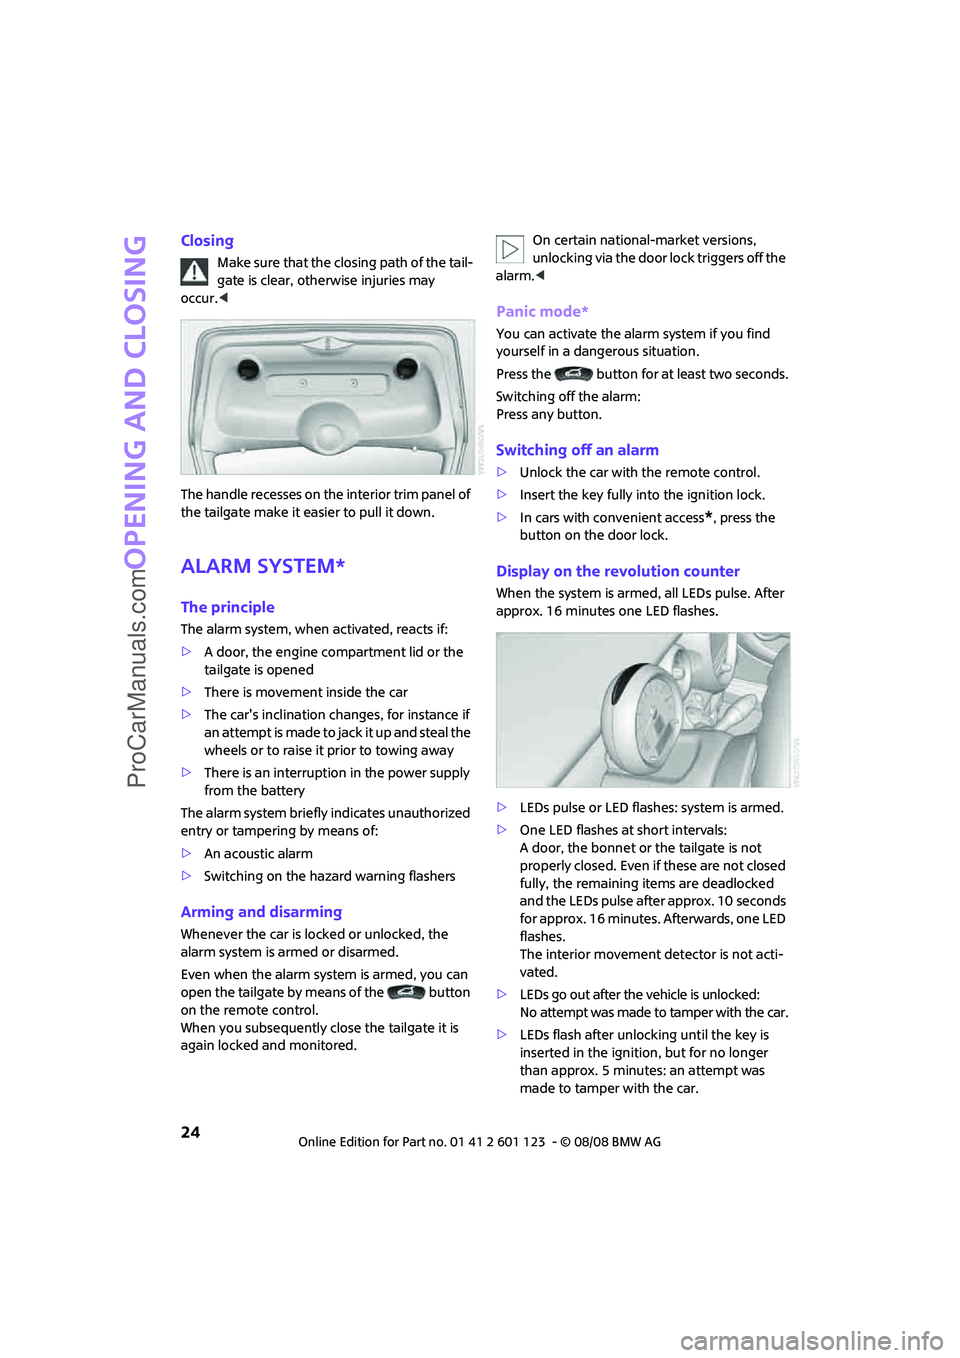
The handle recesses on the interior trim panel of
the tailgate make it easier to pull it down.
Alarm system*
The principle
The alarm system, when activated, reacts if:
>A door, the engine compartment lid or the
tailgate is opened
>There is movement inside the car
>The car's inclination changes, for instance if
an attempt is made to jack it up and steal the
wheels or to raise it prior to towing away
>There is an interruption in the power supply
from the battery
The alarm system briefly indicates unauthorized
entry or tampering by means of:
>An acoustic alarm
>Switching on the hazard warning flashers
Arming and disarming
Whenever the car is locked or unlocked, the
alarm system is armed or disarmed.
Even when the alarm system is armed, you can
open the tailgate by means of the button
on the remote control.
When you subsequently close the tailgate it is
again locked and monitored.On certain national-market versions,
unlocking via the door lock triggers off the
alarm.<
Panic mode*
You can activate the alarm system if you find
yourself in a dangerous situation.
Press the button for at least two seconds.
Switching off the alarm:
Press any button.
Switching off an alarm
>Unlock the car with the remote control.
>Insert the key fully into the ignition lock.
>In cars with convenient access
*, press the
button on the door lock.
Display on the revolution counter
When the system is armed, all LEDs pulse. After
approx. 16 minutes one LED flashes.
>LEDs pulse or LED flashes: system is armed.
>One LED flashes at short intervals:
A door, the bonnet or the tailgate is not
properly closed. Even if these are not closed
fully, the remaining items are deadlocked
and the LEDs pulse after approx. 10 seconds
for approx. 16 minutes. Afterwards, one LED
flashes.
The interior movement detector is not acti-
vated.
>LEDs go out after the vehicle is unlocked:
No attempt was made to tamper with the car.
>LEDs flash after unlocking until the key is
inserted in the ignition, but for no longer
than approx. 5 minutes: an attempt was
made to tamper with the car.
ProCarManuals.com
Page 27 of 160
REFERENCEAT A GLANCE CONTROLS DRIVING TIPS MOBILITY
25
Tilt alarm sensor
The vehicle's inclination is monitored. The alarm
is triggered, for instance, if an attempt is made
to steal the car's wheels or tow it away.
Interior movement detector
Before the interior movement detector can
operate correctly, the windows and glass roof
must be closed.
Avoiding false alarms
The tilt alarm sensor and the interior movement
detector can be switched off together.
This prevents false alarms, e.g. in the following
situations:
>In duplex garages
>When being transported on car-carrying
trains, ferries or trailers
>If pets are to remain inside the car
Switching off the tilt alarm sensor and
interior movement detector
>Press the button on the remote con-
trol twice in succession.
>Lock the vehicle twice with the integrated
key.
LEDs flash in short succession for approx. 2 sec-
onds.
The tilt alarm sensor and the interior movement
detector are switched off until the car is next
unlocked and locked.
Convenient access*
Convenient access enables you to enter your
vehicle without having to hold the remote con-
trol in your hand. All you need to do is wear the
remote control close to your body, e.g. in your
jacket pocket. The vehicle automatically detects
the remote control within the immediate vicinity
or in the passenger compartment.
Convenient access supports the following func-
tions:
>Unlocking/locking the vehicle
>Unlocking the tailgate by itself
>Enginestarting
>Convenient operation
Functional requirements
>The vehicle or the tailgate can only be
locked when the vehicle detects that the
remote control currently in use is outside of
the vehicle.
>The vehicle cannot be locked or unlocked
again until after approx. 2 seconds.
>The engine can only be started when the
vehicle detects that the remote control is
inside the vehicle.
>The doors and tailgate must be closed to be
able to operate the windows and glass sun-
roof.
Comparison to standard remote controls
In general, there is no difference between using
convenient access or pressing the buttons on
the remote control to carry out the functions
mentioned above.
Instructions on opening and closing are found
starting on page18.
Special features regarding the use of convenient
access are described below.
If you notice a brief delay while opening or
closing the windows or glass sunroof, the
system is checking whether a remote control is
inside the vehicle. Repeat the opening or closing
procedure, if necessary.<
ProCarManuals.com
Page 28 of 160
Opening and closing
26
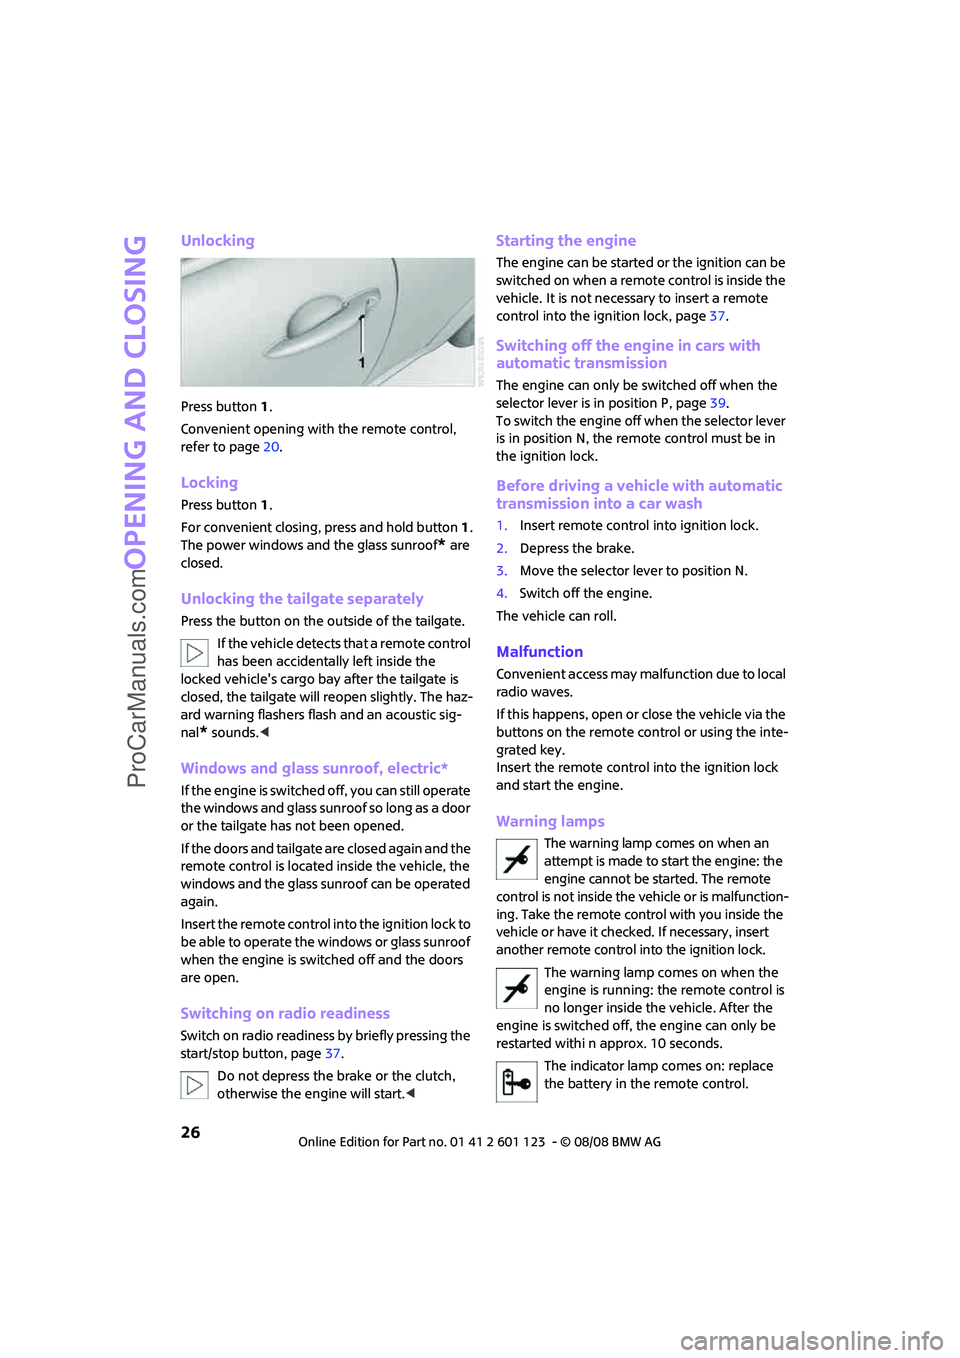
Unlocking
Press button 1.
Convenient opening with the remote control,
refer to page20.
Locking
Press button 1.
For convenient closing, press and hold button 1.
The power windows and the glass sunroof
* are
closed.
Unlocking the tailgate separately
Press the button on the outside of the tailgate.
If the vehicle detects that a remote control
has been accidentally left inside the
locked vehicle's cargo bay after the tailgate is
closed, the tailgate will reopen slightly. The haz-
ard warning flashers flash and an acoustic sig-
nal
* sounds.<
Windows and glass sunroof, electric*
If the engine is switched off, you can still operate
the windows and glass sunroof so long as a door
or the tailgate has not been opened.
If the doors and tailgate are closed again and the
remote control is located inside the vehicle, the
windows and the glass sunroof can be operated
again.
Insert the remote control into the ignition lock to
be able to operate the windows or glass sunroof
when the engine is switched off and the doors
are open.
Switching on radio readiness
Switch on radio readiness by briefly pressing the
start/stop button, page37.
Do not depress the brake or the clutch,
otherwise the engine will start.<
Starting the engine
The engine can be started or the ignition can be
switched on when a remote control is inside the
vehicle. It is not necessary to insert a remote
control into the ignition lock, page37.
Switching off the engine in cars with
automatic transmission
The engine can only be switched off when the
selector lever is in position P, page39.
To switch the engine off when the selector lever
is in position N, the remote control must be in
the ignition lock.
Before driving a vehicle with automatic
transmission into a car wash
1.Insert remote control into ignition lock.
2.Depress the brake.
3.Move the selector lever to position N.
4.Switch off the engine.
The vehicle can roll.
Malfunction
Convenient access may malfunction due to local
radio waves.
If this happens, open or close the vehicle via the
buttons on the remote control or using the inte-
grated key.
Insert the remote control into the ignition lock
and start the engine.
Warning lamps
The warning lamp comes on when an
attempt is made to start the engine: the
engine cannot be started. The remote
control is not inside the vehicle or is malfunction-
ing. Take the remote control with you inside the
vehicle or have it checked. If necessary, insert
another remote control into the ignition lock.
The warning lamp comes on when the
engine is running: the remote control is
no longer inside the vehicle. After the
engine is switched off, the engine can only be
restarted withi n approx. 10 seconds.
The indicator lamp comes on: replace
the battery in the remote control.
ProCarManuals.com
Page 86 of 160

Things to remember when driving
84
Things to remember when driving
Break-in period
Moving parts need breaking-in time to adjust to
each other. Please follow the instructions below
in order to achieve the optimal service life and
economy of operation for your vehicle.
Engine and differential
Always obey all official speed limits.
Up to 1,200 miles/2,000 km
Drive at varying engine and road speeds, but do
not exceed the following:
>Gasoline engine
4,500 rpm or 100 mph/160 km/h
Avoid full-throttle operation and use of the
transmission's kick-down mode.
After driving 1,200 miles/2,000 km
Engine and vehicle speeds can be gradually
increased.
Tires
Due to technical factors associated with their
manufacture, tires do not achieve their full trac-
tion potential until after an initial break-in
period. Therefore, drive cautiously during the
first 200 miles/300 km.
Brake system
Brakes require an initial break-in period of
approx. 300 miles/500 km to achieve optimized
contact and wear patterns between brake pads
and rotors. Drive cautiously during this break-in
period.
Clutch
The function of the clutch reaches its optimal
level only after a distance driven of approx.
300 miles/500 km. During this break-in period,
engage the clutch gently.
Following part replacement
The same break-in procedures should be
observed if any of the components mentioned
above have to be renewed in the course of the
vehicle's operating life.
General driving notes
Close the tailgate
Drive the vehicle only when the tailgate is
closed. Otherwise, exhaust fumes could
penetrate the interior of the vehicle.<
If special circumstances make it absolutely nec-
essary to drive with the tailgate open:
1.Close all windows and the glass sunroof.
2.Switch off the recirculated-air mode and sig-
nificantly increase the air flow rate of the air
conditioner or automatic climate control,
page73 or75.
Hot exhaust system
In all vehicles, extremely high tempera-
tures are generated in the exhaust system.
Do not remove the heat shields installed adjacent
to various sections of the exhaust system, and
never apply undercoating to them. When driving,
standing at idle and while parking, take care to
avoid possible contact between the hot exhaust
system and any highly flammable materials such
as hay, leaves, grass, etc. Such contact could lead
to a fire, with the risk of serious personal injuries
and property damage. Do not touch hot exhaust
tail pipes. Otherwise there is a risk of burns.<
Hydroplaning
When driving on wet or slushy roads,
reduce road speed. If you do not, a wedge
of water can form between tires and road sur-
face. This situation, known as hydroplaning, can
cause partial or complete loss of tire contact
with the road surface, so that the car cannot be
steered or braked properly.<
ProCarManuals.com
Page 88 of 160
Things to remember when driving
86
With convenient access and automatic
transmission
Insert the key into the ignition lock.
The engine can be switched off when the selec-
tor lever is in position N. Refer also to page26.
Cargo loading
To avoid loading the tires beyond their
approved carrying capacity, never over-
load the vehicle. Overloading can lead to over-
heating and increases the rate at which damage
develops inside the tires. The ultimate result can
assume the form of a sudden blow-out.<
Avoid fluid spills in the cargo bay as they
could damage the vehicle.<
Cargo bay cover
Do not place any objects on the cover,
otherwise they could endanger the car's
occupants, e.g. in the case of braking or sudden
swerving.<
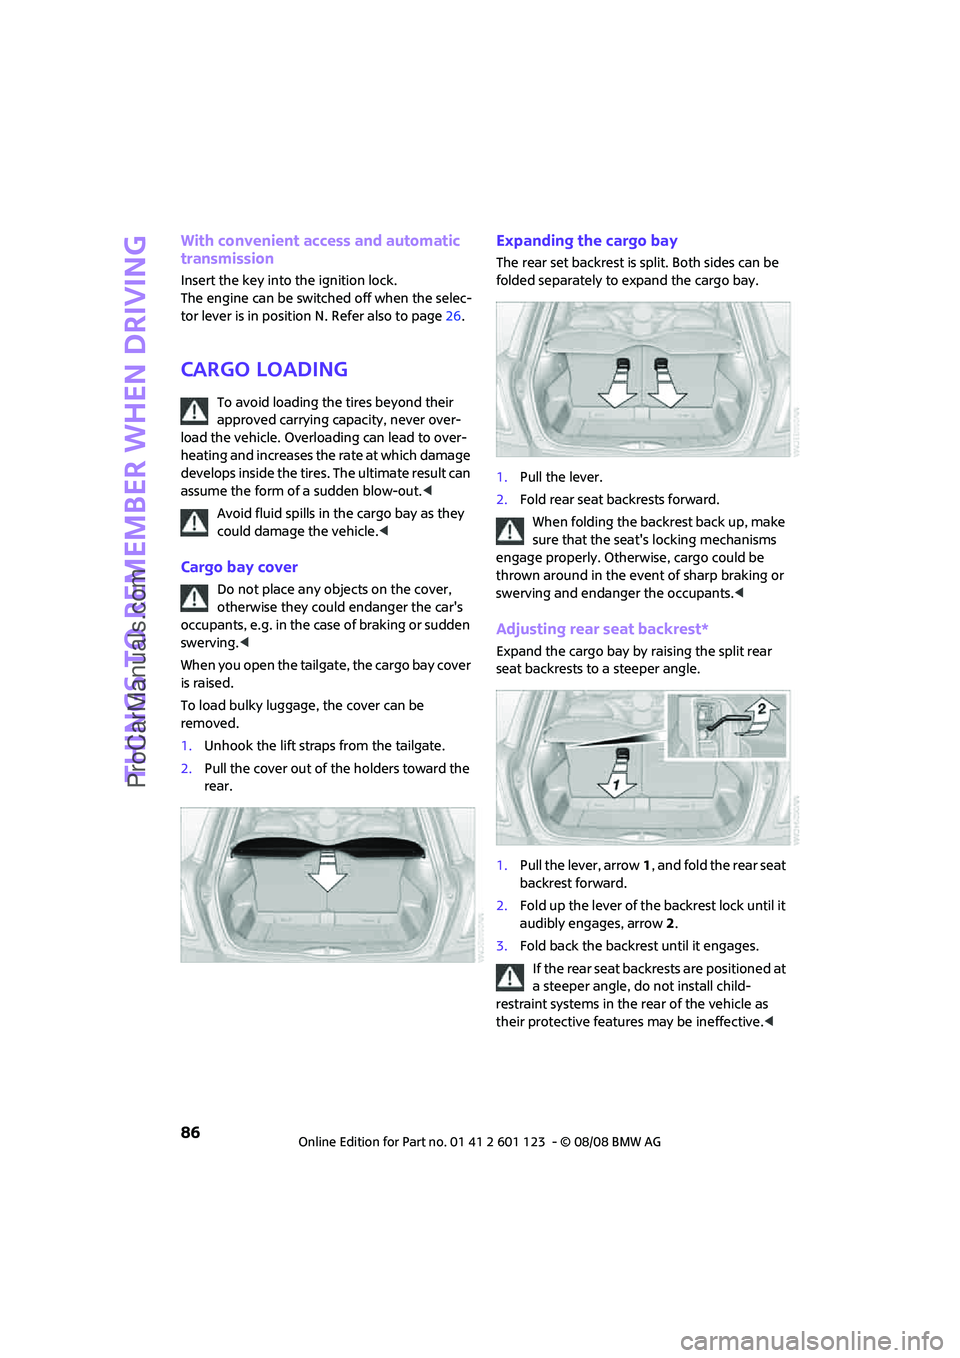
When you open the tailgate, the cargo bay cover
is raised.
To load bulky luggage, the cover can be
removed.
1.Unhook the lift straps from the tailgate.
2.Pull the cover out of the holders toward the
rear.
Expanding the cargo bay
The rear set backrest is split. Both sides can be
folded separately to expand the cargo bay.
1.Pull the lever.
2.Fold rear seat backrests forward.
When folding the backrest back up, make
sure that the seat's locking mechanisms
engage properly. Otherwise, cargo could be
thrown around in the event of sharp braking or
swerving and endanger the occupants.<
Adjusting rear seat backrest*
Expand the cargo bay by raising the split rear
seat backrests to a steeper angle.
1.Pull the lever, arrow1, and fold the rear seat
backrest forward.
2.Fold up the lever of the backrest lock until it
audibly engages, arrow2.
3.Fold back the backrest until it engages.
If the rear seat backrests are positioned at
a steeper angle, do not install child-
restraint systems in the rear of the vehicle as
their protective features may be ineffective.<
ProCarManuals.com
Page 90 of 160
Things to remember when driving
88
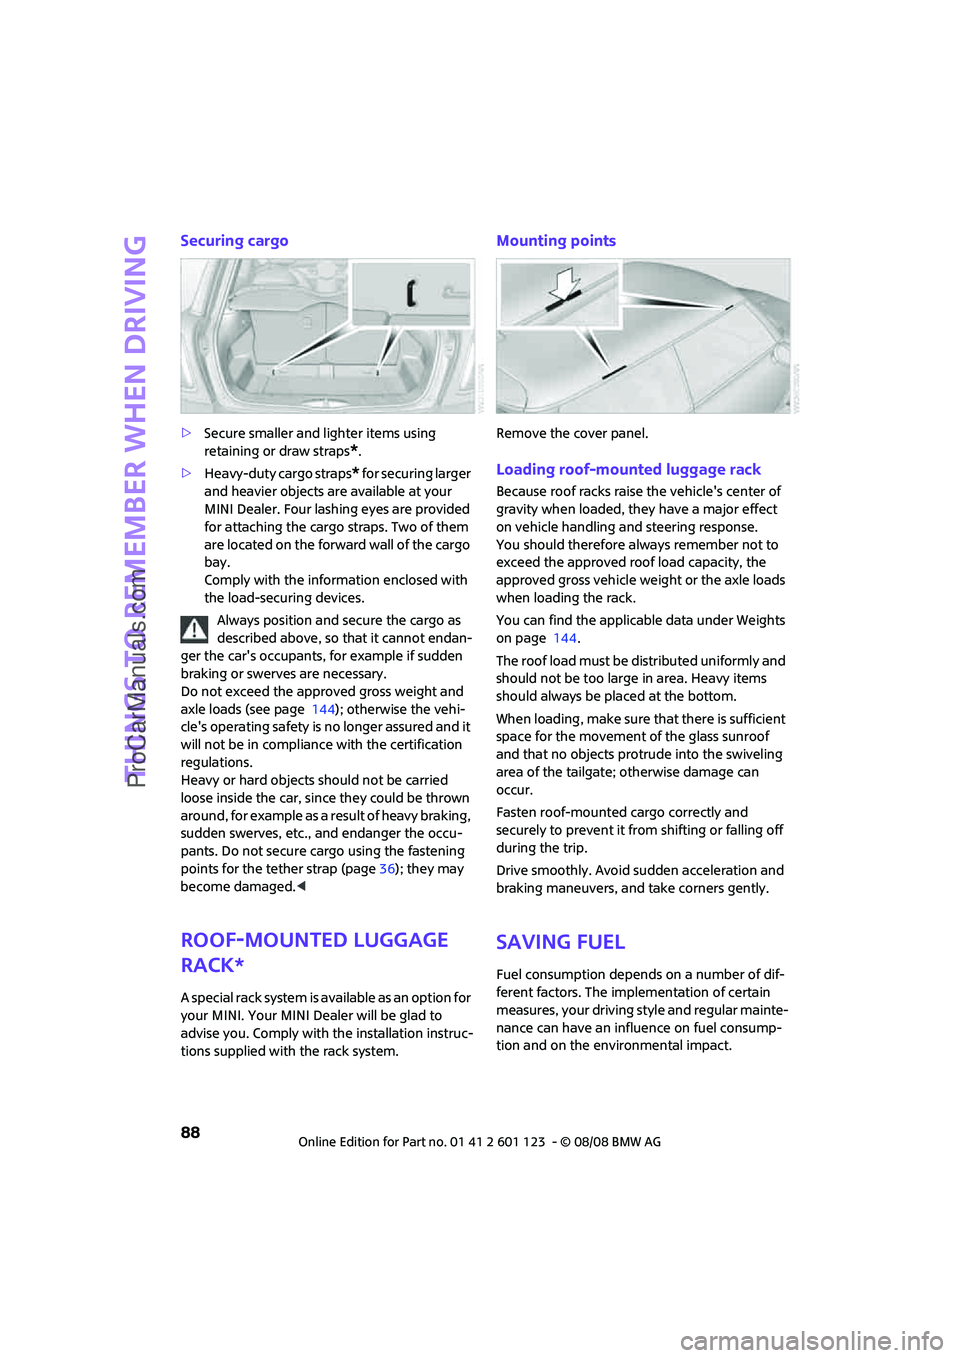
Securing cargo
>Secure smaller and lighter items using
retaining or draw straps
*.
>Heavy-duty cargo straps
* for securing larger
and heavier objects are available at your
MINI Dealer. Four lashing eyes are provided
for attaching the cargo straps. Two of them
are located on the forward wall of the cargo
bay.
Comply with the information enclosed with
the load-securing devices.
Always position and secure the cargo as
described above, so that it cannot endan-
ger the car's occupants, for example if sudden
braking or swerves are necessary.
Do not exceed the approved gross weight and
axle loads (see page 144); otherwise the vehi-
cle's operating safety is no longer assured and it
will not be in compliance with the certification
regulations.
Heavy or hard objects should not be carried
loose inside the car, since they could be thrown
around, for example as a result of heavy braking,
sudden swerves, etc., and endanger the occu-
pants. Do not secure cargo using the fastening
points for the tether strap (page36); they may
become damaged.<
Roof-mounted luggage
rack*
A special rack system is available as an option for
your MINI. Your MINI Dealer will be glad to
advise you. Comply with the installation instruc-
tions supplied with the rack system.
Mounting points
Remove the cover panel.
Loading roof-mounted luggage rack
Because roof racks raise the vehicle's center of
gravity when loaded, they have a major effect
on vehicle handling and steering response.
You should therefore always remember not to
exceed the approved roof load capacity, the
approved gross vehicle weight or the axle loads
when loading the rack.
You can find the applicable data under Weights
on page 144.
The roof load must be distributed uniformly and
should not be too large in area. Heavy items
should always be placed at the bottom.
When loading, make sure that there is sufficient
space for the movement of the glass sunroof
and that no objects protrude into the swiveling
area of the tailgate; otherwise damage can
occur.
Fasten roof-mounted cargo correctly and
securely to prevent it from shifting or falling off
during the trip.
Drive smoothly. Avoid sudden acceleration and
braking maneuvers, and take corners gently.
Saving fuel
Fuel consumption depends on a number of dif-
ferent factors. The implementation of certain
measures, your driving style and regular mainte-
nance can have an influence on fuel consump-
tion and on the environmental impact.
ProCarManuals.com
Page 125 of 160
REFERENCEAT A GLANCE CONTROLS DRIVING TIPS MOBILITY
123
Giving and receiving assistance
Roadside Assistance
The Roadside Assistance service is there to assist
you around the clock in the event of a breakdown,
including on weekends and public holidays.
The phone numbers of the Roadside Assistance
in your home country can be found in the Con-
tact brochure.
First aid pouch*
Some of the articles contained in the first aid
pouch have a limited service life. Therefore,
check the expiration dates of the contents regu-
larly and replace any items in good time, if nec-
essary.
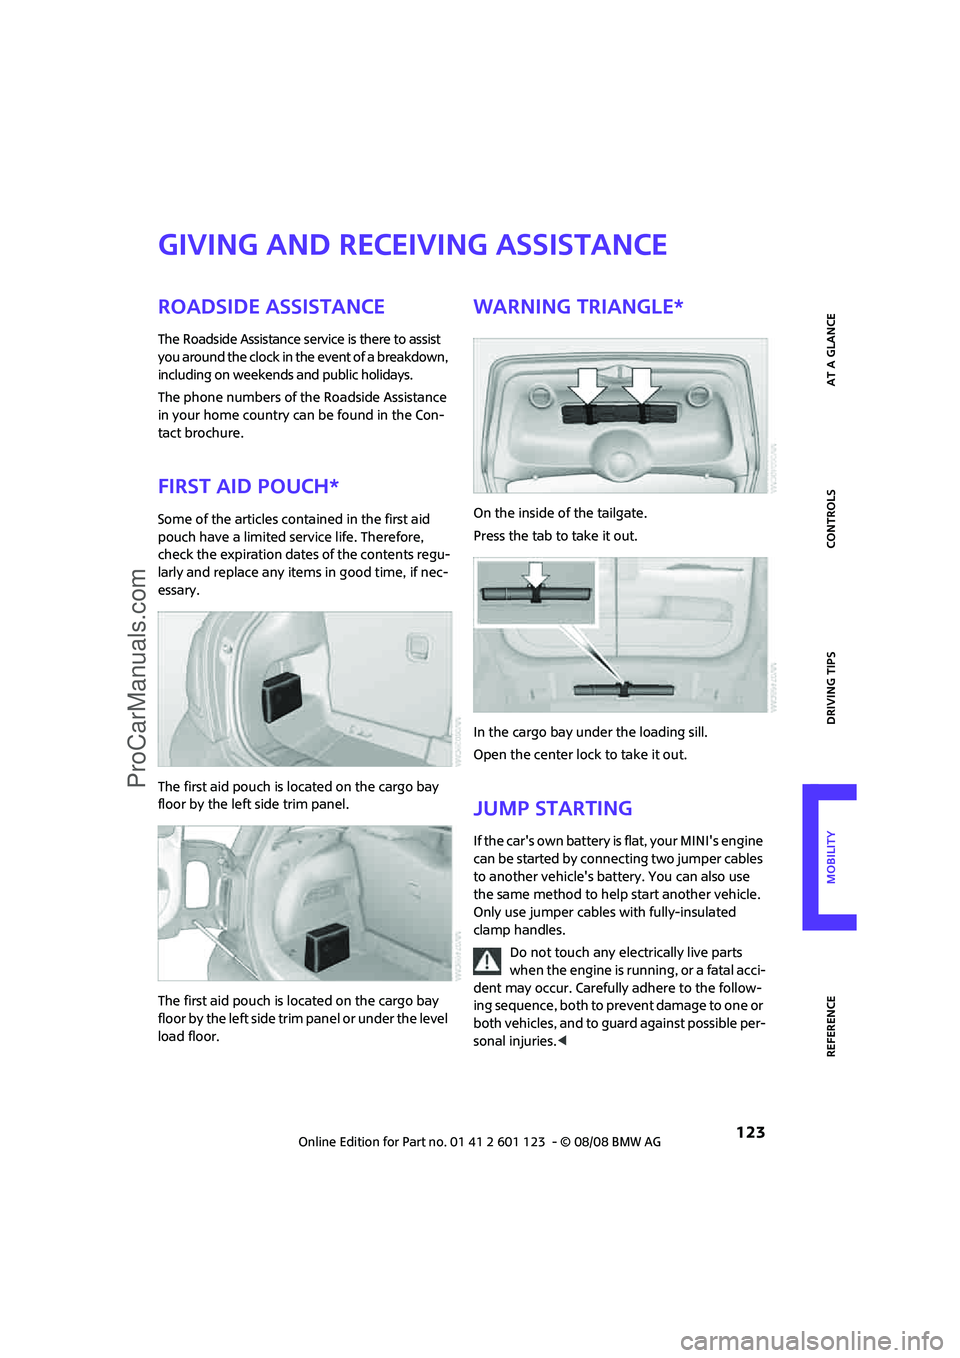
The first aid pouch is located on the cargo bay
floor by the left side trim panel.
The first aid pouch is located on the cargo bay
f l o o r b y t h e l e f t s i d e t r i m p a n e l o r u n d e r t h e l e v e l
load floor.
Warning triangle*
On the inside of the tailgate.
Press the tab to take it out.
In the cargo bay under the loading sill.
Open the center lock to take it out.
Jump starting
If the car's own battery is flat, your MINI's engine
can be started by connecting two jumper cables
to another vehicle's battery. You can also use
the same method to help start another vehicle.
Only use jumper cables with fully-insulated
clamp handles.
Do not touch any electrically live parts
when the engine is running, or a fatal acci-
dent may occur. Carefully adhere to the follow-
ing sequence, both to prevent damage to one or
both vehicles, and to guard against possible per-
sonal injuries.<
ProCarManuals.com