CD player MINI COOPER 2011 Owners Manual
[x] Cancel search | Manufacturer: MINI, Model Year: 2011, Model line: COOPER, Model: MINI COOPER 2011Pages: 210, PDF Size: 3.19 MB
Page 18 of 210
AT A GLANCERadio MINI Boost CD
16
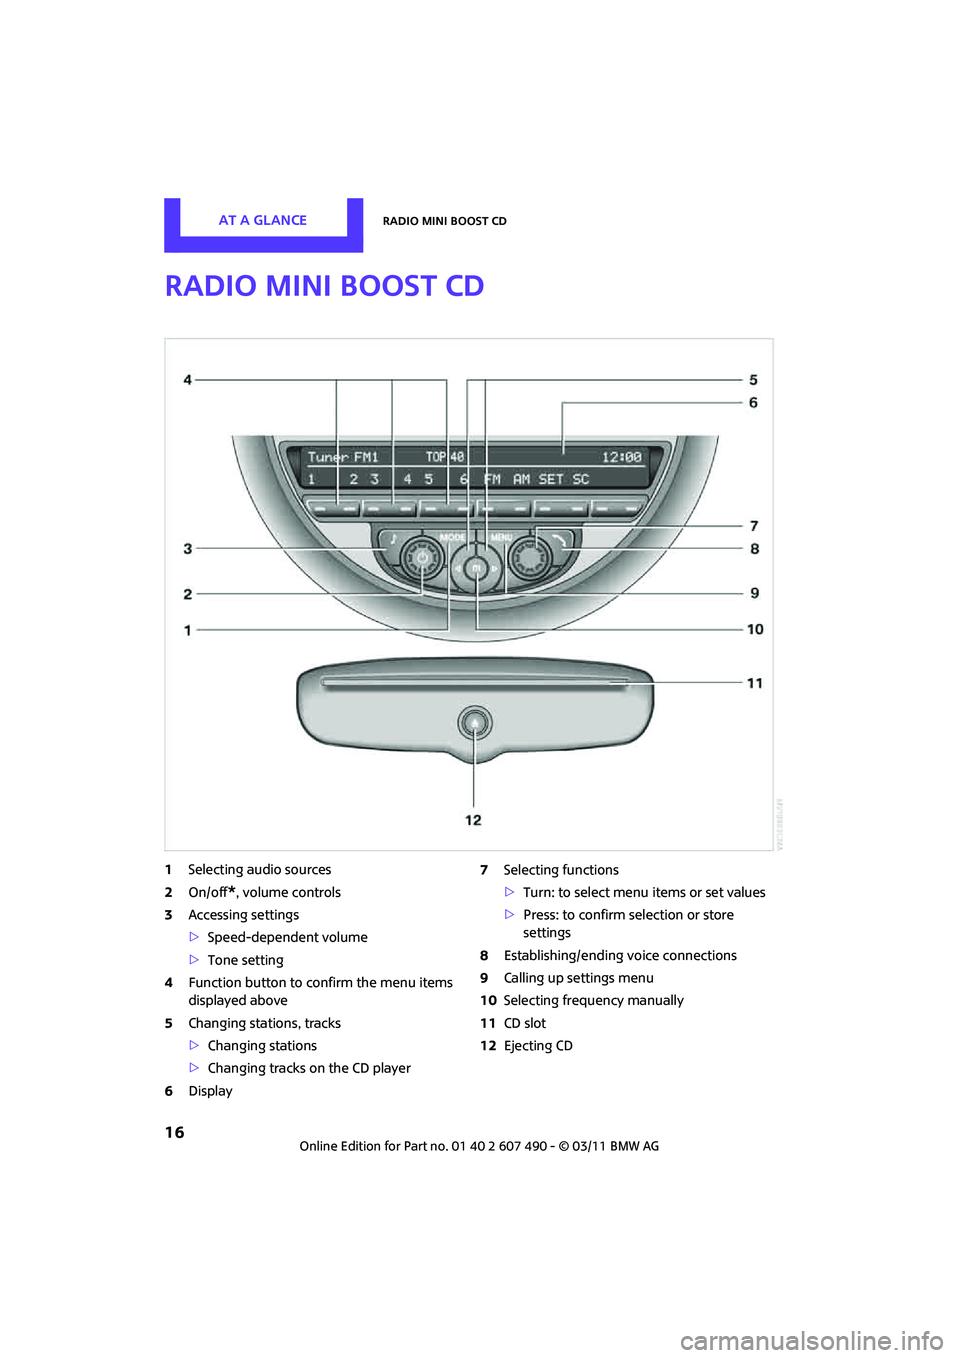
Radio MINI Boost CD
1Selecting audio sources
2 On/off
*, volume controls
3 Accessing settings
>Speed-dependent volume
> Tone setting
4 Function button to confirm the menu items
displayed above
5 Changing stations, tracks
>Changing stations
> Changing tracks on the CD player
6 Display 7
Selecting functions
>Turn: to select menu items or set values
> Press: to confirm selection or store
settings
8 Establishing/ending voice connections
9 Calling up settings menu
10 Selecting frequency manually
11 CD slot
12 Ejecting CD
Page 19 of 210
Radio MINI Boost CDAT A GLANCE
17
Menu navigation
Radio and telephone functions* can be called
up by using the buttons on the radio and menus.
Calling up the settings menu
Press the MENUbutton for:
> Settings
> MINI phone numbers
> Telephone
*
Calling up the audio menu
Press the MODEbutton for:
> Radio
> HD Radio
*
>Satellite radio*
>CD player
> External audio device , for example, an
MP3 player
> USB audio interface
*
Selecting a menu item
Menu items can be selected by using the knob
on the right or by using the function buttons.
Using the knob on the right
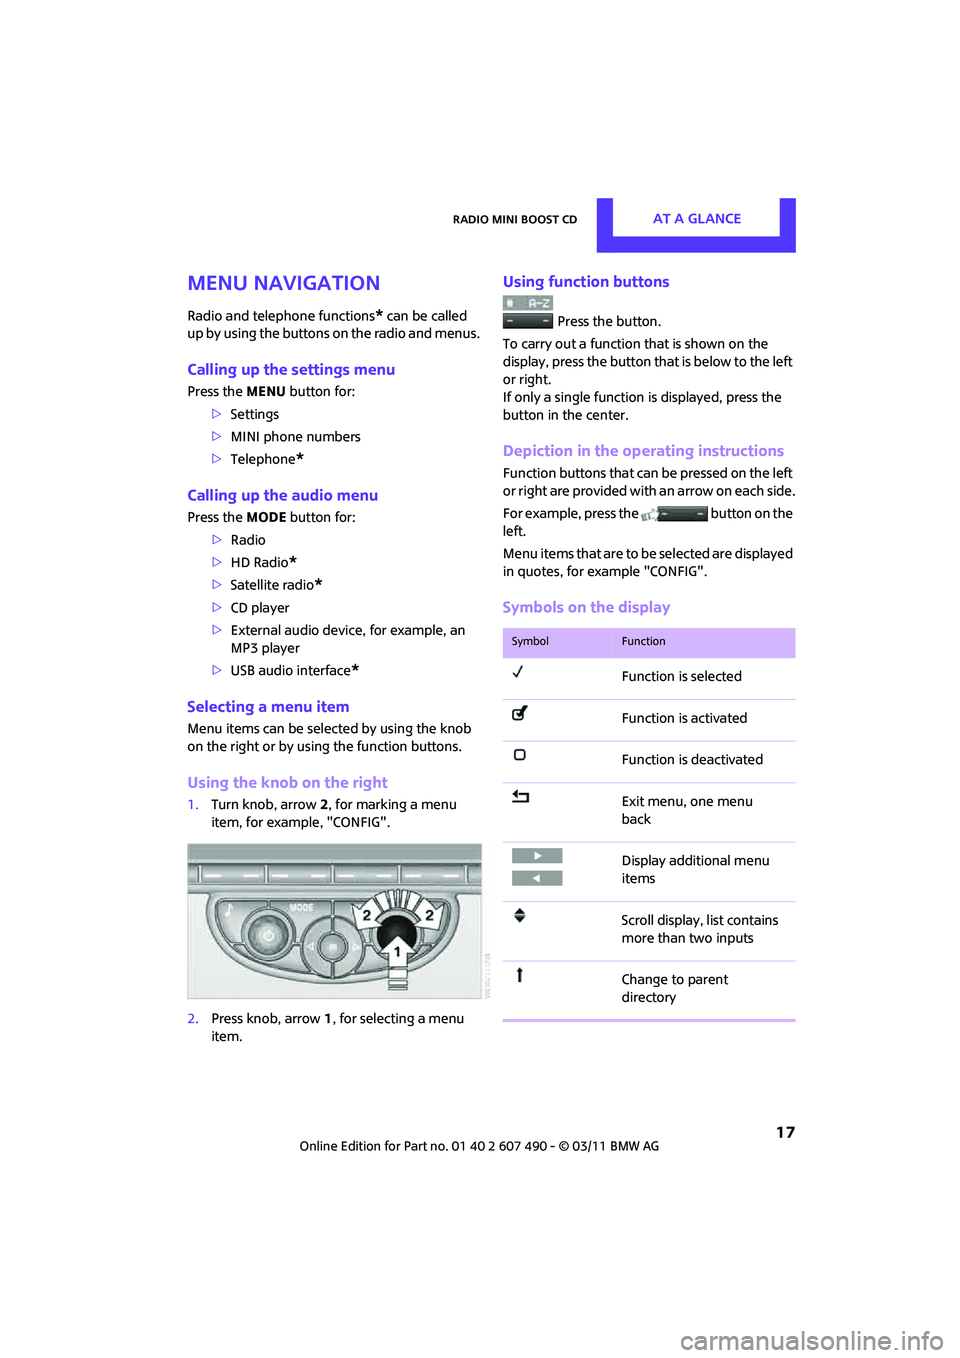
1. Turn knob, arrow 2, for marking a menu
item, for example, "CONFIG".
2. Press knob, arrow 1, for selecting a menu
item.
Using function buttons
Press the button.
To carry out a function that is shown on the
display, press the button that is below to the left
or right.
If only a single function is displayed, press the
button in the center.
Depiction in the operating instructions
Function buttons that can be pressed on the left
or right are provided with an arrow on each side.
For example, press the button on the
left.
Menu items that are to be selected are displayed
in quotes, for example "CONFIG".
Symbols on the display
SymbolFunction
Function is selected
Function is activated
Function is deactivated
Exit menu, one menu
back
Display additional menu
items
Scroll display, list contains
more than two inputs
Change to parent
directory
Page 93 of 210
Practical interior accessoriesCONTROLS
91
If the LED2 does not flash rapidly after
approx. 60 seconds, alter the distance and
repeat this step.
Canada: if the LED is not flashing rapidly
after 60 seconds, change the distance and
repeat the step or, if the programming was
interrupted by the hand-held transmitter,
press and hold the memory button and
press the button on the hand-held transmit-
ter for 2 seconds and release several times.
Glove compartment
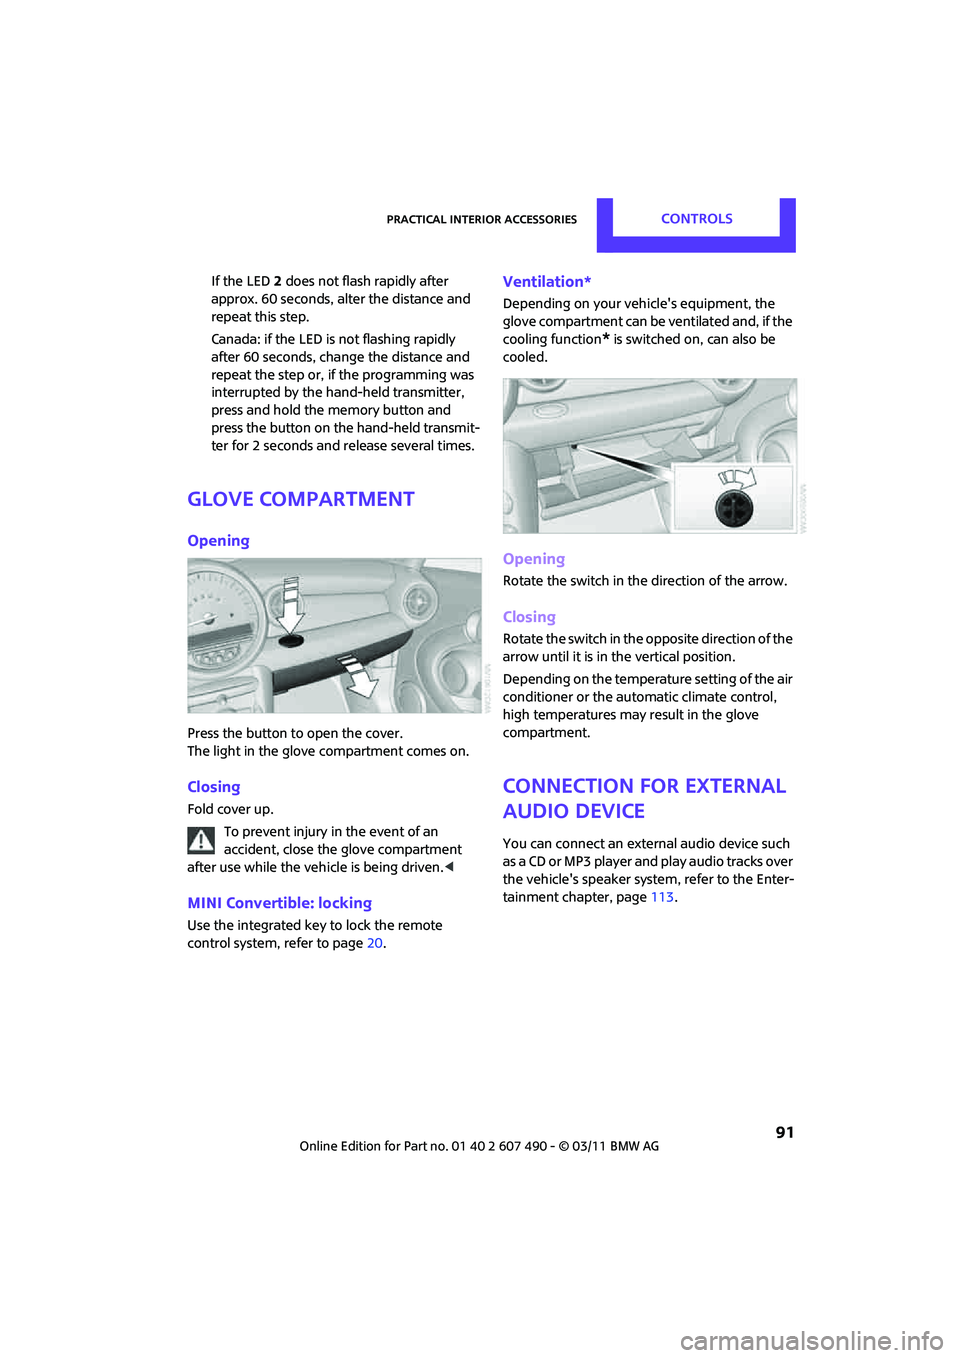
Opening
Press the button to open the cover.
The light in the glove compartment comes on.
Closing
Fold cover up.
To prevent injury in the event of an
accident, close the glove compartment
after use while the vehi cle is being driven.<
MINI Convertible: locking
Use the integrated key to lock the remote
control system, refer to page20.
Ventilation*
Depending on your vehicle's equipment, the
glove compartment can be ventilated and, if the
cooling function
* is switched on, can also be
cooled.
Opening
Rotate the switch in the direction of the arrow.
Closing
Rotate the switch in the opposite direction of the
arrow until it is in the vertical position.
Depending on the temperature setting of the air
conditioner or the automatic climate control,
high temperatures may result in the glove
compartment.
Connection for external
audio device
You can connect an external audio device such
as a CD or MP3 player an d play audio tracks over
the vehicle's speaker system, refer to the Enter-
tainment chapter, page 113.
Page 108 of 210
ENTERTAINMENTRadio MINI Boost CD
106
Radio MINI Boost CD
Radio switching on/off
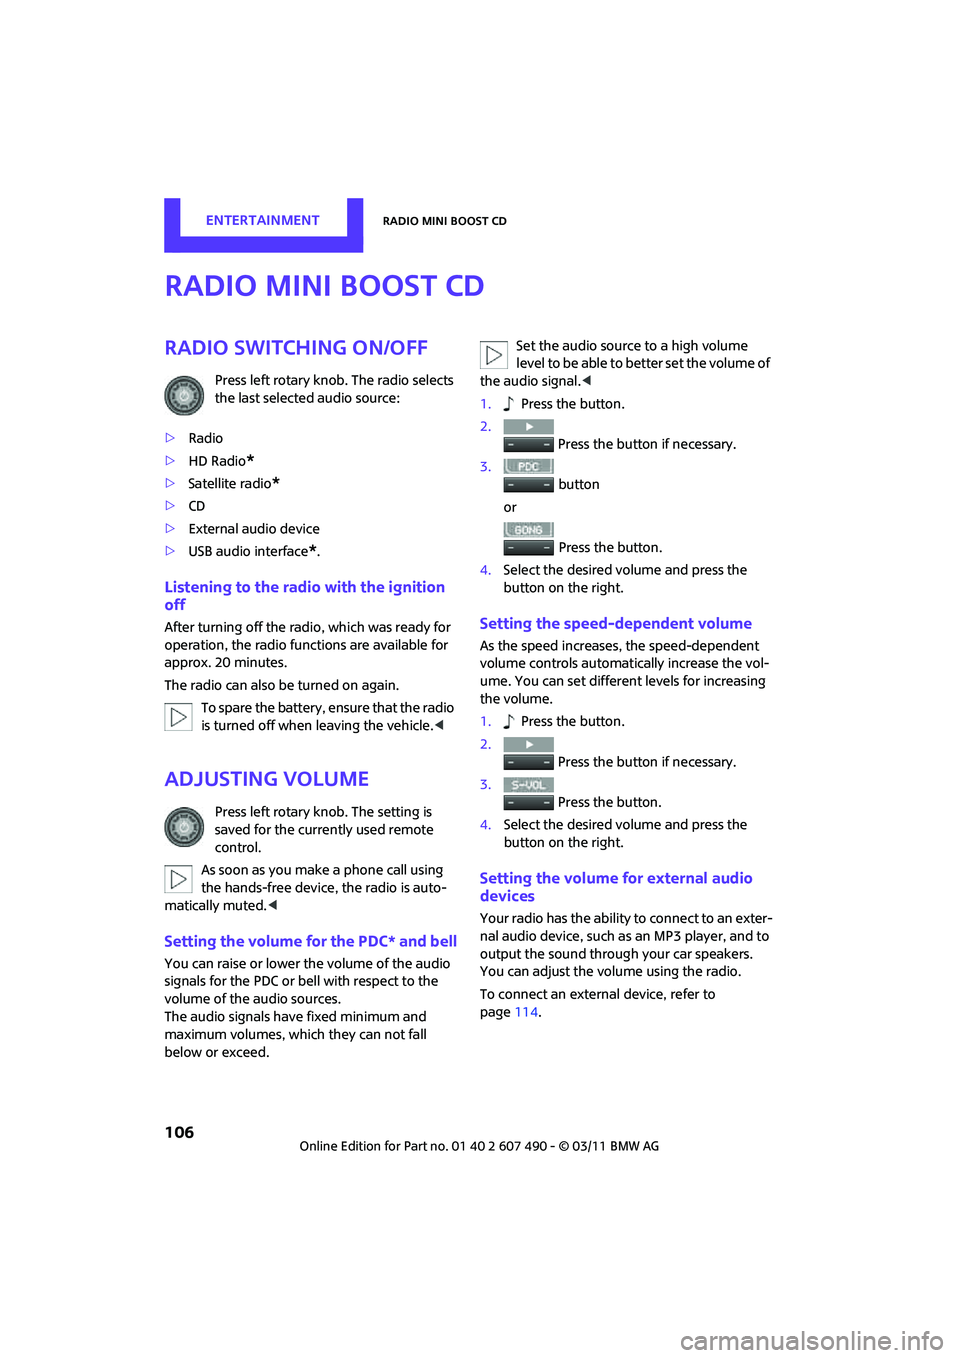
Press left rotary knob. The radio selects
the last selected audio source:
> Radio
> HD Radio
*
>Satellite radio*
>CD
> External audio device
> USB audio interface
*.
Listening to the radi o with the ignition
off
After turning off the radi o, which was ready for
operation, the radio functions are available for
approx. 20 minutes.
The radio can also be turned on again.
To spare the battery, ensure that the radio
is turned off when leaving the vehicle. <
Adjusting volume
Press left rotary knob. The setting is
saved for the currently used remote
control.
As soon as you make a phone call using
the hands-free device, the radio is auto-
matically muted. <
Setting the volume for the PDC* and bell
You can raise or lower the volume of the audio
signals for the PDC or bell with respect to the
volume of the audio sources.
The audio signals have fixed minimum and
maximum volumes, which they can not fall
below or exceed. Set the audio source to a high volume
level to be able to better set the volume of
the audio signal. <
1. Press the button.
2. Press the button if necessary.
3. button
or
Press the button.
4. Select the desired vo lume and press the
button on the right.
Setting the speed-dependent volume
As the speed increases, the speed-dependent
volume controls automatically increase the vol-
ume. You can set different levels for increasing
the volume.
1. Press the button.
2. Press the button if necessary.
3. Press the button.
4. Select the desired vo lume and press the
button on the right.
Setting the volume for external audio
devices
Your radio has the ability to connect to an exter-
nal audio device, such as an MP3 player, and to
output the sound through your car speakers.
You can adjust the volume using the radio.
To connect an extern al device, refer to
page 114.
Page 113 of 210
Radio MINI Boost CDENTERTAINMENT
111
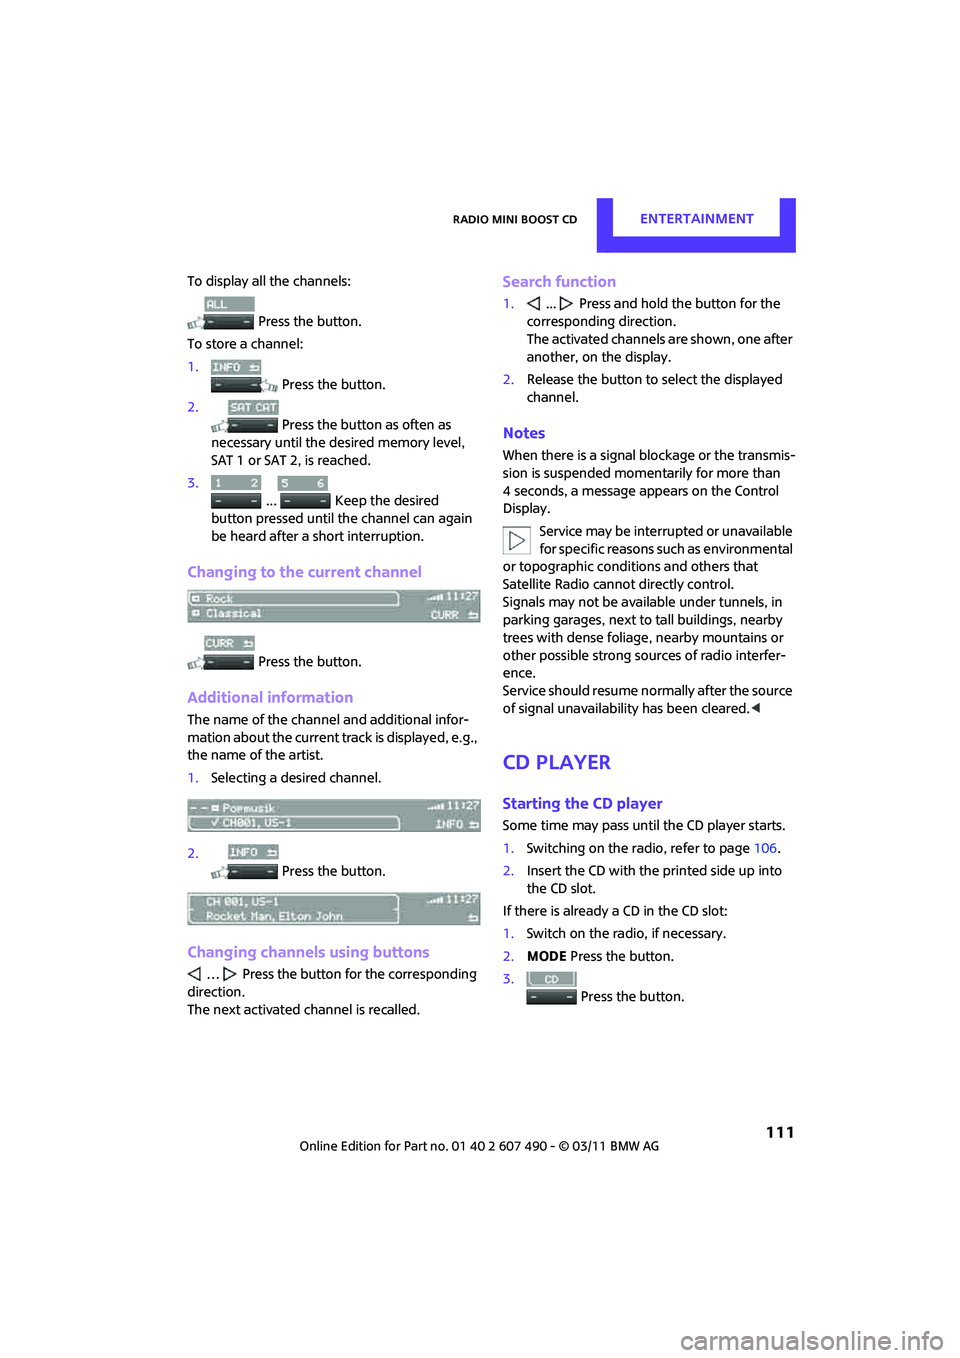
To display all the channels: Press the button.
To store a channel:
1. Press the button.
2. Press the button as often as
necessary until the de sired memory level,
SAT 1 or SAT 2, is reached.
3.
... Keep the desired
button pressed until the channel can again
be heard after a short interruption.
Changing to the current channel
Press the button.
Additional information
The name of the channel and additional infor-
mation about the current track is displayed, e.g.,
the name of the artist.
1. Selecting a desired channel.
2. Press the button.
Changing channels using buttons
… Press the button for the corresponding
direction.
The next activated channel is recalled.
Search function
1. ... Press and hold the button for the
corresponding direction.
The activated channels are shown, one after
another, on the display.
2. Release the button to select the displayed
channel.
Notes
When there is a signal blockage or the transmis-
sion is suspended mome ntarily for more than
4 seconds, a message appears on the Control
Display.
Service may be interru pted or unavailable
for specific reasons such as environmental
or topographic conditio ns and others that
Satellite Radio cannot directly control.
Signals may not be available under tunnels, in
parking garages, next to tall buildings, nearby
trees with dense foliage, nearby mountains or
other possible strong sources of radio interfer-
ence.
Service should resume no rmally after the source
of signal unavailabil ity has been cleared.<
CD player
Starting the CD player
Some time may pass until the CD player starts.
1.Switching on the radio, refer to page 106.
2. Insert the CD with the printed side up into
the CD slot.
If there is already a CD in the CD slot:
1. Switch on the radio, if necessary.
2. MODE Press the button.
3. Press the button.
Page 114 of 210
ENTERTAINMENTRadio MINI Boost CD
112
Changing the music track
Jumping tracks
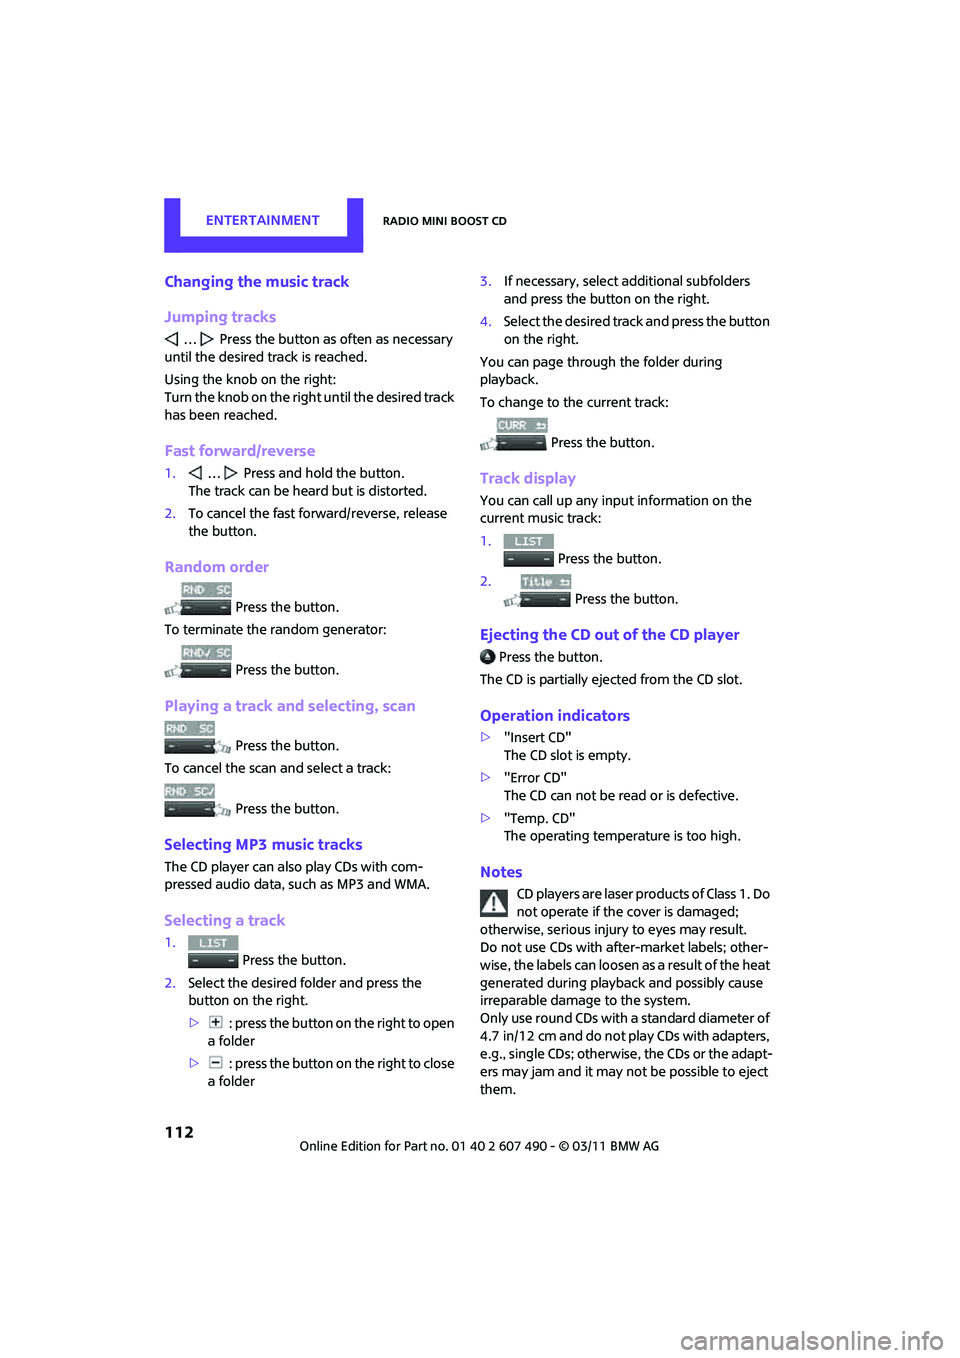
… Press the button as often as necessary
until the desired track is reached.
Using the knob on the right:
Turn the knob on the right until the desired track
has been reached.
Fast forward/reverse
1. … Press and hold the button.
The track can be heard but is distorted.
2. To cancel the fast forward/reverse, release
the button.
Random order
Press the button.
To terminate the random generator:
Press the button.
Playing a track and selecting, scan
Press the button.
To cancel the scan and select a track:
Press the button.
Selecting MP3 music tracks
The CD player can also play CDs with com-
pressed audio data, such as MP3 and WMA.
Selecting a track
1. Press the button.
2. Select the desired folder and press the
button on the right.
> : press the button on the right to open
a folder
> : press the button on the right to close
a folder 3.
If necessary, select a dditional subfolders
and press the button on the right.
4. Select the desired track and press the button
on the right.
You can page through the folder during
playback.
To change to the current track:
Press the button.
Track display
You can call up any input information on the
current music track:
1. Press the button.
2. Press the button.
Ejecting the CD out of the CD player
Press the button.
The CD is partially ejected from the CD slot.
Operation indicators
> "Insert CD"
The CD slot is empty.
> "Error CD"
The CD can not be read or is defective.
> "Temp. CD"
The operating temperature is too high.
Notes
CD players are laser products of Class 1. Do
not operate if the cover is damaged;
otherwise, serious injury to eyes may result.
Do not use CDs with after-market labels; other-
wise, the labels can loosen as a result of the heat
generated during playback and possibly cause
irreparable damage to the system.
Only use round CDs with a standard diameter of
4.7 in/12 cm and do not pl ay CDs with adapters,
e.g., single CDs; otherwise, the CDs or the adapt-
ers may jam and it may not be possible to eject
them.
Page 115 of 210
Radio MINI Boost CDENTERTAINMENT
113
Do not use combined CD/DVDs, e.g., DVDPlus;
otherwise, the CD/DVD may jam and it may not
be possible to eject it.<
General malfunctions
The CD players are optimized for operation in
vehicles. They may be more sensitive to
defective CDs than play ers for stationary use.
If a CD can not be played, first check if the CD is
properly inserted.
Humidity
If there is high humidity, the CD or the focusing
lens for the laser beam may get fogged up and
playing the CD may temporarily not be possible.
Malfunctions with individual CDs
If there are malfunctions with individual CDs,
then they may be due to the following causes.
CDs that you burned yourself
Potential problems with home-burned CDs are,
for example, inconsistent data generation and
burning processes, as we ll as low quality or
excessive aging of the blanks that are used.
Only write on the upper surface of CDs with a
writing instrume nt that is suitable for the
purpose.
Damaged CDs
Avoid finger prints as well as dust, scratches and
moisture.
Store CDs in sleeves.
Do not expose CDs to a temperature greater
than 122 7/50 6, elevated humidity or direct
sunlight.
CDs with copy protection
CDs are often provided with copy protection
from the manufacturer. This can result in CDs not
playing or playing back in only a limited fashion.
Care
If necessary, clean the reflecting side of the CD
with a commercially availab le cleaning cloth by
wiping in a straight line from the center
outwards.
USB audio interface*
> iPods/iPhones or USB devices such as MP3
players and USB memory sticks: connect via
the USB audio interface.
> iPhone/mobile phone music players: con-
nection using a snap-in adapter
*, refer to
page 129.
> Only one iPod/iPhone can be connected to
the vehicle. Output fr om an iPod/iPhone to
the USB audio interface is only possible if
there is no iPhone in the snap-in adapter.
> Popular audio files, such as MP3, AAC and
M3U playlists, can be played. Depending on
the audio file, proper playback can not be
ensured in every case,
such as for bit rates greater than 256 kbit/s.
> Music tracks with inte grated Digital Rights
Management (DRM) cannot be played.
Because of the large number of audio devices on
the market, it can not be ensured that every
device will properly operate in the vehicle.
Additional information may be found at
www.mini.com/connectivity or at a dealer.
Page 120 of 210
COMMUNICATIONSTelephone
118
Telephone
Overview
The concept
Mobile phones or other external devices, e.g.
audio players, can be connected to the vehicle
via Bluetooth.
Bluetooth® is a registered trademark of
Bluetooth® SIG, Inc.
Your MINI is equipped with a complete mobile
phone preparation. After a suitable mobile
phone is paired with the vehicle once, the
mobile phone can be controlled via the radio,
the buttons
* on the steering wheel, and by
voice
*.
It may be necessary for some functions to be
activated by the mobile phone provider. Only make entries when traffic conditions
permit. Do not hold the mobile phone in
your hand while you are driving; use the hands-
free system instead. If you do not observe this
precaution, your being distracted can endanger
vehicle occupants and other road users. <
Snap-in adapter*
The snap-in adapter, refer to page129, makes it
possible to:
> Accommodate the mobile phone.
> Recharge its battery.
> Connect it to an exte rnal antenna of the
vehicle.
This assures a better network connection
and constant sound quality.
A mobile phone that is connected to the vehicle
should not be operated via the mobile phone
keypad; otherwise, ma lfunctions may occur.
Suitable mobile phones
For precise information as to which mobile
phones and external devices with Bluetooth
interfaces are supported by the mobile phone
preparation, go to ww w.mini.com/connectivity.
*
Page 197 of 210
Everything from A to ZREFERENCE
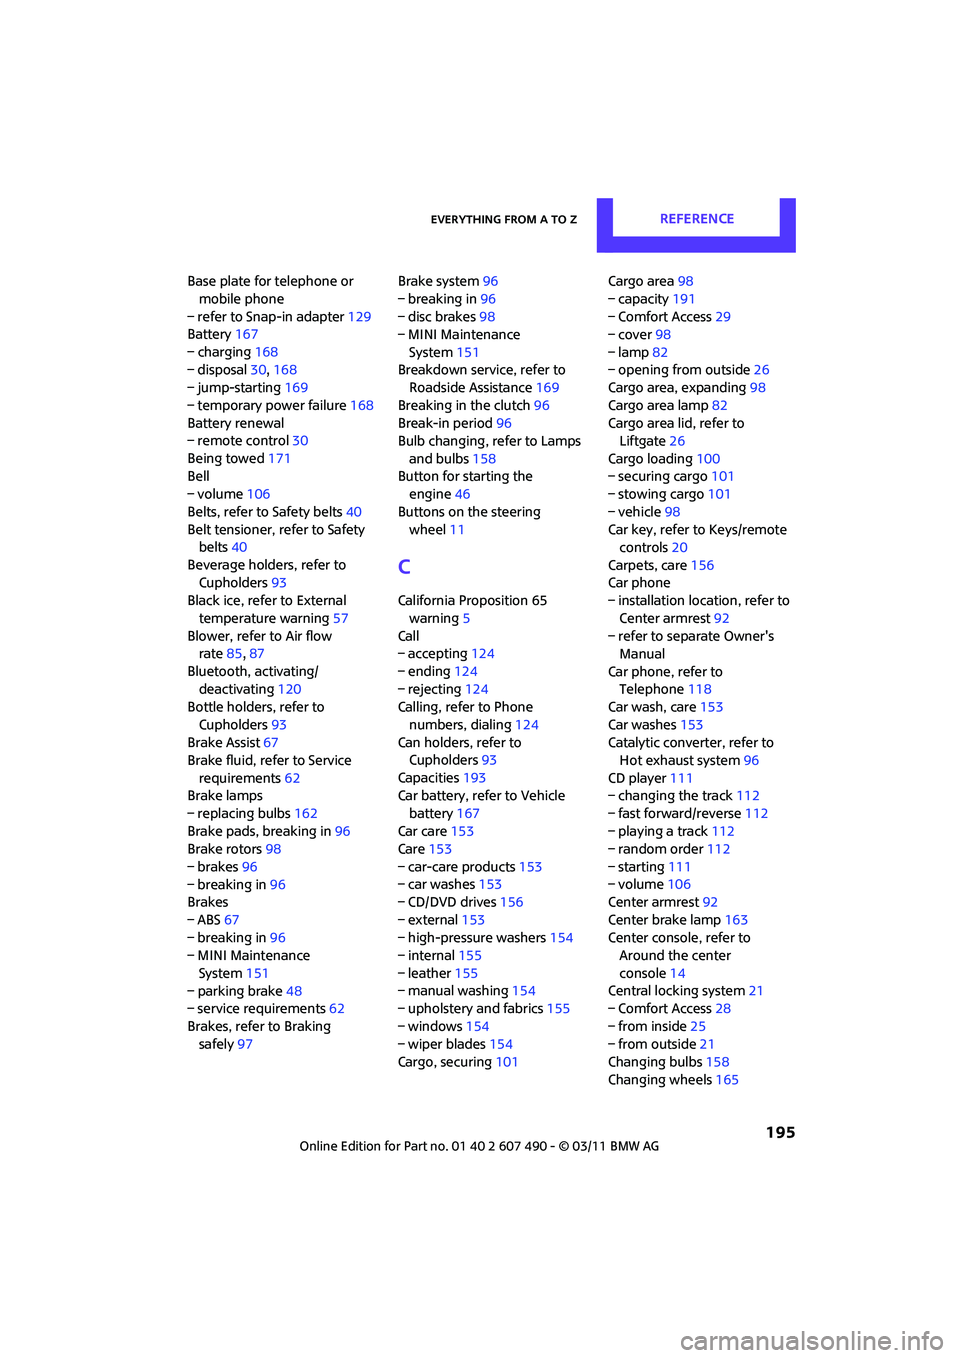
195
Base plate for telephone or mobile phone
– refer to Snap-in adapter 129
Battery 167
– charging 168
– disposal 30,168
– jump-starting 169
– temporary power failure 168
Battery renewal
– remote control 30
Being towed 171
Bell
– volume 106
Belts, refer to Safety belts 40
Belt tensioner, refer to Safety belts 40
Beverage holders, refer to Cupholders 93
Black ice, refer to External
temperature warning 57
Blower, refer to Air flow rate 85,87
Bluetooth, activating/ deactivating 120
Bottle holders, refer to
Cupholders 93
Brake Assist 67
Brake fluid, refer to Service
requirements 62
Brake lamps
– replacing bulbs 162
Brake pads, breaking in 96
Brake rotors 98
– brakes 96
– breaking in 96
Brakes
– ABS 67
– breaking in 96
– MINI Maintenance
System 151
– parking brake 48
– service requirements 62
Brakes, refer to Braking safely 97 Brake system
96
– breaking in 96
– disc brakes 98
– MINI Maintenance
System 151
Breakdown service, refer to Roadside Assistance 169
Breaking in the clutch 96
Break-in period 96
Bulb changing, refer to Lamps
and bulbs 158
Button for starting the engine 46
Buttons on the steering wheel 11
C
California Proposition 65
warning 5
Call
– accepting 124
– ending 124
– rejecting 124
Calling, refer to Phone
numbers, dialing 124
Can holders, refer to Cupholders 93
Capacities 193
Car battery, refer to Vehicle
battery 167
Car care 153
Care 153
– car-care products 153
– car washes 153
– CD/DVD drives 156
– external 153
– high-pressure washers 154
– internal 155
– leather 155
– manual washing 154
– upholstery and fabrics 155
– windows 154
– wiper blades 154
Cargo, securing 101 Cargo area
98
– capacity 191
– Comfort Access 29
– cover 98
– lamp 82
– opening from outside 26
Cargo area, expanding 98
Cargo area lamp 82
Cargo area lid, refer to Liftgate 26
Cargo loading 100
– securing cargo 101
– stowing cargo 101
– vehicle 98
Car key, refer to Keys/remote controls 20
Carpets, care 156
Car phone
– installation location, refer to
Center armrest 92
– refer to separate Owner's Manual
Car phone, refer to Telephone 118
Car wash, care 153
Car washes 153
Catalytic converter, refer to Hot exhaust system 96
CD player 111
– changing the track 112
– fast forward/reverse 112
– playing a track 112
– ran
dom order 112
– starting 111
– volume 106
Center armrest 92
Center brake lamp 163
Center console, refer to Around the center
console 14
Central locking system 21
– Comfort Access 28
– from inside 25
– from outside 21
Changing bulbs 158
Changing wheels 165
Page 204 of 210
REFERENCEEverything from A to Z
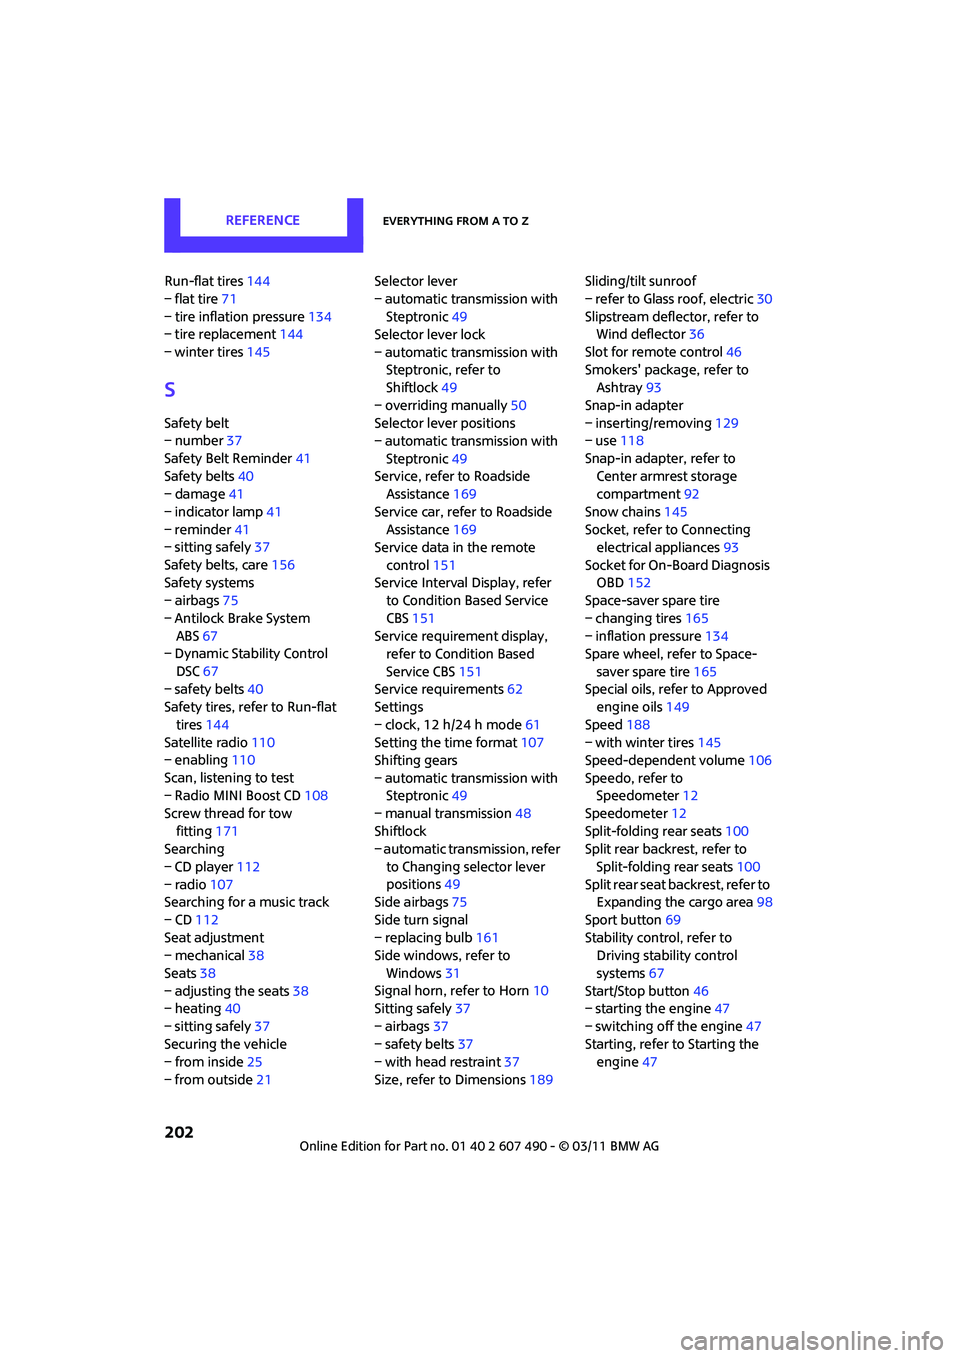
202
Run-flat tires144
– flat tire 71
– tire inflation pressure 134
– tire replacement 144
– winter tires 145
S
Safety belt
– number37
Safety Belt Reminder 41
Safety belts 40
– damage 41
– indicator lamp 41
– reminder 41
– sitting safely 37
Safety belts, care 156
Safety systems
– airbags 75
– Antilock Brake System ABS 67
– Dynamic Stability Control
DSC 67
– safety belts 40
Safety tires, refer to Run-flat
tires 144
Satellite radio 110
– enabling 110
Scan, listening to test
– Radio MINI Boost CD 108
Screw thread for tow fitting 171
Searching
– CD player 112
– radio 107
Searching for a music track
– CD 112
Seat adjustment
– mechanical 38
Seats 38
– adjusting the seats 38
– heating 40
– sitting safely 37
Securing the vehicle
– from inside 25
– from outside 21 Selector lever
– automatic transmission with
Steptronic 49
Selector lever lock
– automatic transmission with Steptronic, refer to
Shiftlock 49
– overriding manually 50
Selector lever positions
– automatic transmission with
Steptronic 49
Service, refer to Roadside Assistance 169
Service car, refe r to Roadside
Assistance 169
Service data in the remote
control 151
Service Interval Display, refer to Condition Based Service
CBS 151
Service requirement display, refer to Condition Based
Service CBS 151
Service requirements 62
Settings
– clock, 12 h/24 h mode 61
Setting the time format 107
Shifting gears
– automatic transmission with Steptr
onic49
– manual transmission 48
Shiftlock
– automatic transmission, refer
to Changing selector lever
positions 49
Side airbags 75
Side turn signal
– replacing bulb 161
Side windows, refer to
Windows 31
Signal horn, refer to Horn 10
Sitting safely 37
– airbags 37
– safety belts 37
– with head restraint 37
Size, refer to Dimensions 189Sliding/tilt sunroof
– refer to Glass roof, electric
30
Slipstream deflector, refer to Wind deflector 36
Slot for remote control 46
Smokers' package, refer to Ashtray 93
Snap-in adapter
– inserting/removing 129
– use 118
Snap-in adapter, refer to Center armrest storage
compartment 92
Snow chains 145
Socket, refer to Connecting electrical appliances 93
Socket for On-Board Diagnosis OBD 152
Space-saver spare tire
– changing tires 165
– inflation pressure 134
Spare wheel, refer to Space-
saver spare tire 165
Special oils, refer to Approved engine oils 149
Speed 188
– with winter tires 145
Speed-dependent volume 106
Speedo, refer to Speedometer 12
Speedometer 12
Split-folding rear seats 100
Split rear backrest, refer to
Split-folding rear seats 100
Split rear seat backrest, refer to Expanding the cargo area 98
Sport button 69
Stability control, refer to Driving stability control
systems 67
Start/Stop button 46
– starting the engine 47
– switching off the engine 47
Starting, refer to Starting the engine 47