interior MINI COOPER 2015 Service Manual
[x] Cancel search | Manufacturer: MINI, Model Year: 2015, Model line: COOPER, Model: MINI COOPER 2015Pages: 248, PDF Size: 5.43 MB
Page 163 of 248
LoadingVehicle features and op‐tions
This chapter describes all standard, country-
specific and optional features offered with the
series. It also describes features that are not
necessarily available in your car, e. g., due to
the selected options or country versions. This
also applies to safety-related functions and sys‐
tems. The respectively applicable country provi‐
sions must be observed when using the respec‐
tive features and systems.
Information WARNING
High gross weight can overheat the tires,
damage them, and cause a sudden drop in tire
inflation pressure. There is risk of an accident.
Pay attention to the permitted load capacity of
the tires and never exceed the permitted gross
weight. ◀
WARNING
Loose objects or devices with a cable
connection to the vehicle, for example mobile
phones, can be thrown into the car's interior
while driving, for example in the event of an
accident or during braking and evasive maneu‐
vers. There is risk of injuries. Secure loose ob‐
jects or devices with a cable connection to the
vehicle in the car's interior. ◀
CAUTION
Fluids in the cargo area can cause dam‐
age. There is risk of property damage. Make
sure that no fluids leak in the cargo area. ◀Determining the load
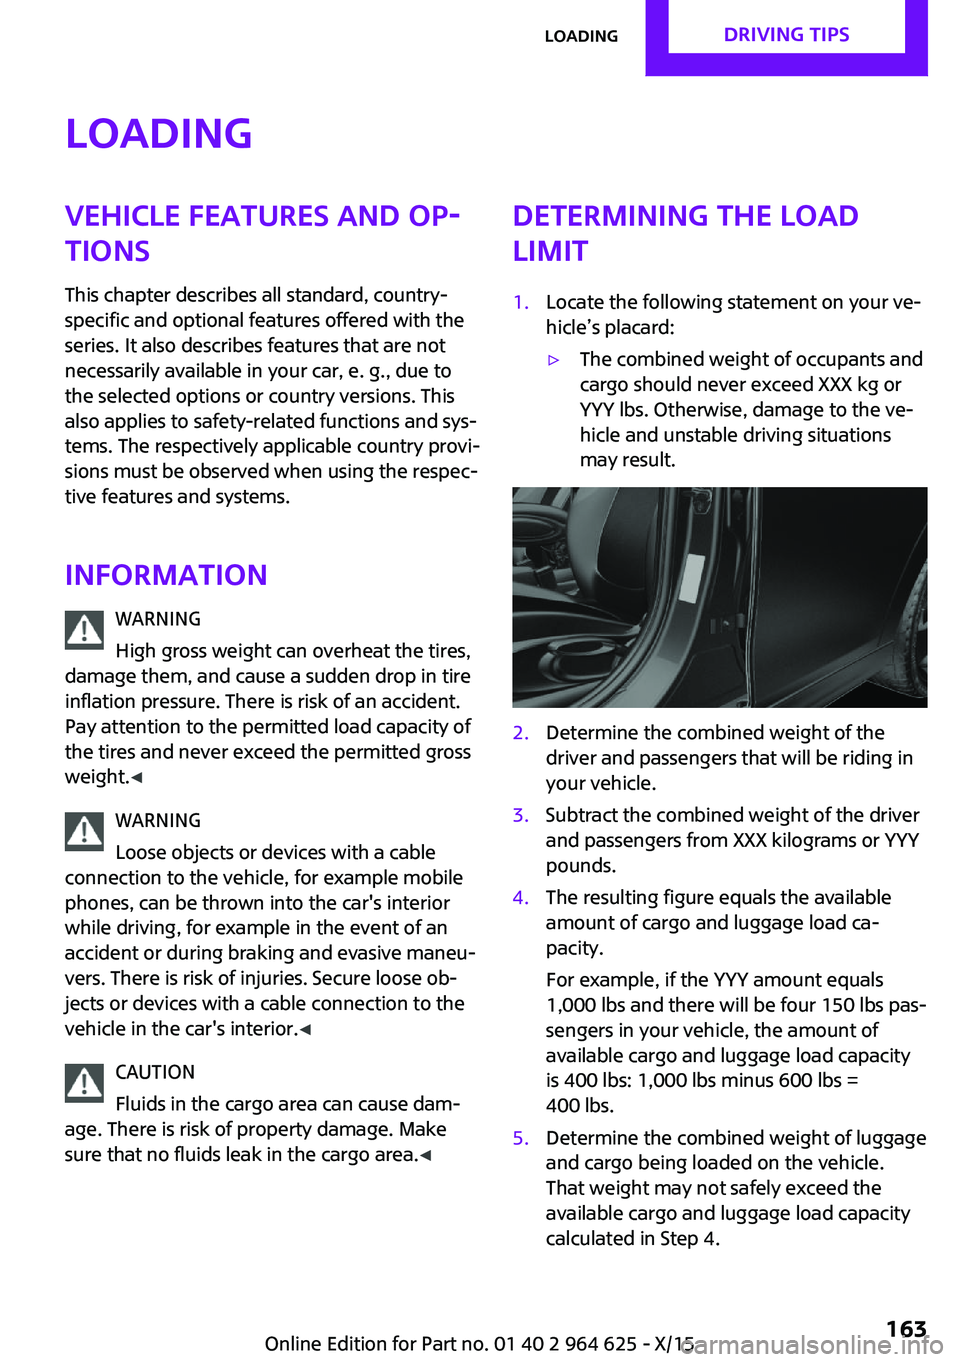
limit1.Locate the following statement on your ve‐
hicle’s placard:▷The combined weight of occupants and
cargo should never exceed XXX kg or
YYY lbs. Otherwise, damage to the ve‐
hicle and unstable driving situations
may result.2.Determine the combined weight of the
driver and passengers that will be riding in
your vehicle.3.Subtract the combined weight of the driver
and passengers from XXX kilograms or YYY
pounds.4.The resulting figure equals the available
amount of cargo and luggage load ca‐
pacity.
For example, if the YYY amount equals
1,000 lbs and there will be four 150 lbs pas‐
sengers in your vehicle, the amount of
available cargo and luggage load capacity
is 400 lbs: 1,000 lbs minus 600 lbs =
400 lbs.5.Determine the combined weight of luggage
and cargo being loaded on the vehicle.
That weight may not safely exceed the
available cargo and luggage load capacity
calculated in Step 4.Seite 163LoadingDRIVING TIPS163
Online Edition for Part no. 01 40 2 964 625 - X/15
Page 164 of 248
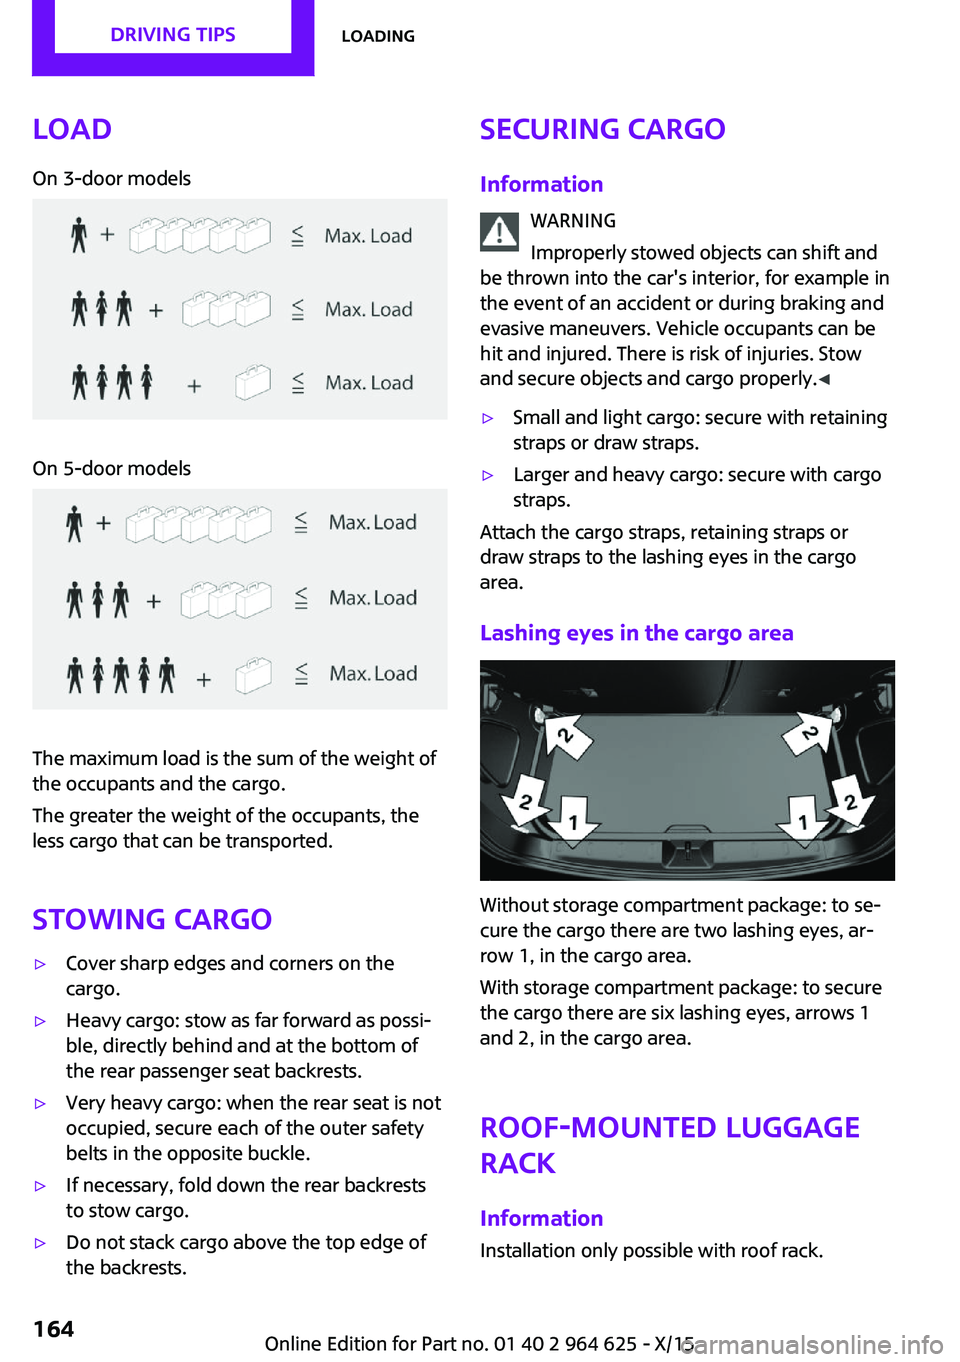
LoadOn 3-door modelsOn 5-door models
The maximum load is the sum of the weight of
the occupants and the cargo.
The greater the weight of the occupants, the
less cargo that can be transported.
Stowing cargo
▷Cover sharp edges and corners on the
cargo.▷Heavy cargo: stow as far forward as possi‐
ble, directly behind and at the bottom of
the rear passenger seat backrests.▷Very heavy cargo: when the rear seat is not
occupied, secure each of the outer safety
belts in the opposite buckle.▷If necessary, fold down the rear backrests
to stow cargo.▷Do not stack cargo above the top edge of
the backrests.Securing cargo
Information WARNING
Improperly stowed objects can shift and
be thrown into the car's interior, for example in
the event of an accident or during braking and
evasive maneuvers. Vehicle occupants can be
hit and injured. There is risk of injuries. Stow
and secure objects and cargo properly. ◀▷Small and light cargo: secure with retaining
straps or draw straps.▷Larger and heavy cargo: secure with cargo
straps.
Attach the cargo straps, retaining straps or
draw straps to the lashing eyes in the cargo
area.
Lashing eyes in the cargo area
Without storage compartment package: to se‐
cure the cargo there are two lashing eyes, ar‐
row 1, in the cargo area.
With storage compartment package: to secure
the cargo there are six lashing eyes, arrows 1
and 2, in the cargo area.
Roof-mounted luggage
rack
Information Installation only possible with roof rack.
Seite 164DRIVING TIPSLoading164
Online Edition for Part no. 01 40 2 964 625 - X/15
Page 168 of 248

The Coasting driving condition is enabled under
certain conditions.
Under certain conditions the engine is auto‐
matically decoupled from the transmission in
selector lever position D. The vehicle continues
traveling with the engine idling to reduce fuel
consumption. Selector lever position D remains
engaged. An indicator provides information
about the distance traveled in Coasting mode.
In addition, context-sensitive instructions are
displayed to assist with an optimized fuel con‐
sumption driving style.
The achieved extended range is displayed in
the instrument cluster.
Overview The system includes the following MINIMAL
functions and displays:▷GREEN bonus range, refer to page 169.▷GREEN tips driving instruction, refer to
page 169.▷GREEN climate control, refer to page 168.▷MINIMALISM analyzer, refer to page 171.▷Coasting driving condition, refer to
page 170.
Activating GREEN Mode
Turn Driving Dynamics Control to
the right until GREEN Mode is
displayed in the instrument clus‐
ter.
Configuring GREEN Mode
Via the Driving Dynamics Control
1.Activating GREEN Mode.2."Configure GREEN"3.Configure the program.
Via onboard monitor:
1. "Settings"2."GREEN Mode"
Or
1. "Settings"2."Driving mode"3."Configure GREEN"
Configure the program.
GREEN tip
▷"Tip at:"
Set the GREEN Mode speed at which a
GREEN Mode tip is to be displayed.▷"GREEN speed warning":
Displays a reminder when the set GREEN
Mode speed is exceeded.
Coasting
Fuel-efficiency can be optimized by disengag‐
ing the engine and Coasting, refer to page 170,
with the engine idling.
This function is only available in GREEN Mode.
GREEN climate control
"GREEN climate control"
Climate control is set to be fuel-efficient.
By making a slight change to the set tempera‐
ture, or adjusting the rate of heating or cooling
of the car's interior fuel consumption can be
economized.
The outputs of the seat heater and the exterior
Additionally heat output to seats and exterior
mirror is reduced.
Exterior mirror heat is available when outside
temperatures are very low.
GREEN potential
The percentage of potential savings that can be
achieved with the current configuration is dis‐
played.
Seite 168DRIVING TIPSSaving fuel168
Online Edition for Part no. 01 40 2 964 625 - X/15
Page 221 of 248
CareVehicle features and op‐tions
This chapter describes all standard, country-
specific and optional features offered with the series. It also describes features that are not
necessarily available in your car, e. g., due to
the selected options or country versions. This
also applies to safety-related functions and sys‐
tems. The respectively applicable country provi‐
sions must be observed when using the respec‐
tive features and systems.
Car washes
General information Regularly remove foreign objects such as leaves
in the area below the windshield when the
hood is raised.
Wash your vehicle frequently, particularly in
winter. Intense soiling and road salt can dam‐
age the vehicle.
Steam jets or high-pressure washers
Information CAUTION
When cleaning with high-pressure wash‐
ers, components can be damaged due to the
pressure or temperatures being too high. There
is risk of property damage. Maintain sufficient
distance and do not spray too long continu‐
ously. Follow the Owner's Manual for the high-
pressure washer. ◀
Distances and temperature▷Maximum temperature: 140 ℉/60 ℃.▷Minimum distance from sensors, cameras,
seals: 12 inches/30 cm.▷Minimum distance from glass sunroof:
31.5 inches/80 cm.
Automatic car washes
Information CAUTION
Water can penetrate in the windshield
area due to high-pressure washers. There is risk
of property damage. Avoid high-pressure
washers. ◀
CAUTION
Improper use of automatic car washes
can cause damage to the vehicle. There is risk of property damage. Information the following
instructions:
▷Give preference to cloth car washes or
those that use soft brushes in order to
avoid paint damage.▷Avoid car washes with guide rails higher
than 4 in/10 cm to avoid damage to the
chassis.▷Observe the tire width of the guide rail to
avoid damage to tires and rims.▷Fold in exterior mirrors to avoid damage to
the exterior mirrors.▷Unscrew the rod antenna to avoid the rod
antenna breaking off.▷Deactivate rain sensor if necessary to avoid
damage to the wiper system. ◀
In some cases, an unintentional alarm can be
triggered by the interior motion sensor of the
alarm system. Follow the instructions on avoid‐
ing an unintentional alarm, refer to page 45.
With front PDC: to reduce PDC false alarms,
switch off automatic PDC activation on obstacle
detection, for example in car washes, refer to
page 128.
Seite 221CareMOBILITY221
Online Edition for Part no. 01 40 2 964 625 - X/15
Page 222 of 248

Before driving into a car washIn order to ensure that the vehicle can roll in a
car wash, take the following steps:
Manual transmission:1.Drive into the car wash.2.Shift to neutral.3.Switch the engine off.4.Switch on the ignition.
Steptronic transmission:
1.Drive into the car wash.2.Engage selector lever position N.3.Make sure that the parking brake is re‐
leased.4.Press the Start/Stop button to switch off the
engine.
In this way, the ignition remains switched
on, and two Check-Control messages are
displayed.
A signal sounds when you leave the vehicle
while in selector lever position N.
The vehicle cannot be locked from the outside
when in selector lever position N. A signal is
sounded when an attempt is made to lock the
vehicle.
To start the engine with manual transmission:
1.Press on the clutch pedal.2.Press the Start/Stop button.
To start the engine with Steptronic transmis‐
sion:
1.Depress the brake pedal.2.Press the Start/Stop button.
Headlights
▷Do not rub dry and do not use abrasive or
acidic cleansers.▷Soak areas that have been dirtied e. g.,
from insects, with shampoo and wash off
with water.▷Thaw ice with de-icing spray; do not use an
ice scraper.
After washing the vehicle
After washing the vehicle, apply the brakes
briefly to dry them; otherwise, braking action
can be reduced and corrosion of the brake
discs can occur.
Completely remove all residues on the win‐
dows, to minimize loss of visibility due to
smearing and to reduce wiper noises and wiper
blade wear.
Vehicle care Car care products
The manufacturer of your vehicle recommends
using care and cleaning products from MINI.
WARNING
Cleansers can contain substances that are
dangerous and harmful to your health. There is
risk of injuries. When cleaning the interior, open
the doors or windows. Only use products in‐
tended for cleaning vehicles. Follow the instruc‐
tions on the container. ◀
Vehicle paint
Regular care contributes to driving safety and
value retention. Environmental influences in
areas with elevated air pollution or natural con‐
taminants, such as tree resin or pollen can af‐
fect the vehicle's paintwork. Tailor the fre‐
quency and extent of your car care to these
influences.
Aggressive substances such as spilled fuel, oil,
grease or bird droppings must be removed im‐
mediately to prevent the finish from being al‐
tered or discolored.
Leather careRemove dust from the leather often, using acloth or vacuum cleaner.
Seite 222MOBILITYCare222
Online Edition for Part no. 01 40 2 964 625 - X/15
Page 223 of 248
Otherwise, particles of dust and road grime
chafe in pores and folds, and lead to increased
wear and premature degradation of the leather
surface.
To guard against discoloration, such as from
clothing, clean leather and provide leather care
roughly every two months.
Clean light-colored leather more frequently be‐
cause soiling on such surfaces is substantially
more visible.
Use leather care products; otherwise, dirt and
grease will gradually break down the protective
layer of the leather surface.
Suitable care products are available from a
dealer’s service center or another qualified
service center or repair shop.
Upholstery material care
Vacuum regularly with a vacuum cleaner.
If upholstery is very dirty, for example, with
beverage stains, use a soft sponge or micro‐
fiber cloth with a suitable interior cleaner.
Clean the upholstery down to the seams using
large sweeping motions. Avoid rubbing the ma‐
terial vigorously.
CAUTION
Open Velcro® fasteners on articles of
clothing can damage the seat covers. There is
risk of property damage. Ensure that any Vel‐
cro® fasteners are closed. ◀
Caring for special components
Light-alloy wheels
When cleaning the vehicle, use only neutral
wheel cleaners having a pH value from 5 to 9.
Do not use abrasive cleaning agents or steam
jets above 140 ℉/60 ℃. Follow the manufac‐
turer's instructions.
Aggressive, acidic or alkaline cleaning agents can destroy the protective layer of adjacent
components, such as the brake disk.Chrome surfaces
Carefully clean components such as the radia‐
tor grille or door handles with an ample supply
of water, possibly with shampoo added, partic‐
ularly when they have been exposed to road
salt.
Rubber components
Environmental influences can cause surface
soiling of rubber parts and a loss of gloss. For
cleaning, use only water and suitable care
products, the manufacturer of your vehicle rec‐
ommends original MINI care products.
Treat especially worn rubber parts with rubber
care agents at regular intervals. When cleaning
rubber seals, do not use any silicon-containing
car care products in order to avoid damage or
noises.
Fine wood parts Clean fine wood facing and fine wood compo‐
nents only with a moist rag. Then dry with a
soft cloth.
Plastic components
These include:▷Imitation leather surfaces.▷Roofliner.▷Lamp lenses.▷Instrument cluster cover.▷Matt black spray-coated components.▷Painted parts in the interior.
Clean with a microfiber cloth.
Dampen cloth lightly with water.
Do not soak the roofliner.
CAUTION
Cleansers that contain alcohol or solvents,
such as lacquer thinners, heavy-duty grease re‐
movers, fuel, or such, can damage plastic parts.
There is risk of property damage. Clean with a
Seite 223CareMOBILITY223
Online Edition for Part no. 01 40 2 964 625 - X/15
Page 239 of 248
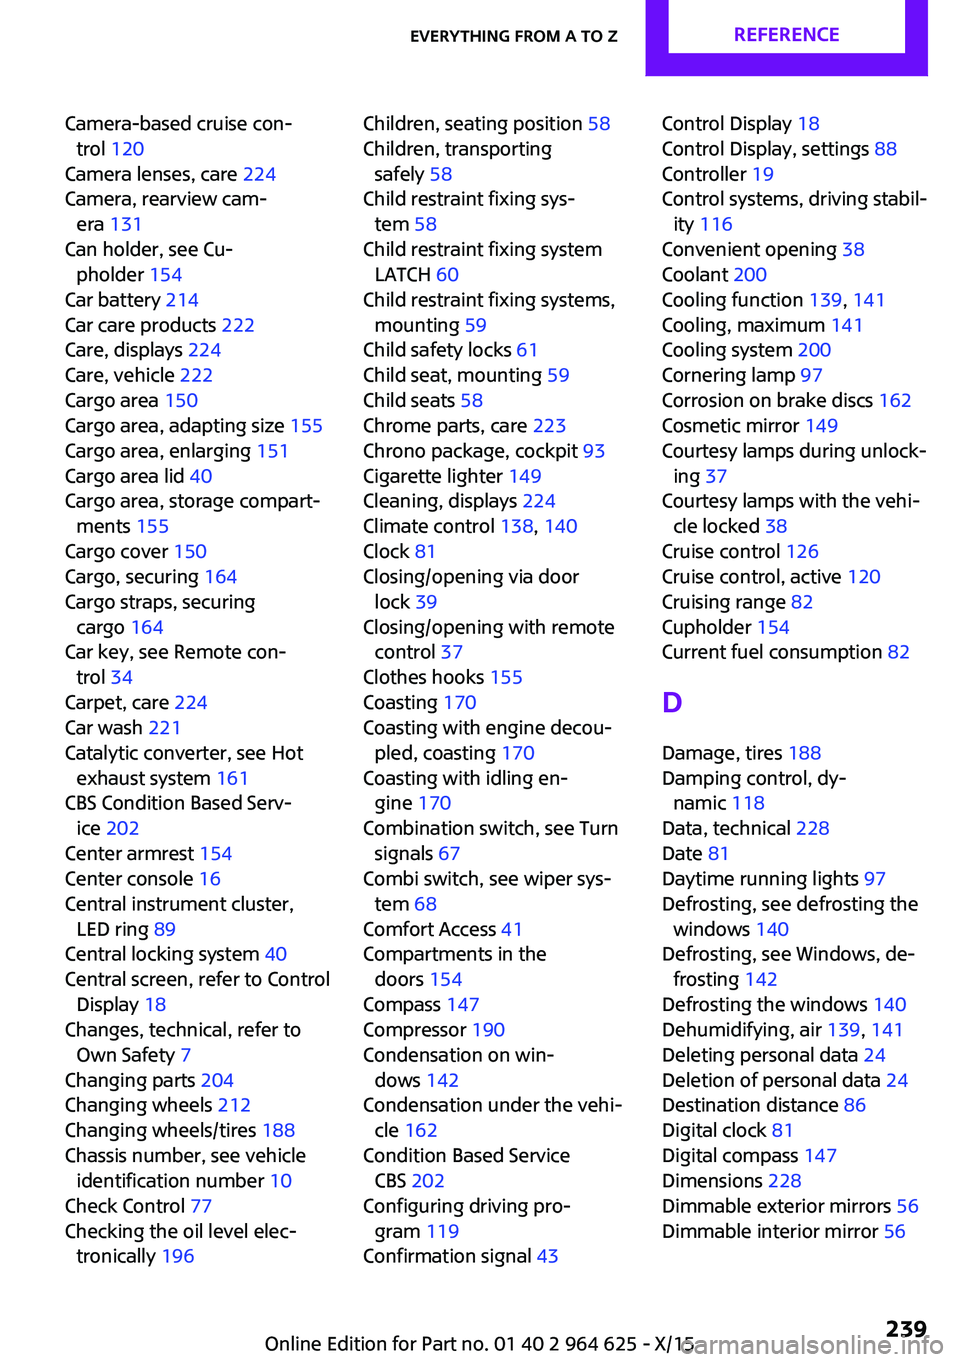
Camera-based cruise con‐trol 120
Camera lenses, care 224
Camera, rearview cam‐ era 131
Can holder, see Cu‐ pholder 154
Car battery 214
Car care products 222
Care, displays 224
Care, vehicle 222
Cargo area 150
Cargo area, adapting size 155
Cargo area, enlarging 151
Cargo area lid 40
Cargo area, storage compart‐ ments 155
Cargo cover 150
Cargo, securing 164
Cargo straps, securing cargo 164
Car key, see Remote con‐ trol 34
Carpet, care 224
Car wash 221
Catalytic converter, see Hot exhaust system 161
CBS Condition Based Serv‐ ice 202
Center armrest 154
Center console 16
Central instrument cluster, LED ring 89
Central locking system 40
Central screen, refer to Control Display 18
Changes, technical, refer to Own Safety 7
Changing parts 204
Changing wheels 212
Changing wheels/tires 188
Chassis number, see vehicle identification number 10
Check Control 77
Checking the oil level elec‐ tronically 196 Children, seating position 58
Children, transporting safely 58
Child restraint fixing sys‐ tem 58
Child restraint fixing system LATCH 60
Child restraint fixing systems, mounting 59
Child safety locks 61
Child seat, mounting 59
Child seats 58
Chrome parts, care 223
Chrono package, cockpit 93
Cigarette lighter 149
Cleaning, displays 224
Climate control 138, 140
Clock 81
Closing/opening via door lock 39
Closing/opening with remote control 37
Clothes hooks 155
Coasting 170
Coasting with engine decou‐ pled, coasting 170
Coasting with idling en‐ gine 170
Combination switch, see Turn signals 67
Combi switch, see wiper sys‐ tem 68
Comfort Access 41
Compartments in the doors 154
Compass 147
Compressor 190
Condensation on win‐ dows 142
Condensation under the vehi‐ cle 162
Condition Based Service CBS 202
Configuring driving pro‐ gram 119
Confirmation signal 43 Control Display 18
Control Display, settings 88
Controller 19
Control systems, driving stabil‐ ity 116
Convenient opening 38
Coolant 200
Cooling function 139, 141
Cooling, maximum 141
Cooling system 200
Cornering lamp 97
Corrosion on brake discs 162
Cosmetic mirror 149
Courtesy lamps during unlock‐ ing 37
Courtesy lamps with the vehi‐ cle locked 38
Cruise control 126
Cruise control, active 120
Cruising range 82
Cupholder 154
Current fuel consumption 82
D
Damage, tires 188
Damping control, dy‐ namic 118
Data, technical 228
Date 81
Daytime running lights 97
Defrosting, see defrosting the windows 140
Defrosting, see Windows, de‐ frosting 142
Defrosting the windows 140
Dehumidifying, air 139, 141
Deleting personal data 24
Deletion of personal data 24
Destination distance 86
Digital clock 81
Digital compass 147
Dimensions 228
Dimmable exterior mirrors 56
Dimmable interior mirror 56 Seite 239Everything from A to ZREFERENCE239
Online Edition for Part no. 01 40 2 964 625 - X/15
Page 240 of 248

Direction indicator, see Turnsignals 67
Display, electronic, instrument cluster 77
Display, engine tempera‐ ture 86
Display lighting, see Instru‐ ment lighting 98
Displays 76
Displays, cleaning 224
Disposal, coolant 201
Disposal, vehicle battery 215
Distance control, see PDC 128
Distance to destination 86
Divided screen view, split screen 23
Door lock, see Remote con‐ trol 34
Drive mode, GREEN Mode 167
Drive-off assistant 119
Drive-off assistant, see DSC 116
Driving Dynamics Control 118
Driving Excitement, SPORT 87
Driving instruction, GREEN Mode 169
Driving instructions, break- in 160
Driving mode 118
Driving notes, general 161
Driving stability control sys‐ tems 116
Driving style analysis 171
Driving tips 161
DSC Dynamic Stability Con‐ trol 116
DTC Dynamic Traction Con‐ trol 117
Dynamic Damping Con‐ trol 118
Dynamic Stability Control DSC 116
Dynamic Traction Control DTC 117 E
Electronic displays, instrument cluster 77
Electronic oil measure‐ ment 196
Electronic Stability Program ESP, see DSC 116
Emergency detection, remote control 35
Emergency release, fuel filler flap 176
Emergency start function, en‐ gine start 35
Emergency wheel, compact wheel, see Emergency
wheel 212
Energy Control 82
Engine, automatic Start/Stop function 64
Engine, automatic switch- off 64
Engine compartment 194
Engine compartment, working in 194
Engine coolant 200
Engine idling when driving, coasting 170
Engine oil 196
Engine oil, adding 197
Engine oil additives 198
Engine oil change 198
Engine oil filler neck 197
Engine oil types, alterna‐ tive 198
Engine oil types, suitable 198
Engine start during malfunc‐ tion 35
Engine start, jump-start‐ ing 216
Engine start, see Starting the engine 63
Engine stop 63
Engine temperature, dis‐ play 86
Entering a car wash 221 Equipment, interior 145
Error displays, see Check Con‐ trol 77
ESP Electronic Stability Pro‐ gram, see DSC 116
Exchanging wheels/tires 188
Exhaust system 161
Exterior mirror, automatic dimming feature 56
Exterior mirrors 55
External start 216
External temperature dis‐ play 81
External temperature warn‐ ing 81
Eyes for securing cargo 164
F
Failure message, see Check Control 77
False alarm, see Unintentional alarm 45
Fan, see Air flow 139, 142
Favorites buttons, onboard monitor 24
Filler neck for engine oil 197
Fine wood, care 223
First-aid kit 216
Flat tire, changing wheels 212
Flat Tire Monitor FTM 107
Flat tire, repairing 190
Flat tire, Tire Pressure Monitor TPM 103
Flat tire, warning lamp 104, 107
Flooding 161
Floor carpet, care 224
Floor mats, care 224
Fogged up windows 140
Folding back rear seat back‐ rests 151
Fold-out position, windshield wipers 70
Foot brake 161
Front airbags 100 Seite 240REFERENCEEverything from A to Z240
Online Edition for Part no. 01 40 2 964 625 - X/15
Page 241 of 248

Front-end collision warningwith City Braking func‐
tion 110
Front fog lights 98
Front-seat passenger airbags, automatic deactivation 102
Front-seat passenger airbags, indicator lamp 102
FTM Flat Tire Monitor 107
Fuel 178
Fuel consumption, see Aver‐ age fuel consumption 86
Fuel filler flap 176
Fuel gauge 81
Fuel lid 176
Fuel quality 178
Fuel recommendation 178
Fuel, tank capacity 232
Fuse 215
G Garage door opener, see Uni‐ versal Integrated Remote
Control 145
Gasoline 178
Gear change, Steptronic trans‐ mission 72
Gear shift indicator 83
General driving notes 161
Glare shield 149
Glass sunroof, refer to Panor‐ amic glass sunroof 47
Glove compartment 153
GREEN Mode 167
GREEN Mode, bonus range 169
GREEN Mode driving style analysis 171
GREEN Mode indicator 167
GREEN - program, driving dy‐ namics 118
GREEN tip 169
Gross vehicle weight, ap‐ proved 229
Ground clearance 162 H
Halogen headlights 206
Handbrake, see parking brake 66
Hand-held transmitter, alter‐ nating code 146
Hazard warning flashers 216
Head airbag 100
Headlight control, auto‐ matic 96
Headlight courtesy delay fea‐ ture 96
Headlight flasher 68
Headlight glass 205
Headlights, care 222
Head restraints 49
Head restraints, front 53
Head restraints, rear 54
Head-up Display 90
Head-Up Display, Shift point indicator 92
Head-up Display, sport dis‐ plays 92
Head-up Display, standard view 91
Heavy cargo, stowing 164
High-beam Assistant 97
High beams 68
High beams/low beams, see High-beam Assistant 97
Hills 162
Hill start assistant, see Drive- off assistant 119
Holder for beverages 154
Homepage 6
Hood 194
Horn 14
Hot exhaust system 161
HUD Head-up Display 90
Hydroplaning 161
I
Ice warning, see External tem‐ perature warning 81 Icy roads, see External tem‐
perature warning 81
Identification marks, tires 186
Identification number, see ve‐ hicle identification num‐
ber 10
Ignition key, see Remote con‐ trol 34
Ignition off 62
Ignition on 62
Illuminated ring, central in‐ strument cluster 89
Indication of a flat tire 104, 107
Indicator lamp, see Check Control 77
Individual air distribu‐ tion 139, 142
Individual settings, see Per‐ sonal Profile 36
Inflation pressure, tires 180
Inflation pressure warning, tires 107
Info display, refer to On-Board computer 85
Information 6
Initialize, Tire Pressure Moni‐ tor TPM 104
Initializing, Flat Tire Monitor FTM 107
Instrument cluster 76
Instrument cluster, electronic displays 77
Instrument lighting 98
Integrated key 34
Integrated Owner's Manual in the vehicle 29
Intelligent Safety 109
Intensity, AUTO program 142
Interior equipment 145
Interior lights 98
Interior lights during unlock‐ ing 37
Interior lights with the vehicle locked 38 Seite 241Everything from A to ZREFERENCE241
Online Edition for Part no. 01 40 2 964 625 - X/15
Page 242 of 248

Interior mirror, automaticdimming feature 56
Interior mirror, manually dim‐ mable 56
Interior motion sensor 44
Interior rearview mirror, com‐ pass 147
Internet site 6
Interval display, service re‐ quirements 82
Interval mode 69
J Jacking points for the vehicle jack 212
Joystick, Steptronic transmis‐ sion 72
Jump-starting 216
K
Key/remote control 34
Keyless Go, see Comfort Ac‐ cess 41
Key Memory, see Personal Profile 36
Kickdown, Steptronic trans‐ mission 72
Knee airbag 101
L
Label on recommended tires 189
Lamp replacement 205
Lamp replacement, front 206
Lamp replacement, rear 208
Lamp replacement, side 211
Language on Control Dis‐ play 89
Lashing eyes, securing cargo 164
LATCH child restraint sys‐ tem 60
Launch Control 74 Leather, care 222
LED bug light 206
LED headlights 206
LED ring, central instrument cluster 89
LEDs, light-emitting di‐ odes 205
Letters and numbers, enter‐ ing 25
Light 95
Light-alloy wheels, care 223
Light-emitting diodes, LEDs 205
Lighter 149
Lighting 95
Lights and bulbs 205
Light switch 95
Load 164
Loading 163
Lock, door 39
Locking/unlocking via door lock 39
Locking/unlocking with re‐ mote control 37
Locking, automatic 43
Locking, settings 43
Lock, power window 46
Locks, doors, and windows 61
Low beams 95
Low beams, automatic, see High-beam Assistant 97
Lower back support, mechani‐ cal 50
Luggage rack, refer to Roof- mounted luggage rack 164
Lumbar support, mechani‐ cal 50
M
Maintenance 202
Maintenance require‐ ments 202
Maintenance, service require‐ ments 82 Maintenance system,
MINI 202
Make-up mirror 149
Malfunction displays, see Check Control 77
Manual air distribu‐ tion 139, 142
Manual air flow 139, 142
Manual mode, transmis‐ sion 73
Manual operation, door lock 39
Manual operation, exterior mirrors 55
Manual operation, fuel filler flap 176
Manual operation, Park Dis‐ tance Control PDC 129
Manual operation, rearview camera 131
Manual transmission 71
Manufacturer of the MINI 7
Marking, run-flat tires 190
Master key, see Remote con‐ trol 34
Maximum cooling 141
Maximum speed, display 83
Maximum speed, winter tires 189
Measurement, units of 89
Medical kit 216
Menu in instrument cluster 85
Menus, refer to onboard mon‐ itor operating concept 20
Messages, see Check Con‐ trol 77
Microfilter 140, 143
MID - program, driving dy‐ namics 118
MINI Connected, refer to Integrated Owner's Manual
MINI maintenance sys‐ tem 202
MINIMALISM Analyser 171
MINIMALISM info 170
MINI Motorer’s Guide app 6 Seite 242REFERENCEEverything from A to Z242
Online Edition for Part no. 01 40 2 964 625 - X/15