display MINI COOPER CONVERTIBLE 2016 Owners Manual
[x] Cancel search | Manufacturer: MINI, Model Year: 2016, Model line: COOPER CONVERTIBLE, Model: MINI COOPER CONVERTIBLE 2016Pages: 252, PDF Size: 5.41 MB
Page 186 of 252
Wheels and tiresVehicle features and op‐
tions
This chapter describes all standard, country-
specific and optional features offered with the
series. It also describes features that are not
necessarily available in your car, e. g., due to
the selected options or country versions. This
also applies to safety-related functions and sys‐
tems. The respectively applicable country provi‐
sions must be observed when using the respec‐
tive features and systems.
Tire inflation pressure Safety informationThe tire characteristics and tire inflation pres‐
sure influence the following:▷The service life of the tires.▷Road safety.▷Driving comfort.
Checking the tire inflation pressure
WARNING
A tire with low or missing tire inflation
pressure impacts handling, such as steering
and braking response. There is risk of an acci‐
dent. Regularly check the tire inflation pressure,
and correct it as needed, e.g., twice a month and before a long trip. ◀
Tires have a natural, consistent loss of tire infla‐ tion pressure.
Tires heat up while driving, and the tire inflation
pressure increases along with the tire's temper‐
ature. The tire inflation pressure specifications
relate to cold tires or tires with the ambient
temperature.
Only check the tire inflation pressure when the
tires are cold. This means after driving no more
than 1.25 miles/2 km or when the vehicle has
been parked for at least 2 hours.
The displays of inflation devices may under-
read by up to 0.1 bar.
For Flat Tire Monitor: after correcting the tire
inflation pressure, reinitialize the Flat Tire Moni‐
tor.
For Tire Pressure Monitor: after correcting the
tire inflation pressure, reset the Tire Pressure
Monitor.▷Reinitialize the Flat Tire Monitor.▷Reinitialize the Tire Pressure Monitor.
Pressure specifications
The tire inflation pressure table, refer to
page 187, contains all tire inflation pressure
specifications for the specified tire sizes at the
ambient temperature. The tire inflation pres‐
sure values apply to tire sizes approved by the
manufacturer of the vehicle for the vehicle
type.
To identify the correct tire inflation pressure,
please note the following:
▷Tire sizes of your vehicle.▷Maximum permitted driving speed.
Tire inflation pressures up to 100 mph/
160 km/h
For speeds of up to 100 mph/160 km/h and for
optimum driving comfort, note the pressure
values in the tire inflation pressure table, refer
to page 187, and adjust as necessary.
Seite 186MOBILITYWheels and tires186
Online Edition for Part no. 01 40 2 969 276 - II/16
Page 193 of 252
they achieve their full traction potential after a
break-in time.
Drive conservatively for the first
200 miles/300 km.
Retreaded tires The manufacturer of your vehicle does not rec‐
ommend the use of retreaded tires.
WARNING
Retreaded tires can have different tire
casing structures. With advanced age the serv‐
ice life can be limited. There is risk of an acci‐
dent. The manufacturer of your vehicle does
not recommend the use of retreaded tires. ◀
Winter tires Winter tires are recommended for operating on
winter roads.
Although so-called all-season M+S tires provide
better winter traction than summer tires, they
do not provide the same level of performance
as winter tires.
Maximum speed of winter tires
If the maximum speed of the vehicle is higher
than the permissible speed for the winter tires,
then a respective symbol is displayed in your
field of vision. The label is available from a
dealer’s service center or another qualified
service center or repair shop.
With mounted winter tires, observe and adhere
to the permissible maximum speed.
Run-flat tires If you are already using run-flat tires, for your
own safety you should replace them only with
the same kind. No spare tire is available in the
case of a flat tire. Further information is availa‐
ble from a dealer’s service center or another
qualified service center or repair shop.Rotating wheels between axles
Different wear patterns can occur on the front
and rear axles depending on individual driving
conditions. The tires can be rotated between
the axles to achieve even wear. Further infor‐
mation is available from a dealer’s service cen‐
ter or another qualified service center or repair
shop. After rotating, check the tire pressure and
correct if needed.
Storage Store wheels and tires in a cool, dry place with
as little exposure to light as possible.
Always protect tires against all contact with oil,
grease and fuels.
Do not exceed the maximum tire inflation pres‐
sure indicated on the side wall of the tire.
Run-flat tires
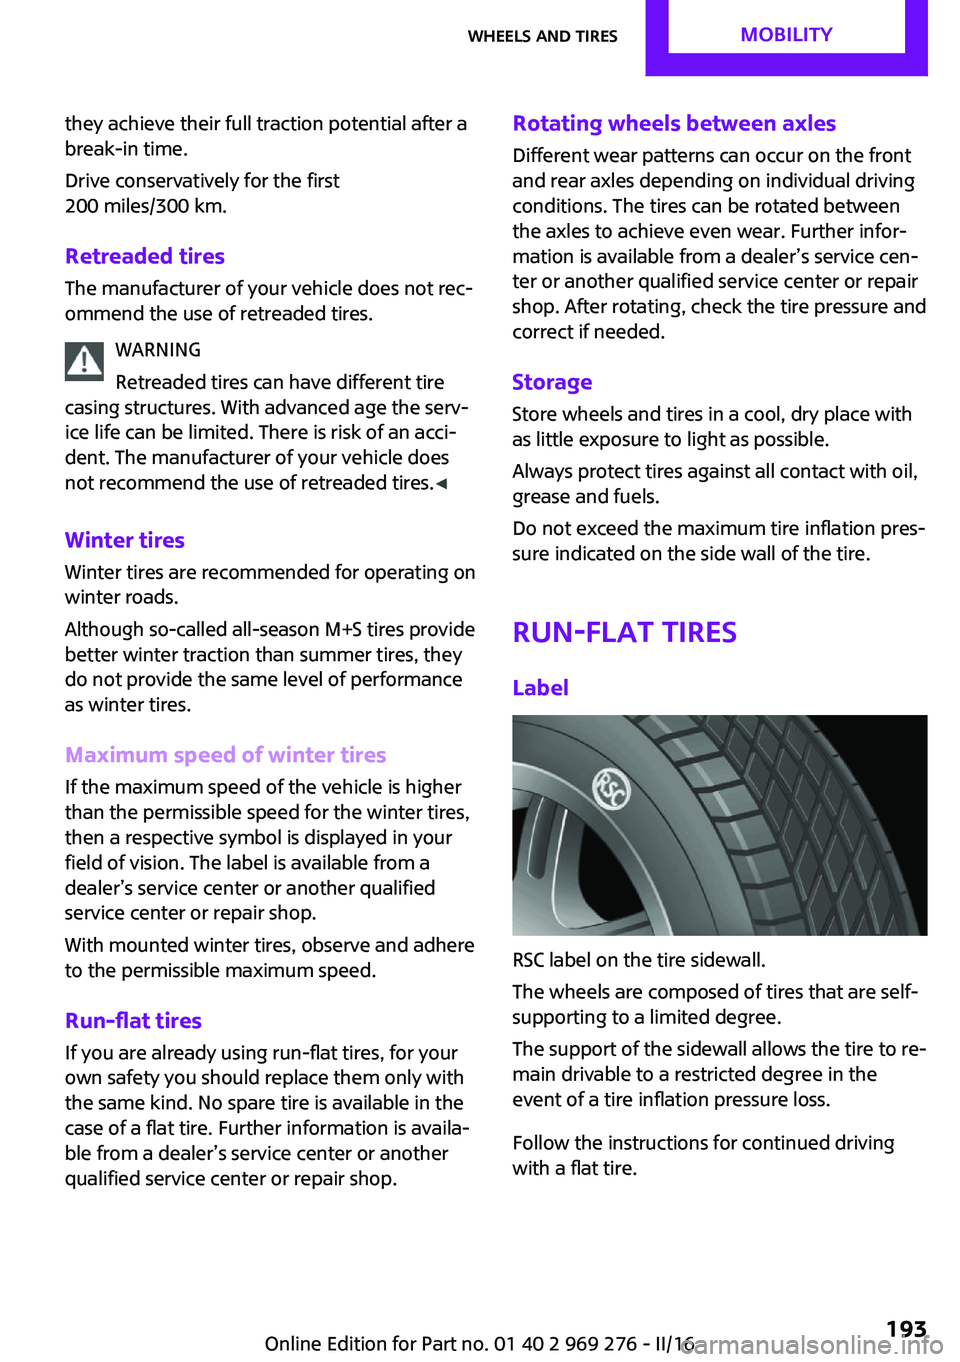
Label
RSC label on the tire sidewall.
The wheels are composed of tires that are self-
supporting to a limited degree.
The support of the sidewall allows the tire to re‐
main drivable to a restricted degree in the
event of a tire inflation pressure loss.
Follow the instructions for continued driving
with a flat tire.
Seite 193Wheels and tiresMOBILITY193
Online Edition for Part no. 01 40 2 969 276 - II/16
Page 199 of 252
WARNING
The engine compartment accommodates
moving components. Certain components in
the engine compartment can also move with
the vehicle switched off, e.g., the radiator fan.
There is a a risk of injury. Do not reach into the
area of moving parts. Keep articles of clothing
and hair away from moving parts. ◀
WARNING
There are protruding parts, e.g., locking
hook, on the inside of the hood. There is a a
risk of injury. If the hood is open, pay attention
to protruding parts and keep these areas
clear. ◀
WARNING
An incorrectly locked hood can open
while driving and restrict visibility. There is risk
of an accident. Stop immediately and correctly
close the hood. ◀
WARNING
Body parts can be jammed when opening
and closing the hood. There is a a risk of injury.
Make sure that the area of movement of the
hood is clear during opening and closing. ◀
ATTENTION
Folded-away wipers can be jammed
when the hood is opened. There is a risk of
damage to property. Make sure that the wipers
with the wiper blades mounted are folded
down onto the windshield before opening the
hood. ◀
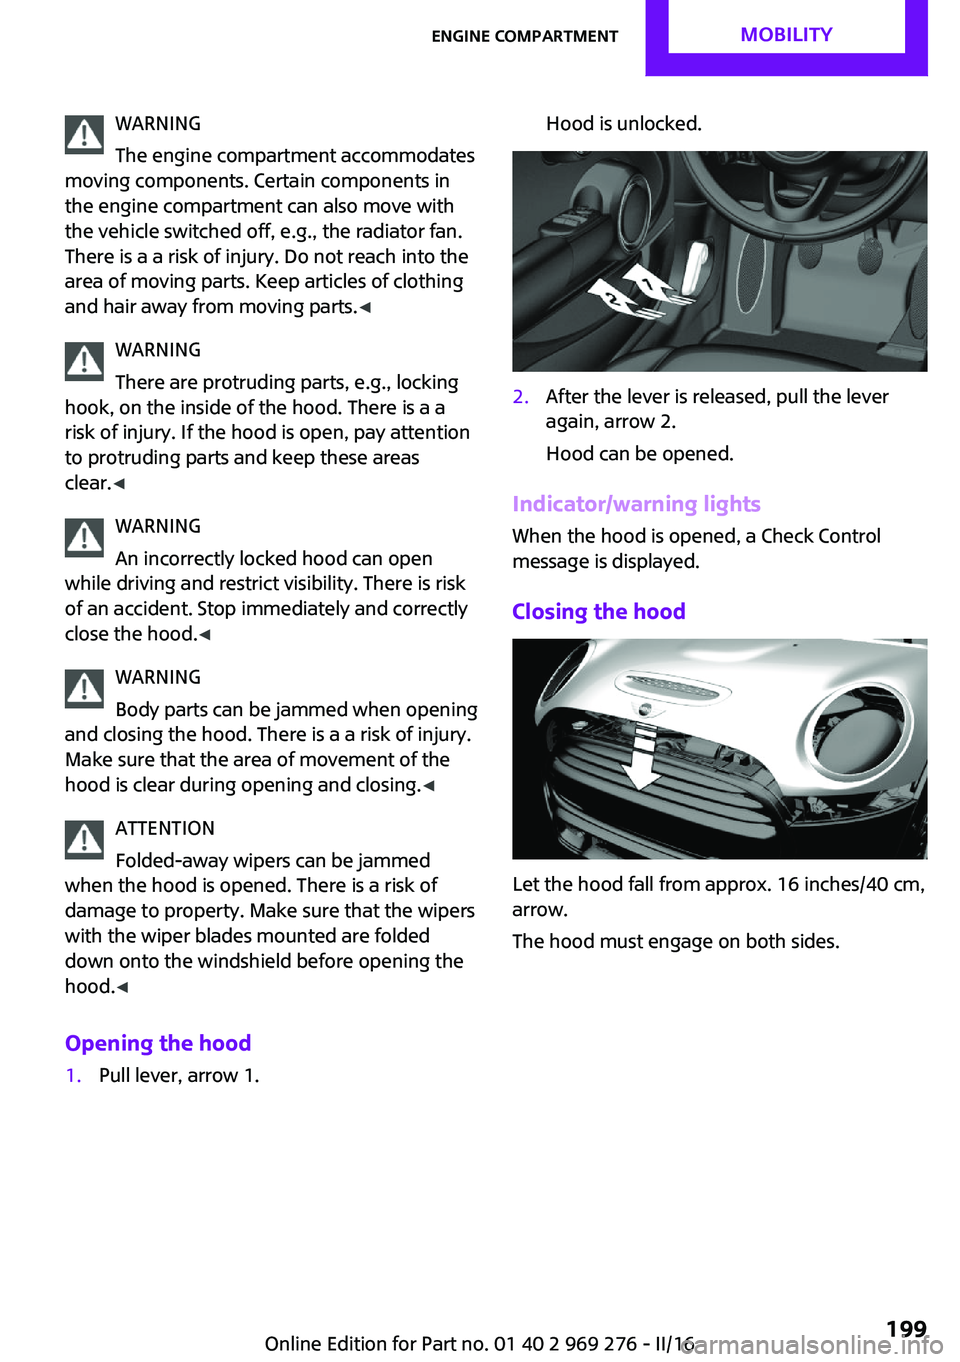
Opening the hood1.Pull lever, arrow 1.Hood is unlocked.2.After the lever is released, pull the lever
again, arrow 2.
Hood can be opened.
Indicator/warning lights
When the hood is opened, a Check Control
message is displayed.
Closing the hood
Let the hood fall from approx. 16 inches/40 cm,
arrow.
The hood must engage on both sides.
Seite 199Engine compartmentMOBILITY199
Online Edition for Part no. 01 40 2 969 276 - II/16
Page 200 of 252
Engine oilVehicle features and op‐
tions
This chapter describes all standard, country-
specific and optional features offered with the
series. It also describes features that are not
necessarily available in your car, e. g., due to
the selected options or country versions. This
also applies to safety-related functions and sys‐
tems. The respectively applicable country provi‐
sions must be observed when using the respec‐
tive features and systems.
General information The engine oil consumption is dependent on
the driving style and driving conditions.
The engine oil consumption can increase in the
following situations, for example:▷Sporty driving style.▷Break-in of the engine.▷Idling of the engine.▷With use of engine oil types that are classi‐
fied as not suitable.
Therefore, regularly check the engine oil level
after refueling.
The vehicle is equipped with electronic oil
measurement.
The electronic oil measurement has two meas‐
uring principles:
▷Status display.▷Detailed measurement.Electronic oil measure‐
ment
Status display
The concept
The engine oil level is monitored electronically
while driving and shown on the Control Display.
If the engine oil level reaches the minimum
level, a check control message is displayed.
RequirementsA current measured value is available after ap‐
prox. 30 minutes of driving. During a shorter
trip, the status of the last, sufficiently long trip is
displayed.
With frequent short-distance trips, perform a
detailed measurement.
Displaying the engine oil level On the Control Display:1. "Vehicle info"2."Vehicle status"3. "Engine oil level"
Engine oil level display messagesDifferent messages appear on the display de‐
pending on the engine oil level. Pay attention
to these messages.
If the engine oil level is too low within the next
125 miles/200 km, add engine oil, refer to
page 201.
ATTENTION
Too low of an engine oil level causes en‐
gine damage. There is a risk of damage to
property. Immediately add engine oil. ◀
Take care not to add too much engine oil.
Seite 200MOBILITYEngine oil200
Online Edition for Part no. 01 40 2 969 276 - II/16
Page 201 of 252
ATTENTION
Too much engine oil can damage the en‐
gine or the catalytic converter. There is a risk of
damage to property. Do not add too much en‐
gine oil. When too much engine oil is added,
have oil level corrected by a dealer’s service
center or another qualified service center or re‐
pair shop. ◀
Detailed measurement
The concept
In the detailed measurement the engine oil
level is checked when the vehicle is stationary,
and displayed via a scale.
If the engine oil level reaches the minimum
level, a check control message is displayed.
During the measurement, the idle speed is in‐
creased somewhat.
Requirements▷Vehicle is parked in a horizontal position.▷Manual transmission: shift lever in neutral
position, clutch and accelerator pedals not
depressed.▷Steptronic transmission: selector lever in se‐
lector lever position N or P and accelerator
pedal not depressed.▷Engine is running and is at operating tem‐
perature.
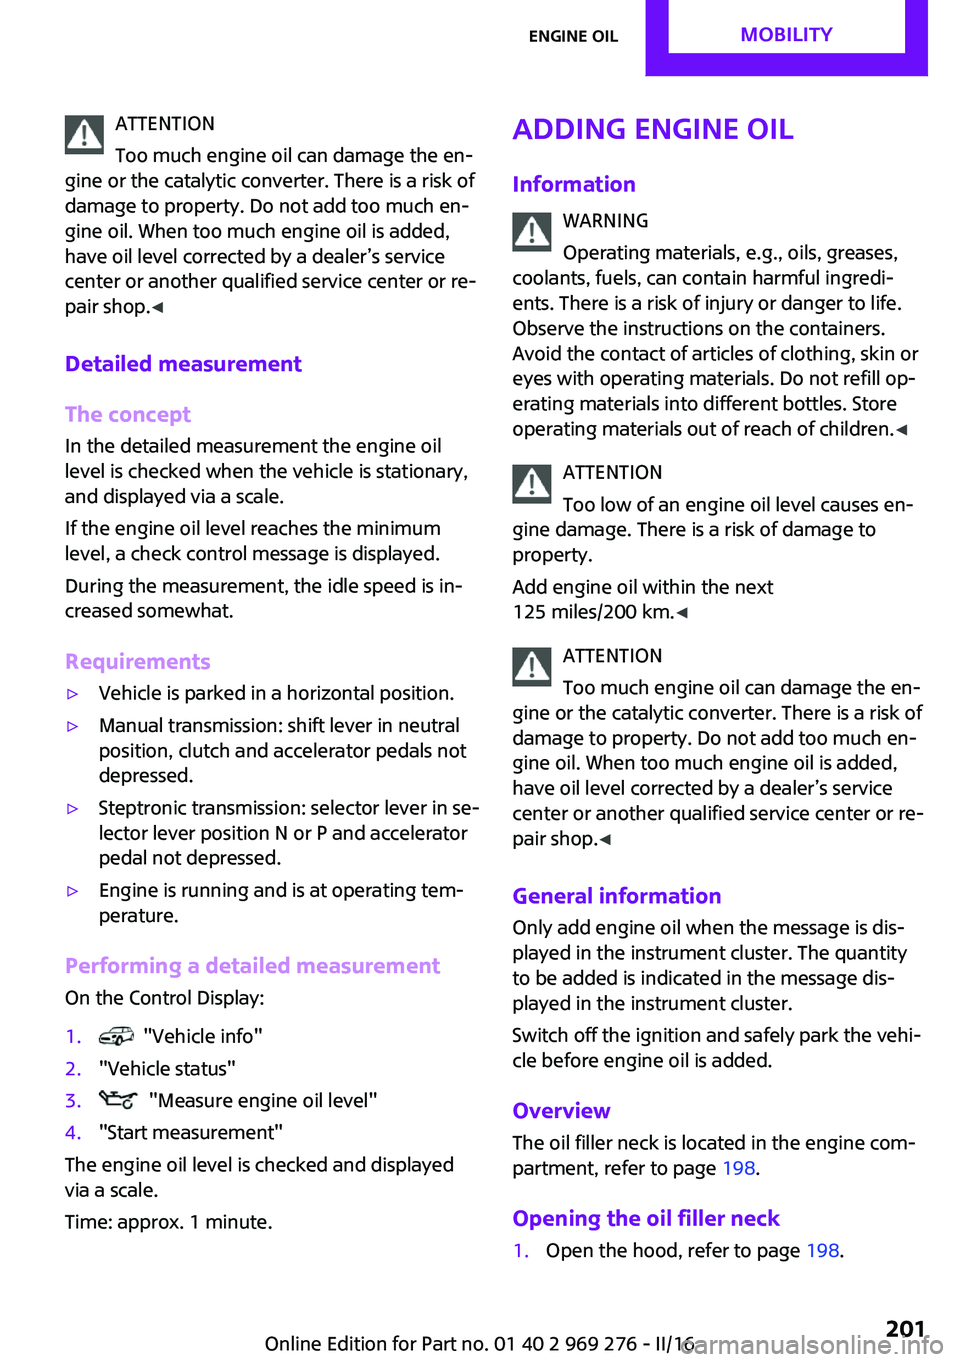
Performing a detailed measurement
On the Control Display:
1. "Vehicle info"2."Vehicle status"3. "Measure engine oil level"4."Start measurement"
The engine oil level is checked and displayed
via a scale.
Time: approx. 1 minute.
Adding engine oil
Information WARNING
Operating materials, e.g., oils, greases,
coolants, fuels, can contain harmful ingredi‐
ents. There is a risk of injury or danger to life. Observe the instructions on the containers.Avoid the contact of articles of clothing, skin or
eyes with operating materials. Do not refill op‐
erating materials into different bottles. Store
operating materials out of reach of children. ◀
ATTENTION
Too low of an engine oil level causes en‐
gine damage. There is a risk of damage to
property.
Add engine oil within the next
125 miles/200 km. ◀
ATTENTION
Too much engine oil can damage the en‐
gine or the catalytic converter. There is a risk of
damage to property. Do not add too much en‐
gine oil. When too much engine oil is added,
have oil level corrected by a dealer’s service
center or another qualified service center or re‐
pair shop. ◀
General information
Only add engine oil when the message is dis‐ played in the instrument cluster. The quantity
to be added is indicated in the message dis‐
played in the instrument cluster.
Switch off the ignition and safely park the vehi‐
cle before engine oil is added.
Overview The oil filler neck is located in the engine com‐
partment, refer to page 198.
Opening the oil filler neck1.Open the hood, refer to page 198.Seite 201Engine oilMOBILITY201
Online Edition for Part no. 01 40 2 969 276 - II/16
Page 206 of 252
MaintenanceVehicle features and op‐
tions
This chapter describes all standard, country-
specific and optional features offered with the
series. It also describes features that are not
necessarily available in your car, e. g., due to
the selected options or country versions. This
also applies to safety-related functions and sys‐
tems. The respectively applicable country provi‐
sions must be observed when using the respec‐
tive features and systems.
MINI maintenance system
The maintenance system indicates required
maintenance measures, and thereby provides
support in maintaining road safety and the op‐
erational reliability of the vehicle.
In some cases scopes and intervals may vary
according to the country-specific version. Re‐
placement work, spare parts, fuels and lubri‐
cants and wear materials are calculated sepa‐
rately. Further information is available from a
dealer’s service center or another qualified
service center or repair shop.
Condition Based Service
CBS
Sensors and special algorithms take into ac‐
count the driving conditions of the vehicle.
Based on this, Condition Based Service recog‐
nizes the maintenance requirements.
The system makes it possible to adapt the
amount of maintenance corresponding to your
user profile.Information on service requirements, refer to
page 86, can be displayed on the Control Dis‐
play.
Service data in the remote control Information on the required maintenance is
continuously stored in the remote control. The
dealer’s service center can read this data out
and suggest an optimized maintenance scope
for the vehicle.
Therefore, hand the service advisor the remote
control with which the vehicle was driven most
recently.
Storage periods
Storage periods during which the vehicle bat‐
tery was disconnected are not taken into ac‐
count.
If this occurs, have a dealer's service center or
another qualified service center or repair shop
update the time-dependent maintenance pro‐
cedures, such as checking brake fluid and, if
necessary, changing the engine oil and the mi‐
crofilter/activated-charcoal filter.
Service and Warranty In‐
formation Booklet for
US models and Warranty
and Service Guide Book‐
let for Canadian models
Please consult your Service and Warranty Infor‐
mation Booklet for US models and Warranty
and Service Guide Booklet for Canadian models
for additional information on service require‐
ments.
The manufacturer of your vehicle recommends
that maintenance and repair be performed by a
dealer’s service center or another qualifiedSeite 206MOBILITYMaintenance206
Online Edition for Part no. 01 40 2 969 276 - II/16
Page 218 of 252
More information about the battery can be re‐
quested from a dealer’s service center or an‐
other qualified service center or repair shop.
Battery replacement ATTENTION
Vehicle batteries that are not compatible
can damage vehicle systems and impair vehicle
functions. There is a risk of personal and prop‐
erty damage. Only vehicle batteries that are
compatible with your vehicle type should be in‐
stalled in your vehicle. Information on compati‐
ble vehicle batteries is available at your dealer’s
service center. ◀
After a battery replacement, the manufacturer
of your vehicle recommends that the vehicle
battery be registered on the vehicle by a
dealer’s service center or another qualified
service center or repair shop to ensure that all
comfort features are fully available and that
any Check Control messages of these comfort
features are no longer displayed.
Charging the battery
General information
Make sure that the battery is always sufficiently
charged to guarantee that the battery remains
usable for its full service life.
The battery may need to be charged in the fol‐
lowing cases:▷When making frequent short-distance
drives.▷If the vehicle is not used for more than a
month.▷Steptronic transmission: when parked for
long periods of time in selector lever posi‐
tion D, R or N.Information
ATTENTION
Battery chargers for the vehicle battery
can work with high voltages and currents, which means that the 12 volt on-board net‐
work can be overloaded or damaged. There is a
risk of damage to property. Only connect bat‐
tery chargers for the vehicle battery to the
starting aid terminals in the engine compart‐
ment. ◀
Starting aid terminals In the vehicle, only charge the battery via the
starting aid terminals, refer to page 221, in the
engine compartment with the engine off.
Power failure
After a power loss, some equipment needs to
be newly initialized or individual settings up‐
dated, for example:▷Time: update.▷Date: update.▷Navigation system: wait for the operability
of the navigation.▷Seat and mirror memory: store the posi‐
tions again.
Disposing of old batteries
Have old batteries disposed of by a
dealer’s service center or another quali‐
fied service center or repair shop or
take them to a collection point.
Maintain the battery in an upright position for
transport and storage. Secure the battery so
that it does not tip over during transport.
Seite 218MOBILITYReplacing components218
Online Edition for Part no. 01 40 2 969 276 - II/16
Page 227 of 252
Before driving into a car washIn order to ensure that the vehicle can roll in a
car wash, take the following steps:
Manual transmission:1.Drive into the car wash.2.Shift to neutral.3.Switch the engine off.4.Switch on the ignition.
Steptronic transmission:
1.Drive into the car wash.2.Engage selector lever position N.3.Make sure that the parking brake is re‐
leased.4.Press the Start/Stop button to switch off the
engine.
In this way, the ignition remains switched
on, and two Check-Control messages are
displayed.
A signal sounds when you leave the vehicle
while in selector lever position N.
The vehicle cannot be locked from the outside
when in selector lever position N. A signal is
sounded when an attempt is made to lock the
vehicle.
To start the engine with manual transmission:
1.Press on the clutch pedal.2.Press the Start/Stop button.
To start the engine with Steptronic transmis‐
sion:
1.Depress the brake pedal.2.Press the Start/Stop button.
Headlights
▷Do not rub dry and do not use abrasive or
acidic cleansers.▷Soak areas that have been dirtied e. g.,
from insects, with shampoo and wash off
with water.▷Thaw ice with de-icing spray; do not use an
ice scraper.
After washing the vehicle
After washing the vehicle, apply the brakes
briefly to dry them; otherwise, braking action
can be reduced and corrosion of the brake
discs can occur.
Completely remove all residues on the win‐
dows, to minimize loss of visibility due to
smearing and to reduce wiper noises and wiper
blade wear.
Vehicle care Vehicle care products
The manufacturer of your vehicle recommends
using care and cleaning products from MINI.
WARNING
Cleansers can contain substances that are
dangerous and harmful to your health. There is
a risk of injury. When cleaning the interior,
open the doors or windows. Only use products
intended for cleaning vehicles. Follow the in‐
structions on the container. ◀
Vehicle paint Regular care contributes to driving safety and
value retention. Environmental influences in
areas with elevated air pollution or natural con‐
taminants, such as tree resin or pollen can af‐
fect the vehicle's paintwork. Tailor the fre‐
quency and extent of your vehicle care to these
influences.
Aggressive substances such as spilled fuel, oil,
grease or bird droppings, must be removed im‐
mediately to prevent the finish from being al‐
tered or discolored.
Caring for the convertible top
The appearance and life of the convertible top
depend on correct care and operation.
Seite 227CareMOBILITY227
Online Edition for Part no. 01 40 2 969 276 - II/16
Page 230 of 252
floor mats and do not layer several floor mats.
Make sure that there is sufficient clearance for
the pedals. Ensure that the floor mats are se‐
curely fastened again after they were removed,
e.g., for cleaning. ◀
Floor mats can be removed from the car's inte‐
rior for cleaning.
If the floor carpets are very dirty, clean with a
microfiber cloth and water or a textile cleaner.
To prevent matting of the carpet, rub back and
forth in the direction of travel only.
Sensor/camera lenses To clean sensors and camera lenses, use a cloth
moistened with a small amount of glass deter‐
gent.
Displays/Screens/Projection lenses ATTENTION
Chemical cleansers, moisture or fluids of
any kind can damage the surface of displays
and screens. There is a risk of damage to prop‐
erty. Clean with a clean, antistatic microfiber
cloth. ◀
ATTENTION
The surface of displays can be damaged
with improper cleaning. There is a risk of dam‐
age to property. Avoid pressure that is too high
and do not use any scratching materials. ◀
Clean with a clean, antistatic microfiber cloth.
Head-up Display:
For stubborn soiling on the projection lens of
the Head-up Display, dampen the microfiber
cloth with alcohol. Extending projection lens,
refer to page 95.
Long-term vehicle storage
When the vehicle is shut down for longer than
three months, special measures must be taken.
Further information is available from a dealer’s
service center or another qualified service cen‐
ter or repair shop.Seite 230MOBILITYCare230
Online Edition for Part no. 01 40 2 969 276 - II/16
Page 242 of 252
Everything from A to ZIndexA
ABS, Antilock Brake Sys‐ tem 122
Acceleration Assistant, see Launch Control 78
Accessories and parts 8
ACC, see camera-based cruise control 126
Activated-charcoal filter 149
Active Cruise Control, see camera-based cruise con‐
trol 126
Additional information, on‐ board monitor 23
Additives, oil 202
Adjustments, seats/head re‐ straints 54
Adjustments, steering wheel 62
After washing vehicle 227
Airbags 105
Airbags, indicator/warning light 106
Air circulation, see Recircu‐ lated-air mode 145, 148
Air conditioner 144
Air, dehumidifying, see Cool‐ ing function 145, 147
Air distribution, man‐ ual 145 , 148
Air flow, air conditioner 145
Air flow, automatic climate control 148
Air pressure, tires 186
Air vents, see Ventilation 149
Alarm system 44
Alarm triggering 44
Alarm, unintentional 45
All around the center con‐ sole 16 All around the interior mir‐
ror 17
All around the steering wheel 14
All-season tires, see Winter tires 193
Alternating-code hand-held transmitter 152
Alternative oil types 202
Always Open Timer, Control Display 97
Always Open Timer, onboard computer 90
Antifreeze, washer fluid 74
Antilock Brake System, ABS 122
Anti-slip control, see DSC 122
App, MINI Motorer’s Guide 6
Approved axle load 235
Arrival time 91
Ash tray 155
Assistance, Roadside Assis‐ tance 220
Assistance when driving off 125
Assist system, refer to Intelli‐ gent Safety 115
AUTO intensity 148
Automatic car wash 226
Automatic climate con‐ trol 146
Automatic Curb Monitor 60
Automatic deactivation, Front- seat passenger airbags 107
Automatic headlamp con‐ trol 101
Automatic locking 43
Automatic recirculated-air control 148
Automatic transmission with Steptronic 75 AUTO program, automatic cli‐
mate control 147
AUTO program, intensity 148
Auto Start/Stop function 68
AUX-IN port, position in vehi‐ cle 156
Average fuel consumption 90
Average speed 90
Axle loads, weights 235
B
Backrest curvature, see Lum‐ bar support 55
Band-aids, see First-aid kit 220
Battery replacement, vehicle battery 218
Battery, vehicle 217
Being towed, see Tow-starting and towing 222
Belts, safety belts 56
Beverage holder, cup holder 161
Bonus range, GREEN Mode 176
Bottle holder, see Cup holder 161
Brake assistant 122
Brake discs, break-in 166
Brake pads, break-in 166
Braking, information 167
Breakdown assistance 220
Break-in 166
Brightness of Control Dis‐ play 93
Bug light 210
Bulb replacement 209
Bulb replacement, front 209
Bulb replacement, rear 212
Bulb replacement, side 214 Seite 242REFERENCEEverything from A to Z242
Online Edition for Part no. 01 40 2 969 276 - II/16