tow MINI Countryman 2011 (Mini Connected) User Guide
[x] Cancel search | Manufacturer: MINI, Model Year: 2011, Model line: Countryman, Model: MINI Countryman 2011Pages: 254, PDF Size: 3.84 MB
Page 88 of 254
CONTROLSClimate
86
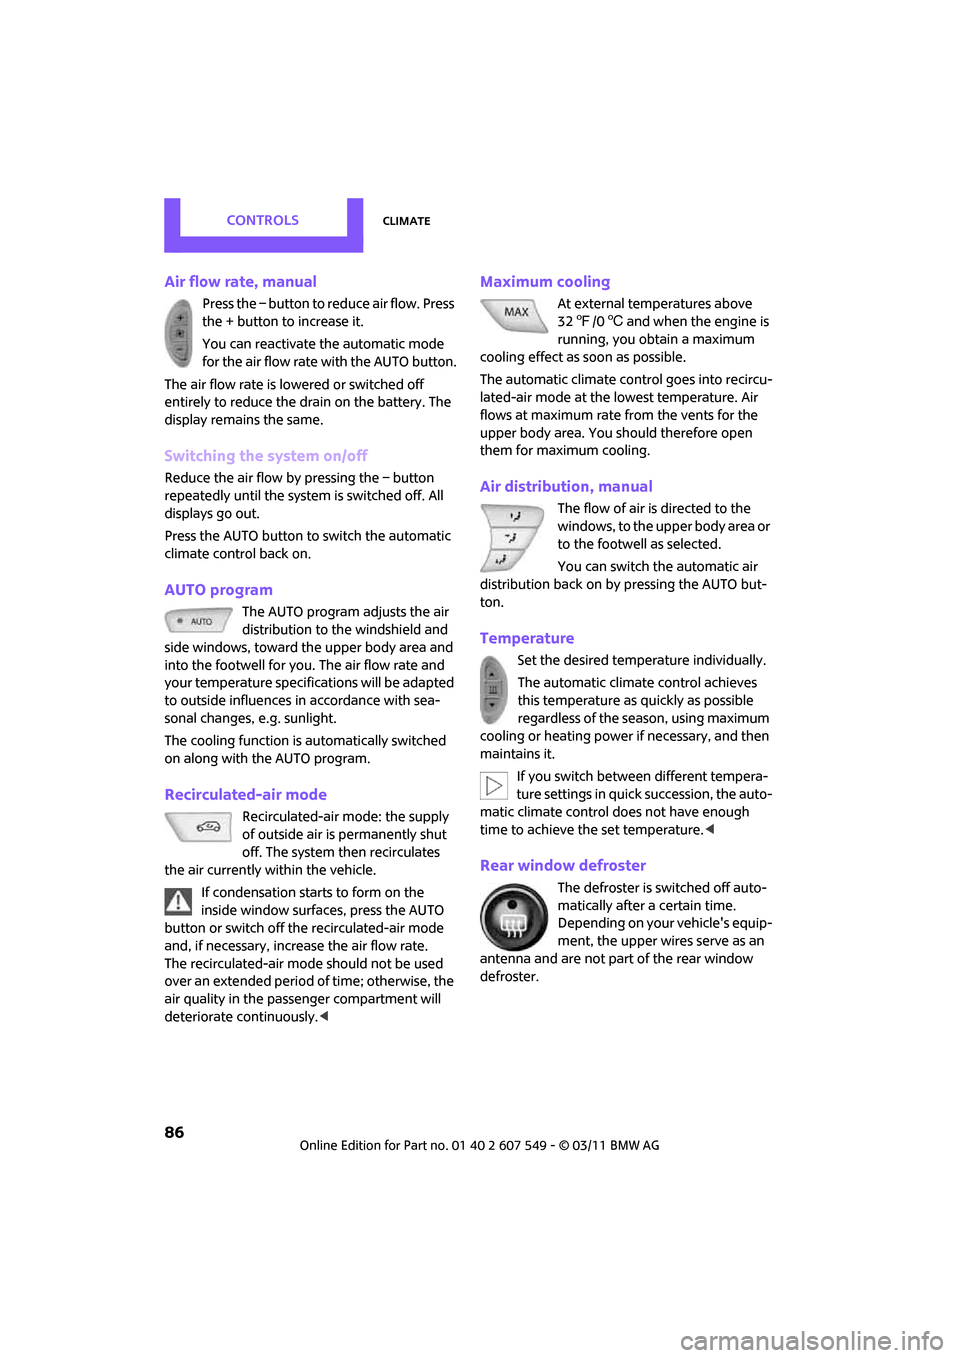
Air flow rate, manual
Press the – button to reduce air flow. Press
the + button to increase it.
You can reactivate the automatic mode
for the air flow rate with the AUTO button.
The air flow rate is lo wered or switched off
entirely to reduce the drain on the battery. The
display remains the same.
Switching the system on/off
Reduce the air flow by pressing the – button
repeatedly until the system is switched off. All
displays go out.
Press the AUTO button to switch the automatic
climate control back on.
AUTO program
The AUTO program adjusts the air
distribution to the windshield and
side windows, toward the upper body area and
into the footwell for you. The air flow rate and
your temperature specifications will be adapted
to outside influences in accordance with sea-
sonal changes, e.g. sunlight.
The cooling function is automatically switched
on along with the AUTO program.
Recirculated-air mode
Recirculated-air mode: the supply
of outside air is permanently shut
off. The system then recirculates
the air currently within the vehicle.
If condensation starts to form on the
inside window surfac es, press the AUTO
button or switch off the recirculated-air mode
and, if necessary, increa se the air flow rate.
The recirculated-air mode should not be used
over an extended period of time; otherwise, the
air quality in the passenger compartment will
deteriorate continuously. <
Maximum cooling
At external temperatures above
327 /06 and when the engine is
running, you obtain a maximum
cooling effect as soon as possible.
The automatic clim ate control goes into recircu-
lated-air mode at the lowest temperature. Air
flows at maximum rate from the vents for the
upper body area. You should therefore open
them for maximum cooling.
Air distribution, manual
The flow of air is directed to the
windows, to the upper body area or
to the footwell as selected.
You can switch the automatic air
distribution back on by pressing the AUTO but-
ton.
Temperature
Set the desired temperature individually.
The automatic climate control achieves
this temperature as quickly as possible
regardless of the season, using maximum
cooling or heating power if necessary, and then
maintains it.
If you switch between different tempera-
ture settings in quick succession, the auto-
matic climate control does not have enough
time to achieve the set temperature. <
Rear window defroster
The defroster is switched off auto-
matically after a certain time.
Depending on your vehicle's equip-
ment, the upper wires serve as an
antenna and are not part of the rear window
defroster.
Page 102 of 254

DRIVING TIPSThings to remember when driving
100
Flat load floor*
Do not exceed the maximum load of
150 kg for the load floor; otherwise, dam-
age may result. <
Access to the storage space
Under the load floor, there is storage space, e.g.,
for the cargo net
*.
1. Reach into the recess, arrow 1, at the back
edge of the load floor.
2. Lift up load floor behind and fold forwards,
arrow 2.
Before closing the liftgate, put the load floor
back on the cargo area floor.
Removing
If necessary, the load fl oor can be removed. To
do this, lift the load floor at the recess, fold up
and remove.
Cargo net*
Ensure that the cargo net is firmly
attached; otherwise, injuries may occur. <
Before installing
1.Remove the pouch with the cargo net from
the storage compartment under the pull-out
floor panel in the cargo area.
2. Remove the cargo net from the pouch, then
unroll and unfold it.
After use, fold the cargo net together, roll it
back up in the same way, and place it in the
pouch so that it can be stowed under the
floor panel again. When doing so, make sure
that hooks and tensioning buckles do not
rest against the rod elements.
3. Unfold the cargo net until the rod elements
snap into place.
Installing behind the front seats
1.If necessary, remove the cargo area cover.
2. Fold down the rear seat backrests, refer to
Expanding cargo area.
3. Insert each cargo net mounting pin all the
way into its respective front mount in the
headliner, arrow 1, and push it forward.
4. Attach the hook, arrow 2, at the bottom of
each retaining strap to the respective eye on
the vehicle floor.
5. Lash the cargo net se curely. To do so,
tighten the retaining stra ps at the tensioning
buckles.
Removing
When removing and stowing the cargo net, pro-
ceed in the reverse sequence.
Page 104 of 254

DRIVING TIPSThings to remember when driving
102
Load
The permissible load is the sum of the occu-
pants' weights and the weight of the cargo. The
greater the weight of the occupants, the less
cargo/luggage can be transported.
Stowing cargo
> Position heavy objects as low and as far for-
ward as possible, ideally directly behind the
rear seat backrests.
> Cover sharp edges and corners.
> For very heavy cargo when the rear seat is
not occupied, secure each safety belt in the
respective opposite buckle.
> Do not stack higher than the top edge of the
backrests.
> Use the cargo net, refer to page 100. Ensure
that no objects can penetrate through the
net.
Securing cargo
> Secure smaller and lighter items using
retaining or draw straps
*.
> Heavy-duty cargo straps
* for securing larger
and heavier objects are available at your
MINI dealer.
> These cargo straps are fastened using eight
*
securing eyes.
Two of them are located on the side wall
*,
arrows 1, of the cargo area.
Two of them are located on the rear wall,
arrows 2, of the cargo area.
To use the lower lashing eyes, raise or remove
the pull-out floor panel.
Comply with the information enclosed with the
load-securing devices. Always position and secure the cargo as
described above, so that it cannot endan-
ger the car's occupants, for example if sudden
braking or swerve s are necessary.
Do not exceed the approved gross vehicle
weight and axle loads, page 226; otherwise, the
vehicle's operating safety is no longer assured
and the vehicle will not be in compliance with
the construction and use regulations.
Heavy or hard objects should not be carried
loose inside the car, since they could be thrown
around, for example as a result of heavy braking,
sudden swerves, etc., and endanger the occu-
pants. Do not secure cargo using the fastening
points for the tether strap, page 44; they may
become damaged. <
Page 111 of 254
Destination entryNAVIGATION
109
Destination entry
In entering your destination you can select from
among the following options:
> Manual destination entry, see below
> Selecting destination from address book,
page 111
> Last destinations, page 112
> Special destinations, refer to page 112
> Entering the destination via map, refer to
page 114
> Selecting home address, refer to page 112
> Entering destinatio n via voice*, page115
After selecting your destination you can proceed
to start the route guidance, page 118.
Manual destination
entry
To make it easier to enter town/city names and
street names, you are supported with the word-
match principle, refer to page 116. This makes it
possible to enter different spellings and com-
pletes your entry automatically so that stored
town/city names and st reet names can be
accessed quickly.
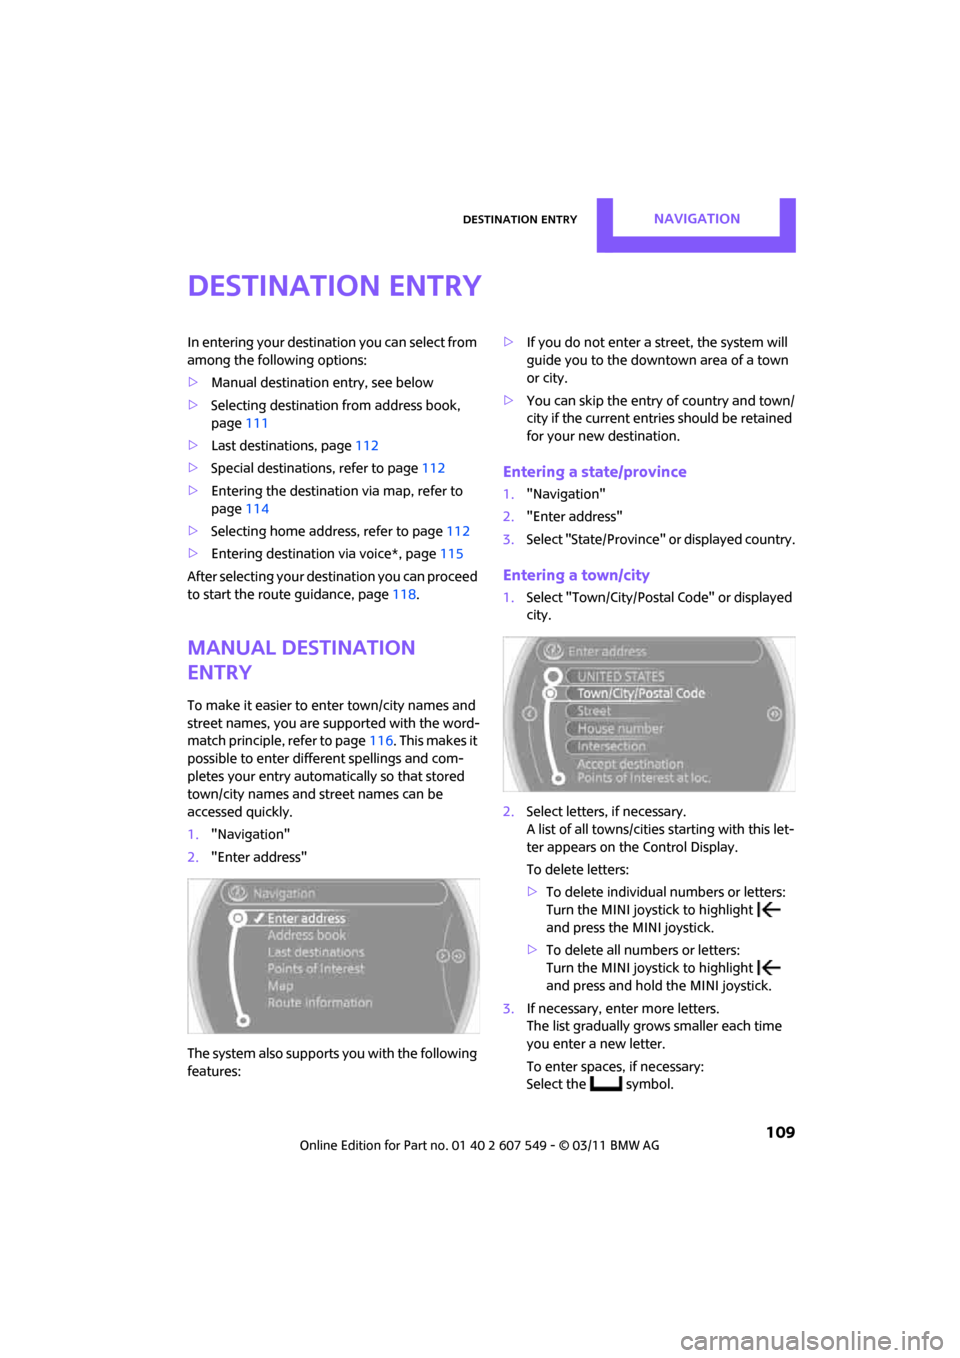
1. "Navigation"
2. "Enter address"
The system also supports you with the following
features: >
If you do not enter a street, the system will
guide you to the downtown area of a town
or city.
> You can skip the entry of country and town/
city if the current entries should be retained
for your new destination.
Entering a state/province
1."Navigation"
2. "Enter address"
3. Select "State/Province" or displayed country.
Entering a town/city
1.Select "Town/City/Postal Code" or displayed
city.
2. Select letters, if necessary.
A list of all towns/cities starting with this let-
ter appears on the Control Display.
To delete letters:
> To delete individual numbers or letters:
Turn the MINI joystick to highlight
and press the MINI joystick.
> To delete all numbers or letters:
Turn the MINI joystick to highlight
and press and hold the MINI joystick.
3. If necessary, enter more letters.
The list gradually grows smaller each time
you enter a new letter.
To enter spaces, if necessary:
Select the symbol.
Page 112 of 254
NAVIGATIONDestination entry
110
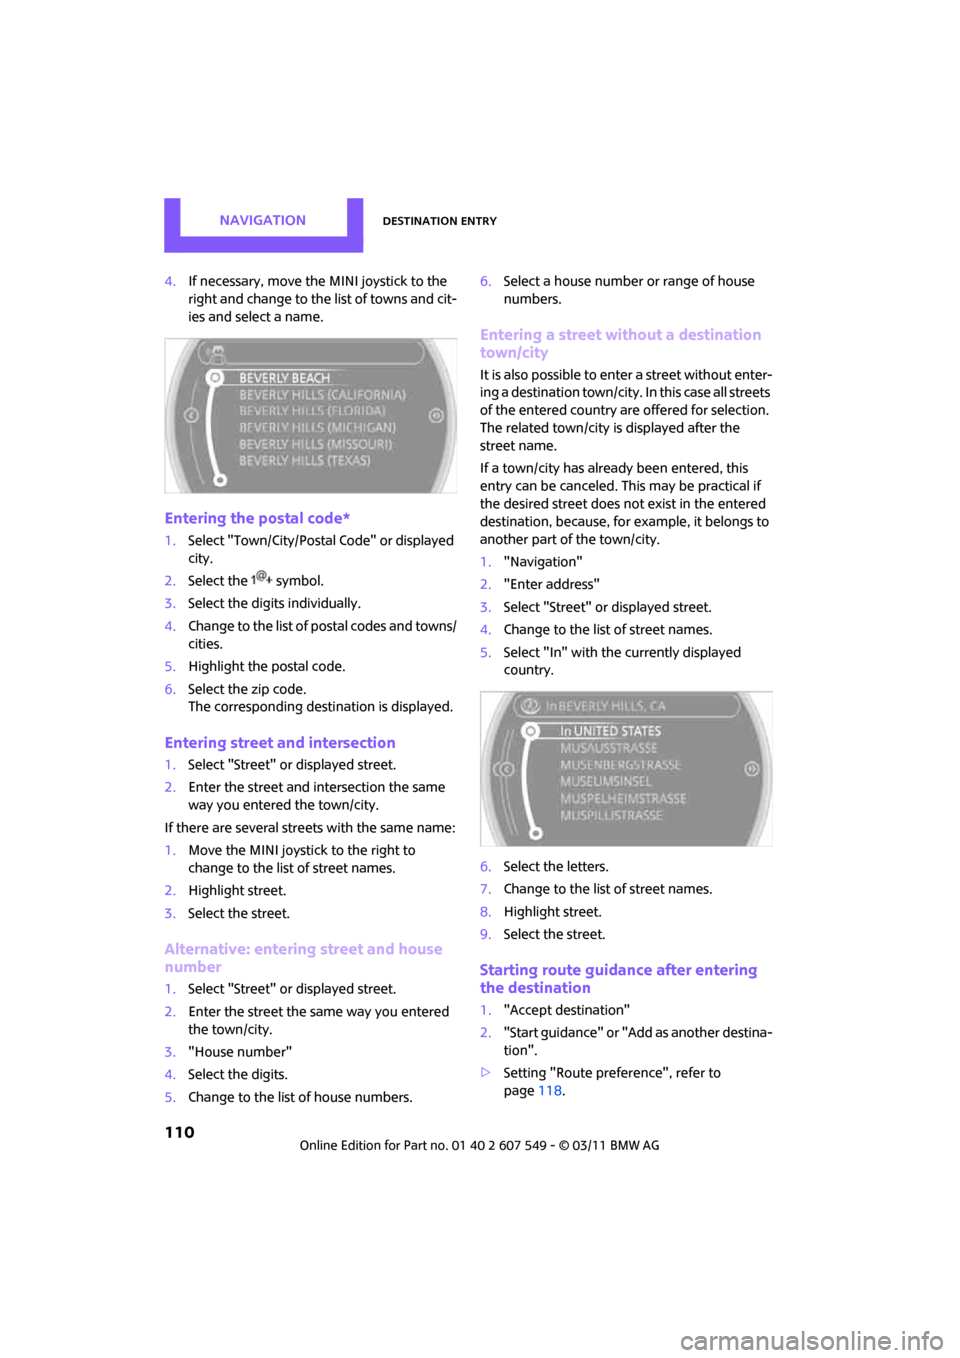
4.If necessary, move the MINI joystick to the
right and change to the list of towns and cit-
ies and select a name.
Entering the postal code*
1.Select "Town/City/Postal Code" or displayed
city.
2. Select the symbol.
3. Select the digits individually.
4. Change to the list of postal codes and towns/
cities.
5. Highlight the postal code.
6. Select the zip code.
The corresponding dest ination is displayed.
Entering street and intersection
1.Select "Street" or displayed street.
2. Enter the street and intersection the same
way you entered the town/city.
If there are several streets with the same name:
1. Move the MINI joystick to the right to
change to the list of street names.
2. Highlight street.
3. Select the street.
Alternative: entering street and house
number
1. Select "Street" or displayed street.
2. Enter the street the same way you entered
the town/city.
3. "House number"
4. Select the digits.
5. Change to the list of house numbers. 6.
Select a house number or range of house
numbers.
Entering a street without a destination
town/city
It is also possible to enter a street without enter-
ing a destination to wn/city. In this case all streets
of the entered country ar e offered for selection.
The related town/city is displayed after the
street name.
If a town/city has already been entered, this
entry can be canceled. This may be practical if
the desired street does not exist in the entered
destination, because, for example, it belongs to
another part of the town/city.
1. "Navigation"
2. "Enter address"
3. Select "Street" or displayed street.
4. Change to the list of street names.
5. Select "In" with the currently displayed
country.
6. Select the letters.
7. Change to the list of street names.
8. Highlight street.
9. Select the street.
Starting route guidance after entering
the destination
1."Accept destination"
2. "Start guidance" or "Add as another destina-
tion".
> Setting "Route preference", refer to
page 118.
Page 115 of 254
Destination entryNAVIGATION
113
Accessing search for special
destinations
1."Navigation"
2. Select "Points of Interest"
search.
A-Z search
1."A-Z search"
2. "Town/City"
3. "Category"
4. "Category details"
For some special destin ations, it is possible
to select several catego ry details. Move the
MINI joystick to the left to exit category
details.
or
5. "Keyword"
6. Enter keyword.
A list of the special destinations is displayed.
7. Select the special destination.
8. Select the symbol.
9. "Start guidance" or "Add as another destina-
tion".
If several details are stored, then you can
scroll through the pages.
If a phone number is available, a connection
can be established, if desired.
Category search
1."Category search"
2. "Search destination"
3. Select or enter town/city.
4. "Category"
5. Select category.
6. "Category details"
For some special destin ations, it is possible
to select several catego ry details. Move the
MINI joystick to the left to exit category
details. 7.
"Start search"
A list of the special destinations is displayed.
8. Select the special destination.
Details are displayed.
9. Select the symbol.
10. "Start guidance" or "Add as another destina-
tion".
If several details are stored, then you can scroll
through the pages. If a phone number is avail-
able, a connection can be established, if desired.
Special destination location
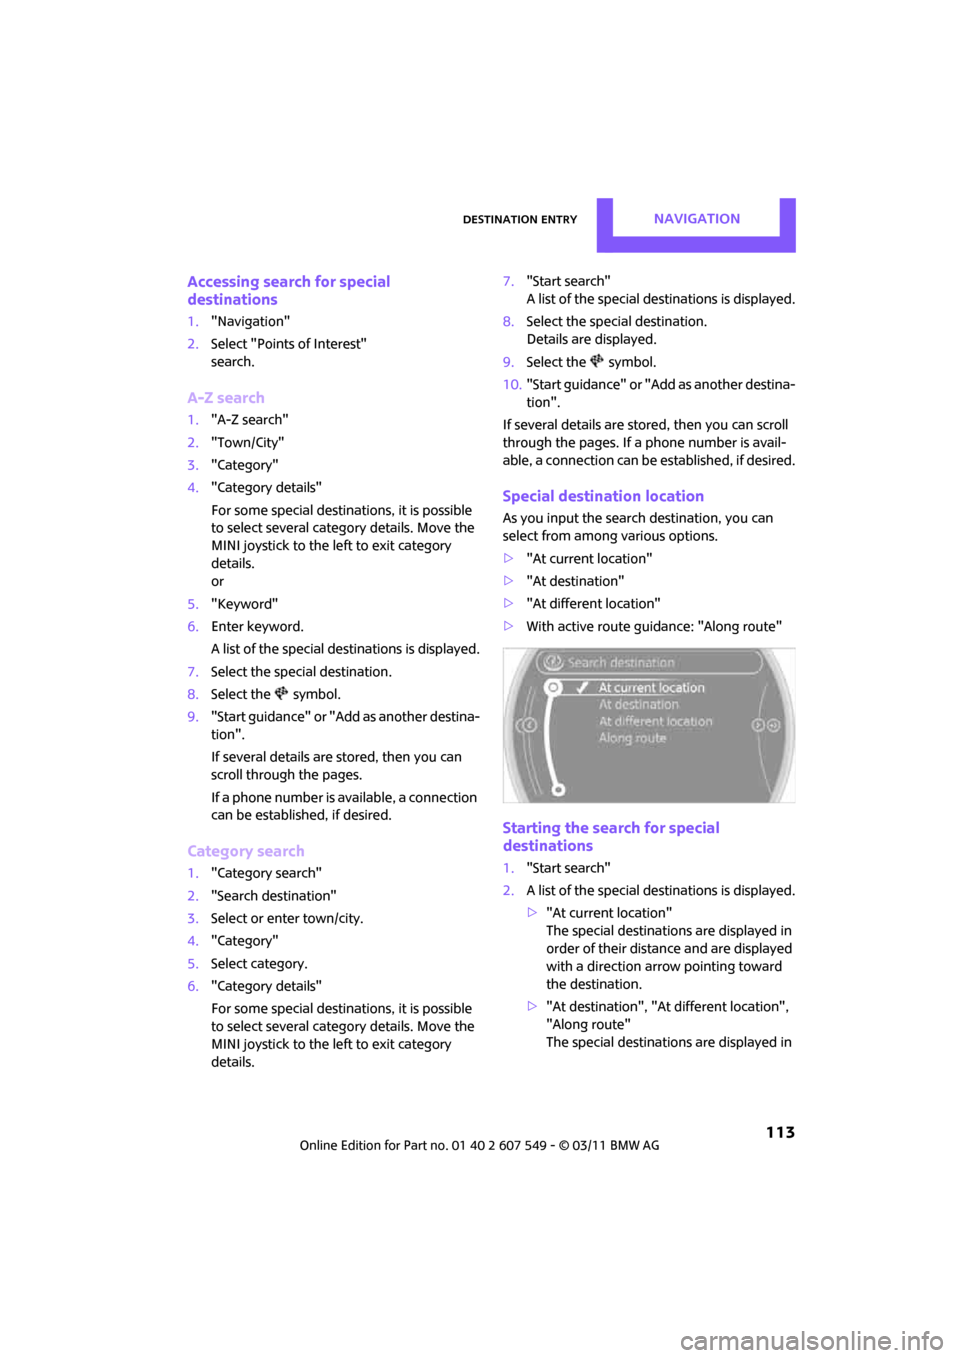
As you input the search destination, you can
select from among various options.
>"At current location"
> "At destination"
> "At different location"
> With active route gu idance: "Along route"
Starting the search for special
destinations
1."Start search"
2. A list of the special destinations is displayed.
>"At current location"
The special destinations are displayed in
order of their distance and are displayed
with a direction arro w pointing toward
the destination.
> "At destination", "At different location",
"Along route"
The special destinations are displayed in
Page 117 of 254
Destination entryNAVIGATION
115
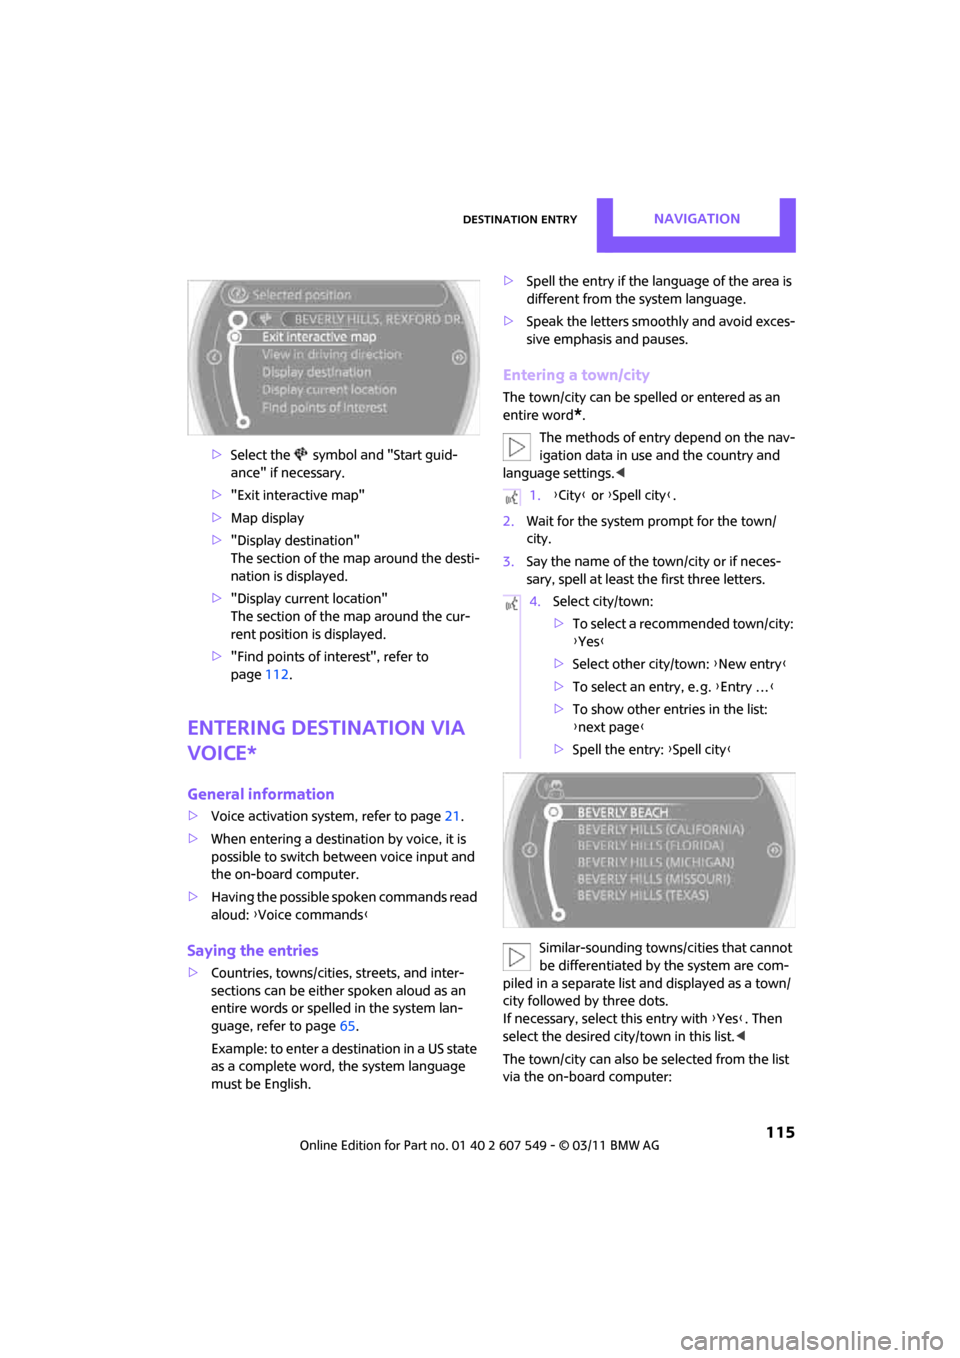
>Select the symbol and "Start guid-
ance" if necessary.
> "Exit interactive map"
> Map display
> "Display de stination"
The section of the map around the desti-
nation is displayed.
> "Display current location"
The section of the map around the cur-
rent position is displayed.
> "Find points of interest", refer to
page 112.
Entering destination via
voice*
General information
>Voice activation system, refer to page 21.
> When entering a destinat ion by voice, it is
possible to switch between voice input and
the on-board computer.
> Having the possible spoken commands read
aloud: {Voice commands }
Saying the entries
>Countries, towns/cities, streets, and inter-
sections can be either spoken aloud as an
entire words or spelle d in the system lan-
guage, refer to page 65.
Example: to enter a destination in a US state
as a complete word, the system language
must be English. >
Spell the entry if the language of the area is
different from the system language.
> Speak the letters smoothly and avoid exces-
sive emphasis and pauses.
Entering a town/city
The town/city can be spelled or entered as an
entire word
*.
The methods of entry depend on the nav-
igation data in use and the country and
language settings. <
2. Wait for the system prompt for the town/
city.
3. Say the name of the town/city or if neces-
sary, spell at least the first three letters.
Similar-sounding town s/cities that cannot
be differentiated by the system are com-
piled in a separate list and displayed as a town/
city followed by three dots.
If necessary, select this entry with {Yes }. Then
select the desired city/town in this list. <
The town/city can also be selected from the list
via the on-board computer:
1. {City } or {Spell city }.
4. Select city/town:
>To select a recommended town/city:
{Yes }
> Select other city/town: {New entry }
> To select an entry, e. g. {Entry … }
> To show other entries in the list:
{next page }
> Spell the entry: {Spell city }
Page 118 of 254
NAVIGATIONDestination entry
116
Turn the MINI joystick until the destination is
selected, and press the MINI joystick.
Entering a street or intersection
The street or intersection is entered in the same
way as the town/city.
Entering house number
Depending on the data in the navigation system,
house numbers up to the number 2,000 can be
entered:
Starting route guidance
Route guidance starts immediately.
Adding further intermediate
destinations
Further intermediate destinations can be added.
Saving destination
The destination is automati cally added to the list
of the last destinations.
Planning a trip with
intermediate
destinations
New trip
Various intermediate de stinations can be
entered for a trip. The tr ip destination must be
entered first, refer to Destinatio n input,
page 109.
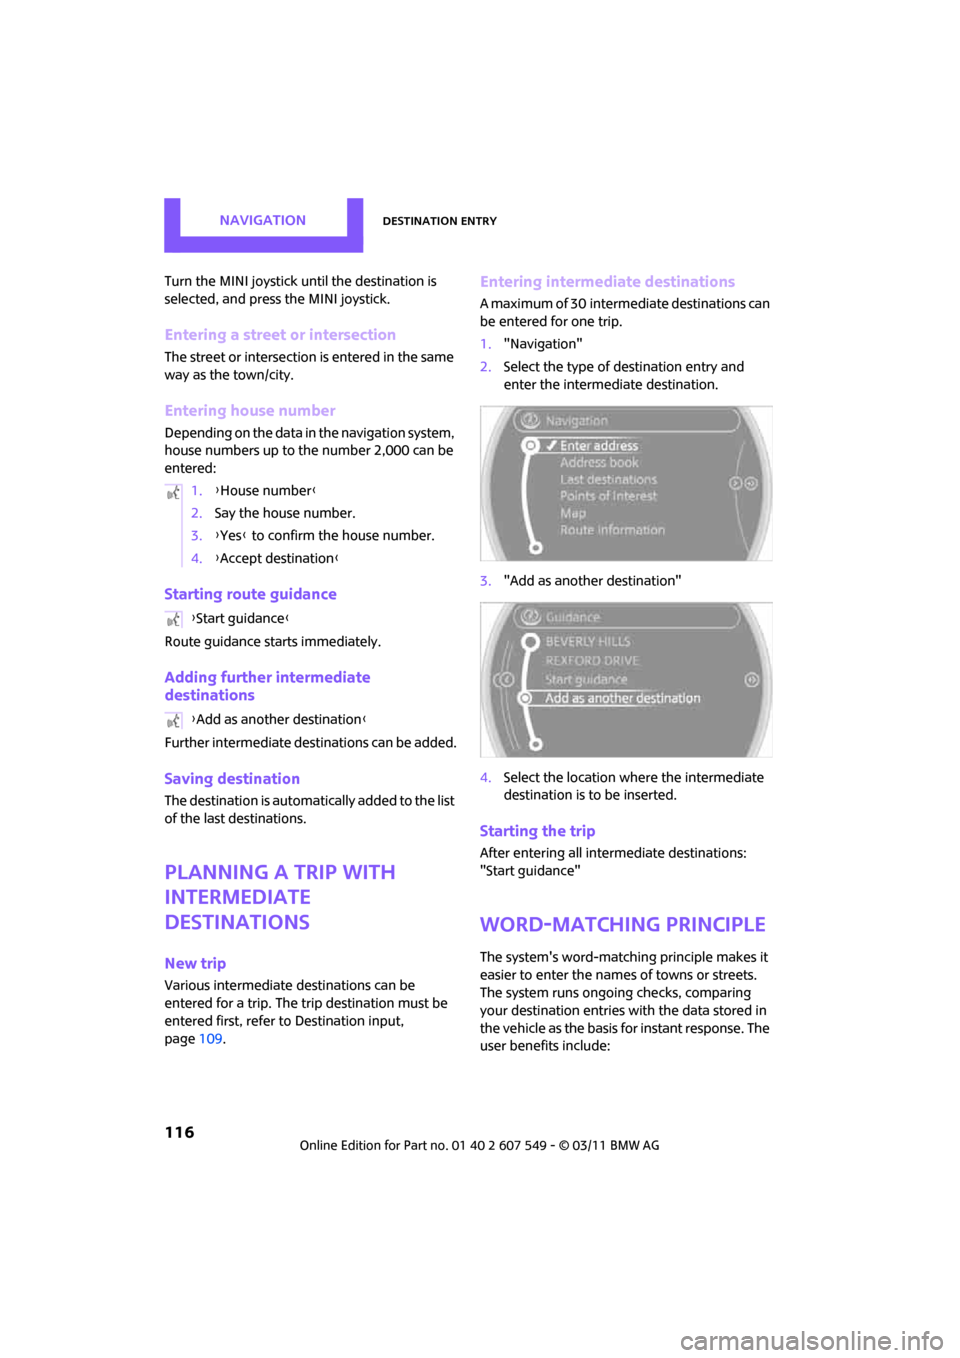
Entering intermediate destinations
A maximum of 30 intermediate destinations can
be entered for one trip.
1."Navigation"
2. Select the type of destination entry and
enter the intermediate destination.
3. "Add as another destination"
4. Select the location where the intermediate
destination is to be inserted.
Starting the trip
After entering all inte rmediate destinations:
"Start guidance"
Word-matching principle
The system's word-matching principle makes it
easier to enter the name s of towns or streets.
The system runs ongoing checks, comparing
your destination entries with the data stored in
the vehicle as the basis for instant response. The
user benefits include:
1.
{House number }
2. Say the house number.
3. {Yes } to confirm the house number.
4. {Accept destination }
{ Start guidance }
{ Add as another destination }
Page 119 of 254
Destination entryNAVIGATION
117
>Town/city names can also be entered differ-
ently from the official names if you use a
form that is customar y in other countries.
Example:
Instead of "München", you can also enter
the English spelling "Munich" or the Italian
spelling "Monaco".
> When you are entering the names of towns/
cities and streets the system will complete
them automatically as soon as enough let-
ters are available to ensure unambiguous
identification.
> The system offers only those letters for
selection of name entries that are stored in
the vehicle. The system will not accept non
existent names and addresses.
Page 121 of 254

Route guidanceNAVIGATION
119
ble distance and stretches of road that
allow rapid driving.
> "Efficient route": optimized combina-
tion of the fastest and shortest possible
route.
> "Short route": short distance without
taking time into account.
> "Alternative routes": suggestions of addi-
tional alternate routes during route guid-
ance.
5. Select additional route criteria, if desired.
Where possible, the selected criteria will be
avoided on the route.
>"Avoid highways": avoid highways
where possible.
> "Avoid toll roads": avoid toll roads where
possible.
> "Avoid ferries": avoid ferries where possi-
ble.
The setting applies to the current route and to
the planning of future routes. If the route criteria "Avoid highways",
"Avoid toll roads", or "Avoid ferries" are
selected, then this can prolong the calculation
time for the route. <
Route
There are various views of the route available
during route guidance:
>Arrow display
> List of streets and towns/cities
> Map view, refer to page 120
Arrow display
The following information is displayed during
route guidance:
>Large arrow: current direction of travel.
> Small arrow: indicates the next change of
direction.
> Intersection view.
> Lane information.
> Traffic information.
> Distance to the next change of direction.
> Street name of the next change of direction.
Lane information
In the arrow display, the recommended lanes of
multi-lane roads are each marked with a trian-
gle.
>Filled triangle: optimum lane.
> Empty triangle: likewise possible lane. It can,
however, also be possible to briefly make
additional lane changes.
List of roads or towns/cities on the route
If the route guidance has been started, then you
can display a list of the roads and towns/cities on
the route. The distance to be traveled and traffic
bulletins are displayed for each segment of the
route.
1. "Navigation"
2. "Route information"
3. Highlight a section.