engine MINI Countryman 2011 Owner's Manual (Mini Connected)
[x] Cancel search | Manufacturer: MINI, Model Year: 2011, Model line: Countryman, Model: MINI Countryman 2011Pages: 254, PDF Size: 3.84 MB
Page 7 of 254
General informationNotes
5
that features described in this Owner's Manual
could differ from those on your vehicle.
For your safety
Maintenance and repair
Advanced technology, e.g. the use of
modern materials and powerful electron-
ics, requires specially adapted maintenance and
repair methods. Therefore, have the necessary
work on your MINI only carried out by a MINI
dealer or a workshop that has specially trained
personnel working in acco rdance with the spec-
ifications of the MINI manufacturer. If this work
is not carried out properly , there is a danger of
subsequent damage and related safety haz-
ards. <
Parts and accessories
For your own safety, use genuine parts
and accessories approved by the manu-
facturer of the MINI.
When you purchase accessories tested
and approved by the manufacturer of the MINI
and Original MINI Parts, you simultaneously
acquire the assurance that they have been thor-
oughly tested by the manufacturer of the MINI
to ensure optimum performance when installed
on your vehicle.
The manufacturer of the MINI warrants these
parts to be free from defects in material and
workmanship.
The manufacturer of the MINI will not accept any
liability for damage result ing from installation of
parts and accessories not approved by the man-
ufacturer of the MINI.
The manufacturer of the MINI cannot test every
product made by other manufacturers to verify
if it can be used on a MINI safely and without risk
to either the vehicle, its operation, or its occu-
pants.
Original MINI Parts, MINI Accessories and other
products approved by the manufacturer of the MINI, together with professional advice on using
these items, are available from all MINI dealers.
Installation and operation of accessories that
have not been approved by the manufacturer of
your MINI, such as alarms, radios, amplifiers,
radar detectors, wheels, suspension compo-
nents, brake dust shield
s, telephones, including
operation of any mobile phone from within the
vehicle without using an externally mounted
antenna, or transceiver equipment, for instance,
CBs, walkie-talkies, ham radios or similar acces-
sories, may cause extensiv e damage to the vehi-
cle, compromise its safety, interfere with the
vehicle's electrical s y s t e m o r a f f e c t t h e v a l i d i t y o f
the MINI Limited Warranty. See your MINI dealer
for additional information. <
Maintenance, replacement, or repair of
the emission control devices and systems
may be performed by any automotive repair
establishment or individu al using any certified
automotive part. <
California Proposition 65 warning
California law requires us to issue the following
warning:
Engine exhaust and a wide variety of
automobile components and parts,
including components foun d in the interior fur-
nishings in a vehicle, contain or emit chemicals
known to the State of California to cause cancer
and birth defects and reproductive harm. In
addition, certain fluids co ntained in vehicles and
certain products of component wear contain or
emit chemicals known to the State of California
to cause cancer and birth defects or other repro-
ductive harm.
Battery posts, terminals and related accessories
contain lead and lead compounds. Wash your
hands after handling.
Used engine oil contains chemicals that have
caused cancer in laboratory animals. Always
protect your skin by washing thoroughly with
soap and water.<
Page 13 of 254
CockpitAT A GLANCE
11
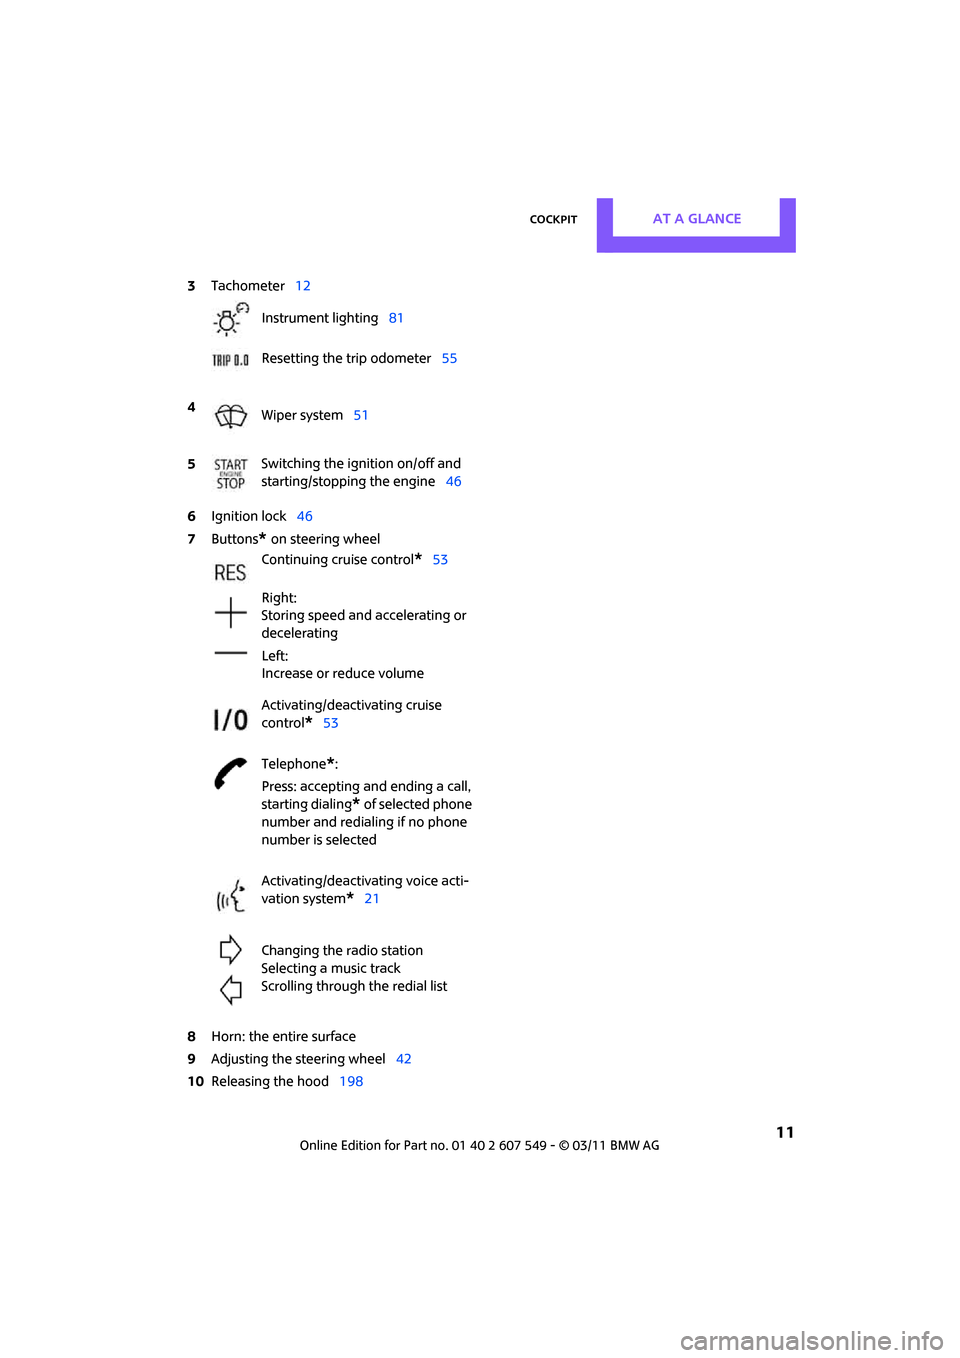
6Ignition lock 46
7 Buttons
* on steering wheel
8 Horn: the entire surface
9 Adjusting the steering wheel 42
10 Releasing the hood 198
3
Tachometer 12
Instrument lighting 81
Resetting the trip odometer 55
4 Wiper system 51
5 Switching the ignition on/off and
starting/stopping the engine
46
Continuing cruise control
*53
Right:
Storing speed and accelerating or
decelerating
Left:
Increase or reduce volume
Activating/deactivating cruise
control
*53
Telephone
*:
Press: accepting an d ending a call,
starting dialing
* of selected phone
number and redialing if no phone
number is selected
Activating/deactivating voice acti-
vation system
*21
Changing the radio station
Selecting a music track
Scrolling through the redial list
Page 15 of 254
CockpitAT A GLANCE
13
Indicator and warning
lamps
The concept
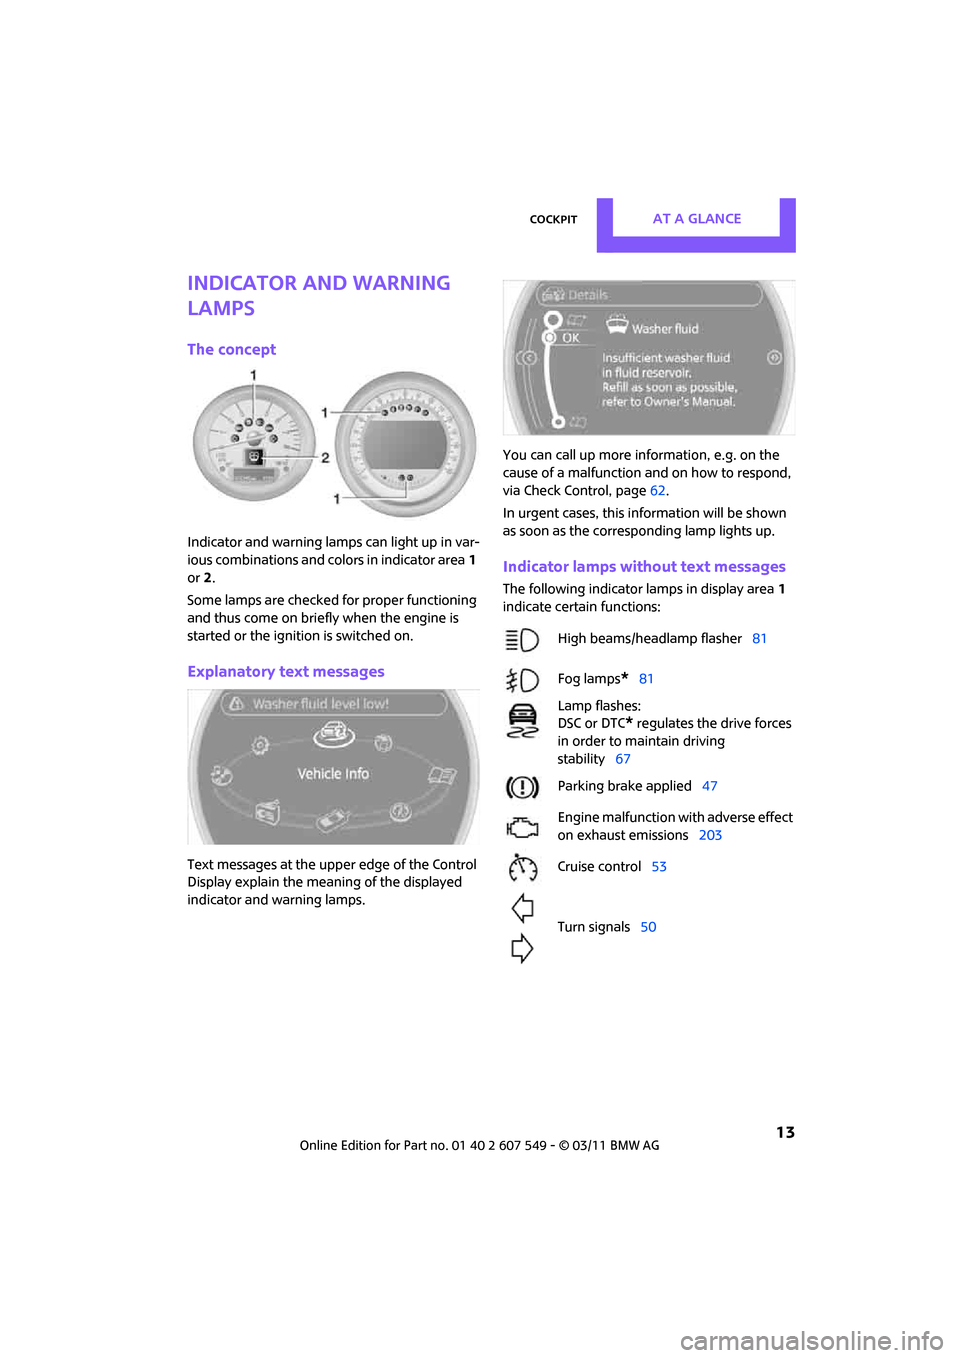
Indicator and warning lamps can light up in var-
ious combinations and colors in indicator area1
or 2.
Some lamps are checked for proper functioning
and thus come on briefly when the engine is
started or the ignition is switched on.
Explanatory text messages
Text messages at the uppe r edge of the Control
Display explain the mean ing of the displayed
indicator and warning lamps. You can call up more information, e.g. on the
cause of a malfunction and on how to respond,
via Check Control, page
62.
In urgent cases, this information will be shown
as soon as the corresponding lamp lights up.
Indicator lamps without text messages
The following indicator lamps in display area 1
indicate certain functions:
High beams/headlamp flasher 81
Fog lamps
*81
Lamp flashes:
DSC or DTC
* regulates the drive forces
in order to maintain driving
stability 67
Parking brake applied 47
Engine malfunction with adverse effect
on exhaust emissions 203
Cruise control 53
Turn signals 50
Page 33 of 254
Opening and closingCONTROLS
31
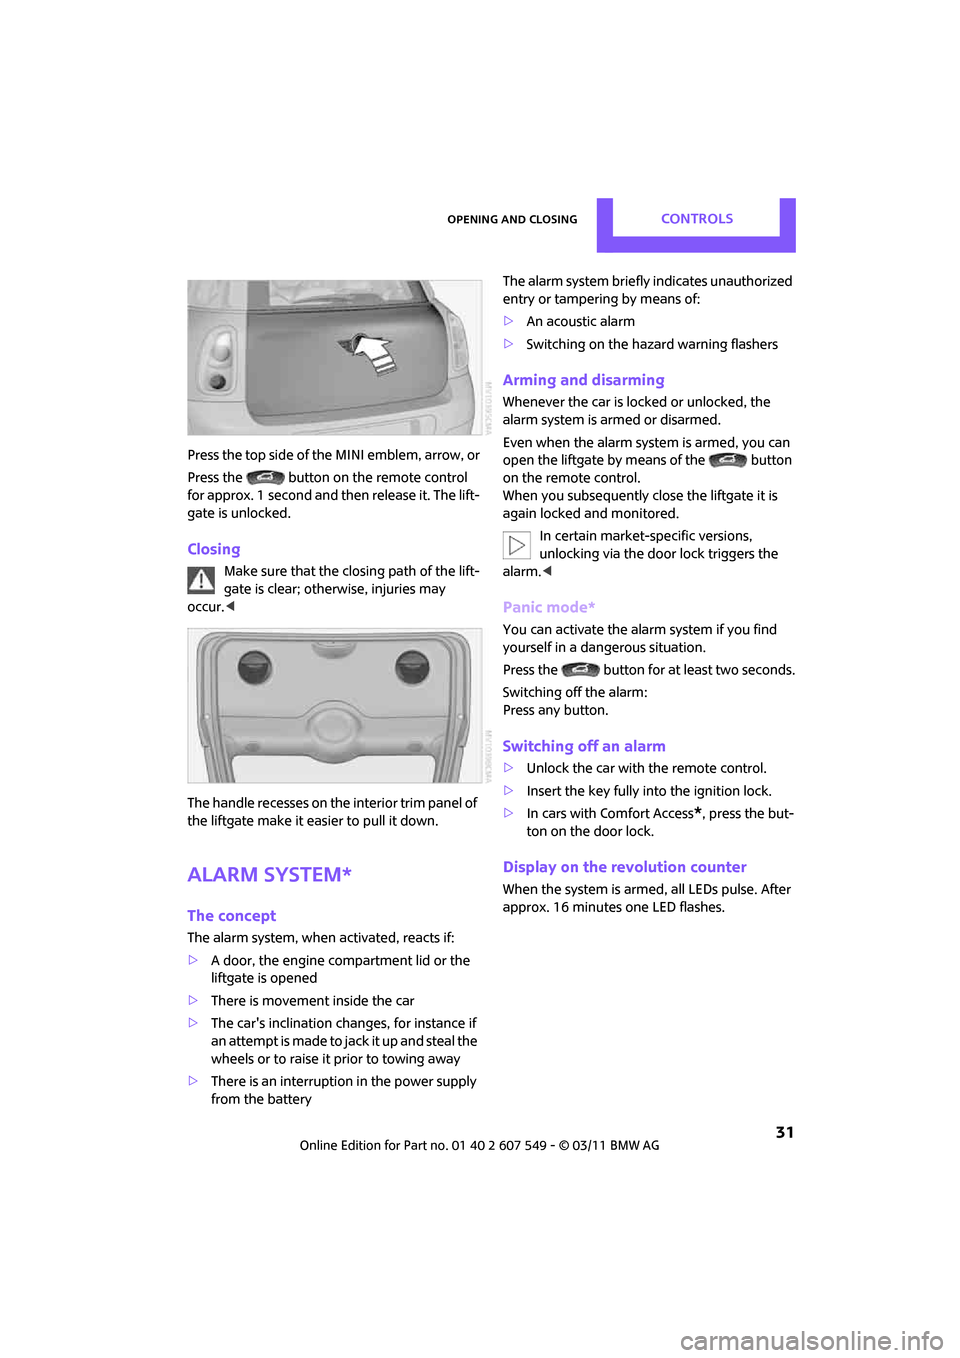
Press the top side of the MINI emblem, arrow, or
Press the button on the remote control
for approx. 1 second and then release it. The lift-
gate is unlocked.
Closing
Make sure that the closing path of the lift-
gate is clear; otherwise, injuries may
occur. <
The handle recesses on the interior trim panel of
the liftgate make it easier to pull it down.
Alarm system*
The concept
The alarm system, when activated, reacts if:
> A door, the engine compartment lid or the
liftgate is opened
> There is movement inside the car
> The car's inclination changes, for instance if
an attempt is made to jack it up and steal the
wheels or to raise it prior to towing away
> There is an interruption in the power supply
from the battery The alarm system briefly indicates unauthorized
entry or tampering by means of:
>
An acoustic alarm
> Switching on the hazard warning flashers
Arming and disarming
Whenever the car is locked or unlocked, the
alarm system is armed or disarmed.
Even when the alarm syst em is armed, you can
open the liftgate by means of the button
on the remote control.
When you subsequently close the liftgate it is
again locked and monitored.
In certain market-specific versions,
unlocking via the door lock triggers the
alarm. <
Panic mode*
You can activate the alarm system if you find
yourself in a dangerous situation.
Press the button for at least two seconds.
Switching off the alarm:
Press any button.
Switching off an alarm
>Unlock the car with the remote control.
> Insert the key fully into the ignition lock.
> In cars with Comfort Access
*, press the but-
ton on the door lock.
Display on the revolution counter
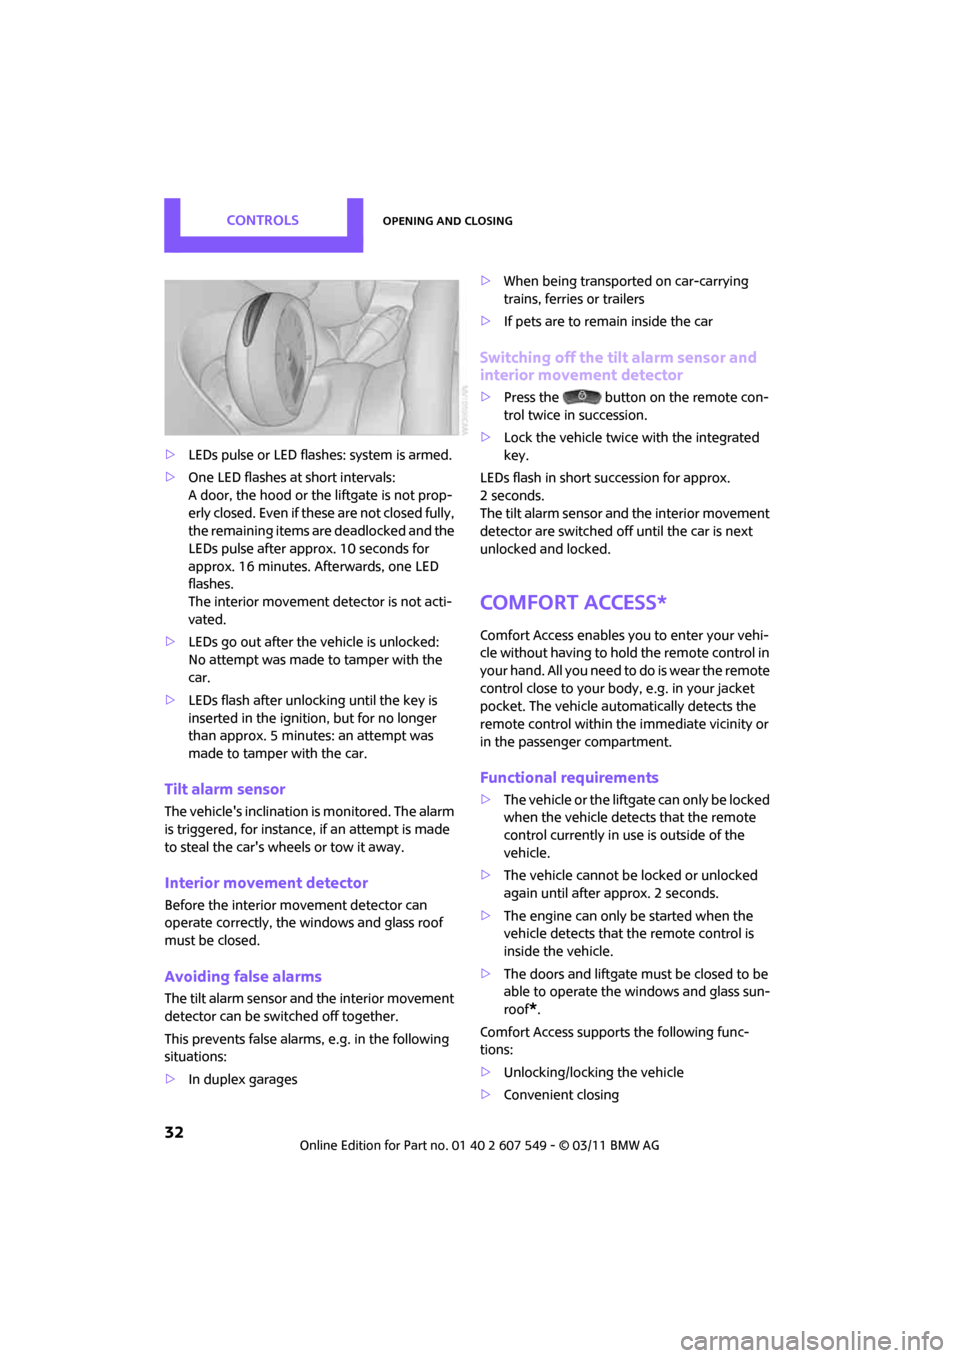
When the system is armed, all LEDs pulse. After
approx. 16 minutes one LED flashes.
Page 34 of 254
CONTROLSOpening and closing
32
>LEDs pulse or LED flashes: system is armed.
> One LED flashes at short intervals:
A door, the hood or the liftgate is not prop-
erly closed. Even if these are not closed fully,
the remaining items ar e deadlocked and the
LEDs pulse after approx. 10 seconds for
approx. 16 minutes. Afterwards, one LED
flashes.
The interior movement detector is not acti-
vated.
> LEDs go out after the vehicle is unlocked:
No attempt was made to tamper with the
car.
> LEDs flash after unlocking until the key is
inserted in the ignition, but for no longer
than approx. 5 minutes: an attempt was
made to tamper with the car.
Tilt alarm sensor
The vehicle's inclination is monitored. The alarm
is triggered, for instance, if an attempt is made
to steal the car's wheels or tow it away.
Interior movement detector
Before the interior movement detector can
operate correctly, the windows and glass roof
must be closed.
Avoiding false alarms
The tilt alarm sensor and the interior movement
detector can be switched off together.
This prevents false alarms, e.g. in the following
situations:
> In duplex garages >
When being transported on car-carrying
trains, ferries or trailers
> If pets are to remain inside the car
Switching off the tilt alarm sensor and
interior movement detector
>Press the button on the remote con-
trol twice in succession.
> Lock the vehicle twice with the integrated
key.
LEDs flash in short succession for approx.
2seconds.
The tilt alarm sensor and the interior movement
detector are switched off until the car is next
unlocked and locked.
Comfort Access*
Comfort Access enables you to enter your vehi-
cle without having to hold the remote control in
your hand. All you need to do is wear the remote
control close to your body, e.g. in your jacket
pocket. The vehicle automatically detects the
remote control within the immediate vicinity or
in the passenger compartment.
Functional requirements
> The vehicle or the liftgate can only be locked
when the vehicle detects that the remote
control currently in use is outside of the
vehicle.
> The vehicle cannot be locked or unlocked
again until after approx. 2 seconds.
> The engine can only be started when the
vehicle detects that the remote control is
inside the vehicle.
> The doors and liftgate must be closed to be
able to operate the windows and glass sun-
roof
*.
Comfort Access support s the following func-
tions:
> Unlocking/locking the vehicle
> Convenient closing
Page 35 of 254
Opening and closingCONTROLS
33
>Unlocking the liftgate separately
> Starting the engine
Comparison to standard remote controls
Essentially, it makes no difference whether you
control the above-mentioned functions using
Comfort Access or by pressing the buttons on
the remote control for Comfort Access.
Instructions on openin g and closing are found
starting on page 26.
Special features regarding the use of Comfort
Access are described below. If you notice a brief delay while opening or
closing the windows or glass roof, the sys-
tem is checking whether a remote control is
inside the vehicle. Repeat the opening or closing
procedure, if necessary. <
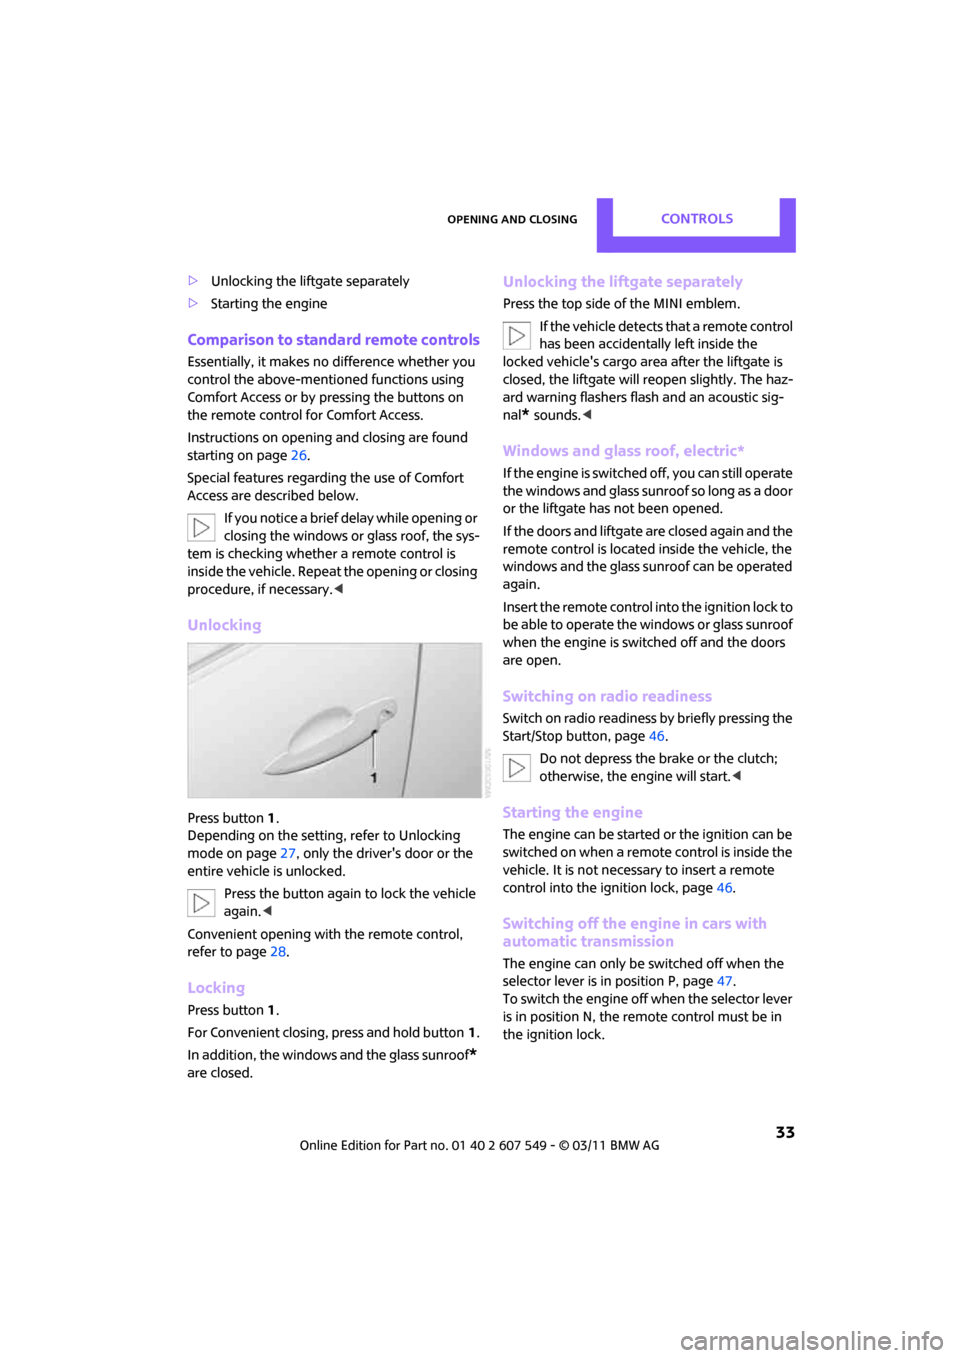
Unlocking
Press button 1.
Depending on the setting, refer to Unlocking
mode on page 27, only the driver's door or the
entire vehicle is unlocked.
Press the button again to lock the vehicle
again. <
Convenient opening with the remote control,
refer to page 28.
Locking
Press button 1.
For Convenient closing, press and hold button 1.
In addition, the windows and the glass sunroof
*
are closed.
Unlocking the liftgate separately
Press the top side of the MINI emblem.
If the vehicle detects that a remote control
has been accidentally left inside the
locked vehicle's cargo area after the liftgate is
closed, the liftgate will reopen slightly. The haz-
ard warning flashers flash and an acoustic sig-
nal
* sounds. <
Windows and glass roof, electric*
If the engine is switched off, you can still operate
the windows and glass sunr oof so long as a door
or the liftgate has not been opened.
If the doors and liftgate are closed again and the
remote control is located inside the vehicle, the
windows and the glass sunroof can be operated
again.
Insert the remote control into the ignition lock to
be able to operate the windows or glass sunroof
when the engine is switched off and the doors
are open.
Switching on radio readiness
Switch on radio readiness by briefly pressing the
Start/Stop button, page 46.
Do not depress the brake or the clutch;
otherwise, the engine will start. <
Starting the engine
The engine can be started or the ignition can be
switched on when a remote control is inside the
vehicle. It is not necessa ry to insert a remote
control into the ignition lock, page 46.
Switching off the engine in cars with
automatic transmission
The engine can only be switched off when the
selector lever is in position P, page47.
To switch the engine off when the selector lever
is in position N, the remote control must be in
the ignition lock.
Page 36 of 254
CONTROLSOpening and closing
34
Before driving a vehicle with automatic
transmission into a car wash
1.Insert remote control into ignition lock.
2. Depress the brake.
3. Move the selector lever to position N.
4. Switch off the engine.
The vehicle can roll.
Malfunction
Comfort Access may malf unction due to local
radio waves.
If this happens, open or close the vehicle via the
buttons on the remote control or using the inte-
grated key.
Insert the remote control into the ignition lock
and start the engine.
Warning lamps
The warning lamp lights up when an
attempt is made to start the engine: the
engine cannot be started. The remote
control is not inside the vehicle or is malfunc-
tioning. Take the remote control with you inside
the vehicle or have it checked. If necessary,
insert another remote co ntrol into the ignition
lock.
The warning lamp lights up when the
engine is running: the remote control is
no longer inside the vehicle. After the
engine is switched off, the engine can only be
restarted within approx. 10 seconds.
The indicator lamp lights up and a mes-
sage appears on the Control Display:
replace the battery in the remote con-
trol.
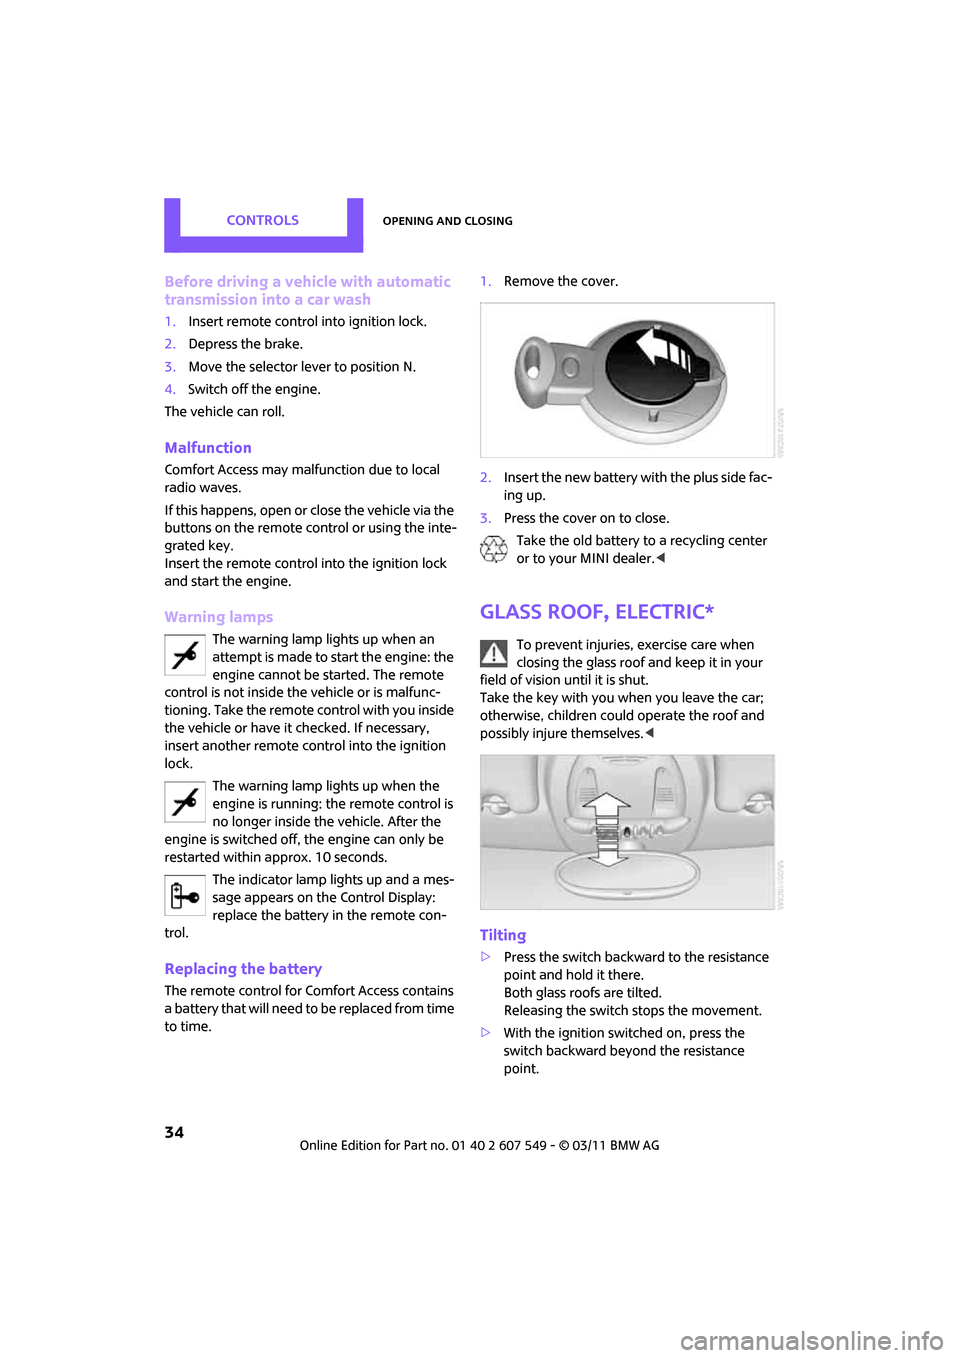
Replacing the battery
The remote control for Comfort Access contains
a b a t t e r y t h a t w i l l n e e d t o b e r e p l a c e d f r o m t i m e
to time. 1.
Remove the cover.
2. Insert the new battery with the plus side fac-
ing up.
3. Press the cover on to close.
Take the old battery to a recycling center
or to your MINI dealer. <
Glass roof, electric*
To prevent injuries, exercise care when
closing the glass roof and keep it in your
field of vision until it is shut.
Take the key with you when you leave the car;
otherwise, children could operate the roof and
possibly injure themselves. <
Tilting
>Press the switch backwa rd to the resistance
point and hold it there.
Both glass roofs are tilted.
Releasing the switch stops the movement.
> With the ignition switched on, press the
switch backward beyond the resistance
point.
Page 37 of 254
Opening and closingCONTROLS
35
Both closed roofs are tilted fully.
Pressing again stops the movement.
Opening, closing
With the ignition switched on and the glass sun-
roof tilted, press the switch backward and hold it
there.
The front glass roof opens.
The rear glass roof is closed.
Releasing the switch stops the movement.
The glass sunroof can be closed in the same way
by pressing the switch forward.
The front glass roof remains in a tilted position.
The rear glass roof is tilted. Pressing on the
switch again closes bo th roofs completely.
Convenient operation via door lock or Comfort
Access, refer to page 28,29,33.
Roller sun blind
The roller sun blind can be opened and closed
independently of the glass roof.
Following interruptions in electrical
power supply
After a power failure, there is a possibility that
the glass roof can only be tilted. In this case,
have the system initialized. The manufacturer of
your MINI recommends that you have this work
done by your MINI dealer.
Windows
To prevent injuries, exercise care when
closing the windows.
Take the remote control with you when you
leave the car; otherwise, children could operate
the electric windows and possibly injure them-
selves. <
If, after a window is opened and closed
several times in close succession, the win-
dow can only be closed and not opened, the sys-
tem is overheated. Let the system cool for sev-
eral minutes with the igni tion switched on or the
engine running. <
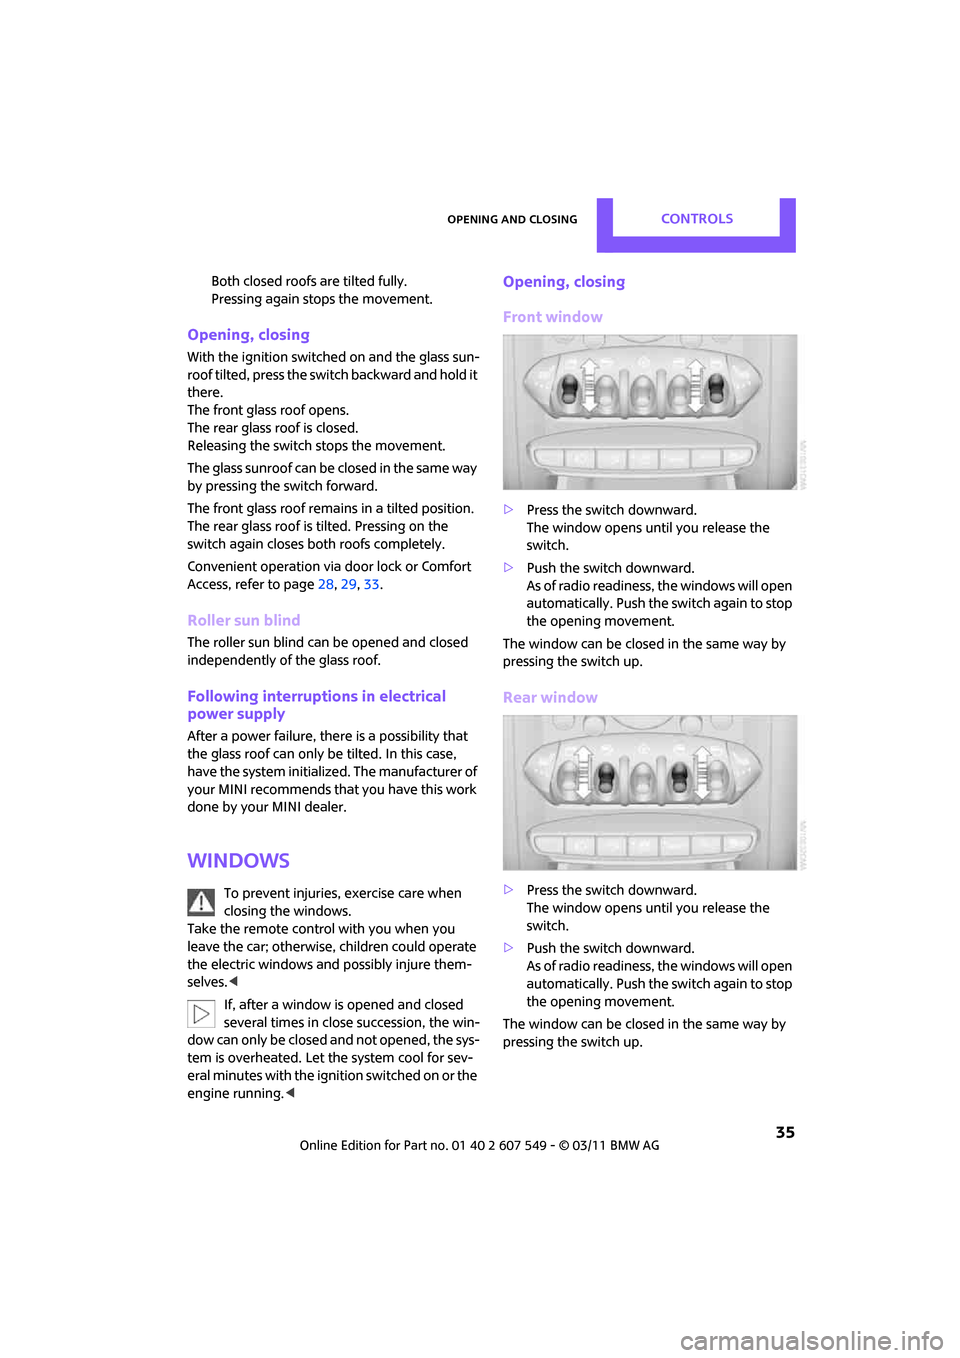
Opening, closing
Front window
>Press the switch downward.
The window opens until you release the
switch.
> Push the switch downward.
As of radio readiness, the windows will open
automatically. Push the switch again to stop
the opening movement.
The window can be closed in the same way by
pressing the switch up.
Rear window
> Press the switch downward.
The window opens until you release the
switch.
> Push the switch downward.
As of radio readiness, the windows will open
automatically. Push the switch again to stop
the opening movement.
The window can be closed in the same way by
pressing the switch up.
Page 43 of 254
AdjustmentsCONTROLS
41
Safety belt reminder
Front seats
The indicator lamps come on and an
acoustic signal sounds.A message also
appears on the Control Display.Check
whether the safety belt has been fas-
tened correctly. The 'Fasten safety belts'
reminder is issued when the driver's safety belt
has not been fastened. The 'Fasten safety belts'
reminder is also activate d at road speeds above
approx. 5 mph or 8 km/h if the front passenger's
safety belt has not been fastened, if objects are
placed on the front passenger seat, or if driver or
front passenger unfasten their safety belts.
Damage to safety belts
If the safety belts are damaged or stressed
in an accident: have the safety belt system
and its seat-belt tensio ners replaced and the
belt anchors checked. Have this work carried out
only by a MINI dealer or by a workshop that has
specially trained personnel working in accor-
dance with the specifications of the MINI manu-
facturer; otherwise, correct operation of these
safety systems is not ensured. <
Mirrors
Exterior mirrors
The mirror on the passenger's side is more
curved than the driver's mirror. The
objects seen in the mirror are closer than they
appear. Do not gauge your distance from traffic
behind you on the basis of what you see in the
mirror; otherwise, there is an increased risk of an
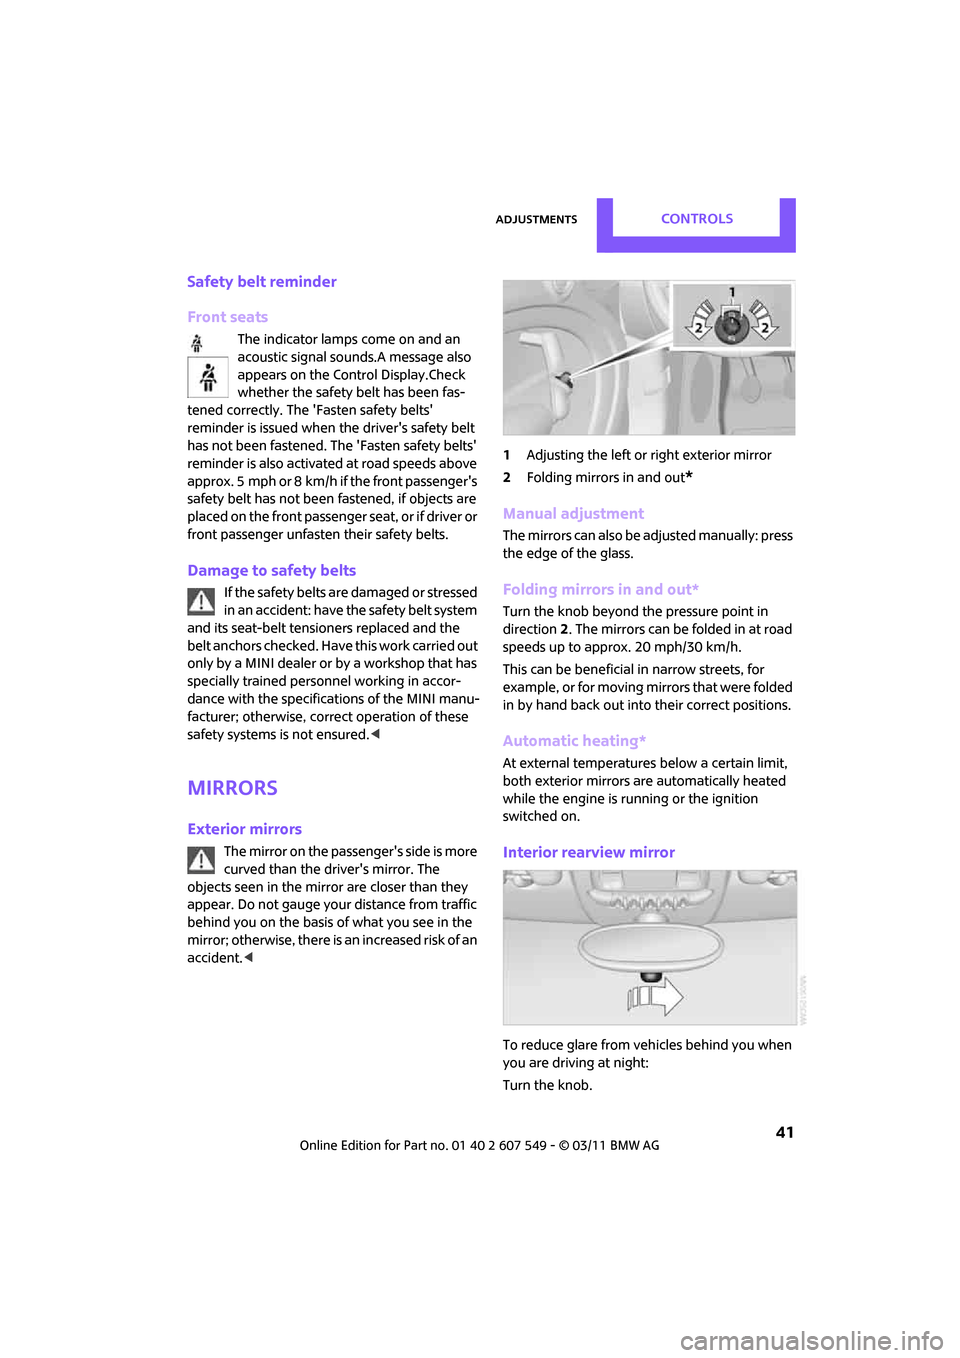
accident. < 1
Adjusting the left or right exterior mirror
2 Folding mirrors in and out
*
Manual adjustment
The mirrors can also be adjusted manually: press
the edge of the glass.
Folding mirrors in and out*
Turn the knob beyond the pressure point in
direction 2. The mirrors can be folded in at road
speeds up to approx. 20 mph/30 km/h.
This can be beneficial in narrow streets, for
example, or for moving mirrors that were folded
in by hand back out into their correct positions.
Automatic heating*
At external temperatures below a certain limit,
both exterior mirrors are automatically heated
while the engine is running or the ignition
switched on.
Interior rearview mirror
To reduce glare from vehicles behind you when
you are driving at night:
Turn the knob.
Page 48 of 254
CONTROLSDriving
46
Driving
Ignition lock
Inserting the key into the ignition lock
Insert the key all the way into the ignition lock.
Radio readiness
Individual electrical consumers can operate.
Removing the key from the ignition lock
Press in the key briefly. It is ejected slightly.
At the same time:
>The ignition is switched off if it was on
beforehand.
Automatic transmission
The key can only be removed if the selector lever
is in position P: interlock.
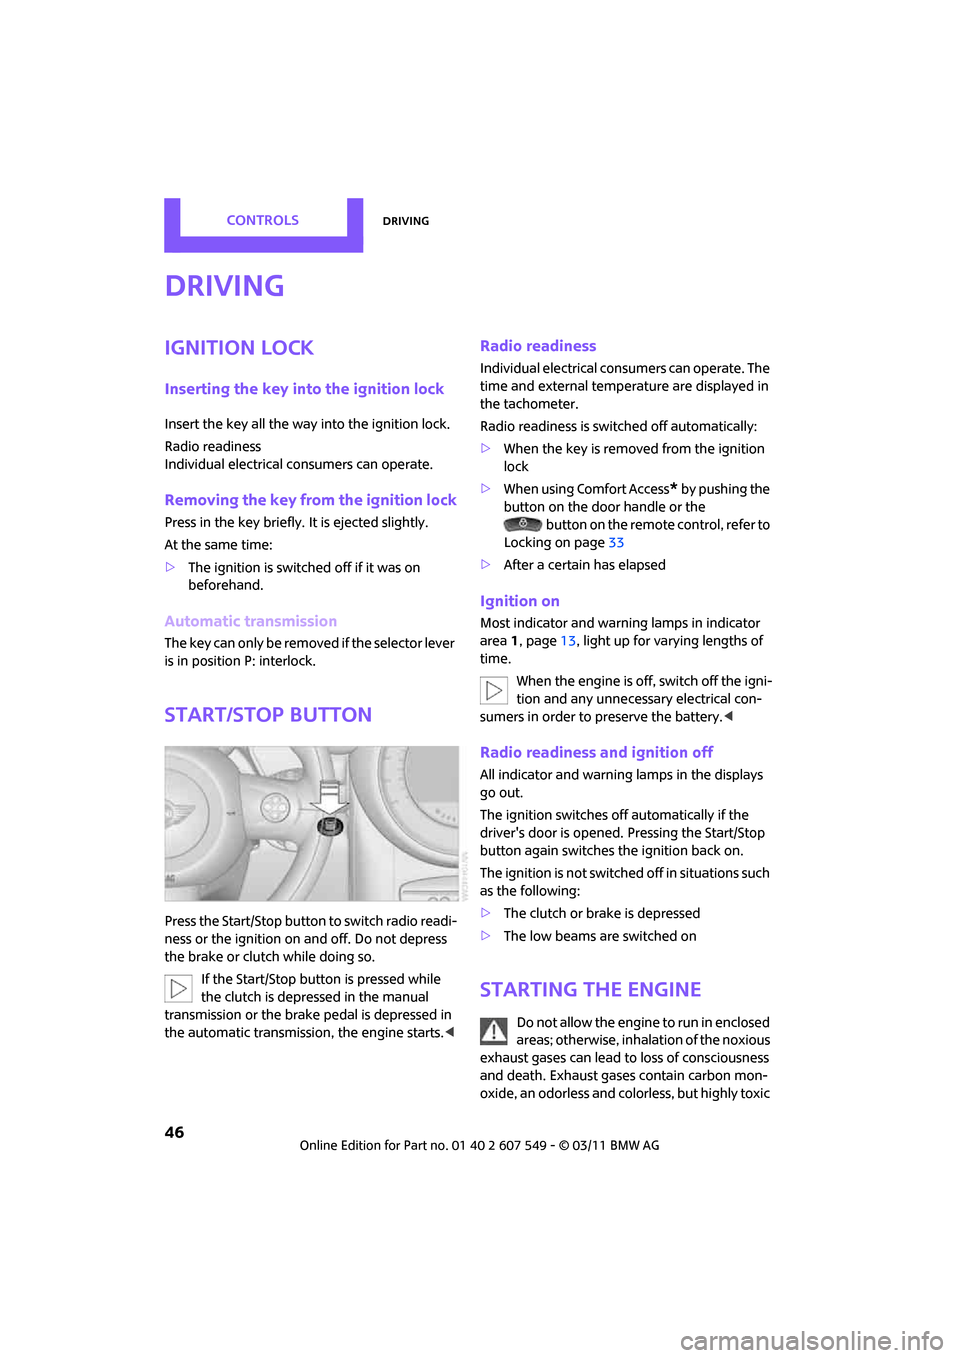
Start/Stop button
Press the Start/Stop button to switch radio readi-
ness or the ignition on and off. Do not depress
the brake or clutch while doing so.
If the Start/Stop button is pressed while
the clutch is depressed in the manual
transmission or the brake pedal is depressed in
the automatic transmission, the engine starts. <
Radio readiness
Individual electrical consumers can operate. The
time and external temperature are displayed in
the tachometer.
Radio readiness is switched off automatically:
>When the key is removed from the ignition
lock
> When using Comfort Access
* by pushing the
button on the door handle or the button on the remote control, refer to
Locking on page 33
> After a certain has elapsed
Ignition on
Most indicator and warn ing lamps in indicator
area 1, page 13, light up for varying lengths of
time.
When the engine is off, switch off the igni-
tion and any unnecessary electrical con-
sumers in order to preserve the battery. <
Radio readiness and ignition off
All indicator and warning lamps in the displays
go out.
The ignition switches off automatically if the
driver's door is opened. Pressing the Start/Stop
button again switches the ignition back on.
The ignition is not switched off in situations such
as the following:
> The clutch or brake is depressed
> The low beams are switched on
Starting the engine
Do not allow the engine to run in enclosed
areas; otherwise, inhalation of the noxious
exhaust gases can lead to loss of consciousness
and death. Exhaust gases contain carbon mon-
oxide, an odorless and colo rless, but highly toxic