airbag MINI Countryman 2011 Owner's Manual
[x] Cancel search | Manufacturer: MINI, Model Year: 2011, Model line: Countryman, Model: MINI Countryman 2011Pages: 196, PDF Size: 3.06 MB
Page 17 of 196
CockpitAT A GLANCE
15
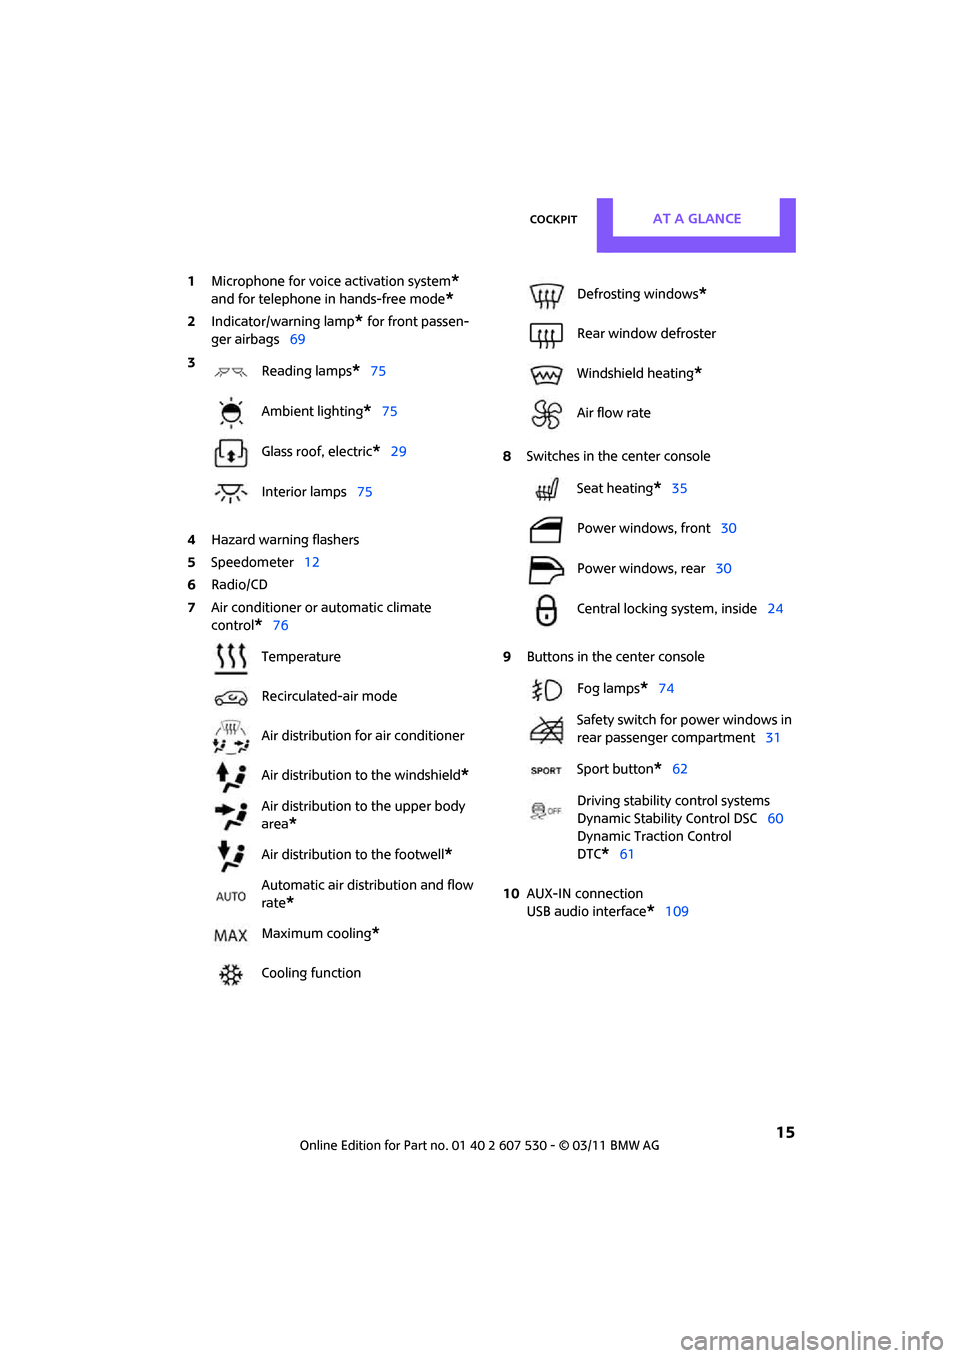
1Microphone for voice activation system*
and for telephone in hands-free mode*
2Indicator/warning lamp* for front passen-
ger airbags 69
4 Hazard warning flashers
5 Speedometer 12
6 Radio/CD
7 Air conditioner or automatic climate
control
*76 8
Switches in the center console
9 Buttons in the center console
10 AUX-IN connection
USB audio interface
*109
3
Reading lamps
*75
Ambient lighting
*75
Glass roof, electric
*29
Interior lamps 75
Temperature
Recirculated-air mode
Air distribution for air conditioner
Air distribution to the windshield
*
Air distribution to the upper body
area
*
Air distribution to the footwell*
Automatic air distribution and flow
rate
*
Maximum cooling*
Cooling function
Defrosting windows*
Rear window defroster
Windshield heating
*
Air flow rate
Seat heating
*35
Power windows, front 30
Power windows, rear 30
Central locking system, inside 24
Fog lamps
*74
Safety switch for power windows in
rear passenger compartment 31
Sport button
*62
Driving stability control systems
Dynamic Stability Control DSC 60
Dynamic Traction Control
DTC*61
Page 34 of 196
ControlsAdjustments
32
Adjustments
Sitting safely
The ideal sitting position can make a vital contri-
bution to relaxed, fatigu e-free driving. In con-
junction with the safety belts, the head restraints
and the airbags, the seated position has a major
influence on your safety in the event of an acci-
dent. To ensure that th e safety systems operate
with optimal efficiency, we strongly urge you to
observe the instructions contained in the follow-
ing section.
For additional informatio n on transporting chil-
dren safely, refer to page 38.
Airbags
Always maintain an adequate distance
between yourself and the airbags. Always
grip the steering wheel on the rim, with your
hands in the 3 o'clock and 9 o'clock positions, to
minimize the risk of inju ry to the hands or arms
in the event of the airbag being triggered off.
No one and nothing should come between the
airbags and the seat occupant.
Do not use the cover of the front airbag on the
front passenger side as a storage area. Ensure
that the front passenger is correctly seated, e.g.
that no feet or legs are propped against the
dashboard. Otherwise, leg injury could result if
the front airbag suddenly deployed.
Make sure that passeng ers keep their heads
away from the side ai rbag and do not lean
against the cover of the head airbag, otherwise
injuries can occur when the airbags are trig-
gered. <
Even if you follow all the instructions, injuries
resulting from contact with airbags cannot be
fully excluded, depending on the circumstances.
The ignition and inflation noise may provoke a
mild hearing loss in extremely sensitive individ-
uals. This effect is usually only temporary.
For airbag locations and additional information
on airbags, refer to page 68.
Head restraint
A correctly adjusted head restraint reduces the
risk of neck injury in the event of an accident.
Adjust the head restraint in such a way
that its center is at approx. ear level. Oth-
erwise, there is an increased risk of injury in the
event of an accident. <
Head restraints, refer to page 34.
Safety belt
Before every drive, make sure that all occupants
wear their safety belts. Airbags complement the
safety belt as an additional safety device, but
they do not represent a substitute.
Number of safety belts
Never allow more than one person to
wear a single safety belt. Never allow
infants or small children to ride in a passenger's
lap.
Make sure that the belt in the lap area sits low
across the hips and does not press against the
abdomen. The safety belt must not rest against
the throat, run across sh arp edges, pass over
hard or fragile objects or be pinched. Fasten the
safety belt so that it is pulled taut across the lap
and shoulder, fitting the body snugly without
any twists. Otherwise, the belt could slide over
the hips in the event of a frontal collision and
injure the abdomen. Avoid wearing bulky cloth-
ing and regularly pull the belt in the upper-body
area taut; otherwise, its restraining effect could
be impaired. <
Safety belts, refer to page 35.
Page 37 of 196
AdjustmentsControls
35
Front
1.Pull up as far as it will go.
2. Fold the backrest back slightly.
3. Press button 1 and pull the head restraint
out as far as it will go.
4. Also press button 2 with a suitable tool and
completely remove the head restraint.
5. Fold back the backrest.
Rear
1.Pull up as far as it will go.
2. Fold the backrest forward slightly.
3. Press button 1 and pull the head restraint
out completely.
4. Also press button 2 with a suitable tool and
completely remove the head restraint.
5. Fold rear seat backrest back into position.
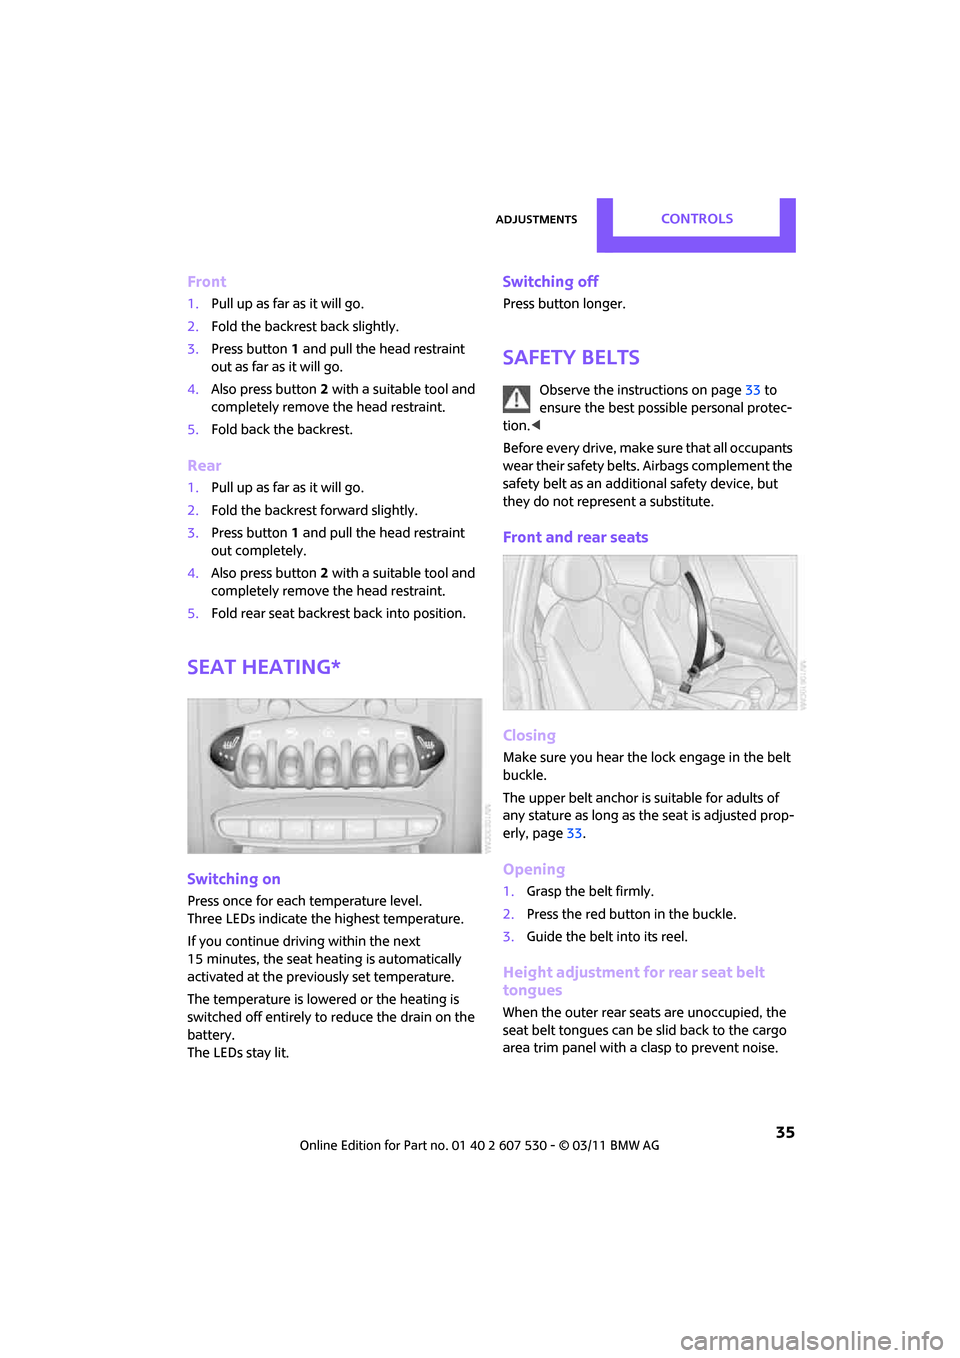
Seat heating*
Switching on
Press once for each temperature level.
Three LEDs indicate the highest temperature.
If you continue driving within the next
15 minutes, the seat heating is automatically
activated at the previously set temperature.
The temperature is lowered or the heating is
switched off entirely to reduce the drain on the
battery.
The LEDs stay lit.
Switching off
Press button longer.
Safety belts
Observe the instructions on page 33 to
ensure the best possible personal protec-
tion. <
Before every drive, make sure that all occupants
wear their safety belts. Airbags complement the
safety belt as an additi onal safety device, but
they do not represent a substitute.
Front and rear seats
Closing
Make sure you hear the lock engage in the belt
buckle.
The upper belt anchor is suitable for adults of
any stature as long as th e seat is adjusted prop-
erly, page 33.
Opening
1.Grasp the belt firmly.
2. Press the red button in the buckle.
3. Guide the belt into its reel.
Height adjustment for rear seat belt
tongues
When the outer rear seats are unoccupied, the
seat belt tongues can be slid back to the cargo
area trim panel with a clasp to prevent noise.
Page 40 of 196
ControlsTransporting children safely
38
Transporting children safely
The right place for
children
Do not leave children unattended in the
vehicle; otherwise, they could endanger
themselves and/or other persons by opening the
doors, for example. <
Children should always sit in the rear
Accident research has shown that the safest
place for children is on the rear seat.
Only transport children under the age of
13 or smaller than 5 ft/150 cm in the rear
in a child restraint system suitable for their age,
weight and size. Otherwise, there is an
increased risk of injury in the event of an acci-
dent. <
Children 13 years of age or older must be buck-
led in with a safety belt as soon as there no
longer is any child restraint system that is appro-
priate for their age, size and weight.
Exception for front passenger seat
Front passenger airbags
Should it be necessary to use a child
restraint system on the front passenger
seat, the front and side airbags must be deacti-
vated. Otherwise, there is an increased risk of
injury to the child if th e airbags deploy, even if
the child is seated in a child restraint system.<
For more information on automatic deactivation
of the front passenger airbags, refer to page 68.
Child restraint systems,
installation
Before installing a child restraint system on the
rear seats, move the seat as far back as possible. After the child restr
aint system has been
installed on the respecti ve rear seat, move the
backrest forward so that the it rests lightly
against the child restrain t system, refer to Rear
seat backrests on page 92.
Observe the child restraint system manu-
facturer's instructions when selecting,
installing and using child restraint systems. Oth-
erwise, the protective effect may be dimin-
ished. <
On the front passenger seat
After installing a chil d restraint system on
the front passenger se at, make sure that
the front, side, and knee airbags for the front
passenger are deactivated; otherwise, there is
an increased risk of inju ry if the airbags deploy.<
Seat position
Before installing a child restraint system, move
the front passenger seat as far back and up
* as
possible to obtain the be st possible position for
the belt. Do not change the seat position after
this.
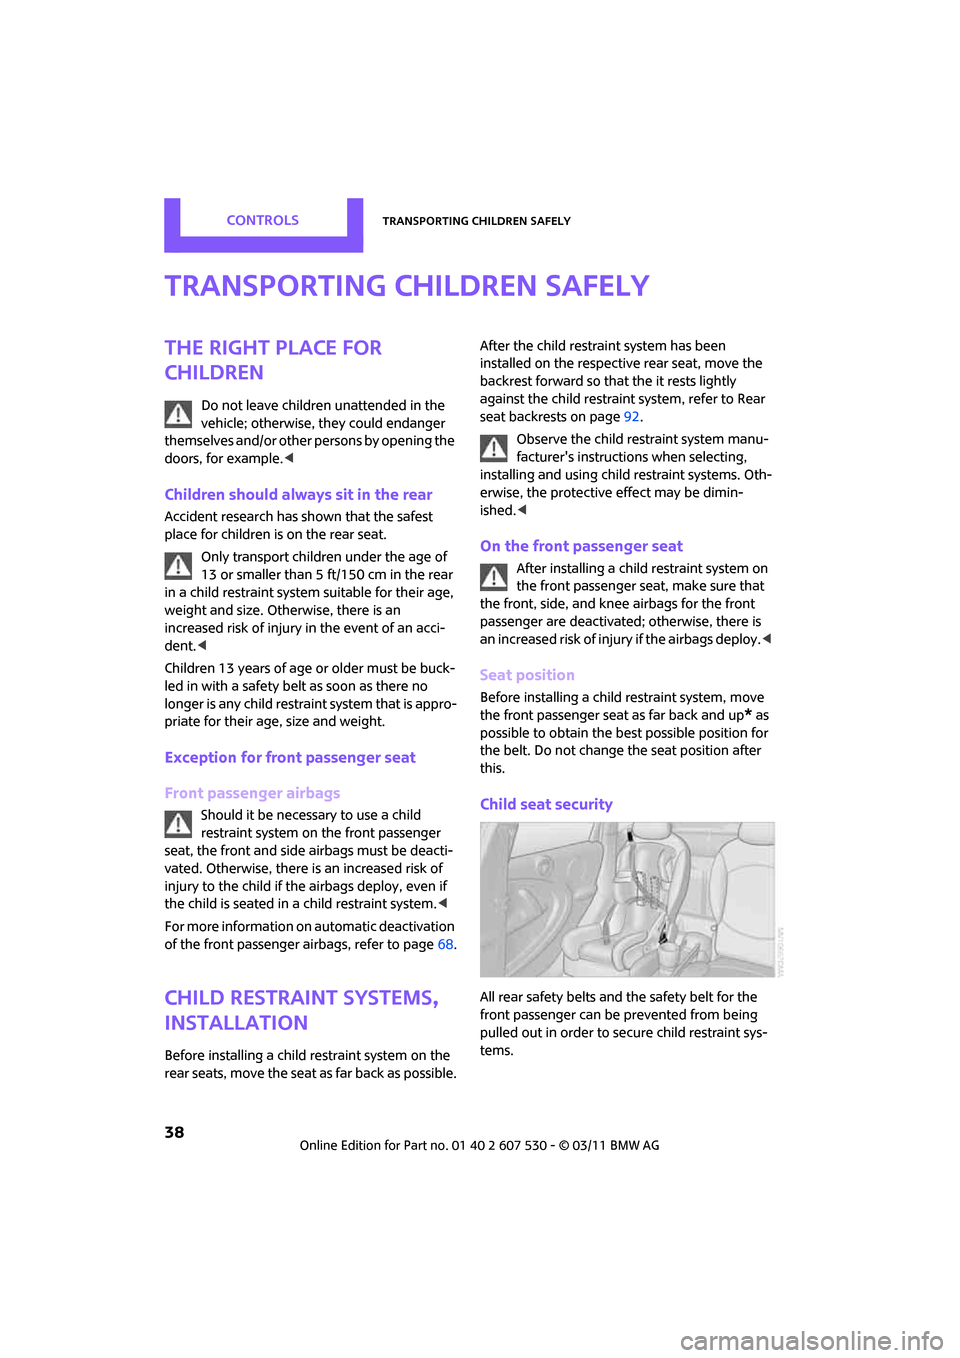
Child seat security
All rear safety belts and the safety belt for the
front passenger can be prevented from being
pulled out in order to se cure child restraint sys-
tems.
Page 70 of 196
ControlsTechnology for driving comfort and safety
68
Airbags
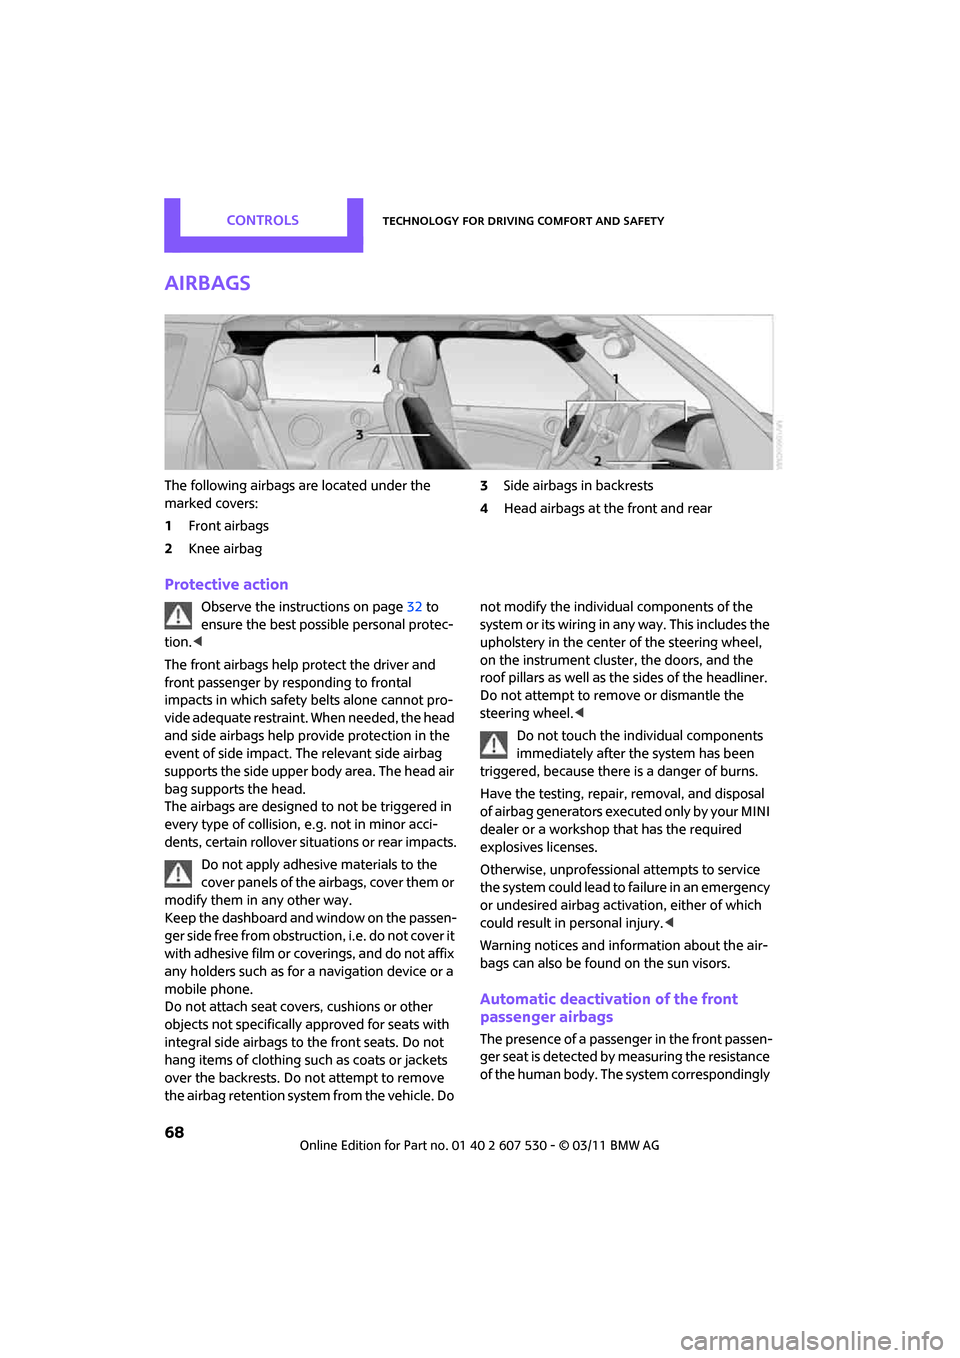
The following airbags are located under the
marked covers:
1Front airbags
2 Knee airbag 3
Side airbags in backrests
4 Head airbags at the front and rear
Protective action
Observe the instructions on page 32 to
ensure the best possible personal protec-
tion. <
The front airbags help protect the driver and
front passenger by re sponding to frontal
impacts in which safety belts alone cannot pro-
vide adequate restraint. When needed, the head
and side airbags help provide protection in the
event of side impact. The relevant side airbag
supports the side upper body area. The head air
bag supports the head.
The airbags are designed to not be triggered in
every type of collision, e.g. not in minor acci-
dents, certain rollover situations or rear impacts.
Do not apply adhesive materials to the
cover panels of the airbags, cover them or
modify them in any other way.
Keep the dashboard and window on the passen-
g e r s i d e f r e e f r o m o b s t r u c t i o n , i . e . d o n o t c o v e r i t
with adhesive film or co verings, and do not affix
any holders such as for a navigation device or a
mobile phone.
Do not attach seat cove rs, cushions or other
objects not specifically approved for seats with
integral side airbags to the front seats. Do not
hang items of clothing su ch as coats or jackets
over the backrests. Do not attempt to remove
the airbag retention system from the vehicle. Do not modify the individual components of the
syste m o r its w iring in any way. Th is includ es the
upholstery in the center of the steering wheel,
on the instrument cluster, the doors, and the
roof pillars as well as the sides of the headliner.
Do not attempt to remove or dismantle the
steering wheel.<
Do not touch the individual components
immediately after the system has been
triggered, because there is a danger of burns.
Have the testing, repair, removal, and disposal
of airbag generators executed only by your MINI
dealer or a workshop that has the required
explosives licenses.
Otherwise, unprofessional attempts to service
the system could lead to failure in an emergency
or undesired airbag activation, either of which
could result in personal injury. <
Warning notices and information about the air-
bags can also be found on the sun visors.
Automatic deactivation of the front
passenger airbags
The presence of a passenger in the front passen-
ger seat is detected by measuring the resistance
of the human body. The system correspondingly
Page 71 of 196
Technology for driving comfort and safetyControls
69
activates or deactivates the front, side, and knee
airbags for the front passenger.Make sure that the front passenger's feet
remain in the footwell; otherwise, it is not
possible to guarantee the function of the front
passenger airbags. <
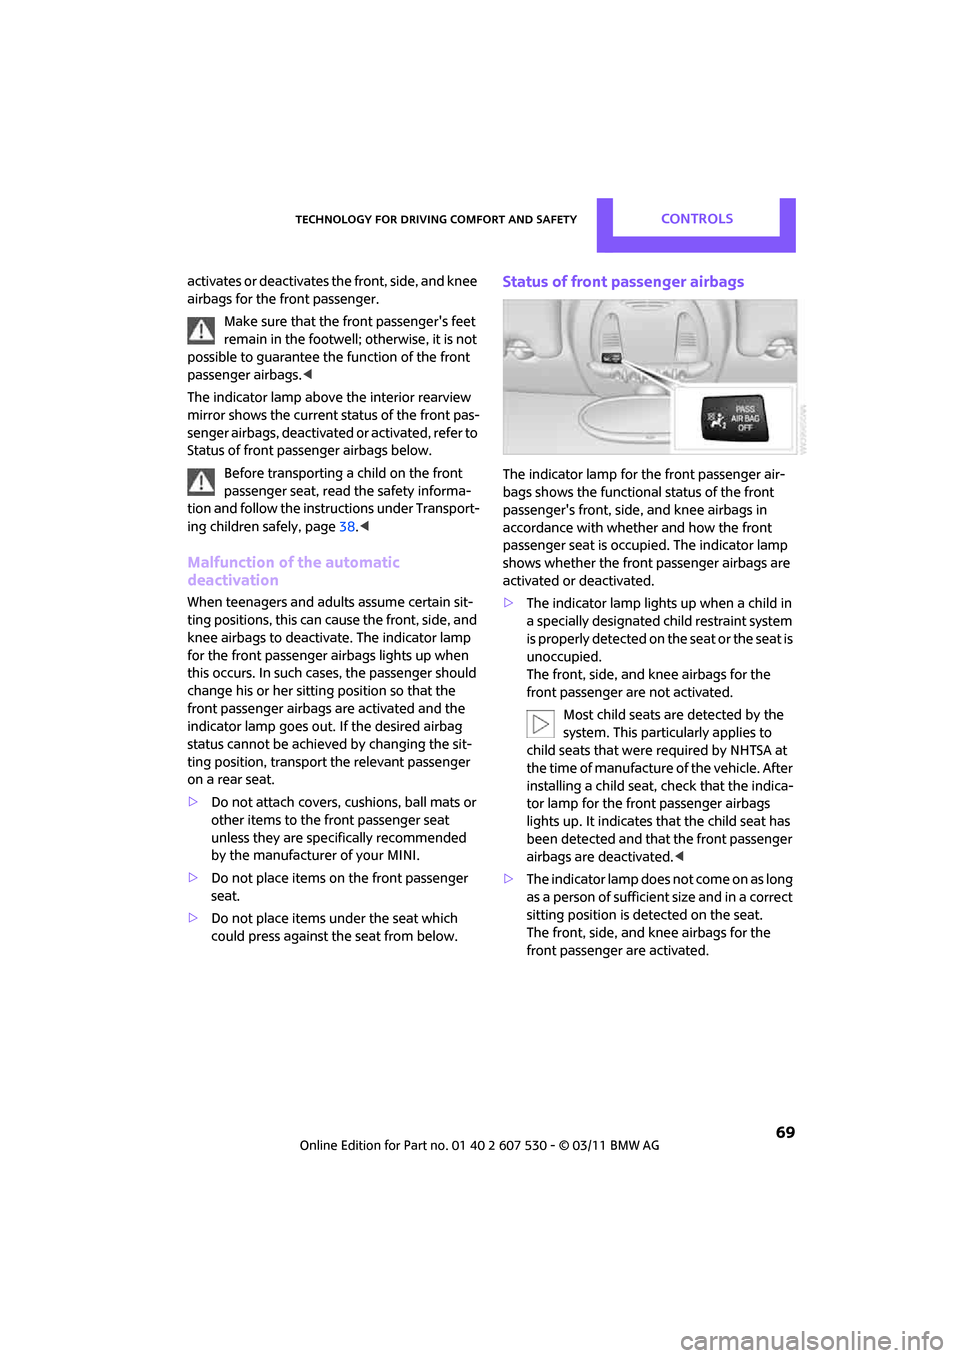
The indicator lamp above the interior rearview
mirror shows the current status of the front pas-
senger airbags, deactivate d or activated, refer to
Status of front passenger airbags below.
Before transporting a child on the front
passenger seat, read the safety informa-
tion and follow the instructions under Transport-
ing children safely, page 38.<
Malfunction of the automatic
deactivation
When teenagers and adul ts assume certain sit-
ting positions, this can cause the front, side, and
knee airbags to deactiva te. The indicator lamp
for the front passenger airbags lights up when
this occurs. In such cases, the passenger should
change his or her sittin g position so that the
front passenger airbags are activated and the
indicator lamp goes out. If the desired airbag
status cannot be achieved by changing the sit-
ting position, transport the relevant passenger
on a rear seat.
> Do not attach covers, cushions, ball mats or
other items to the front passenger seat
unless they are specifically recommended
by the manufacturer of your MINI.
> Do not place items on the front passenger
seat.
> Do not place items un der the seat which
could press against th e seat from below.
Status of front passenger airbags
The indicator lamp for the front passenger air-
bags shows the functional status of the front
passenger's front, side , and knee airbags in
accordance with whether and how the front
passenger seat is occupied. The indicator lamp
shows whether the front passenger airbags are
activated or deactivated.
> The indicator lamp lights up when a child in
a specially designated child restraint system
i s p r o p e r l y d e t e c t e d o n t h e s e a t o r t h e s e a t i s
unoccupied.
The front, side, and knee airbags for the
front passenger are not activated.
Most child seats are detected by the
system. This particularly applies to
child seats that were required by NHTSA at
the time of manufacture of the vehicle. After
installing a child seat, check that the indica-
tor lamp for the front passenger airbags
lights up. It indicates that the child seat has
been detected and that the front passenger
airbags are deactivated. <
> The indicator lamp does not come on as long
as a person of sufficient size and in a correct
sitting position is detected on the seat.
The front, side, and knee airbags for the
front passenger are activated.
Page 72 of 196
ControlsTechnology for driving comfort and safety
70
Operational readiness of airbag system
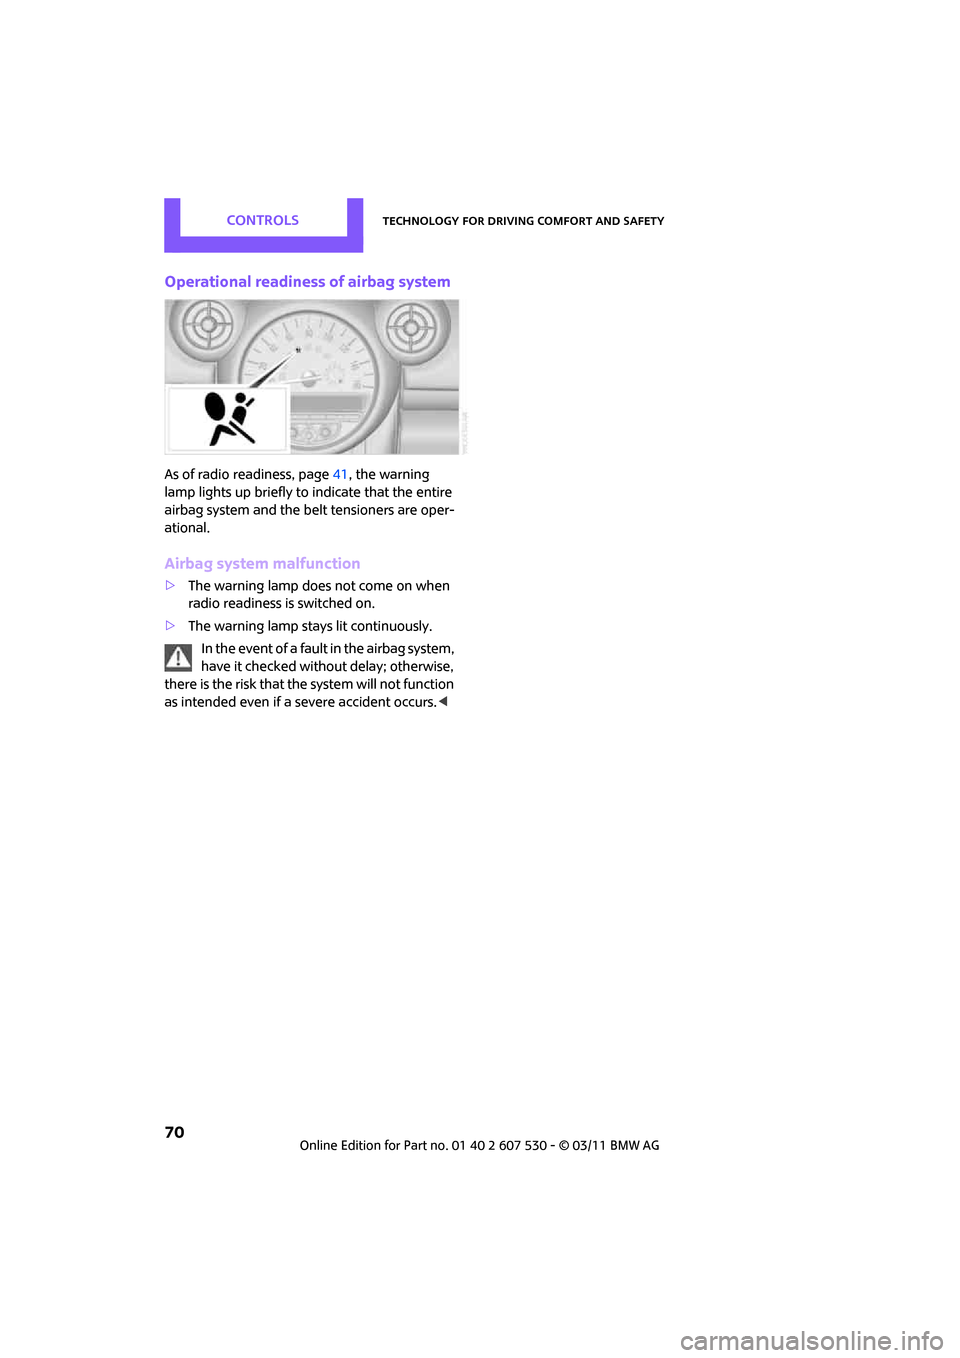
As of radio readiness, page41, the warning
lamp lights up briefly to indicate that the entire
airbag system and the be lt tensioners are oper-
ational.
Airbag system malfunction
> The warning lamp does not come on when
radio readiness is switched on.
> The warning lamp stays lit continuously.
In the event of a fault in the airbag system,
have it checked without delay; otherwise,
there is the risk that the system will not function
as intended even if a severe accident occurs. <
Page 166 of 196
MobilityIndicator and warning lamps
164
Lights up in red:
Service due Arrange a service appointment.Check service requirements,
page142.
Lights up in yellow:
The engine will start the next time the
Start/Stop button is briefly pressed,
possibly without the brake or clutch
being depressed
Remote control malfunctioning or, in
cars with Comfort Access, not
detected The engine cannot be started. Have
the remote control
checked, if neces-
sary.
Remote control battery is discharged Use the remote control for a longer journey or, in cars with Comfort
Access, replace the battery.
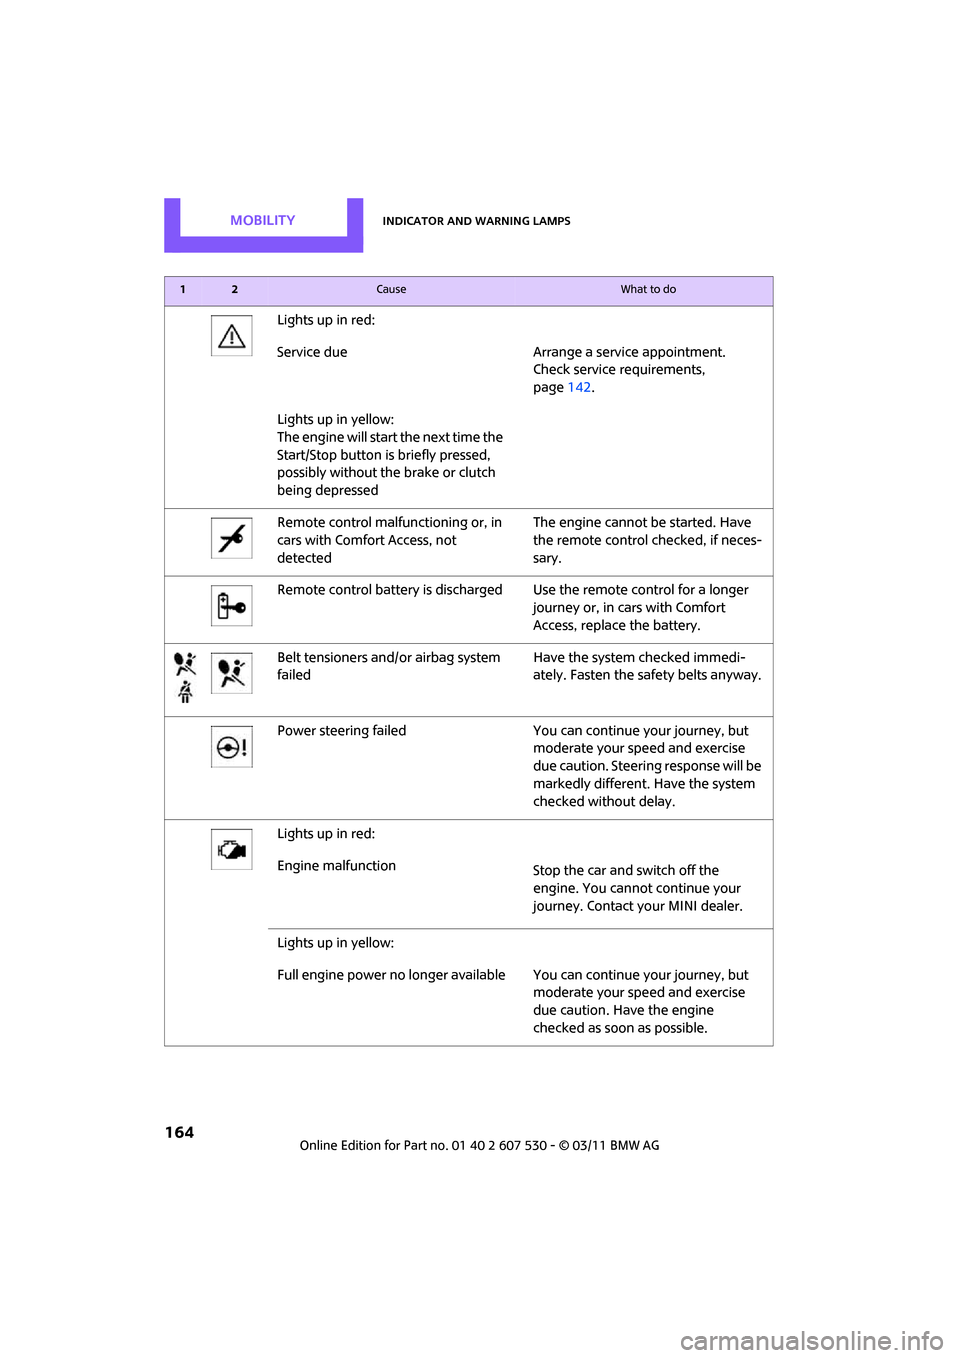
Belt tensioners and/ or airbag system
failed Have the system checked immedi-
ately. Fasten the safety belts anyway.
Power steering failed You can continue your journey, but moderate your speed and exercise
due caution. Steering response will be
markedly different. Have the system
checked without delay.
Lights up in red:
Engine malfunction Stop the car and switch off the
engine. You cannot continue your
journey. Contact your MINI dealer.
Lights up in yellow:
Full engine power no longer available Y ou can continue your journey, but
moderate your speed and exercise
due caution. Have the engine
checked as soon as possible.
12Cause What to do
Page 182 of 196
180
ReferenceEverything from A to Z
Everything from A to Z
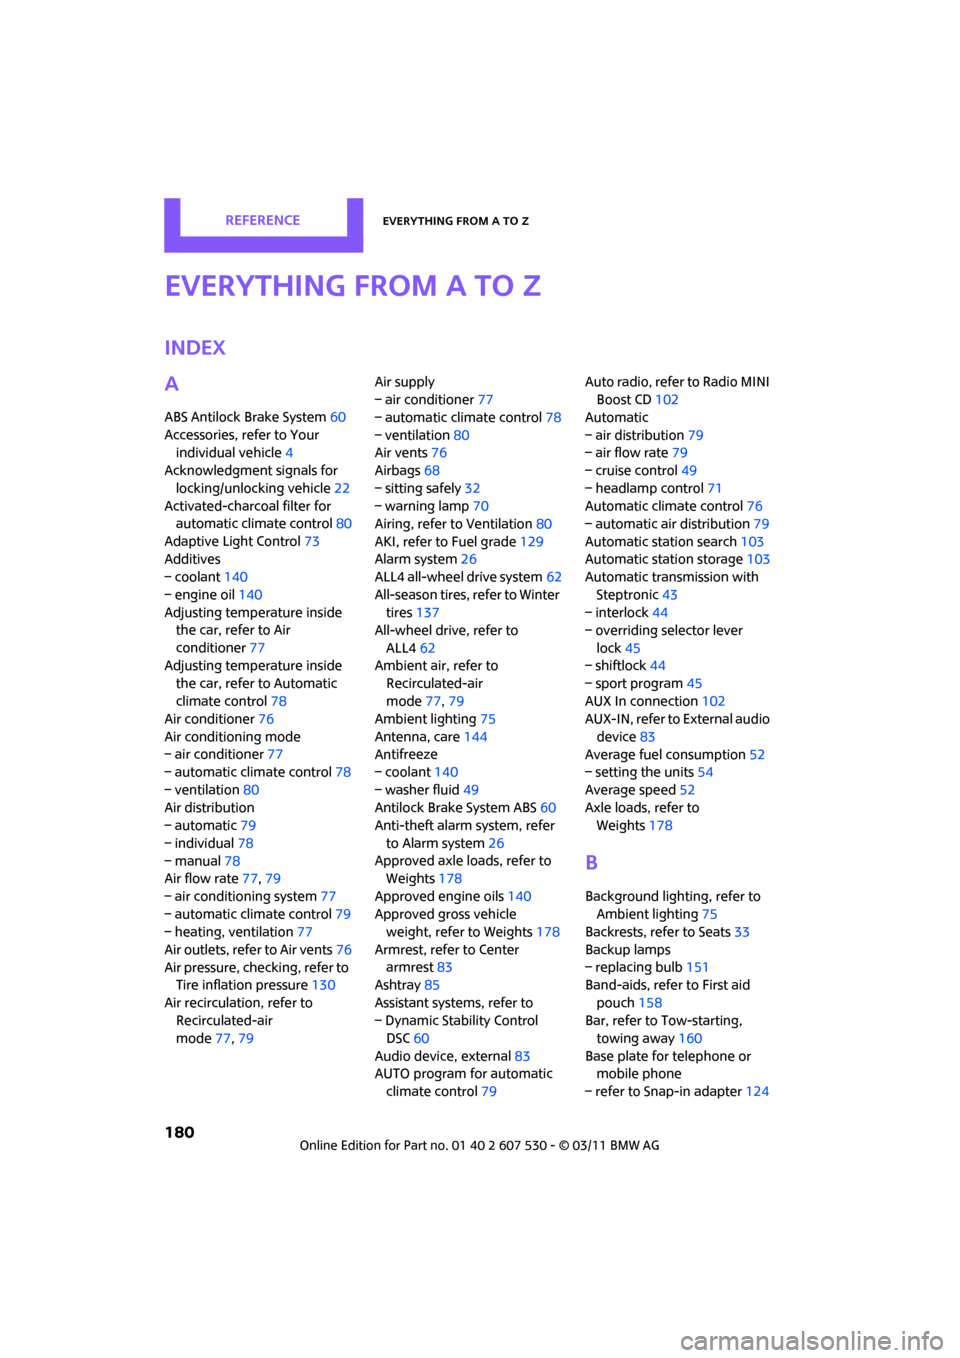
Index
A
ABS Antilock Brake System60
Accessories, refer to Your individual vehicle 4
Acknowledgment signals for
locking/unlocking vehicle 22
Activated-charcoa l filter for
automatic climate control 80
Adaptive Light Control 73
Additives
– coolant 140
– engine oil 140
Adjusting temperature inside the car, refer to Air
conditioner 77
Adjusting temperature inside the car, refer to Automatic
climate control 78
Air conditioner 76
Air conditioning mode
– air conditioner 77
– automatic cl imate control78
– ventilation 80
Air distribution
– automatic 79
– individual 78
– manual 78
Air flow rate 77,79
– air conditioning system 77
– automatic cl imate control79
– heating, ventilation 77
Air outlets, refer to Air vents 76
Air pressure, checking, refer to Tire inflation pressure 130
Air recirculation, refer to Recirculated-air
mode 77,79 Air supply
– air conditioner
77
– automatic climate control 78
– ventilation 80
Air vents 76
Airbags 68
– sitting safely 32
– warning lamp 70
Airing, refer to Ventilation80
AKI, refer to Fuel grade 129
Alarm system 26
ALL4 all-wheel drive system 62
All-season tires, refer to Winter tires 137
All-wheel drive, refer to
ALL4 62
Ambient air, refer to Recirculated-air
mode 77,79
Ambient lighting 75
Antenna, care 144
An
tifreeze
– coolant 140
– washer fluid 49
Antilock Brake System ABS 60
Anti-theft alarm system, refer
to Alarm system 26
Approved axle loads, refer to Weights 178
Approved engine oils 140
Approved gross vehicle weight, refer to Weights 178
Armrest, refer to Center armrest 83
Ashtray 85
Assistant systems, refer to
– Dynamic Stability Control DSC 60
Audio device, external 83
AUTO program for automatic climate control 79 Auto radio, refer to Radio MINI
Boost CD 102
Automatic
– air distribution 79
– air flow rate 79
– cruise control 49
– headlamp control 71
Automatic climate control 76
– automatic air distribution 79
Automatic station search 103
Automatic station storage 103
Automatic transmission with
Steptronic 43
– interlock 44
– overriding selector lever
lock 45
– shiftlock 44
– sport program 45
AUX In connection 102
AUX-IN, refer to External audio
device 83
Average fuel consumption 52
– setting the units 54
Average speed 52
Axle loads, refer to Weights 178
B
Background lighting, refer to
Ambient lighting 75
Backrests, refer to Seats 33
Backup lamps
– replacing bulb 151
Band-aids, refer to First aid
pouch 158
Bar, refer to Tow-starting, towing away 160
Base plate for telephone or mobile phone
– refer to Snap-in adapter 124
Page 184 of 196
ReferenceEverything from A to Z
182
Center Rail, refer to Storage compartments 84
Central locking system 21
– Comfort Access 27
– from inside 24
– from outside 21
– setting unlocking
behavior 21
Changing bulbs 148
Changing wheels 155
Chassis number, refer to Engine compartment 139
Check Control 57
Child restraint fixing system LATCH 39
Child restraint systems 38
Child seats 38
Child-safety locks 40
Chrome parts, care 146
Chrome parts, refer to Care 144
Cigarette lighter 85
Cleaning headlamps 48
– washer fluid 49
Clock
– 12 h/24 h mode 54
– setting time 57
Closing
– from inside 24
– from outside 21
Clothes hooks 85
Cockpit 10
Cold start, refer to Starting the
engine 42
Comfort Access 27
– replacing the battery 29
– what to observe before entering a car wash 29
Comfort area, refer to Around
the center console 14
Compartment for remote control, refer to Ignition
lock 41
Compressed audio files 107
Computer 52
Condensation, refer to When the vehicle is parked 92Condition Based Service
CBS 142
Configuring settings, refer to Personal Profile 20
Connecting vacuum cleaner, refer to Connecting electrical
appliances 86
Consumption, refer to Average fuel consumption 52
Controls and displays 10
Convenient access, refer to Comfort Access 27
Convenient operation
– windows 22
Convenient start, refer to
St
arting the engine 42
Coolant 140
– checking level 141
– filling 141
– temperature 141
Coolant temperature 141
Cooling fluid, refer to
Coolant 140
Cooling, maximum 79
Copyright 2
Cornering light, refer to Adaptive Light Control 73
Cruising range 52
Cupholders 85
Curb weight, refer to
Weights 178
Current fuel consumption 52
D
Dashboard instruments, refer
to Displays 12
Dashboard lighting, refer to Instrument lighting 74
Dashboard, refer to Cockpit 10
Data 176
– capacities 179
– dimensions 177
– engine 176
– weights 178
Data memory 143 Date
– setting
57
Date setting 103
Daytime running lights 72
DBC Dynamic Brake Control, refer to Brake Assist 60
Deactivating front passenger
airbags 68
Deadlocking, refer to Locking 22
Defect
– door lock 24
– fuel filler flap 128
Defogging windows 78,80
Defrost position, refer to Defrosting windows 78,80
Defrosting windows 78,80
Defrosting windows and removing condensation
– air conditioner 78
– automatic climate control 80
Defrosting windshield, refer to
Defrosting windows 78,80
Differential, breaking in 90
Digital radio, refer to HD
Radio 105
Dimensions 177
Dipstick, engine oil 139
Directional indicators, refer to Turn signals 46
Displacement, refer to Engine data 176
Display lighting, refer to
Instrument lighting 74
Displays 12
– instrument cluster 12
Displays and controls 10
Displays, care 147
Disposal
– of coolant 140
– remote control battery 29
– vehicle battery 156
Distance remaining to service, refer to Service
requirements 55
Distance warning, refer
to Park
Distance Control PDC 59