transmission MINI Countryman 2011 Owner's Manual
[x] Cancel search | Manufacturer: MINI, Model Year: 2011, Model line: Countryman, Model: MINI Countryman 2011Pages: 196, PDF Size: 3.06 MB
Page 14 of 196
AT A GLANCECockpit
12
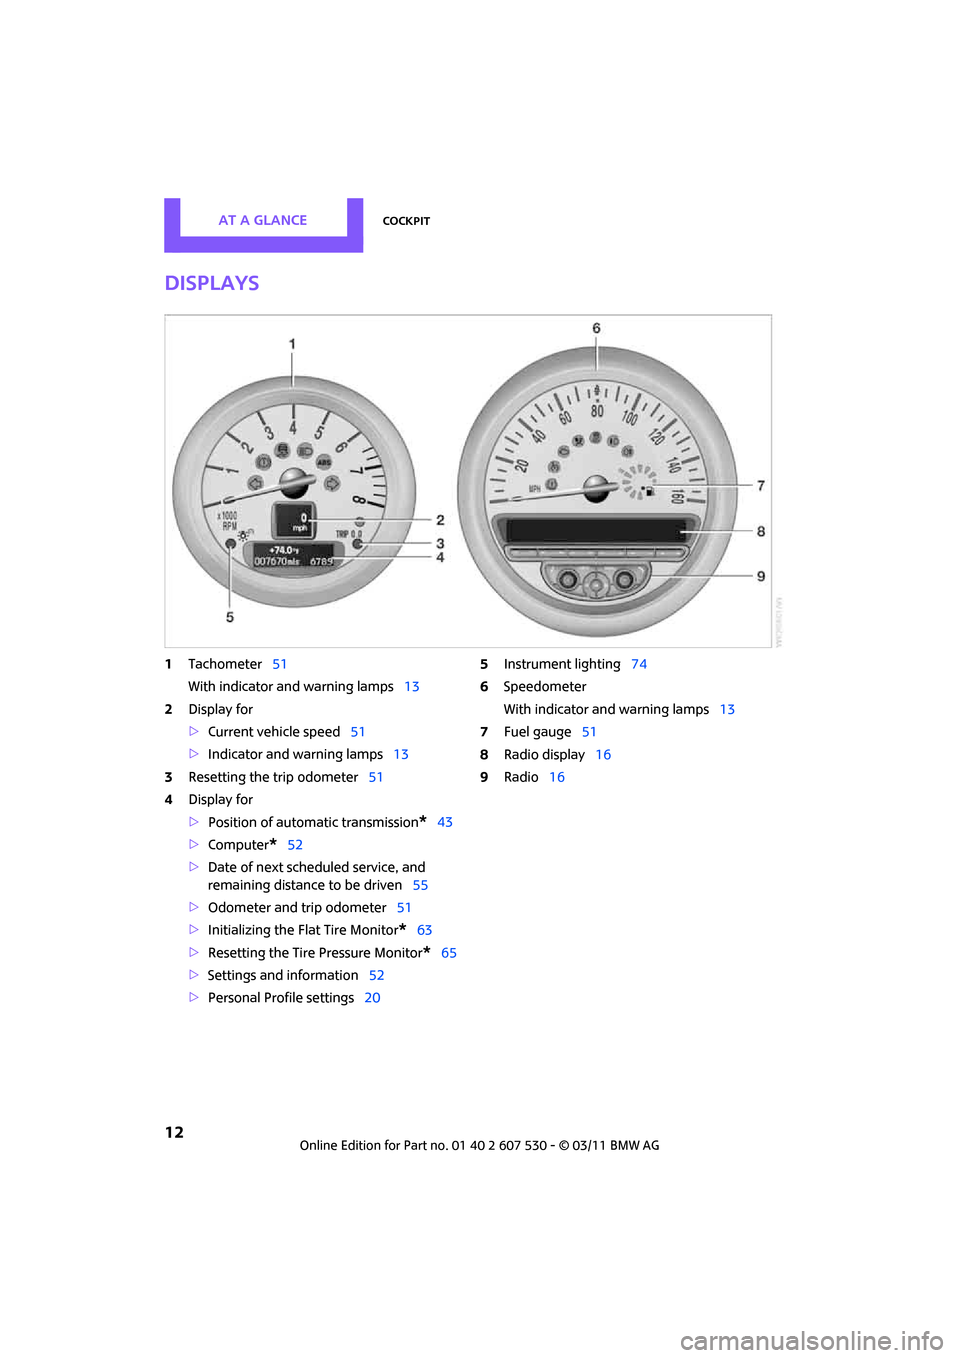
Displays
1Tachometer 51
With indicator and warning lamps 13
2 Display for
>Current vehicle speed 51
> Indicator and warning lamps 13
3 Resetting the trip odometer 51
4 Display for
>Position of automatic transmission
*43
> Computer
*52
> Date of next scheduled service, and
remaining distance to be driven 55
> Odometer and trip odometer 51
> Initializing the Fl at Tire Monitor
*63
> Resetting the Tire Pressure Monitor
*65
> Settings and information 52
> Personal Prof ile settings20 5
Instrument lighting 74
6 Speedometer
With indicator and warning lamps 13
7 Fuel gauge 51
8 Radio display 16
9 Radio 16
Page 31 of 196
Opening and closingControls
29
Switching off the engine in cars with
automatic transmission
The engine can only be switched off when the
selector lever is in position P, page43.
To switch the engine off when the selector lever
is in position N, the re mote control must be in
the ignition lock.
Before driving a vehicle with automatic
transmission into a car wash
1. Insert remote control into ignition lock.
2. Depress the brake.
3. Move the selector lever to position N.
4. Switch off the engine.
The vehicle can roll.
Malfunction
Comfort Access may malfunction due to local
radio waves.
If this happens, open or close the vehicle via the
buttons on the remote control or using the inte-
grated key.
Insert the remote control into the ignition lock
and start the engine.
Warning lamps
The warning lamp lights up when an
attempt is made to start the engine: the
engine cannot be started. The remote
control is not inside the vehicle or is malfunc-
tioning. Take the remote control with you inside
the vehicle or have it checked. If necessary,
insert another remote co ntrol into the ignition
lock.
The warning lamp lights up when the
engine is running: th e remote control is
no longer inside the vehicle. After the
engine is switched off, the engine can only be
restarted within approx. 10 seconds.
The indicator lamp lights up: replace the
battery in the remote control.
Replacing the battery
The remote control for Comfort Access contains
a battery that will need to be replaced from time
to time.
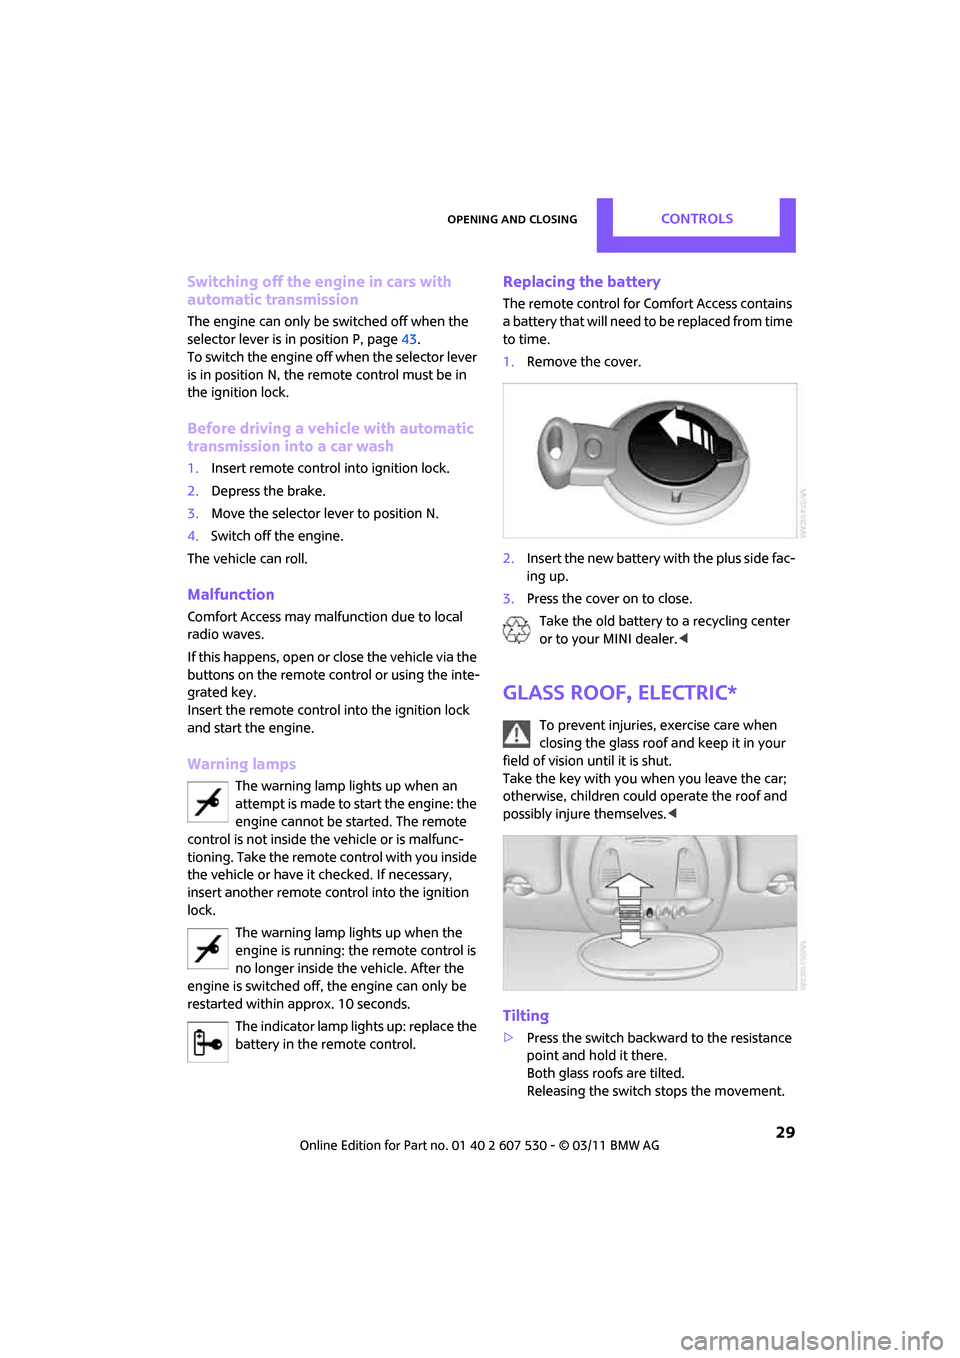
1. Remove the cover.
2. Insert the new battery with the plus side fac-
ing up.
3. Press the cover on to close.
Take the old battery to a recycling center
or to your MINI dealer. <
Glass roof, electric*
To prevent injuries, exercise care when
closing the glass roof and keep it in your
field of vision until it is shut.
Take the key with you when you leave the car;
otherwise, children could operate the roof and
possibly injure themselves. <
Tilting
>Press the switch backwa rd to the resistance
point and hold it there.
Both glass roofs are tilted.
Releasing the switch stops the movement.
Page 43 of 196
DrivingControls
41
Driving
Ignition lock
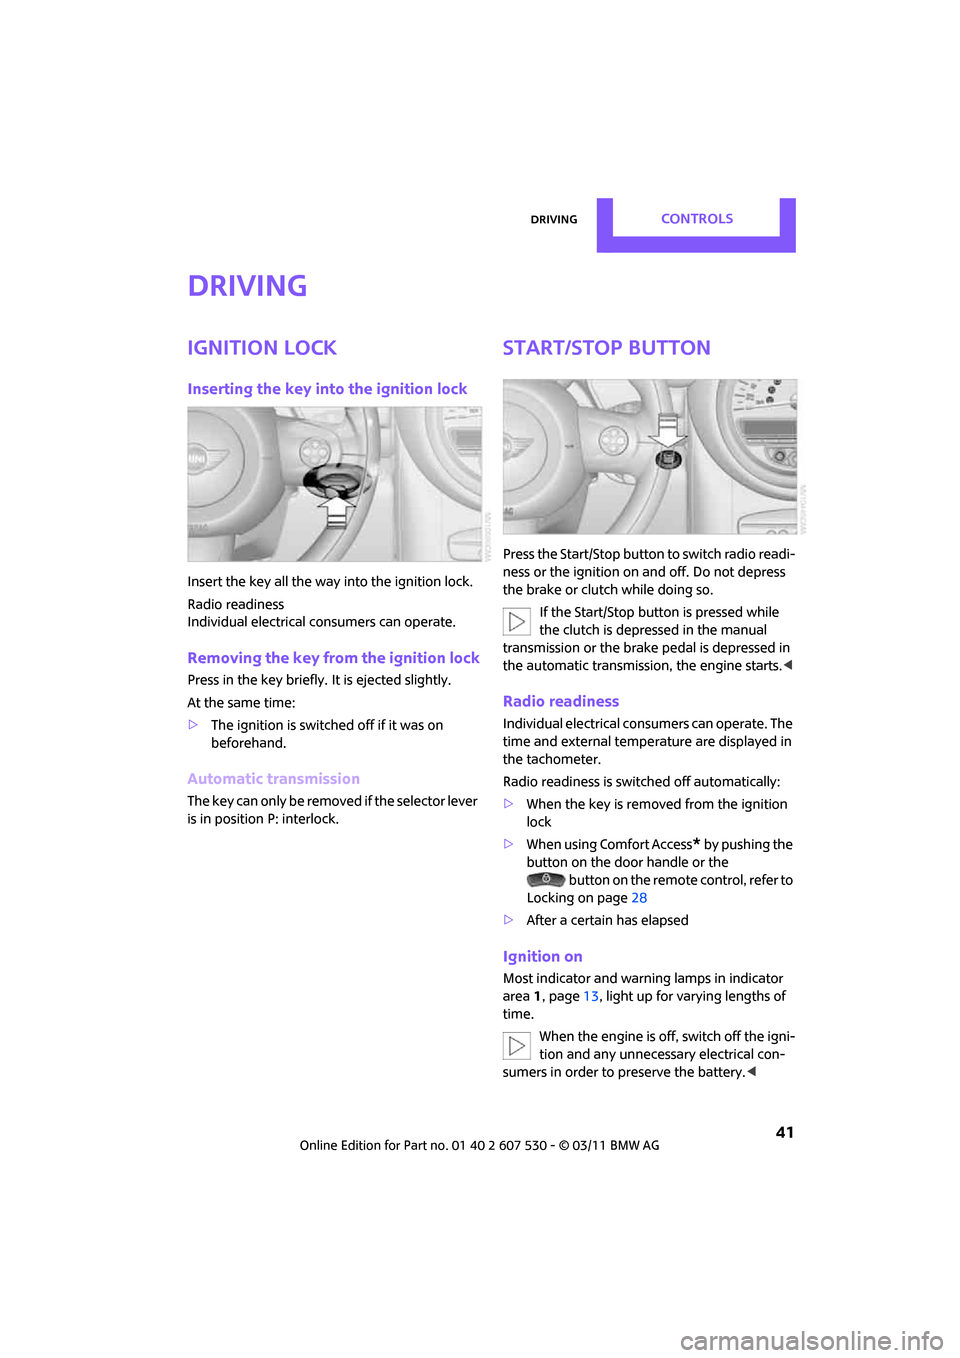
Inserting the key into the ignition lock
Insert the key all the way into the ignition lock.
Radio readiness
Individual electrical consumers can operate.
Removing the key from the ignition lock
Press in the key briefly. It is ejected slightly.
At the same time:
> The ignition is switched off if it was on
beforehand.
Automatic transmission
The key can only be removed if the selector lever
is in position P: interlock.
Start/Stop button
Press the Start/Stop button to switch radio readi-
ness or the ignition on and off. Do not depress
the brake or clutch while doing so.
If the Start/Stop button is pressed while
the clutch is depressed in the manual
transmission or the brak e pedal is depressed in
the automatic transmission, the engine starts. <
Radio readiness
Individual electrical consumers can operate. The
time and external temperature are displayed in
the tachometer.
Radio readiness is switched off automatically:
>When the key is removed from the ignition
lock
> When using Comfort Access
* by pushing the
button on the door handle or the
button on the remote control, refer to
Locking on page 28
> After a certain has elapsed
Ignition on
Most indicator and warning lamps in indicator
area 1, page 13, light up for va rying lengths of
time.
When the engine is off, switch off the igni-
tion and any unnecessary electrical con-
sumers in order to preserve the battery. <
Page 44 of 196
ControlsDriving
42
Radio readiness and ignition off
All indicator and warning lamps in the displays
go out.
The ignition switches off automatically if the
driver's door is opened. Pressing the Start/Stop
button again switches the ignition back on.
The ignition is not switched off in situations such
as the following:
> The clutch or brake is depressed
> The low beams are switched on
Starting the engine
Do not allow the engine to run in enclosed
areas; otherwise, inha lation of the noxious
exhaust gases can lead to loss of consciousness
and death. Exhaust gase s contain carbon mon-
oxide, an odorless and colorless, but highly toxic
gas. Never leave an unattended vehicle with the
engine running; otherwise, such a vehicle repre-
sents a potential safety hazard.
Before leaving the car while the engine is run-
ning, place the transmission in neutral or move
the selector lever to position P and forcefully
apply the parking brake to prevent the car from
moving. <
Avoid frequent starting in quick succes-
sion or repeated start attempts in which
the engine does not start. Otherwise, the fuel is
not burned or inadequate ly burned and there is
a danger of overheatin g and damaging the cat-
alytic converter. <
Do not let the engine warm up with the vehicle
at a standstill. Move off immediately at a moder-
ate engine speed.
When starting the engi ne, do not depress the
accelerator pedal.
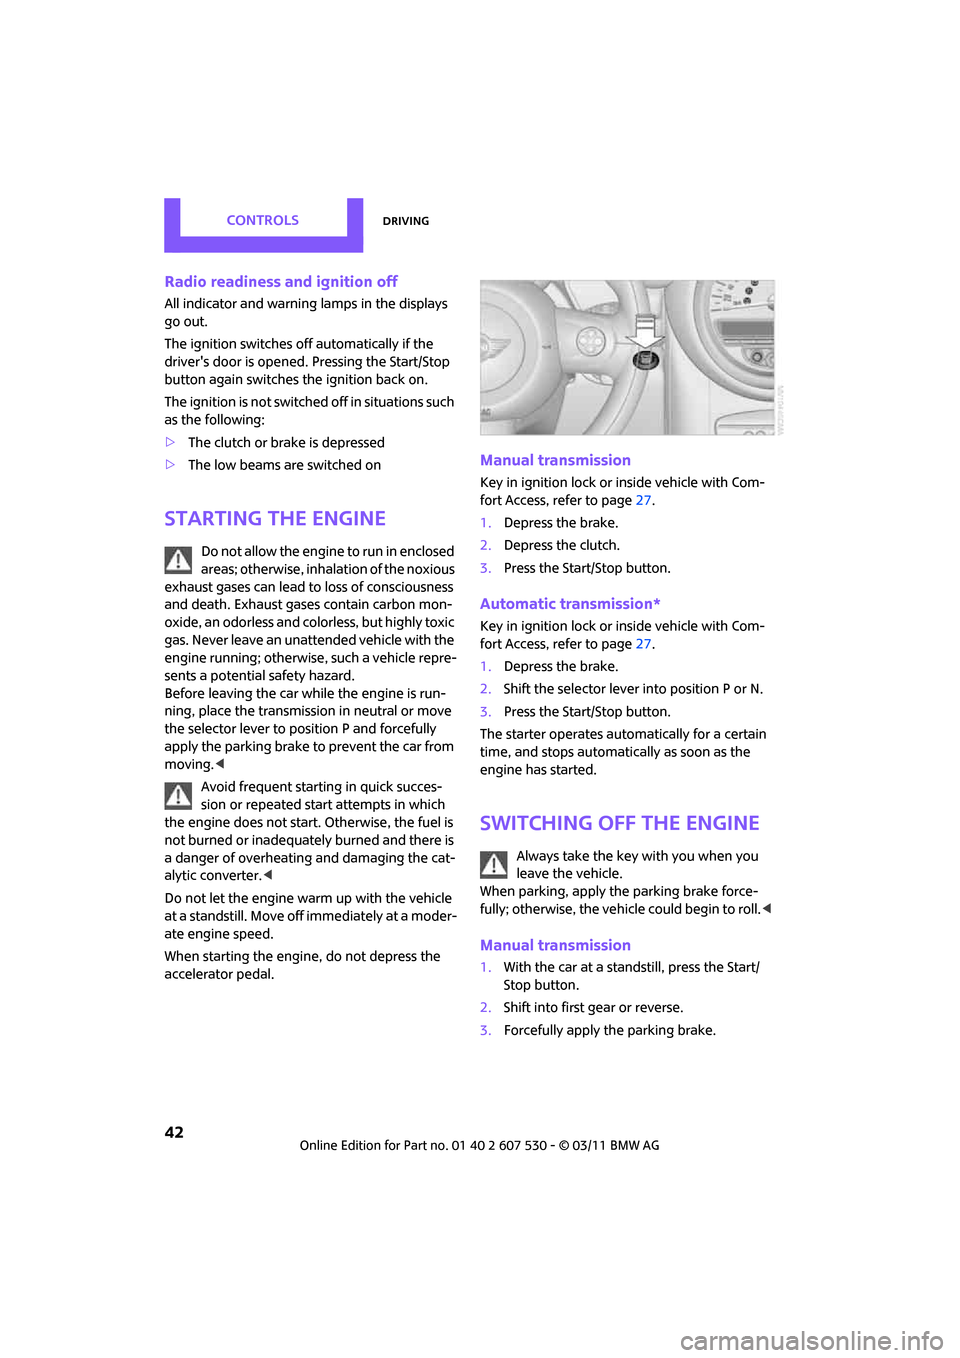
Manual transmission
Key in ignition lock or inside vehicle with Com-
fort Access, refer to page 27.
1. Depress the brake.
2. Depress the clutch.
3. Press the Start/Stop button.
Automatic transmission*
Key in ignition lock or inside vehicle with Com-
fort Access, refer to page 27.
1. Depress the brake.
2. Shift the selector lever into position P or N.
3. Press the Start/Stop button.
The starter operates auto matically for a certain
time, and stops automati cally as soon as the
engine has started.
Switching off the engine
Always take the key with you when you
leave the vehicle.
When parking, apply the parking brake force-
fully; otherwise, the vehicle could begin to roll. <
Manual transmission
1.With the car at a standstill, press the Start/
Stop button.
2. Shift into first gear or reverse.
3. Forcefully apply the parking brake.
Page 45 of 196
DrivingControls
43
Automatic transmission*
1.With the car at a stop, move the selector
lever to position P.
2. Press the Start/Stop button.
3. Forcefully apply the parking brake.
Before driving into a car wash
By following these steps, the vehicle is able to
roll:
1.Place the remote control, even with Comfort
Access, in the ig nition lock.
2. Depress the brake.
3. Move the selector lever to position N.
4. Switch off the engine.
Parking brake
The parking brake is primarily intended to pre-
vent the vehicle from rolling while parked; it
brakes the rear wheels.
Applying
The lever locks in position automatically.
Releasing
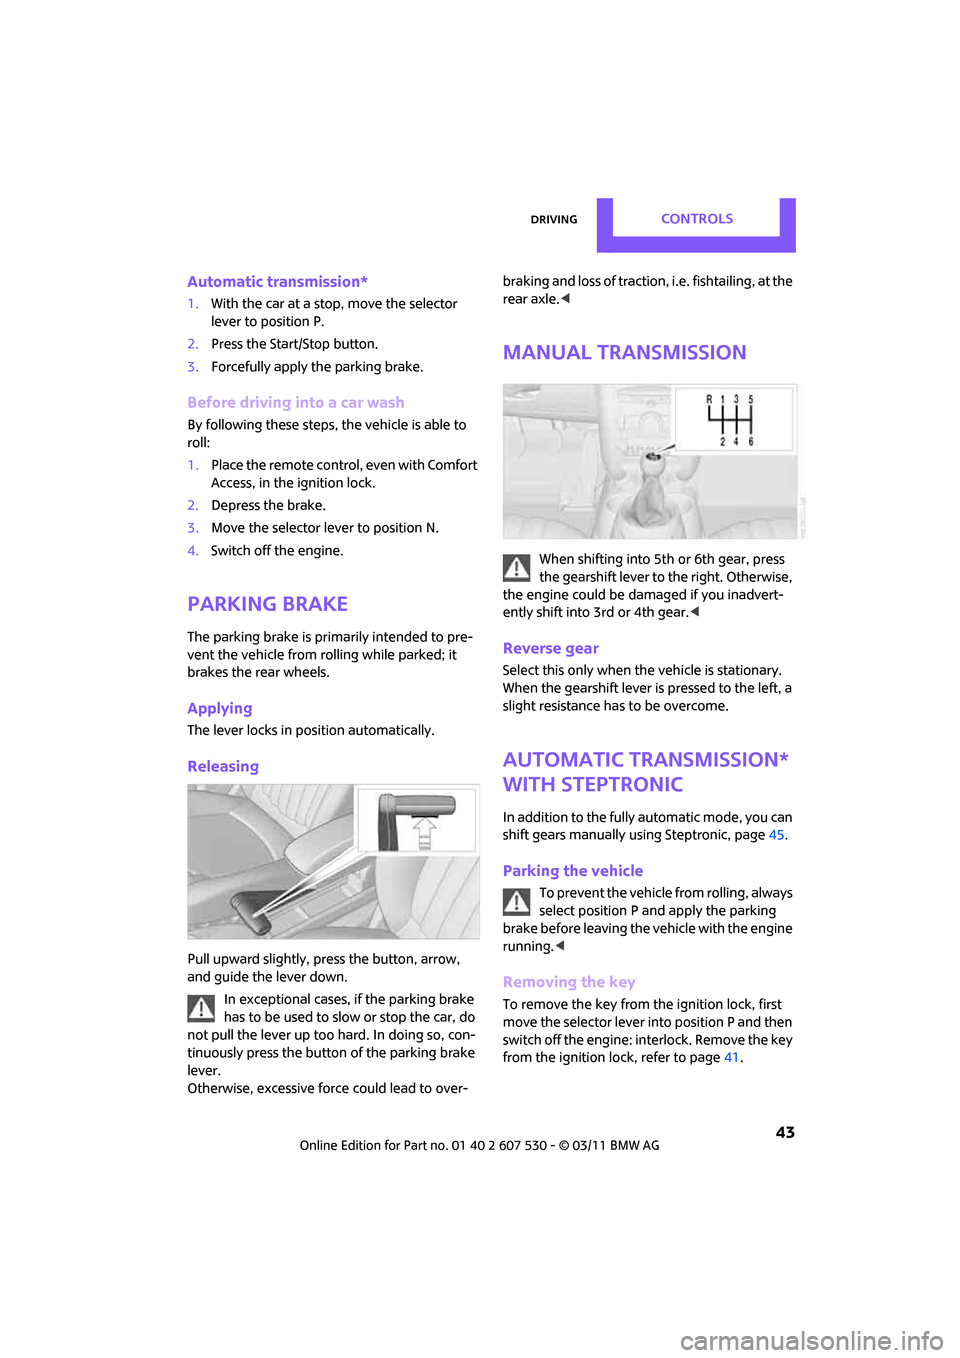
Pull upward slightly, press the button, arrow,
and guide the lever down.
In exceptional cases, if the parking brake
has to be used to slow or stop the car, do
not pull the lever up too hard. In doing so, con-
tinuously press the button of the parking brake
lever.
Otherwise, excessive force could lead to over- braking and loss of traction, i.e. fishtailing, at the
rear axle.
<
Manual transmission
When shifting into 5th or 6th gear, press
the gearshift lever to the right. Otherwise,
the engine could be damaged if you inadvert-
ently shift into 3rd or 4th gear.<
Reverse gear
Select this only when the vehicle is stationary.
When the gearshift lever is pressed to the left, a
slight resistance ha s to be overcome.
Automatic transmission*
with Steptronic
In addition to the fully automatic mode, you can
shift gears manually using Steptronic, page 45.
Parking the vehicle
To prevent the vehicle from rolling, always
select position P and apply the parking
brake before leaving the vehicle with the engine
running. <
Removing the key
To remove the key from the ignition lock, first
move the selector lever into position P and then
switch off the engine: interlock. Remove the key
from the ignition lock, refer to page 41.
Page 46 of 196

ControlsDriving
44
Selector lever positions
P R N D M/S + –
Displays in the tachometer
P R N D DS M1 to M6
The selector lever position is displayed, or the
current gear in the manual mode.
Changing selector lever positions
> The selector lever can only be moved out of
position P when the ignition is switched on
or the engine is running.
> Before moving the le ver away from P or N
with the vehicle stationary, first depress the
brake; otherwise, the selector lever will
refuse to move: shiftlock.
To prevent the vehicle from creeping
after you select a driving position,
depress the brake until you are ready to
start. <
A lock prevents accidental shifting into selector
lever positions R and P.
Overriding the selector lever lock
Press the button on the front of the selector
lever, arrow.
P Park
Select this only when the vehicle is stationary.
The transmission locks to prevent the drive
wheels from turning.
R Reverse
Select this only when the vehicle is stationary.
N Neutral
Select this when you are in a car wash, for exam-
ple. The vehicle can roll.
D Drive, automatic position
Position for normal vehi cle operation. All for-
ward gears are selected automatically.
Under normal operatin g conditions, the fuel
consumption is lowest wh en driving in position
D.
Kickdown
Kickdown enables you to achieve maximum
performance.
Depress the accelerator pedal beyond the full-
throttle resistance point.
Page 47 of 196
DrivingControls
45
Sports programming and manual mode
M/S
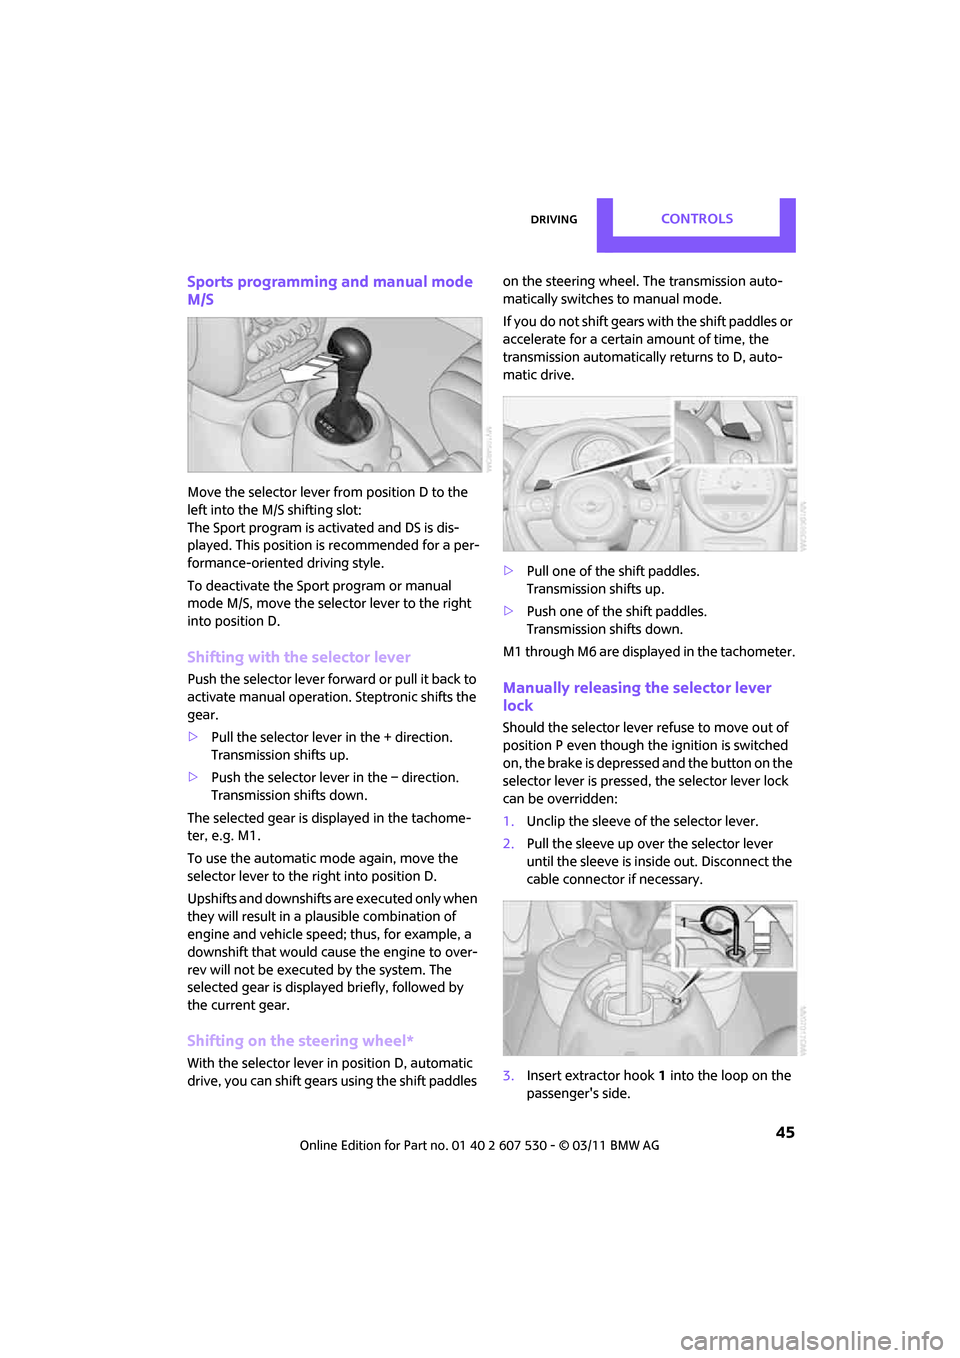
Move the selector lever from position D to the
left into the M/S shifting slot:
The Sport program is activated and DS is dis-
played. This position is recommended for a per-
formance-oriented driving style.
To deactivate the Sport program or manual
mode M/S, move the selector lever to the right
into position D.
Shifting with the selector lever
Push the selector lever forward or pull it back to
activate manual operation. Steptronic shifts the
gear.
> Pull the selector lever in the + direction.
Transmission shifts up.
> Push the selector leve r in the – direction.
Transmission shifts down.
The selected gear is displayed in the tachome-
ter, e.g. M1.
To use the automatic mode again, move the
selector lever to the right into position D.
Upshifts and downshifts are executed only when
they will result in a pl ausible combination of
engine and vehicle speed; thus, for example, a
downshift that would cause the engine to over-
rev will not be executed by the system. The
selected gear is displayed briefly, followed by
the current gear.
Shifting on the steering wheel*
With the selector lever in position D, automatic
drive, you can shift gears using the shift paddles on the steering wheel. The transmission auto-
matically switches to manual mode.
If you do not shift gears with the shift paddles or
accelerate for a certai
n amount of time, the
transmission automatically returns to D, auto-
matic drive.
> Pull one of the shift paddles.
Transmission shifts up.
> Push one of th e shift paddles.
Transmission shifts down.
M1 through M6 are displayed in the tachometer.
Manually releasing the selector lever
lock
Should the selector lever refuse to move out of
position P even though the ignition is switched
on, the brake is depressed and the button on the
selector lever is pressed, the selector lever lock
can be overridden:
1. Unclip the sleeve of the selector lever.
2. Pull the sleeve up over the selector lever
until the sleeve is insi de out. Disconnect the
cable connector if necessary.
3. Insert extractor hook 1 into the loop on the
passenger's side.
Page 51 of 196

DrivingControls
49
Do not use the washers when the washer
fluid reservoir is empty; otherwise, you will
damage the washer pump. <
Washer fluid
Washer fluid is flammable. Keep it away
from ignition sources, only store it in the
closed, original container, and keep out of reach
of children; otherwise, there is a danger of
injury. Comply with the instructions on the con-
tainer. <
Washer fluid reservoir
Only refill washer flui d that contains anti-
freeze when the engine is cool, to avoid
contact with hot engine parts. Otherwise, fluid
spills constitute a fire hazard and a risk to per-
sonal safety. <
Fill with water and, if required, with a washer
antifreeze, according to manufacturer's recom-
mendations. Mix the water and antifreeze before filling
the washer fluid reservoir to make sure
the correct concentration is maintained. <
Capacity
Approx. 4.2 US quarts/4 liters.
Cruise control*
The concept
Cruise control is available at vehicle speeds of at
least approx. 20 mph or 30 km/h. The car then
stores and maintains the speed that you specify
using the button on the steering wheel.
Do not use cruise control when driving at
constant speed is prevented by adverse
conditions, e.g. winding roads, dense traffic or
poor road conditions due to, e.g., snow, rain, ice
or loose surfaces. Otherwise, you could lose con-
trol of the vehicle and cause an accident as a
result. <
Activating
1Resuming cruise control
2 Activating/deactivating cruise control
3 Maintaining, storing and increasing speed
4 Maintaining, storing and decreasing speed
Indicator lamp in the sp eedometer lights up. The
cruise control system is ready and can be acti-
vated.
Activating/deactivating cruise control
Press button 2.
The system is automatically deactivated if:
> braking takes place
> the clutch is engaged
> the transmission is set on N
> the stability control system is on
Cruise control is not de activated by depressing
the accelerator pedal. Once the accelerator
Page 61 of 196
Technology for driving comfort and safetyControls
59
Technology for driving comfort and
safety
Park Distance Control
PDC*
The concept
PDC assists you with parking in reverse. Acoustic
signals warn you of the presence of an object
behind the vehicle. The measurement is carried
out by four ultrasonic sensors in the rear
bumper.An acoustic warning sounds when an
object is approx. 24 in/60 cm from the
corner sensors or appr ox. 5 ft/1.50 m from the
center sensors. PDC is a parking aid that can dis-
play objects, which are slowly being
approached, which is the usual case when park-
ing a vehicle. Avoid approaching an object at
high speed; otherwise, physical circumstances
may lead to the system warning being issued
too late. <
Automatic mode
With the engine running or the ignition switched
on, the system is activated automatically after
approx. 1 second when you engage reverse
gear or move the automatic transmission selec-
tor lever to position R. Wait this short period
before driving.
Acoustic signals
As the distance between vehicle and object
decreases, the intervals between the tones
become shorter. If the distance to the nearest
object falls to below roughly 1 ft/30 cm, then a
continuous tone sounds.
If the distance remains co nstant, e.g. when driv-
ing parallel to a wall, th e acoustic signal stops
after approx. 3 seconds.
Adjustments
The volume of the acoustic signals can be set,
refer to page 102.
Malfunction
Indicator lamp lights up. PDC has failed.
Have the system checked.
To avoid this problem, keep the sensors
clean and free of ice or snow in order to ensure
that they will continue to operate effectively.
When using a high-pressure cleaner, do not
direct the jet toward the sensors for lengthy
periods and only spray from a distance of at least
4in/10cm.
System limitations
Even with PDC, final re sponsibility for esti-
mating the distance between the vehicle
and any obstructions always remains with the
driver. Sensors, too, ha ve blind spots in which
objects cannot be detected. Moreover, ultra-
sonic detection can reach its physical limits with
objects such as trailer tow bars and couplings,
thin and wedge-shaped objects, etc. Low
objects already indicated, such as curbs, may
enter the sensors' blind spots before or after a
continuous audible signal is given. Higher, pro-
truding objects, such as wall ledges, may not be
detectable. Therefore, al ways drive cautiously;
otherwise, there is a risk of personal injury or
property damage. Loud sound sources outside
or inside the car can drown out the PDC signal. <
Driving stability control
systems
Your MINI has a number of systems that help to
maintain the vehicle's st ability even in adverse
driving conditions.
Page 64 of 196
ControlsTechnology for driving comfort and safety
62
Activating DSC
Press the button again: the indicator lamps go
out.
Hill Assist
Hill Assist aids you in co mfortably driving off on
inclines. It is not necessary to use the parking
brake for this.
1. Hold the MINI with the brake.
2. Release the brake and immediately drive
off.
Hill Assist holds the car in place for approx.
2 seconds after the brake is released.
Depending on the load and gradient, the
vehicle can roll backwa rd slightly during
this period. After you release the brake, immedi-
ately start driving since the Hill Assist only holds
the vehicle for about 2 seconds, and it will start
to roll backward. <
ALL4 all-wheel drive system*
ALL4 is the all-wheel driv e system of your MINI.
The combined effects of ALL4 and DSC further
optimize the traction and dynamic driving char-
acteristics. The ALL4 all- wheel drive system vari-
ably distributes the drive force to the front and
rear axle depending on the driving situation and
prevailing road conditions.
Sport button*
Pressing the button causes your MINI to respond
even more sportily.
> Engine responds more spontaneously to
movements of the accelerator.
> Steering response is more direct.
> Cooper S: the engine sounds more sporty in
coasting mode.
With automatic transmission:
> More rapid gear shifti ng in Sport program.
Activating the system
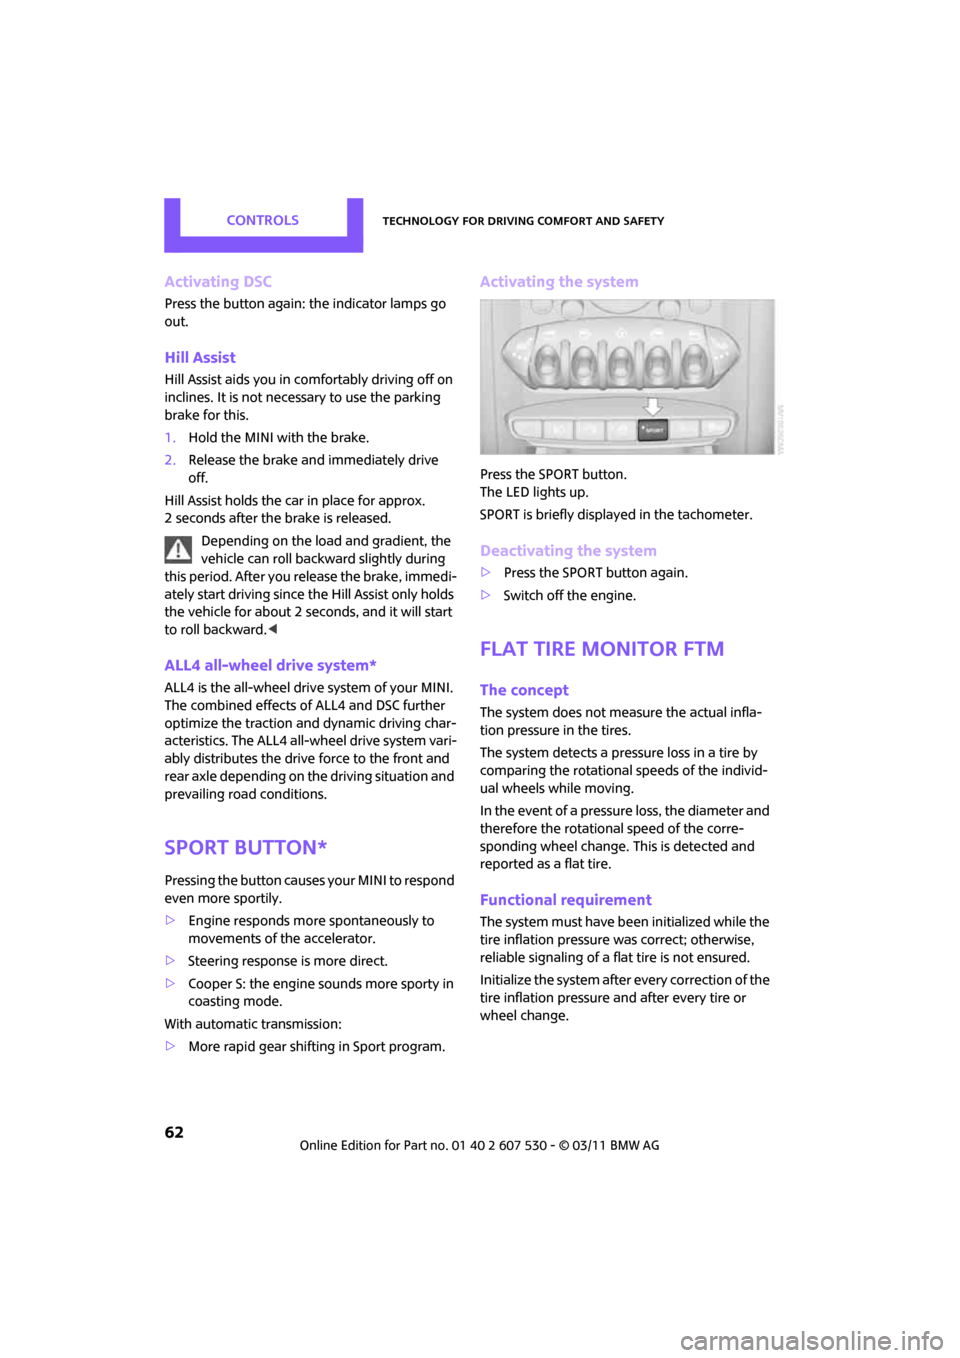
Press the SPORT button.
The LED lights up.
SPORT is briefly displayed in the tachometer.
Deactivating the system
>Press the SPORT button again.
> Switch off the engine.
Flat Tire Monitor FTM
The concept
The system does not me asure the actual infla-
tion pressure in the tires.
The system detects a pres sure loss in a tire by
comparing the rotational speeds of the individ-
ual wheels while moving.
In the event of a pressure loss, the diameter and
therefore the rotational speed of the corre-
sponding wheel change. This is detected and
reported as a flat tire.
Functional requirement
The system must have be en initialized while the
tire inflation pressure was correct; otherwise,
reliable signaling of a fl at tire is not ensured.
Initialize the system afte r every correction of the
tire inflation pressure and after every tire or
wheel change.