check engine light MINI Countryman 2012 Owner's Manual (Mini Connected)
[x] Cancel search | Manufacturer: MINI, Model Year: 2012, Model line: Countryman, Model: MINI Countryman 2012Pages: 259, PDF Size: 3.07 MB
Page 14 of 259
CockpitAT A GLANCE
13
Indicator and warning
lamps
The concept
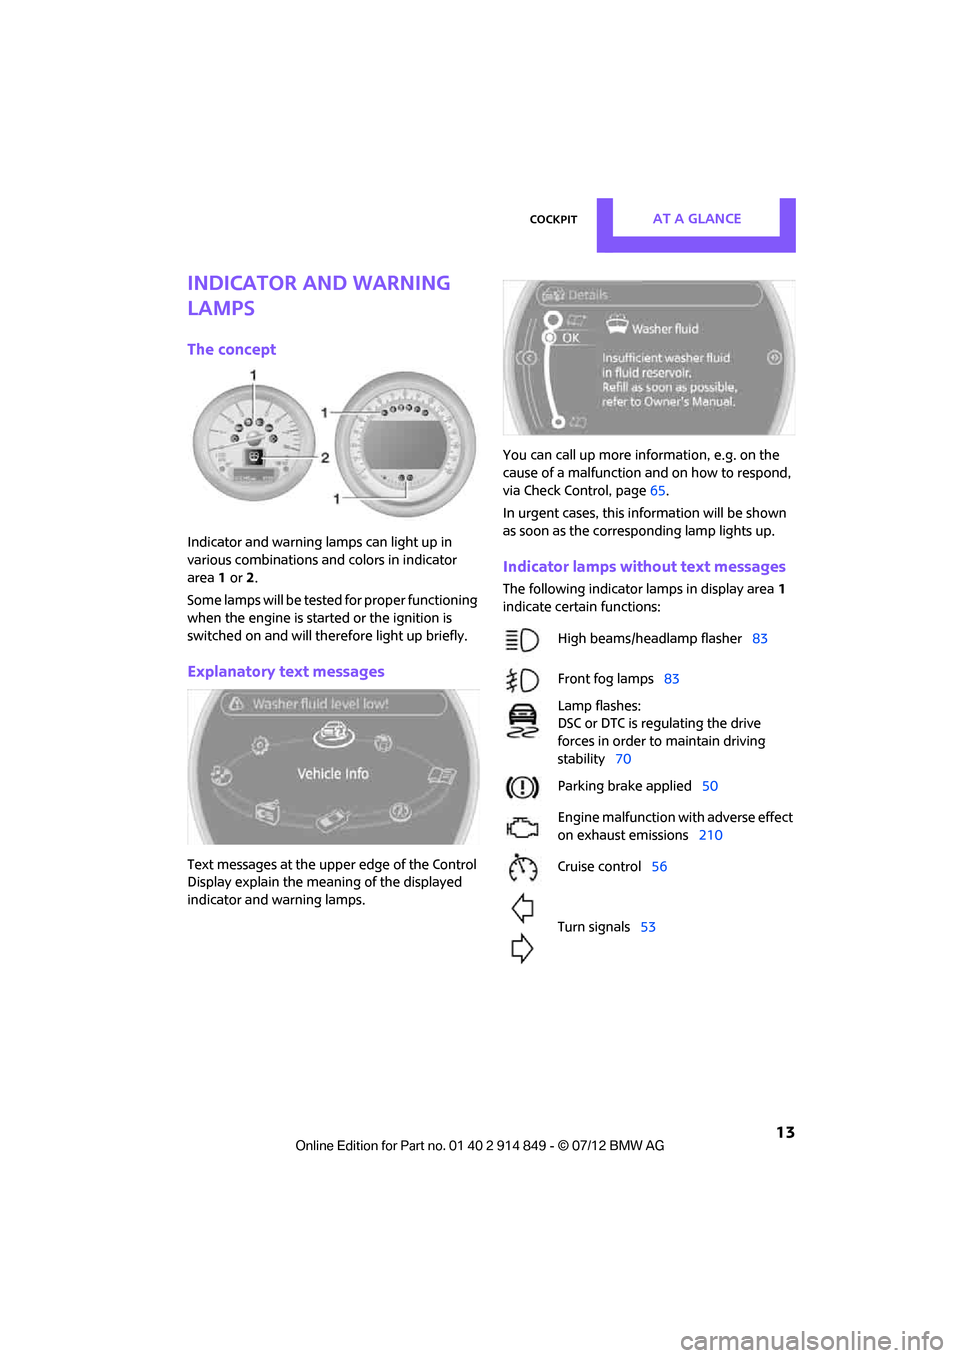
Indicator and warning lamps can light up in
various combinations and colors in indicator
area 1 or 2.
Some lamps will be tested for proper functioning
when the engine is started or the ignition is
switched on and will therefore light up briefly.
Explanatory text messages
Text messages at the uppe r edge of the Control
Display explain the mean ing of the displayed
indicator and warning lamps. You can call up more information, e.g. on the
cause of a malfunction and on how to respond,
via Check Control, page
65.
In urgent cases, this information will be shown
as soon as the corresponding lamp lights up.
Indicator lamps without text messages
The following indicator lamps in display area 1
indicate certain functions:
High beams/headlamp flasher 83
Front fog lamps 83
Lamp flashes:
DSC or DTC is regulating the drive
forces in order to maintain driving
stability 70
Parking brake applied 50
Engine malfunction with adverse effect
on exhaust emissions 210
Cruise control 56
Turn signals 53
Online Edition for Part no. 01 40 2 914 849 - \251 07/12 BMW AG
Page 34 of 259
Opening and closingCONTROLS
33
>The vehicle cannot be locked or unlocked
again until after approx. 2 seconds.
> The engine can only be started if the remote
control is in the vehicle.
> The doors and tailgate mu st be closed to be
able to operate the windows and glass roof.
Comparison to standard remote controls
The indicated function can be operated by
pressing the buttons or via Comfort Access.
Instructions on openin g and closing are found
starting on page 26.
If you notice a brief delay while opening or
closing the windows or glass roof, the sys-
tem is checking whether a remote control is
inside the vehicle. Repeat the opening or closing
procedure, if necessary. <
Unlocking
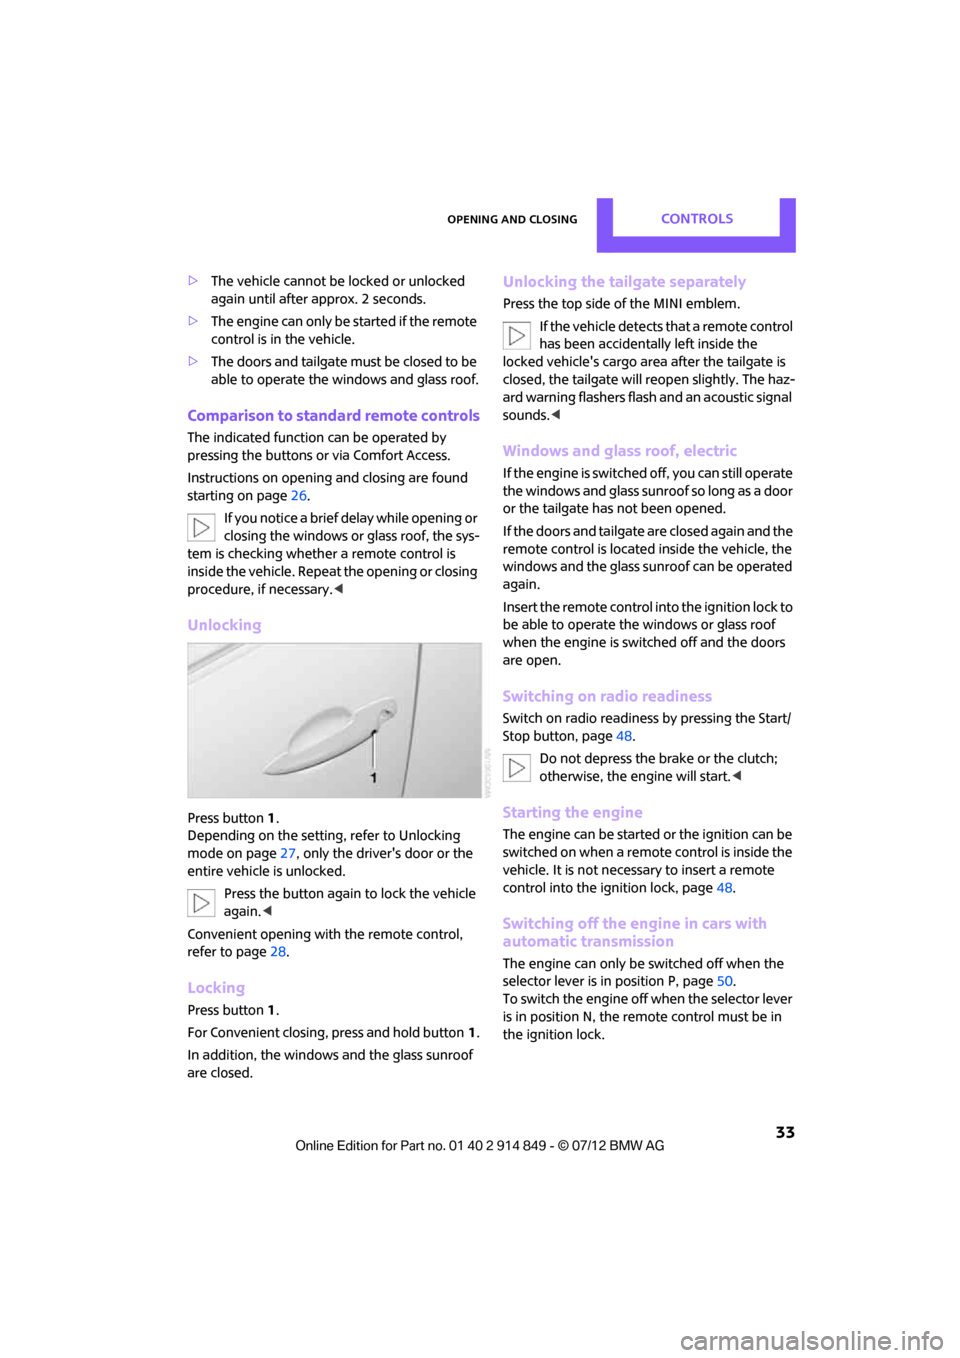
Press button 1.
Depending on the setting, refer to Unlocking
mode on page 27, only the driver's door or the
entire vehicle is unlocked.
Press the button again to lock the vehicle
again. <
Convenient opening with the remote control,
refer to page 28.
Locking
Press button 1.
For Convenient closing, press and hold button 1.
In addition, the windows and the glass sunroof
are closed.
Unlocking the tailgate separately
Press the top side of the MINI emblem. If the vehicle detects that a remote control
has been accidentally left inside the
locked vehicle's cargo area after the tailgate is
closed, the tailgate will reopen slightly. The haz-
ard warning flashers flash and an acoustic signal
sounds. <
Windows and glass roof, electric
If the engine is switched off, you can still operate
the windows and glass sunr oof so long as a door
or the tailgate has not been opened.
If the doors and tailgate are closed again and the
remote control is located inside the vehicle, the
windows and the glass sunroof can be operated
again.
Insert the remote control into the ignition lock to
be able to operate the windows or glass roof
when the engine is switched off and the doors
are open.
Switching on radio readiness
Switch on radio readiness by pressing the Start/
Stop button, page 48.
Do not depress the brake or the clutch;
otherwise, the engine will start. <
Starting the engine
The engine can be started or the ignition can be
switched on when a remote control is inside the
vehicle. It is not necessa ry to insert a remote
control into the ignition lock, page 48.
Switching off the engine in cars with
automatic transmission
The engine can only be switched off when the
selector lever is in position P, page50.
To switch the engine off when the selector lever
is in position N, the remote control must be in
the ignition lock.
Online Edition for Part no. 01 40 2 914 849 - \251 07/12 BMW AG
Page 35 of 259
CONTROLSOpening and closing
34
Before driving a vehicle with automatic
transmission into a car wash
1.Insert remote control into ignition lock.
2. Depress the brake.
3. Move the selector lever to position N.
4. Switch off the engine.
The vehicle can roll.
Malfunction
Comfort Access may malf unction due to local
radio waves.
If this happens, open or close the vehicle via the
buttons on the remote control or using the inte-
grated key.
Insert the remote control into the ignition lock
and start the engine.
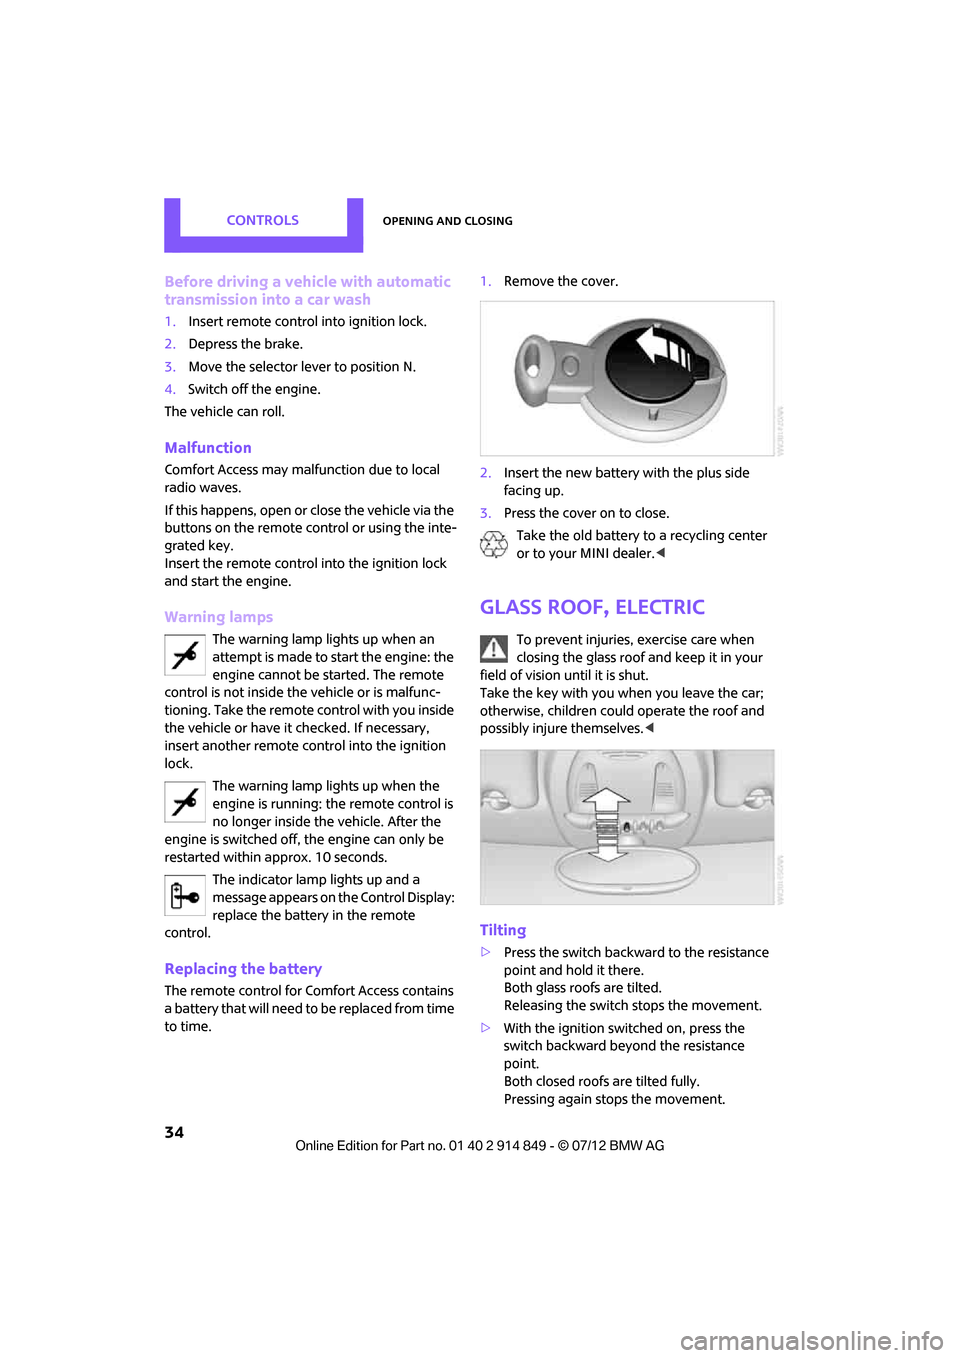
Warning lamps
The warning lamp lights up when an
attempt is made to start the engine: the
engine cannot be started. The remote
control is not inside the vehicle or is malfunc-
tioning. Take the remote control with you inside
the vehicle or have it checked. If necessary,
insert another remote co ntrol into the ignition
lock.
The warning lamp lights up when the
engine is running: the remote control is
no longer inside the vehicle. After the
engine is switched off, the engine can only be
restarted within approx. 10 seconds.
The indicator lamp lights up and a
message appears on th e Control Display:
replace the battery in the remote
control.
Replacing the battery
The remote control for Comfort Access contains
a b a t t e r y t h a t w i l l n e e d t o b e r e p l a c e d f r o m t i m e
to time. 1.
Remove the cover.
2. Insert the new battery with the plus side
facing up.
3. Press the cover on to close.
Take the old battery to a recycling center
or to your MINI dealer. <
Glass roof, electric
To prevent injuries, exercise care when
closing the glass roof and keep it in your
field of vision until it is shut.
Take the key with you when you leave the car;
otherwise, children could operate the roof and
possibly injure themselves. <
Tilting
>Press the switch backwa rd to the resistance
point and hold it there.
Both glass roofs are tilted.
Releasing the switch stops the movement.
> With the ignition switched on, press the
switch backward beyond the resistance
point.
Both closed roofs are tilted fully.
Pressing again stops the movement.
Online Edition for Part no. 01 40 2 914 849 - \251 07/12 BMW AG
Page 70 of 259
Technology for driving comfort and safetyCONTROLS
69
Technology for driving comfort and
safety
Vehicle equipment
In this chapter, all production, country, and
optional equipment that is offered in the model
range is described. Equipment is also described
that is not available because of, for example,
selected options or count ry version. This also
applies to safety related functions and systems.
Park Distance Control
PDC
The concept
PDC assists you with parking in reverse. Acoustic
signals and a visual indicator
warn you of the
presence of an object behind the vehicle. The
measurement is carried out by four ultrasonic
sensors in the rear bumper.
These sensors have a range of approx.
6.5ft/2m. However, an acoustic warning
does not sound until an object is approx. 24 in/
60 cm from the rear corner sensors or approx.
5 ft/1.50 m from the rear center sensors. PDC is
a parking aid that can indicate objects when
they are approached slowly, as is usually the
case when parking. Avoid approaching an
object at high speed; otherwise, physical cir-
cumstances may lead to the system warning
being issued too late. <
Automatic mode
With the engine running or the ignition switched
on, the system is activated automatically after
approx. 1 second when you engage reverse
gear or move the automatic transmission selec-
tor lever to position R. Wait this short period
before driving.
Acoustic signals
As the distance between vehicle and object
decreases, the intervals between the tones
become shorter. If the distance to the nearest
object falls to below roughly 1 ft/30 cm, then a
continuous tone sounds.
If the distance remains constant, e.g. when
driving parallel to a wall, the acoustic signal
stops after approx. 3 seconds.
Malfunction
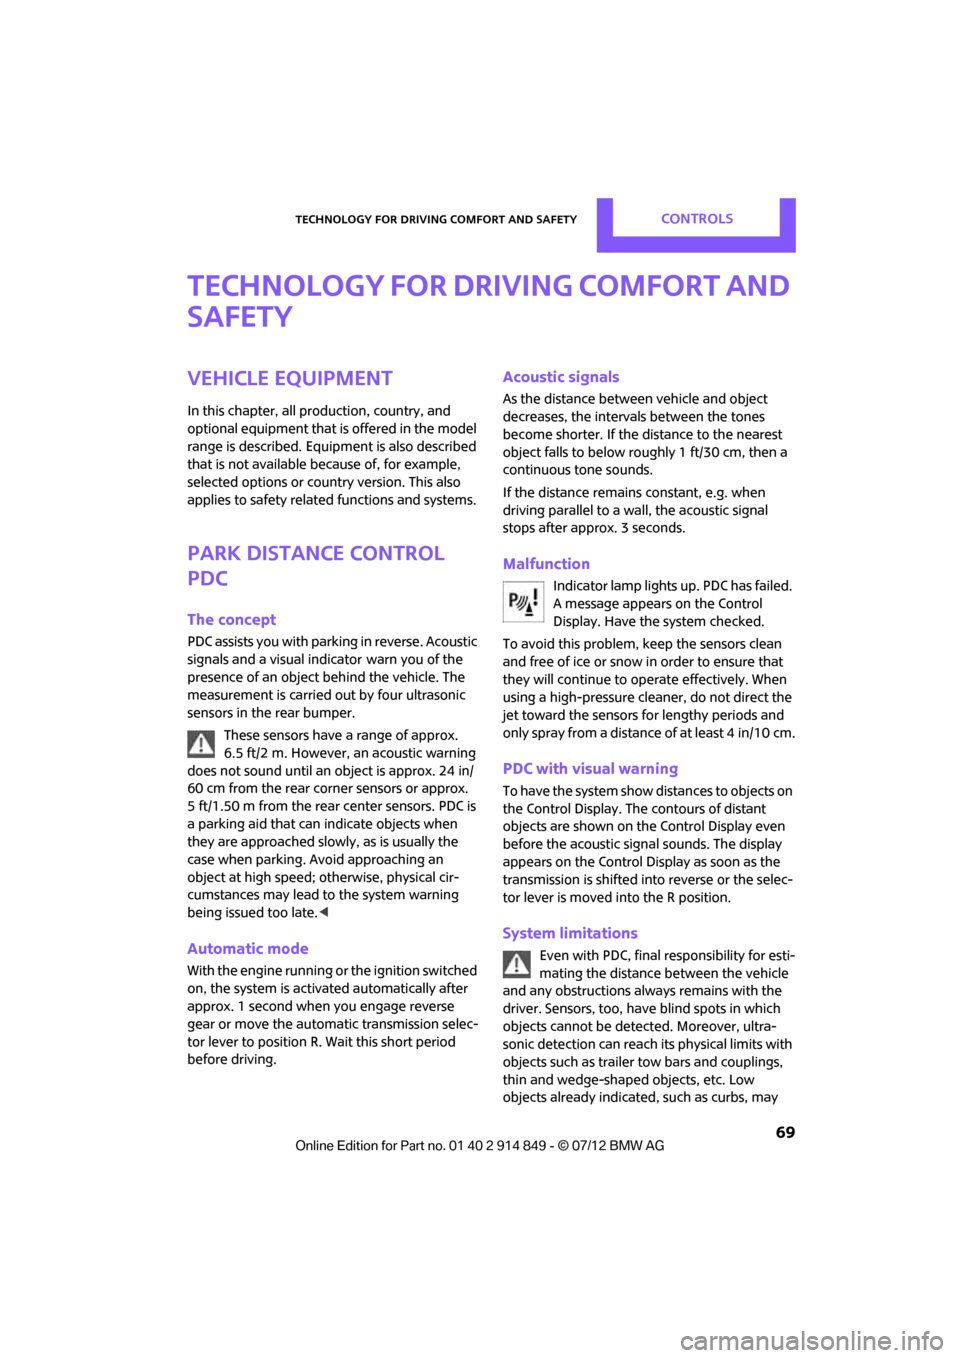
Indicator lamp lights up. PDC has failed.
A message appears on the Control
Display. Have the system checked.
To avoid this problem, keep the sensors clean
and free of ice or snow in order to ensure that
they will continue to operate effectively. When
using a high-pressure clea ner, do not direct the
jet toward the sensors for lengthy periods and
only spray from a distance of at least 4 in/10 cm.
PDC with visual warning
To have the system show distances to objects on
the Control Display. The contours of distant
objects are shown on the Control Display even
before the acoustic sign al sounds. The display
appears on the Control Di splay as soon as the
transmission is shifted in to reverse or the selec-
tor lever is moved into the R position.
System limitations
Even with PDC, final re sponsibility for esti-
mating the distance between the vehicle
and any obstructions always remains with the
driver. Sensors, too, ha ve blind spots in which
objects cannot be detected. Moreover, ultra-
sonic detection can reach its physical limits with
objects such as trailer tow bars and couplings,
thin and wedge-shaped objects, etc. Low
objects already indicated, such as curbs, may
Online Edition for Part no. 01 40 2 914 849 - \251 07/12 BMW AG
Page 111 of 259
DRIVING TIPSThings to remember when driving
110
Saving fuel
General information
Your vehicle incorporates numerous techno-
logies for reducing fuel consumption and
emissions.
Fuel consumption depends on a number of
different factors. Fuel consumption and environ-
mental pollution are affected by various actions,
the manner of driving and regular maintenance.
Remove unnecessary cargo
Additional weight increases fuel consumption.
Remove attached parts no longer in use
Attached parts on the ve hicle affect its aerody-
namics and increase fuel consumption.
Closing windows
Open windows increase air resistance and
therefore fuel consumption.
Check tire inflation pressure regularly
Check and, if necessary, correct tire inflation
pressure at least twice a month and before start-
ing on a long trip.
Low inflation pressure increases rolling resis-
tance and thus leads to greater fuel consump-
tion and tire wear.
Drive off immediately
Do not wait for the engine to warm up while the
vehicle remains stationary. Start driving right
away, but at moderate engi ne speeds. This is the
fastest way for the cold engine to reach its
operating temperature.
Think ahead while driving
Avoid unnecessary accelera tion and braking. by
maintaining a suitable di stance to the vehicle
driving ahead.
Looking-ahead and smooth driving reduces fuel
consumption.
Avoid high engine speeds
Use first gear only for driving off. In second and
higher gears, accelerate smoothly to a suitable
engine and road speed. In doing so, avoid high
engine speeds and shift up early.
When you reach your desired traveling speed,
shift to the highest suit able gear and drive at
constant speed.
As a rule: driving at lo w engine speeds lowers
fuel consumption and reduces wear.
Coasting
When approaching a red traffic light, take your
foot off the accelerator and let the car roll to a
stop in the highest gear possible.
On a downhill gradient, take your foot off the
accelerator and let the vehicle coast in a suitable
gear.
Fuel supply is shut off automatically when the
vehicle is coasting.
Switch off the engine during lengthy
stops
Switch off the engine when stopping for lengthy
periods, e.g. at traffic li ghts, railroad crossings or
in traffic jams.
Switch off any features that are not
currently required
Features such as air co nditioning, seat heaters
and the rear window defroster require a great
deal of energy and result in greater fuel con-
sumption, especially in city driving and during
Stop & Go operation. For this reason, switch off
these features if they are not really needed.
Have the vehicle serviced
Have your vehicle servic ed regularly to achieve
good economy and a long vehicle life. The man-
ufacturer of your MINI recommends having the
vehicle serviced by a MINI dealer. Also note the
MINI Maintenance System, page 209.
Online Edition for Part no. 01 40 2 914 849 - \251 07/12 BMW AG
Page 112 of 259

Things to remember when drivingDRIVING TIPS
111
Driving on poor roads
Your MINI with ALL4 drive is at home on any
type of street or road. It combines an all-wheel
drive system with the advantages of a normal
passenger car.Do not drive on unpaved terrain, as other-
wise the vehicle may be damaged. <
When you are driving on poor roads, there are a
few points which you shou ld strictly observe for
your own safety, for that of your passengers,
and for the safety of the vehicle:
> Familiarize yourself with the vehicle before
beginning to drive an d do not take risks
under any circumstances.
> Adapt your speed to road conditions. The
steeper and rougher the road surface is, the
lower the speed should be.
> When driving on very steep uphill or down-
hill grades, make sure in advance that the
engine oil and coolant levels are close to the
maximum mark, refer to page 206.
> While driving, watch carefully for obstacles
such as rocks or holes. Try to avoid these
obstacles whenever possible.
> Make sure that the un dercarriage does not
touch the ground, for example on hilltops
and bumpy roads. The ground clearance of
the vehicle is a maximum of approx. 6.0 in/
15 cm. Please note that the ground clear-
ance can vary depending on loading and the
driving conditions of the vehicle.
> Only drive through road surface water up to
a maximum water depth of 1 ft/30 cm and
only at walking speed; do not remain sta-
tionary.
> After driving through water at low speed,
lightly press the brake pedal several times to
dry the brakes and to prevent the braking
effect from being reduced by wetness.
> Depending on the condition of the surface, it
may be practical to briefly activate DTC, refer
to DTC Dynamic Traction Control on
page 71. >
If the drive wheels spin on one side, depress
the accelerator pedal sufficiently so that the
driving stability control systems can distrib-
ute the drive forces to the individual wheels.
After driving on poor roads, please observe the
following points to maintain the driving safety of
the vehicle:
> Clean the coarsest dirt from the body.
> Clean mud, snow, ice, etc. from the wheels
and tires and check the tires for damage.
Online Edition for Part no. 01 40 2 914 849 - \251 07/12 BMW AG
Page 211 of 259
MOBILITYMaintenance
210
Socket for On-Board
Diagnosis OBD
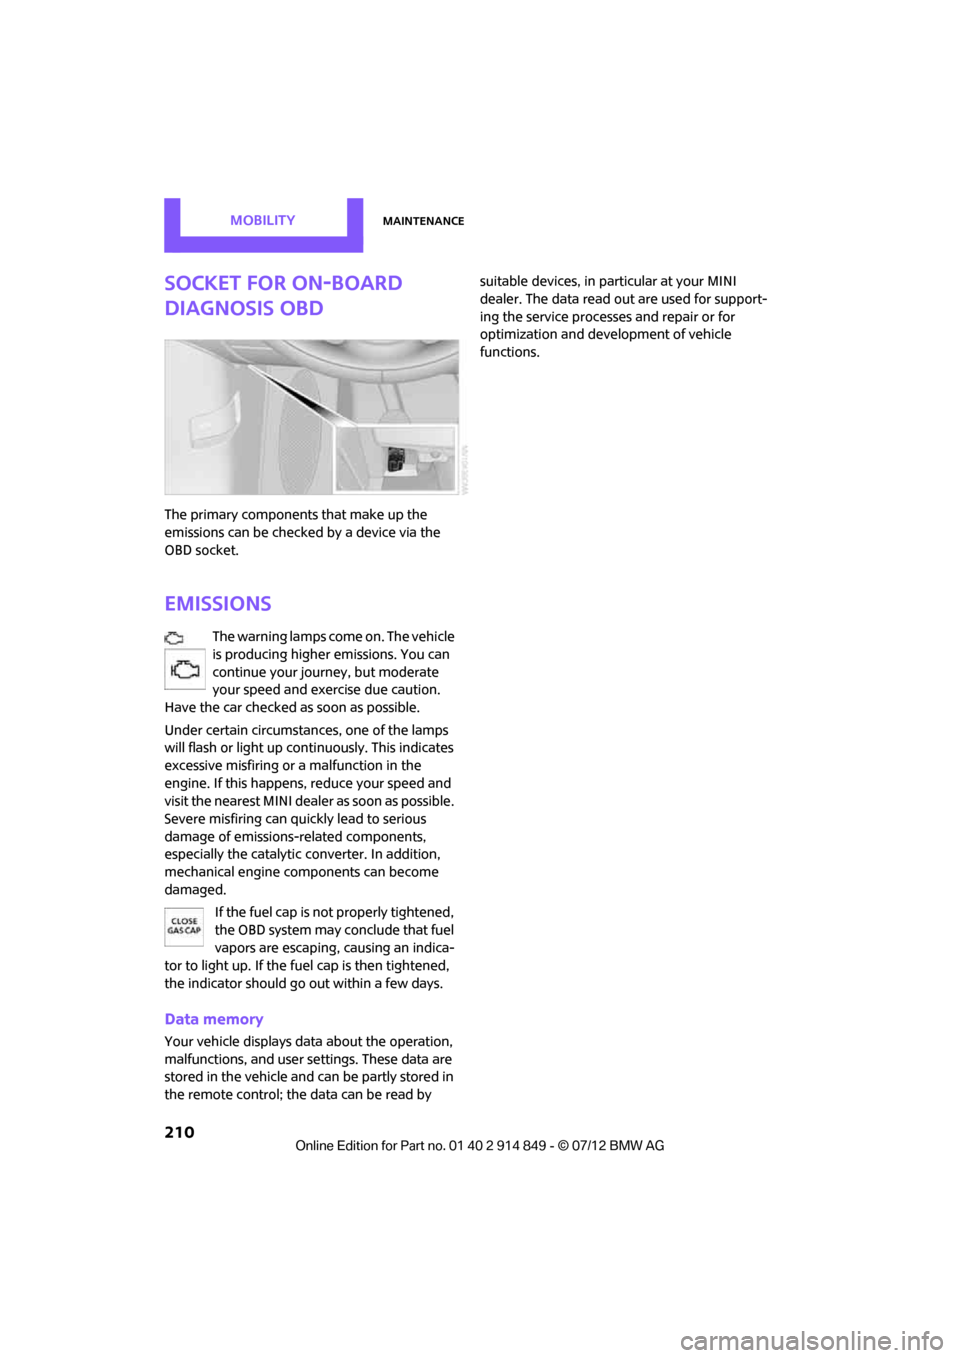
The primary components that make up the
emissions can be checked by a device via the
OBD socket.
Emissions
The warning lamps come on. The vehicle
is producing higher emissions. You can
continue your journey, but moderate
your speed and exercise due caution.
Have the car checked as soon as possible.
Under certain circumstances, one of the lamps
will flash or light up cont inuously. This indicates
excessive misfiring or a malfunction in the
engine. If this happens, reduce your speed and
visit the nearest MINI dealer as soon as possible.
Severe misfiring can quickly lead to serious
damage of emissions-related components,
especially the catalytic converter. In addition,
mechanical engine components can become
damaged.
If the fuel cap is not properly tightened,
the OBD system may conclude that fuel
vapors are escaping, causing an indica-
tor to light up. If the fuel cap is then tightened,
the indicator should go out within a few days.
Data memory
Your vehicle displays da ta about the operation,
malfunctions, and user settings. These data are
stored in the vehicle and can be partly stored in
the remote control; the data can be read by suitable devices, in pa
rticular at your MINI
dealer. The data read out are used for support-
ing the service processe s and repair or for
optimization and development of vehicle
functions.
Online Edition for Part no. 01 40 2 914 849 - \251 07/12 BMW AG
Page 217 of 259

MOBILITYReplacing components
216
consumer in question; otherwise, short circuits
could result. To avoid possible injury or equip-
ment damage when replacing bulbs, observe
any instructions provided by the bulb manufac-
turer.<
Caring for headlamp s, refer to page212.
For any bulb replacement not described
below, contact a MINI dealer or a work-
shop that has specially trained personnel
working in accordance with the specifications of
the MINI manufacturer. <
For checking and adjusting headlamp aim,
please contact your MINI dealer. <
Light-emitting diodes LEDs
Light-emitting diodes installed behind translu-
cent lenses serve as the light sources for many of
the controls and displays in your vehicle. These
light-emitting diodes are related to conven-
tional laser diodes, and legislation defines them
as Class 1 light-emitting diodes.
Do not remove the covers or expose the
eyes directly to the unfiltered light source
for several hours; otherwise, this could cause
irritation of the retina. <
Headlamp glass lens
In cool or humid weather, condensation may
occur on the interiors of the headlamps. During
trips with the headlamps on, the condensation
disappears after a short time. The headlamps do
not need to be changed.
Do not remove the condensation from head-
lamps, despite driving with lights on, and if
condensation increases, e.g., because of water
droplets, have this checked by your MINI dealer.
Xenon lamps
The service life of these bulbs is very long and
the probability of failure very low, provided that
they are not switched on and off an excessive
number of times. If a xenon lamp fails neverthe-
less, switch on the fog lamps and continue the
journey with great care , provided that local
legislation does not prohibit this. Work on the xenon lighting system,
including lamp replacement, is only to be
carried out only by your MINI dealer. Due to high
voltage, there is a risk of fatal injury if work on
the xenon lamps is carried out improperly. <
Halogen low beams and high beams
H13 bulb, 60/55 watts
The H13 bulb is pressurized. Therefore,
wear safety glasses and protective gloves.
Otherwise, there is a risk of injury if the bulb is
damaged. <
Be careful when inst alling the cover;
otherwise, leaks co uld occur and cause
damage to the headlamp system. <
Accessing the lamp from the engine
compartment
The low-beam/high-beam bulb can be changed
from the engine compartment.
Removing the cover:
1. Press the tab.
2. Flip open the cover and take it out of the
holder.
Follow the same steps in reverse order to
reattach the cover.
Online Edition for Part no. 01 40 2 914 849 - \251 07/12 BMW AG
Page 222 of 259
Replacing componentsMOBILITY
221
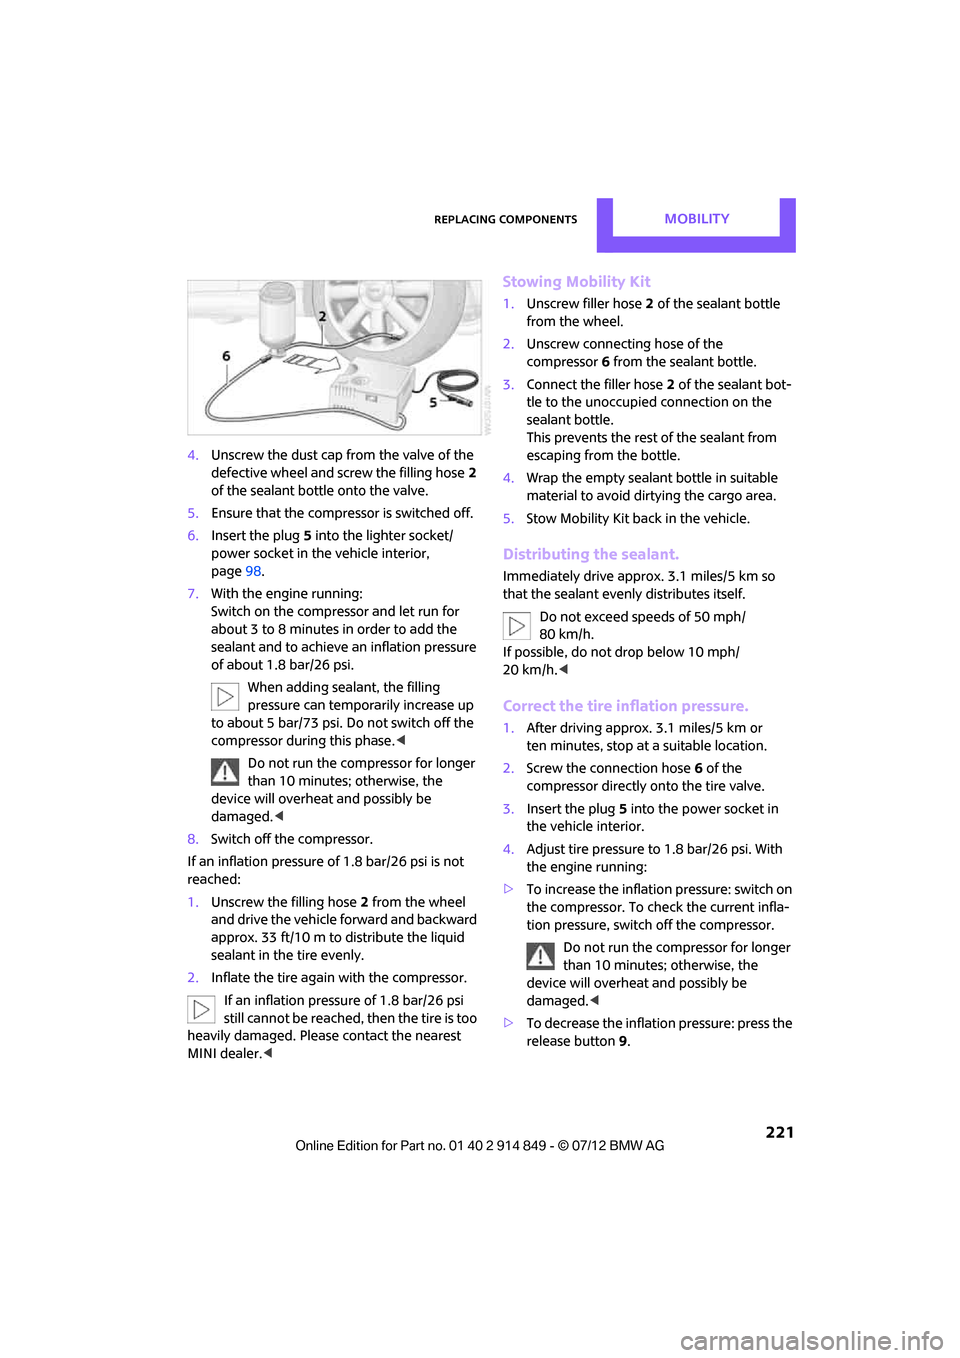
4.Unscrew the dust cap from the valve of the
defective wheel and screw the filling hose 2
of the sealant bottle onto the valve.
5. Ensure that the compre ssor is switched off.
6. Insert the plug 5 into the lighter socket/
power socket in the vehicle interior,
page 98.
7. With the engine running:
Switch on the compre ssor and let run for
about 3 to 8 minutes in order to add the
sealant and to achieve an inflation pressure
of about 1.8 bar/26 psi.
When adding sealant, the filling
pressure can temporarily increase up
to about 5 bar/73 psi. Do not switch off the
compressor during this phase. <
Do not run the compressor for longer
than 10 minutes; otherwise, the
device will overheat and possibly be
damaged. <
8. Switch off the compressor.
If an inflation pressure of 1.8 bar/26 psi is not
reached:
1. Unscrew the filling hose 2 from the wheel
and drive the vehicle forward and backward
approx. 33 ft/10 m to distribute the liquid
sealant in the tire evenly.
2. Inflate the tire again with the compressor.
If an inflation pressure of 1.8 bar/26 psi
still cannot be reached, then the tire is too
heavily damaged. Please contact the nearest
MINI dealer. <
Stowing Mobility Kit
1.Unscrew filler hose 2 of the sealant bottle
from the wheel.
2. Unscrew connecting hose of the
compressor 6 from the sealant bottle.
3. Connect the filler hose 2 of the sealant bot-
tle to the unoccupied connection on the
sealant bottle.
This prevents the rest of the sealant from
escaping from the bottle.
4. Wrap the empty sealant bottle in suitable
material to avoid dirtying the cargo area.
5. Stow Mobility Kit back in the vehicle.
Distributing the sealant.
Immediately drive approx. 3.1 miles/5 km so
that the sealant evenly distributes itself.
Do not exceed speeds of 50 mph/
80 km/h.
If possible, do not drop below 10 mph/
20 km/h.<
Correct the tire inflation pressure.
1. After driving approx. 3.1 miles/5 km or
ten minutes, stop at a suitable location.
2. Screw the connection hose 6 of the
compressor directly onto the tire valve.
3. Insert the plug 5 into the power socket in
the vehicle interior.
4. Adjust tire pressure to 1.8 bar/26 psi. With
the engine running:
> To increase the inflatio n pressure: switch on
the compressor. To check the current infla-
tion pressure, switch off the compressor.
Do not run the compressor for longer
than 10 minutes; otherwise, the
device will overheat and possibly be
damaged. <
> To decrease the inflat ion pressure: press the
release button 9.
Online Edition for Part no. 01 40 2 914 849 - \251 07/12 BMW AG
Page 225 of 259

MOBILITYReplacing components
224
Power failure
After a temporary power loss, some equipment
may not be fully functional and may require
initialization. Individual se ttings are also lost and
must be reprogrammed:
> Time and date
These values must be updated, page 64.
> Radio
In some cases, statio ns may have to be
stored again, page 139.
> Onboard monitor
Operability must be waited for, page114.
> Glass sunroof, electric
It may only be possible to tilt the sunroof, if
applicable. The system must be initialized.
Contact your near est MINI dealer.
Indicator and warning lamps
Lights up in red:
Battery is no longer being charged.
Alternator malfunction.
Switch off all unnecessary electrical consumers.
Have the battery checked without delay. Lights up in yellow:
Battery charge level very low, battery
aged, or battery not securely con-
nected.
Charge it by taking a long er drive or by using an
external charger. If the display appears again,
have the battery checked as soon as possible.
Fuses
Do not attempt to repair a blown fuse or
replace it with a fuse of a different color or
Ampere rating. To do this could cause a fire in
the vehicle resulting from a circuit overload.
Have fuses replaced by your MINI dealer. <
A fuse assignment diag ram is located on the
inside of the fuse box cover panels.
In the engine compartment
Opening the cover
Press the latch.
In the vehicle interior
On the right side of the footwell.
Opening the cover
Press out at the recess.
Online Edition for Part no. 01 40 2 914 849 - \251 07/12 BMW AG