engine MINI Countryman 2012 Owner's Manual (Mini Connected)
[x] Cancel search | Manufacturer: MINI, Model Year: 2012, Model line: Countryman, Model: MINI Countryman 2012Pages: 259, PDF Size: 3.07 MB
Page 4 of 259
Contents
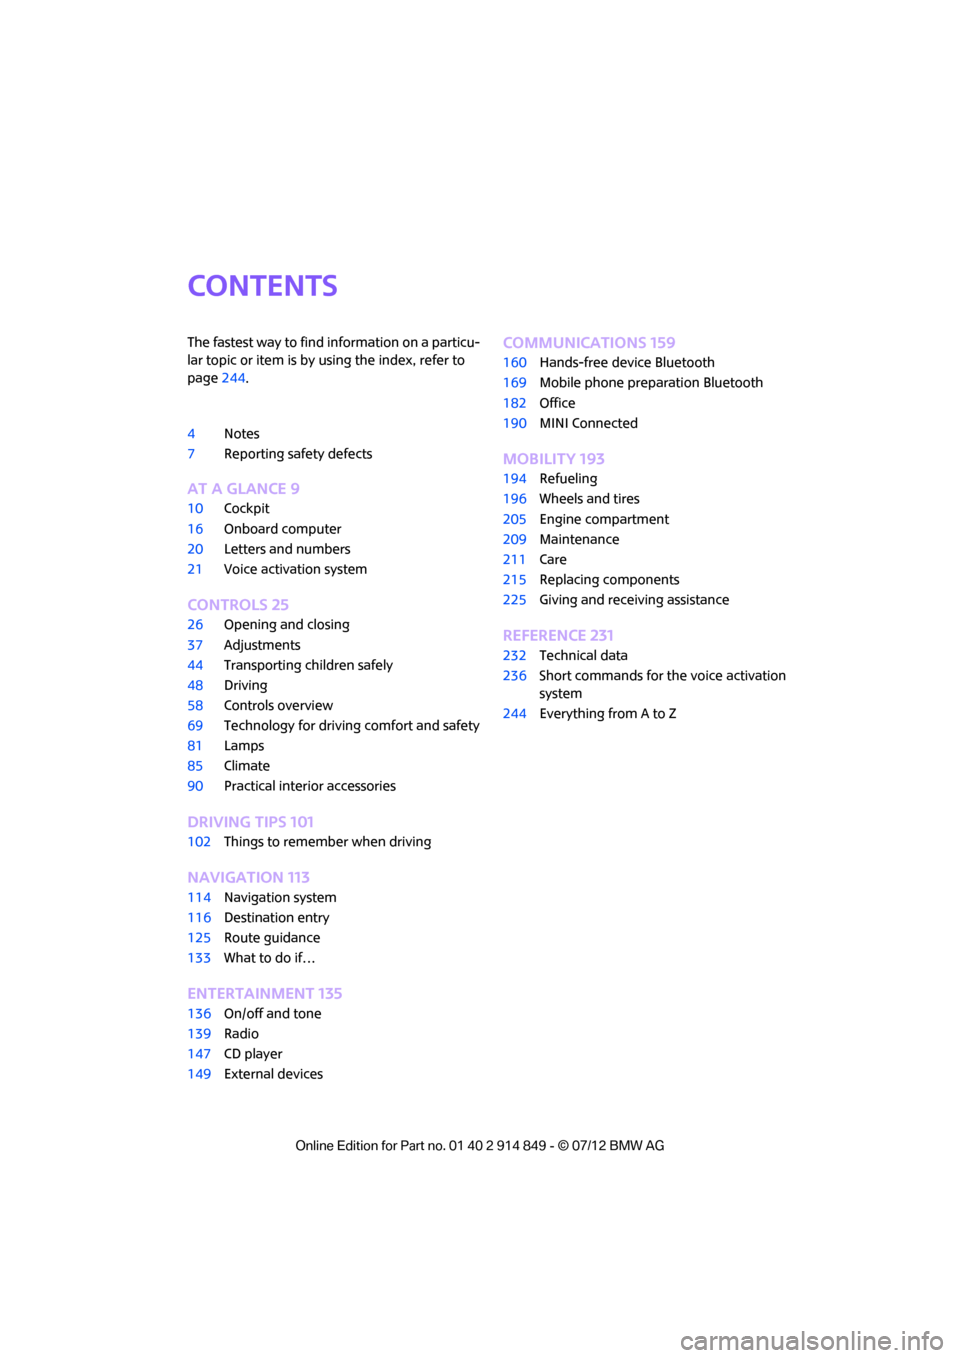
The fastest way to find information on a particu-
lar topic or item is by using the index, refer to
page244.
4 Notes
7 Reporting safety defects
AT A GLANCE 9
10Cockpit
16 Onboard computer
20 Letters and numbers
21 Voice activation system
CONTROLS 25
26Opening and closing
37 Adjustments
44 Transporting children safely
48 Driving
58 Controls overview
69 Technology for drivin g comfort and safety
81 Lamps
85 Climate
90 Practical interior accessories
DRIVING TIPS 101
102Things to remember when driving
NAVIGATION 113
114Navigation system
116 Destination entry
125 Route guidance
133 What to do if…
ENTERTAINMENT 135
136On/off and tone
139 Radio
147 CD player
149 External devices
COMMUNICATIONS 159
160Hands-free device Bluetooth
169 Mobile phone preparation Bluetooth
182 Office
190 MINI Connected
MOBILITY 193
194Refueling
196 Wheels and tires
205 Engine compartment
209 Maintenance
211 Care
215 Replacing components
225 Giving and receiving assistance
REFERENCE 231
232Technical data
236 Short commands for the voice activation
system
244 Everything from A to Z
Online Edition for Part no. 01 40 2 914 849 - \251 07/12 BMW AG
Page 6 of 259
Notes
5
necessary work on your MINI only carried out by
a MINI dealer or a work shop that has specially
trained personnel workin g in accordance with
the specifications of the MINI manufacturer. If
this work is not carried out properly, there is a
danger of subsequent damage and related
safety hazards. <
Parts and accessories
For your own safety, use genuine parts
and accessories approved by the manu-
facturer of the MINI.
When you purchase accessories tested
and approved by the manufacturer of the MINI
and Original MINI Parts, you simultaneously
acquire the assurance that they have been thor-
oughly tested by the manufacturer of the MINI
to ensure optimum performance when installed
on your vehicle.
The manufacturer of the MINI warrants these
parts to be free from defects in material and
workmanship.
The manufacturer of the MINI will not accept any
liability for damage result ing from installation of
parts and accessories not approved by the man-
ufacturer of the MINI.
The manufacturer of the MINI cannot test every
product made by other manufacturers to verify
if it can be used on a MINI safely and without risk
to either the vehicle, its operation, or its occu-
pants.
Original MINI Parts, MINI Accessories and other
products approved by the manufacturer of the
MINI, together with professional advice on using
these items, are available from all MINI dealers.
Installation and operation of accessories that
have not been approved by the manufacturer of
your MINI, such as alarms, radios, amplifiers,
radar detectors, wheels, suspension compo-
nents, brake dust shield s, telephones, including
operation of any mobile phone from within the
vehicle without using an externally mounted
antenna, or transceiver equipment, for instance,
CBs, walkie-talkies, ham radios or similar acces-
sories, may cause extensiv e damage to the vehi-cle, compromise its safety, interfere with the
vehicle's electrical
s y s t e m o r a f f e c t t h e v a l i d i t y o f
the MINI Limited Warranty. See your MINI dealer
for additional information. <
Maintenance, replacement, or repair of
the emission control devices and systems
may be performed by any automotive repair
establishment or individu al using any certified
automotive part.
warning:
Engine exhaust and a wide variety of
automobile components and parts,
including components foun d in the interior fur-
nishings in a vehicle, contain or emit chemicals
known to the State of California to cause cancer
and birth defects and reproductive harm. In
addition, certain fluids co ntained in vehicles and
certain products of component wear contain or
emit chemicals known to the State of California
to cause cancer and birth defects or other repro-
ductive harm.
Battery posts, terminals and related accessories
contain lead and lead compounds. Wash your
hands after handling.
Used engine oil contains chemicals that have
caused cancer in laboratory animals. Always
protect your skin by washing thoroughly with
soap and water.<
Service and warranty
We recommend that you read this publication
thoroughly.
Your MINI is covered by the following warran-
ties:
> New Vehicle Limited Warranty
> Rust Perforation Limited Warranty
> Federal Emissions System Defect Warranty
> Federal Emissions Performance Warranty
> California Emission Control System Limited
Warranty
Online Edition for Part no. 01 40 2 914 849 - \251 07/12 BMW AG
Page 12 of 259
CockpitAT A GLANCE
11
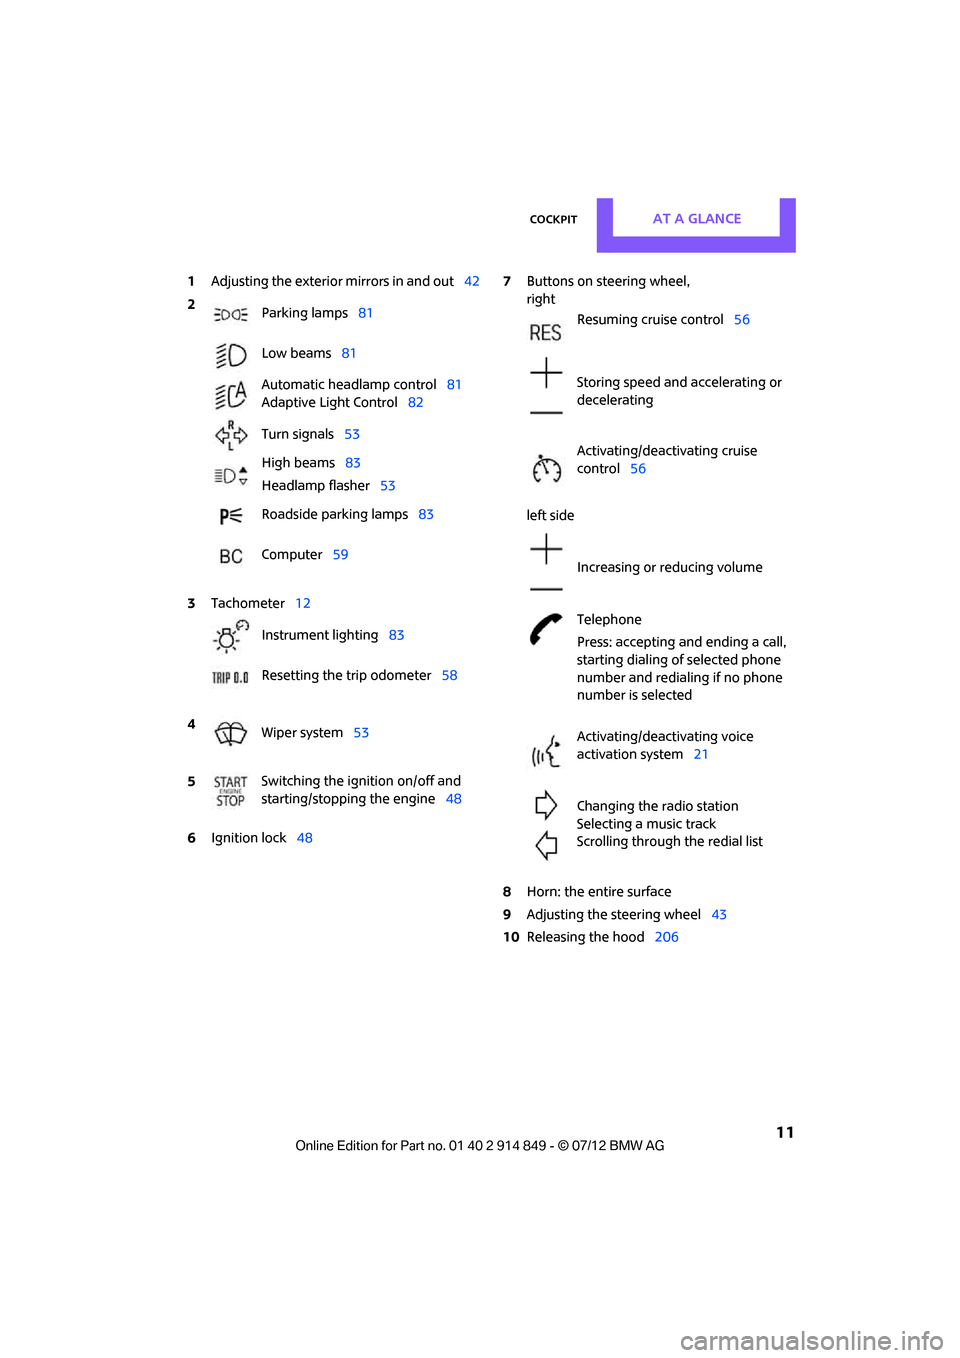
1Adjusting the exterior mirrors in and out42
6 Ignition lock 48 7
Buttons on steering wheel,
right
left side
8 Horn: the entire surface
9 Adjusting the steering wheel 43
10 Releasing the hood 206
2
Parking lamps 81
Low beams 81
Automatic headlamp control 81
Adaptive Light Control 82
Turn signals 53
High beams 83
Headlamp flasher 53
Roadside parking lamps 83
Computer 59
3 Tachometer 12
Instrument lighting 83
Resetting the trip odometer 58
4 Wiper system 53
5 Switching the ignition on/off and
starting/stopping the engine
48
Resuming cruise control56
Storing speed and accelerating or
decelerating
Activating/deactivating cruise
control 56
Increasing or reducing volume
Telephone
Press: accepting and ending a call,
starting dialing of selected phone
number and redialing if no phone
number is selected
Activating/deactivating voice
activation system 21
Changing the radio station
Selecting a music track
Scrolling through the redial list
Online Edition for Part no. 01 40 2 914 849 - \251 07/12 BMW AG
Page 14 of 259
CockpitAT A GLANCE
13
Indicator and warning
lamps
The concept
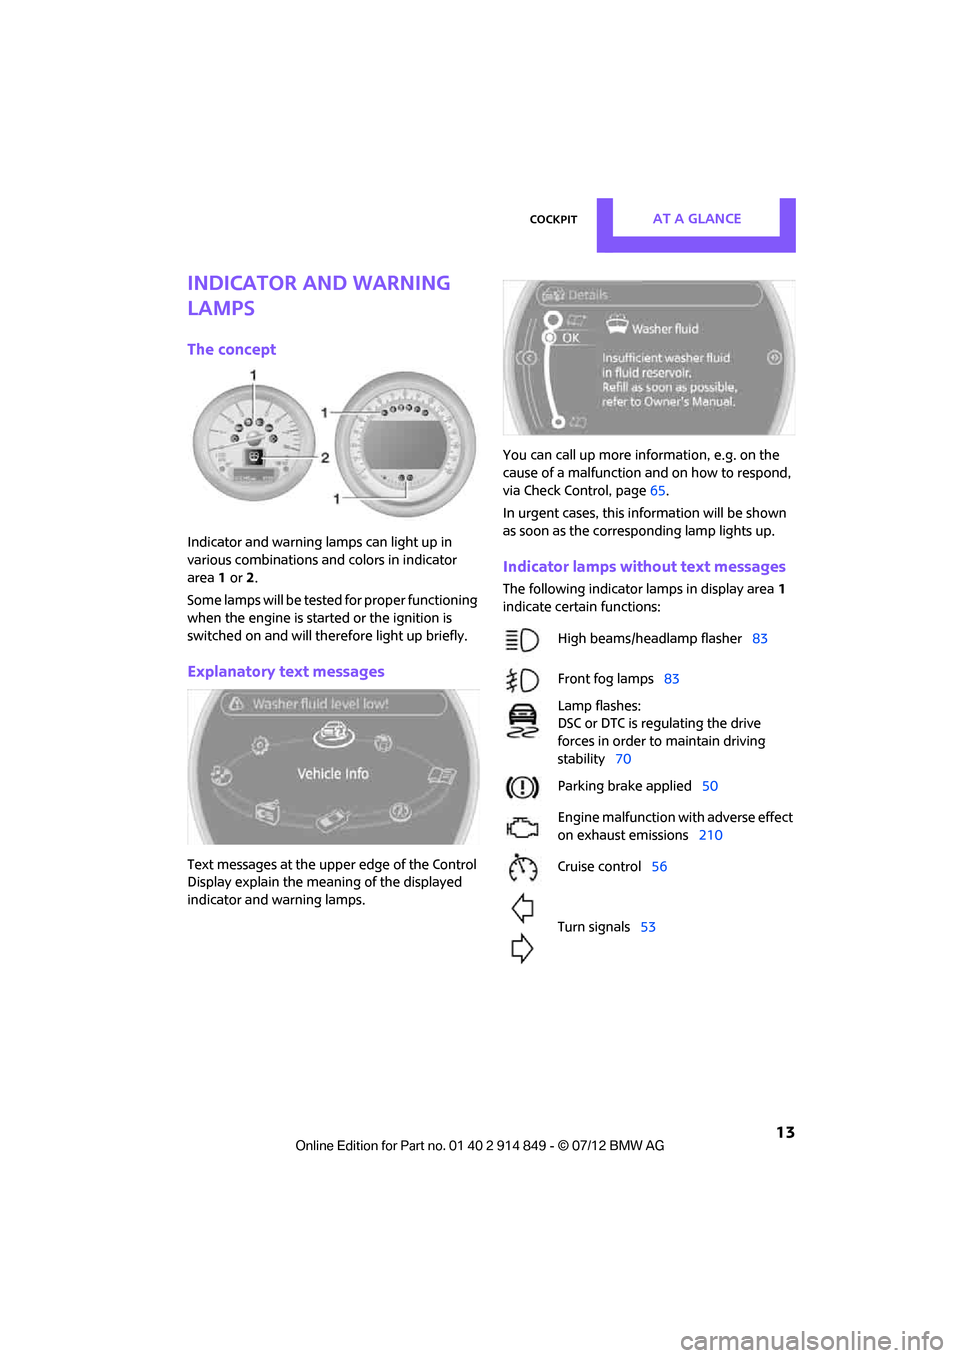
Indicator and warning lamps can light up in
various combinations and colors in indicator
area 1 or 2.
Some lamps will be tested for proper functioning
when the engine is started or the ignition is
switched on and will therefore light up briefly.
Explanatory text messages
Text messages at the uppe r edge of the Control
Display explain the mean ing of the displayed
indicator and warning lamps. You can call up more information, e.g. on the
cause of a malfunction and on how to respond,
via Check Control, page
65.
In urgent cases, this information will be shown
as soon as the corresponding lamp lights up.
Indicator lamps without text messages
The following indicator lamps in display area 1
indicate certain functions:
High beams/headlamp flasher 83
Front fog lamps 83
Lamp flashes:
DSC or DTC is regulating the drive
forces in order to maintain driving
stability 70
Parking brake applied 50
Engine malfunction with adverse effect
on exhaust emissions 210
Cruise control 56
Turn signals 53
Online Edition for Part no. 01 40 2 914 849 - \251 07/12 BMW AG
Page 32 of 259
Opening and closingCONTROLS
31
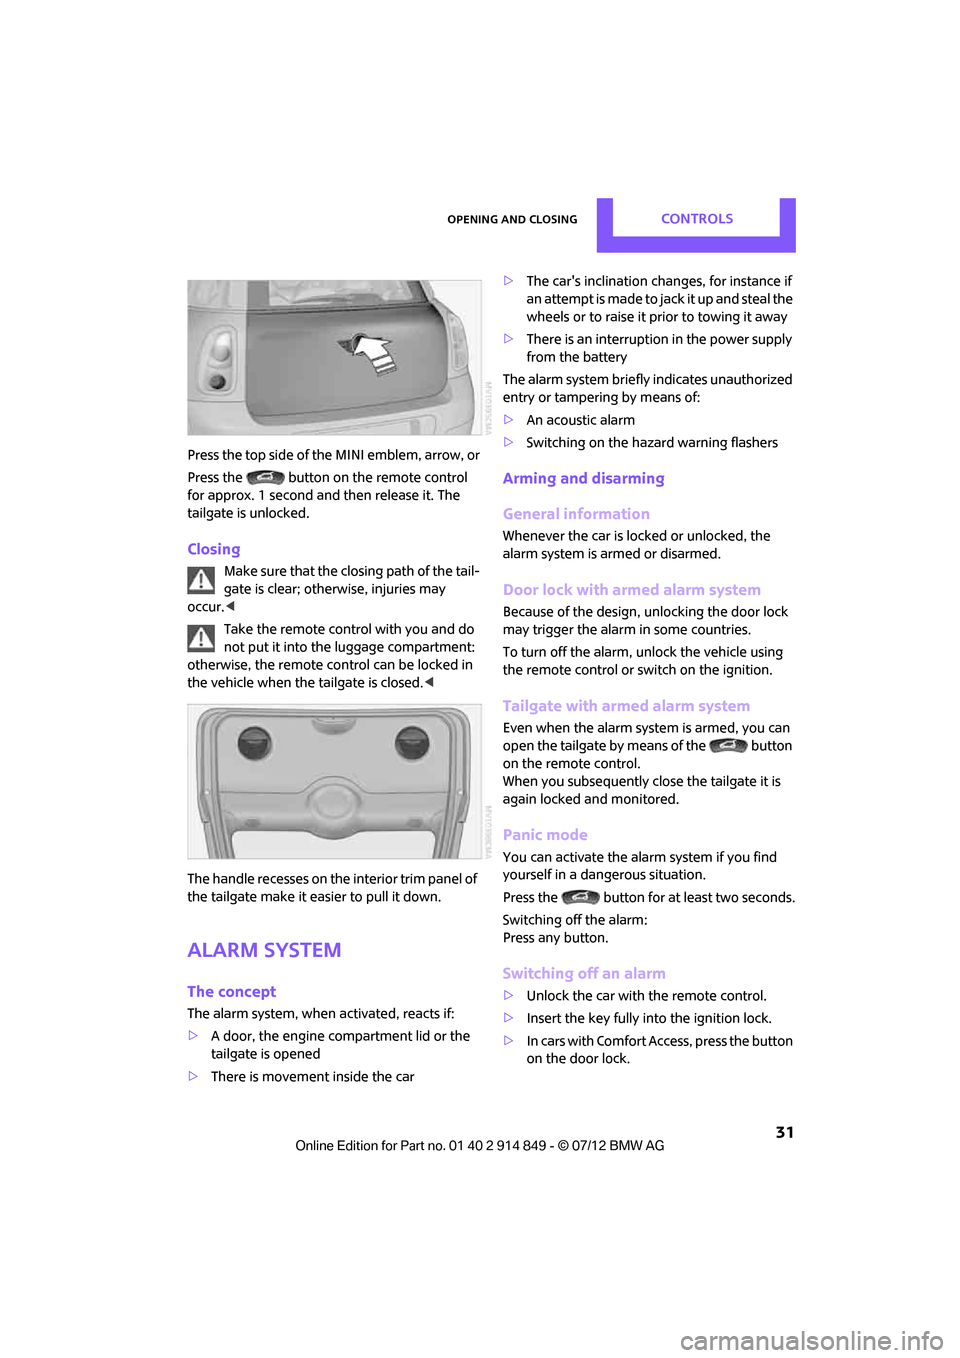
Press the top side of the MINI emblem, arrow, or
Press the button on the remote control
for approx. 1 second and then release it. The
tailgate is unlocked.
Closing
Make sure that the closing path of the tail-
gate is clear; otherwise, injuries may
occur. <
Take the remote control with you and do
not put it into the luggage compartment:
otherwise, the remote co ntrol can be locked in
the vehicle when the tailgate is closed. <
The handle recesses on the interior trim panel of
the tailgate make it easier to pull it down.
Alarm system
The concept
The alarm system, when activated, reacts if:
> A door, the engine compartment lid or the
tailgate is opened
> There is movement inside the car >
The car's inclination changes, for instance if
an attempt is made to jack it up and steal the
wheels or to raise it prior to towing it away
> There is an interruption in the power supply
from the battery
The alarm system briefly indicates unauthorized
entry or tampering by means of:
> An acoustic alarm
> Switching on the hazard warning flashers
Arming and disarming
General information
Whenever the car is locked or unlocked, the
alarm system is armed or disarmed.
Door lock with armed alarm system
Because of the design, unlocking the door lock
may trigger the alarm in some countries.
To turn off the alarm, unlock the vehicle using
the remote control or switch on the ignition.
Tailgate with armed alarm system
Even when the alarm syst em is armed, you can
open the tailgate by means of the button
on the remote control.
When you subsequently close the tailgate it is
again locked and monitored.
Panic mode
You can activate the alarm system if you find
yourself in a dangerous situation.
Press the button for at least two seconds.
Switching off the alarm:
Press any button.
Switching off an alarm
>Unlock the car with the remote control.
> Insert the key fully into the ignition lock.
> In cars with Comfort Access, press the button
on the door lock.
Online Edition for Part no. 01 40 2 914 849 - \251 07/12 BMW AG
Page 33 of 259
CONTROLSOpening and closing
32
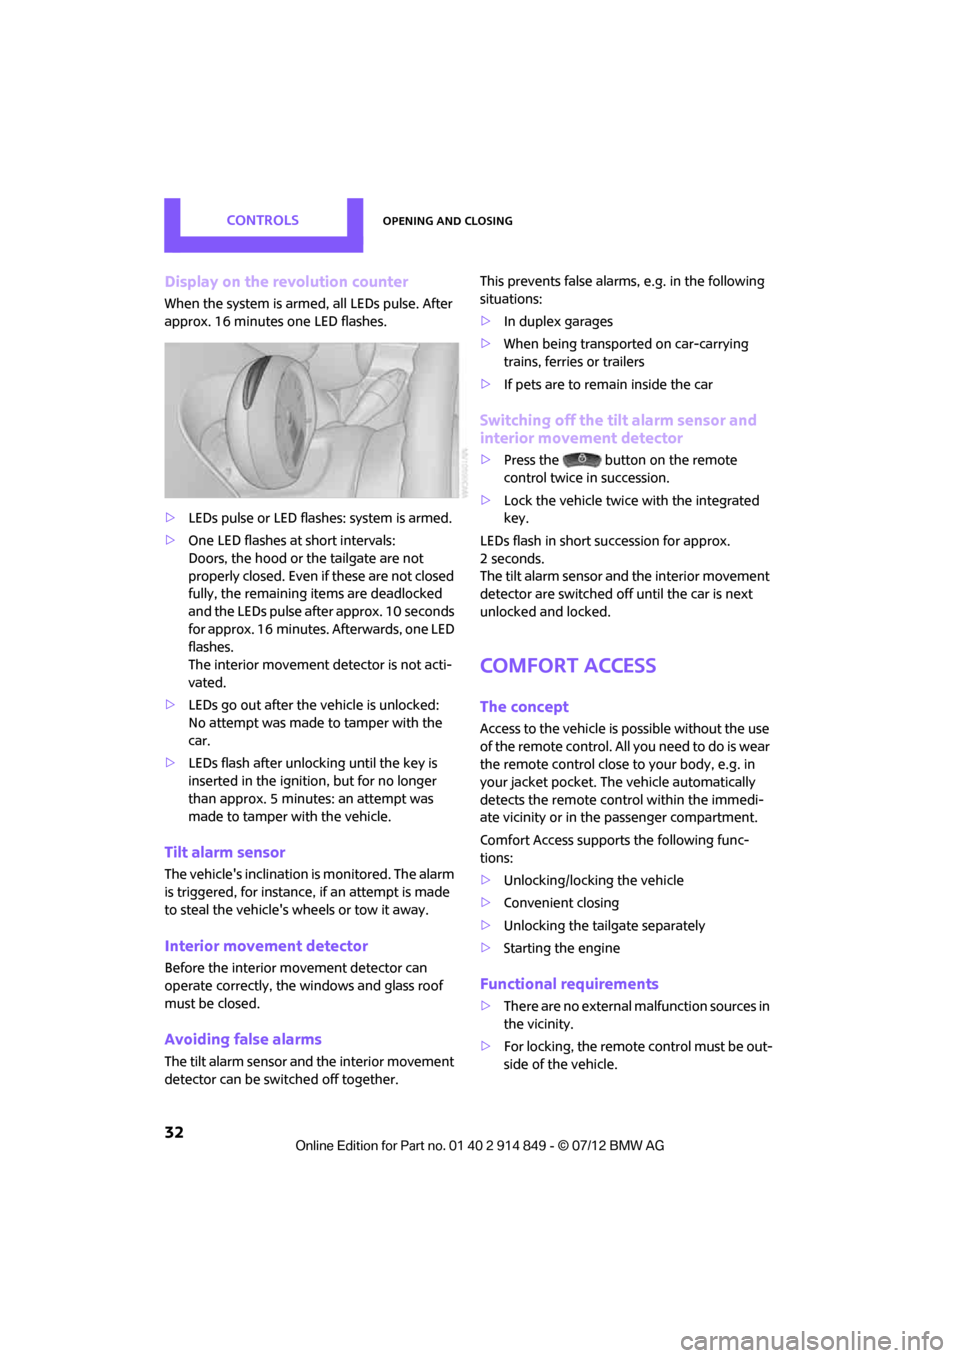
Display on the revolution counter
When the system is armed, all LEDs pulse. After
approx. 16 minutes one LED flashes.
>LEDs pulse or LED flashes: system is armed.
> One LED flashes at short intervals:
Doors, the hood or the tailgate are not
properly closed. Even if these are not closed
fully, the remaining items are deadlocked
and the LEDs pulse after approx. 10 seconds
for approx. 16 minutes. Afterwards, one LED
flashes.
The interior movement detector is not acti-
vated.
> LEDs go out after the vehicle is unlocked:
No attempt was made to tamper with the
car.
> LEDs flash after unlocking until the key is
inserted in the ignition, but for no longer
than approx. 5 minutes: an attempt was
made to tamper with the vehicle.
Tilt alarm sensor
The vehicle's inclination is monitored. The alarm
is triggered, for instance, if an attempt is made
to steal the vehicle's wheels or tow it away.
Interior movement detector
Before the interior movement detector can
operate correctly, the windows and glass roof
must be closed.
Avoiding false alarms
The tilt alarm sensor and the interior movement
detector can be switched off together. This prevents false alarms, e.g. in the following
situations:
>
In duplex garages
> When being transported on car-carrying
trains, ferries or trailers
> If pets are to remain inside the car
Switching off the tilt alarm sensor and
interior movement detector
>Press the button on the remote
control twice in succession.
> Lock the vehicle twice with the integrated
key.
LEDs flash in short succession for approx.
2seconds.
The tilt alarm sensor and the interior movement
detector are switched off until the car is next
unlocked and locked.
Comfort Access
The concept
Access to the vehicle is possible without the use
of the remote control. All you need to do is wear
the remote control close to your body, e.g. in
your jacket pocket. The vehicle automatically
detects the remote control within the immedi-
ate vicinity or in the passenger compartment.
Comfort Access support s the following func-
tions:
> Unlocking/locking the vehicle
> Convenient closing
> Unlocking the tailgate separately
> Starting the engine
Functional requirements
>There are no external malfunction sources in
the vicinity.
> For locking, the remote control must be out-
side of the vehicle.
Online Edition for Part no. 01 40 2 914 849 - \251 07/12 BMW AG
Page 34 of 259
Opening and closingCONTROLS
33
>The vehicle cannot be locked or unlocked
again until after approx. 2 seconds.
> The engine can only be started if the remote
control is in the vehicle.
> The doors and tailgate mu st be closed to be
able to operate the windows and glass roof.
Comparison to standard remote controls
The indicated function can be operated by
pressing the buttons or via Comfort Access.
Instructions on openin g and closing are found
starting on page 26.
If you notice a brief delay while opening or
closing the windows or glass roof, the sys-
tem is checking whether a remote control is
inside the vehicle. Repeat the opening or closing
procedure, if necessary. <
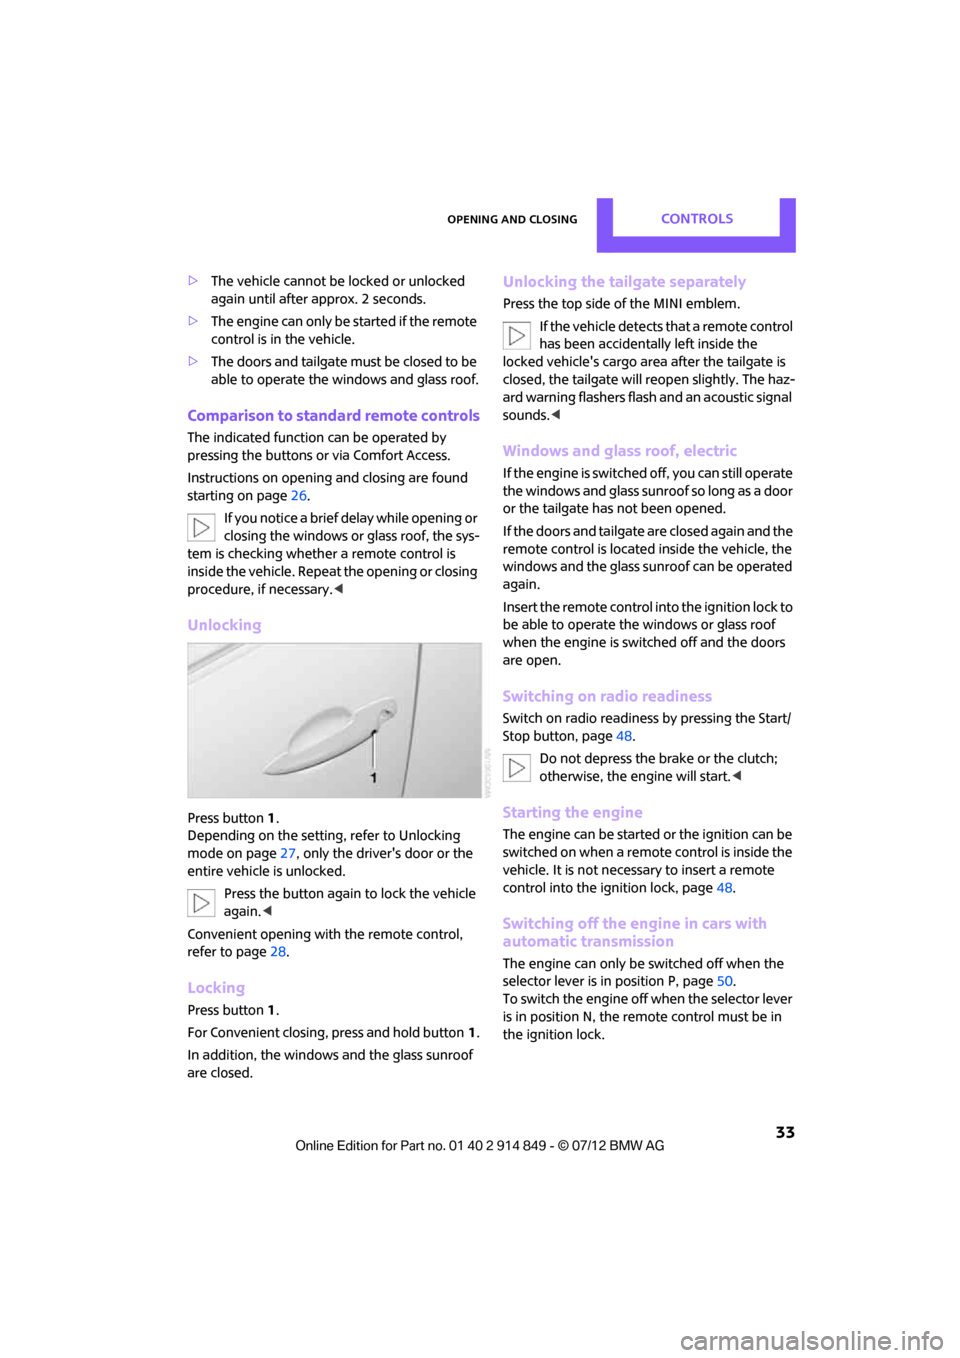
Unlocking
Press button 1.
Depending on the setting, refer to Unlocking
mode on page 27, only the driver's door or the
entire vehicle is unlocked.
Press the button again to lock the vehicle
again. <
Convenient opening with the remote control,
refer to page 28.
Locking
Press button 1.
For Convenient closing, press and hold button 1.
In addition, the windows and the glass sunroof
are closed.
Unlocking the tailgate separately
Press the top side of the MINI emblem. If the vehicle detects that a remote control
has been accidentally left inside the
locked vehicle's cargo area after the tailgate is
closed, the tailgate will reopen slightly. The haz-
ard warning flashers flash and an acoustic signal
sounds. <
Windows and glass roof, electric
If the engine is switched off, you can still operate
the windows and glass sunr oof so long as a door
or the tailgate has not been opened.
If the doors and tailgate are closed again and the
remote control is located inside the vehicle, the
windows and the glass sunroof can be operated
again.
Insert the remote control into the ignition lock to
be able to operate the windows or glass roof
when the engine is switched off and the doors
are open.
Switching on radio readiness
Switch on radio readiness by pressing the Start/
Stop button, page 48.
Do not depress the brake or the clutch;
otherwise, the engine will start. <
Starting the engine
The engine can be started or the ignition can be
switched on when a remote control is inside the
vehicle. It is not necessa ry to insert a remote
control into the ignition lock, page 48.
Switching off the engine in cars with
automatic transmission
The engine can only be switched off when the
selector lever is in position P, page50.
To switch the engine off when the selector lever
is in position N, the remote control must be in
the ignition lock.
Online Edition for Part no. 01 40 2 914 849 - \251 07/12 BMW AG
Page 35 of 259
CONTROLSOpening and closing
34
Before driving a vehicle with automatic
transmission into a car wash
1.Insert remote control into ignition lock.
2. Depress the brake.
3. Move the selector lever to position N.
4. Switch off the engine.
The vehicle can roll.
Malfunction
Comfort Access may malf unction due to local
radio waves.
If this happens, open or close the vehicle via the
buttons on the remote control or using the inte-
grated key.
Insert the remote control into the ignition lock
and start the engine.
Warning lamps
The warning lamp lights up when an
attempt is made to start the engine: the
engine cannot be started. The remote
control is not inside the vehicle or is malfunc-
tioning. Take the remote control with you inside
the vehicle or have it checked. If necessary,
insert another remote co ntrol into the ignition
lock.
The warning lamp lights up when the
engine is running: the remote control is
no longer inside the vehicle. After the
engine is switched off, the engine can only be
restarted within approx. 10 seconds.
The indicator lamp lights up and a
message appears on th e Control Display:
replace the battery in the remote
control.
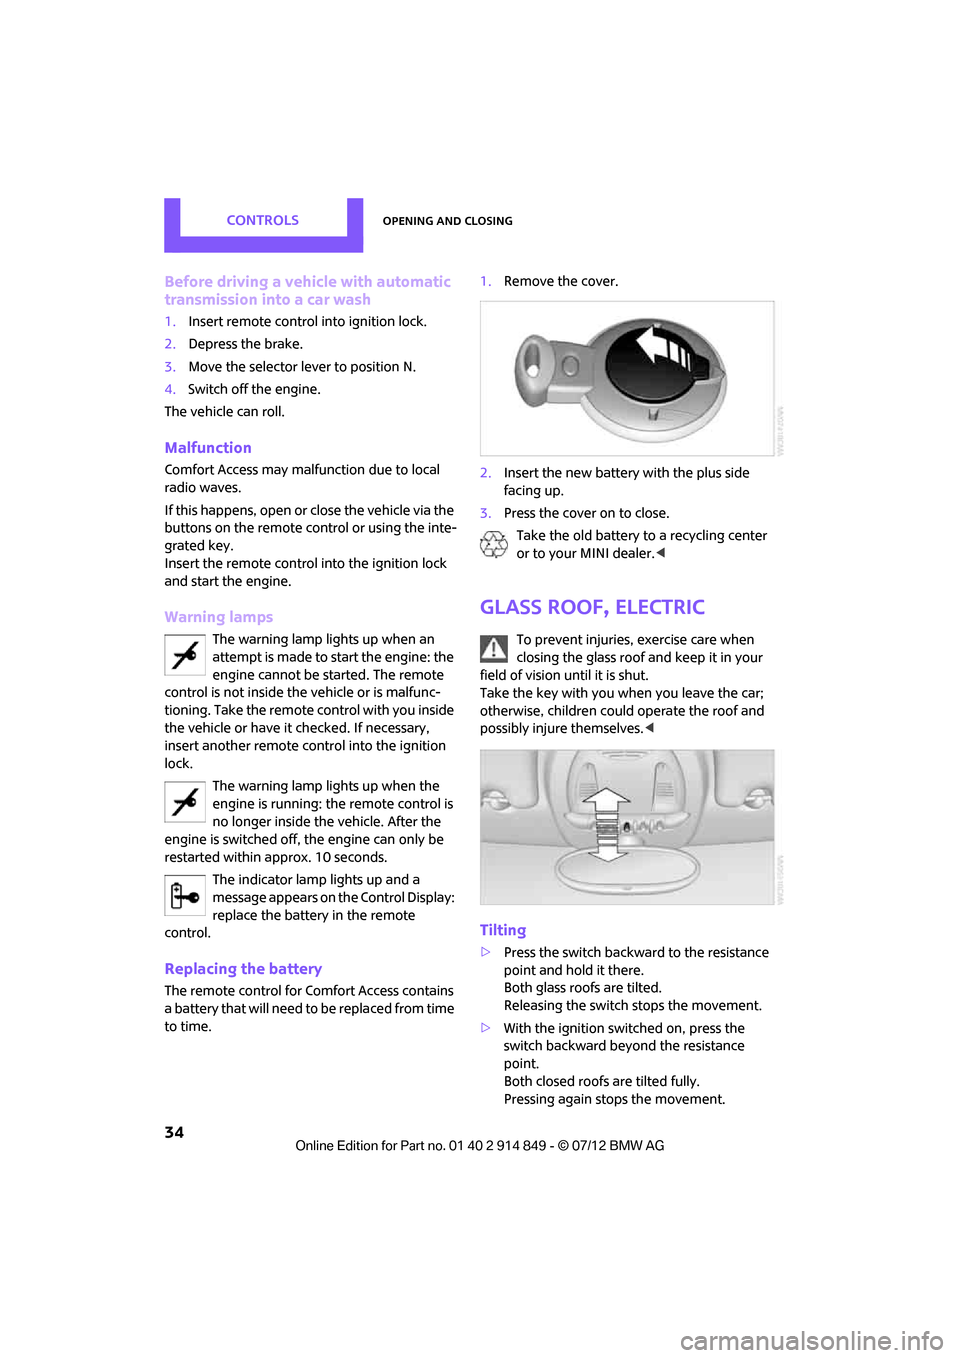
Replacing the battery
The remote control for Comfort Access contains
a b a t t e r y t h a t w i l l n e e d t o b e r e p l a c e d f r o m t i m e
to time. 1.
Remove the cover.
2. Insert the new battery with the plus side
facing up.
3. Press the cover on to close.
Take the old battery to a recycling center
or to your MINI dealer. <
Glass roof, electric
To prevent injuries, exercise care when
closing the glass roof and keep it in your
field of vision until it is shut.
Take the key with you when you leave the car;
otherwise, children could operate the roof and
possibly injure themselves. <
Tilting
>Press the switch backwa rd to the resistance
point and hold it there.
Both glass roofs are tilted.
Releasing the switch stops the movement.
> With the ignition switched on, press the
switch backward beyond the resistance
point.
Both closed roofs are tilted fully.
Pressing again stops the movement.
Online Edition for Part no. 01 40 2 914 849 - \251 07/12 BMW AG
Page 36 of 259
Opening and closingCONTROLS
35
Opening, closing
With the ignition switched on and the glass sun-
roof tilted, press the switch backward and hold it
there.
The front glass roof opens.
The rear glass roof is closed.
Releasing the switch stops the movement.
The glass roof can be closed in the same way by
pressing the switch forward.
The front glass roof remains in a tilted position.
The rear glass roof is tilted. Pressing on the
switch again closes bo th roofs completely.
Convenience operation via door lock or Comfort
Access, refer to page 28 and33.
Roller sunblind
The roller sunblind can be opened and closed
independently of the glass roof.
Following interruptions in electrical
power supply
After a power failure, there is a possibility that
the glass roof can only be tilted. In this case,
have the system initialized. The manufacturer of
your MINI recommends that you have this work
done by your MINI dealer.
Windows
To prevent injuries, exercise care when
closing the windows.
Take the remote control with you when you
leave the car; otherwise, children could operate
the electric windows and possibly injure them-
selves. <
If, after a window is opened and closed
several times in close succession, the
window can only be closed and not opened, the
system is overheated. Let the system cool for
several minutes with the ignition switched on or
the engine running.<
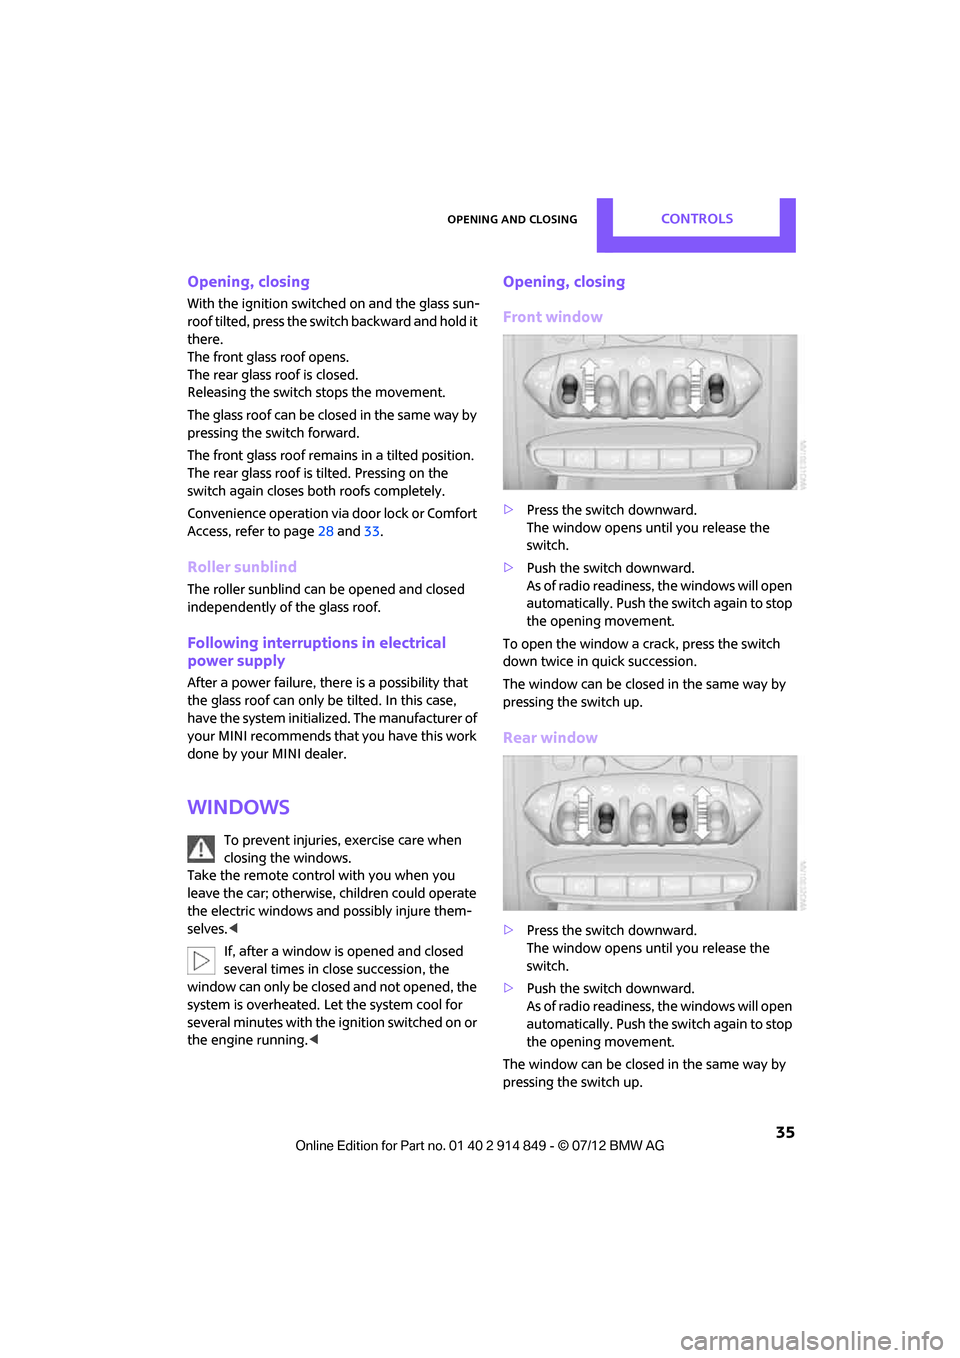
Opening, closing
Front window
> Press the switch downward.
The window opens until you release the
switch.
> Push the switch downward.
As of radio readiness, the windows will open
automatically. Push the switch again to stop
the opening movement.
To open the window a crack, press the switch
down twice in quick succession.
The window can be closed in the same way by
pressing the switch up.
Rear window
> Press the switch downward.
The window opens until you release the
switch.
> Push the switch downward.
As of radio readiness, the windows will open
automatically. Push the switch again to stop
the opening movement.
The window can be closed in the same way by
pressing the switch up.
Online Edition for Part no. 01 40 2 914 849 - \251 07/12 BMW AG
Page 44 of 259
AdjustmentsCONTROLS
43
Automatic heating
At external temperatures below a certain limit,
both exterior mirrors are automatically heated
while the engine is running or the ignition
switched on.
Interior rearview mirror
To reduce glare from vehicles behind you when
you are driving at night:
Turn the knob.
Interior and exterior mirrors,
automatic dimming feature
It is controlled by two photosensors:
> Inside the interior rearview mirror, arrow.
> On the back of the mirror.
For proper function:
> Keep the photosensors clean.
> Do not cover the area between the interior
rearview mirror and the windshield.
> Do not place stickers or decals on the wind-
shield in front of the mirror.
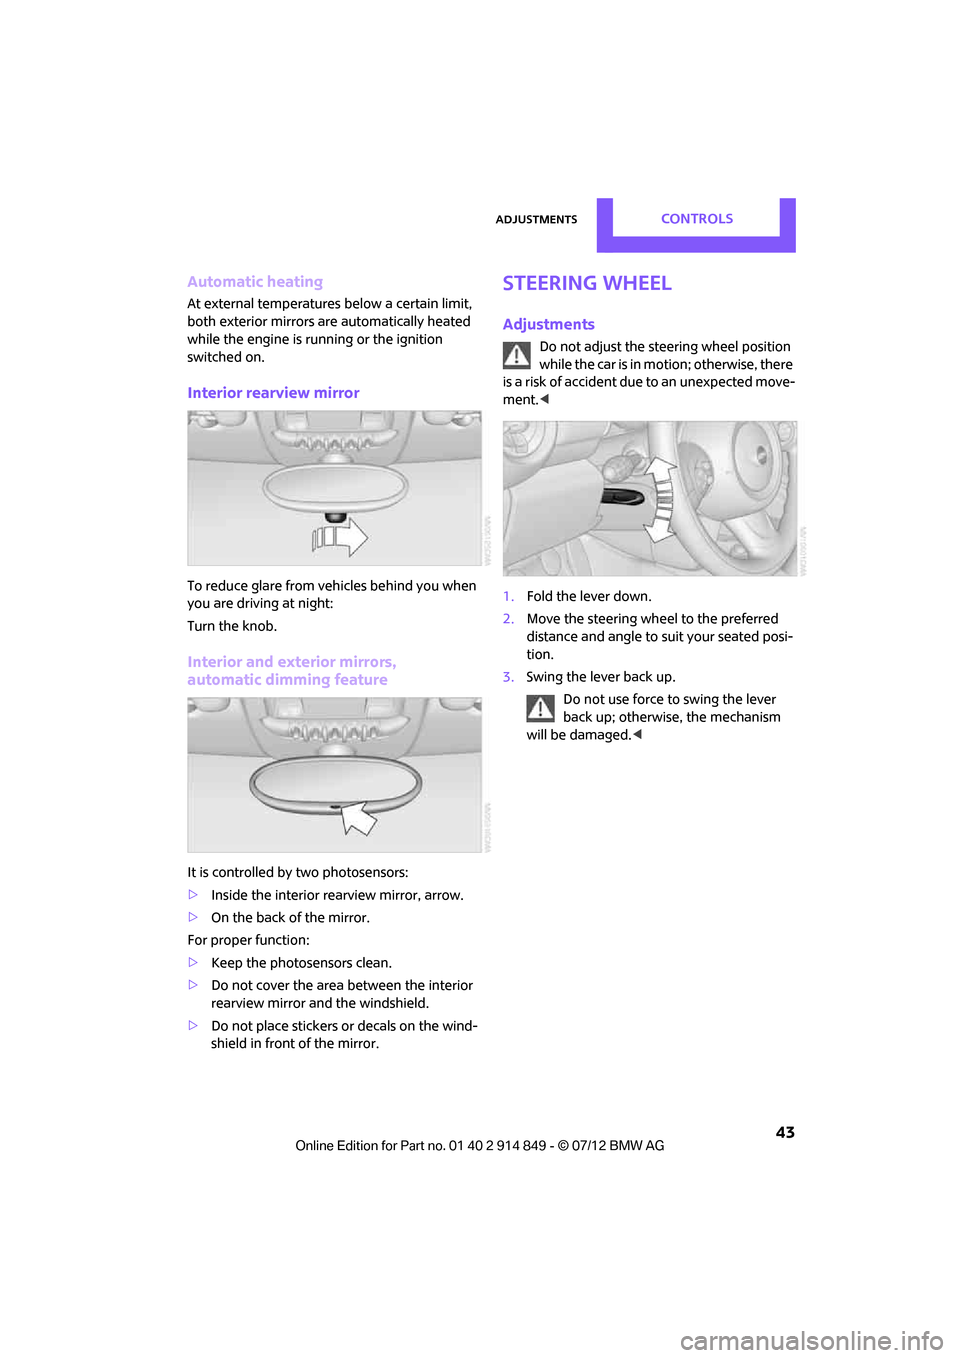
Steering wheel
Adjustments
Do not adjust the steering wheel position
while the car is in motion; otherwise, there
is a risk of accident du e to an unexpected move-
ment. <
1. Fold the lever down.
2. Move the steering wheel to the preferred
distance and angle to su it your seated posi-
tion.
3. Swing the lever back up.
Do not use force to swing the lever
back up; otherwise, the mechanism
will be damaged. <
Online Edition for Part no. 01 40 2 914 849 - \251 07/12 BMW AG