stop start MINI Countryman 2012 Owner's Manual (Mini Connected)
[x] Cancel search | Manufacturer: MINI, Model Year: 2012, Model line: Countryman, Model: MINI Countryman 2012Pages: 259, PDF Size: 3.07 MB
Page 12 of 259
CockpitAT A GLANCE
11
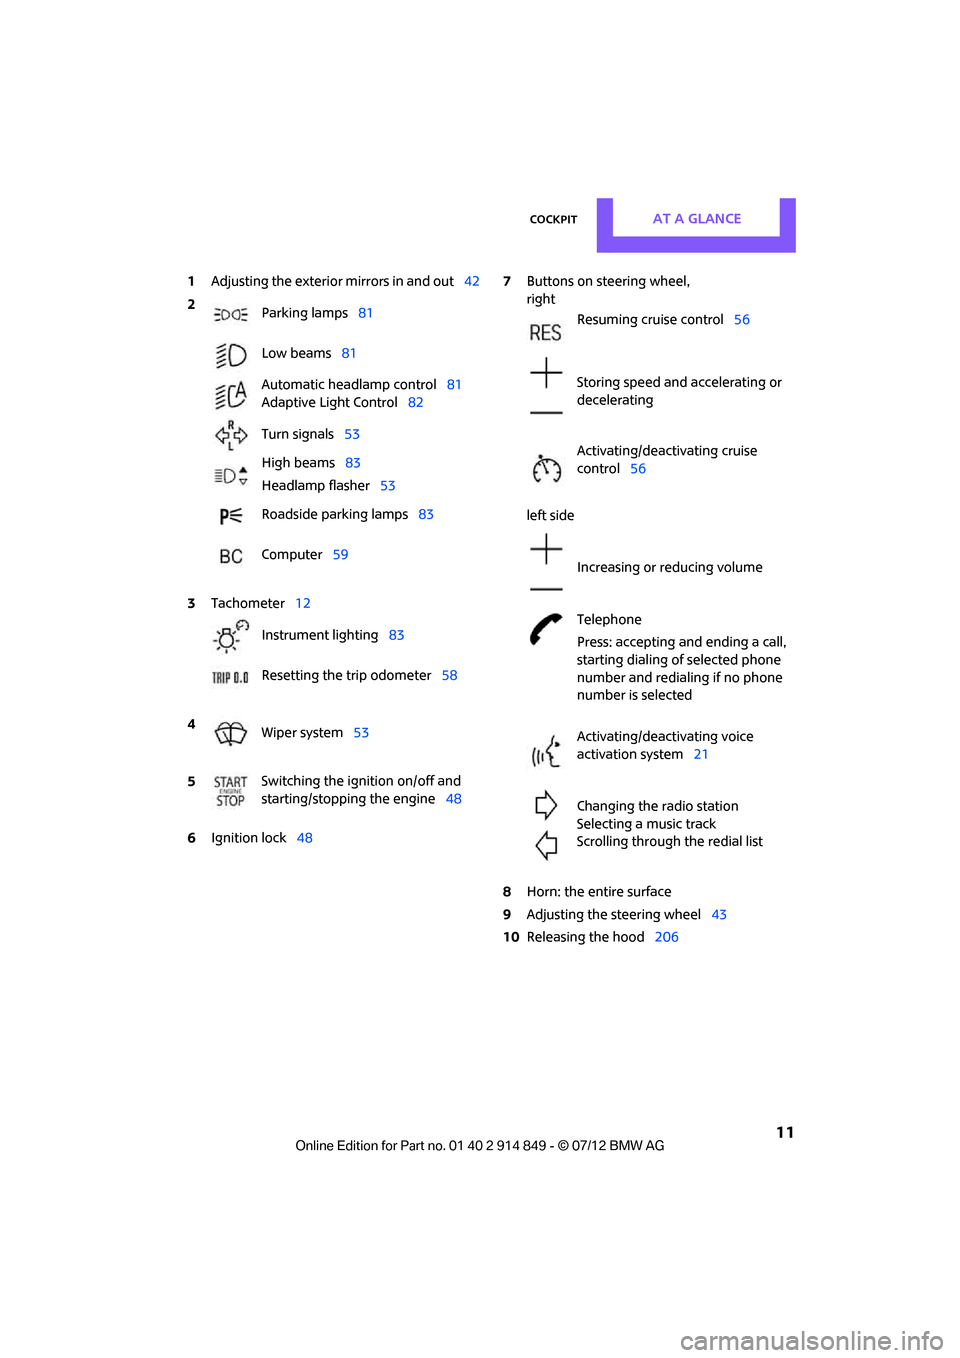
1Adjusting the exterior mirrors in and out42
6 Ignition lock 48 7
Buttons on steering wheel,
right
left side
8 Horn: the entire surface
9 Adjusting the steering wheel 43
10 Releasing the hood 206
2
Parking lamps 81
Low beams 81
Automatic headlamp control 81
Adaptive Light Control 82
Turn signals 53
High beams 83
Headlamp flasher 53
Roadside parking lamps 83
Computer 59
3 Tachometer 12
Instrument lighting 83
Resetting the trip odometer 58
4 Wiper system 53
5 Switching the ignition on/off and
starting/stopping the engine
48
Resuming cruise control56
Storing speed and accelerating or
decelerating
Activating/deactivating cruise
control 56
Increasing or reducing volume
Telephone
Press: accepting and ending a call,
starting dialing of selected phone
number and redialing if no phone
number is selected
Activating/deactivating voice
activation system 21
Changing the radio station
Selecting a music track
Scrolling through the redial list
Online Edition for Part no. 01 40 2 914 849 - \251 07/12 BMW AG
Page 34 of 259
Opening and closingCONTROLS
33
>The vehicle cannot be locked or unlocked
again until after approx. 2 seconds.
> The engine can only be started if the remote
control is in the vehicle.
> The doors and tailgate mu st be closed to be
able to operate the windows and glass roof.
Comparison to standard remote controls
The indicated function can be operated by
pressing the buttons or via Comfort Access.
Instructions on openin g and closing are found
starting on page 26.
If you notice a brief delay while opening or
closing the windows or glass roof, the sys-
tem is checking whether a remote control is
inside the vehicle. Repeat the opening or closing
procedure, if necessary. <
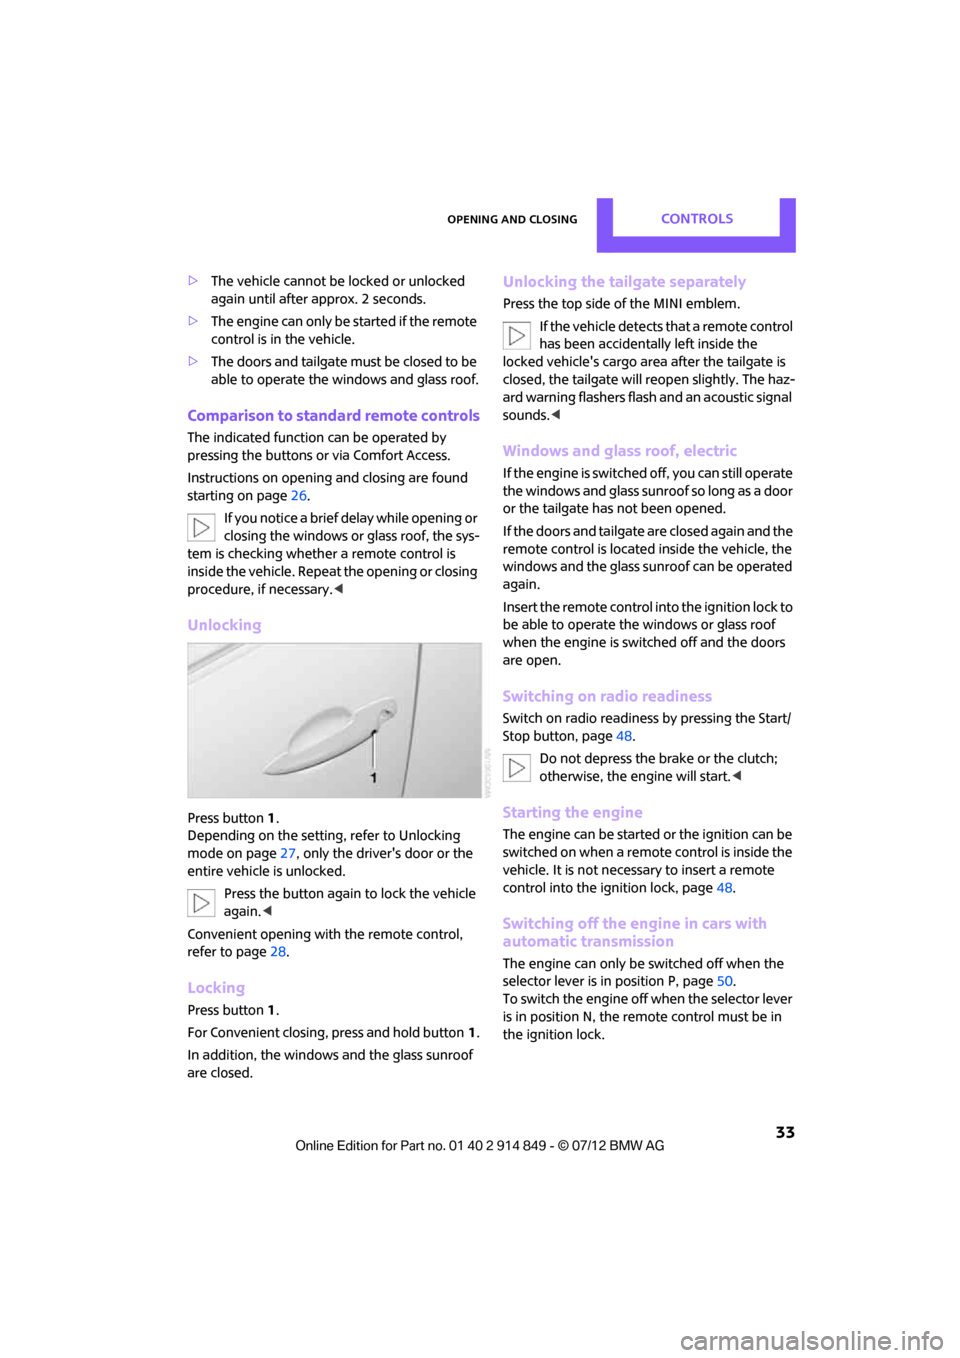
Unlocking
Press button 1.
Depending on the setting, refer to Unlocking
mode on page 27, only the driver's door or the
entire vehicle is unlocked.
Press the button again to lock the vehicle
again. <
Convenient opening with the remote control,
refer to page 28.
Locking
Press button 1.
For Convenient closing, press and hold button 1.
In addition, the windows and the glass sunroof
are closed.
Unlocking the tailgate separately
Press the top side of the MINI emblem. If the vehicle detects that a remote control
has been accidentally left inside the
locked vehicle's cargo area after the tailgate is
closed, the tailgate will reopen slightly. The haz-
ard warning flashers flash and an acoustic signal
sounds. <
Windows and glass roof, electric
If the engine is switched off, you can still operate
the windows and glass sunr oof so long as a door
or the tailgate has not been opened.
If the doors and tailgate are closed again and the
remote control is located inside the vehicle, the
windows and the glass sunroof can be operated
again.
Insert the remote control into the ignition lock to
be able to operate the windows or glass roof
when the engine is switched off and the doors
are open.
Switching on radio readiness
Switch on radio readiness by pressing the Start/
Stop button, page 48.
Do not depress the brake or the clutch;
otherwise, the engine will start. <
Starting the engine
The engine can be started or the ignition can be
switched on when a remote control is inside the
vehicle. It is not necessa ry to insert a remote
control into the ignition lock, page 48.
Switching off the engine in cars with
automatic transmission
The engine can only be switched off when the
selector lever is in position P, page50.
To switch the engine off when the selector lever
is in position N, the remote control must be in
the ignition lock.
Online Edition for Part no. 01 40 2 914 849 - \251 07/12 BMW AG
Page 35 of 259
CONTROLSOpening and closing
34
Before driving a vehicle with automatic
transmission into a car wash
1.Insert remote control into ignition lock.
2. Depress the brake.
3. Move the selector lever to position N.
4. Switch off the engine.
The vehicle can roll.
Malfunction
Comfort Access may malf unction due to local
radio waves.
If this happens, open or close the vehicle via the
buttons on the remote control or using the inte-
grated key.
Insert the remote control into the ignition lock
and start the engine.
Warning lamps
The warning lamp lights up when an
attempt is made to start the engine: the
engine cannot be started. The remote
control is not inside the vehicle or is malfunc-
tioning. Take the remote control with you inside
the vehicle or have it checked. If necessary,
insert another remote co ntrol into the ignition
lock.
The warning lamp lights up when the
engine is running: the remote control is
no longer inside the vehicle. After the
engine is switched off, the engine can only be
restarted within approx. 10 seconds.
The indicator lamp lights up and a
message appears on th e Control Display:
replace the battery in the remote
control.
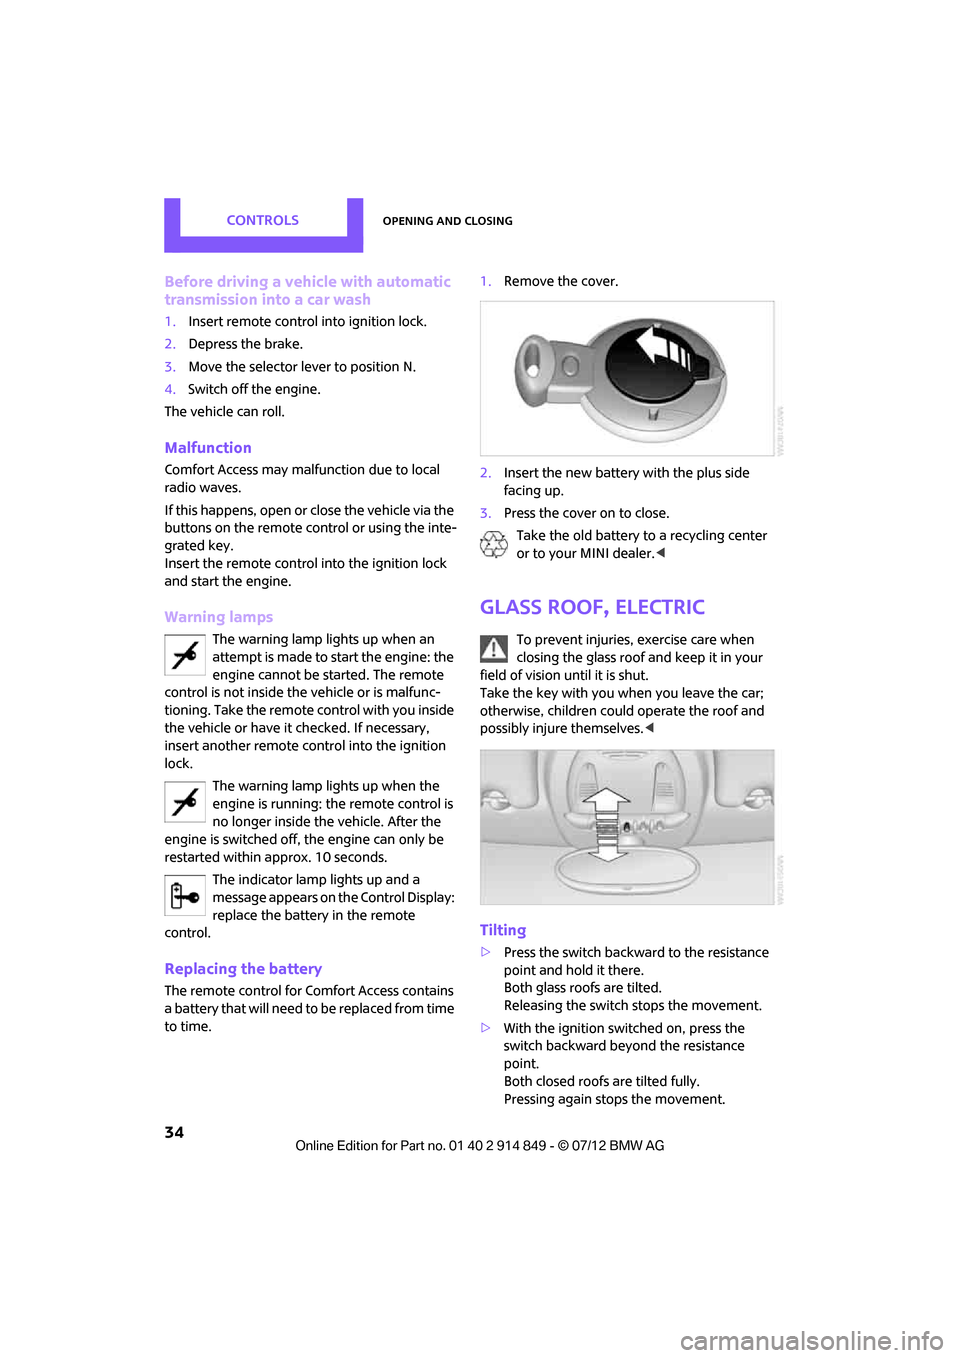
Replacing the battery
The remote control for Comfort Access contains
a b a t t e r y t h a t w i l l n e e d t o b e r e p l a c e d f r o m t i m e
to time. 1.
Remove the cover.
2. Insert the new battery with the plus side
facing up.
3. Press the cover on to close.
Take the old battery to a recycling center
or to your MINI dealer. <
Glass roof, electric
To prevent injuries, exercise care when
closing the glass roof and keep it in your
field of vision until it is shut.
Take the key with you when you leave the car;
otherwise, children could operate the roof and
possibly injure themselves. <
Tilting
>Press the switch backwa rd to the resistance
point and hold it there.
Both glass roofs are tilted.
Releasing the switch stops the movement.
> With the ignition switched on, press the
switch backward beyond the resistance
point.
Both closed roofs are tilted fully.
Pressing again stops the movement.
Online Edition for Part no. 01 40 2 914 849 - \251 07/12 BMW AG
Page 49 of 259
CONTROLSDriving
48
Driving
Vehicle equipment
In this chapter, all production, country, and
optional equipment that is offered in the model
range is described. Equipment is also described
that is not available because of, for example,
selected options or coun try version. This also
applies to safety relate d functions and systems.
Ignition lock
Inserting the key into the ignition lock
Insert the key all the way into the ignition lock.
Radio readiness
Individual electrical consumers can operate.
Removing the key from the ignition lock
Press in the key briefly. It is ejected slightly.
At the same time:
>The ignition is switched off if it was on
beforehand.
Automatic transmission
The key can only be removed if the selector lever
is in position P: interlock.
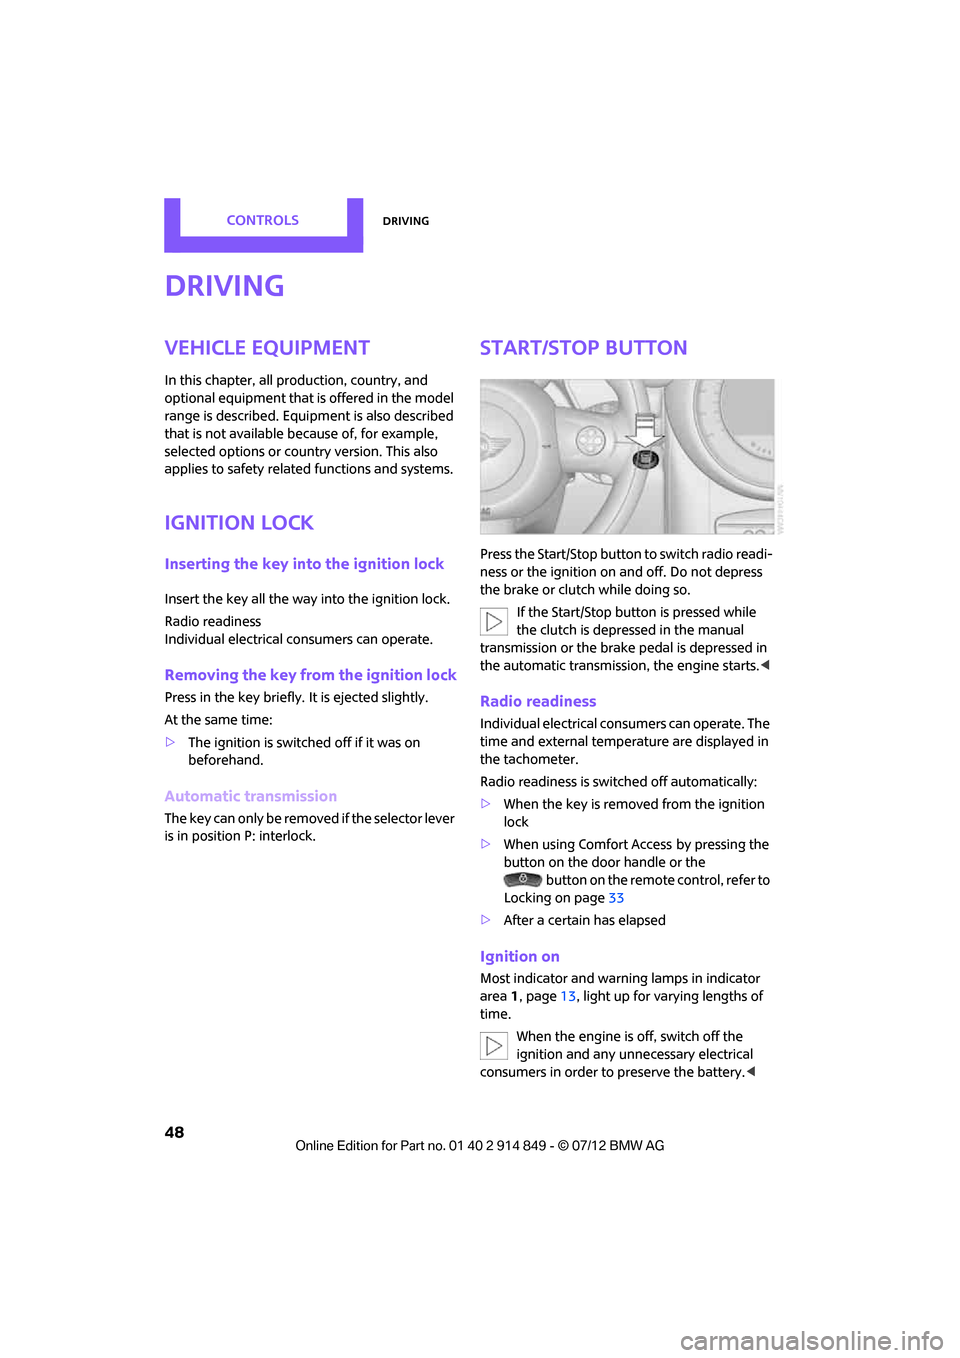
Start/Stop button
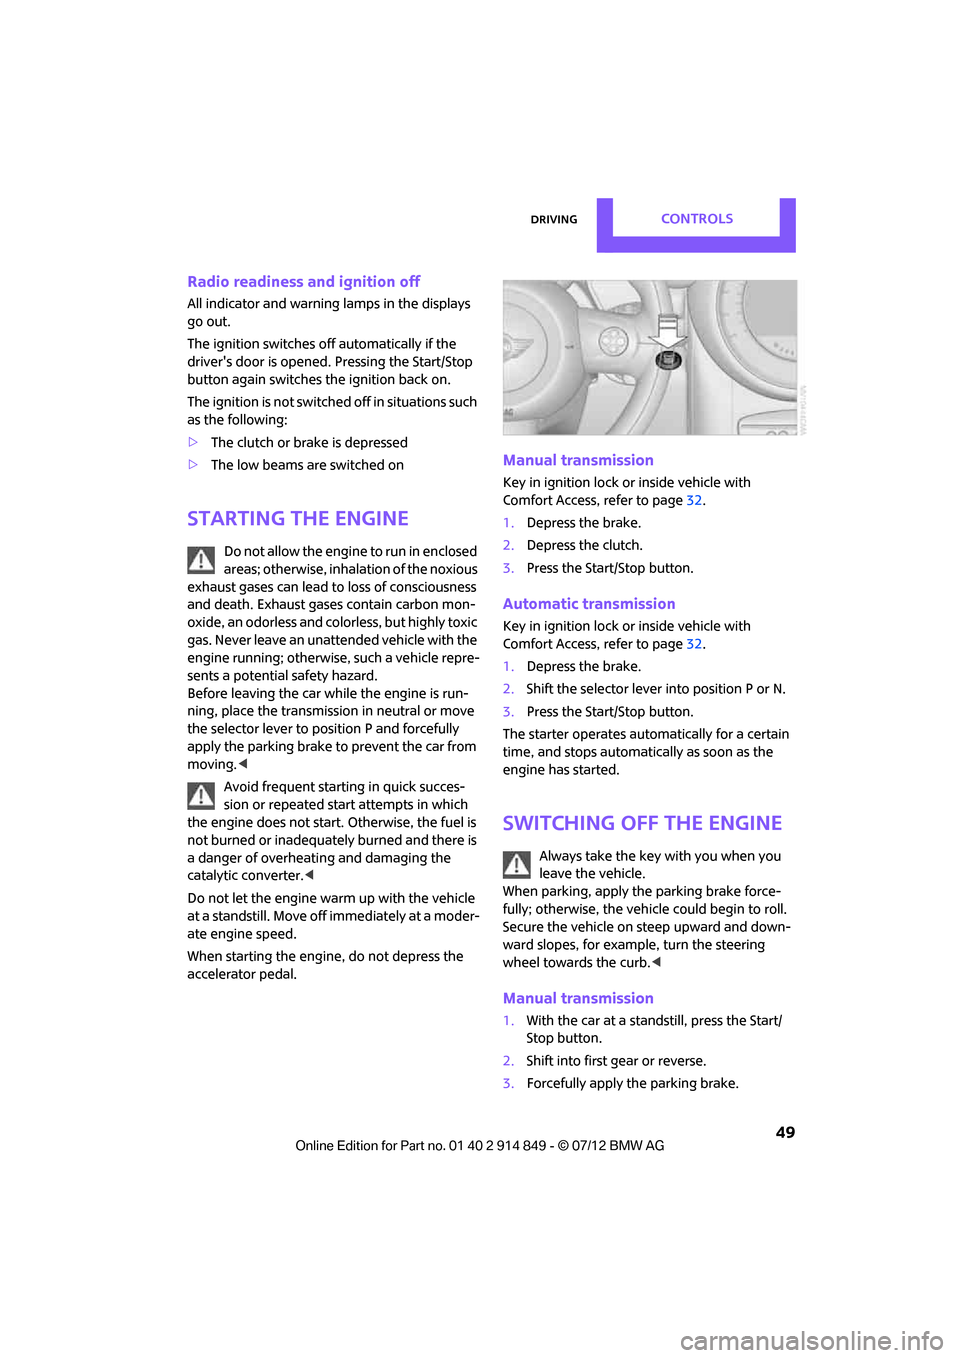
Press the Start/Stop button to switch radio readi-
ness or the ignition on and off. Do not depress
the brake or clutch while doing so.
If the Start/Stop button is pressed while
the clutch is depressed in the manual
transmission or the brake pedal is depressed in
the automatic transmission, the engine starts. <
Radio readiness
Individual electrical consumers can operate. The
time and external temperature are displayed in
the tachometer.
Radio readiness is switched off automatically:
>When the key is removed from the ignition
lock
> When using Comfort Access
by pressing the
button on the door handle or the
button on the remote control, refer to
Locking on page 33
> After a certain has elapsed
Ignition on
Most indicator and warn ing lamps in indicator
area 1, page 13, light up for varying lengths of
time.
When the engine is off, switch off the
ignition and any unnecessary electrical
consumers in order to preserve the battery. <
Online Edition for Part no. 01 40 2 914 849 - \251 07/12 BMW AG
Page 50 of 259
DrivingCONTROLS
49
Radio readiness and ignition off
All indicator and warning lamps in the displays
go out.
The ignition switches off automatically if the
driver's door is opened. Pressing the Start/Stop
button again switches the ignition back on.
The ignition is not switched off in situations such
as the following:
>The clutch or brake is depressed
> The low beams are switched on
Starting the engine
Do not allow the engine to run in enclosed
areas; otherwise, inhalation of the noxious
exhaust gases can lead to loss of consciousness
and death. Exhaust gases contain carbon mon-
oxide, an odorless and colorless, but highly toxic
gas. Never leave an unattended vehicle with the
engine running; otherwise, such a vehicle repre-
sents a potential safety hazard.
Before leaving the car while the engine is run-
ning, place the transmission in neutral or move
the selector lever to position P and forcefully
apply the parking brake to prevent the car from
moving. <
Avoid frequent starting in quick succes-
sion or repeated start attempts in which
the engine does not start. Otherwise, the fuel is
not burned or inadequately burned and there is
a danger of overheating and damaging the
catalytic converter. <
Do not let the engine warm up with the vehicle
at a standstill. Move of f immediately at a moder-
ate engine speed.
When starting the engine, do not depress the
accelerator pedal.
Manual transmission
Key in ignition lock or inside vehicle with
Comfort Access, refer to page 32.
1. Depress the brake.
2. Depress the clutch.
3. Press the Start/Stop button.
Automatic transmission
Key in ignition lock or inside vehicle with
Comfort Access, refer to page 32.
1. Depress the brake.
2. Shift the selector lever into position P or N.
3. Press the Start/Stop button.
The starter operates auto matically for a certain
time, and stops automatically as soon as the
engine has started.
Switching off the engine
Always take the key with you when you
leave the vehicle.
When parking, apply the parking brake force-
fully; otherwise, the vehicle could begin to roll.
Secure the vehicle on steep upward and down-
ward slopes, for example, turn the steering
wheel towards the curb. <
Manual transmission
1.With the car at a standstill, press the Start/
Stop button.
2. Shift into first gear or reverse.
3. Forcefully apply the parking brake.
Online Edition for Part no. 01 40 2 914 849 - \251 07/12 BMW AG
Page 51 of 259
CONTROLSDriving
50
Automatic transmission
1.With the car at a stop, move the selector
lever to position P.
2. Press the Start/Stop button.
3. Forcefully apply the parking brake.
Before driving into a car wash
By following these steps, the vehicle is able to
roll:
1.Place the remote control, even with Comfort
Access, in the ignition lock.
2. Depress the brake.
3. Move the selector lever to position N.
4. Switch off the engine.
Parking brake
The parking brake is primarily intended to pre-
vent the vehicle from rolling while parked; it
brakes the rear wheels.
In addition, follow the instructions on page 49
under Switching off the engine.
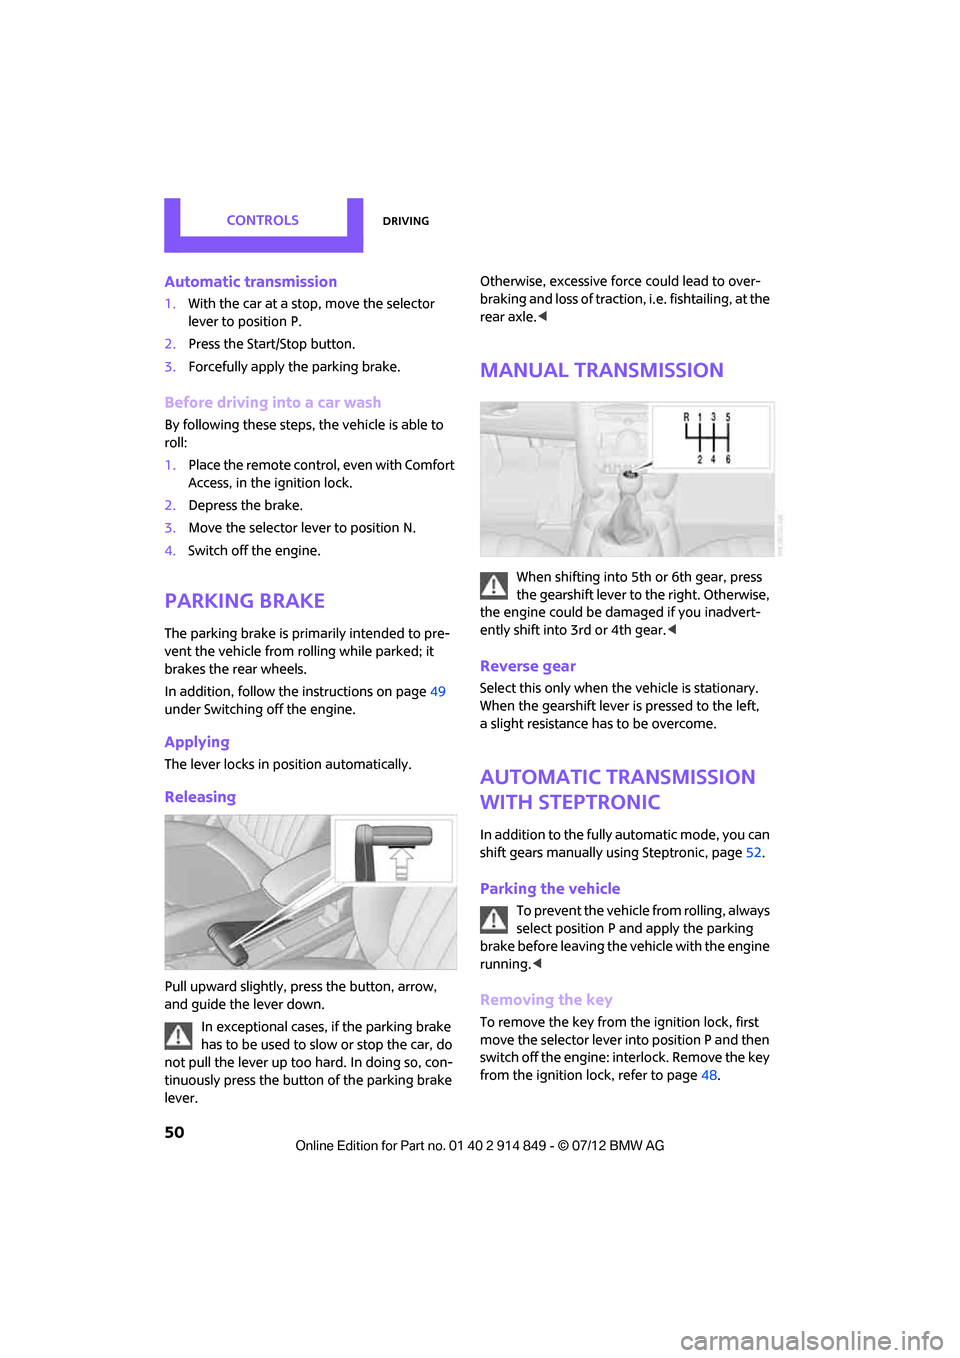
Applying
The lever locks in position automatically.
Releasing
Pull upward slightly, pr ess the button, arrow,
and guide the lever down.
In exceptional cases, if the parking brake
has to be used to slow or stop the car, do
not pull the lever up too hard. In doing so, con-
tinuously press the button of the parking brake
lever. Otherwise, excessive force could lead to over-
braking and loss of traction
, i.e. fishtailing, at the
rear axle. <
Manual transmission
When shifting into 5t h or 6th gear, press
the gearshift lever to the right. Otherwise,
the engine could be damaged if you inadvert-
ently shift into 3rd or 4th gear. <
Reverse gear
Select this only when the vehicle is stationary.
When the gearshift lever is pressed to the left,
a slight resistance ha s to be overcome.
Automatic transmission
with Steptronic
In addition to the fully automatic mode, you can
shift gears manually using Steptronic, page 52.
Parking the vehicle
To prevent the vehicle from rolling, always
select position P and apply the parking
brake before leaving the vehicle with the engine
running. <
Removing the key
To remove the key from the ignition lock, first
move the selector lever into position P and then
switch off the engine: in terlock. Remove the key
from the ignition lock, refer to page 48.
Online Edition for Part no. 01 40 2 914 849 - \251 07/12 BMW AG
Page 77 of 259

CONTROLSTechnology for driving comfort and safety
76
>Interference from systems or devices with
the same transmission frequency.
> Malfunction.
Resetting system
Reset the system again af ter each correction of
the tire inflation pressure and after every tire or
wheel change.
1. "Vehicle Info"
2. "Vehicle status"
3. "Reset"
4. Start the engine – do not drive away.
5. Select "Reset" to start the initialization.
6. Start to drive.
The tires are shown in gray and "Resetting
TPM..." is displayed.
After driving a few minutes, the set inflation
pressures in the tires are accepted as the target
values to be monitored. The resetting process is
completed automatically as you drive. The tires
are depicted in green on the Control Display and
"Status: TPM active" is displayed again.
The trip can be interrupted at any time. When
driving resumes, resett ing is continued auto-
matically.
If a flat tire is detected while the system is
resetting, all tires on the Control Display
are displayed in yellow. The message "Low tire!"
is displayed. <
Message with low tire inflation pressure
The warning lamps come on in yellow
and red. A message appears on the
onboard computer. An acoustic signal
also sounds.
> There is a flat tire or substantial loss in tire
pressure in the displayed tire.
> The system was not reset after a wheel
change and thus issues a warning based on
the inflation pressures initialized last.
1. Reduce speed and stop the vehicle with cau-
tion. Avoid sudden braking and steering
maneuvers.
2. Check whether the vehicle is equipped with
normal tires or with run-flat tires.
Run-flat tires, refer to page 203, are identi-
fied by a circular sy mbol containing the
letters RSC on the tire sidewall.
When a low inflation pressure is reported, the
Dynamic Stability Cont rol DSC is activated.
Actions in the event of a flat tire
Normal tires
1.Identify the damaged tire.
To do so, check the inflation pressure in all
four tires. The inflatio n pressure display of
the Mobility Kit, page 220, can be used for
this purpose.
If the inflation pressure is correct in all four
tires, then the Tire Pressure Monitor may not
have been reset. The system must then be
reset.
If it is not possible to identify the damaged
tire, contact your MINI dealer.
2. Use the Mobility Kit to remedy the flat tire on
the damaged wheel, refer to page 220.
The use of tire sealant, e.g. Mobility Kit, can
damage the TPM wheel electronics. In this
case, have the electronics checked and
replaced if necessary at your earliest oppor-
tunity.
Online Edition for Part no. 01 40 2 914 849 - \251 07/12 BMW AG
Page 79 of 259
CONTROLSTechnology for driving comfort and safety
78
The system has detected a wheel change, but
has not yet been reset. It is not possible to pro-
vide a reliable warning about the current infla-
tion pressure.
Check the tire inflation pressure and reset the
system, page 76.
Declaration according to NHTSA/
FMVSS 138 Tire Pressure Monitoring
Systems
Each tire, including the spare, should be
checked monthly when cold and inflated to the
inflation pressure recommended by the vehicle
manufacturer on the vehicle placard or tire infla-
tion pressure label. If your vehicle has tires of a
different size than the size indicated on the vehi-
cle placard or tire inflation pressure label, you
should determine the proper tire inflation pres-
sure for those tires. As an added safety feature,
your vehicle has been equipped with a tire pres-
sure monitoring system TPMS that illuminates a
low tire pressure telltal e when one or more of
your tires are significantly underinflated.
Accordingly, when the low tire pressure telltale
illuminates, you should st op and check your tires
as soon as possible, and inflate them to the
proper pressure. Driving on a significantly
underinflated tire causes the tire to overheat and can lead to tire failure. Underinflation also
reduces fuel efficiency and tire tread life, and
may affect the vehicle's handling and stopping
ability. Please note that the TPMS is not a substi-
tute for proper tire maintenance, and it is the
driver's responsibility to
maintain correct tire
pressure, even if underi nflation has not reached
the level at which the TPMS low tire pressure tell-
tale illuminates.
The TPMS malfunction indicator is combined
with the low tire pressure telltale. When the sys-
tem detects a malfunction, the telltale will flash
for approximately one minute and then remain
continuously lit. This sequence will continue
upon subsequent vehicle startups as long as the
malfunction exists. When the malfunction indi-
cator is illuminated, the system may not be able
to detect or signal low tire pressure as intended.
TPMS malfunctions may occur for a variety of
reasons, including the installation of replace-
ment or alternate tires or wheels on the vehicle
that prevent the TPMS from functioning prop-
erly. Always check the TP MS malfunction telltale
after replacing one or mo re tires or wheels on
your vehicle to ensure that the replacement or
alternate tires and wheels allow the TPMS to
continue to function properly.
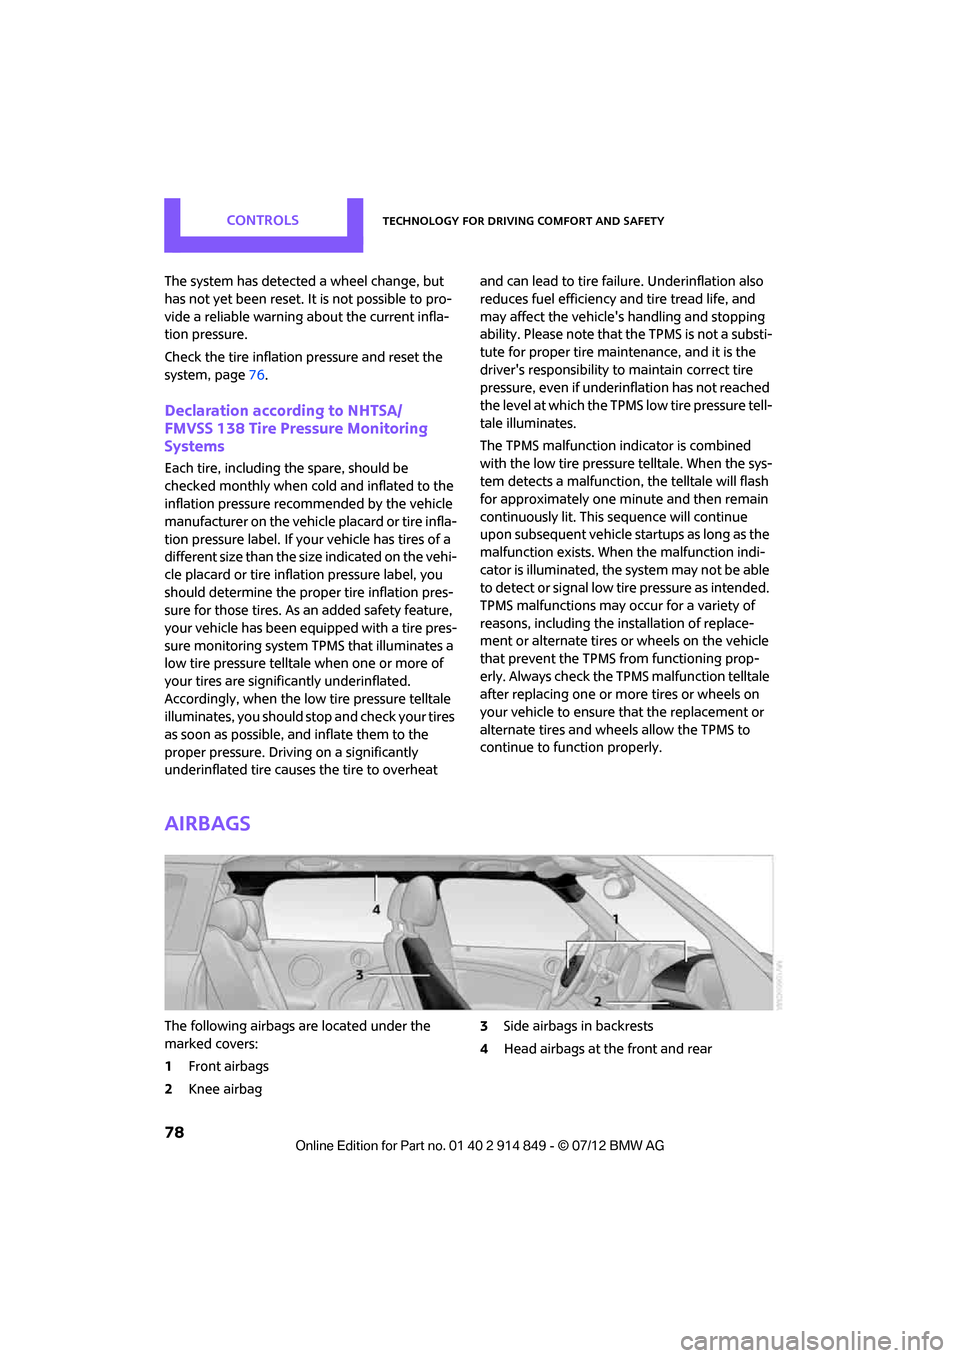
Airbags
The following airbags are located under the
marked covers:
1 Front airbags
2 Knee airbag 3
Side airbags in backrests
4 Head airbags at the front and rear
Online Edition for Part no. 01 40 2 914 849 - \251 07/12 BMW AG
Page 84 of 259
LampsCONTROLS
83
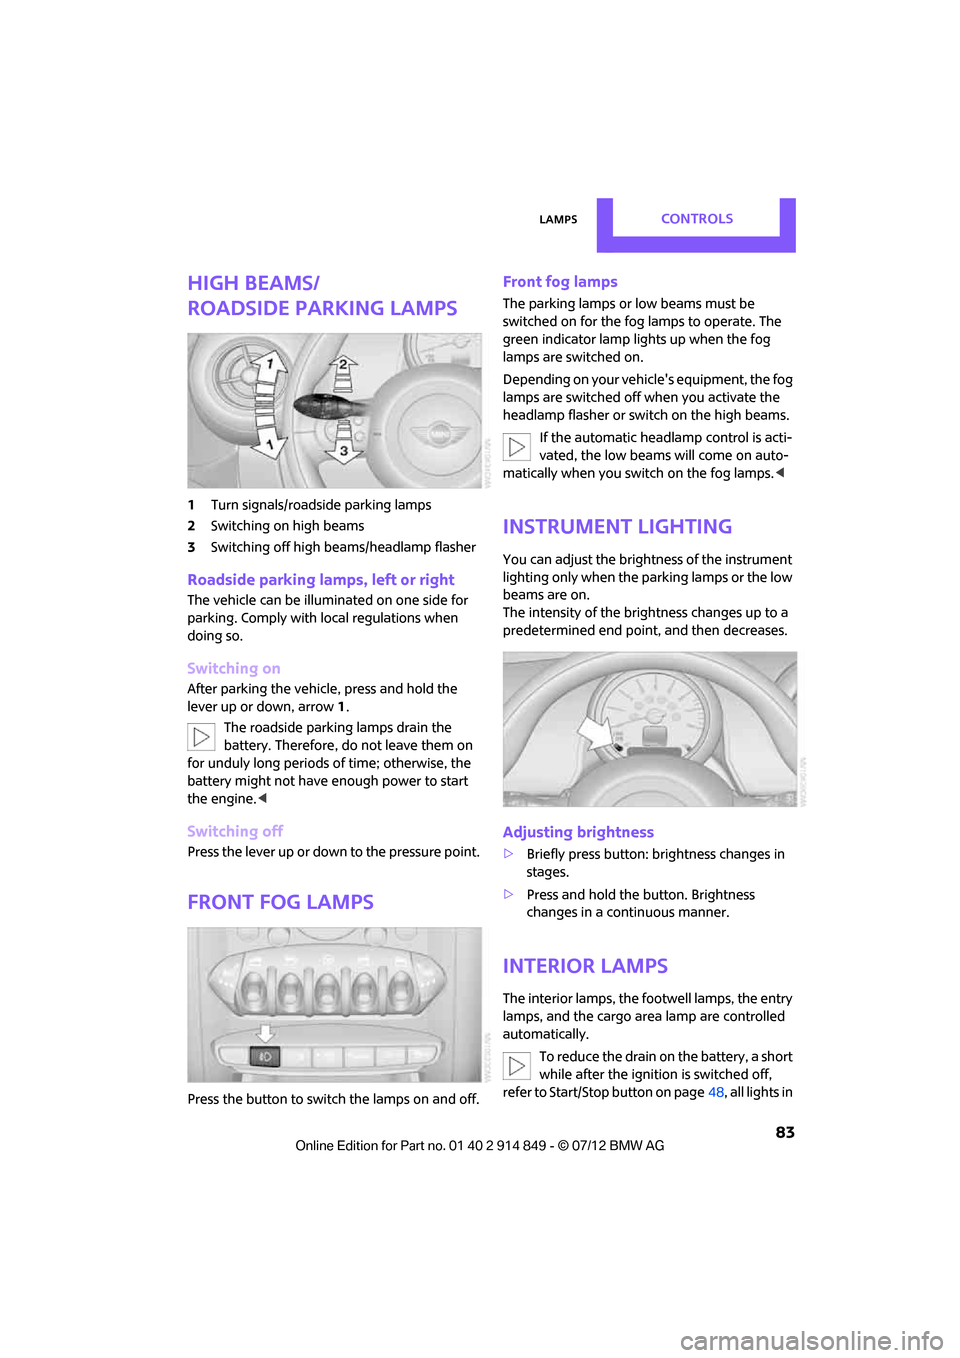
High beams/
roadside parking lamps
1Turn signals/roadside parking lamps
2 Switching on high beams
3 Switching off high be ams/headlamp flasher
Roadside parking lamps, left or right
The vehicle can be illumi nated on one side for
parking. Comply with local regulations when
doing so.
Switching on
After parking the vehicle, press and hold the
lever up or down, arrow 1.
The roadside parking lamps drain the
battery. Therefore, do not leave them on
for unduly long periods of time; otherwise, the
battery might not have enough power to start
the engine.<
Switching off
Press the lever up or down to the pressure point.
Front fog lamps
Press the button to switch the lamps on and off.
Front fog lamps
The parking lamps or low beams must be
switched on for the fog lamps to operate. The
green indicator lamp lights up when the fog
lamps are switched on.
Depending on your vehicle's equipment, the fog
lamps are switched off when you activate the
headlamp flasher or switch on the high beams.
If the automatic headlamp control is acti-
vated, the low beams will come on auto-
matically when you switch on the fog lamps. <
Instrument lighting
You can adjust the brightness of the instrument
lighting only when the parking lamps or the low
beams are on.
The intensity of the brightness changes up to a
predetermined end point, and then decreases.
Adjusting brightness
>Briefly press button: brightness changes in
stages.
> Press and hold the button. Brightness
changes in a continuous manner.
Interior lamps
The interior lamps, the footwell lamps, the entry
lamps, and the cargo area lamp are controlled
automatically.
To reduce the drain on the battery, a short
while after the ignition is switched off,
refer to Start/Stop button on page 48, all lights in
Online Edition for Part no. 01 40 2 914 849 - \251 07/12 BMW AG
Page 111 of 259
DRIVING TIPSThings to remember when driving
110
Saving fuel
General information
Your vehicle incorporates numerous techno-
logies for reducing fuel consumption and
emissions.
Fuel consumption depends on a number of
different factors. Fuel consumption and environ-
mental pollution are affected by various actions,
the manner of driving and regular maintenance.
Remove unnecessary cargo
Additional weight increases fuel consumption.
Remove attached parts no longer in use
Attached parts on the ve hicle affect its aerody-
namics and increase fuel consumption.
Closing windows
Open windows increase air resistance and
therefore fuel consumption.
Check tire inflation pressure regularly
Check and, if necessary, correct tire inflation
pressure at least twice a month and before start-
ing on a long trip.
Low inflation pressure increases rolling resis-
tance and thus leads to greater fuel consump-
tion and tire wear.
Drive off immediately
Do not wait for the engine to warm up while the
vehicle remains stationary. Start driving right
away, but at moderate engi ne speeds. This is the
fastest way for the cold engine to reach its
operating temperature.
Think ahead while driving
Avoid unnecessary accelera tion and braking. by
maintaining a suitable di stance to the vehicle
driving ahead.
Looking-ahead and smooth driving reduces fuel
consumption.
Avoid high engine speeds
Use first gear only for driving off. In second and
higher gears, accelerate smoothly to a suitable
engine and road speed. In doing so, avoid high
engine speeds and shift up early.
When you reach your desired traveling speed,
shift to the highest suit able gear and drive at
constant speed.
As a rule: driving at lo w engine speeds lowers
fuel consumption and reduces wear.
Coasting
When approaching a red traffic light, take your
foot off the accelerator and let the car roll to a
stop in the highest gear possible.
On a downhill gradient, take your foot off the
accelerator and let the vehicle coast in a suitable
gear.
Fuel supply is shut off automatically when the
vehicle is coasting.
Switch off the engine during lengthy
stops
Switch off the engine when stopping for lengthy
periods, e.g. at traffic li ghts, railroad crossings or
in traffic jams.
Switch off any features that are not
currently required
Features such as air co nditioning, seat heaters
and the rear window defroster require a great
deal of energy and result in greater fuel con-
sumption, especially in city driving and during
Stop & Go operation. For this reason, switch off
these features if they are not really needed.
Have the vehicle serviced
Have your vehicle servic ed regularly to achieve
good economy and a long vehicle life. The man-
ufacturer of your MINI recommends having the
vehicle serviced by a MINI dealer. Also note the
MINI Maintenance System, page 209.
Online Edition for Part no. 01 40 2 914 849 - \251 07/12 BMW AG