display MINI Countryman 2012 Owner's Guide
[x] Cancel search | Manufacturer: MINI, Model Year: 2012, Model line: Countryman, Model: MINI Countryman 2012Pages: 201, PDF Size: 3.19 MB
Page 71 of 201
CONTROLSTechnology for driving comfort and safety
70
could result in an accident. Do not continue
driving and contact your MINI dealer. <
Tire Pressure Monitor
TPM
The concept
Measuring the inflation pressure in the four
mounted tires. The system notifies you if there is
a significant loss of pressu re in one or more tires.
Functional requirement
The system must have been reset while the
inflation pressure was correct; otherwise, reli-
able signaling of a flat tire is not ensured.
Always use wheels with TPM electronics to
ensure that the system will operate properly.
Reset the system again af ter each correction of
the tire inflation pressure and after every tire or
wheel change.
System limitations
Sudden, serious tire damage caused by
external influences cannot be indicated in
advance. <
The system does not operate correctly if it has
not been reset. For exampl e, a flat tire may be
indicated despite correct tire inflation pressures.
The system is inactive an d cannot indicate a flat
tire:
> If a wheel without TPM electronics is
mounted
> Interference with TPM by other systems or
devices with the same transmission fre-
quency.
Resetting system
Reset the system again af ter each correction of
the tire inflation pressure and after every tire or
wheel change. 1.
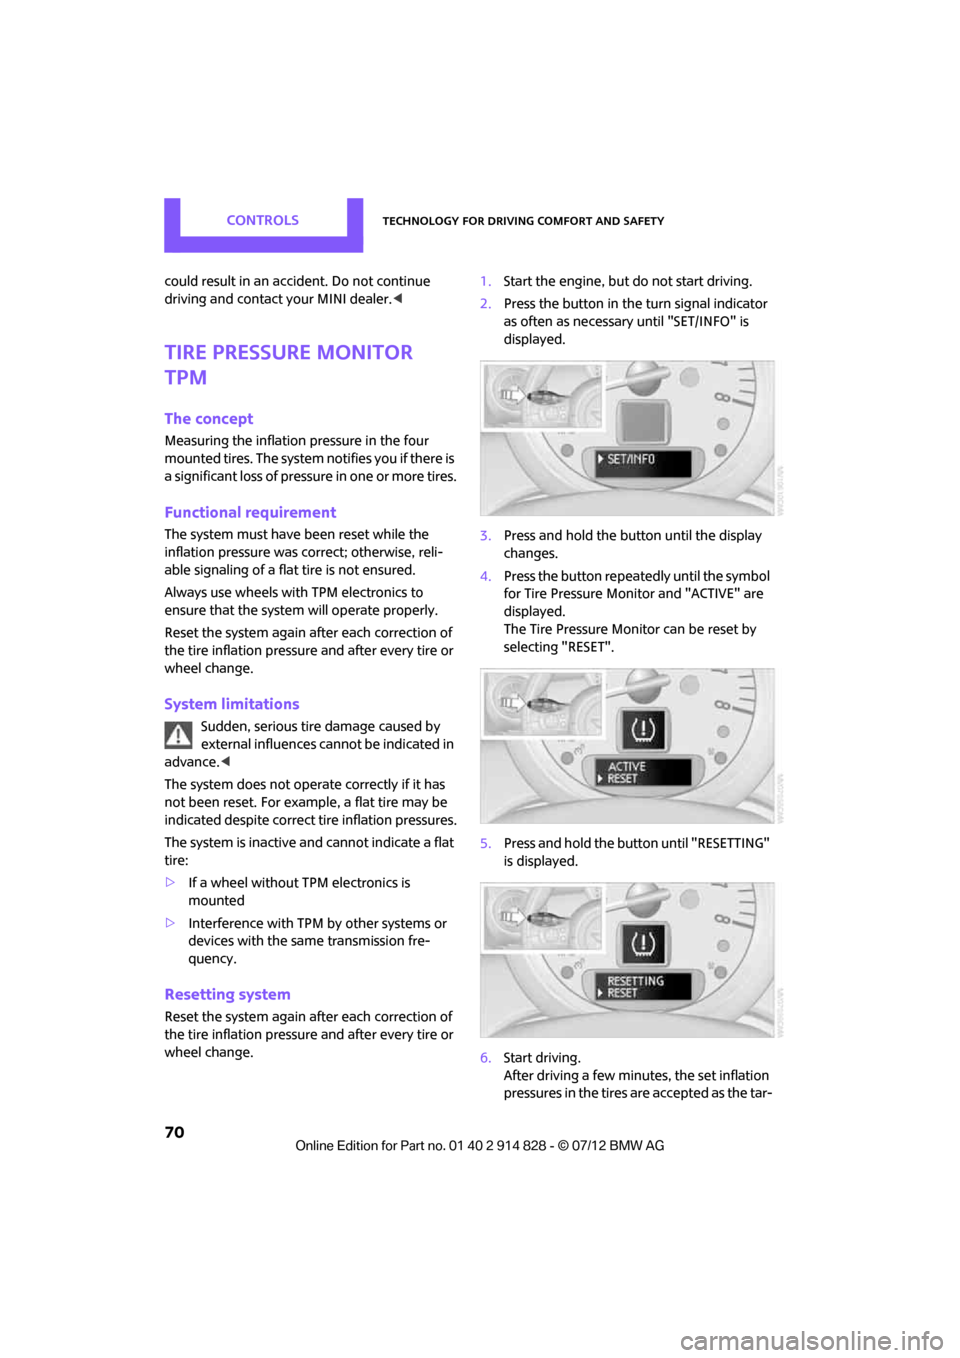
Start the engine, but do not start driving.
2. Press the button in the turn signal indicator
as often as necessary until "SET/INFO" is
displayed.
3. Press and hold the button until the display
changes.
4. Press the button repeatedly until the symbol
for Tire Pressure Monitor and "ACTIVE" are
displayed.
The Tire Pressure Monitor can be reset by
selecting "RESET".
5. Press and hold the button until "RESETTING"
is displayed.
6. Start driving.
After driving a few minutes, the set inflation
pressures in the tires are accepted as the tar-
Online Edition for Part no. 01 40 2 914 828 - \251 07/12 BMW AG
Page 72 of 201

Technology for driving comfort and safetyCONTROLS
71
get values to be monitored. The system
reset is completed during your drive, and
can be interrupted at any time. When driving
resumes, the reset is continued automati-
cally. The indicator lamp goes out after the
system reset is completed.
Message with low tire inflation pressure
The warning lamps come on in yellow
and red. An acoustic signal also sounds.
> There is a flat tire or substantial loss in
tire pressure in the displayed tire.
> The system was not reset after a wheel
change and thus issues a warning based on
the inflation pressures initialized last.
1. Reduce speed and stop the vehicle with cau-
tion. Avoid sudden braking and steering
maneuvers.
2. Check whether the vehicle is equipped with
normal tires or with run-flat tires.
Run-flat tires, refer to page 143, are identi-
fied by a circular symbol containing the let-
ters RSC on the tire sidewall.
When a low inflation pressure is reported, the
Dynamic Stability Control DSC is activated.
Actions in the event of a flat tire
Normal tires
1. Identify the damaged tire.
To do so, check the inflation pressure in all
four tires. The inflation pressure display of
the Mobility Kit, page 160, can be used for
this purpose.
If the inflation pressure is correct in all four
tires, then the Tire Pressure Monitor may not
have been reset. The system must then be
reset.
If it is not possible to identify the damaged
tire, contact your MINI dealer.
2. Use the Mobility Kit to remedy the flat tire on
the damaged wheel, refer to page 160. The use of tire sealant, e.g. Mobility Kit, can
damage the TPM wheel electronics. In this
case, have the electronics checked and
replaced if necessary at your earliest oppor-
tunity.
Run-flat tires
You can continue driving with a damaged tire at
speeds up to 50 mph/80 km/h.
If the vehicle is not equipped with run-flat
tires, do not continue driving; continuing
to drive can result in serious accidents. <
Continued driving with a flat tire
When driving with a damaged tire:
1.Avoid sudden braking and steering maneu-
vers.
2. Do not exceed a speed of 50 mph or
80 km/h.
3. At the next opportunity, check the air pres-
sure in all four tires.
If the inflation pressure is correct in all four
tires, then the Tire Pressure Monitor may not
have been reset. The system must then be
reset.
Possible driving distance with complete loss of
tire inflation pressure:
The distance it is possible to drive depends on
the load and the stress on the vehicle while
driving.
With an average load, it may be possible to drive
for approx. 50 miles/80 km.
When driving with damage d tires, the handling
characteristics change, e.g. the vehicle will skid
sooner when braking, braking distances will be
longer, or self-steering response will change.
Adapt your driving style accordingly. Avoid turn-
ing abruptly and driving over obstacles such as
curbs, potholes, etc.
Since the possible driving distance depends to a
considerable degree on the strain exerted on
the vehicle while driving, it can be shorter or,
with a gentle dr iving style, can also be longer,
Online Edition for Part no. 01 40 2 914 828 - \251 07/12 BMW AG
Page 73 of 201
CONTROLSTechnology for driving comfort and safety
72
depending on the speed, road condition, exter-
nal temperature, vehicle load, etc.
Drive cautiously and do not exceed a
speed of 50 mph/80 km/h.
A loss of tire inflation pressure results in a
change in the handling characteristics, e.g.
reduced lane stability during braking, a longer
braking distance and alte red self-steering prop-
erties. <
Vibrations or loud no ises while driving can
indicate complete failure of the tire.
Reduce your speed and bring the vehicle to a
stop; otherwise, pieces of tire may come off,
which could result in an accident. Do not con-
tinue driving and contac t your MINI dealer.<
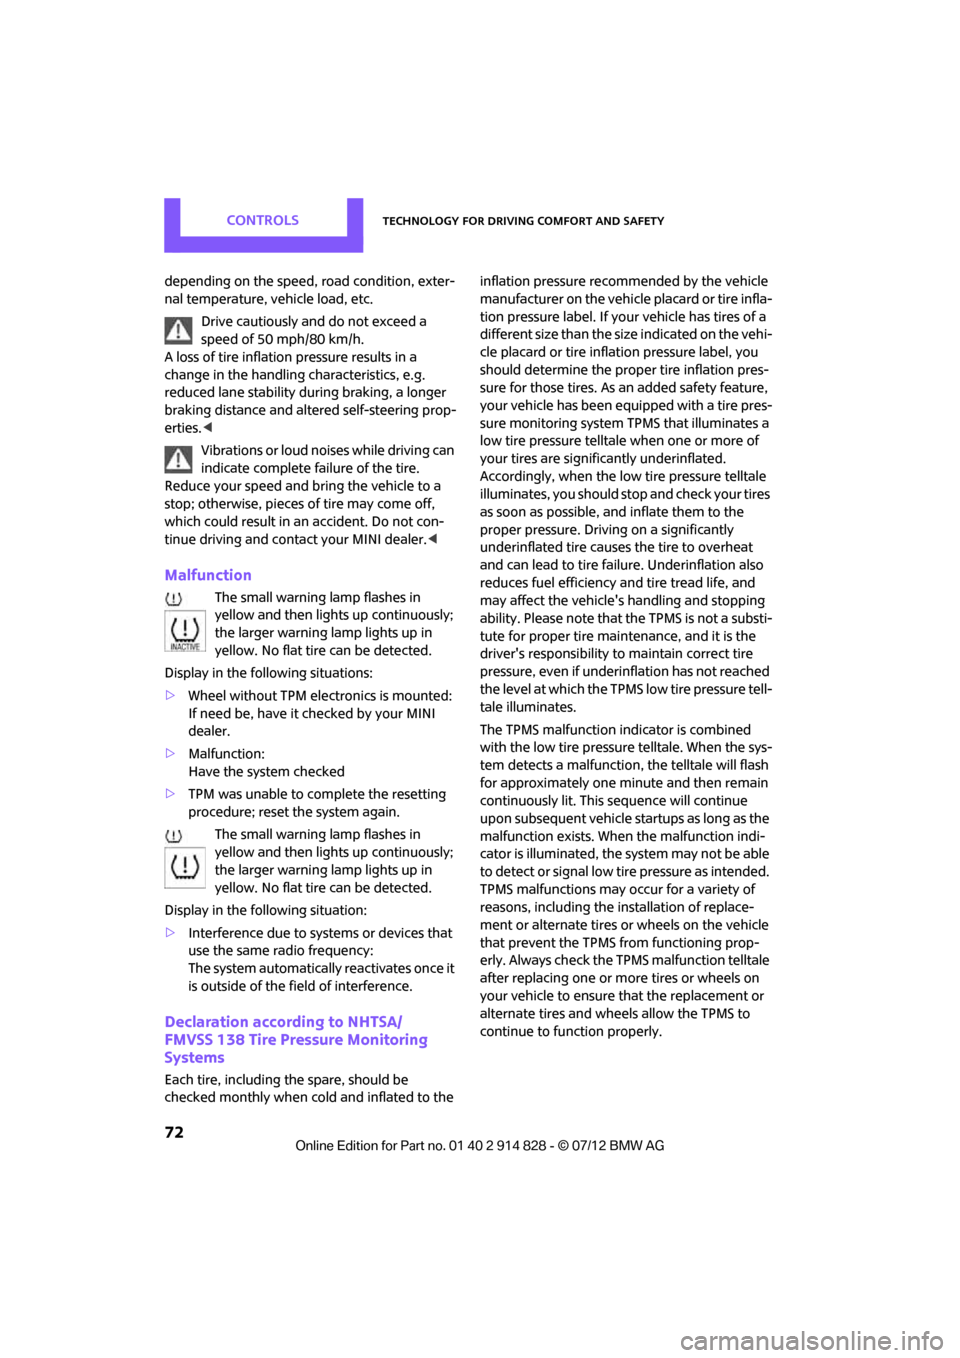
Malfunction
The small warning lamp flashes in
yellow and then lights up continuously;
the larger warning lamp lights up in
yellow. No flat tire can be detected.
Display in the following situations:
> Wheel without TPM electronics is mounted:
If need be, have it checked by your MINI
dealer.
> Malfunction:
Have the system checked
> TPM was unable to complete the resetting
procedure; reset the system again.
The small warning lamp flashes in
yellow and then lights up continuously;
the larger warning lamp lights up in
yellow. No flat tire can be detected.
Display in the following situation:
> Interference due to sy stems or devices that
use the same radio frequency:
The system automatically reactivates once it
is outside of the field of interference.
Declaration according to NHTSA/
FMVSS 138 Tire Pressure Monitoring
Systems
Each tire, including the spare, should be
checked monthly when cold and inflated to the inflation pressure recommended by the vehicle
manufacturer on the vehicle placard or tire infla-
tion pressure label. If yo
ur vehicle has tires of a
different size than the size indicated on the vehi-
cle placard or tire inflation pressure label, you
should determine the proper tire inflation pres-
sure for those tires. As an added safety feature,
your vehicle has been equipped with a tire pres-
sure monitoring system TPMS that illuminates a
low tire pressure telltal e when one or more of
your tires are significantly underinflated.
Accordingly, when the low tire pressure telltale
illuminates, you should st op and check your tires
as soon as possible, and inflate them to the
proper pressure. Driving on a significantly
underinflated tire causes the tire to overheat
and can lead to tire failure. Underinflation also
reduces fuel efficiency and tire tread life, and
may affect the vehicle's handling and stopping
ability. Please note that the TPMS is not a substi-
tute for proper tire maintenance, and it is the
driver's responsibility to maintain correct tire
pressure, even if underi nflation has not reached
the level at which the TPMS low tire pressure tell-
tale illuminates.
The TPMS malfunction indicator is combined
with the low tire pressure telltale. When the sys-
tem detects a malfunction, the telltale will flash
for approximately one minute and then remain
continuously lit. This sequence will continue
upon subsequent vehicle startups as long as the
malfunction exists. When the malfunction indi-
cator is illuminated, the system may not be able
to detect or signal low tire pressure as intended.
TPMS malfunctions may occur for a variety of
reasons, including the installation of replace-
ment or alternate tires or wheels on the vehicle
that prevent the TPMS from functioning prop-
erly. Always check the TP MS malfunction telltale
after replacing one or mo re tires or wheels on
your vehicle to ensure that the replacement or
alternate tires and wheels allow the TPMS to
continue to function properly.
Online Edition for Part no. 01 40 2 914 828 - \251 07/12 BMW AG
Page 78 of 201

LampsCONTROLS
77
Welcome lamps
If you leave the light switch in the low beam or
automatic headlamp control position when you
switch off the ignition, the parking lamps and
interior lamps come on for a certain time as soon
as the vehicle is unlocked.
Pathway lighting
If you activate the headlamp flasher after
switching off the ignition with the lamps
switched off, the lo w beams come on and
remain on for a certain time.
The setting is stored for the remote control in
use, refer to Personal Profile, page 22.
Setting the duration or deactivating the
function
1. Switch on the ignition, refer to page 45.
2. Press the button in the turn signal indicator
as often as necessary until "SET/INFO" is
displayed.
3. Press and hold the butt on until the display
changes.
4. Press the button as of ten as necessary until
the symbol and "SET" are displayed. 5.
Press and hold the butt on until the display
changes.
6. Press the button repeatedly until the display
shows the illustrated symbol.
7. Press and hold the butt on until the display
changes.
8. Press the button to select:
>
The function is deactivated.
> ...
Select the corresponding period, e.g.,
40 seconds.
9. Press the button for a longer period.
The setting is stored.
Daytime running lights
The light switch can remain in the lamps off,
parking lamps or automatic headlamp control
position.
In the lamps off position, the exterior lighting is
automatically switched of f after the vehicle is
parked. In the parking lamps position, the park-
ing lamps will stay on after the ignition is
switched off.
Switch on the parking lamps separately if
needed.
Activating/deactivating daytime
running lights
The setting is stored for the remote control in
use, refer to Personal Profile, page 22.
Online Edition for Part no. 01 40 2 914 828 - \251 07/12 BMW AG
Page 79 of 201

CONTROLSLamps
78
1.Switch on the ignition, refer to page 45.
2. Press the button in the turn signal indicator
as often as necessary until "SET/INFO" is
displayed.
3. Press and hold the button until the display
changes.
4. Press the button as often as necessary until
the symbol and "SET" are displayed.
5. Press and hold the button until the display
changes.
6. Press the button repeatedly until the display
shows the illustra ted symbol, arrow.
7. Press and hold the button until the display
changes.
8. Press the button to select:
>
Daytime running lights activated. >
Daytime running lights deactivated.
9. Press the button for a longer period.
The setting is stored.
Adaptive Light Control
The concept
Adaptive Light Control is a variable headlamp
control system that enables better illumination
of the road surface. Depending on the steering
angle and other parameters, the light from the
headlamp follows the course of the road.
Activating Adaptive Light Control
With the ignition switched on, turn the light
switch to position 3, refer to page 76.
Standstill function: to avoid blinding oncoming
traffic, the Adaptive Light Control does not pivot
toward the driver's side when the vehicle is at a
standstill.
In reverse, the Adaptive Light Control is not acti-
vated.
Malfunction
A message is displayed.
The Adaptive Light Control is malfunctioning or
failed. Have the system checked as soon as pos-
sible.
High beams/
roadside parking lamps
1 Turn signals/roadside parking lamps
2 Switching on high beams
Online Edition for Part no. 01 40 2 914 828 - \251 07/12 BMW AG
Page 85 of 201
CONTROLSClimate
84
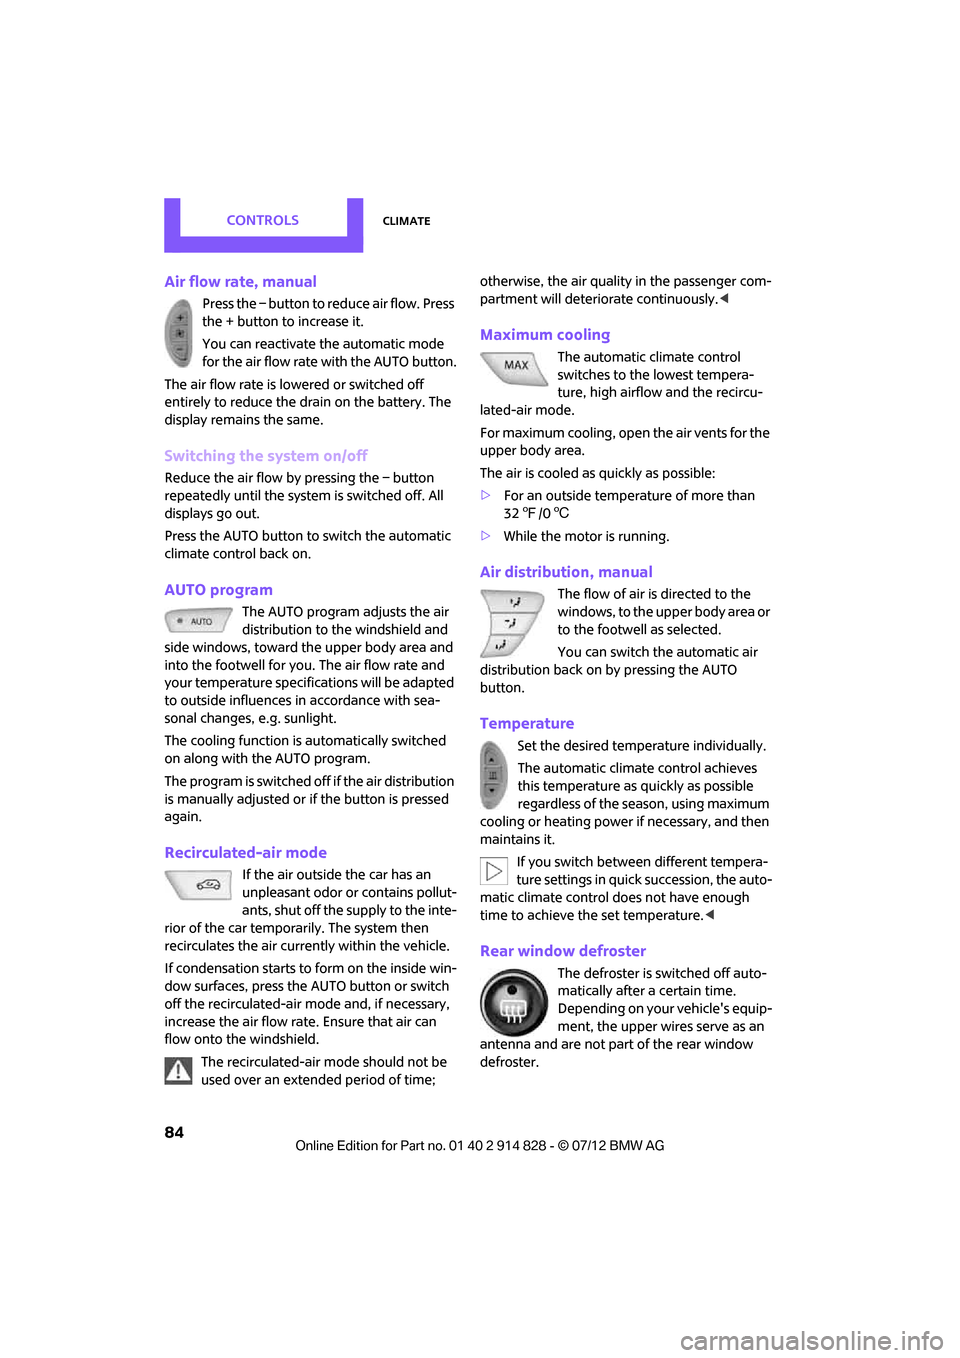
Air flow rate, manual
Press the – button to reduce air flow. Press
the + button to increase it.
You can reactivate the automatic mode
for the air flow rate with the AUTO button.
The air flow rate is lo wered or switched off
entirely to reduce the drain on the battery. The
display remains the same.
Switching the system on/off
Reduce the air flow by pressing the – button
repeatedly until the system is switched off. All
displays go out.
Press the AUTO button to switch the automatic
climate control back on.
AUTO program
The AUTO program adjusts the air
distribution to the windshield and
side windows, toward the upper body area and
into the footwell for you. The air flow rate and
your temperature specifications will be adapted
to outside influences in accordance with sea-
sonal changes, e.g. sunlight.
The cooling function is automatically switched
on along with the AUTO program.
The program is switched off if the air distribution
is manually adjusted or if the button is pressed
again.
Recirculated-air mode
If the air outside the car has an
unpleasant odor or contains pollut-
ants, shut off the supply to the inte-
rior of the car temporarily. The system then
recirculates the air currently within the vehicle.
If condensation starts to form on the inside win-
dow surfaces, press the AUTO button or switch
off the recirculated-air mode and, if necessary,
increase the air flow rate. Ensure that air can
flow onto the windshield.
The recirculated-air mode should not be
used over an extended period of time; otherwise, the air quality in the passenger com-
partment will deteriorate continuously.
<
Maximum cooling
The automatic climate control
switches to the lowest tempera-
ture, high airflow and the recircu-
lated-air mode.
For maximum cooling, open the air vents for the
upper body area.
The air is cooled as quickly as possible:
> For an outside temperature of more than
327 /06
> While the motor is running.
Air distribution, manual
The flow of air is directed to the
windows, to the upper body area or
to the footwell as selected.
You can switch the automatic air
distribution back on by pressing the AUTO
button.
Temperature
Set the desired temperature individually.
The automatic climate control achieves
this temperature as quickly as possible
regardless of the season, using maximum
cooling or heating power if necessary, and then
maintains it.
If you switch between different tempera-
ture settings in quick succession, the auto-
matic climate control does not have enough
time to achieve the set temperature. <
Rear window defroster
The defroster is switched off auto-
matically after a certain time.
Depending on your vehicle's equip-
ment, the upper wires serve as an
antenna and are not part of the rear window
defroster.
Online Edition for Part no. 01 40 2 914 828 - \251 07/12 BMW AG
Page 86 of 201
ClimateCONTROLS
85
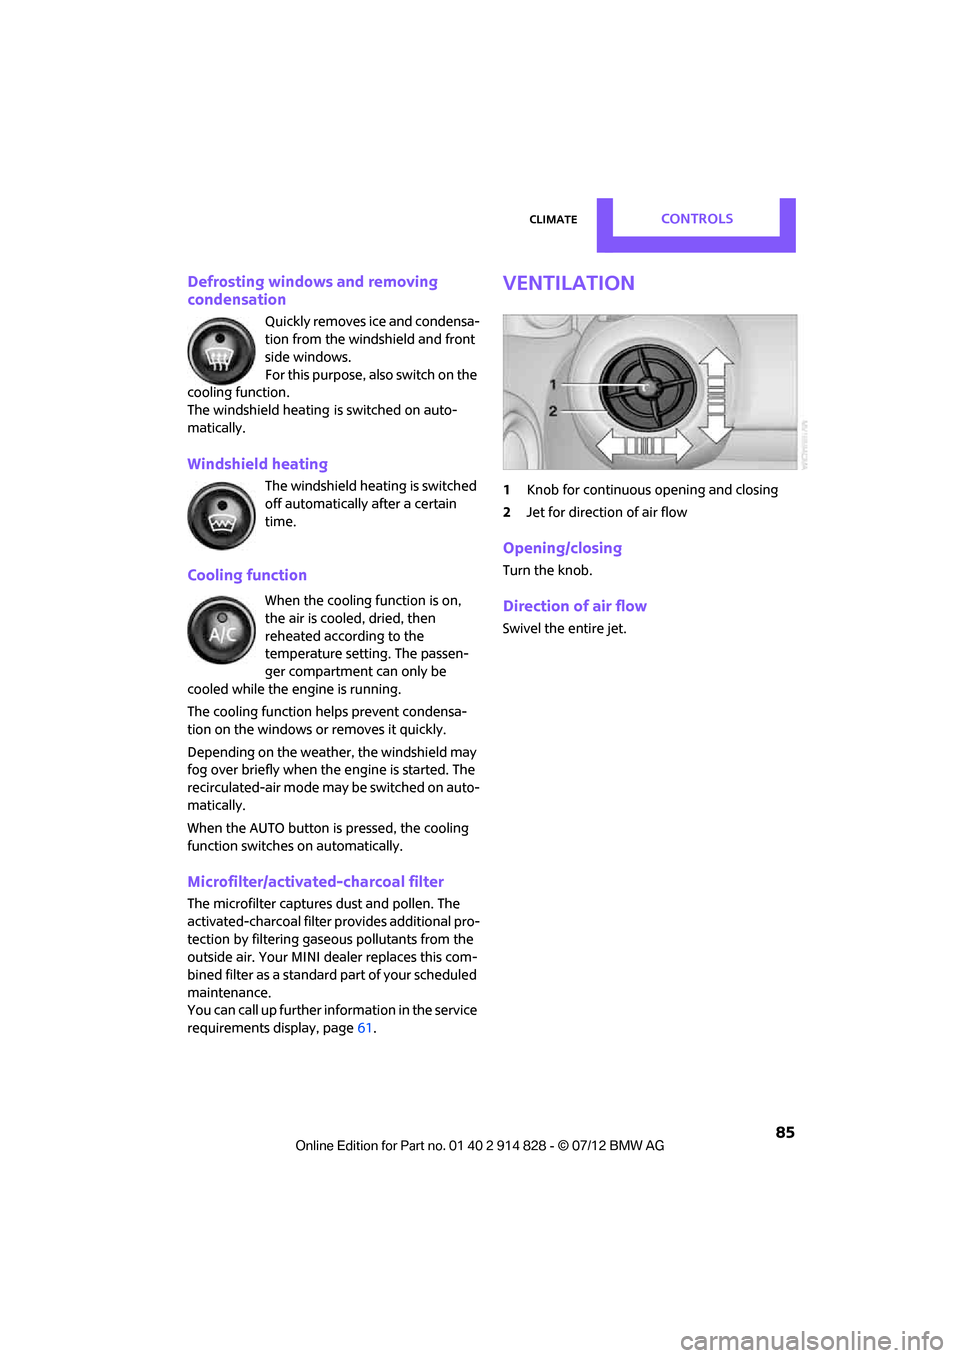
Defrosting windows and removing
condensation
Quickly removes ice and condensa-
tion from the windshield and front
side windows.
For this purpose, also switch on the
cooling function.
The windshield heating
is switched on auto-
matically.
Windshield heating
The windshield heating is switched
off automatically after a certain
time.
Cooling function
When the cooling function is on,
the air is cooled, dried, then
reheated according to the
temperature setting. The passen-
ger compartment can only be
cooled while the engine is running.
The cooling function helps prevent condensa-
tion on the windows or removes it quickly.
Depending on the weather, the windshield may
fog over briefly when the engine is started. The
recirculated-air mode may be switched on auto-
matically.
When the AUTO button is pressed, the cooling
function switches on automatically.
Microfilter/activated-charcoal filter
The microfilter captures dust and pollen. The
activated-charcoal filter provides additional pro-
tection by filtering gase ous pollutants from the
outside air. Your MINI dealer replaces this com-
bined filter as a standard part of your scheduled
maintenance.
You can call up further information in the service
requirements display, page 61.
Ventilation
1 Knob for continuous opening and closing
2 Jet for direction of air flow
Opening/closing
Turn the knob.
Direction of air flow
Swivel the entire jet.
Online Edition for Part no. 01 40 2 914 828 - \251 07/12 BMW AG
Page 89 of 201

CONTROLSPractical interior accessories
88
press the button on the hand-held transmit-
ter for 2 seconds and release several times.
Operation
Before using the integrated universal
remote control, always inspect the imme-
diate area to make certain that no people,
animals or objects are within the travel range of
the device.
Comply also with the safe ty instructions supplied
with the original hand-held transmitter. <
The device, for example a garage door, can be
operated while the engine is running or when
the ignition is on by using the button on the
rearview mirror. In addition, while within the
reception range of the device, press the button
until the function is deleted. The LED on the
rearview mirror is constant ly on while the signal
is being transmitted.
Deleting stored functions
Press and hold the right and left buttons on the
rearview mirror for approx. 20 seconds until the
LED on the rearview mirror starts flashing
quickly. All stored functions are deleted. The
functions can not be deleted individually.
Digital compass
1Setting button on the back of the mirror
2 Display
The cardinal or ordinal direction in which the
vehicle is moving is shown on the display.
Operating principle
By pressing the setting button with a thin, sharp
object, e.g., a pen or a similar object, various
functions can be called up. The following setting
options are displayed one after the other,
depending on how long the setting button is
pressed down:
> Quick press: display switches on/off
> 3 to 6 seconds: compass zone setting
> 6 to 9 seconds: compass calibration
> 9 to 12 seconds: left/right-hand drive setting
> 12 to 15 seconds: setting the language
Setting the compass zones
Set the appropriate compass zone on your
vehicle so that the compass operates properly;
see world map with compass zones.
To set the compass zone s, press the setting
button for approx. 3-4 seconds. The number of
the compass zones that have been set are
shown on the display.
To change the zone sett ing, quickly press the
setting button as often as necessary until the
number of the compass zone for your location is
displayed.
The compass is again ready to use after approx.
10 seconds.
Online Edition for Part no. 01 40 2 914 828 - \251 07/12 BMW AG
Page 90 of 201

Practical interior accessoriesCONTROLS
89
Calibrating the digital compass
The digital compass must be calibrated in the
following situations:
>The incorrect cardinal direction is displayed.
> The direction that is displayed does not
change even though the driving direction
changes.
> Not all cardinal directions are displayed.
Procedure
1.Make sure that there are no large metal
objects or overhead power lines near your
vehicle, and that you have enough space to
drive in circles.
2. Set the compass zone th at currently applies.
3. Press the setting button approx.
6-7 seconds to call up C. Then drive in a
complete circle at a maximum speed of
4 mph/7 km/h.
If the calibration is successful, the C will be
replaced by the directions.
Setting right/left-hand drive
Your digital compass is already set to right-hand
drive or left-hand drive at the factory, depend-
ing upon your vehicle.
Setting the language
You can set the language on the display:
Press the setting button for approx.
12-13 seconds. Briefly press the setting button
again to switch between English "E" and
German "O".
The setting is au tomatically stored after approx.
10 seconds.
Online Edition for Part no. 01 40 2 914 828 - \251 07/12 BMW AG
Page 111 of 201
ENTERTAINMENTRadio MINI Boost CD
110
Or, by using the knob on the right:
1.Press the button.
2. Turn the knob on the right until the desired
frequency is reached.
Automatically updating strongest
stations
Press the correspon ding button until
"Autostore" is displayed.
Several seconds may go by until the stations are
stored and one of the stations can be heard.
If you do not wish to use the Autostore
feature, you can store six stations of your
choice in the FMA or AMA memory levels.<
Playing and selecting stations, scan
You can listen to all the receivable stations for
approx. 10 seconds.
Press the button.
Interrupting the scan an d selecting a station:
Press the button.
When a traffic information station is selected,
only traffic information broadcasts will be
played.
Storing and recalling stations
Memory presets
Your radio can store 30 stations:
> FM1, FM2: six stations each of your choice
> AM: six stations each of your choice
> FMA/AMA: the six stro ngest stations auto-
matically
Storing a station
1.
Press the corresponding button as
often as necessary until the desired fre-
quency range is selected.
2. Select station. 3.
… Press and hold the
desired button until th e station can again be
heard after a short interruption.
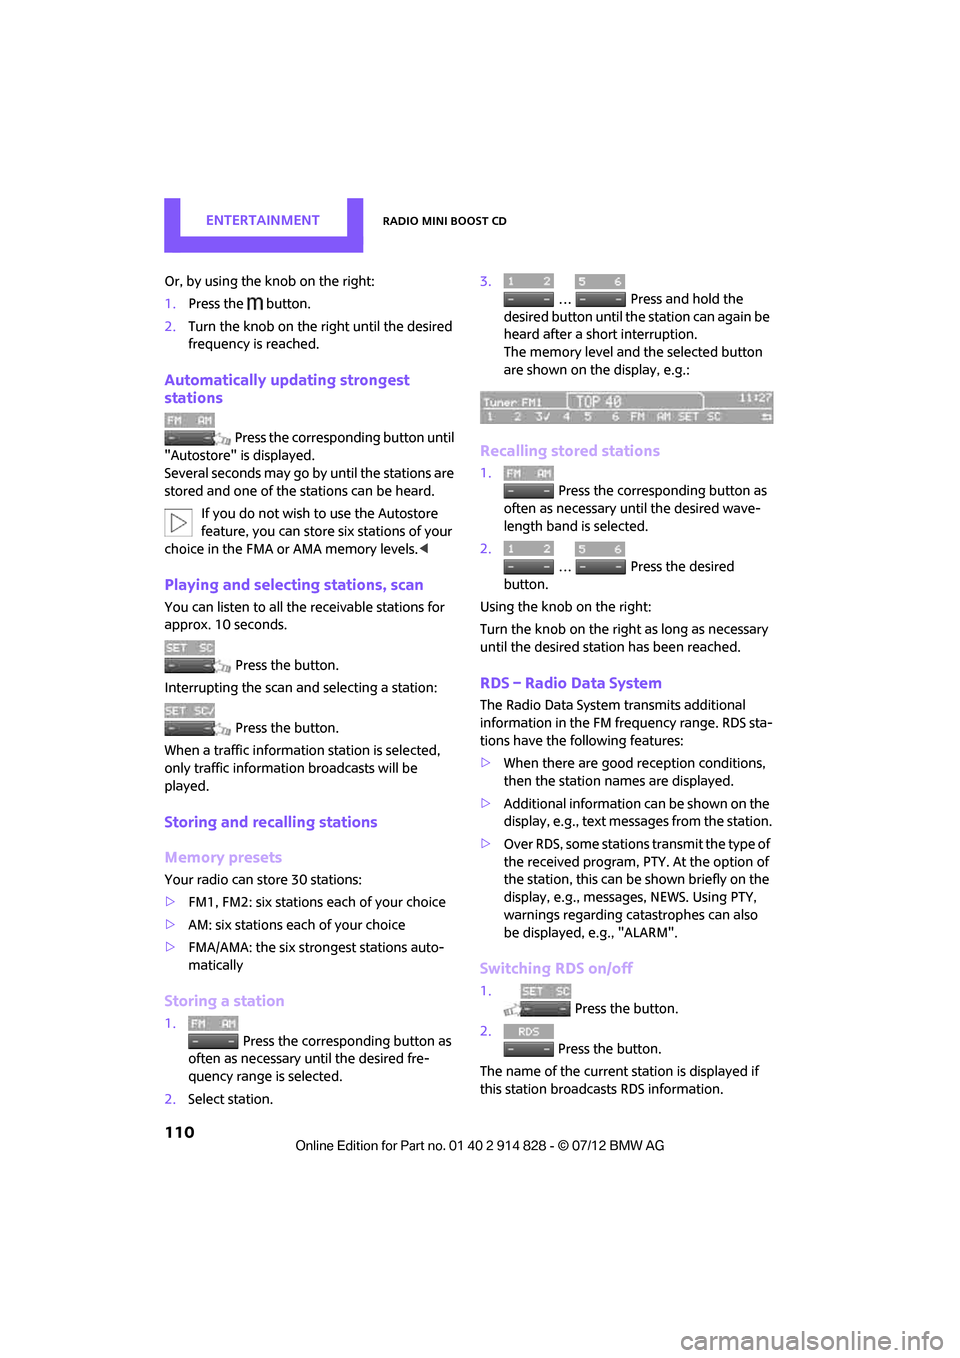
The memory level and the selected button
are shown on the display, e.g.:
Recalling stored stations
1. Press the corresponding button as
often as necessary until the desired wave-
length band is selected.
2.
… Press the desired
button.
Using the knob on the right:
Turn the knob on the right as long as necessary
until the desired stat ion has been reached.
RDS – Radio Data System
The Radio Data System transmits additional
information in the FM frequency range. RDS sta-
tions have the following features:
>When there are good reception conditions,
then the station names are displayed.
> Additional information can be shown on the
display, e.g., text me ssages from the station.
> Over RDS, some stations transmit the type of
the received program, PTY. At the option of
the station, this can be shown briefly on the
display, e.g., message s, NEWS. Using PTY,
warnings regarding ca tastrophes can also
be displayed, e.g., "ALARM".
Switching RDS on/off
1. Press the button.
2. Press the button.
The name of the current station is displayed if
this station broadcasts RDS information.
Online Edition for Part no. 01 40 2 914 828 - \251 07/12 BMW AG