key MINI Countryman 2015 (Mini Connected) User Guide
[x] Cancel search | Manufacturer: MINI, Model Year: 2015, Model line: Countryman, Model: MINI Countryman 2015Pages: 283, PDF Size: 6.76 MB
Page 182 of 283
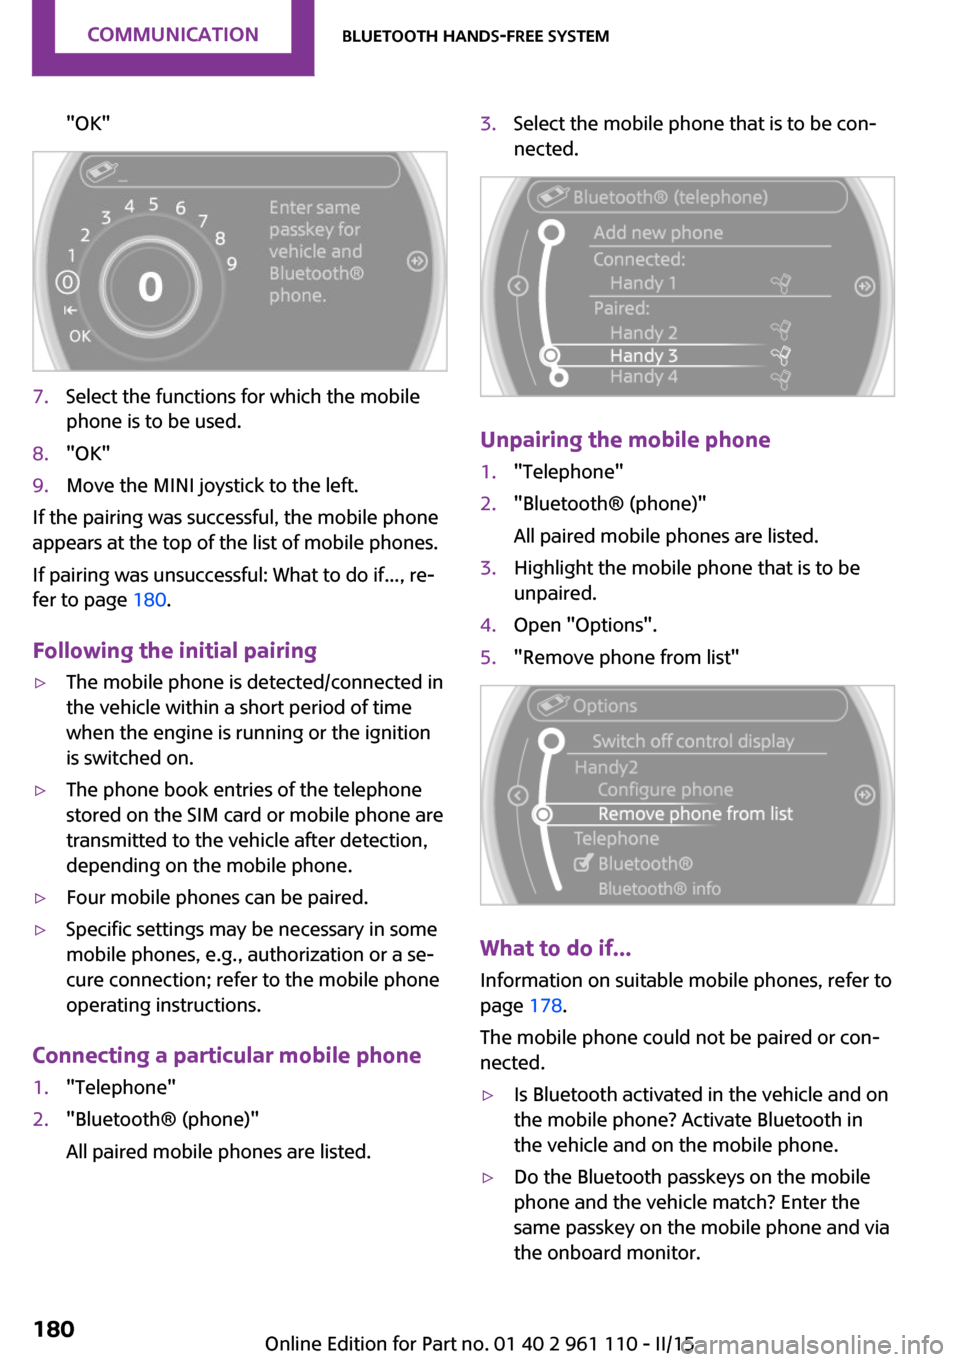
"OK"7.Select the functions for which the mobile
phone is to be used.8."OK"9.Move the MINI joystick to the left.
If the pairing was successful, the mobile phone
appears at the top of the list of mobile phones.
If pairing was unsuccessful: What to do if..., re‐
fer to page 180.
Following the initial pairing
▷The mobile phone is detected/connected in
the vehicle within a short period of time
when the engine is running or the ignition
is switched on.▷The phone book entries of the telephone
stored on the SIM card or mobile phone are
transmitted to the vehicle after detection,
depending on the mobile phone.▷Four mobile phones can be paired.▷Specific settings may be necessary in some
mobile phones, e.g., authorization or a se‐
cure connection; refer to the mobile phone
operating instructions.
Connecting a particular mobile phone
1."Telephone"2."Bluetooth® (phone)"
All paired mobile phones are listed.3.Select the mobile phone that is to be con‐
nected.
Unpairing the mobile phone
1."Telephone"2."Bluetooth® (phone)"
All paired mobile phones are listed.3.Highlight the mobile phone that is to be
unpaired.4.Open "Options".5."Remove phone from list"
What to do if...
Information on suitable mobile phones, refer to
page 178.
The mobile phone could not be paired or con‐
nected.
▷Is Bluetooth activated in the vehicle and on
the mobile phone? Activate Bluetooth in
the vehicle and on the mobile phone.▷Do the Bluetooth passkeys on the mobile
phone and the vehicle match? Enter the
same passkey on the mobile phone and via
the onboard monitor.Seite 180COMMUNICATIONBluetooth hands-free system180
Online Edition for Part no. 01 40 2 961 110 - II/15
Page 183 of 283
▷A multi-character passkey may be needed.▷Did it take longer than 30 seconds to enter
the passkey? Repeat the pairing procedure.▷Are too many Bluetooth devices connected
to the mobile phone or vehicle? Delete con‐
nections with other devices if necessary.▷The mobile phone is in power-save mode
or has only a limited remaining battery life.
Charge the mobile phone via the charging
cable.▷Depending on the mobile phone, it is possi‐
ble that only one mobile phone can be con‐
nected to the vehicle. Unpair the connected
mobile phone from the vehicle and pair
and connect only one mobile phone.
The mobile phone no longer reacts.
▷Switch the mobile phone off and on again.▷Is the ambient temperature too high or
low? Do not expose the mobile phone to
extreme environmental conditions.
No phone book entries or only some phone
book entries are displayed, or they are incom‐
plete.
▷Transmission of the phone book entries is
not yet complete.▷It is possible that only the phone book en‐
tries of the mobile phone or the SIM card
are transmitted.▷It may not be possible to display phone
book entries with special characters.▷The number of phone book entries to be
stored is too high.▷Is the data volume of the contact too large,
e. g., due to stored information such as
notes? Reduce the data volume of the con‐
tact.
The phone connection quality is poor.
▷The strength of the Bluetooth signal on the
mobile phone can be adjusted, depending
on the mobile phone.▷Place the mobile phone in the area of the
center console.If all points in this list have been checked and
the required function is still not available, con‐
tact Customer Relations or the service center.
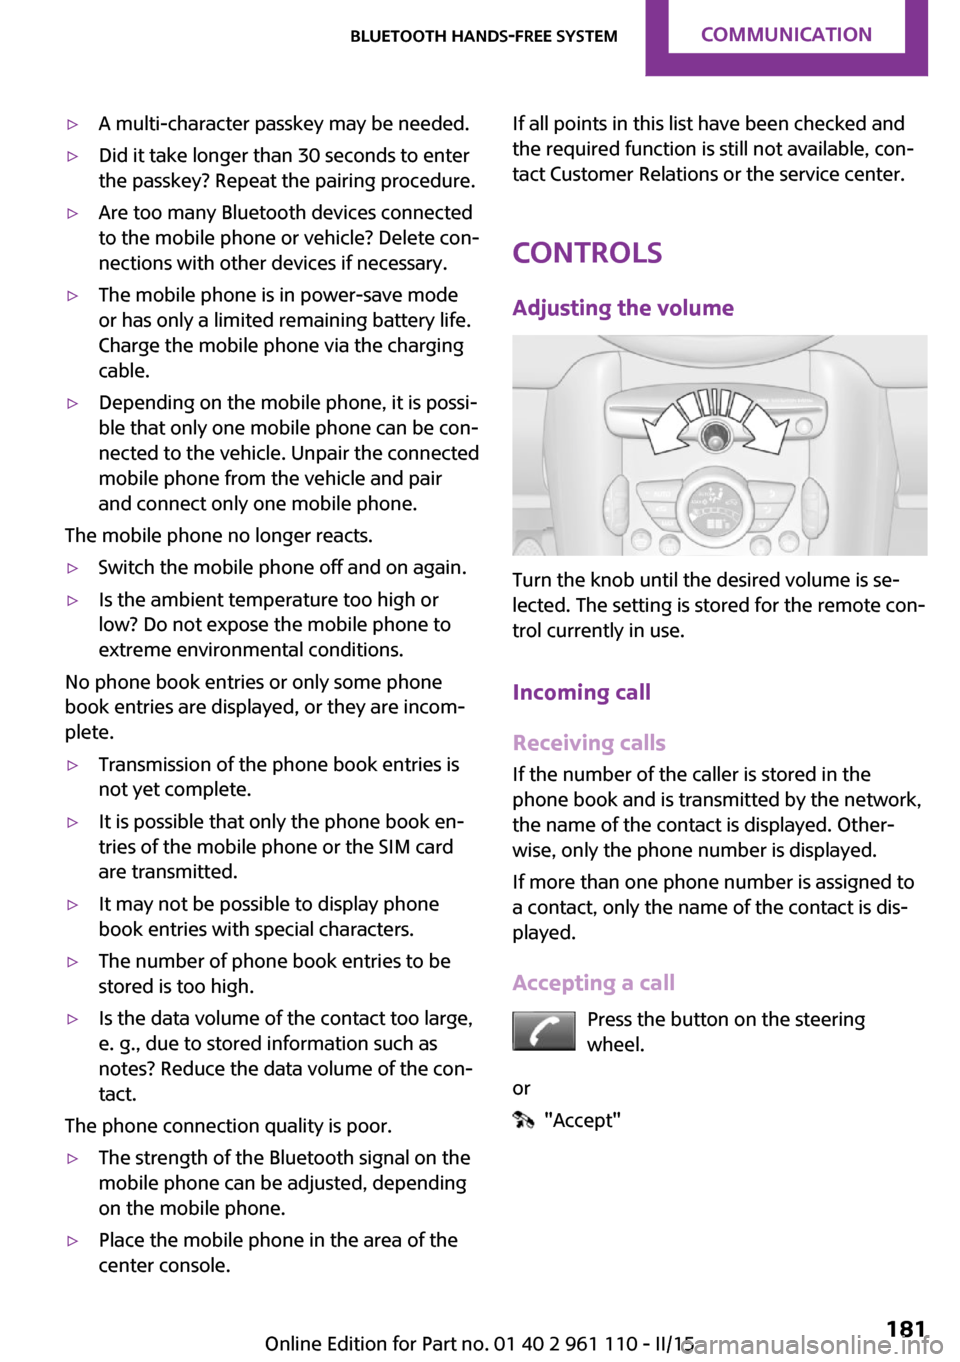
Controls Adjusting the volume
Turn the knob until the desired volume is se‐
lected. The setting is stored for the remote con‐
trol currently in use.
Incoming call
Receiving calls If the number of the caller is stored in the
phone book and is transmitted by the network,
the name of the contact is displayed. Other‐
wise, only the phone number is displayed.
If more than one phone number is assigned to
a contact, only the name of the contact is dis‐
played.
Accepting a call Press the button on the steering
wheel.
or
"Accept"
Seite 181Bluetooth hands-free systemCOMMUNICATION181
Online Edition for Part no. 01 40 2 961 110 - II/15
Page 185 of 283
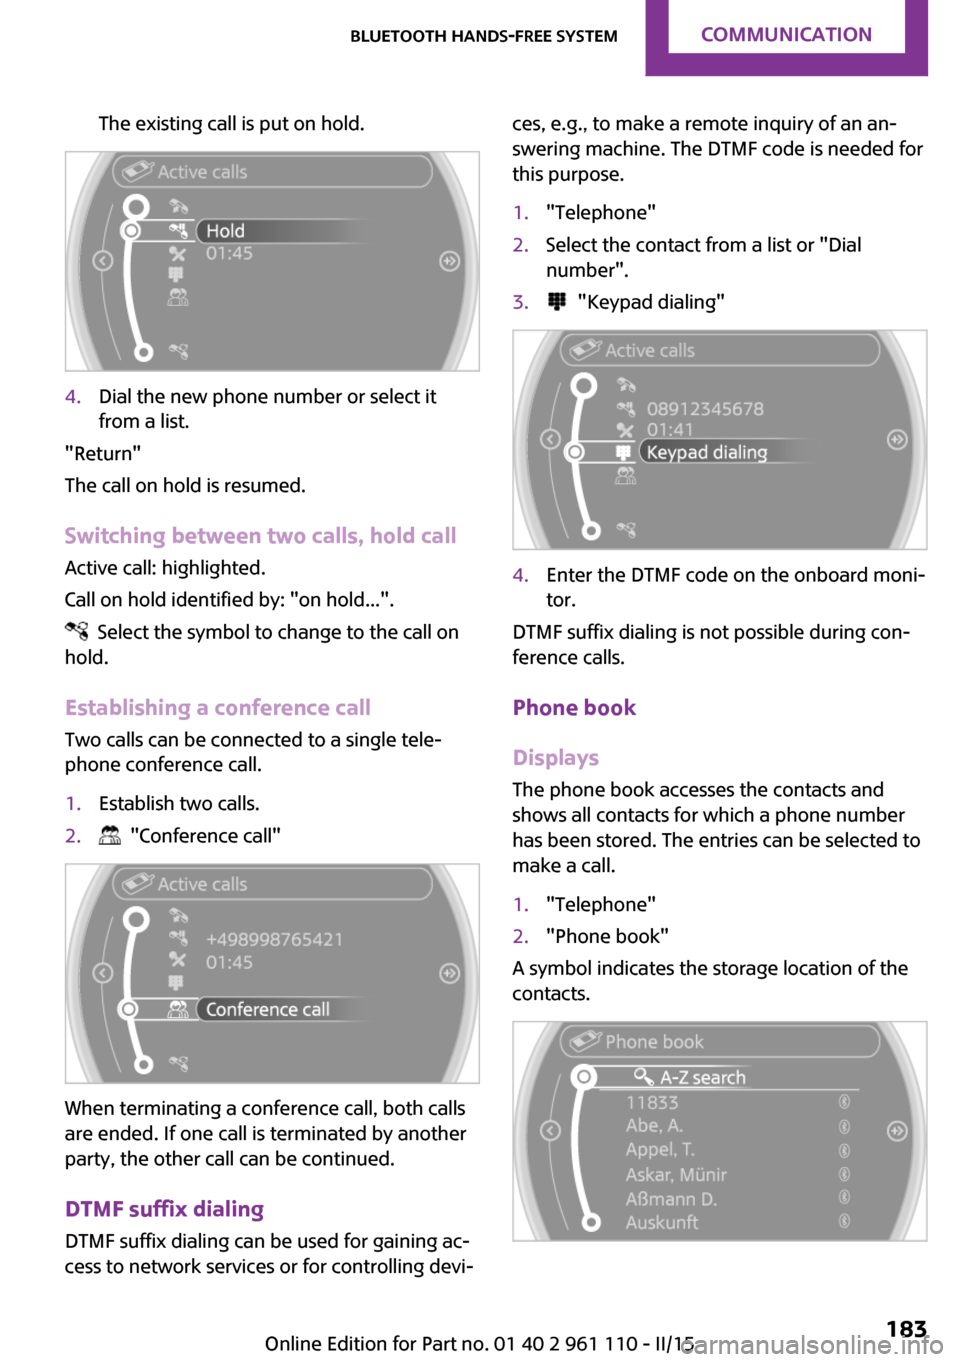
The existing call is put on hold.4.Dial the new phone number or select it
from a list.
"Return"
The call on hold is resumed.
Switching between two calls, hold call Active call: highlighted.
Call on hold identified by: "on hold...".
Select the symbol to change to the call on
hold.
Establishing a conference call
Two calls can be connected to a single tele‐
phone conference call.
1.Establish two calls.2. "Conference call"
When terminating a conference call, both calls
are ended. If one call is terminated by another
party, the other call can be continued.
DTMF suffix dialing
DTMF suffix dialing can be used for gaining ac‐
cess to network services or for controlling devi‐
ces, e.g., to make a remote inquiry of an an‐
swering machine. The DTMF code is needed for
this purpose.1."Telephone"2.Select the contact from a list or "Dial
number".3. "Keypad dialing"4.Enter the DTMF code on the onboard moni‐
tor.
DTMF suffix dialing is not possible during con‐
ference calls.
Phone book
Displays The phone book accesses the contacts and
shows all contacts for which a phone number
has been stored. The entries can be selected to
make a call.
1."Telephone"2."Phone book"
A symbol indicates the storage location of the
contacts.
Seite 183Bluetooth hands-free systemCOMMUNICATION183
Online Edition for Part no. 01 40 2 961 110 - II/15
Page 191 of 283
Do not operate a mobile phone that is con‐
nected to the vehicle on the mobile phone key‐
pad, as this may lead to a malfunction.
Notes
At high temperatures, the charging function of
the mobile phone may be limited and functions
may not be executed.
When using the mobile phone via the vehicle,
note the operating instructions of the mobile
phone.
Pairing/unpairing the
mobile phone
General information The following functions are available:▷Use of a mobile phone as a telephone.▷Use of a mobile phone as an additional te‐
lephone.▷Use of a mobile phone as an audio source.▷Use of an audio device as an audio source,
refer to page 171.
Requirements
▷The mobile phone is suitable, refer to
page 188.▷The mobile phone is ready for operation.▷Bluetooth is activated in the vehicle and on
the mobile phone.▷Bluetooth presettings may need to be
made on the mobile phone, e.g., for a con‐
nection without confirmation or visibility,
refer to the mobile phone operating in‐
structions.▷Deactivate Bluetooth audio if necessary.▷Compare the control number on the Control
Display with the control number on the mo‐
bile phone display. Confirm the control
number on the mobile phone and in the
vehicle.▷A number with at least four and a maxi‐
mum of 16 digits was defined as the Blue‐
tooth passkey. It is only required once for
pairing.▷The radio ready state is switched on.
Activating/deactivating Bluetooth
Bluetooth is not permitted everywhere. Comply
with all safety guidelines and regulations.
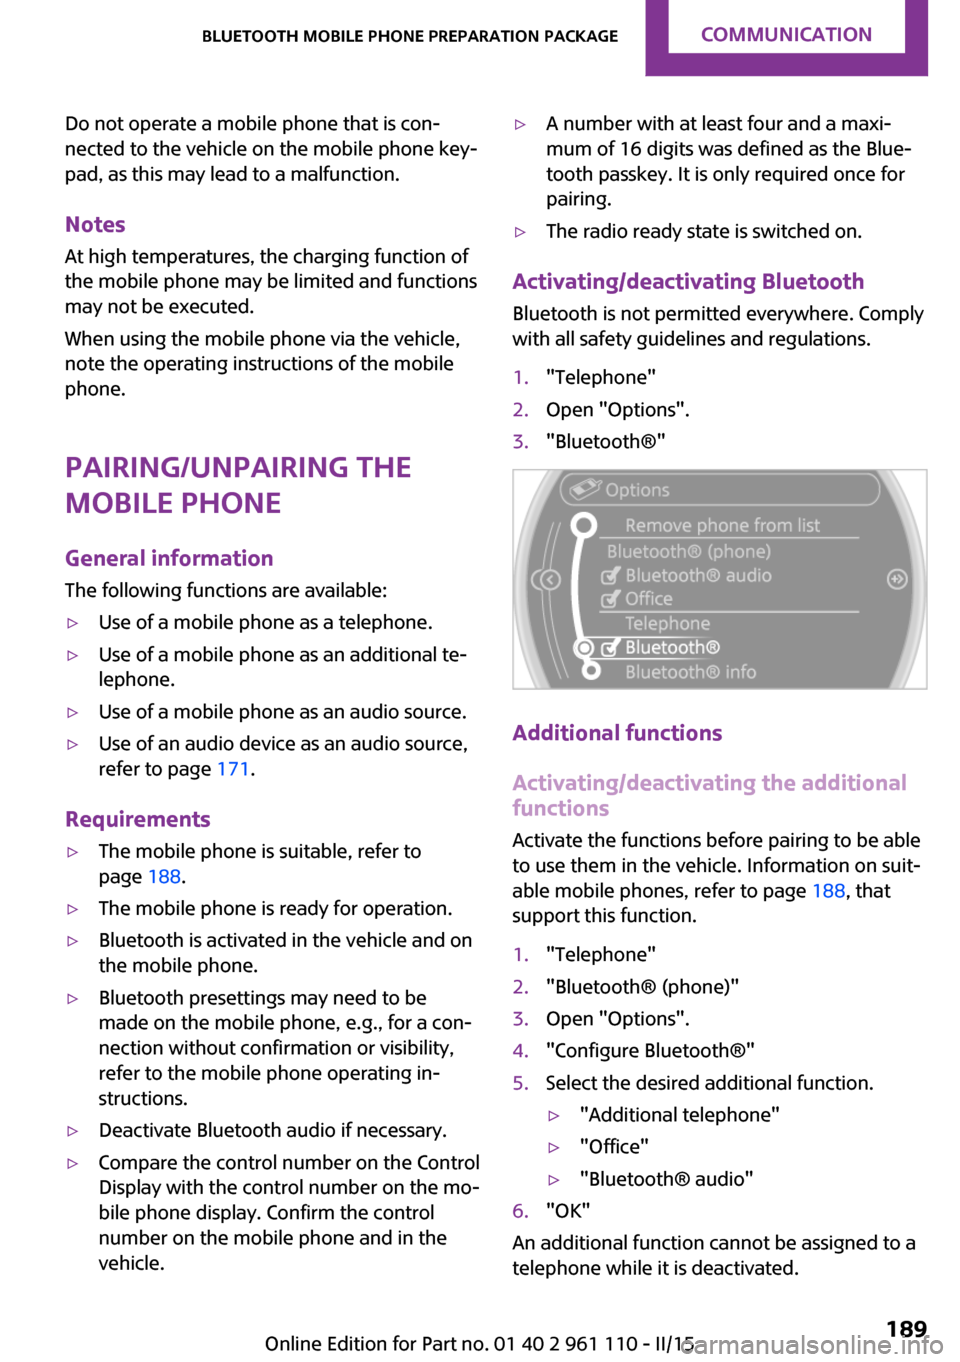
1."Telephone"2.Open "Options".3."Bluetooth®"
Additional functions
Activating/deactivating the additional functions
Activate the functions before pairing to be able
to use them in the vehicle. Information on suit‐
able mobile phones, refer to page 188, that
support this function.
1."Telephone"2."Bluetooth® (phone)"3.Open "Options".4."Configure Bluetooth®"5.Select the desired additional function.▷"Additional telephone"▷"Office"▷"Bluetooth® audio"6."OK"
An additional function cannot be assigned to a
telephone while it is deactivated.
Seite 189Bluetooth mobile phone preparation packageCOMMUNICATION189
Online Edition for Part no. 01 40 2 961 110 - II/15
Page 192 of 283
Additional telephoneA mobile phone can be used as an additional
telephone.
The additional telephone can be used to accept
incoming calls, refer to page 193. While a call is
active on the additional telephone, received
calls are displayed on the Control Display.
Office Contacts, appointments, tasks, notes, text mes‐
sages, and e-mails from the mobile phone are
transferred to the vehicle.
Bluetooth audio
A mobile phone can be used as an audio source.
"Bluetooth® audio"
To use a mobile phone in the vehicle as a tele‐
phone only, deactivate the function and recon‐
nect the mobile phone.
Pairing and connecting a mobile phone Pairing the mobile phone
To avoid becoming distracted and posing
an unnecessary hazard both to your own vehi‐
cle's occupants and to other road users, only
pair the mobile phone while the vehicle is sta‐
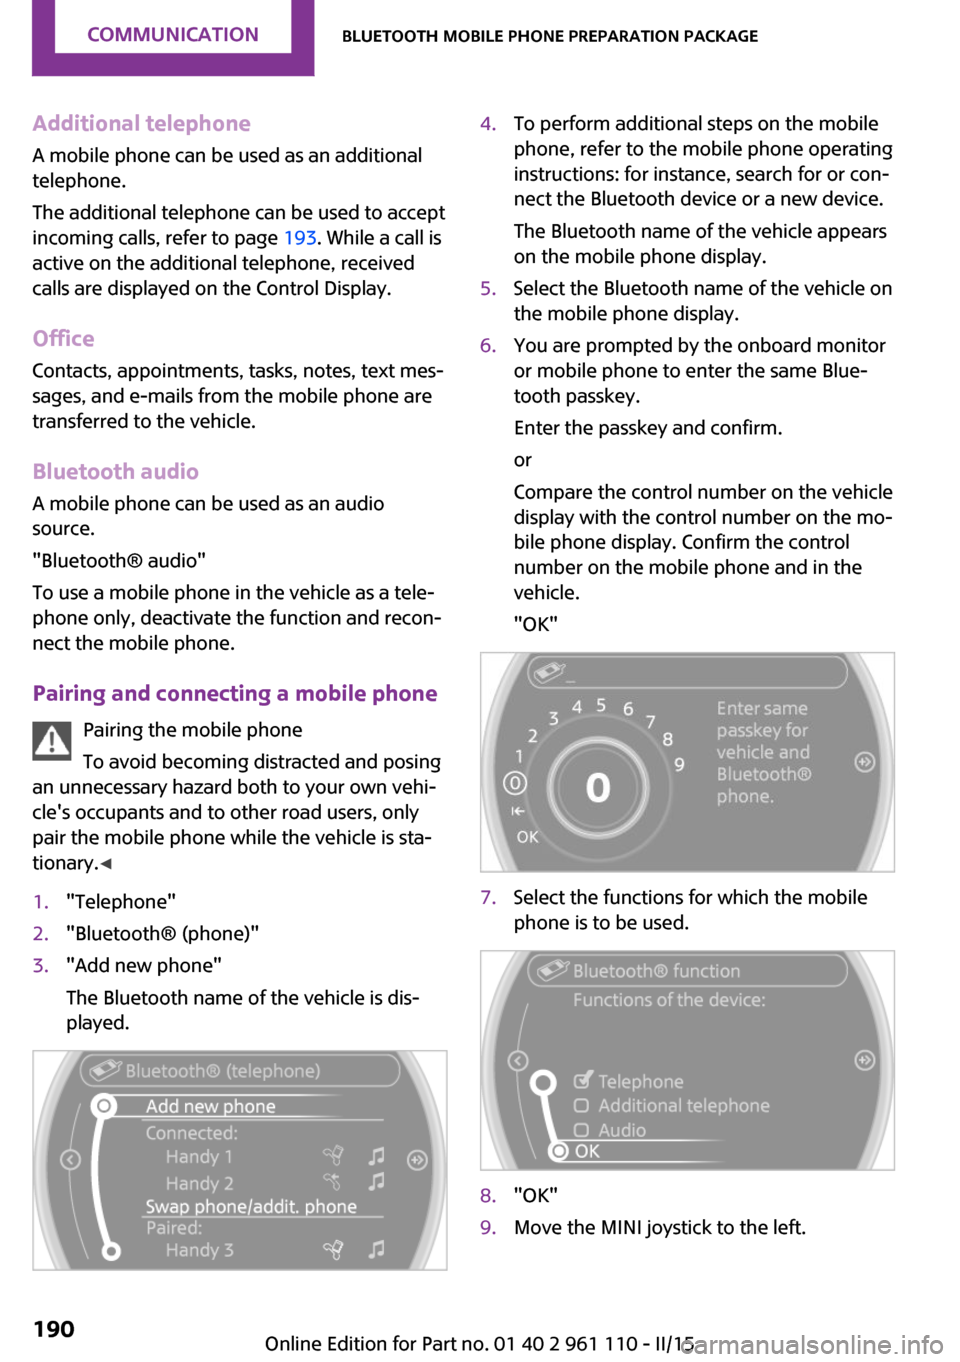
tionary. ◀1."Telephone"2."Bluetooth® (phone)"3."Add new phone"
The Bluetooth name of the vehicle is dis‐
played.4.To perform additional steps on the mobile
phone, refer to the mobile phone operating
instructions: for instance, search for or con‐
nect the Bluetooth device or a new device.
The Bluetooth name of the vehicle appears
on the mobile phone display.5.Select the Bluetooth name of the vehicle on
the mobile phone display.6.You are prompted by the onboard monitor
or mobile phone to enter the same Blue‐
tooth passkey.
Enter the passkey and confirm.
or
Compare the control number on the vehicle
display with the control number on the mo‐
bile phone display. Confirm the control
number on the mobile phone and in the
vehicle.
"OK"7.Select the functions for which the mobile
phone is to be used.8."OK"9.Move the MINI joystick to the left.Seite 190COMMUNICATIONBluetooth mobile phone preparation package190
Online Edition for Part no. 01 40 2 961 110 - II/15
Page 194 of 283
▷"Additional telephone"▷"Audio"7."OK"
If a function has already been assigned to an‐
other connected mobile phone, the function is
deactivated in that mobile phone and the mo‐
bile phone is unpaired when the function is as‐
signed to a new mobile phone.
Swapping the telephone and additional
telephone
If a phone and additional phone are connected
to the vehicle, the function can be swapped be‐
tween the two devices.
1."Telephone"2."Bluetooth® (phone)"3."Swap phone/addit. phone"
Using a mobile phone as an audio
source
An audio-capable mobile phone can be used as
an audio source. Activate Bluetooth audio, refer
to page 190.
Pair the mobile phone with the vehicle and
connect it, refer to page 190.
The mobile phone is used as the audio source,
provided that another device has not been con‐
nected as the audio source.
If another device has already been connected
as the audio source:
1.Pair the mobile phone with the vehicle and
connect it, refer to page 190.2."Use for audio"
The mobile phone is connected as an audio
source. The previous audio source is no lon‐
ger connected to the vehicle.
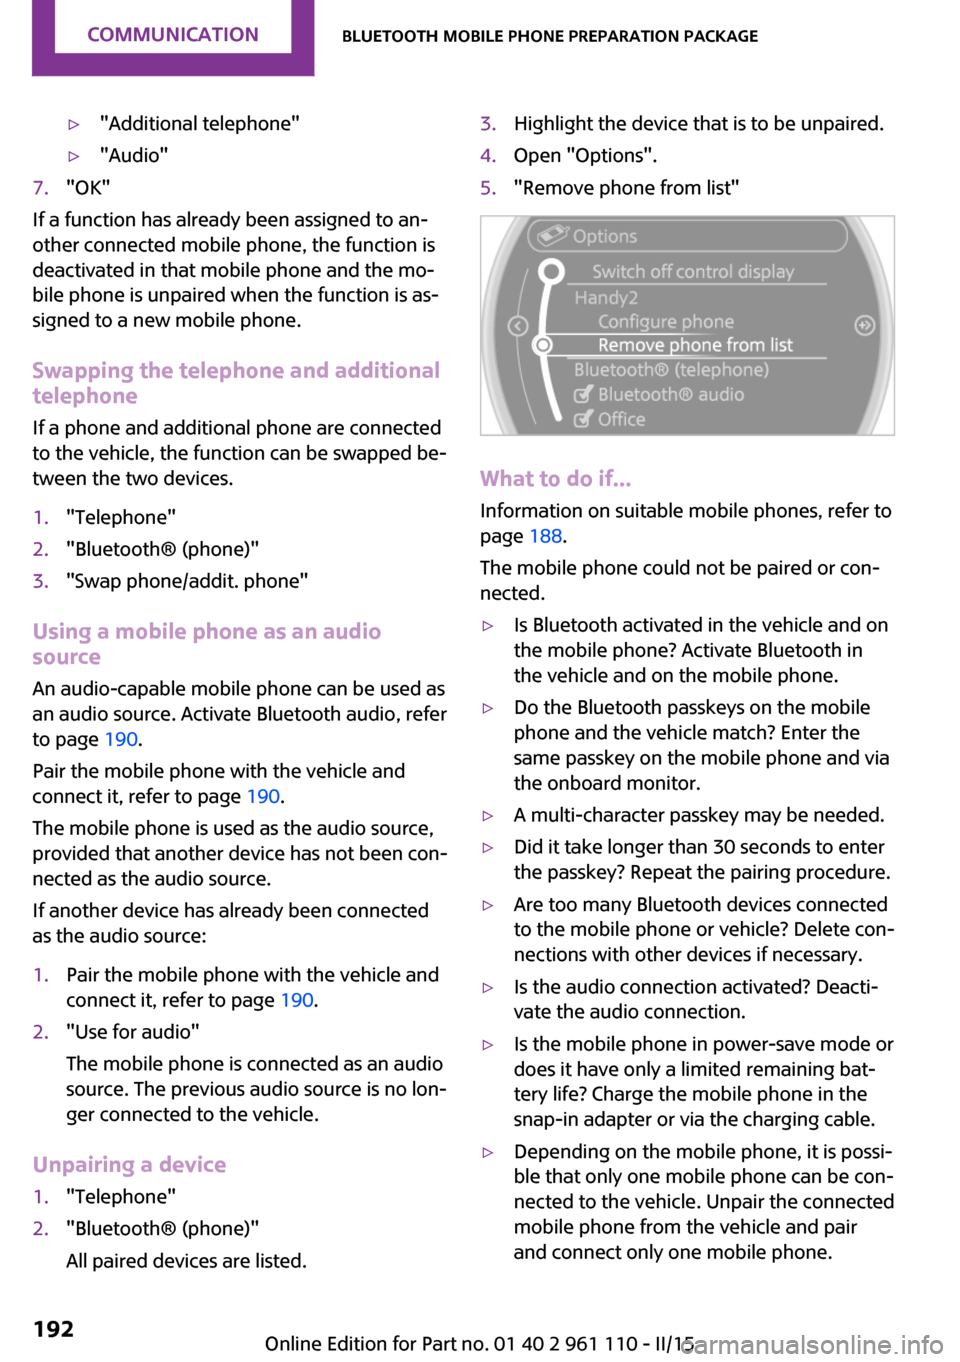
Unpairing a device
1."Telephone"2."Bluetooth® (phone)"
All paired devices are listed.3.Highlight the device that is to be unpaired.4.Open "Options".5."Remove phone from list"
What to do if...
Information on suitable mobile phones, refer to
page 188.
The mobile phone could not be paired or con‐
nected.
▷Is Bluetooth activated in the vehicle and on
the mobile phone? Activate Bluetooth in
the vehicle and on the mobile phone.▷Do the Bluetooth passkeys on the mobile
phone and the vehicle match? Enter the
same passkey on the mobile phone and via
the onboard monitor.▷A multi-character passkey may be needed.▷Did it take longer than 30 seconds to enter
the passkey? Repeat the pairing procedure.▷Are too many Bluetooth devices connected
to the mobile phone or vehicle? Delete con‐
nections with other devices if necessary.▷Is the audio connection activated? Deacti‐
vate the audio connection.▷Is the mobile phone in power-save mode or
does it have only a limited remaining bat‐
tery life? Charge the mobile phone in the
snap-in adapter or via the charging cable.▷Depending on the mobile phone, it is possi‐
ble that only one mobile phone can be con‐
nected to the vehicle. Unpair the connected
mobile phone from the vehicle and pair
and connect only one mobile phone.Seite 192COMMUNICATIONBluetooth mobile phone preparation package192
Online Edition for Part no. 01 40 2 961 110 - II/15
Page 198 of 283
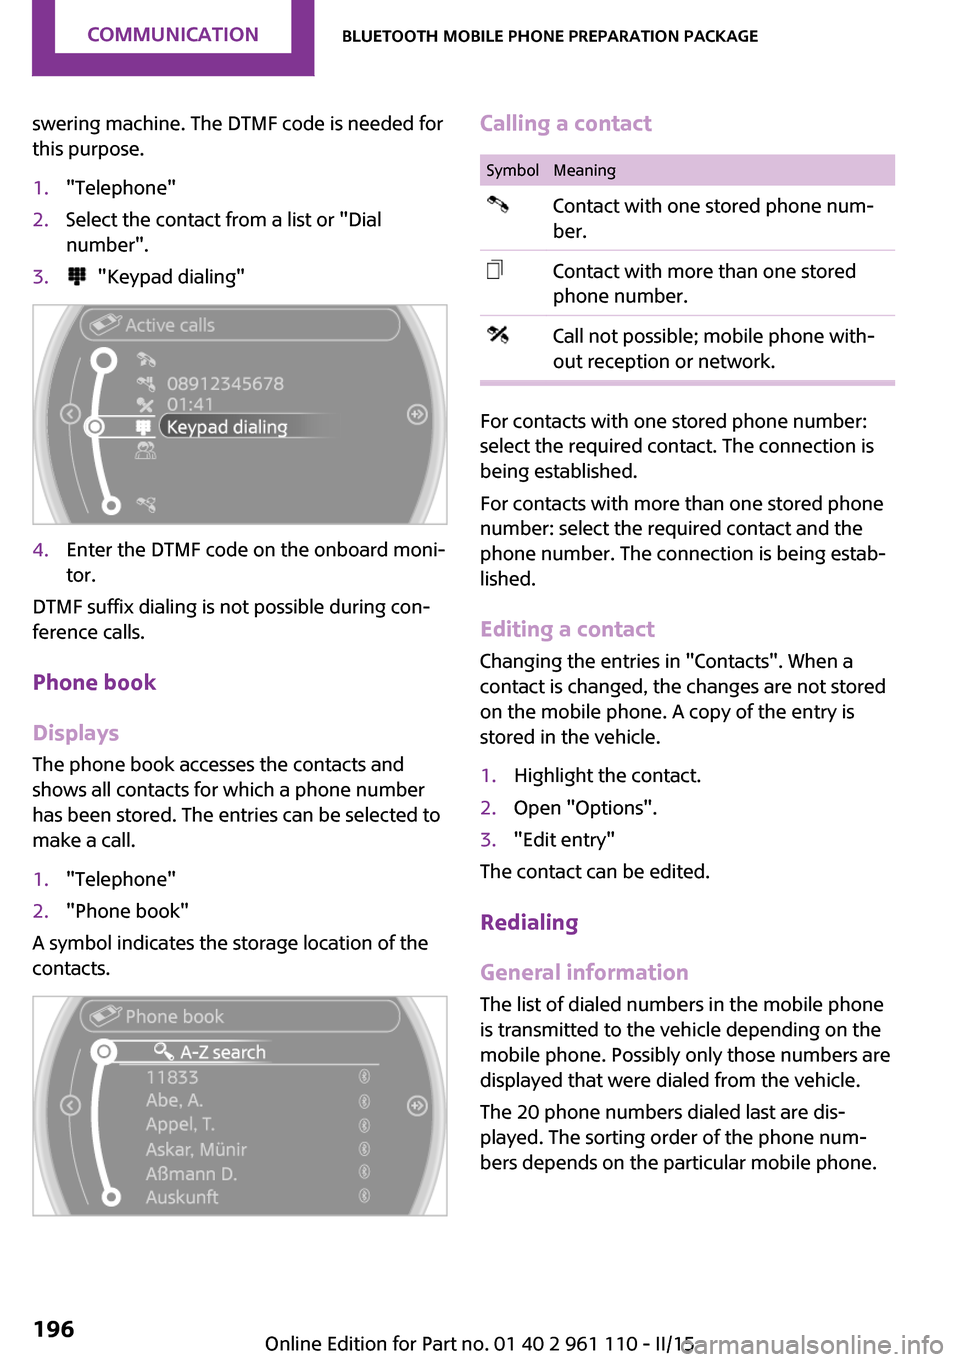
swering machine. The DTMF code is needed for
this purpose.1."Telephone"2.Select the contact from a list or "Dial
number".3. "Keypad dialing"4.Enter the DTMF code on the onboard moni‐
tor.
DTMF suffix dialing is not possible during con‐
ference calls.
Phone book
Displays The phone book accesses the contacts and
shows all contacts for which a phone number
has been stored. The entries can be selected to
make a call.
1."Telephone"2."Phone book"
A symbol indicates the storage location of the
contacts.
Calling a contactSymbolMeaningContact with one stored phone num‐
ber.Contact with more than one stored
phone number.Call not possible; mobile phone with‐
out reception or network.
For contacts with one stored phone number:
select the required contact. The connection is
being established.
For contacts with more than one stored phone
number: select the required contact and the
phone number. The connection is being estab‐
lished.
Editing a contact
Changing the entries in "Contacts". When a
contact is changed, the changes are not stored
on the mobile phone. A copy of the entry is
stored in the vehicle.
1.Highlight the contact.2.Open "Options".3."Edit entry"
The contact can be edited.
Redialing
General information
The list of dialed numbers in the mobile phone
is transmitted to the vehicle depending on the
mobile phone. Possibly only those numbers are
displayed that were dialed from the vehicle.
The 20 phone numbers dialed last are dis‐
played. The sorting order of the phone num‐
bers depends on the particular mobile phone.
Seite 196COMMUNICATIONBluetooth mobile phone preparation package196
Online Edition for Part no. 01 40 2 961 110 - II/15
Page 243 of 283
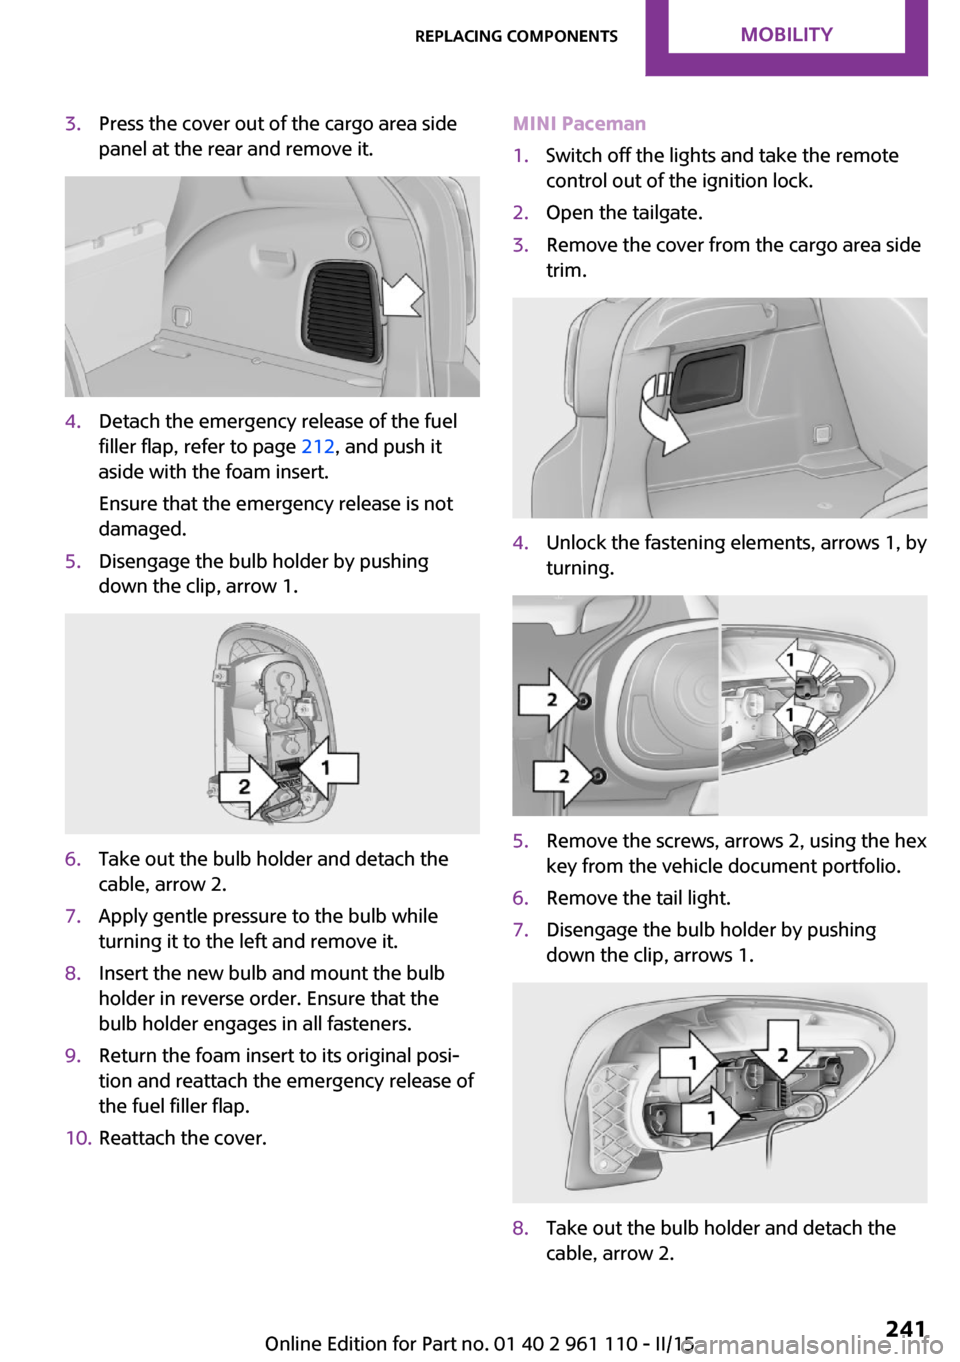
3.Press the cover out of the cargo area side
panel at the rear and remove it.4.Detach the emergency release of the fuel
filler flap, refer to page 212, and push it
aside with the foam insert.
Ensure that the emergency release is not
damaged.5.Disengage the bulb holder by pushing
down the clip, arrow 1.6.Take out the bulb holder and detach the
cable, arrow 2.7.Apply gentle pressure to the bulb while
turning it to the left and remove it.8.Insert the new bulb and mount the bulb
holder in reverse order. Ensure that the
bulb holder engages in all fasteners.9.Return the foam insert to its original posi‐
tion and reattach the emergency release of
the fuel filler flap.10.Reattach the cover.MINI Paceman1.Switch off the lights and take the remote
control out of the ignition lock.2.Open the tailgate.3.Remove the cover from the cargo area side
trim.4.Unlock the fastening elements, arrows 1, by
turning.5.Remove the screws, arrows 2, using the hex
key from the vehicle document portfolio.6.Remove the tail light.7.Disengage the bulb holder by pushing
down the clip, arrows 1.8.Take out the bulb holder and detach the
cable, arrow 2.Seite 241Replacing componentsMOBILITY241
Online Edition for Part no. 01 40 2 961 110 - II/15
Page 272 of 283
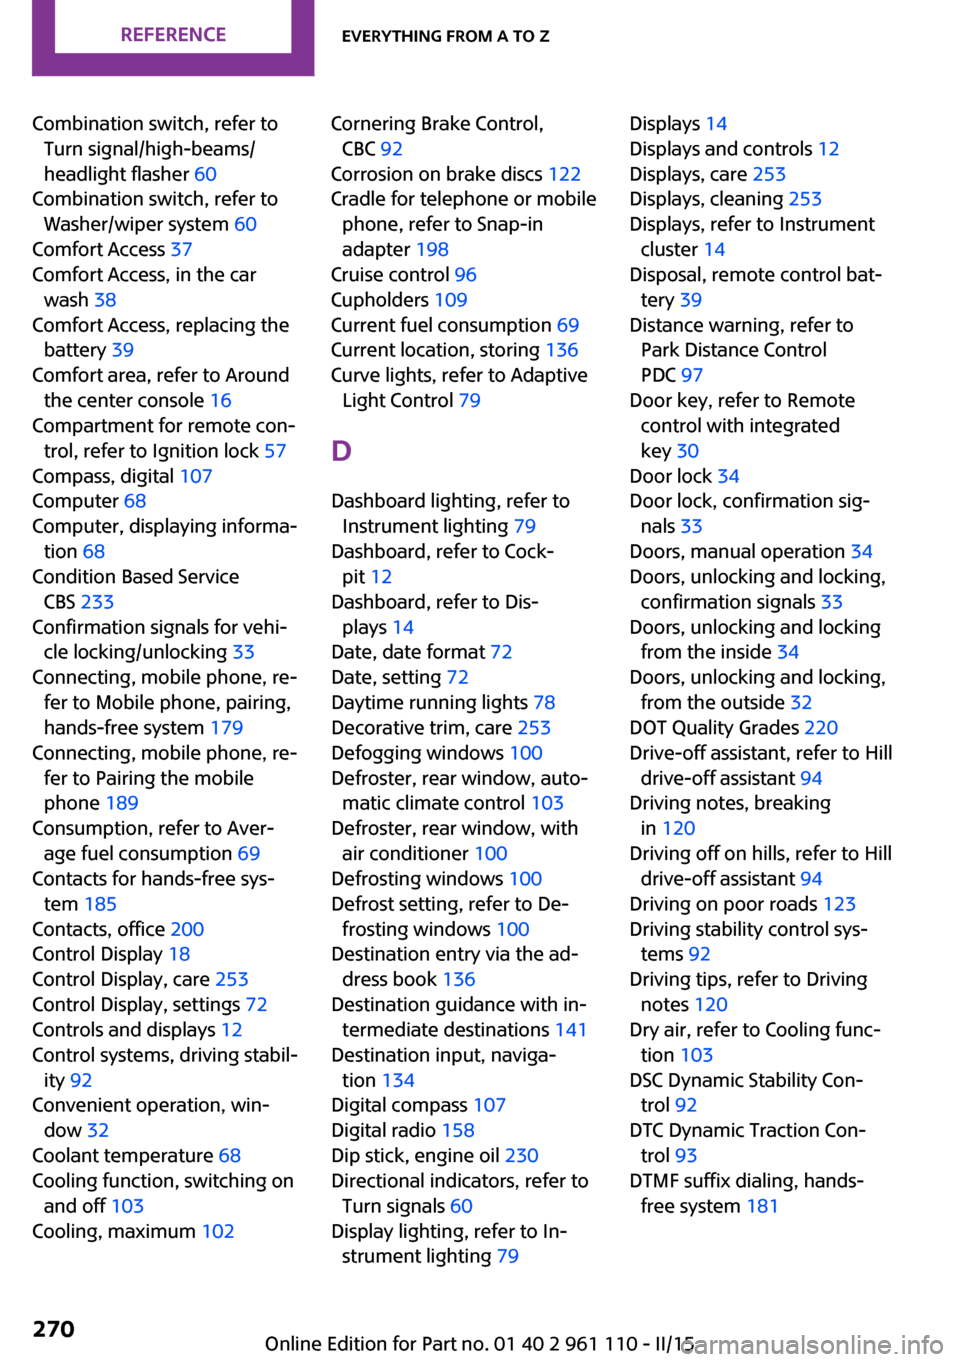
Combination switch, refer toTurn signal/high-beams/
headlight flasher 60
Combination switch, refer to Washer/wiper system 60
Comfort Access 37
Comfort Access, in the car wash 38
Comfort Access, replacing the battery 39
Comfort area, refer to Around the center console 16
Compartment for remote con‐ trol, refer to Ignition lock 57
Compass, digital 107
Computer 68
Computer, displaying informa‐ tion 68
Condition Based Service CBS 233
Confirmation signals for vehi‐ cle locking/unlocking 33
Connecting, mobile phone, re‐ fer to Mobile phone, pairing,
hands-free system 179
Connecting, mobile phone, re‐ fer to Pairing the mobile
phone 189
Consumption, refer to Aver‐ age fuel consumption 69
Contacts for hands-free sys‐ tem 185
Contacts, office 200
Control Display 18
Control Display, care 253
Control Display, settings 72
Controls and displays 12
Control systems, driving stabil‐ ity 92
Convenient operation, win‐ dow 32
Coolant temperature 68
Cooling function, switching on and off 103
Cooling, maximum 102 Cornering Brake Control,
CBC 92
Corrosion on brake discs 122
Cradle for telephone or mobile phone, refer to Snap-in
adapter 198
Cruise control 96
Cupholders 109
Current fuel consumption 69
Current location, storing 136
Curve lights, refer to Adaptive Light Control 79
D Dashboard lighting, refer to Instrument lighting 79
Dashboard, refer to Cock‐ pit 12
Dashboard, refer to Dis‐ plays 14
Date, date format 72
Date, setting 72
Daytime running lights 78
Decorative trim, care 253
Defogging windows 100
Defroster, rear window, auto‐ matic climate control 103
Defroster, rear window, with air conditioner 100
Defrosting windows 100
Defrost setting, refer to De‐ frosting windows 100
Destination entry via the ad‐ dress book 136
Destination guidance with in‐ termediate destinations 141
Destination input, naviga‐ tion 134
Digital compass 107
Digital radio 158
Dip stick, engine oil 230
Directional indicators, refer to Turn signals 60
Display lighting, refer to In‐ strument lighting 79 Displays 14
Displays and controls 12
Displays, care 253
Displays, cleaning 253
Displays, refer to Instrument cluster 14
Disposal, remote control bat‐ tery 39
Distance warning, refer to Park Distance Control
PDC 97
Door key, refer to Remote control with integrated
key 30
Door lock 34
Door lock, confirmation sig‐ nals 33
Doors, manual operation 34
Doors, unlocking and locking, confirmation signals 33
Doors, unlocking and locking from the inside 34
Doors, unlocking and locking, from the outside 32
DOT Quality Grades 220
Drive-off assistant, refer to Hill drive-off assistant 94
Driving notes, breaking in 120
Driving off on hills, refer to Hill drive-off assistant 94
Driving on poor roads 123
Driving stability control sys‐ tems 92
Driving tips, refer to Driving notes 120
Dry air, refer to Cooling func‐ tion 103
DSC Dynamic Stability Con‐ trol 92
DTC Dynamic Traction Con‐ trol 93
DTMF suffix dialing, hands- free system 181 Seite 270REFERENCEEverything from A to Z270
Online Edition for Part no. 01 40 2 961 110 - II/15
Page 275 of 283
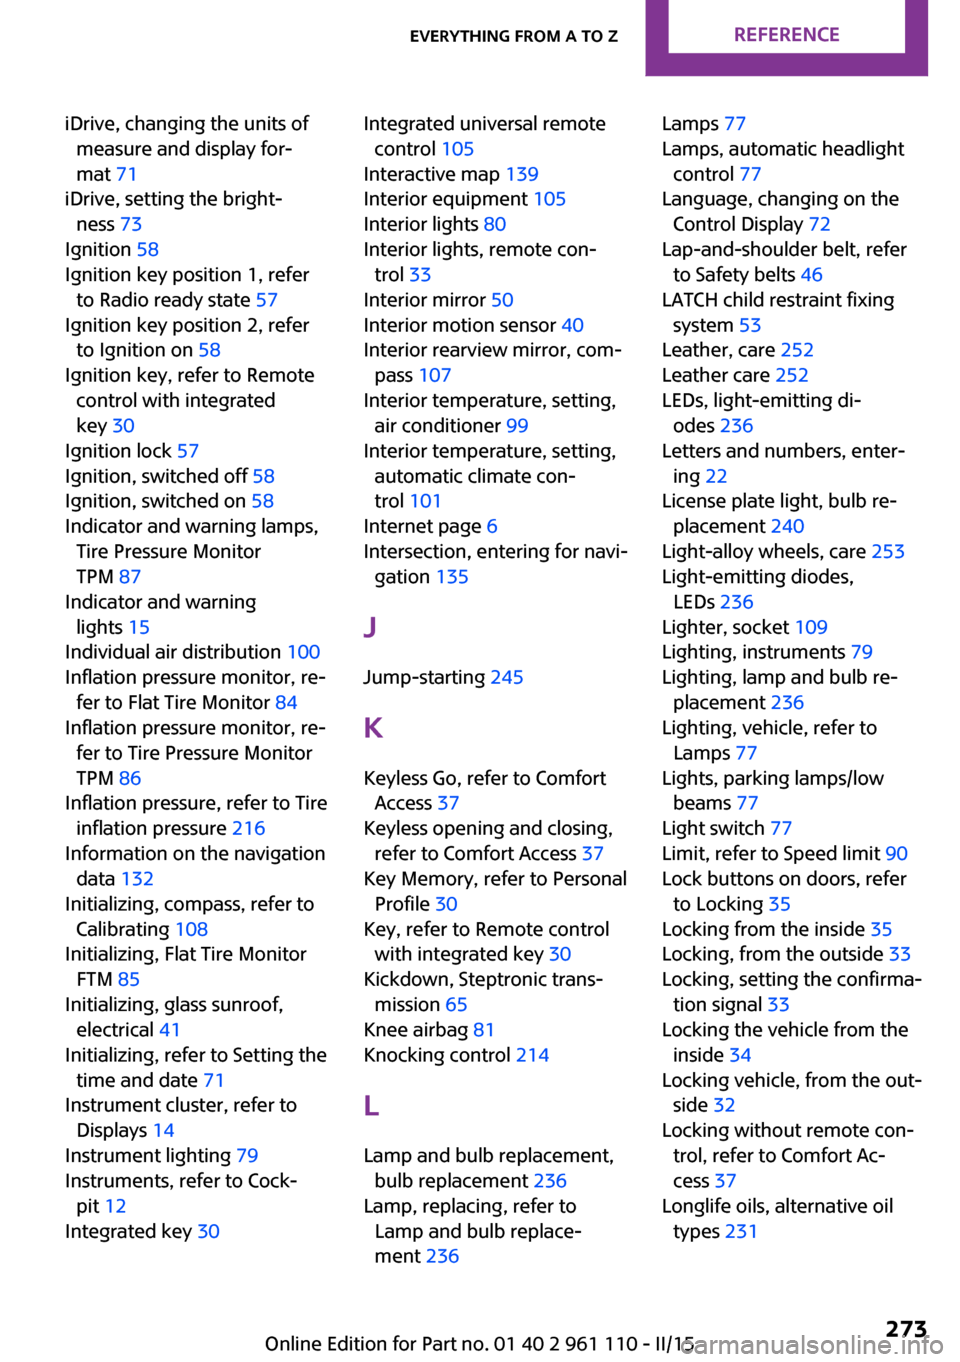
iDrive, changing the units ofmeasure and display for‐
mat 71
iDrive, setting the bright‐ ness 73
Ignition 58
Ignition key position 1, refer to Radio ready state 57
Ignition key position 2, refer to Ignition on 58
Ignition key, refer to Remote control with integrated
key 30
Ignition lock 57
Ignition, switched off 58
Ignition, switched on 58
Indicator and warning lamps, Tire Pressure Monitor
TPM 87
Indicator and warning lights 15
Individual air distribution 100
Inflation pressure monitor, re‐ fer to Flat Tire Monitor 84
Inflation pressure monitor, re‐ fer to Tire Pressure Monitor
TPM 86
Inflation pressure, refer to Tire inflation pressure 216
Information on the navigation data 132
Initializing, compass, refer to Calibrating 108
Initializing, Flat Tire Monitor FTM 85
Initializing, glass sunroof, electrical 41
Initializing, refer to Setting the time and date 71
Instrument cluster, refer to Displays 14
Instrument lighting 79
Instruments, refer to Cock‐ pit 12
Integrated key 30 Integrated universal remote
control 105
Interactive map 139
Interior equipment 105
Interior lights 80
Interior lights, remote con‐ trol 33
Interior mirror 50
Interior motion sensor 40
Interior rearview mirror, com‐ pass 107
Interior temperature, setting, air conditioner 99
Interior temperature, setting, automatic climate con‐
trol 101
Internet page 6
Intersection, entering for navi‐ gation 135
J
Jump-starting 245
K Keyless Go, refer to Comfort Access 37
Keyless opening and closing, refer to Comfort Access 37
Key Memory, refer to Personal Profile 30
Key, refer to Remote control with integrated key 30
Kickdown, Steptronic trans‐ mission 65
Knee airbag 81
Knocking control 214
L Lamp and bulb replacement, bulb replacement 236
Lamp, replacing, refer to Lamp and bulb replace‐
ment 236 Lamps 77
Lamps, automatic headlight control 77
Language, changing on the Control Display 72
Lap-and-shoulder belt, refer to Safety belts 46
LATCH child restraint fixing system 53
Leather, care 252
Leather care 252
LEDs, light-emitting di‐ odes 236
Letters and numbers, enter‐ ing 22
License plate light, bulb re‐ placement 240
Light-alloy wheels, care 253
Light-emitting diodes, LEDs 236
Lighter, socket 109
Lighting, instruments 79
Lighting, lamp and bulb re‐ placement 236
Lighting, vehicle, refer to Lamps 77
Lights, parking lamps/low beams 77
Light switch 77
Limit, refer to Speed limit 90
Lock buttons on doors, refer to Locking 35
Locking from the inside 35
Locking, from the outside 33
Locking, setting the confirma‐ tion signal 33
Locking the vehicle from the inside 34
Locking vehicle, from the out‐ side 32
Locking without remote con‐ trol, refer to Comfort Ac‐
cess 37
Longlife oils, alternative oil types 231 Seite 273Everything from A to ZREFERENCE273
Online Edition for Part no. 01 40 2 961 110 - II/15