ESP MINI Countryman 2015 Owner's Manual (Mini Connected)
[x] Cancel search | Manufacturer: MINI, Model Year: 2015, Model line: Countryman, Model: MINI Countryman 2015Pages: 283, PDF Size: 6.76 MB
Page 5 of 283
Addendum
ADDENDUM TO OWNER'S MANUAL
We wanted to provide you with some updates
and clarifications with respect to the printed
MINI Owner's Manual. These updates and clari-
fications will supersede the materials contained
in that document.
1. Where the terms “service center,” “the ser-
vice center,” “your service center,” “service
specialist,” or “service” are used in the Ow-
ner's Manual, we wanted to clarify that the
terms refer to a MINI dealer's service center
or another service center or repair shop that
employs trained personnel that can perform
maintenance and repair work on your ve-
hicle in accordance with MINI specifications.
2. Where the text of the Owner's Manual con-
tains an affirmative instruction to contact a
“service center” or “your service center,” we
wanted to clarify that MINI recommends
that, if you are faced with one of the situa-
tions addressed by that text, you contact or
seek the assistance of a MINI dealer's service
center or another service center or repair
shop that employs trained personnel that
can perform maintenance and repair work
on your vehicle in accordance with MINI
specifications.
While MINI, at no cost to you, will pay for re-
pairs required by the limited warranties pro-
vided with respect to your vehicle and for
maintenance under the Maintenance Pro-
gram during the applicable warranty and
maintenance coverage periods, you are free
to elect, both during those periods and the-
reafter, to have maintenance and repair
work provided by other service centers or
repair shops.
3. Where the Owner's Manual makes reference
to parts and accessories having been appro-
ved by MINI, those references are intended
to reflect that those parts and accessories
are recommended by MINI. You may elect
to use other parts and accessories, but, if
you do, we recommend that you make sure
that any such parts and/or accessories are
appropriate for use on your vehicle.
4. At page 6 and page 7, under the warranty
section's discussion of homologation, where
it states that you “cannot lodge warranty
claims for your vehicle there,” the text
should read that you “may not be able to
lodge warranty claims for your vehicle
there.”
5. At page 7, in the “Parts and accessories” sec-
tion, the sentence beginning “For your own
safety … ,” should be disregarded and the
following the text should be read in lieu the-
reof: “The manufacturer of your vehicle re-
commends using genuine MINI parts and
accessories.” In the fifth sentence of that pa-
ragraph, the word “cannot” should read
“does not.”
6. At page 48, in the “Checking and replacing
safety belts” section, the text beginning,
“Have the work performed only by your ser-
vice center …” should be disregarded and
the following text should be read in lieu the-
reof: “MINI recommends having this work
performed by a service center as it is impor-
tant that this safety feature functions pro-
perly.”
7. At page 122 under the heading: “Objects in
the area around the pedals” and at page
253 under the heading: “Carpets/floor
mats,” the paragraph that begins: “Only use
floor mats …” should be disregarded and
the following language should be read in
lieu thereof: “The manufacturer of your ve-
hicle recommends that you use floor mats
that have been identified by it as appropri-
ate for use in your vehicle and that can be
properly fixed in place.”
8. At page 129, under the heading: “Have
maintenance carried out,” the sentence be-
ginning, “Have the maintenance carried
out …” should be disregarded and the fol-
lowing text should be read in lieu thereof:
Online Edition for Part no. 01 40 2 961 110 - II/15
Page 6 of 283
Addendum
“MINI recommends that you have the main-
tenance carried out by your service center.”
9. At page 207, under the heading “Software
applications,” the text of that section should
be disregarded and the following text read
in lieu thereof: “The manufacturer of your
vehicle recommends the use of MINI recom-
mended software; otherwise there may be
malfunctions in system operations.”
10. At page 216, under the heading “Pressure
specifications,” the sentence beginning,
“The inflation pressures apply to the tire si-
zes approved … .” should be disregarded.
11. At page 223, under the heading: “Approved
wheels and tires,” the term “Approved”
should be disregarded and in lieu thereof,
the term “Recommended” should be read in
its place. In addition, the text of that section
should be disregarded and the following
text should be read in lieu thereof:
The manufacturer of your vehicle strongly
suggests that you use wheels and tires that
have been recommended by the vehicle
manufacturer for your vehicle type; other-
wise, for example, despite having the same
official size ratings, variations can lead to
body contact and with it, the risk of severe
accidents.
The manufacturer of your vehicle does not
evaluate non-recommended wheels and ti-
res to determine if they are suitable for use
on your vehicle.
12. At page 229, under the heading “Hood,” the
sentence beginning, “If you are unfamiliar”
should be disregarded.
13. At page 233, under the heading: “Service
and Warranty Information Booklet for US
Models and Warranty and Service Guide
Booklet for Canadian Models,” the second
paragraph should be disregarded and the
following text read in lieu thereof:
The manufacturer of your vehicle recom-
mends that you have maintenance and re-
pair performed by your MINI dealer's service
center or another service center or repair
shop that employs trained personnel that
can perform maintenance and repair work
on your vehicle in accordance with MINI
specifications. The manufacturer of your ve-
hicle recommends that you maintain re-
cords of all maintenance and repair work
performed on your vehicle.
14. At page 243, under the “Battery replace-
ment” section, the text should be disregar-
ded and in lieu thereof the following text
should be read:
Use of recommended vehicle batteries
The manufacturer of your vehicle recom-
mends that you use vehicle batteries that it
has tested and recommends for use in your
vehicle; otherwise the vehicle could be da-
maged and systems or functions may not be
fully available.
After a battery replacement, the manufactu-
rer of your vehicle recommends that you
have the battery registered on your vehicle
by a service center to ensure that all comfort
functions are fully available, and that any
“check control” messages of these comfort
functions are no longer displayed.
Online Edition for Part no. 01 40 2 961 110 - II/15
Page 10 of 283
▷California Emission Control System Limited
Warranty.
Detailed information about these warranties is
listed in the Service and Warranty Information
Booklet for US models or in the Warranty and
Service Guide Booklet for Canadian models.
Your vehicle has been specifically adapted and
designed to meet the particular operating con‐
ditions and homologation requirements in your
country and continental region in order to de‐
liver the full driving pleasure while the vehicle is
operated under those conditions. If you wish to
operate your vehicle in another country or re‐
gion, you may be required to adapt your vehi‐
cle to meet different prevailing operating con‐
ditions and homologation requirements. You
should also be aware of any applicable war‐
ranty limitations or exclusions for such country
or region. In such case, please contact Cus‐
tomer Relations for further information.
Maintenance
Maintain the vehicle regularly to sustain the
road safety, operational reliability and the New
Vehicle Limited Warranty.
Specifications for required maintenance meas‐
ures:
▷MINI Maintenance system▷Service and Warranty Information Booklet
for US models▷Warranty and Service Guide Booklet for
Canadian models
If the vehicle is not maintained according to
these specifications, this could result in serious
damage to the vehicle. Such damage is not
covered by the MINI New Vehicle Limited War‐
ranty.
Data memory
Numerous electronic components in your vehi‐
cle contain data memories that store technical
information on the vehicle condition, events
and faults, either temporarily or permanently. This technical information generally documents
the state of a component, a module, a system
or the environment:▷Operating conditions of system compo‐
nents, such as filling levels.▷Status messages from the vehicle and its in‐
dividual components, such as wheel rpm/
speed, motion delay, transverse accelera‐
tion.▷Malfunctions and defects in important sys‐
tem components, such as lights and brakes.▷Vehicle responses to special driving situa‐
tions, such as airbag deployment, use of
the stability control systems.▷Ambient conditions, such as the tempera‐
ture.
These data are of a technical nature only and
are used to detect and eliminate faults and to
optimize vehicle functions. Travel profiles of
routes driven with the vehicle cannot be cre‐
ated from these data. If services are used, for
instance in the event of repairs, service proc‐
esses, warranty cases, quality assurance, etc.,
this technical information can be read out from
the event and fault data memories by service
personnel, including the manufacturer, using
special diagnosis tools. This service personnel
can provide you with more information if
needed. After troubleshooting, the information
in the fault memory is cleared or overwritten
continuously.
Situations are conceivable during the use of the
vehicle in which these technical data could be‐
come associated with a specific person in com‐
bination with other information, such as an ac‐
cident report, damage to the vehicle, witness
accounts, etc., possibly with the involvement of
an authorized expert.
Additional functions that are contractually
agreed with the customer, such as vehicle lo‐
calization in the event of an emergency, permit
the transfer of certain vehicle data out of the
vehicle.
Seite 8Notes8
Online Edition for Part no. 01 40 2 961 110 - II/15
Page 17 of 283
Indicator/warning lights
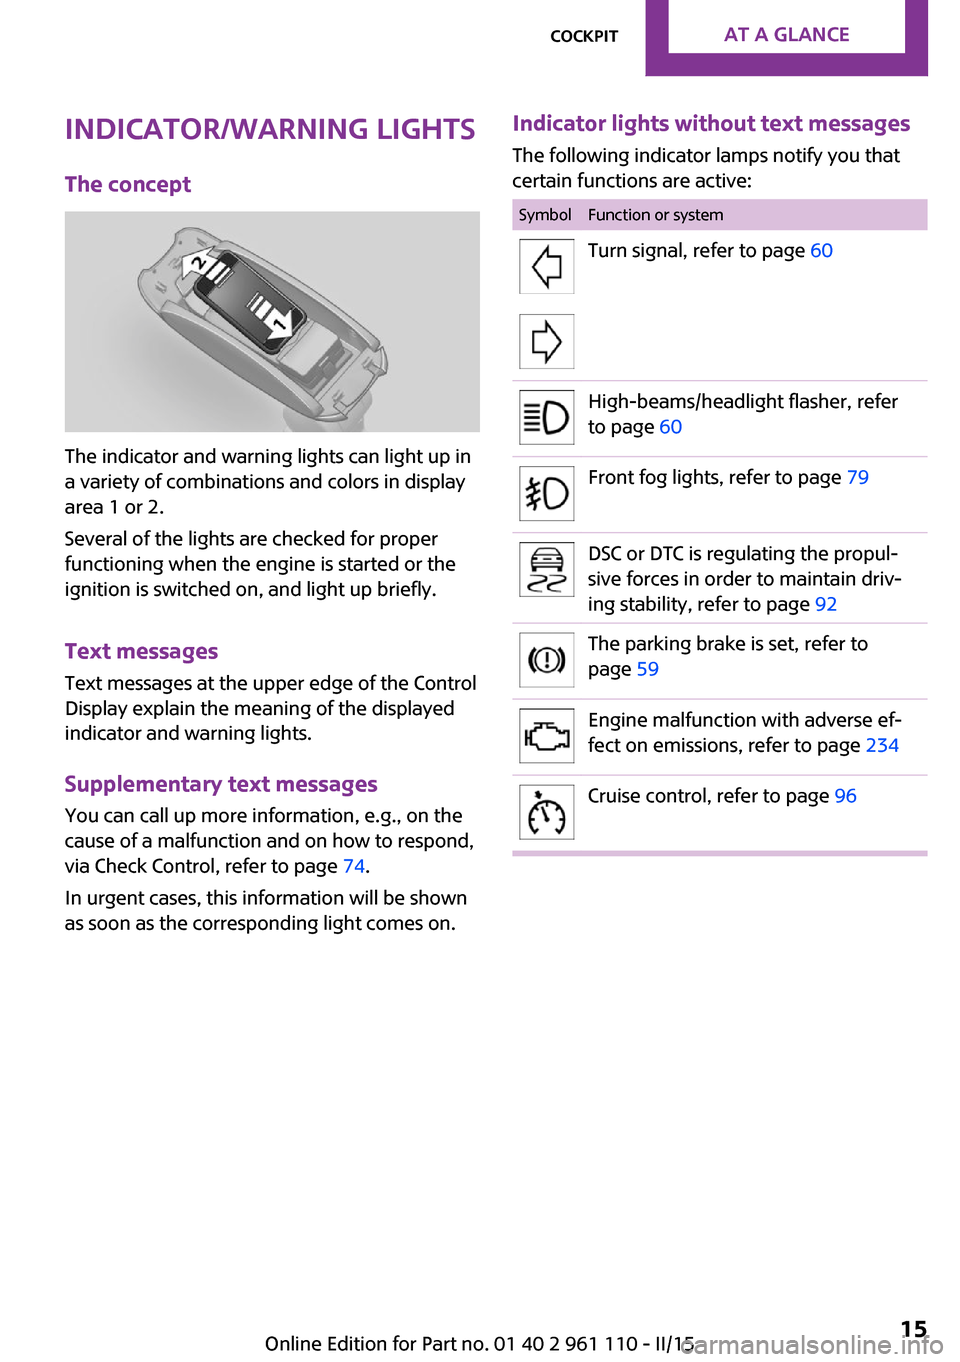
The concept
The indicator and warning lights can light up in
a variety of combinations and colors in display
area 1 or 2.
Several of the lights are checked for proper
functioning when the engine is started or the
ignition is switched on, and light up briefly.
Text messages
Text messages at the upper edge of the Control
Display explain the meaning of the displayed
indicator and warning lights.
Supplementary text messages
You can call up more information, e.g., on the
cause of a malfunction and on how to respond,
via Check Control, refer to page 74.
In urgent cases, this information will be shown
as soon as the corresponding light comes on.
Indicator lights without text messages
The following indicator lamps notify you that
certain functions are active:SymbolFunction or systemTurn signal, refer to page 60High-beams/headlight flasher, refer
to page 60Front fog lights, refer to page 79DSC or DTC is regulating the propul‐
sive forces in order to maintain driv‐
ing stability, refer to page 92The parking brake is set, refer to
page 59Engine malfunction with adverse ef‐
fect on emissions, refer to page 234Cruise control, refer to page 96Seite 15CockpitAT A GLANCE15
Online Edition for Part no. 01 40 2 961 110 - II/15
Page 27 of 283
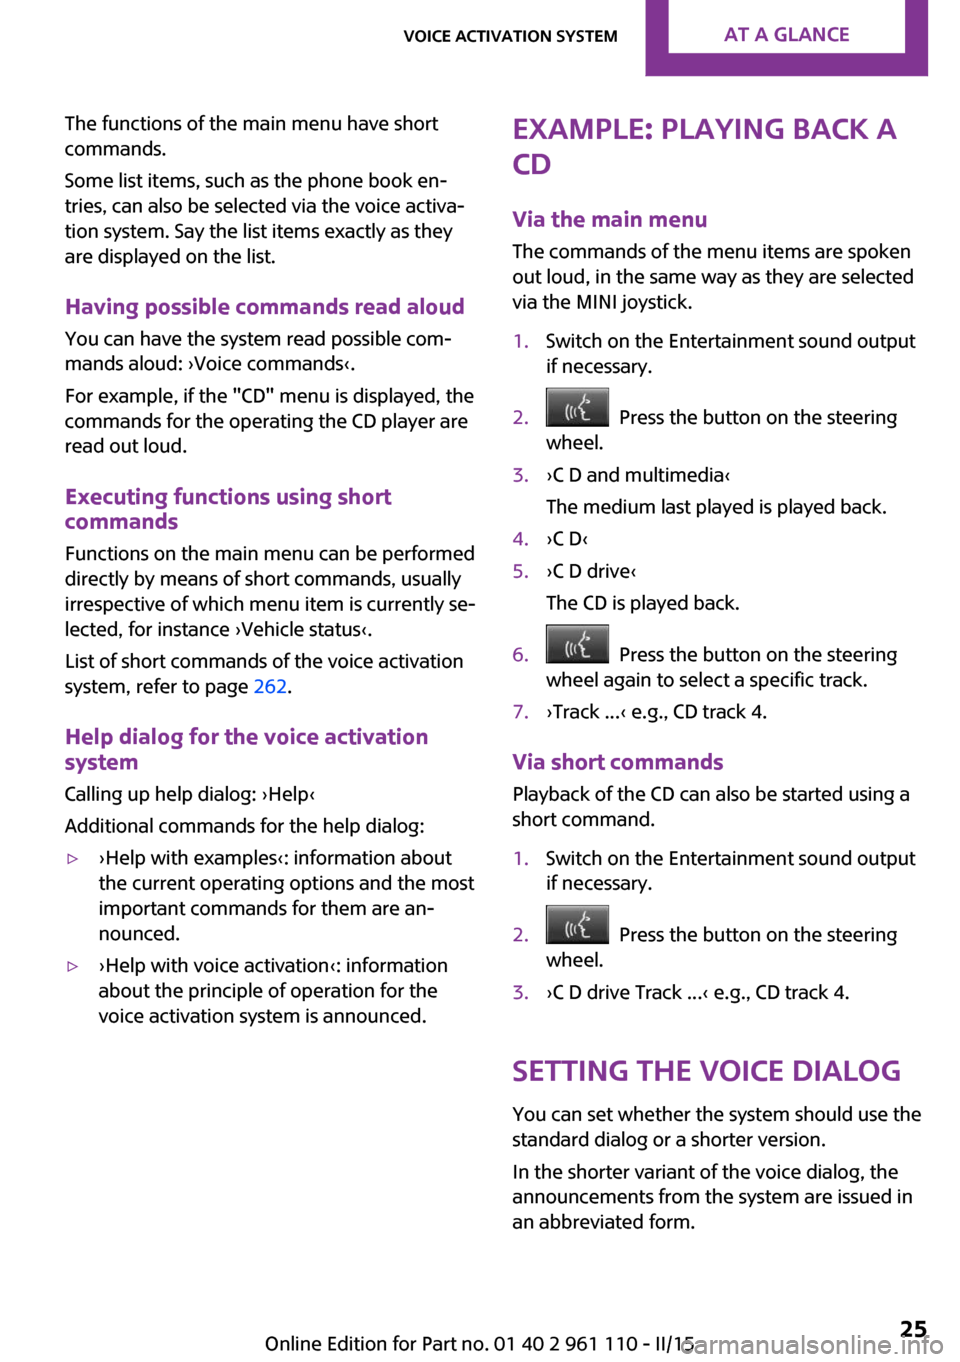
The functions of the main menu have short
commands.
Some list items, such as the phone book en‐
tries, can also be selected via the voice activa‐
tion system. Say the list items exactly as they
are displayed on the list.
Having possible commands read aloud
You can have the system read possible com‐
mands aloud: ›Voice commands‹.
For example, if the "CD" menu is displayed, the
commands for the operating the CD player are
read out loud.
Executing functions using short
commands
Functions on the main menu can be performeddirectly by means of short commands, usually
irrespective of which menu item is currently se‐
lected, for instance ›Vehicle status‹.
List of short commands of the voice activation
system, refer to page 262.
Help dialog for the voice activation
system
Calling up help dialog: ›Help‹
Additional commands for the help dialog:▷›Help with examples‹: information about the current operating options and the most
important commands for them are an‐
nounced.▷›Help with voice activation‹: information
about the principle of operation for the
voice activation system is announced.Example: playing back a
CD
Via the main menu
The commands of the menu items are spoken
out loud, in the same way as they are selected
via the MINI joystick.1.Switch on the Entertainment sound output
if necessary.2. Press the button on the steering
wheel.3.›C D and multimedia‹
The medium last played is played back.4.›C D‹5.›C D drive‹
The CD is played back.6. Press the button on the steering
wheel again to select a specific track.7.›Track ...‹ e.g., CD track 4.
Via short commands
Playback of the CD can also be started using a
short command.
1.Switch on the Entertainment sound output
if necessary.2. Press the button on the steering
wheel.3.›C D drive Track ...‹ e.g., CD track 4.
Setting the voice dialog
You can set whether the system should use the
standard dialog or a shorter version.
In the shorter variant of the voice dialog, the
announcements from the system are issued in
an abbreviated form.
Seite 25Voice activation systemAT A GLANCE25
Online Edition for Part no. 01 40 2 961 110 - II/15
Page 33 of 283
▷While the vehicle is being unlocked, the re‐
mote control is recognized and the settings
stored with it are called up and imple‐
mented.▷Your personal settings will be recognized
and called up again even if the vehicle has
been used in the meantime by someone
else with another remote control.▷The individual settings are stored for no
more than three remote controls.
Personal Profile settings
The following functions and settings can be
stored in a profile.
More information on the settings can be found
under:
▷Response of the central locking system
when the car is being unlocked, refer to
page 32.▷Automatic locking of the vehicle, refer to
page 35.▷Triple turn signal activation, refer to
page 60.▷Settings for the displays on the onboard
monitor, in the speedometer, and in the
tachometer:▷12h/24h clock format, refer to
page 71.▷Date format, refer to page 72.▷Brightness of the Control Display, refer
to page 73.▷Language on the Control Display, refer
to page 72.▷Units of measure for fuel consumption,
distance covered/remaining distances,
and temperature, refer to page 71.▷Light settings:▷Headlamp courtesy delay feature, refer
to page 78.▷Daytime running lights, refer to
page 78.▷Automatic climate control, refer to
page 101: AUTO program, activating/deac‐
tivating the cooling function, setting the
temperature, air volume, and air distribu‐
tion.▷Entertainment:▷Tone settings, refer to page 154.▷Volume, refer to page 154.
Central locking system
The concept
The central locking system becomes active
when the driver's door is closed.
The system simultaneously engages and re‐
leases the locks on the following:
▷Doors.▷Tailgate.▷Fuel filler flap.
Operating from the outside
▷Via the remote control.▷Via the door lock.▷In cars with Comfort Access, via the door
handles on the driver's and front passenger
sides.
The following takes place simultaneously when
locking/unlocking the vehicle via the remote
control:
▷Depending on the vehicle equipment, the
anti-theft protection is switched on and off
as well. The anti-theft protection makes it
impossible to unlock the doors using the
lock buttons or door handles.▷The welcome lamps, interior lamps, and
ambient lighting are switched on and off.▷The alarm system is armed or disarmed, re‐
fer to page 39.Seite 31Opening and closingCONTROLS31
Online Edition for Part no. 01 40 2 961 110 - II/15
Page 39 of 283
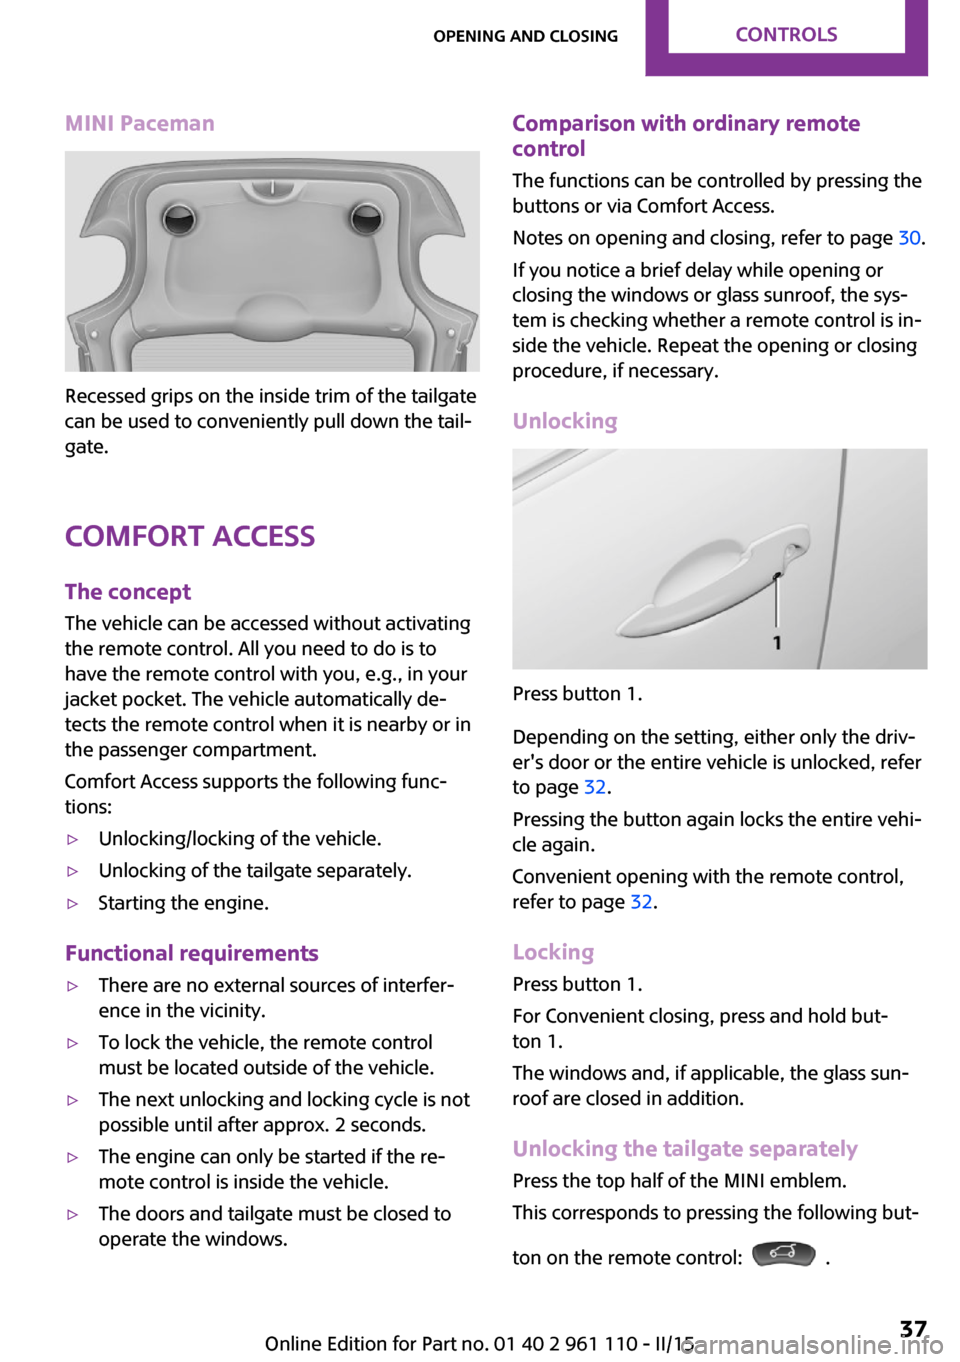
MINI Paceman
Recessed grips on the inside trim of the tailgate
can be used to conveniently pull down the tail‐
gate.
Comfort Access The concept
The vehicle can be accessed without activating
the remote control. All you need to do is to
have the remote control with you, e.g., in your
jacket pocket. The vehicle automatically de‐
tects the remote control when it is nearby or in
the passenger compartment.
Comfort Access supports the following func‐
tions:
▷Unlocking/locking of the vehicle.▷Unlocking of the tailgate separately.▷Starting the engine.
Functional requirements
▷There are no external sources of interfer‐
ence in the vicinity.▷To lock the vehicle, the remote control
must be located outside of the vehicle.▷The next unlocking and locking cycle is not
possible until after approx. 2 seconds.▷The engine can only be started if the re‐
mote control is inside the vehicle.▷The doors and tailgate must be closed to
operate the windows.Comparison with ordinary remote
control
The functions can be controlled by pressing the
buttons or via Comfort Access.
Notes on opening and closing, refer to page 30.
If you notice a brief delay while opening or
closing the windows or glass sunroof, the sys‐
tem is checking whether a remote control is in‐
side the vehicle. Repeat the opening or closing
procedure, if necessary.
Unlocking
Press button 1.
Depending on the setting, either only the driv‐
er's door or the entire vehicle is unlocked, refer
to page 32.
Pressing the button again locks the entire vehi‐
cle again.
Convenient opening with the remote control,
refer to page 32.
Locking
Press button 1.
For Convenient closing, press and hold but‐
ton 1.
The windows and, if applicable, the glass sun‐
roof are closed in addition.
Unlocking the tailgate separately
Press the top half of the MINI emblem.
This corresponds to pressing the following but‐
ton on the remote control:
.
Seite 37Opening and closingCONTROLS37
Online Edition for Part no. 01 40 2 961 110 - II/15
Page 42 of 283
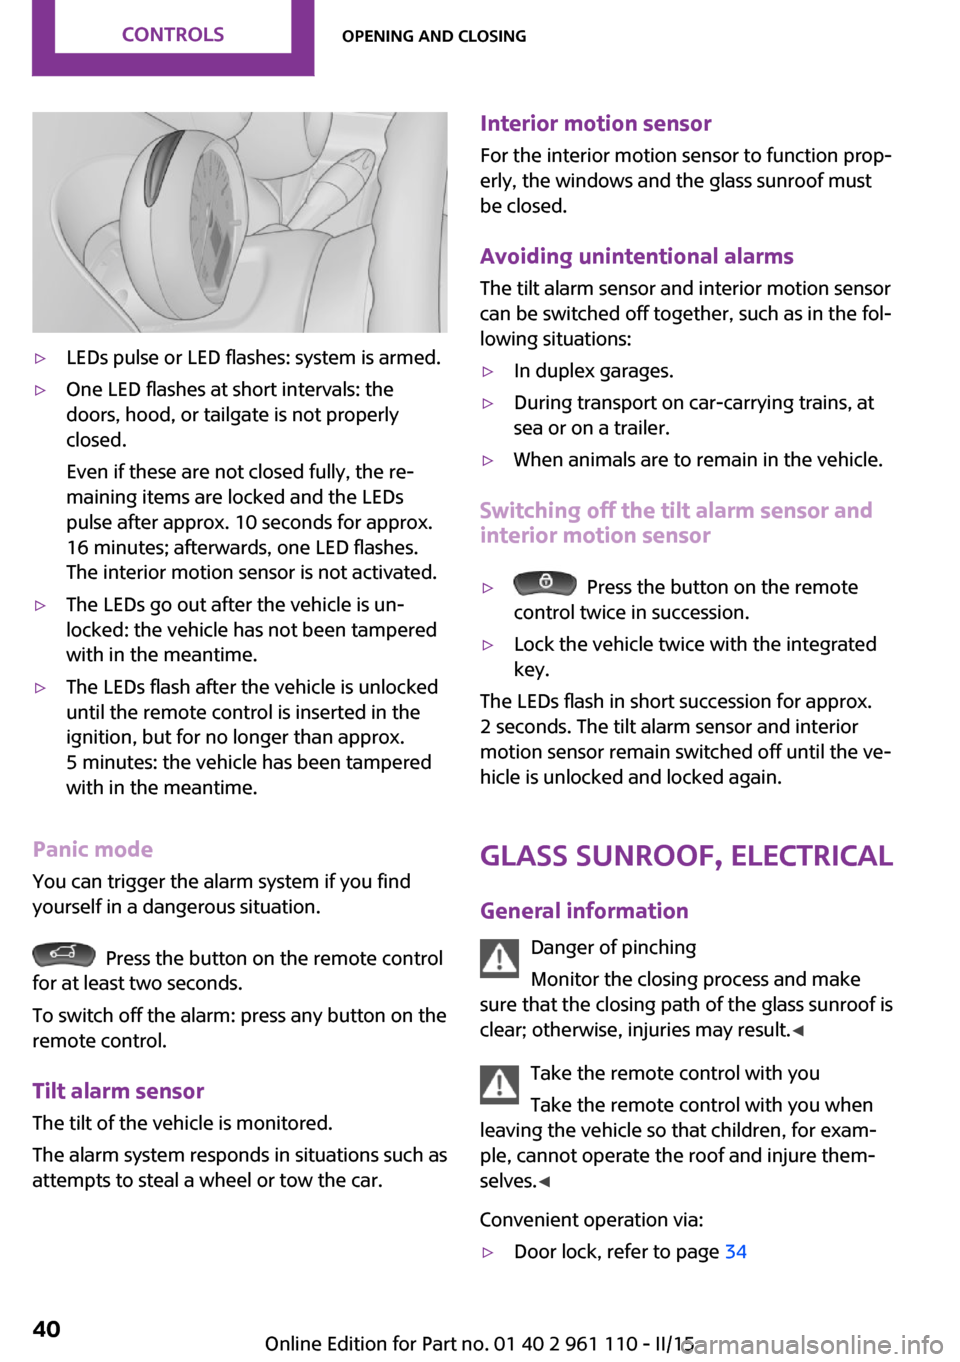
▷LEDs pulse or LED flashes: system is armed.▷One LED flashes at short intervals: the
doors, hood, or tailgate is not properly
closed.
Even if these are not closed fully, the re‐
maining items are locked and the LEDs
pulse after approx. 10 seconds for approx.
16 minutes; afterwards, one LED flashes.
The interior motion sensor is not activated.▷The LEDs go out after the vehicle is un‐
locked: the vehicle has not been tampered
with in the meantime.▷The LEDs flash after the vehicle is unlocked
until the remote control is inserted in the
ignition, but for no longer than approx.
5 minutes: the vehicle has been tampered
with in the meantime.
Panic mode
You can trigger the alarm system if you find
yourself in a dangerous situation.
Press the button on the remote control
for at least two seconds.
To switch off the alarm: press any button on the
remote control.
Tilt alarm sensor
The tilt of the vehicle is monitored.
The alarm system responds in situations such as
attempts to steal a wheel or tow the car.
Interior motion sensor
For the interior motion sensor to function prop‐
erly, the windows and the glass sunroof must be closed.
Avoiding unintentional alarms
The tilt alarm sensor and interior motion sensor
can be switched off together, such as in the fol‐
lowing situations:▷In duplex garages.▷During transport on car-carrying trains, at
sea or on a trailer.▷When animals are to remain in the vehicle.
Switching off the tilt alarm sensor and
interior motion sensor
▷ Press the button on the remote
control twice in succession.▷Lock the vehicle twice with the integrated
key.
The LEDs flash in short succession for approx.
2 seconds. The tilt alarm sensor and interior
motion sensor remain switched off until the ve‐
hicle is unlocked and locked again.
Glass sunroof, electrical
General information Danger of pinching
Monitor the closing process and make
sure that the closing path of the glass sunroof is
clear; otherwise, injuries may result. ◀
Take the remote control with you
Take the remote control with you when
leaving the vehicle so that children, for exam‐
ple, cannot operate the roof and injure them‐
selves. ◀
Convenient operation via:
▷Door lock, refer to page 34Seite 40CONTROLSOpening and closing40
Online Edition for Part no. 01 40 2 961 110 - II/15
Page 46 of 283
AdjustingVehicle equipment
This chapter describes all series equipment as
well as country-specific and special equipment
offered for this model series. Therefore, it also
describes equipment that may not be found in
your vehicle, for instance due to the selected
special equipment or the country version. This
also applies to safety-related functions and sys‐
tems.
When using the features and systems described
here, adhere to local regulations.
Sitting safely
The ideal seating position can make a vital con‐
tribution to relaxed, fatigue-free driving.
The seating position plays an important role in
an accident in combination with:▷Safety belts, refer to page 46▷Head restraints, refer to page 48.▷Airbags, refer to page 81.
Seats
Note before adjusting Do not adjust the seat while driving
Never attempt to adjust the driver's seat
while driving. The seat could respond with un‐
expected movement and the ensuing loss of
vehicle control could lead to an accident. ◀
Do not incline the backrest too far to the
rear
Do not incline the backrest on the front passen‐
ger side too far to the rear during driving. Oth‐
erwise, there is the danger of sliding under the
safety belt in an accident. This would eliminate
the protection normally provided by the belt. ◀
Front seat adjustment
Forward/backward
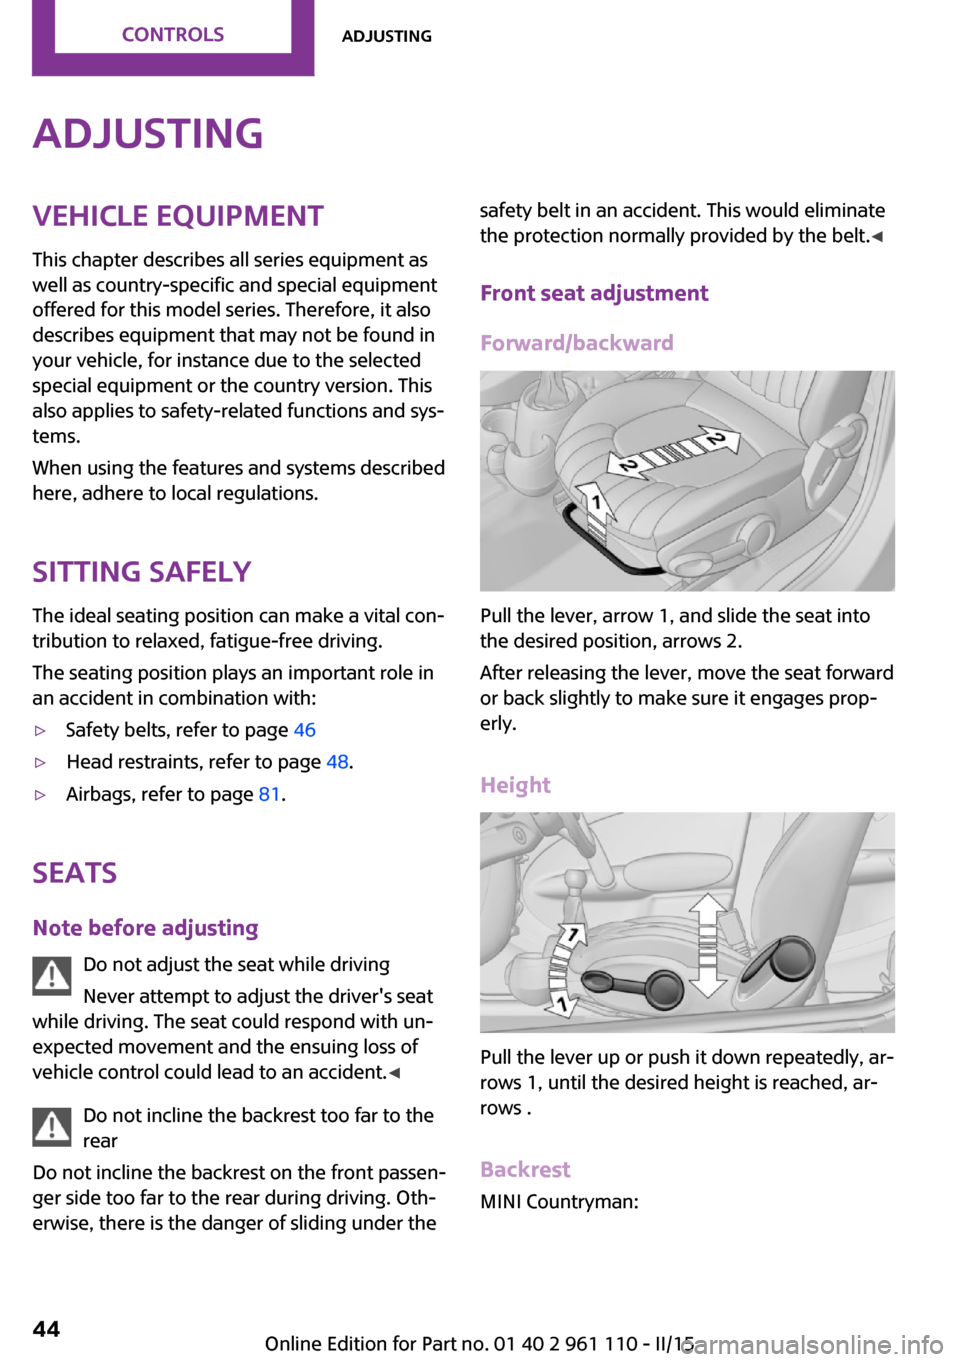
Pull the lever, arrow 1, and slide the seat into
the desired position, arrows 2.
After releasing the lever, move the seat forward
or back slightly to make sure it engages prop‐
erly.
Height
Pull the lever up or push it down repeatedly, ar‐
rows 1, until the desired height is reached, ar‐
rows .
Backrest MINI Countryman:
Seite 44CONTROLSAdjusting44
Online Edition for Part no. 01 40 2 961 110 - II/15
Page 50 of 283
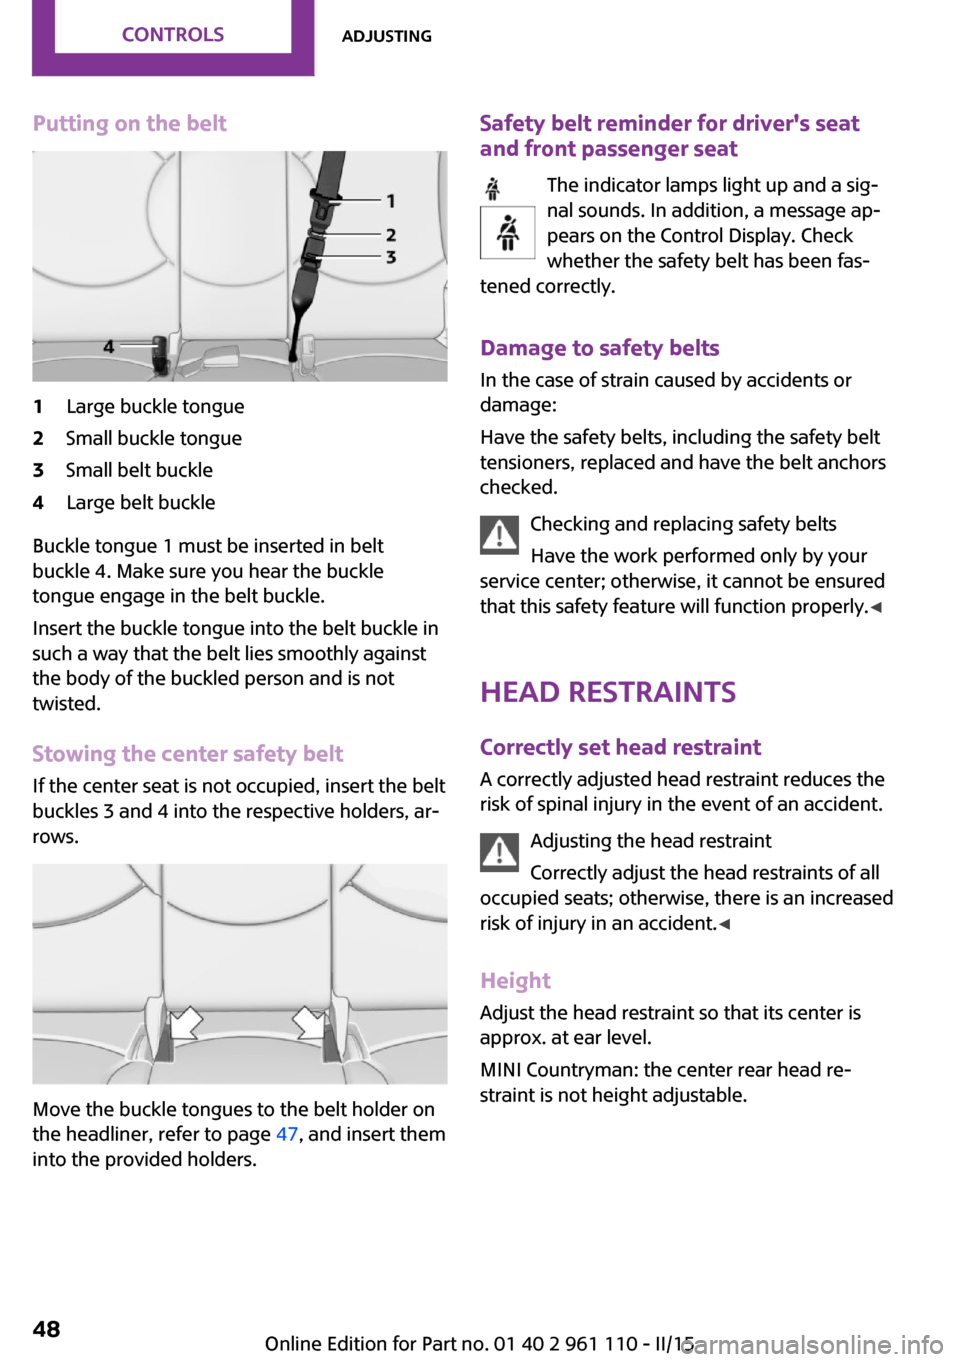
Putting on the belt1Large buckle tongue2Small buckle tongue3Small belt buckle4Large belt buckle
Buckle tongue 1 must be inserted in belt
buckle 4. Make sure you hear the buckle
tongue engage in the belt buckle.
Insert the buckle tongue into the belt buckle in
such a way that the belt lies smoothly against
the body of the buckled person and is not
twisted.
Stowing the center safety belt
If the center seat is not occupied, insert the belt
buckles 3 and 4 into the respective holders, ar‐
rows.
Move the buckle tongues to the belt holder on
the headliner, refer to page 47, and insert them
into the provided holders.
Safety belt reminder for driver's seat
and front passenger seat
The indicator lamps light up and a sig‐
nal sounds. In addition, a message ap‐
pears on the Control Display. Check
whether the safety belt has been fas‐
tened correctly.
Damage to safety belts
In the case of strain caused by accidents or
damage:
Have the safety belts, including the safety belt
tensioners, replaced and have the belt anchors
checked.
Checking and replacing safety belts
Have the work performed only by your
service center; otherwise, it cannot be ensured
that this safety feature will function properly. ◀
Head restraints Correctly set head restraint
A correctly adjusted head restraint reduces the
risk of spinal injury in the event of an accident.
Adjusting the head restraint
Correctly adjust the head restraints of all
occupied seats; otherwise, there is an increased
risk of injury in an accident. ◀
Height Adjust the head restraint so that its center is
approx. at ear level.
MINI Countryman: the center rear head re‐
straint is not height adjustable.Seite 48CONTROLSAdjusting48
Online Edition for Part no. 01 40 2 961 110 - II/15