warning MINI Coupe 2012 Owner's Guide
[x] Cancel search | Manufacturer: MINI, Model Year: 2012, Model line: Coupe, Model: MINI Coupe 2012Pages: 218, PDF Size: 3.84 MB
Page 84 of 218
Technology for driving comfort and safetyCONTROLS
83
pressures in the tires are accepted as the
target values to be monitored. The system
reset is completed during your drive, and
can be interrupted at any time. When driving
resumes, the reset is continued automati-
cally. The indicator lamp goes out after the
system reset is completed.
Message for low tire inflation pressure
The warning lamps come on in yellow
and red. An acoustic signal also sounds.
1. Reduce speed and stop the vehicle
with caution. Avoid sudden braking and
steering maneuvers.
2. Check whether the vehicle is equipped with
normal tires or with run-flat tires.
Run-flat tires, refer to page 152, are identi-
fied by a circular symbol containing the
letters RSC on the tire sidewall.
When a low inflation pressure is reported, the
Dynamic Stability Control DSC is activated.
Actions in the event of a flat tire
Normal tires
1. Identify the damaged tire.
To do so, check the inflation pressure in all
four tires. The inflation pressure display of
the Mobility Kit, refer to page 171, can be
used for this.
If the inflation pressure is correct in all four
tires, then the Tire Pressure Monitor may not
have been reset. The system must then be
reset.
If it is not possible to identify the damaged
tire, contact your MINI dealer.
2. Use the Mobility Kit to remedy the flat tire on
the damaged wheel, refer to page 170, or to
replace the damaged wheel, refer to
page. 173.
The use of tire sealant, e.g. Mobility Kit, can
damage the TPM wheel electronics. In this
case, have the electronics checked and
replaced if necessary at your earliest oppor-
tunity.
Run-flat tires
You can continue driving with a damaged tire at
speeds up to 50 mph/80 km/h.
If the vehicle is not equipped with run-flat
tires, do not continue driving; continuing
to drive can result in serious accidents. <
Continued driving with a flat tire
When driving with a damaged tire:
1.Avoid sudden braking and steering maneu-
vers.
2. Do not exceed a speed of 50 mph/80 km/h.
3. At the next opportunity, check the air
pressure in all four tires.
If the inflation pressure is correct in all four
tires, then the Tire Pressure Monitor may not
have been reset. The system must then be
reset.
Possible driving distance with complete loss of
tire inflation pressure:
The distance it is possible to drive with a flat tire
depends on the load and the stress on the
vehicle while driving.
With an average load, it may be possible to drive
for approx. 50 miles/80 km.
When driving with damage d tires, the handling
characteristics change, e.g. the vehicle will skid
sooner when braking, braking distances will be
longer, or self-steering response will change.
Adapt your driving style accordingly. Avoid
turning abruptly and driv ing over obstacles such
as curbs, potholes, etc.
Since the possible driving distance depends to a
considerable degree on the strain exerted on
the vehicle while driving, it can be shorter or,
with a gentle dr iving style, can also be longer,
depending on the speed, road condition, exter-
nal temperature, vehicle load, etc.
Drive cautiously and do not exceed a
speed of 50 mph/80 km/h.
A loss of tire inflation pressure results in a
change in the handling characteristics, e.g.
reduced lane stability during braking, a longer
Online Edition for Part no. 01 40 2 914 786 - \251 07/12 BMW AG
Page 85 of 218
CONTROLSTechnology for driving comfort and safety
84
braking distance and altered self-steering
properties. <
Vibrations or loud no ises while driving can
indicate complete failure of the tire.
Reduce your speed and bring the vehicle to a
stop; otherwise, pieces of tire may come off,
which could result in an accident. Do not con-
tinue driving and contac t your MINI dealer.<
Malfunction
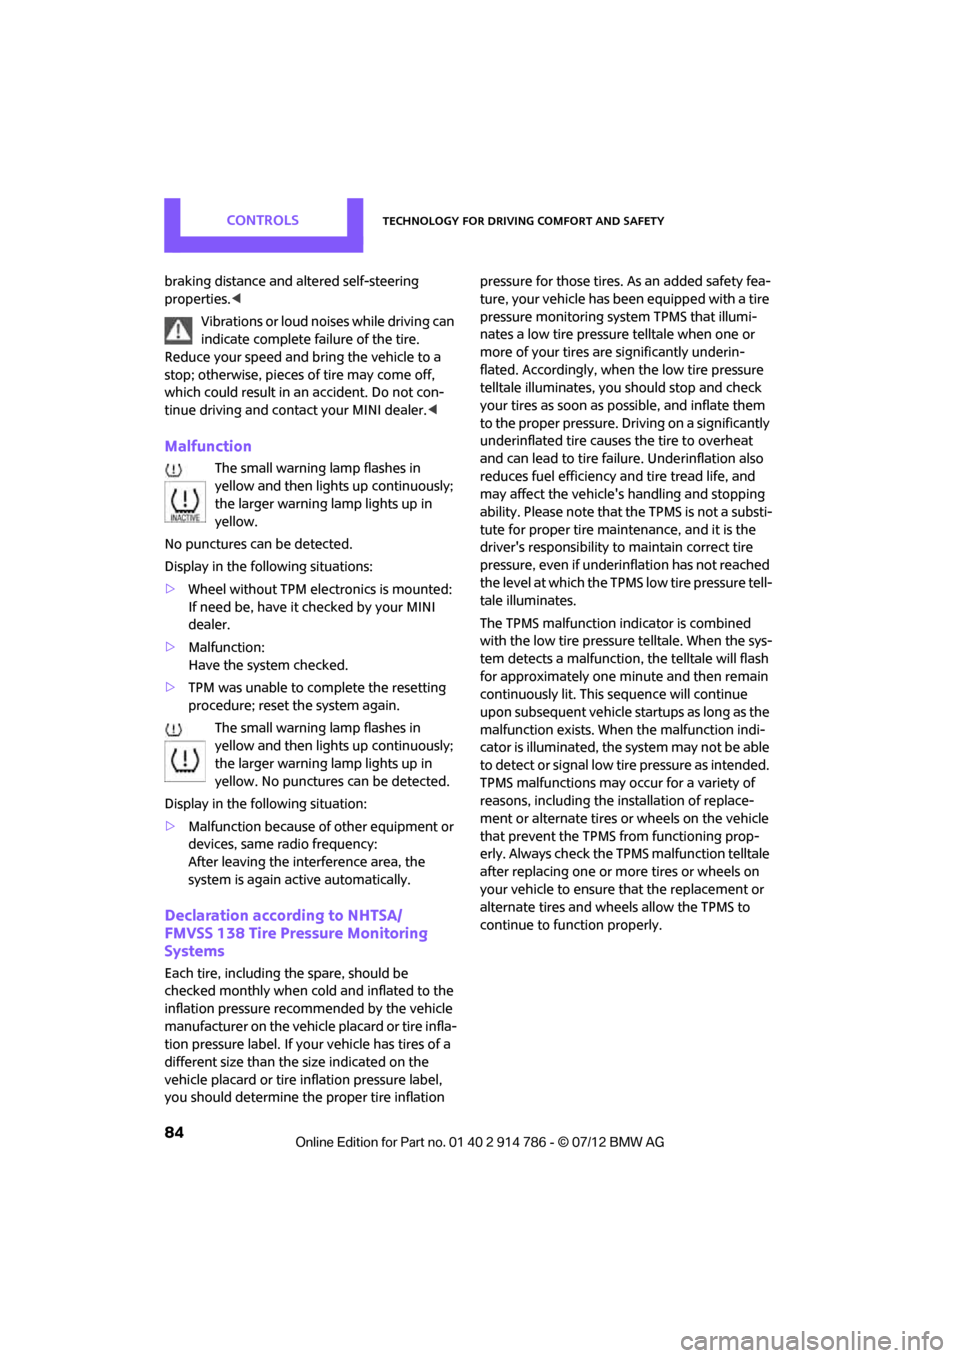
The small warning lamp flashes in
yellow and then lights up continuously;
the larger warning lamp lights up in
yellow.
No punctures can be detected.
Display in the following situations:
> Wheel without TPM electronics is mounted:
If need be, have it checked by your MINI
dealer.
> Malfunction:
Have the system checked.
> TPM was unable to complete the resetting
procedure; reset the system again.
The small warning lamp flashes in
yellow and then lights up continuously;
the larger warning lamp lights up in
yellow. No punctures can be detected.
Display in the following situation:
> Malfunction because of other equipment or
devices, same radio frequency:
After leaving the interference area, the
system is again active automatically.
Declaration according to NHTSA/
FMVSS 138 Tire Pressure Monitoring
Systems
Each tire, including the spare, should be
checked monthly when cold and inflated to the
inflation pressure recommended by the vehicle
manufacturer on the vehicle placard or tire infla-
tion pressure label. If your vehicle has tires of a
different size than the size indicated on the
vehicle placard or tire inflation pressure label,
you should determine the proper tire inflation pressure for those tires.
As an added safety fea-
ture, your vehicle has been equipped with a tire
pressure monitori ng system TPMS that illumi-
nates a low tire pressure telltale when one or
more of your tires are significantly underin-
flated. Accordingly, when the low tire pressure
telltale illuminates, you should stop and check
your tires as soon as po ssible, and inflate them
to the proper pressure. Driving on a significantly
underinflated tire causes the tire to overheat
and can lead to tire failure. Underinflation also
reduces fuel efficiency and tire tread life, and
may affect the vehicle's handling and stopping
ability. Please note that the TPMS is not a substi-
tute for proper tire maintenance, and it is the
driver's responsibility to maintain correct tire
pressure, even if underi nflation has not reached
the level at which the TPMS low tire pressure tell-
tale illuminates.
The TPMS malfunction indicator is combined
with the low tire pressure telltale. When the sys-
tem detects a malfunction, the telltale will flash
for approximately one minute and then remain
continuously lit. This sequence will continue
upon subsequent vehicle startups as long as the
malfunction exists. When the malfunction indi-
cator is illuminated, the system may not be able
to detect or signal low tire pressure as intended.
TPMS malfunctions may occur for a variety of
reasons, including the installation of replace-
ment or alternate tires or wheels on the vehicle
that prevent the TPMS from functioning prop-
erly. Always check the TP MS malfunction telltale
after replacing one or mo re tires or wheels on
your vehicle to ensure that the replacement or
alternate tires and wheels allow the TPMS to
continue to function properly.
Online Edition for Part no. 01 40 2 914 786 - \251 07/12 BMW AG
Page 86 of 218
Technology for driving comfort and safetyCONTROLS
85
Airbags
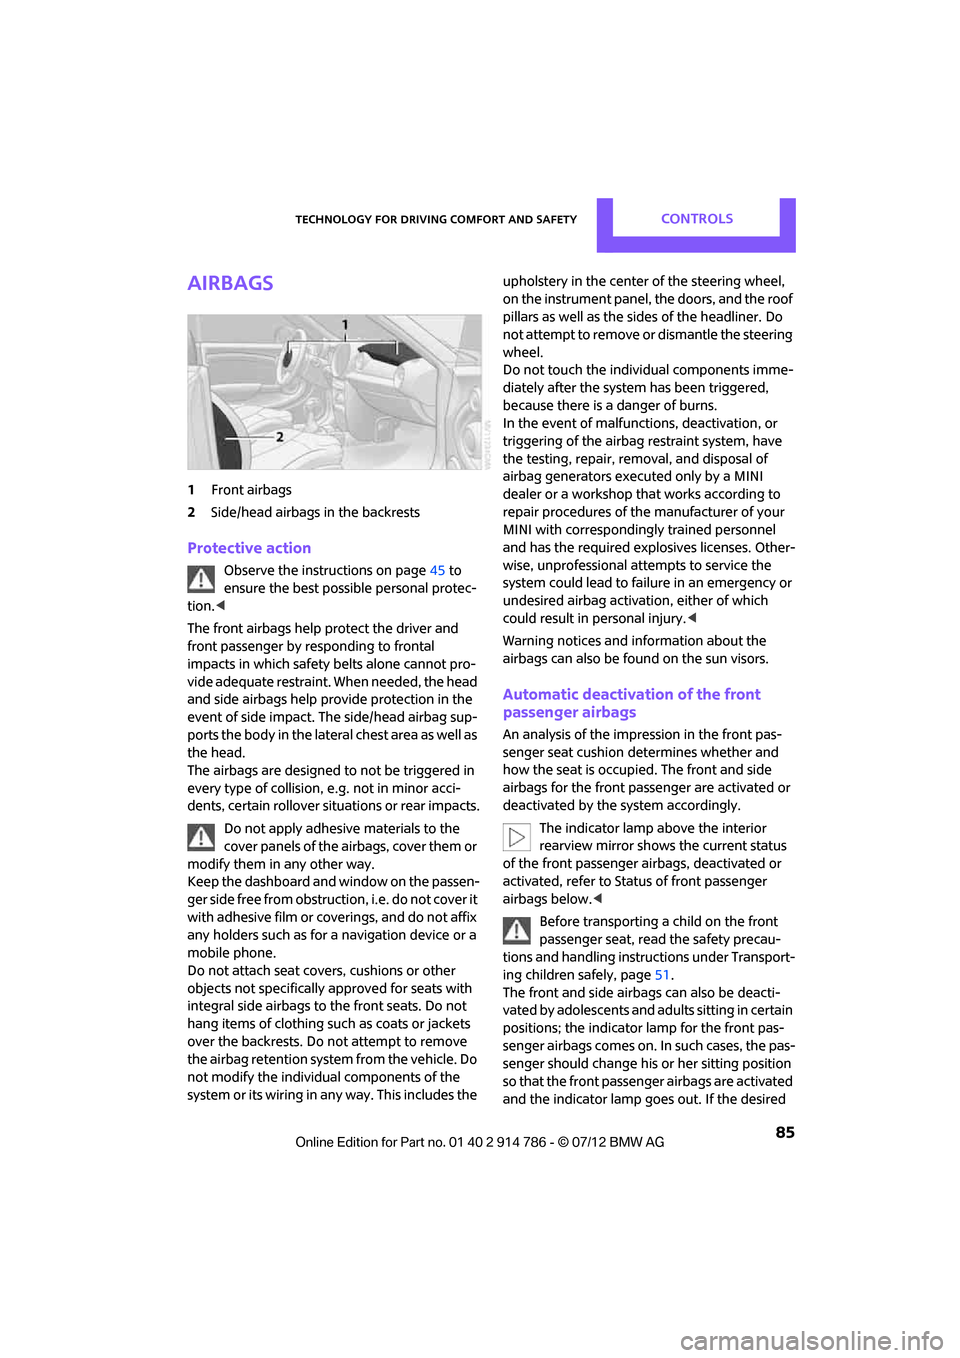
1Front airbags
2 Side/head airbags in the backrests
Protective action
Observe the instructions on page 45 to
ensure the best possible personal protec-
tion. <
The front airbags help protect the driver and
front passenger by responding to frontal
impacts in which safety belts alone cannot pro-
vide adequate restraint. When needed, the head
and side airbags help provide protection in the
event of side impact. The side/head airbag sup-
ports the body in the lateral chest area as well as
the head.
The airbags are designed to not be triggered in
every type of collision, e.g. not in minor acci-
dents, certain rollover si tuations or rear impacts.
Do not apply adhesive materials to the
cover panels of the airbags, cover them or
modify them in any other way.
Keep the dashboard and window on the passen-
g e r s i d e f r e e f r o m o b s t r u c t i o n , i . e . d o n o t c o v e r i t
with adhesive film or coverings, and do not affix
any holders such as for a navigation device or a
mobile phone.
Do not attach seat covers, cushions or other
objects not specifically approved for seats with
integral side airbags to the front seats. Do not
hang items of clothing such as coats or jackets
over the backrests. Do not attempt to remove
the airbag retention system from the vehicle. Do
not modify the individual components of the
system or its wiring in any way. This includes the upholstery in the center of the steering wheel,
on the instrument panel, the doors, and the roof
pillars as well as the side
s of the headliner. Do
not attempt to remove or dismantle the steering
wheel.
Do not touch the individual components imme-
diately after the system has been triggered,
because there is a danger of burns.
In the event of malfuncti ons, deactivation, or
triggering of the airbag restraint system, have
the testing, repair, removal, and disposal of
airbag generators executed only by a MINI
dealer or a workshop th at works according to
repair procedures of the manufacturer of your
MINI with correspondingly trained personnel
and has the required explosives licenses. Other-
wise, unprofessional attempts to service the
system could lead to fail ure in an emergency or
undesired airbag activation, either of which
could result in personal injury. <
Warning notices and in formation about the
airbags can also be found on the sun visors.
Automatic deactivation of the front
passenger airbags
An analysis of the impression in the front pas-
senger seat cushion determines whether and
how the seat is occupied. The front and side
airbags for the front passenger are activated or
deactivated by the system accordingly.
The indicator lamp above the interior
rearview mirror shows the current status
of the front passenger airbags, deactivated or
activated, refer to Status of front passenger
airbags below. <
Before transporting a child on the front
passenger seat, read the safety precau-
tions and handling instructions under Transport-
ing children safely, page 51.
The front and side airbag s can also be deacti-
vated by adolescents and adults sitting in certain
positions; the indicator lamp for the front pas-
senger airbags comes on. In such cases, the pas-
senger should change his or her sitting position
so that the front passenger airbags are activated
and the indicator lamp goes out. If the desired
Online Edition for Part no. 01 40 2 914 786 - \251 07/12 BMW AG
Page 87 of 218
CONTROLSTechnology for driving comfort and safety
86
airbag status cannot be achieved by changing
the sitting position, transport the relevant pas-
senger on a rear seat. Do not attach covers,
cushions, ball mats or other items to the front
passenger seat unless they are specifically
recommended by the manufacturer of your
MINI. Do not place items under the seat which
could press against the se at from below. Other-
wise, a correct analysis of the seat cushion is not
ensured. <
Status of front passenger airbags
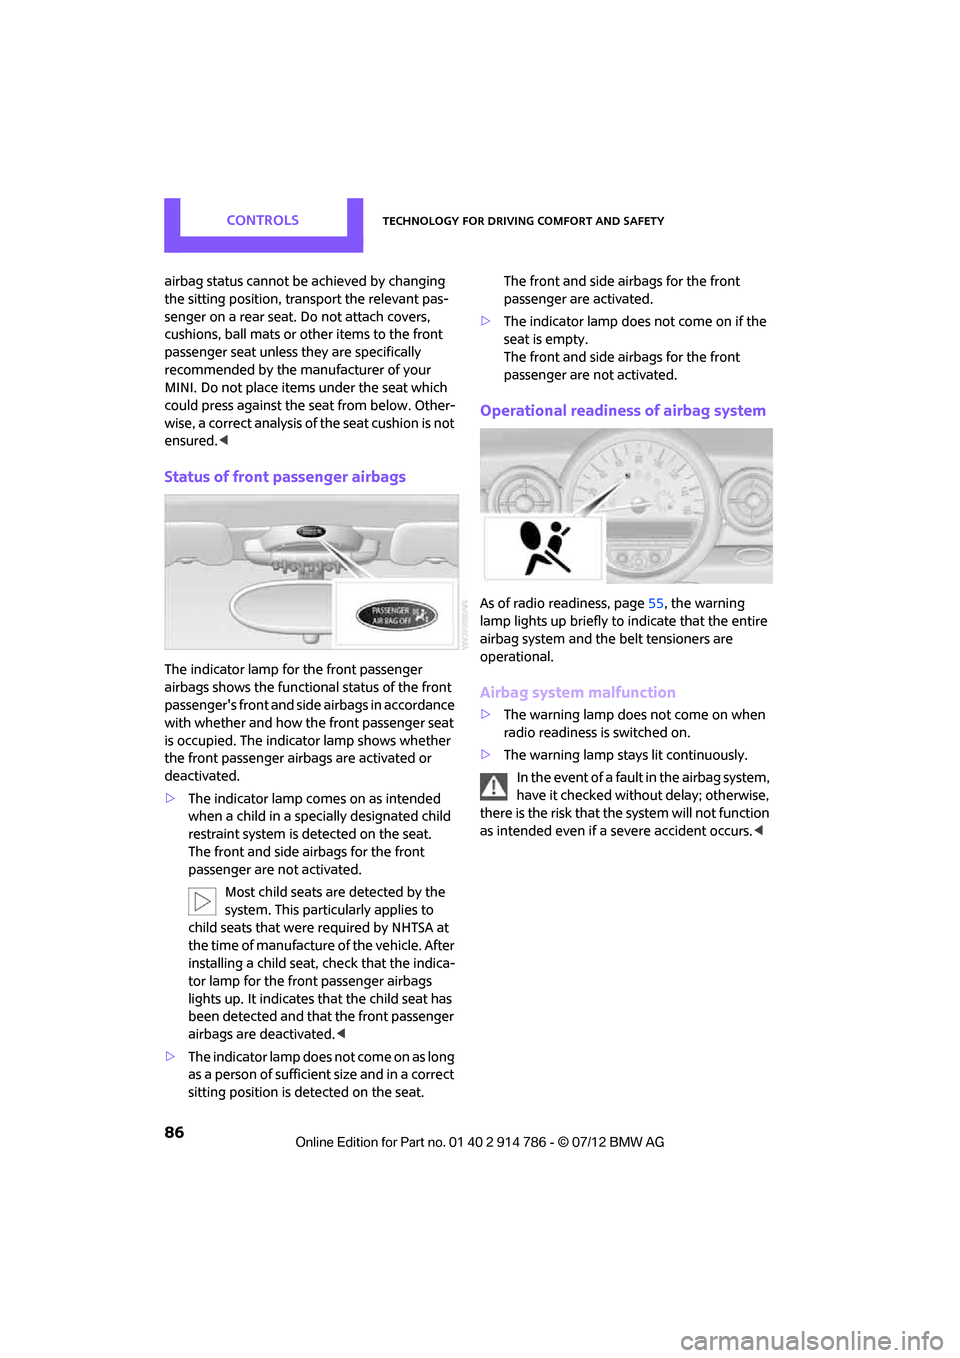
The indicator lamp for the front passenger
airbags shows the function al status of the front
passenger's front and side airbags in accordance
with whether and how the front passenger seat
is occupied. The indica tor lamp shows whether
the front passenger airbags are activated or
deactivated.
> The indicator lamp co mes on as intended
when a child in a spec ially designated child
restraint system is detected on the seat.
The front and side airbags for the front
passenger are not activated.
Most child seats are detected by the
system. This particularly applies to
child seats that were required by NHTSA at
the time of manufacture of the vehicle. After
installing a child seat, check that the indica-
tor lamp for the front passenger airbags
lights up. It indicates that the child seat has
been detected and that the front passenger
airbags are deactivated. <
> T h e i n d i c a t o r l a m p d o e s n o t c o m e o n a s l o n g
as a person of sufficient size and in a correct
sitting position is detected on the seat. The front and side airbags for the front
passenger are activated.
> The indicator lamp does not come on if the
seat is empty.
The front and side airbags for the front
passenger are not activated.
Operational readines s of airbag system
As of radio readiness, page 55, the warning
lamp lights up briefly to indicate that the entire
airbag system and the belt tensioners are
operational.
Airbag system malfunction
> The warning lamp does not come on when
radio readiness is switched on.
> The warning lamp stays lit continuously.
In the event of a fault in the airbag system,
have it checked without delay; otherwise,
there is the risk that the system will not function
as intended even if a severe accident occurs. <
Online Edition for Part no. 01 40 2 914 786 - \251 07/12 BMW AG
Page 119 of 218
ENTERTAINMENTRadio MINI Boost CD
118
Or, by using the knob on the right:
1.Press the button.
2. Turn the knob on the right until the desired
frequency is reached.
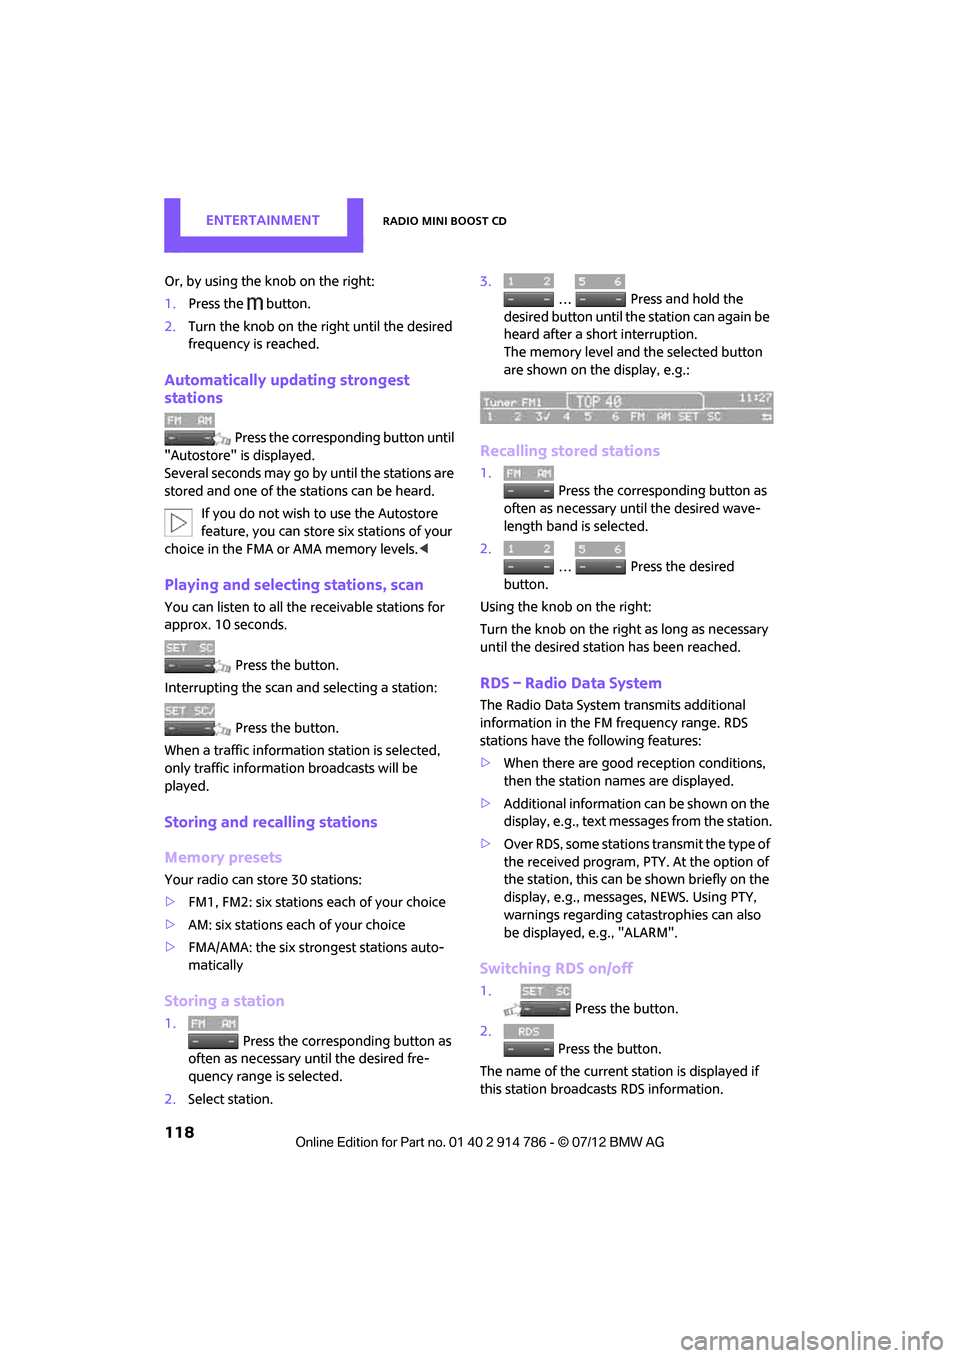
Automatically updating strongest
stations
Press the correspon ding button until
"Autostore" is displayed.
Several seconds may go by until the stations are
stored and one of the stations can be heard.
If you do not wish to use the Autostore
feature, you can store six stations of your
choice in the FMA or AMA memory levels.<
Playing and selecting stations, scan
You can listen to all the receivable stations for
approx. 10 seconds.
Press the button.
Interrupting the scan an d selecting a station:
Press the button.
When a traffic information station is selected,
only traffic information broadcasts will be
played.
Storing and recalling stations
Memory presets
Your radio can store 30 stations:
> FM1, FM2: six stations each of your choice
> AM: six stations each of your choice
> FMA/AMA: the six stro ngest stations auto-
matically
Storing a station
1.
Press the corresponding button as
often as necessary until the desired fre-
quency range is selected.
2. Select station. 3.
… Press and hold the
desired button until th e station can again be
heard after a short interruption.
The memory level and the selected button
are shown on the display, e.g.:
Recalling stored stations
1. Press the corresponding button as
often as necessary until the desired wave-
length band is selected.
2.
… Press the desired
button.
Using the knob on the right:
Turn the knob on the right as long as necessary
until the desired stat ion has been reached.
RDS – Radio Data System
The Radio Data System transmits additional
information in the FM frequency range. RDS
stations have the following features:
>When there are good reception conditions,
then the station names are displayed.
> Additional information can be shown on the
display, e.g., text me ssages from the station.
> Over RDS, some stations transmit the type of
the received program, PTY. At the option of
the station, this can be shown briefly on the
display, e.g., message s, NEWS. Using PTY,
warnings regarding ca tastrophies can also
be displayed, e.g., "ALARM".
Switching RDS on/off
1. Press the button.
2. Press the button.
The name of the current station is displayed if
this station broadcasts RDS information.
Online Edition for Part no. 01 40 2 914 786 - \251 07/12 BMW AG
Page 158 of 218
Engine compartmentMOBILITY
157
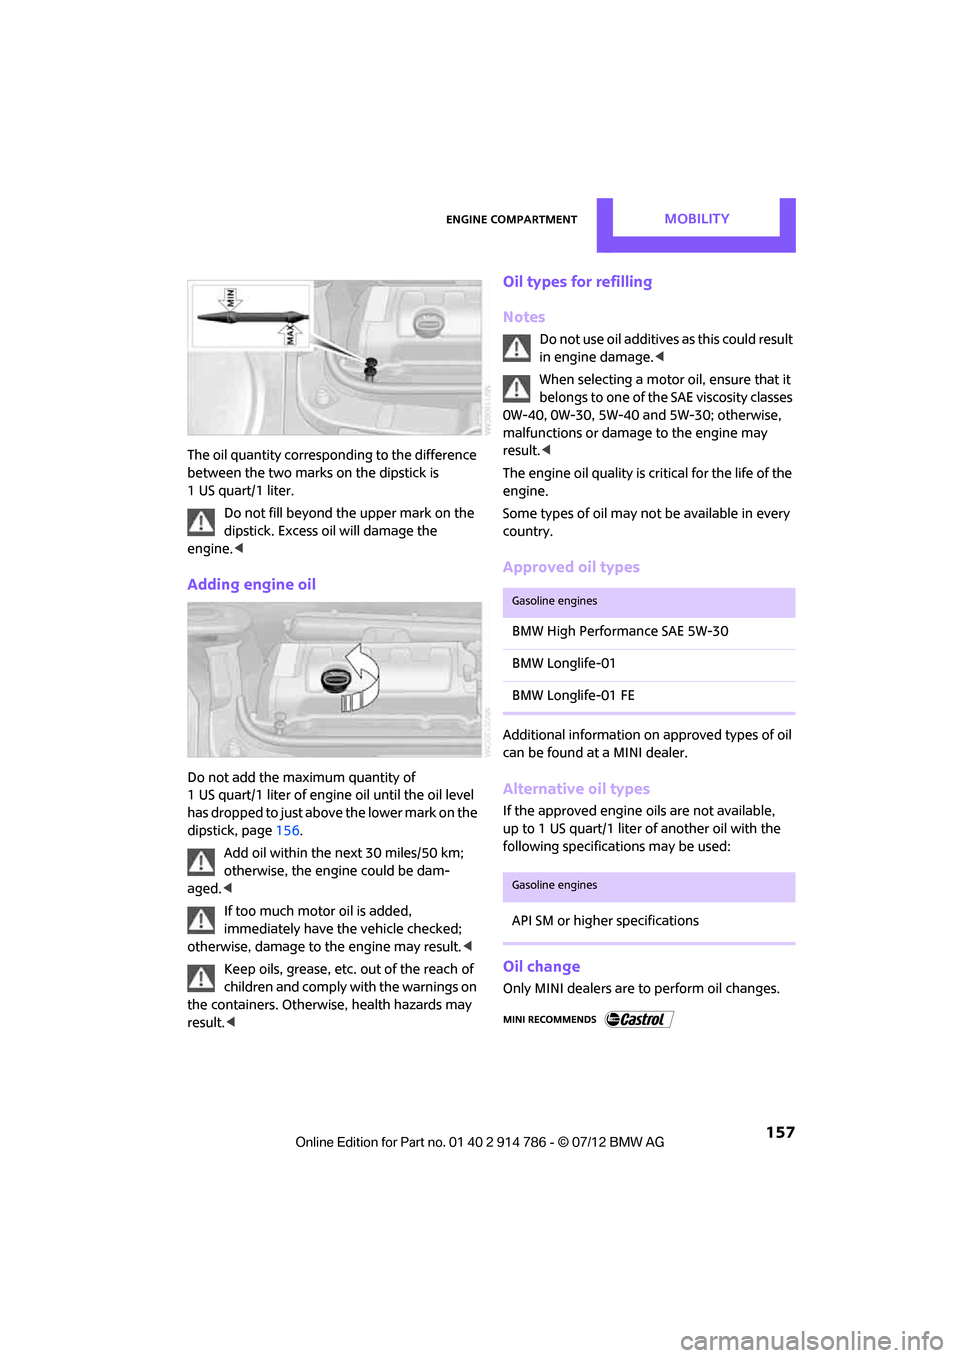
The oil quantity corresponding to the difference
between the two marks on the dipstick is
1 US quart/1 liter.Do not fill beyond the upper mark on the
dipstick. Excess oil will damage the
engine. <
Adding engine oil
Do not add the maximum quantity of
1 US quart/1 liter of engine oil until the oil level
has dropped to just abov e the lower mark on the
dipstick, page 156.
Add oil within the next 30 miles/50 km;
otherwise, the engine could be dam-
aged. <
If too much motor oil is added,
immediately have the vehicle checked;
otherwise, damage to the engine may result. <
Keep oils, grease, etc. out of the reach of
children and comply with the warnings on
the containers. Otherwise, health hazards may
result. <
Oil types for refilling
Notes
Do not use oil additives as this could result
in engine damage. <
When selecting a motor oil, ensure that it
belongs to one of the SAE viscosity classes
0W-40, 0W-30, 5W-40 and 5W-30; otherwise,
malfunctions or damage to the engine may
result. <
The engine oil quality is critical for the life of the
engine.
Some types of oil may not be available in every
country.
Approved oil types
Additional information on approved types of oil
can be found at a MINI dealer.
Alternative oil types
If the approved engine oils are not available,
up to 1 US quart/1 liter of another oil with the
following specifications may be used:
Oil change
Only MINI dealers are to perform oil changes.
Gasoline engines
BMW High Performance SAE 5W-30
BMW Longlife-01
BMW Longlife-01 FE
Gasoline engines
API SM or higher specifications
Online Edition for Part no. 01 40 2 914 786 - \251 07/12 BMW AG
Page 159 of 218
MOBILITYEngine compartment
158
Coolant
Coolant consists of half water and half additive.
Not all commercially available additives are
suitable for your MINI. Your MINI dealer knows
which additives are suitab le and will be glad to
advise you.
Only use suitable additives; otherwise,
engine damage may result. Because
additives are harmful to your health, it is
important to follow the instructions on the
containers. <
Comply with the appropriate environmen-
tal protection regulations when disposing
of coolant additives. <
Coolant temperature
If the coolant, and therefore the engine, should
overheat, then a warning lamp will go on, refer
to page185.
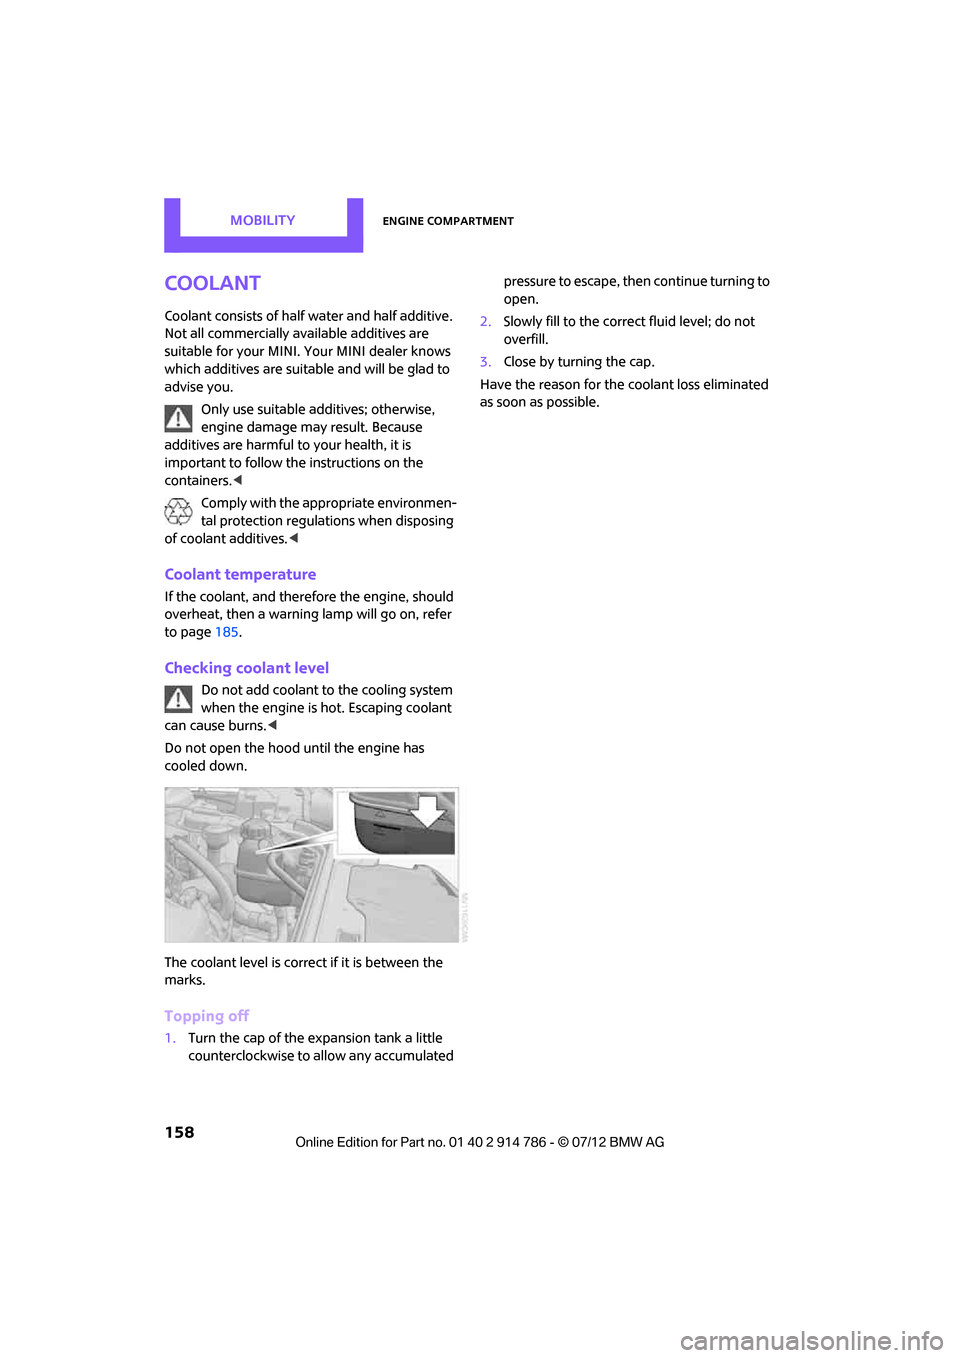
Checking coolant level
Do not add coolant to the cooling system
when the engine is hot. Escaping coolant
can cause burns. <
Do not open the hood until the engine has
cooled down.
The coolant level is correct if it is between the
marks.
Topping off
1. Turn the cap of the ex pansion tank a little
counterclockwise to allow any accumulated pressure to escape, then continue turning to
open.
2. Slowly fill to the correct fluid level; do not
overfill.
3. Close by turning the cap.
Have the reason for the coolant loss eliminated
as soon as possible.
Online Edition for Part no. 01 40 2 914 786 - \251 07/12 BMW AG
Page 161 of 218
MOBILITYMaintenance
160
Socket for On-Board
Diagnosis OBD
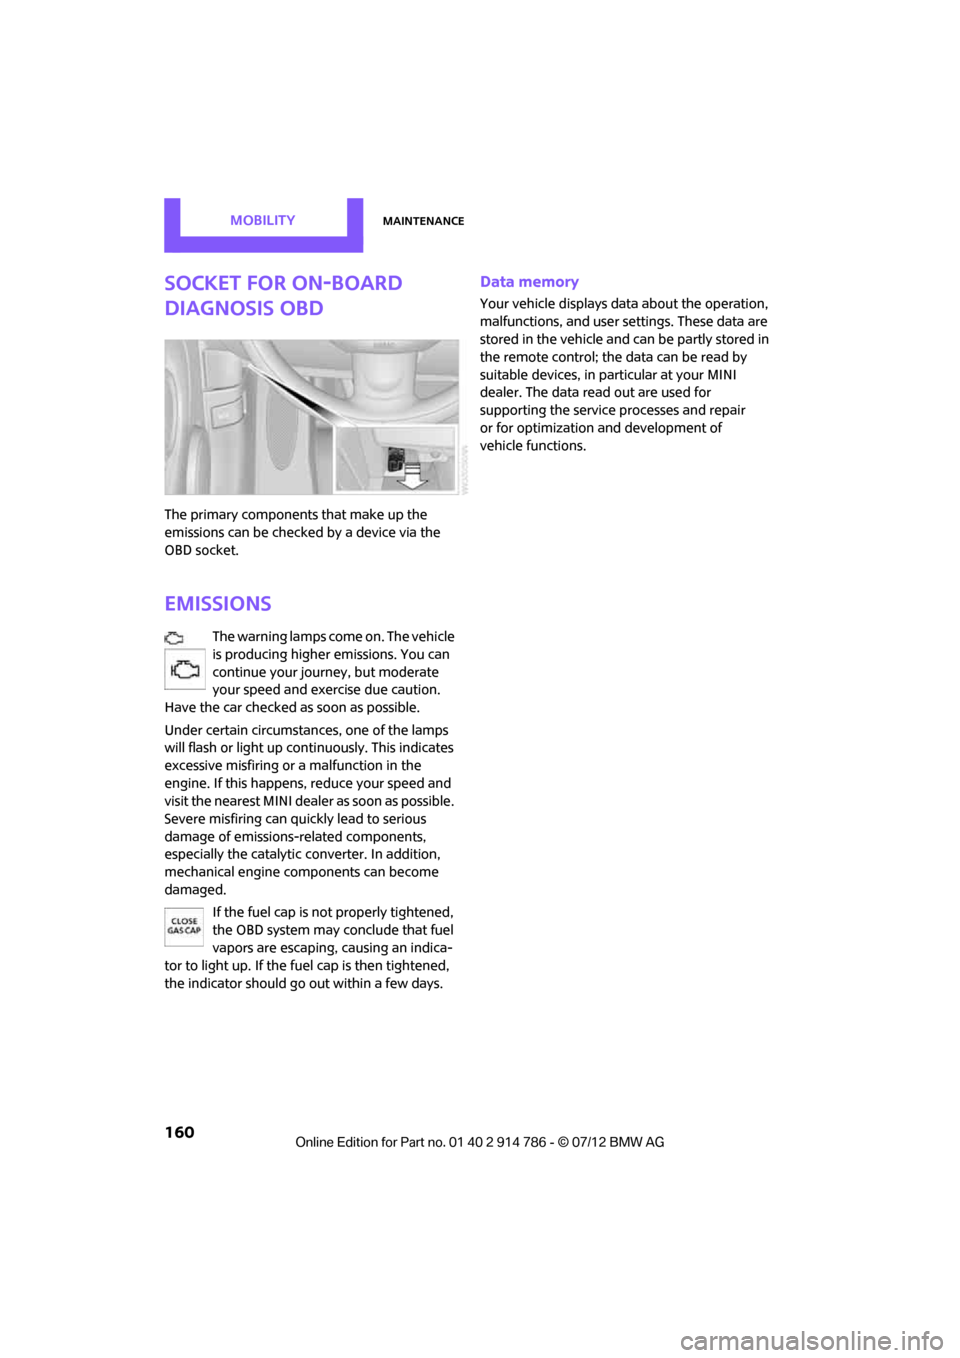
The primary components that make up the
emissions can be checked by a device via the
OBD socket.
Emissions
The warning lamps come on. The vehicle
is producing higher emissions. You can
continue your journey, but moderate
your speed and exercise due caution.
Have the car checked as soon as possible.
Under certain circumstances, one of the lamps
will flash or light up cont inuously. This indicates
excessive misfiring or a malfunction in the
engine. If this happens, reduce your speed and
visit the nearest MINI dealer as soon as possible.
Severe misfiring can quickly lead to serious
damage of emissions-related components,
especially the catalytic converter. In addition,
mechanical engine components can become
damaged.
If the fuel cap is not properly tightened,
the OBD system may conclude that fuel
vapors are escaping, causing an indica-
tor to light up. If the fuel cap is then tightened,
the indicator should go out within a few days.
Data memory
Your vehicle displays data about the operation,
malfunctions, and user settings. These data are
stored in the vehicle and can be partly stored in
the remote control; the data can be read by
suitable devices, in pa rticular at your MINI
dealer. The data read out are used for
supporting the service processes and repair
or for optimization and development of
vehicle functions.
Online Edition for Part no. 01 40 2 914 786 - \251 07/12 BMW AG
Page 162 of 218
CareMOBILITY
161
Care
Vehicle equipment
In this chapter, all production, country, and
optional equipment that is offered in the model
range is described. Equipment is also described
that is not available because of, for example,
selected options or count ry version. This also
applies to safety related functions and systems.
Car-care products
Regular cleaning and care helps to maintain the
value of your MINI.
The manufacturer of your MINI recommends
using manufacturer-approved products to clean
and care for your vehicle.
Your MINI dealer would be pleased to advise
you on cleaning and care products and services
for your MINI.
The ingredients of original MINI Care
Products have been tested, and the
products have been tested in the laboratory
and in practice. They offer optimum care and
protection for your vehicle. <
Do not use any cleansers containing
alcohol or solvents as these may cause
damage. <
Cleaning agents may contain hazardous
or health-damaging substances. Follow
the warning and hazard instructions on the
packaging. For interior cleaning, always open
the doors or windows of the vehicle.
Do not use any products that are not intended
for cleaning the vehicle. <
External care
Washing your vehicle
Especially during the winter months the
vehicle should be frequently washed. Dirt
and road salt can damage the vehicle.<
After washing the vehicle, apply the
brakes briefly to dry them; otherwise,
water can reduce braking efficiency over the
short term and the brake rotors can corrode. <
Car washes
Preference should be given to cloth car washes.
Do not use automatic high-pressure car
washes; otherwise, water may drip into
the vehicle around the windows. <
Before driving into the car wash, check if the
system is suitable for your MINI. Observe the
following points:
> Vehicle dimensions, page 197.
> If necessary: fold in the outside mirrors,
page 49.
> Maximum permissible tire width.
Avoid car washes with tracks higher than
4 in/10 cm; otherwise, the chassis could
be damaged. <
Preparations for driving into the car wash:
> Unscrew the rod antenna.
> MINI Coupe, MINI Roadster: retract spoiler.
> Deactivate the rain sensor to prevent
unintentional wiping.
> Remove additional attachments, e.g.
spoilers or telephone antennas, if there is
a possibility that they could be damaged.
> Insert the remote control into the ignition
lock.
Online Edition for Part no. 01 40 2 914 786 - \251 07/12 BMW AG
Page 171 of 218
MOBILITYReplacing components
170
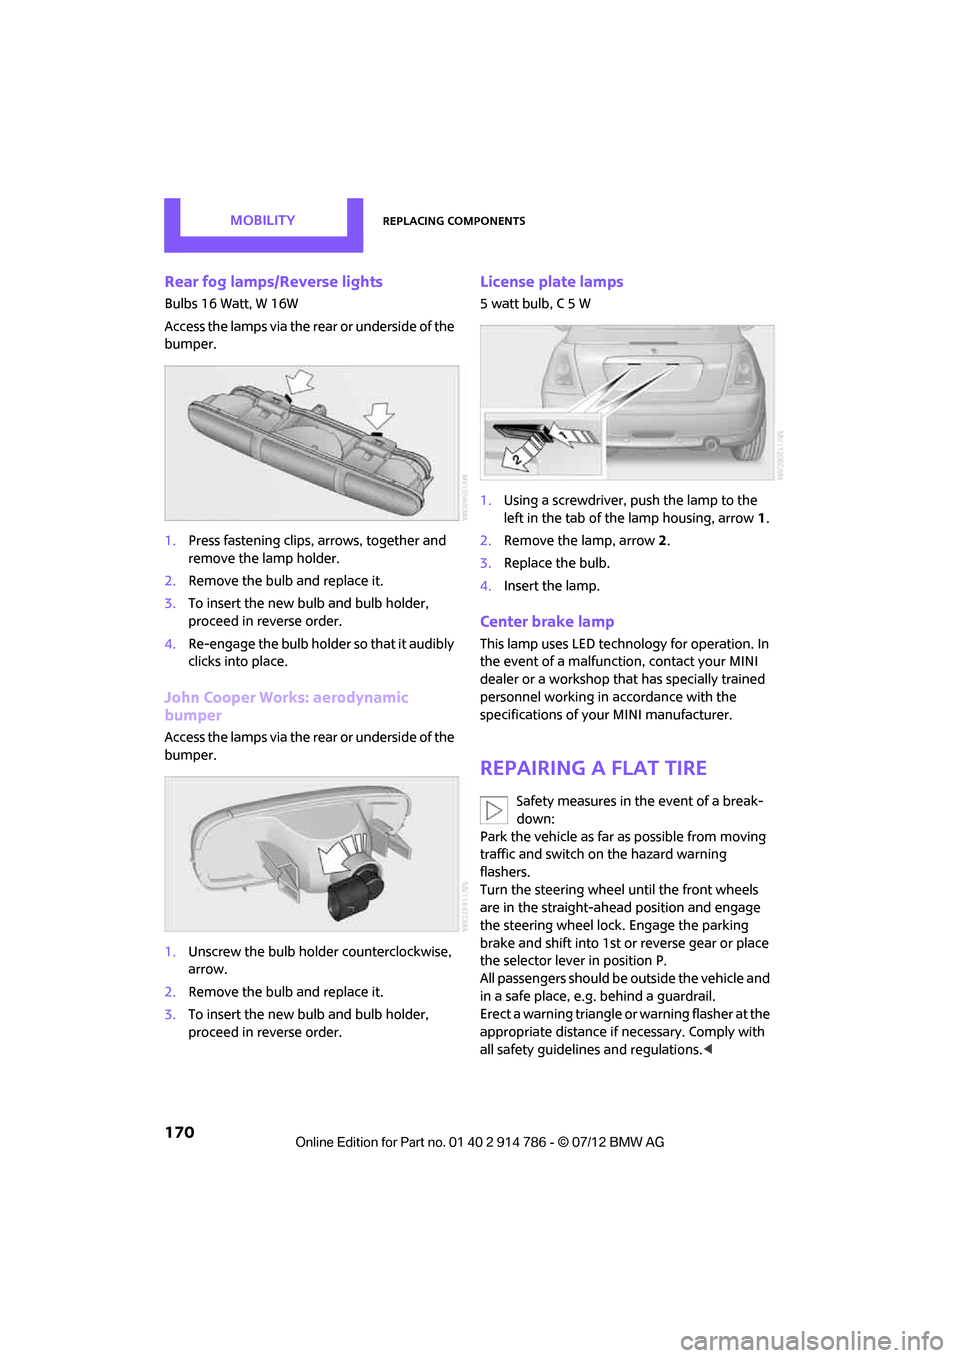
Rear fog lamps/Reverse lights
Bulbs 16 Watt, W 16W
Access the lamps via the rear or underside of the
bumper.
1.Press fastening clips, arrows, together and
remove the lamp holder.
2. Remove the bulb and replace it.
3. To insert the new bulb and bulb holder,
proceed in reverse order.
4. Re-engage the bulb holder so that it audibly
clicks into place.
John Cooper Works: aerodynamic
bumper
Access the lamps via the rear or underside of the
bumper.
1.Unscrew the bulb holder counterclockwise,
arrow.
2. Remove the bulb and replace it.
3. To insert the new bulb and bulb holder,
proceed in reverse order.
License plate lamps
5 watt bulb, C 5 W
1.Using a screwdriver, push the lamp to the
left in the tab of the lamp housing, arrow 1.
2. Remove the lamp, arrow 2 .
3. Replace the bulb.
4. Insert the lamp.
Center brake lamp
This lamp uses LED technology for operation. In
the event of a malfunction, contact your MINI
dealer or a workshop that has specially trained
personnel working in accordance with the
specifications of your MINI manufacturer.
Repairing a flat tire
Safety measures in the event of a break-
down:
Park the vehicle as far as possible from moving
traffic and switch on the hazard warning
flashers.
Turn the steering wheel until the front wheels
are in the straight-ahead position and engage
the steering wheel lock. Engage the parking
brake and shift into 1st or reverse gear or place
the selector lever in position P.
All passengers should be outside the vehicle and
in a safe place, e.g. behind a guardrail.
Erect a warning triangle or warning flasher at the
appropriate distance if necessary. Comply with
all safety guidelines and regulations. <
Online Edition for Part no. 01 40 2 914 786 - \251 07/12 BMW AG