light MINI Coupe 2014 (Mini Connected) Repair Manual
[x] Cancel search | Manufacturer: MINI, Model Year: 2014, Model line: Coupe, Model: MINI Coupe 2014Pages: 288, PDF Size: 6.72 MB
Page 166 of 288
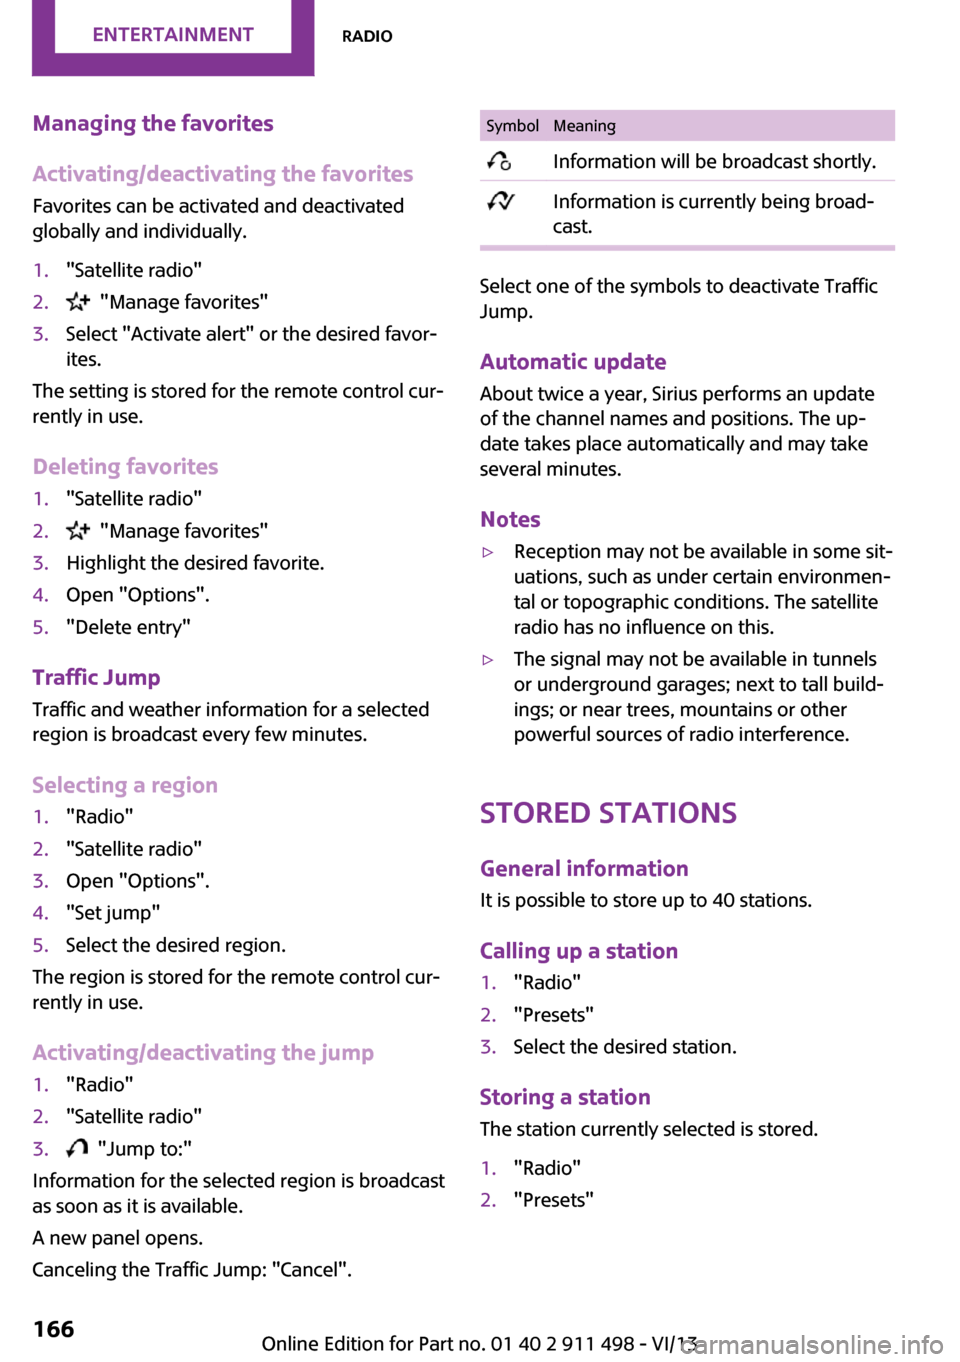
Managing the favorites
Activating/deactivating the favorites
Favorites can be activated and deactivated
globally and individually.1."Satellite radio"2. "Manage favorites"3.Select "Activate alert" or the desired favor‐
ites.
The setting is stored for the remote control cur‐
rently in use.
Deleting favorites
1."Satellite radio"2. "Manage favorites"3.Highlight the desired favorite.4.Open "Options".5."Delete entry"
Traffic Jump Traffic and weather information for a selected
region is broadcast every few minutes.
Selecting a region
1."Radio"2."Satellite radio"3.Open "Options".4."Set jump"5.Select the desired region.
The region is stored for the remote control cur‐
rently in use.
Activating/deactivating the jump
1."Radio"2."Satellite radio"3. "Jump to:"
Information for the selected region is broadcast
as soon as it is available.
A new panel opens.
Canceling the Traffic Jump: "Cancel".
SymbolMeaning Information will be broadcast shortly. Information is currently being broad‐
cast.
Select one of the symbols to deactivate Traffic
Jump.
Automatic update About twice a year, Sirius performs an update
of the channel names and positions. The up‐
date takes place automatically and may take
several minutes.
Notes
▷Reception may not be available in some sit‐
uations, such as under certain environmen‐
tal or topographic conditions. The satellite
radio has no influence on this.▷The signal may not be available in tunnels
or underground garages; next to tall build‐
ings; or near trees, mountains or other
powerful sources of radio interference.
Stored stations
General information
It is possible to store up to 40 stations.
Calling up a station
1."Radio"2."Presets"3.Select the desired station.
Storing a stationThe station currently selected is stored.
1."Radio"2."Presets"Seite 166EntertainmentRadio166
Online Edition for Part no. 01 40 2 911 498 - VI/13
Page 168 of 288
CD/multimediaVehicle equipment
This chapter describes all series equipment as
well as country-specific and special equipment
offered for this model series.Therefore, it also
describes equipment that may not be found in
your vehicle, for instance due to the selected
special equipment or the country version. This
also applies to safety-related functions and sys‐
tems.
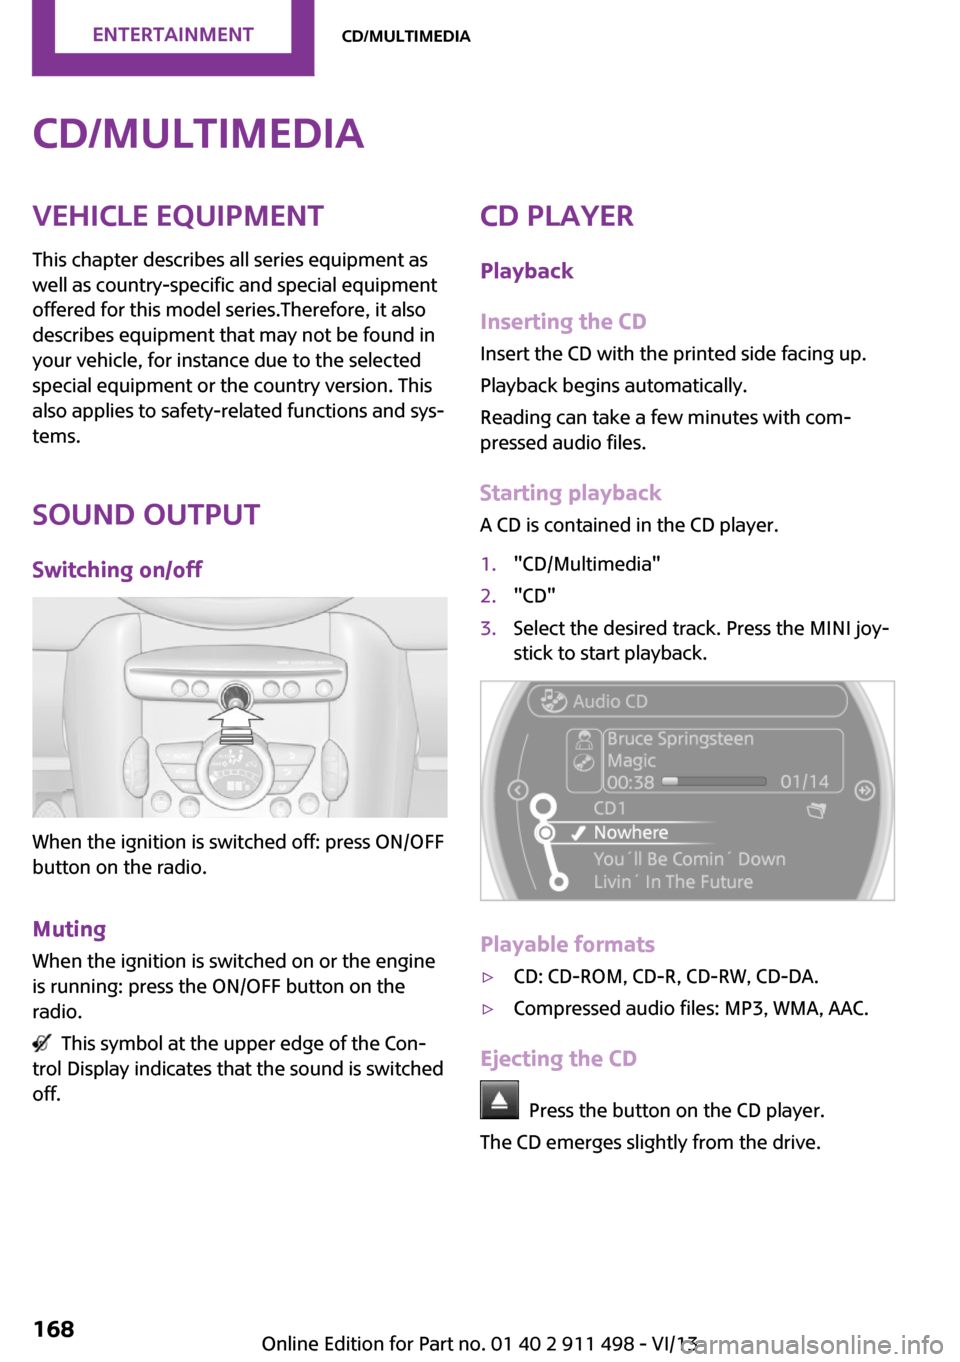
Sound output Switching on/off
When the ignition is switched off: press ON/OFF
button on the radio.
Muting When the ignition is switched on or the engine
is running: press the ON/OFF button on the
radio.
This symbol at the upper edge of the Con‐
trol Display indicates that the sound is switched
off.
CD player
Playback
Inserting the CD
Insert the CD with the printed side facing up.
Playback begins automatically.
Reading can take a few minutes with com‐
pressed audio files.
Starting playback
A CD is contained in the CD player.1."CD/Multimedia"2."CD"3.Select the desired track. Press the MINI joy‐
stick to start playback.
Playable formats
▷CD: CD-ROM, CD-R, CD-RW, CD-DA.▷Compressed audio files: MP3, WMA, AAC.
Ejecting the CD
Press the button on the CD player.
The CD emerges slightly from the drive.
Seite 168EntertainmentCD/multimedia168
Online Edition for Part no. 01 40 2 911 498 - VI/13
Page 170 of 288

4.Open "Options".5."Random"
To switch off random playback: press the
MINI joystick.
Fast forward/reverse
Press and hold the button for the
corresponding direction.
Automatic repeat
The selected track, directories, or CDs are re‐
peated automatically.
Notes
CD player Do not remove the cover
The CD players are officially designated
Class 1 laser products. Do not operate if the
cover is damaged; otherwise, severe eye dam‐
age can result. ◀
CDs Using CDs
▷Do not use self-recorded CDs with la‐
bels applied, as these can become
detached during playback due to
heat buildup and can cause irrepara‐
ble damage to the device.▷Only use round CDs with a standard diame‐
ter of 4.7 in/12 cm and do not play CDs
with an adapter, e.g., single CDs; otherwise,
the CDs or the adapter may jam and no lon‐
ger eject. ◀
General malfunctions
▷The CD players have been optimized for
performance in vehicles. In some instances
they may be more sensitive to faulty CDs
than stationary devices would be.▷If a CD cannot be played, first check if it has
been inserted correctly.
Humidity
High levels of humidity can lead to condensa‐
tion on the CD or the laser's scan lens, and tem‐
porarily prevent playback.
Malfunctions with particular CDs If malfunctions occur only with particular CDs,
this can be due to one of the following causes:
Self-recorded CDs
▷Possible reasons for malfunctions with self-
recorded CDs are inconsistent data creation
or recording processes, or poor quality or
old age of the blank CD.▷Only label CDs on the upper side with a pen
intended for this purpose.
Damage
▷Avoid fingerprints, dust, scratches and
moisture.▷Store CDs in a sleeve.▷Do not subject CDs to temperatures over
50 ℃/122 ℉, high humidity, or direct sun‐
light.
CDs with copy protection
CDs are often provided with a copy protection
feature by the manufacturer. This can mean
Seite 170EntertainmentCD/multimedia170
Online Edition for Part no. 01 40 2 911 498 - VI/13
Page 177 of 288
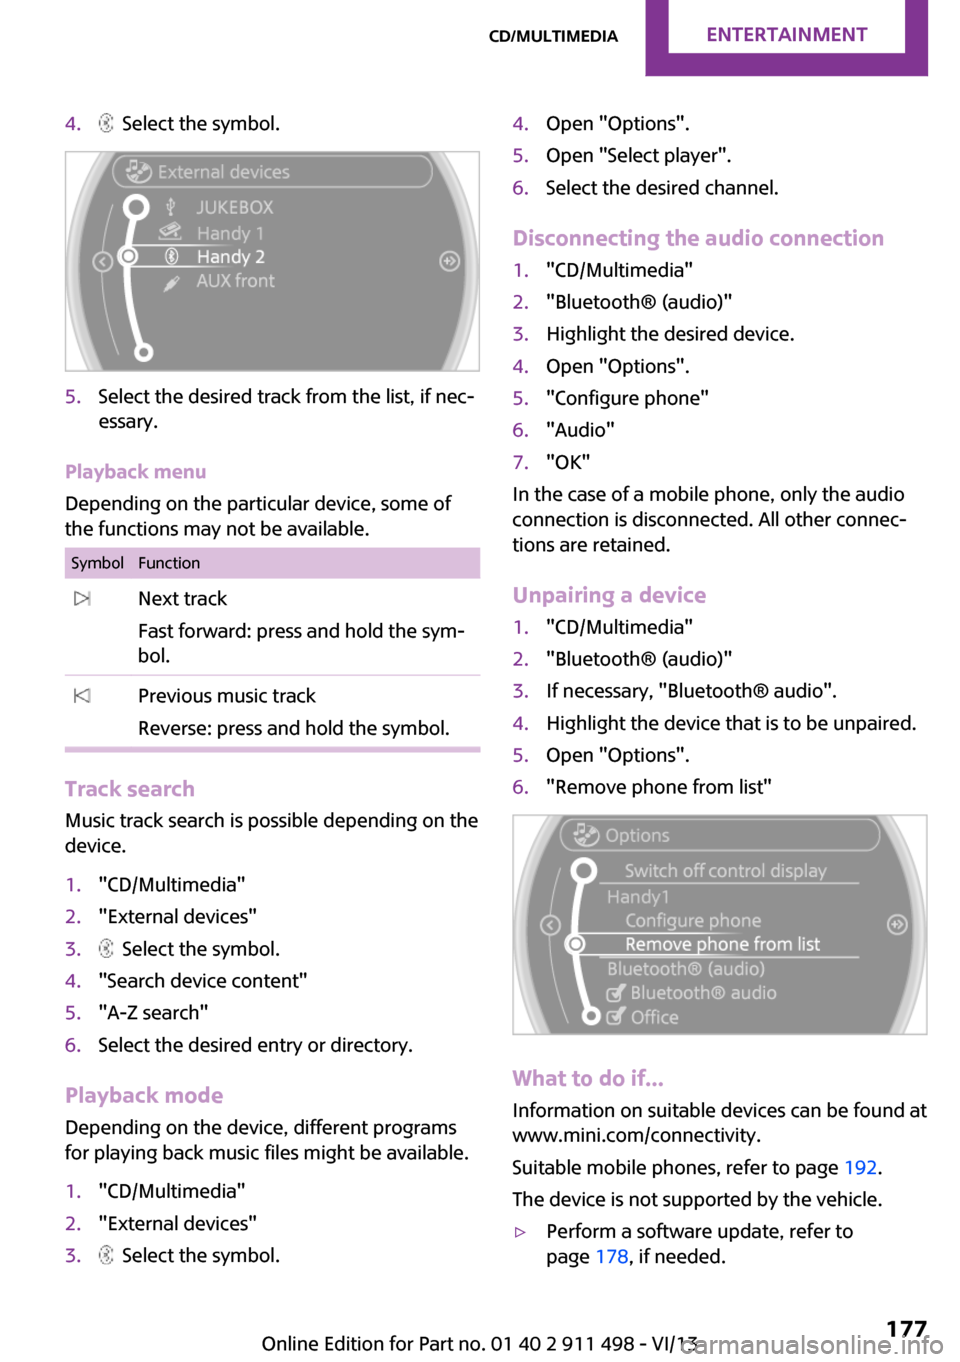
4. Select the symbol.5.Select the desired track from the list, if nec‐
essary.
Playback menu
Depending on the particular device, some of
the functions may not be available.
SymbolFunction Next track
Fast forward: press and hold the sym‐
bol. Previous music track
Reverse: press and hold the symbol.
Track search Music track search is possible depending on the
device.
1."CD/Multimedia"2."External devices"3. Select the symbol.4."Search device content"5."A-Z search"6.Select the desired entry or directory.
Playback mode
Depending on the device, different programs
for playing back music files might be available.
1."CD/Multimedia"2."External devices"3. Select the symbol.4.Open "Options".5.Open "Select player".6.Select the desired channel.
Disconnecting the audio connection
1."CD/Multimedia"2."Bluetooth® (audio)"3.Highlight the desired device.4.Open "Options".5."Configure phone"6."Audio"7."OK"
In the case of a mobile phone, only the audio
connection is disconnected. All other connec‐
tions are retained.
Unpairing a device
1."CD/Multimedia"2."Bluetooth® (audio)"3.If necessary, "Bluetooth® audio".4.Highlight the device that is to be unpaired.5.Open "Options".6."Remove phone from list"
What to do if...
Information on suitable devices can be found at
www.mini.com/connectivity.
Suitable mobile phones, refer to page 192.
The device is not supported by the vehicle.
▷Perform a software update, refer to
page 178, if needed.Seite 177CD/multimediaEntertainment177
Online Edition for Part no. 01 40 2 911 498 - VI/13
Page 184 of 288
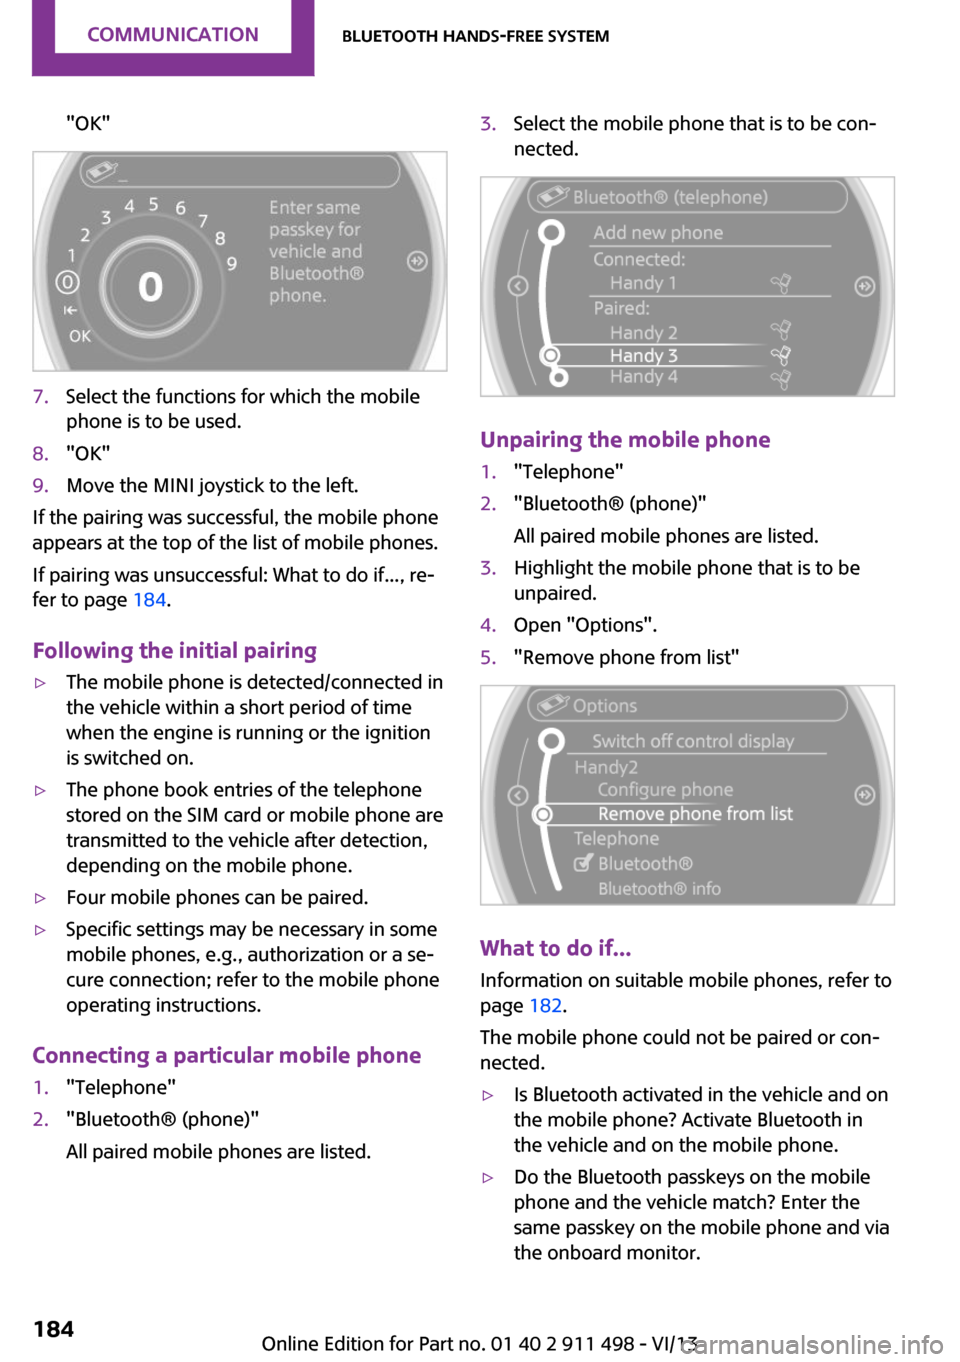
"OK"7.Select the functions for which the mobile
phone is to be used.8."OK"9.Move the MINI joystick to the left.
If the pairing was successful, the mobile phone
appears at the top of the list of mobile phones.
If pairing was unsuccessful: What to do if..., re‐
fer to page 184.
Following the initial pairing
▷The mobile phone is detected/connected in
the vehicle within a short period of time
when the engine is running or the ignition
is switched on.▷The phone book entries of the telephone
stored on the SIM card or mobile phone are
transmitted to the vehicle after detection,
depending on the mobile phone.▷Four mobile phones can be paired.▷Specific settings may be necessary in some
mobile phones, e.g., authorization or a se‐
cure connection; refer to the mobile phone
operating instructions.
Connecting a particular mobile phone
1."Telephone"2."Bluetooth® (phone)"
All paired mobile phones are listed.3.Select the mobile phone that is to be con‐
nected.
Unpairing the mobile phone
1."Telephone"2."Bluetooth® (phone)"
All paired mobile phones are listed.3.Highlight the mobile phone that is to be
unpaired.4.Open "Options".5."Remove phone from list"
What to do if...
Information on suitable mobile phones, refer to
page 182.
The mobile phone could not be paired or con‐
nected.
▷Is Bluetooth activated in the vehicle and on
the mobile phone? Activate Bluetooth in
the vehicle and on the mobile phone.▷Do the Bluetooth passkeys on the mobile
phone and the vehicle match? Enter the
same passkey on the mobile phone and via
the onboard monitor.Seite 184CommunicationBluetooth hands-free system184
Online Edition for Part no. 01 40 2 911 498 - VI/13
Page 187 of 288
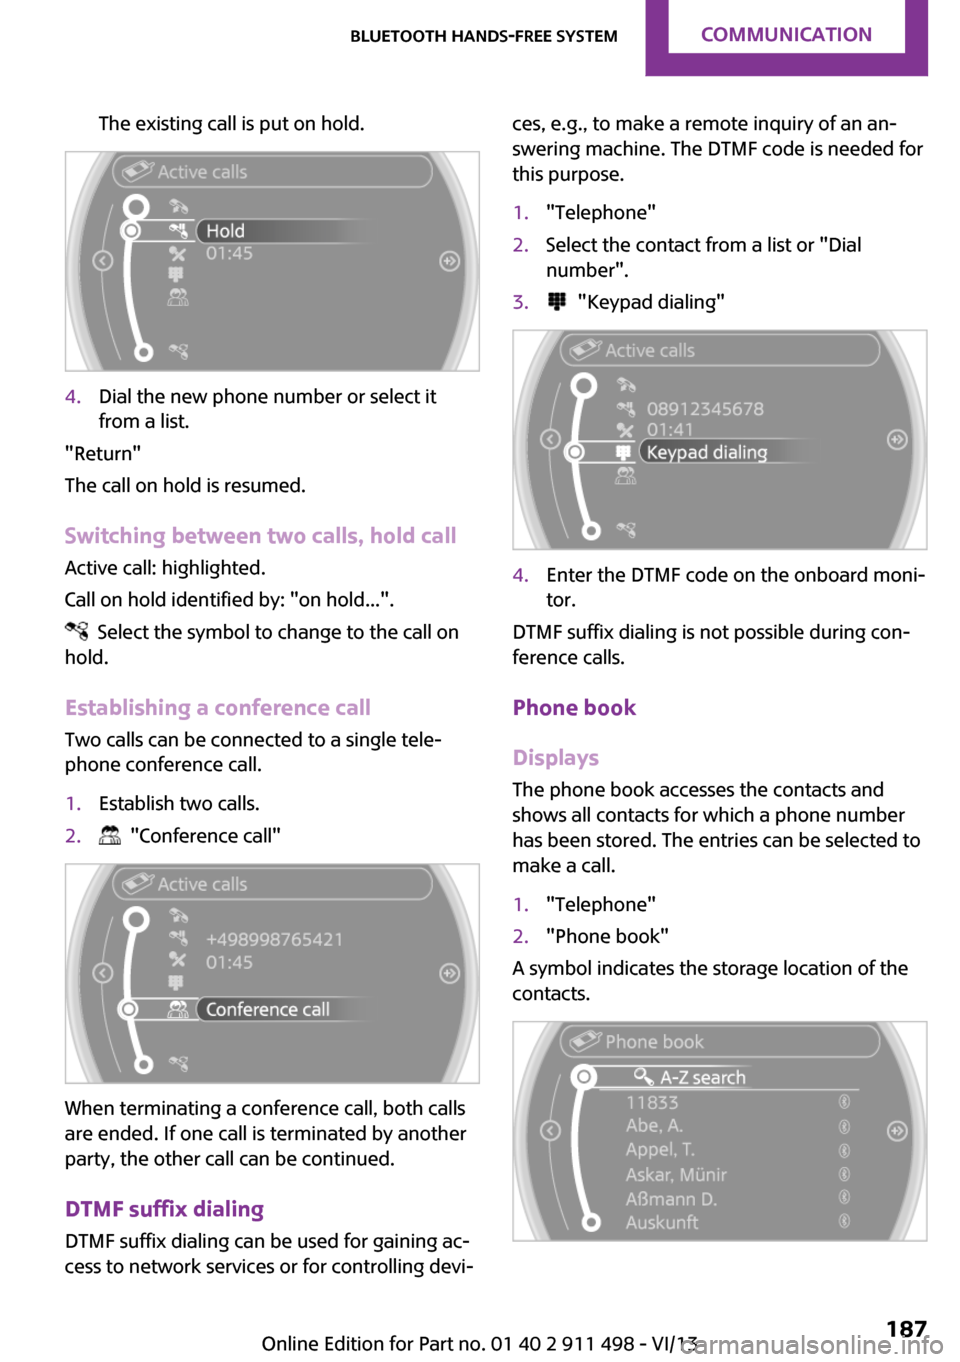
The existing call is put on hold.4.Dial the new phone number or select it
from a list.
"Return"
The call on hold is resumed.
Switching between two calls, hold call Active call: highlighted.
Call on hold identified by: "on hold...".
Select the symbol to change to the call on
hold.
Establishing a conference call
Two calls can be connected to a single tele‐
phone conference call.
1.Establish two calls.2. "Conference call"
When terminating a conference call, both calls
are ended. If one call is terminated by another
party, the other call can be continued.
DTMF suffix dialing
DTMF suffix dialing can be used for gaining ac‐
cess to network services or for controlling devi‐
ces, e.g., to make a remote inquiry of an an‐
swering machine. The DTMF code is needed for
this purpose.1."Telephone"2.Select the contact from a list or "Dial
number".3. "Keypad dialing"4.Enter the DTMF code on the onboard moni‐
tor.
DTMF suffix dialing is not possible during con‐
ference calls.
Phone book
Displays The phone book accesses the contacts and
shows all contacts for which a phone number
has been stored. The entries can be selected to
make a call.
1."Telephone"2."Phone book"
A symbol indicates the storage location of the
contacts.
Seite 187Bluetooth hands-free systemCommunication187
Online Edition for Part no. 01 40 2 911 498 - VI/13
Page 188 of 288
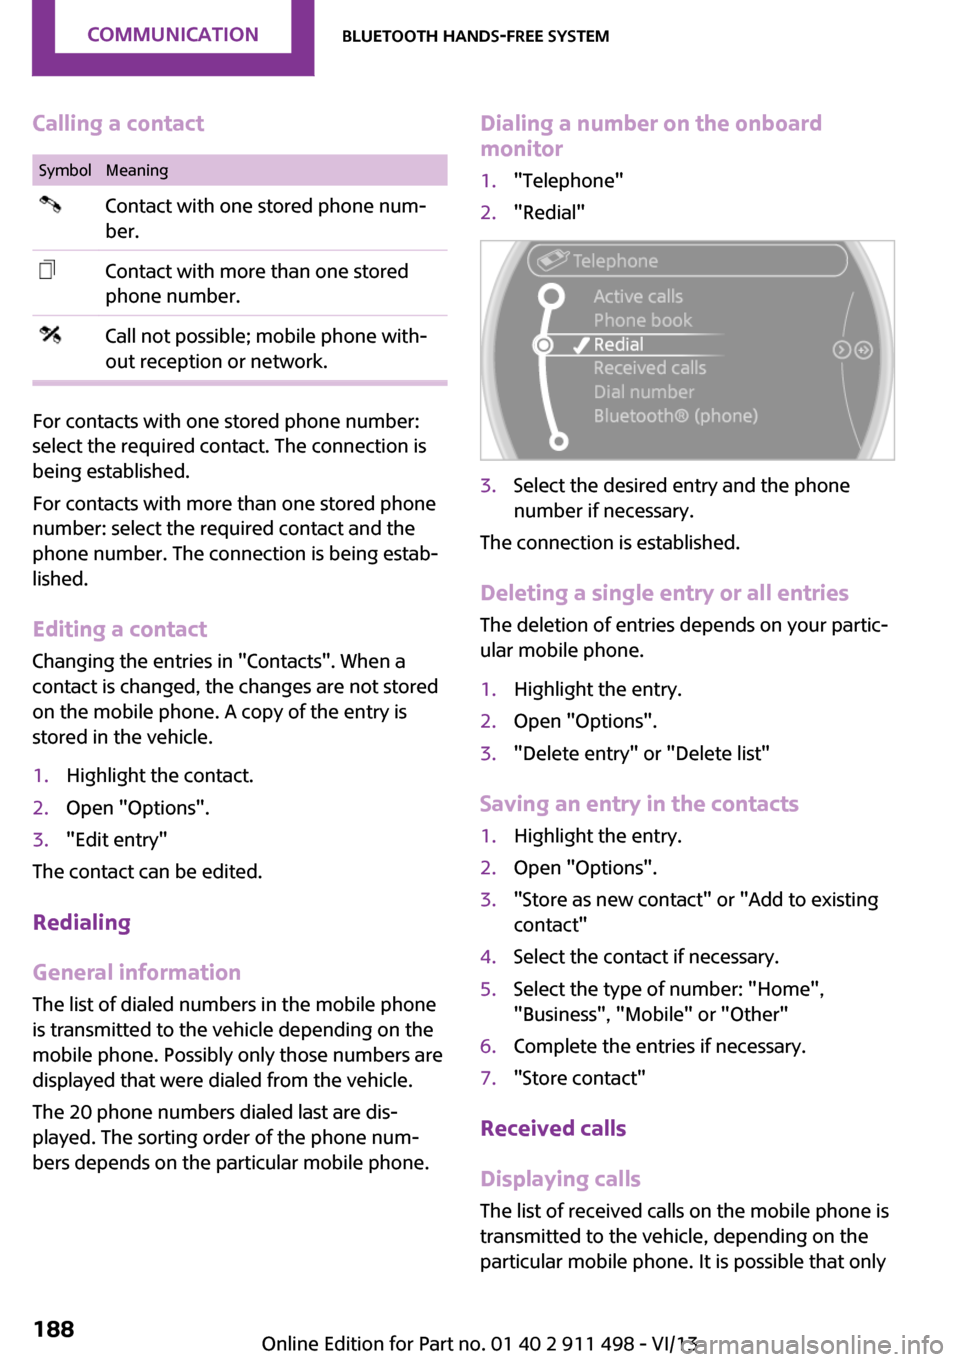
Calling a contactSymbolMeaningContact with one stored phone num‐
ber.Contact with more than one stored
phone number.Call not possible; mobile phone with‐
out reception or network.
For contacts with one stored phone number:
select the required contact. The connection is
being established.
For contacts with more than one stored phone
number: select the required contact and the
phone number. The connection is being estab‐
lished.
Editing a contact
Changing the entries in "Contacts". When a
contact is changed, the changes are not stored
on the mobile phone. A copy of the entry is
stored in the vehicle.
1.Highlight the contact.2.Open "Options".3."Edit entry"
The contact can be edited.
Redialing
General information
The list of dialed numbers in the mobile phone
is transmitted to the vehicle depending on the
mobile phone. Possibly only those numbers are
displayed that were dialed from the vehicle.
The 20 phone numbers dialed last are dis‐
played. The sorting order of the phone num‐
bers depends on the particular mobile phone.
Dialing a number on the onboard
monitor1."Telephone"2."Redial"3.Select the desired entry and the phone
number if necessary.
The connection is established.
Deleting a single entry or all entries
The deletion of entries depends on your partic‐
ular mobile phone.
1.Highlight the entry.2.Open "Options".3."Delete entry" or "Delete list"
Saving an entry in the contacts
1.Highlight the entry.2.Open "Options".3."Store as new contact" or "Add to existing
contact"4.Select the contact if necessary.5.Select the type of number: "Home",
"Business", "Mobile" or "Other"6.Complete the entries if necessary.7."Store contact"
Received calls
Displaying calls
The list of received calls on the mobile phone is
transmitted to the vehicle, depending on the
particular mobile phone. It is possible that only
Seite 188CommunicationBluetooth hands-free system188
Online Edition for Part no. 01 40 2 911 498 - VI/13
Page 189 of 288
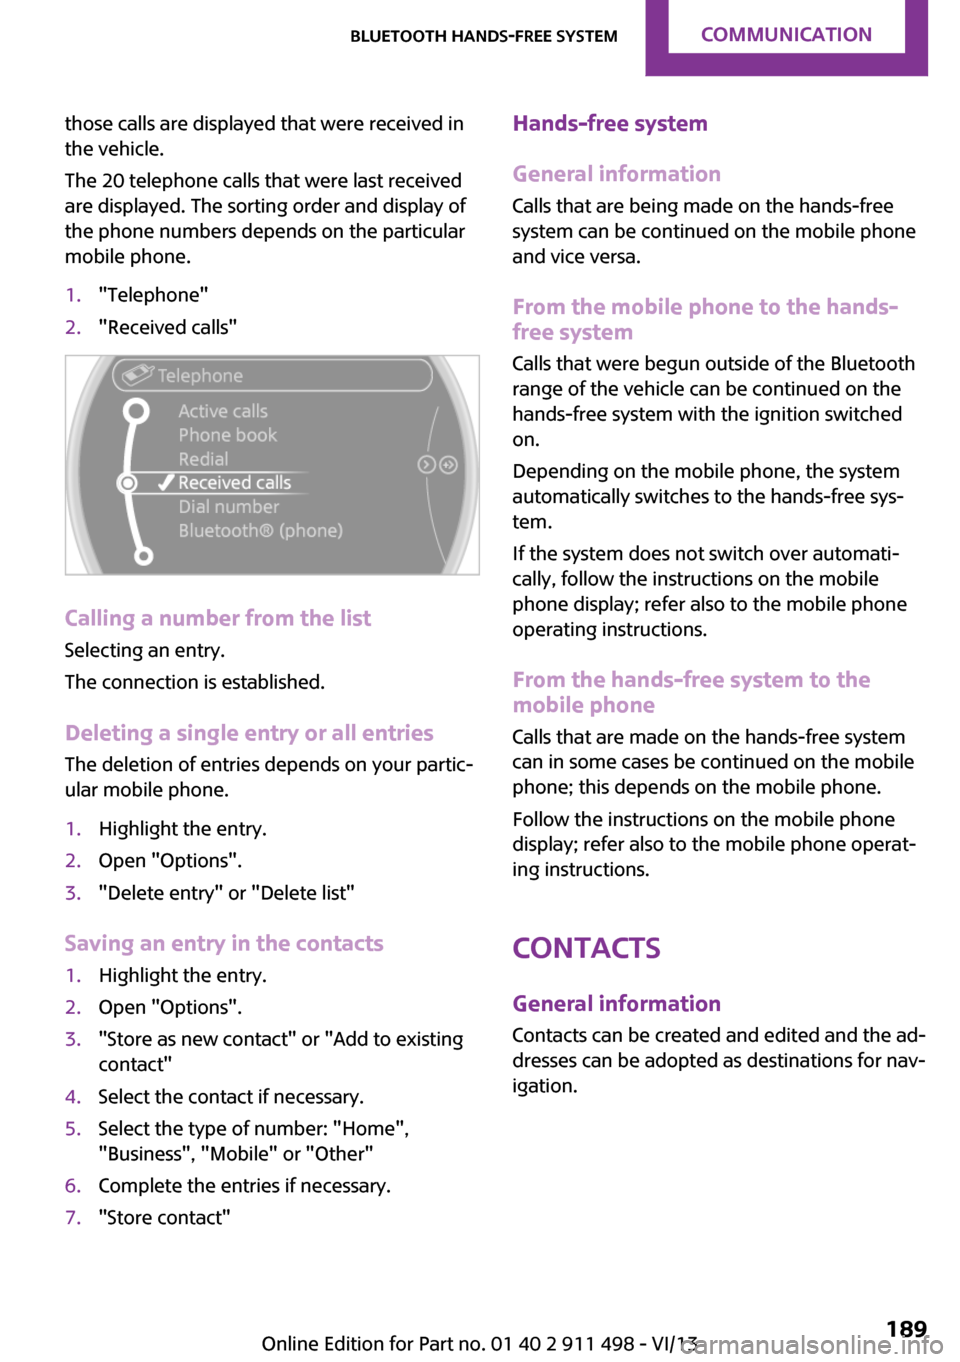
those calls are displayed that were received in
the vehicle.
The 20 telephone calls that were last received
are displayed. The sorting order and display of
the phone numbers depends on the particular
mobile phone.1."Telephone"2."Received calls"
Calling a number from the list
Selecting an entry.
The connection is established.
Deleting a single entry or all entries
The deletion of entries depends on your partic‐
ular mobile phone.
1.Highlight the entry.2.Open "Options".3."Delete entry" or "Delete list"
Saving an entry in the contacts
1.Highlight the entry.2.Open "Options".3."Store as new contact" or "Add to existing
contact"4.Select the contact if necessary.5.Select the type of number: "Home",
"Business", "Mobile" or "Other"6.Complete the entries if necessary.7."Store contact"Hands-free system
General information
Calls that are being made on the hands-free
system can be continued on the mobile phone
and vice versa.
From the mobile phone to the hands-
free system
Calls that were begun outside of the Bluetooth
range of the vehicle can be continued on the
hands-free system with the ignition switched
on.
Depending on the mobile phone, the system
automatically switches to the hands-free sys‐
tem.
If the system does not switch over automati‐
cally, follow the instructions on the mobile
phone display; refer also to the mobile phone
operating instructions.
From the hands-free system to the
mobile phone
Calls that are made on the hands-free system
can in some cases be continued on the mobile
phone; this depends on the mobile phone.
Follow the instructions on the mobile phone
display; refer also to the mobile phone operat‐
ing instructions.
Contacts
General information Contacts can be created and edited and the ad‐
dresses can be adopted as destinations for nav‐
igation.Seite 189Bluetooth hands-free systemCommunication189
Online Edition for Part no. 01 40 2 911 498 - VI/13
Page 191 of 288
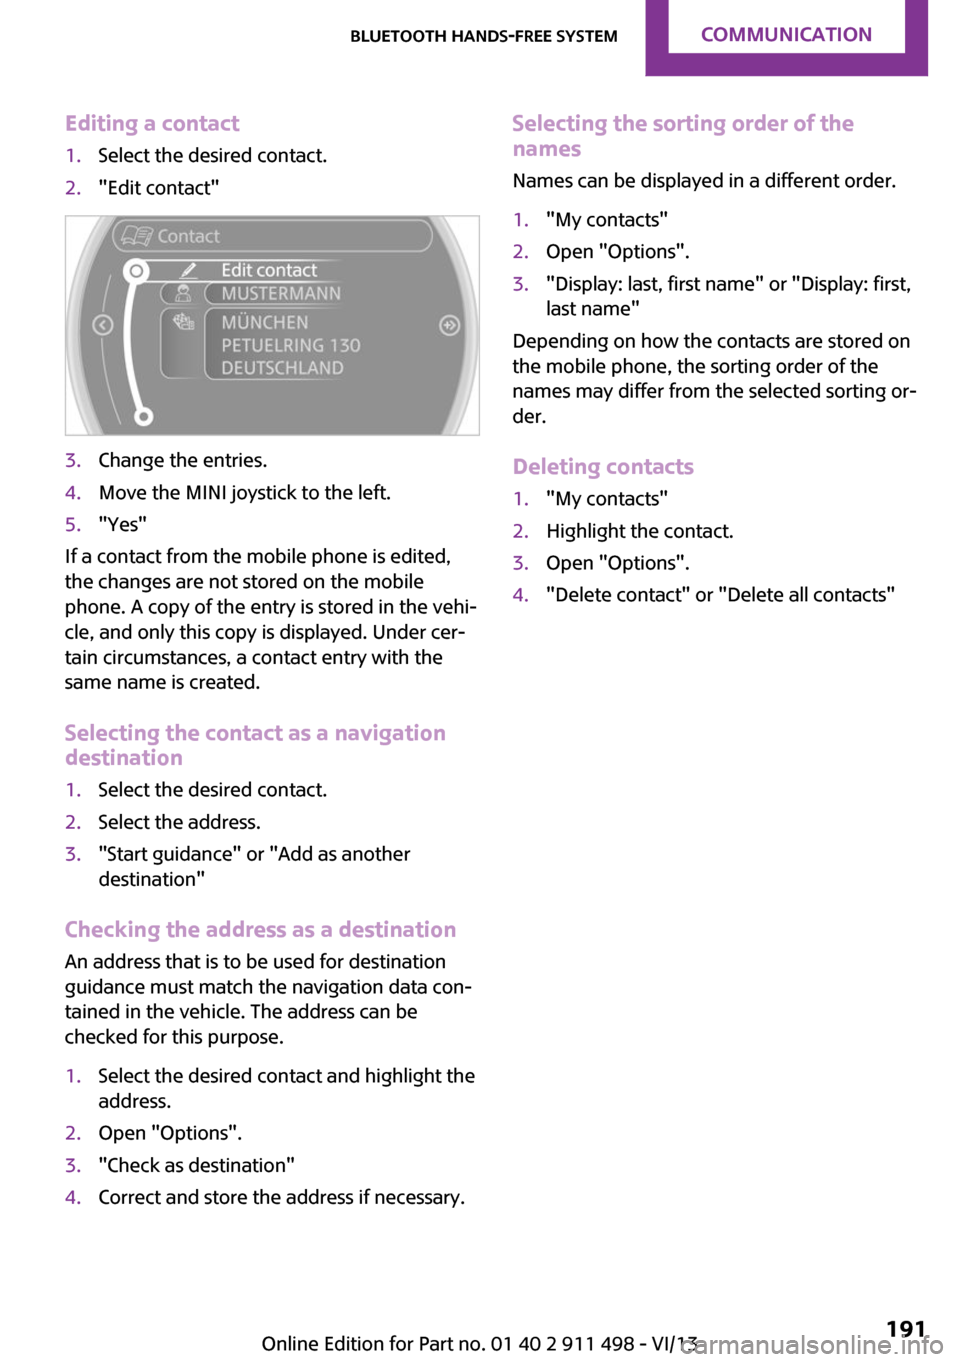
Editing a contact1.Select the desired contact.2."Edit contact"3.Change the entries.4.Move the MINI joystick to the left.5."Yes"
If a contact from the mobile phone is edited,
the changes are not stored on the mobile
phone. A copy of the entry is stored in the vehi‐
cle, and only this copy is displayed. Under cer‐
tain circumstances, a contact entry with the
same name is created.
Selecting the contact as a navigation
destination
1.Select the desired contact.2.Select the address.3."Start guidance" or "Add as another
destination"
Checking the address as a destination
An address that is to be used for destination
guidance must match the navigation data con‐
tained in the vehicle. The address can be
checked for this purpose.
1.Select the desired contact and highlight the
address.2.Open "Options".3."Check as destination"4.Correct and store the address if necessary.Selecting the sorting order of the
names
Names can be displayed in a different order.1."My contacts"2.Open "Options".3."Display: last, first name" or "Display: first,
last name"
Depending on how the contacts are stored on
the mobile phone, the sorting order of the
names may differ from the selected sorting or‐
der.
Deleting contacts
1."My contacts"2.Highlight the contact.3.Open "Options".4."Delete contact" or "Delete all contacts"Seite 191Bluetooth hands-free systemCommunication191
Online Edition for Part no. 01 40 2 911 498 - VI/13
Page 195 of 288
If the pairing was successful, the mobile phone
appears at the top of the list of mobile phones.
The functions supported by the mobile phone
and audio device are displayed as symbols
when paired.
White symbol: the function is active.
Gray symbol: the function is inactive.SymbolFunction Telephone. Additional telephone. Audio source.
Four mobile phones can be paired with the ve‐
hicle at once. Three mobile phones can be con‐
nected with the vehicle at once.
If pairing was unsuccessful: What to do if..., re‐
fer to page 196.
Following the initial pairing
▷The mobile phone is detected/connected in
the vehicle within a short period of time
when the engine is running or the ignition
is switched on.▷The phone book entries of the telephone
stored on the SIM card or mobile phone are
transmitted to the vehicle after detection,
depending on the mobile phone.▷Specific settings may be necessary in some
mobile phones, e.g., authorization or a se‐
cure connection; refer to the mobile phone
operating instructions.
Connecting a particular mobile phone
1."Telephone"2."Bluetooth® (phone)"
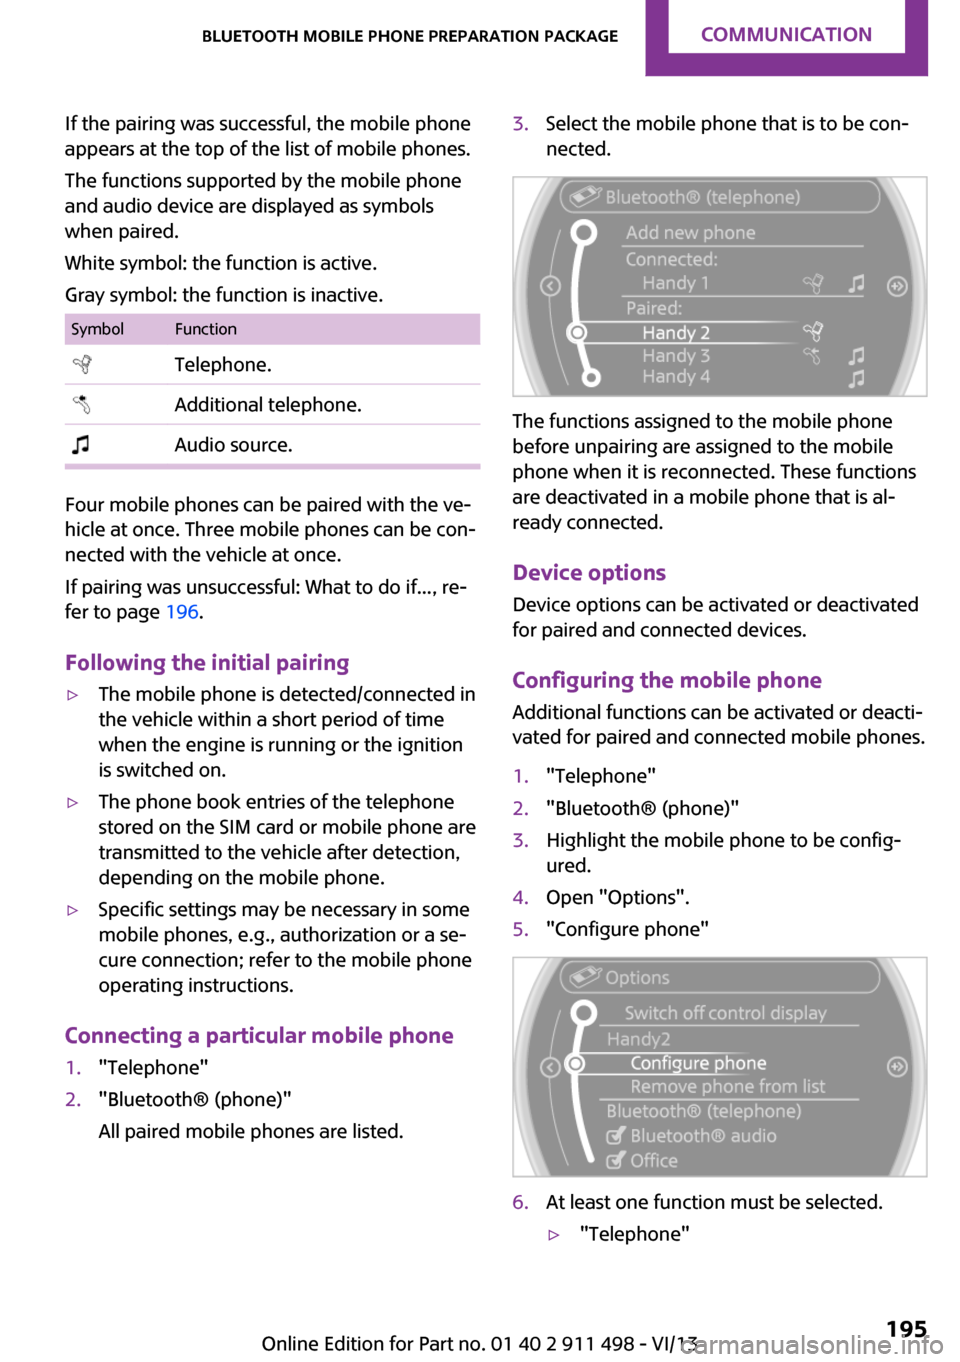
All paired mobile phones are listed.3.Select the mobile phone that is to be con‐
nected.
The functions assigned to the mobile phone
before unpairing are assigned to the mobile
phone when it is reconnected. These functions
are deactivated in a mobile phone that is al‐
ready connected.
Device options Device options can be activated or deactivated
for paired and connected devices.
Configuring the mobile phoneAdditional functions can be activated or deacti‐
vated for paired and connected mobile phones.
1."Telephone"2."Bluetooth® (phone)"3.Highlight the mobile phone to be config‐
ured.4.Open "Options".5."Configure phone"6.At least one function must be selected.▷"Telephone"Seite 195Bluetooth mobile phone preparation packageCommunication195
Online Edition for Part no. 01 40 2 911 498 - VI/13