stop start MINI COUPE ROADSTER CONVERTIBLE 2012 User Guide
[x] Cancel search | Manufacturer: MINI, Model Year: 2012, Model line: COUPE ROADSTER CONVERTIBLE, Model: MINI COUPE ROADSTER CONVERTIBLE 2012Pages: 283, PDF Size: 9.38 MB
Page 136 of 283
Route guidanceNAVIGATION
135
Route guidance
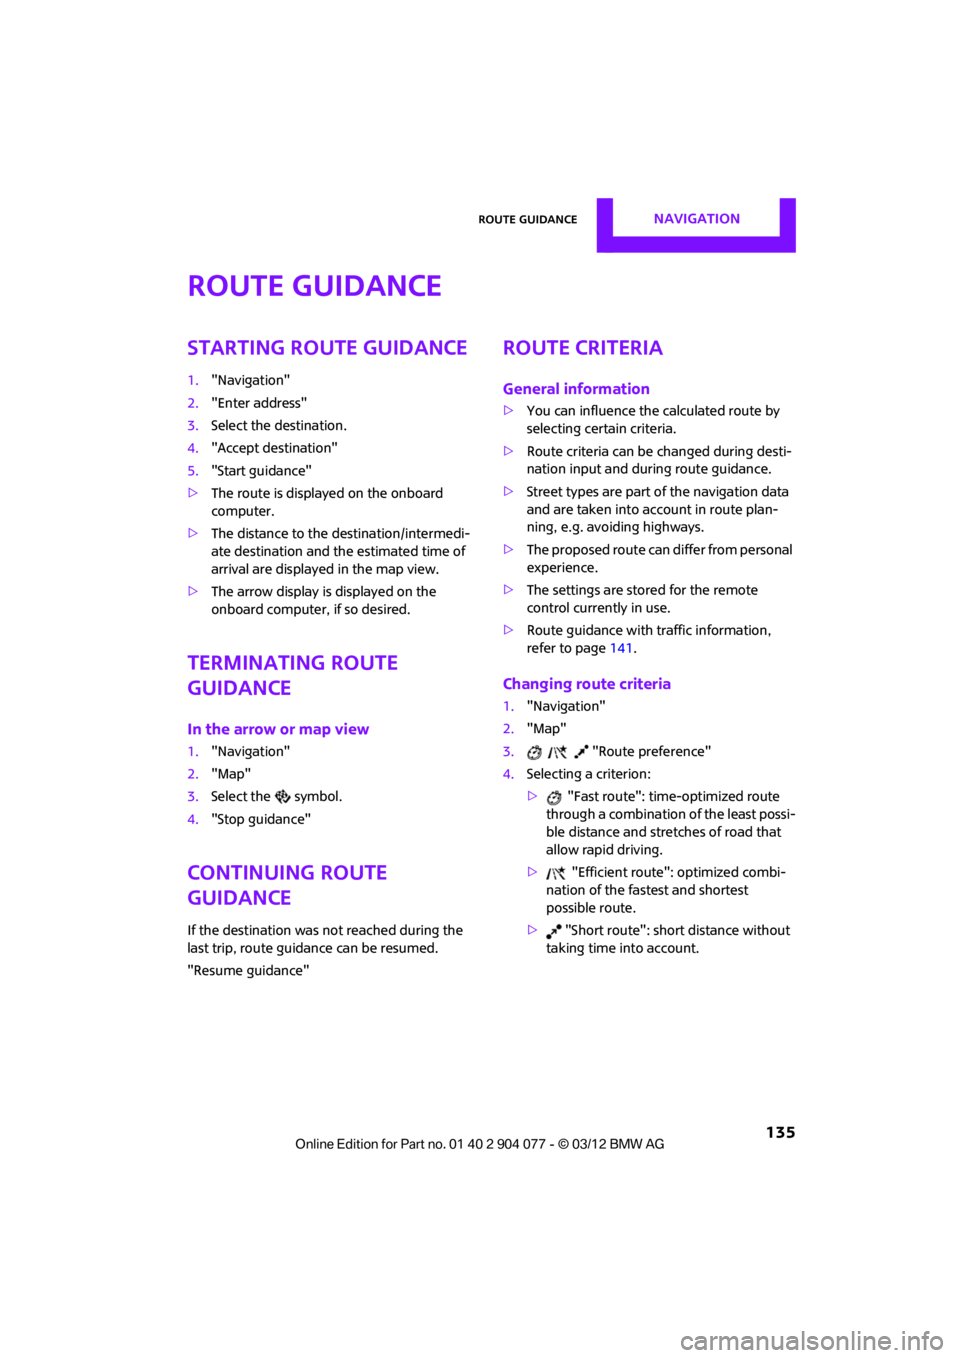
Starting route guidance
1."Navigation"
2. "Enter address"
3. Select the destination.
4. "Accept destination"
5. "Start guidance"
> The route is displayed on the onboard
computer.
> The distance to the destination/intermedi-
ate destination and th e estimated time of
arrival are displayed in the map view.
> The arrow display is displayed on the
onboard computer, if so desired.
Terminating route
guidance
In the arrow or map view
1."Navigation"
2. "Map"
3. Select the symbol.
4. "Stop guidance"
Continuing route
guidance
If the destination was not reached during the
last trip, route guid ance can be resumed.
"Resume guidance"
Route criteria
General information
> You can influence the calculated route by
selecting certain criteria.
> Route criteria can be changed during desti-
nation input and during route guidance.
> Street types are part of the navigation data
and are taken into account in route plan-
ning, e.g. avoiding highways.
> The proposed route can differ from personal
experience.
> The settings are stored for the remote
control currently in use.
> Route guidance with traffic information,
refer to page 141.
Changing route criteria
1."Navigation"
2. "Map"
3. "Route preference"
4. Selecting a criterion:
> "Fast route": time-optimized route
through a combination of the least possi-
ble distance and stre tches of road that
allow rapid driving.
> "Efficient route": optimized combi-
nation of the fastest and shortest
possible route.
> "Short route": shor t distance without
taking time into account.
00320051004F004C00510048000300280047004C0057004C005200510003
Page 139 of 283
NAVIGATIONRoute guidance
138
Planned route
After route guidance is started, the planned
route is displayed on the map.
Status boxes
Show/hide: press the MINI joystick.
>Upper status box: time, phone details, and
entertainment details.
> Lower status box: symb ol for active route
guidance, traffic inform ation status, arrival
time, and distance from destination.
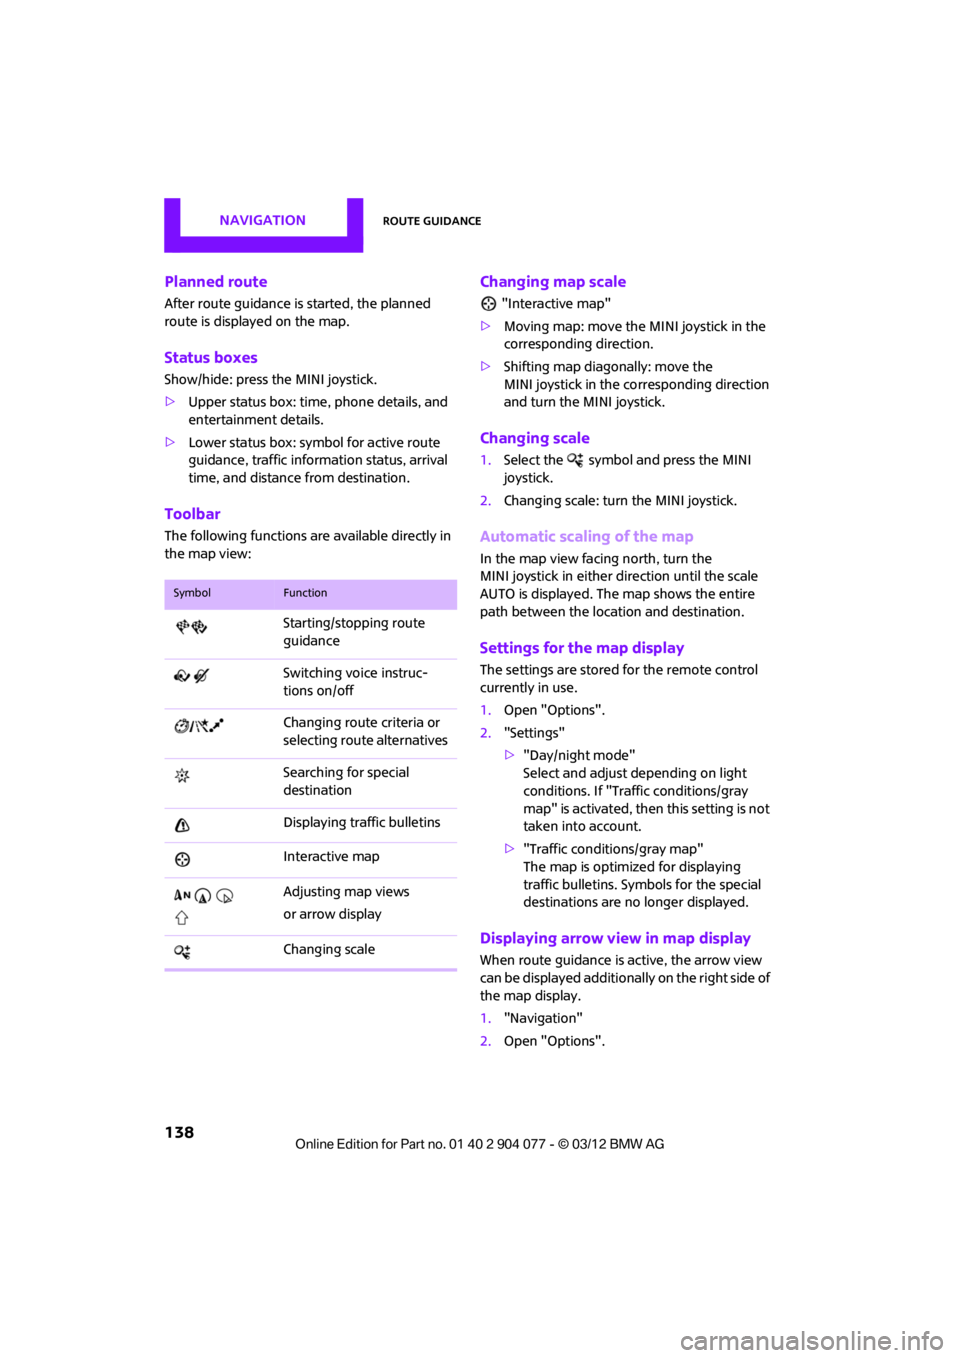
Toolbar
The following functions ar e available directly in
the map view:
Changing map scale
"Interactive map"
> Moving map: move the MINI joystick in the
corresponding direction.
> Shifting map diagonally: move the
MINI joystick in the co rresponding direction
and turn the MINI joystick.
Changing scale
1. Select the symbol and press the MINI
joystick.
2. Changing scale: turn the MINI joystick.
Automatic scaling of the map
In the map view facing north, turn the
MINI joystick in either direction until the scale
AUTO is displayed. The map shows the entire
path between the location and destination.
Settings for the map display
The settings are stored for the remote control
currently in use.
1.Open "Options".
2. "Settings"
>"Day/night mode"
Select and adjust depending on light
conditions. If "Traffic conditions/gray
map" is activated, then this setting is not
taken into account.
> "Traffic conditions/gray map"
The map is optimize d for displaying
traffic bulletins. Symbols for the special
destinations are no longer displayed.
Displaying arrow view in map display
When route guidance is active, the arrow view
can be displayed additionally on the right side of
the map display.
1. "Navigation"
2. Open "Options".
SymbolFunction
Starting/stopping route
guidance
Switching voice instruc-
tions on/off
Changing route criteria or
selecting route alternatives
Searching for special
destination
Displaying traffic bulletins
Interactive map
Adjusting map views
or arrow display
Changing scale
00320051004F004C00510048000300280047004C0057004C005200510003
Page 168 of 283
External devicesENTERTAINMENT
167
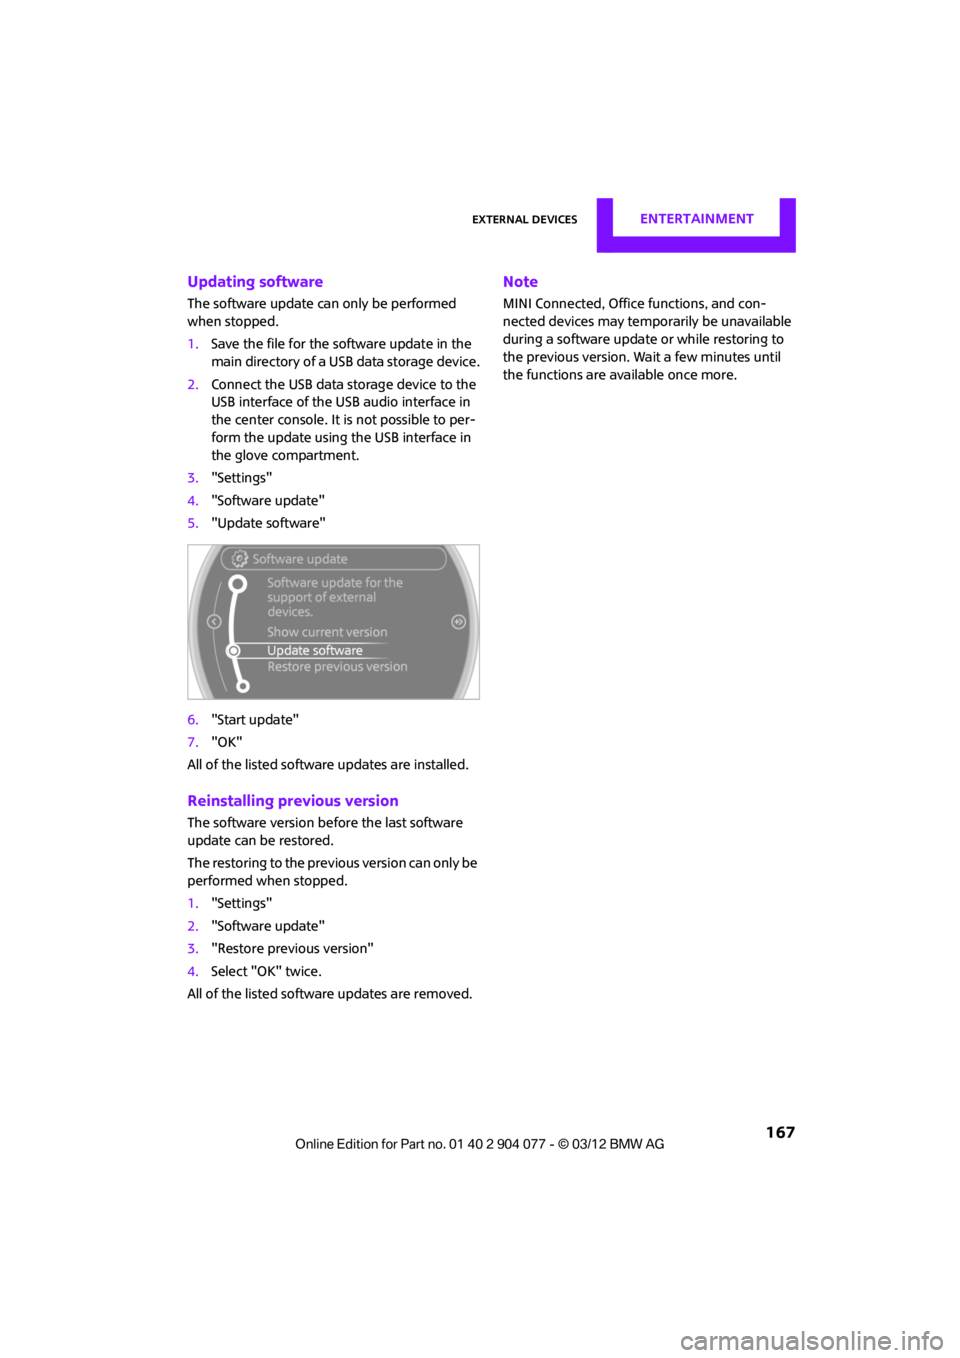
Updating software
The software update can only be performed
when stopped.
1.Save the file for the software update in the
main directory of a USB data storage device.
2. Connect the USB data storage device to the
USB interface of the USB audio interface in
the center console. It is not possible to per-
form the update using the USB interface in
the glove compartment.
3. "Settings"
4. "Software update"
5. "Update software"
6. "Start update"
7. "OK"
All of the listed software updates are installed.
Reinstalling previous version
The software version befo re the last software
update can be restored.
The restoring to the previous version can only be
performed when stopped.
1. "Settings"
2. "Software update"
3. "Restore previous version"
4. Select "OK" twice.
All of the listed software updates are removed.
Note
MINI Connected, Office functions, and con-
nected devices may temporarily be unavailable
during a software update or while restoring to
the previous version. Wait a few minutes until
the functions are available once more.
00320051004F004C00510048000300280047004C0057004C005200510003
Page 247 of 283
MOBILITYGiving and receiving assistance
246
Only attach the tow bar to the tow fittings,
as attachment to other vehicle parts can
lead to damage. <
Towing with a tow rope
When starting off in the towing vehicle, make
sure that the tow rope is taut.
To avoid jerking and the associated
stresses on vehicle components when
towing, always use nylon ropes or nylon straps.
Attach the tow rope to the tow fittings only, as
attaching it to other pa rts of the vehicle could
result in damage. <
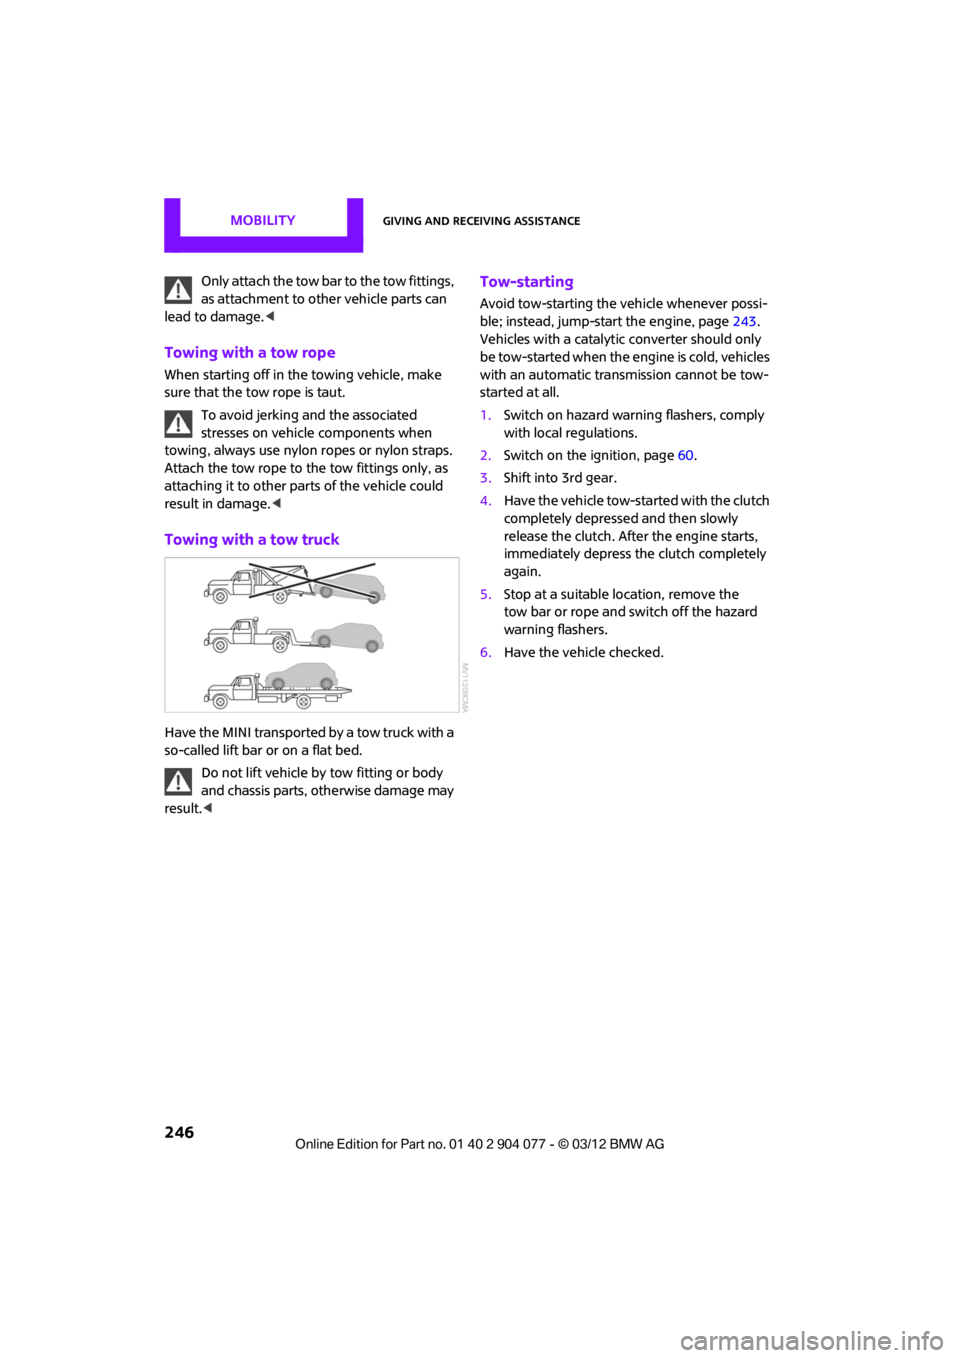
Towing with a tow truck
Have the MINI transported by a tow truck with a
so-called lift bar or on a flat bed.
Do not lift vehicle by tow fitting or body
and chassis parts, otherwise damage may
result. <
Tow-starting
Avoid tow-starting the vehicle whenever possi-
ble; instead, jump-start the engine, page 243.
Vehicles with a catalyti c converter should only
be tow-started when the engine is cold, vehicles
with an automatic transmission cannot be tow-
started at all.
1. Switch on hazard warning flashers, comply
with local regulations.
2. Switch on the ignition, page 60.
3. Shift into 3rd gear.
4. Have the vehicle tow-started with the clutch
completely depressed and then slowly
release the clutch. After the engine starts,
immediately depress the clutch completely
again.
5. Stop at a suitable location, remove the
tow bar or rope and switch off the hazard
warning flashers.
6. Have the vehicle checked.
00320051004F004C00510048000300280047004C0057004C005200510003
Page 265 of 283
REFERENCEShort commands for the voice activation system
264
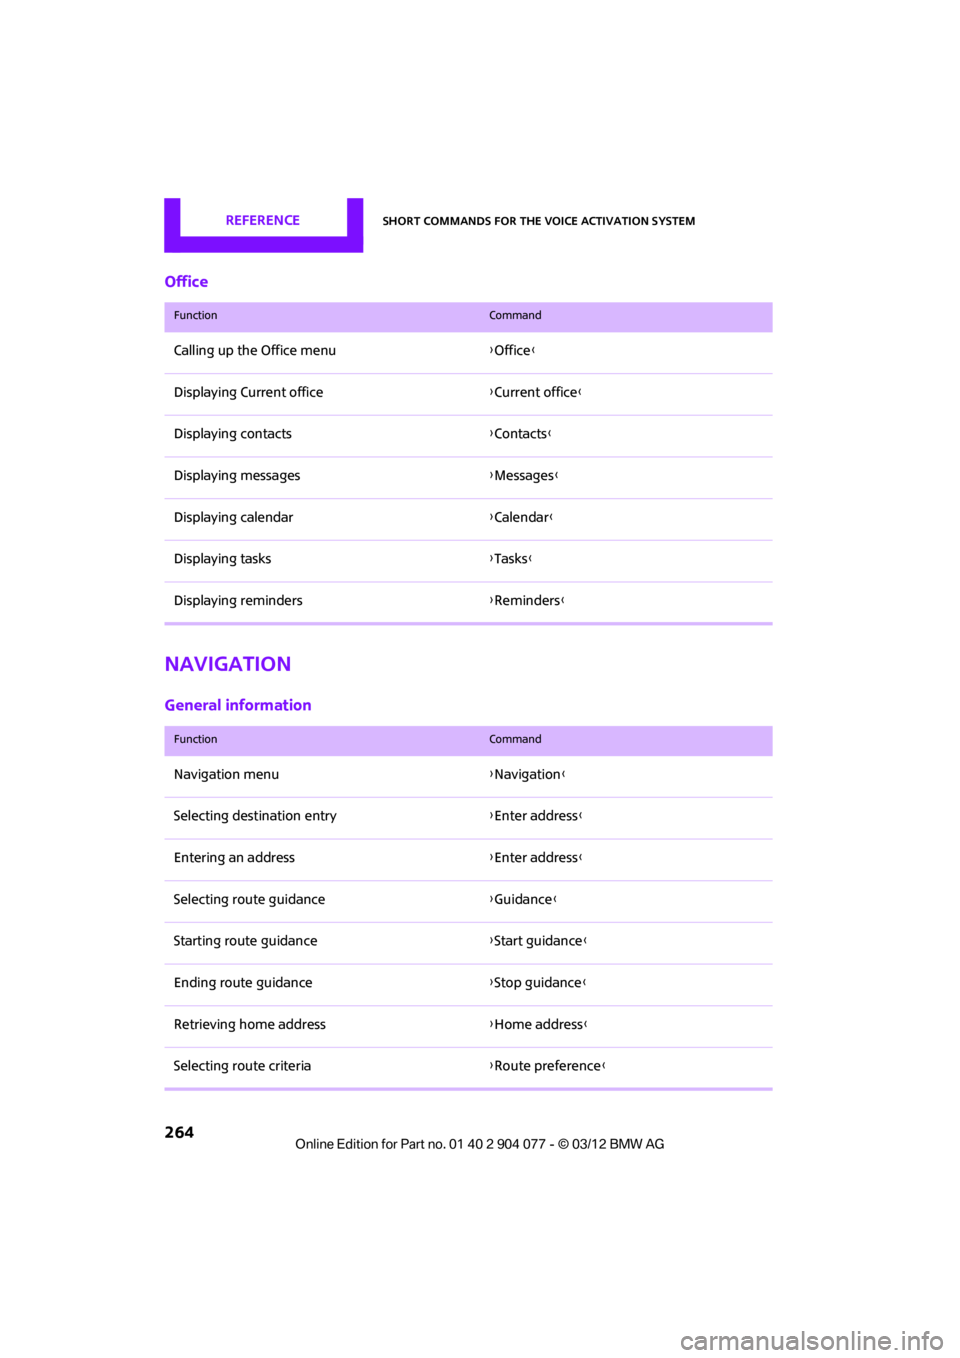
Office
Navigation
General information
FunctionCommand
Calling up the Office menu{Office }
Displaying Current office {Current office }
Displaying contacts {Contacts }
Displaying messages {Messages }
Displaying calendar {Calendar}
Displaying tasks {Tasks }
Displaying reminders {Reminders }
FunctionCommand
Navigation menu {Navigation }
Selecting destination entry {Enter address}
Entering an address {Enter address}
Selecting route guidance {Guidance }
Starting route guidance {Start guidance }
Ending route guidance {Stop guidance }
Retrieving home address {Home address }
Selecting route criteria {Route preference }
00320051004F004C00510048000300280047004C0057004C005200510003
Page 279 of 283
REFERENCEEverything from A to Z
278
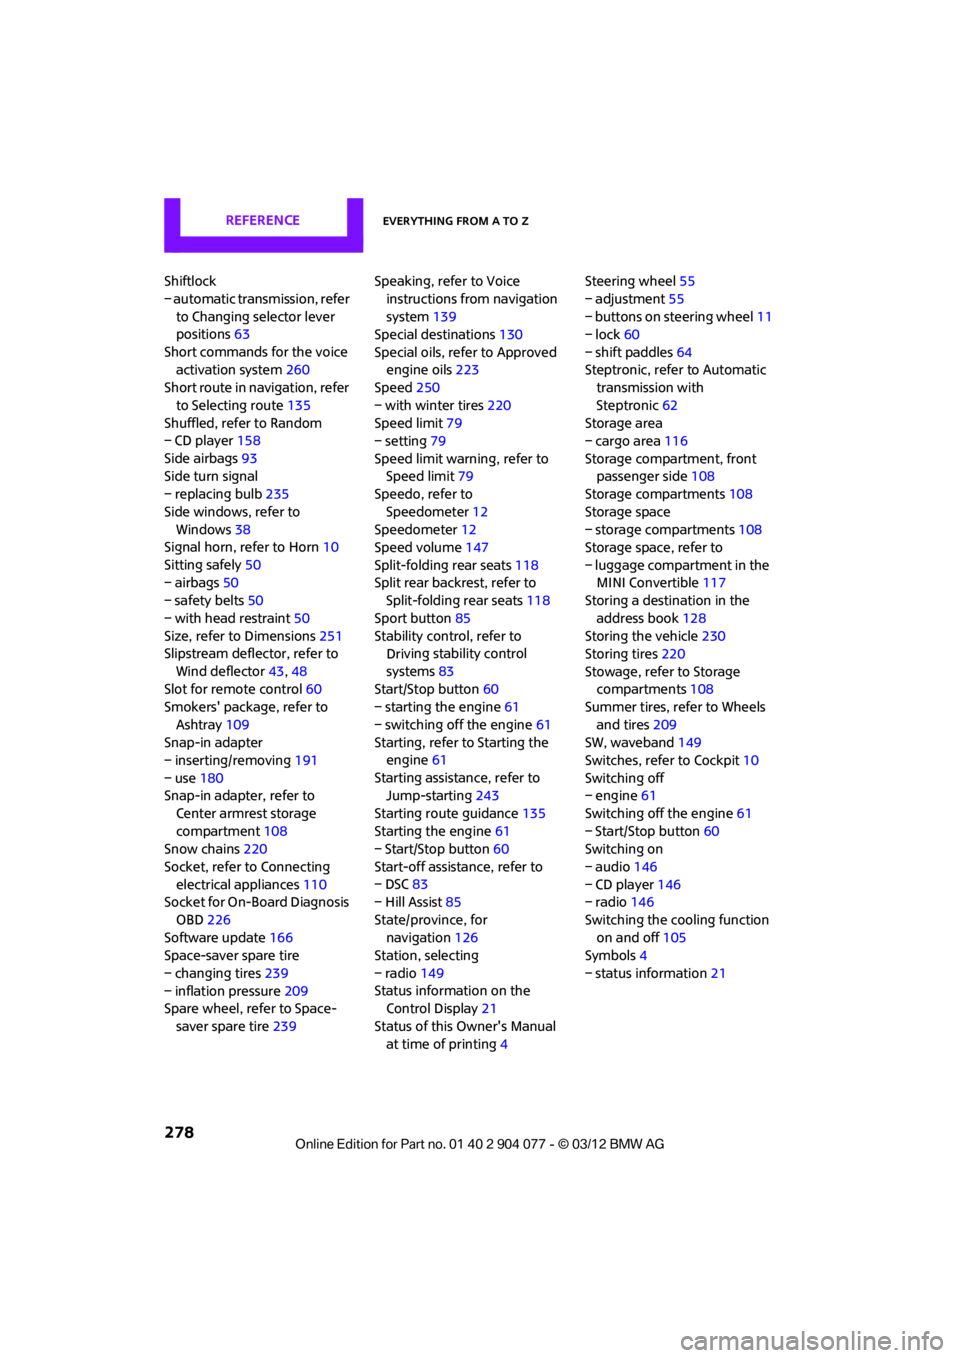
Shiftlock
– automatic transmission, refer to Changing selector lever
positions 63
Short commands for the voice activation system 260
Short route in navigation, refer
to Selecting route 135
Shuffled, refer to Random
– CD player 158
Side airbags 93
Side turn signal
– replacing bulb 235
Side windows, refer to Windows 38
Signal horn, refer to Horn 10
Sitting safely 50
– airbags 50
– safety belts 50
– with head restraint 50
Size, refer to Dimensions 251
Slipstream deflector, refer to
Wind deflector 43,48
Slot for remote control 60
Smokers' package, refer to
Ashtray 109
Snap-in adapter
– inserting/removing 191
– use 180
Snap-in adapter, refer to
Center armrest storage
compartment 108
Snow chains 220
Socket, refer to Connecting electrical appliances 110
Socket for On-Board Diagnosis
OBD 226
Software update 166
Space-saver spare tire
– changing tires 239
– inflation pressure 209
Spare wheel, refer to Space-
saver spare tire 239 Speaking, refer to Voice
instructions from navigation
system 139
Special destinations 130
Special oils, refer to Approved engine oils 223
Speed 250
– with winter tires 220
Speed limit 79
– setting 79
Speed limit warning, refer to Speed limit 79
Speedo, refer to
Speedometer 12
Speedometer 12
Speed volume 147
Split-folding rear seats 118
Split rear backrest, refer to Split-folding rear seats 118
Sport button 85
Stability contro l, refer to
Dri v
ing
stability control
systems 83
Start/Stop button 60
– starting the engine 61
– switching off the engine 61
Starting, refer to Starting the engine 61
Starting assistance, refer to Jump-starting 243
Starting route guidance 135
Starting the engine 61
– Start/Stop button 60
Start-off assistance, refer to
– DSC 83
– Hill Assist 85
State/province, for navigation 126
Station, selecting
– radio 149
Status information on the Control Display 21
Status of this Owner's Manual at time of printing 4Steering wheel
55
– adjustment 55
– buttons on steering wheel 11
– lock 60
– shift paddles 64
Steptronic, refer to Automatic transmission with
Steptronic 62
Storage area
– cargo area 116
Storage compartment, front passenger side 108
Storage compartments 108
Storage space
– storage compartments 108
Storage space, refer to
– luggage compartment in the MINI Convertible 117
Storing a destination in the
address book 128
Storing the vehicle 230
Storing tires 220
Stowage, refer to Storage compartments 108
Summer tires, refer to Wheels
and tires 209
SW, waveband 149
Switches, refer to Cockpit 10
Switching off
– engine 61
Switching off the engine 61
– Start/Stop button 60
Switching on
– audio 146
– CD player 146
– radio 146
Switching the cooling function on and off 105
Symb ols4
–
status information 21
00320051004F004C00510048000300280047004C0057004C005200510003