interior lights MINI COUPE ROADSTER CONVERTIBLE 2015 Owners Manual
[x] Cancel search | Manufacturer: MINI, Model Year: 2015, Model line: COUPE ROADSTER CONVERTIBLE, Model: MINI COUPE ROADSTER CONVERTIBLE 2015Pages: 231, PDF Size: 5.56 MB
Page 18 of 231

Seat heating 47Power windows 33Rear fog light 78MINI Convertible: central power
window switch 33Front fog lights 78Central locking, inside 26All around the head‐
liner1Indicator/warning lights for the front pas‐
senger airbags 832Switch panelReading lights 79MINI Roadster: interior lights/
reading lights 79Ambient lighting color 79MINI Coupe, MINI Roadster: ex‐
tending and retracting the spoiler
manually 93MINI Convertible: opening and
closing the sliding sunroof or
convertible top 34
MINI Roadster: opening and clos‐
ing the convertible top 42Interior lights 79All around the shift/
selector lever1AUX-IN port/USB audio interface 1342Buttons in the center consoleSport button 93Driving stability control sys‐
tems 91Seite 16AT A GLANCECockpit16
Online Edition for Part no. 01 40 2 961 029 - II/15
Page 26 of 231

Setting the confirmation signalsHave unlocking or locking of the vehicle con‐
firmed.1.Switch on the ignition, refer to page 56.2.Press the button on the turn indicator lever
repeatedly until "SET/INFO" is displayed.3.Press and hold the button until the display
changes.4.Press the button repeatedly until the sym‐
bol and "SET" are displayed.5.Press and hold the button until the display
changes.6.Press the button to select, arrow:▷ Confirmation signal during unlock‐
ing▷ Confirmation signal during locking7.Press and hold the button until the display
changes.8.Press the button to select:▷
The hazard warning system flashes dur‐
ing unlocking/locking.▷
An acoustic signal sounds during un‐
locking/locking.▷
The hazard warning system lights up
and an acoustic signal sounds during
unlocking/locking.▷
The function is deactivated.9.Press and hold the button until the display
changes. The setting is stored.
Switching on the interior lamps
When the vehicle is locked:
Press the button.
You can also use this function to locate your ve‐
hicle in parking garages, etc.
Unlocking the tailgate
Press the button for approx. 1 second
and then release it.
Seite 24CONTROLSOpening and closing24
Online Edition for Part no. 01 40 2 961 029 - II/15
Page 43 of 231

vehicle interior against unanticipated
weather damage, it also offers a certain
amount of theft protection. However, even
when the convertible top is closed, valua‐
bles should only be stored in the locked
cargo area.▷Do not attach roof rack systems to the
convertible top.
Safety notes on the convertible top
▷At temperatures below +14 ℉/-10 ℃,
do not move the convertible top or
else damage could result.▷Do not leave the convertible top open for
longer than one day while it is wet; other‐
wise, damage could be caused by the mois‐
ture.▷Do not place any objects on the convertible
top; otherwise, they could fall during oper‐
ation of the convertible top and cause
damage or injury.▷The convertible top pivots up when it is
opened and closed. When moving the
convertible top in places like garages, en‐
sure that there is a minimum height of
79 inches/2 meters; otherwise, damage
could result.▷Always carry out the convertible top move‐
ment to the end. Driving when the
convertible top is not fully opened or closed
may result in damage or injury.▷During opening and closing, ensure that
people cannot be injured by the convertible
top frame or other moving parts. Keep chil‐
dren away from the opening path of the
convertible top.▷For safety reasons, only move the
convertible top while the vehicle is station‐
ary, if possible. ◀
Operation while driving
The convertible top can be opened or closed
while driving at vehicle speeds up to approx.
20 mph/30 km/h.
Pay close attention to the traffic
When operating the convertible top while
driving, pay extra attention to the traffic to
avoid an accident. If possible, do not move the
convertible top while driving in reverse because
your view to the rear is severely limited during
the procedure. Do not operate the convertible
top while the vehicle is moving through curves,
on uneven road surfaces, or in wind. ◀
For better control The indicator lamp lights up. Movement
of the convertible top is completed. The
convertible top is fully opened.
The indicator lamp lights up. Movement
of the convertible top is completed.
Close the convertible top using the han‐
dle.
Malfunction The convertible top not locked, refer to
page 199, indicator lamp lights up.
Interruption Danger
A convertible top that is not fully opened
or closed is a source of danger. ◀
The automatic sequence of movements is inter‐
rupted immediately if the switch for convertible top operation is released. The sequence can be
continued in the desired direction by pushing
or pulling the switch.
When the opening or closing procedure is inter‐
rupted because the switch is released, the
convertible top remains in the position in which
it stopped. The sequence can be continued us‐
ing the switch.
The opening or closing procedure is also inter‐
rupted when it is blocked mechanically. To beSeite 41Opening and closingCONTROLS41
Online Edition for Part no. 01 40 2 961 029 - II/15
Page 62 of 231

▷
Turn signal flashes once.▷
Triple turn signal.9.Press and hold the button until the display
changes.
The setting is stored for the remote control cur‐
rently in use.
Washer/wiper system
Notes Do not switch on the wipers if frozen
Do not switch on the wipers if they are
frozen onto the windshield; otherwise, the
wiper blades and the windshield wiper motor
may be damaged. ◀
Do not use the wipers on a dry windshield
Do not use the wipers on a dry wind‐
shield; otherwise, the wiper blades may wear
more rapidly or become damaged. ◀
At a glance
1Switching on wipers2Switching off wipers or brief wipe3Activating/deactivating intermittent wipe or
the rain sensor4Cleaning the windshield and headlightsSwitching on wipers
Press the wiper lever upward, arrow 1.
The lever automatically returns to its initial po‐
sition when released.
Normal wiper speed
Press up once.
The system switches to operation in the inter‐
mittent mode when the vehicle is stationary.
Fast wiper speed
Press up twice or press once beyond the resist‐
ance point.
The system switches to normal speed when the
vehicle is stationary.
Switching off wipers or brief wipe Press the wiper lever down, arrow 2.
The lever automatically returns to its initial po‐
sition when released.▷Brief wipe: press down once.▷To switch off normal wipe: press down
once.▷To switch off fast wipe: press down twice.
Intermittent wipe or rain sensor
If the car is not equipped with a rain sensor, the
intermittent-wipe time is a preset.
If the car is equipped with a rain sensor, the
time between wipes is controlled automatically
and depends on the intensity of the rainfall.
The rain sensor is mounted on the windshield,
directly in front of the interior rearview mirror.
Deactivate the rain sensor in car washes
Deactivate the rain sensor when passing
through an automatic car wash; otherwise,
damage could be caused by undesired wiper
activation. ◀
Seite 60CONTROLSDriving60
Online Edition for Part no. 01 40 2 961 029 - II/15
Page 79 of 231
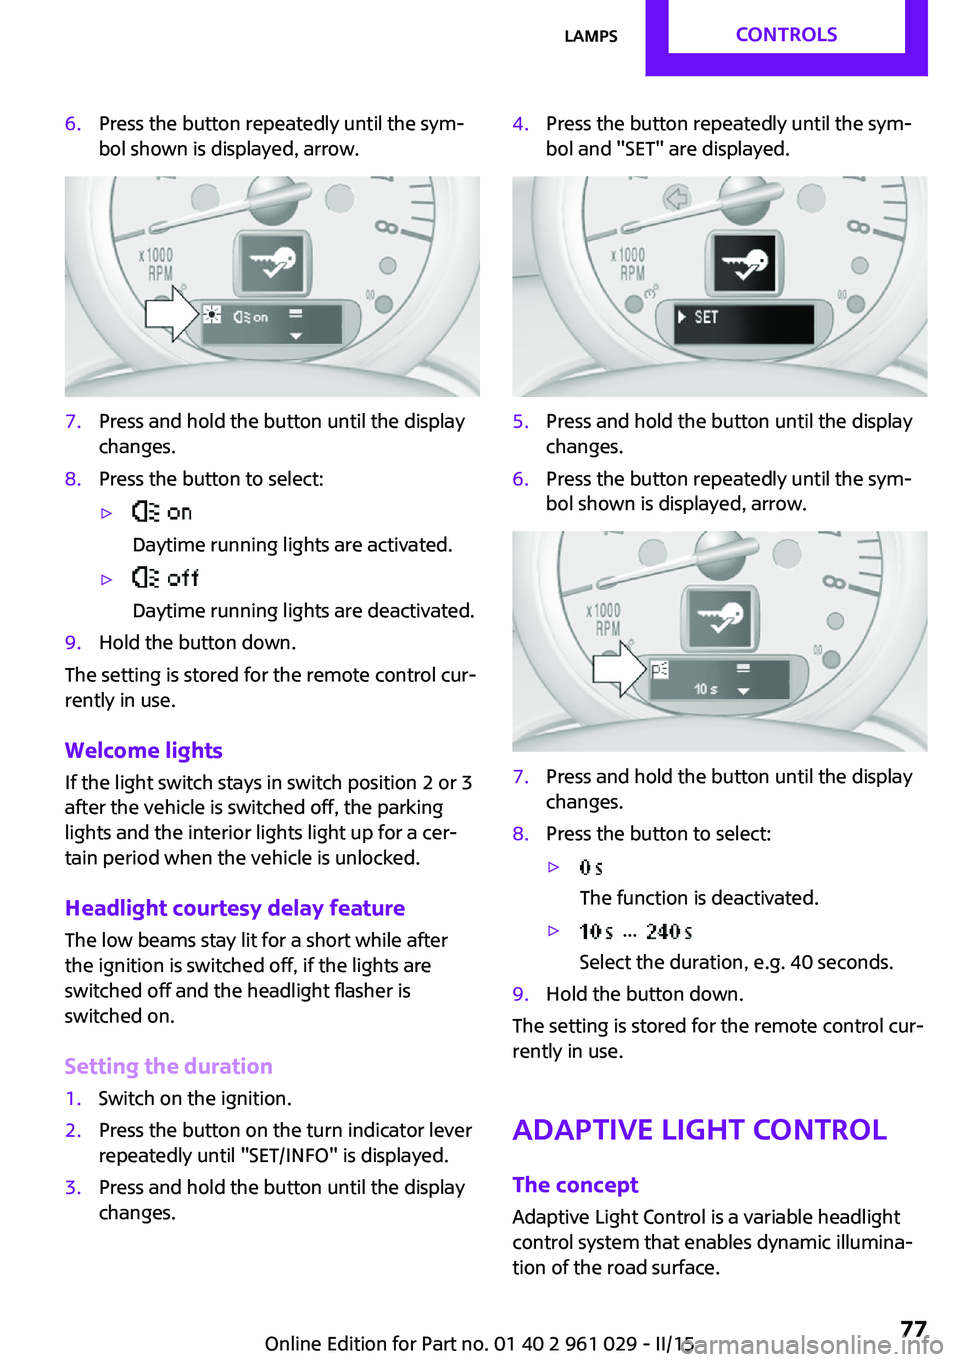
6.Press the button repeatedly until the sym‐
bol shown is displayed, arrow.7.Press and hold the button until the display
changes.8.Press the button to select:▷
Daytime running lights are activated.▷
Daytime running lights are deactivated.9.Hold the button down.
The setting is stored for the remote control cur‐
rently in use.
Welcome lights If the light switch stays in switch position 2 or 3
after the vehicle is switched off, the parking
lights and the interior lights light up for a cer‐
tain period when the vehicle is unlocked.
Headlight courtesy delay feature The low beams stay lit for a short while after
the ignition is switched off, if the lights are
switched off and the headlight flasher is
switched on.
Setting the duration
1.Switch on the ignition.2.Press the button on the turn indicator lever
repeatedly until "SET/INFO" is displayed.3.Press and hold the button until the display
changes.4.Press the button repeatedly until the sym‐
bol and "SET" are displayed.5.Press and hold the button until the display
changes.6.Press the button repeatedly until the sym‐
bol shown is displayed, arrow.7.Press and hold the button until the display
changes.8.Press the button to select:▷
The function is deactivated.▷ ...
Select the duration, e.g. 40 seconds.9.Hold the button down.
The setting is stored for the remote control cur‐
rently in use.
Adaptive Light Control
The concept
Adaptive Light Control is a variable headlight
control system that enables dynamic illumina‐
tion of the road surface.
Seite 77LampsCONTROLS77
Online Edition for Part no. 01 40 2 961 029 - II/15
Page 81 of 231
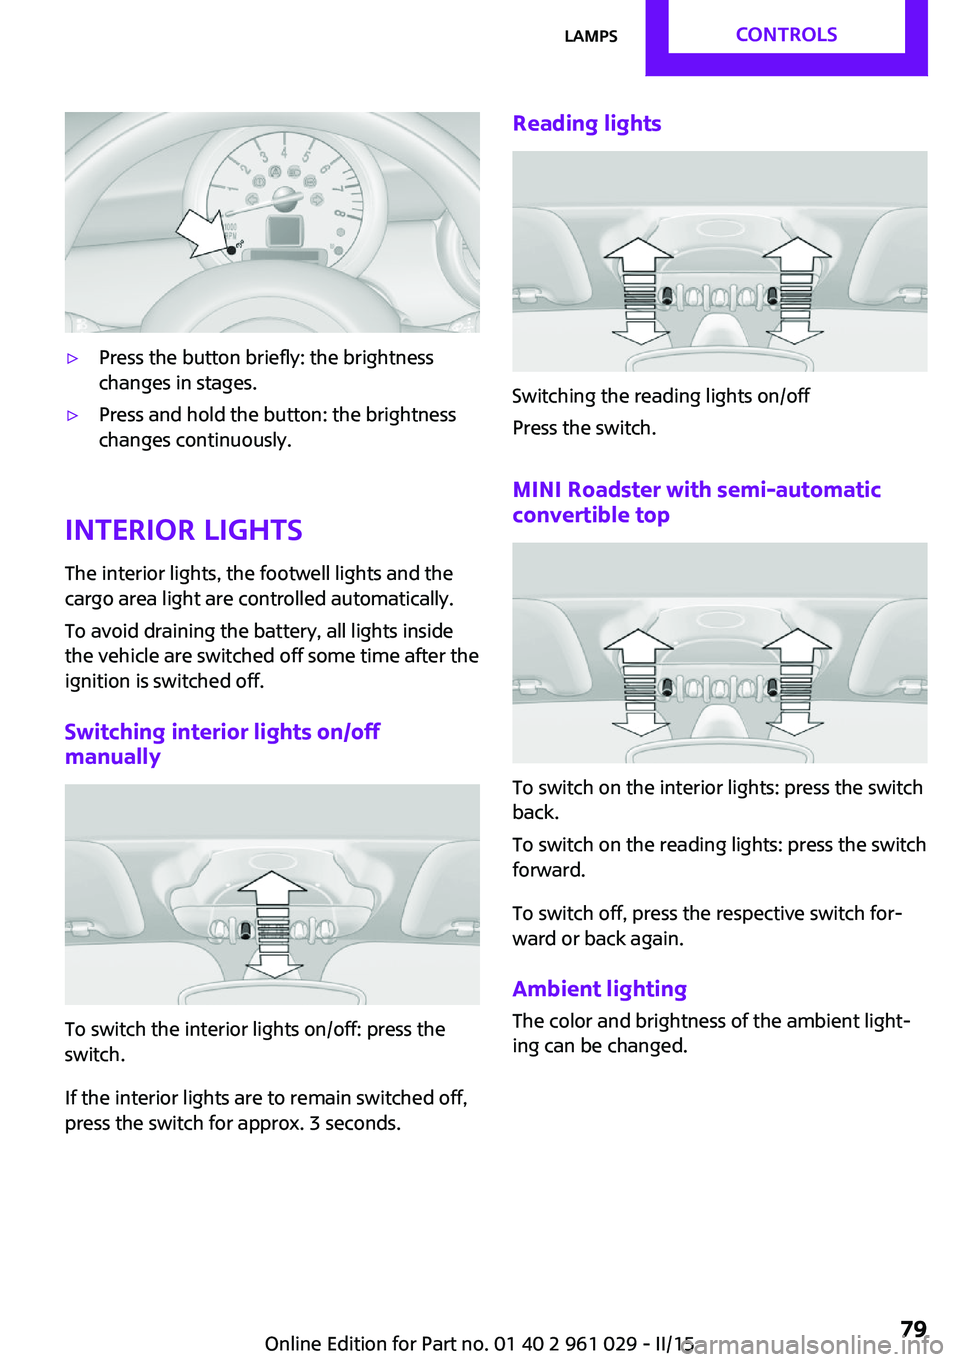
▷Press the button briefly: the brightness
changes in stages.▷Press and hold the button: the brightness
changes continuously.
Interior lights
The interior lights, the footwell lights and thecargo area light are controlled automatically.
To avoid draining the battery, all lights inside
the vehicle are switched off some time after the
ignition is switched off.
Switching interior lights on/off
manually
To switch the interior lights on/off: press the
switch.
If the interior lights are to remain switched off,
press the switch for approx. 3 seconds.
Reading lights
Switching the reading lights on/off
Press the switch.
MINI Roadster with semi-automatic convertible top
To switch on the interior lights: press the switch
back.
To switch on the reading lights: press the switch
forward.
To switch off, press the respective switch for‐
ward or back again.
Ambient lighting
The color and brightness of the ambient light‐
ing can be changed.
Seite 79LampsCONTROLS79
Online Edition for Part no. 01 40 2 961 029 - II/15
Page 84 of 231
▷Do not apply adhesive materials to the air‐
bag cover panels, cover them or modify
them in any way.▷Never modify either the individual compo‐
nents or the wiring in the airbag system.
This also applies to steering wheel covers,
the dashboard, the seats, the roof pillars
and the sides of the headliner. ◀
Even when all instructions are followed closely,
injury from contact with the airbags cannot be
ruled out in certain situations.
The ignition and inflation noise may lead to
short-term and, in most cases, temporary hear‐
ing impairment in sensitive individuals.
In the case of a malfunction, deactivation
and after triggering of the airbags
Do not touch the individual components imme‐
diately after the system has been triggered;
otherwise, there is the danger of burns.
Only have the airbags checked, repaired or dis‐
mantled and the airbag generator scrapped by
your service center or a workshop that has the
necessary authorization for handling explo‐
sives.
Non-professional attempts to service the sys‐
tem could lead to failure in an emergency or
undesired triggering of the airbag, either of
which could result in injury. ◀
Warning notices and information about the air‐
bags can also be found on the sun visors.
Automatic deactivation of the front
passenger airbags
The occupation of the seat is detected by eval‐
uating the impression on the occupied seat sur‐
face of the front passenger seat.
The front and side airbags on the front passen‐
ger side are activated or deactivated accord‐
ingly by the system.
The indicator lamp above the interior rearview
mirror, refer to page 83, shows the current
status of the front passenger airbags, deacti‐
vated or activated.
Leave feet in the footwell
Make sure that the front passenger keeps
his or her feet in the footwell; otherwise, the
front passenger airbags may not function prop‐
erly. ◀
Child restraint fixing system in the front
passenger seat
Before transporting a child on the front passen‐
ger seat, read the safety and operating instruc‐
tions under Transporting children safely, refer
to page 51.◀
Malfunction of the automatic deactivation system
When transporting older children and adults,
the front passenger airbags may be deactivated
in certain sitting positions. In this case, the indi‐
cator lamp for the front passenger airbags
lights up.
In this case, change the sitting position so that
the front passenger airbags are activated and
the indicator lamp goes out.
If it is not possible to activate the airbags, have
the person sit in the rear.
To make sure that occupation of the seat cush‐
ion can be detected correctly:▷Do not attach seat covers, seat cushion
padding, ball mats, or other items to the
front passenger seat unless they are specifi‐
cally recommended by the manufacturer of
your MINI.▷Do not place electronic devices on the pas‐
senger seat if a child restraint fixing system
is mounted on the seat.▷Do not place objects under the seat that
could press against the seat from below.Seite 82CONTROLSSafety82
Online Edition for Part no. 01 40 2 961 029 - II/15
Page 197 of 231
▷Remove additional attachments, for in‐
stance a spoiler or telephone antenna, if
there is a risk that these may be damaged.▷Insert the remote control into the ignition
lock.
Steptronic transmission
Before driving into the car wash, note the fol‐
lowing to ensure that the vehicle can roll:
1.Insert the remote control into the ignition
lock, even with Comfort Access.2.Move the selector lever to position N.3.Release the parking brake.4.Switch the engine off.5.Leave the remote control in the ignition
lock so that the vehicle can roll.
Hand car wash
If washing the vehicle by hand, use copious
quantities of water and car shampoo if neces‐
sary. Clean the vehicle with a sponge or a
washing brush by applying gentle pressure.
Before cleaning the windshield, deactivate the
rain sensor to avoid unintentional wiper activa‐
tion or switch off the ignition.
Adhere to the local regulations regarding
washing cars by hand.
Headlights Do not rub dry and do not use abrasive or caus‐
tic cleansers. Soak areas that have been soiled,
e.g., due to insects, with shampoo and rinse off
with copious quantities of water.
Thaw ice with a window deicer; do not use an
ice scraper.
Windows
Clean the outside and inside surfaces of the
windows and the mirror glasses with window
cleaner.
Do not clean mirror glass with cleaners contain‐
ing quartz.
Wiper blades
Clean with soapy water and replace regularly to
avoid streaking.
Wax and preservative residue and soiling on
the windows cause streaking during window
wiping and lead to premature wear on the
wiper blades and malfunctions of the rain sen‐
sor.
Vehicle care Car care products
Regular cleaning and care contributes signifi‐
cantly to vehicle value retention.
The manufacturer recommends using cleaning
and care products from MINI, since these have
been tested and approved.
Original MINI CareProducts have been tested
on materials, in the laboratory, and in the field,
and offer optimum care and protection for MINI
vehicles.
Do not use cleansers that contain alcohol
or solvents
Do not use cleansers that contain alcohol or
solvents, such as lacquer thinners, heavy-duty
grease removers, fuel, or such; this could lead
to surface damage. ◀
Car care and cleaning products
Follow the instructions on the container.
When cleaning the interior, open the doors or
windows.
Only use products intended for cleaning vehi‐
cles.
Cleansers can contain substances that are dan‐
gerous and harmful to your health. ◀Seite 195CareMOBILITY195
Online Edition for Part no. 01 40 2 961 029 - II/15
Page 220 of 231

Everything from A to ZIndexA
ABS, Antilock Brake Sys‐ tem 91
Acoustic signal, refer to Check Control 73
Activated charcoal filter with automatic climate con‐
trol 103
Adaptive Light Control 77
Additives, engine oil 173
Airbags 81
Airbags, indicator/warning light 83
Air circulation, refer to Recir‐ culated air mode, air condi‐
tioner 100
Air circulation, refer to Recir‐ culated air mode, automatic
climate control 102
Air conditioning 99
Air conditioning mode, air conditioner 99
Air conditioning mode, auto‐ matic climate control 101
Air distribution, air condi‐ tioner, manual 100
Air distribution, auto‐ matic 102
Air distribution, automatic cli‐ mate control, manual 103
Air distribution, individual 100
Air drying, refer to Cooling function 103
Air flow rate for air condi‐ tioner 100
Air flow rate with automatic climate control 102
Air pressure, refer to Tire infla‐ tion pressure 156
Air supply, air conditioner 99 Air supply, automatic climate
control 101
Alarm system 31
Alarm system, avoiding unin‐ tentional alarms 32
Alarm system, ending an alarm 31
Alarm system, interior motion sensor 32
Alarm system, tilt alarm sen‐ sor 32
Always Open Timer 68
Ambient lighting 79
Antifreeze, washer fluid 62
Antilock Brake System, ABS 91
Anti-slip control, refer to Dy‐ namic Stability Control
DSC 91
Anti-theft protection 21
Approved engine oils 173
Ashtray 105
Assistance, roadside 189
Assistance when driving off, refer to Hill drive-off assis‐
tant 93
Assistance with starting en‐ gine, refer to Jump-start‐
ing 189
Automatic air distribution 102
Automatic air flow 102
Automatic car wash 194
Automatic climate con‐ trol 101
Automatic climate control, au‐ tomatic air distribution 102
Automatic, cruise control 96
Automatic headlight con‐ trol 75
Automatic rear spoiler 93 Automatic transmission with
Steptronic 63
AUTO program with auto‐ matic climate control 102
AUX-IN port 134
Average fuel consumption 68
Average fuel consumption, setting the units 70
Average speed 68
Average speed, refer to Com‐ puter 67
B Backrest curvature, refer to Lumbar support 46
Backrests, refer to Seats 45
Backup lights, bulb replace‐ ment 182
Battery disposal 31
Battery, refer to Vehicle bat‐ tery 187
Battery, remote control 20
Battery replacement, remote control 31
Belts, refer to Safety belts 47
Belt tensioners, refer to Safety belts 47
Bi-xenon headlights 179
Brake assistant 91
Brake discs, breaking in 114
Brake fluid, refer to Service re‐ quirements 71
Brake force distribution, elec‐ tronic 91
Brake pads, breaking in 114
Brake, refer to Parking brake 58
Brakes, MINI maintenance system 175 Seite 218REFERENCEEverything from A to Z218
Online Edition for Part no. 01 40 2 961 029 - II/15
Page 224 of 231
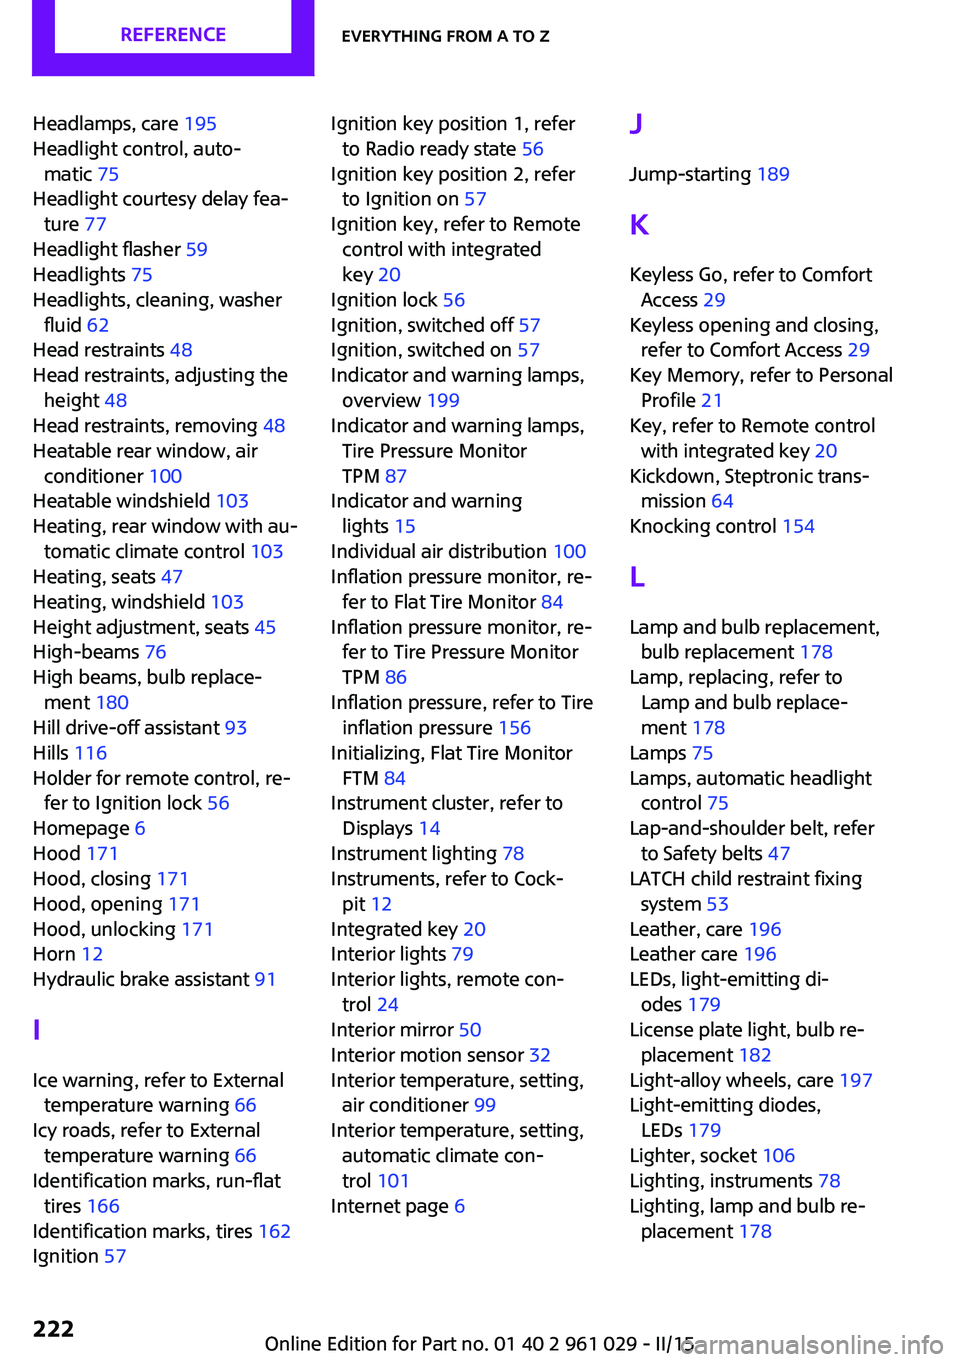
Headlamps, care 195
Headlight control, auto‐ matic 75
Headlight courtesy delay fea‐ ture 77
Headlight flasher 59
Headlights 75
Headlights, cleaning, washer fluid 62
Head restraints 48
Head restraints, adjusting the height 48
Head restraints, removing 48
Heatable rear window, air conditioner 100
Heatable windshield 103
Heating, rear window with au‐ tomatic climate control 103
Heating, seats 47
Heating, windshield 103
Height adjustment, seats 45
High-beams 76
High beams, bulb replace‐ ment 180
Hill drive-off assistant 93
Hills 116
Holder for remote control, re‐ fer to Ignition lock 56
Homepage 6
Hood 171
Hood, closing 171
Hood, opening 171
Hood, unlocking 171
Horn 12
Hydraulic brake assistant 91
I
Ice warning, refer to External temperature warning 66
Icy roads, refer to External temperature warning 66
Identification marks, run-flat tires 166
Identification marks, tires 162
Ignition 57 Ignition key position 1, refer
to Radio ready state 56
Ignition key position 2, refer to Ignition on 57
Ignition key, refer to Remote control with integrated
key 20
Ignition lock 56
Ignition, switched off 57
Ignition, switched on 57
Indicator and warning lamps, overview 199
Indicator and warning lamps, Tire Pressure Monitor
TPM 87
Indicator and warning lights 15
Individual air distribution 100
Inflation pressure monitor, re‐ fer to Flat Tire Monitor 84
Inflation pressure monitor, re‐ fer to Tire Pressure Monitor
TPM 86
Inflation pressure, refer to Tire inflation pressure 156
Initializing, Flat Tire Monitor FTM 84
Instrument cluster, refer to Displays 14
Instrument lighting 78
Instruments, refer to Cock‐ pit 12
Integrated key 20
Interior lights 79
Interior lights, remote con‐ trol 24
Interior mirror 50
Interior motion sensor 32
Interior temperature, setting, air conditioner 99
Interior temperature, setting, automatic climate con‐
trol 101
Internet page 6 J
Jump-starting 189
K
Keyless Go, refer to Comfort Access 29
Keyless opening and closing, refer to Comfort Access 29
Key Memory, refer to Personal Profile 21
Key, refer to Remote control with integrated key 20
Kickdown, Steptronic trans‐ mission 64
Knocking control 154
L Lamp and bulb replacement, bulb replacement 178
Lamp, replacing, refer to Lamp and bulb replace‐
ment 178
Lamps 75
Lamps, automatic headlight control 75
Lap-and-shoulder belt, refer to Safety belts 47
LATCH child restraint fixing system 53
Leather, care 196
Leather care 196
LEDs, light-emitting di‐ odes 179
License plate light, bulb re‐ placement 182
Light-alloy wheels, care 197
Light-emitting diodes, LEDs 179
Lighter, socket 106
Lighting, instruments 78
Lighting, lamp and bulb re‐ placement 178 Seite 222REFERENCEEverything from A to Z222
Online Edition for Part no. 01 40 2 961 029 - II/15