flat tire MINI Hardtop 2 Door 2002 User Guide
[x] Cancel search | Manufacturer: MINI, Model Year: 2002, Model line: Hardtop 2 Door, Model: MINI Hardtop 2 Door 2002Pages: 140, PDF Size: 1.63 MB
Page 86 of 140
84
TIRE REPLACEMENT WHEEL AND TIRE COMBINATIONS Tire age The date on which the tire was manufac-
tured is indicated by the code on the side-
wall:
DOT ... 1202 indicates that the tire was
manufactured in Week 12 of the year 2002.
The manufacturer of your MINI recom-
mends replacement of all tires Ð including
the space-saver spare tire, after no more
than 6 years. Safety (run-flat) tires*
For replacement, use only safety tires,
as in the event of a flat tire there is no
space-saver spare tire.
You will recognize safety tires by a circular
symbol containing the letters RSC on the
side of the tire, see pages 110, 80.<
The right choiceThe factory-approved normal tires and
safety tires are matched to the vehicle and
have been selected to provide optimum
driving safety and the desired driving
comfort.
Never mount wheels and tires that
have not been specifically approved
by the manufacturer for use on your partic-
ular model. Although other wheels and
tires may theoretically have the same
dimensions, variations in factors such as
manufacturing tolerances can result in
contact between tire and bodywork, ulti-
mately leading to serious accidents. The
manufacturer cannot evaluate non-
approved wheels and tires to determine if
they are suited for use, and therefore
cannot ensure the operating safety of the
vehicle if they are fitted.<
The manufacturer has tested certain tire
brands in each size, categorized them as
safe for use on the road, and approved
them. Contact your MINI center for more
details.
The correct wheel and tire combina-
tion affects various systems that
would otherwise be impaired, e.g. ABS,
ASC+T and DSC.
For this reason, use only tires of the same
manufacture and tread configuration. In
the event of a flat tire, for example,
remount the approved wheel and tire
combination as soon as possible.<
StorageStore tires in a cool, dry place, protecting
them against light whenever possible.
Protect the tires against contact with oil,
grease and fuel.Tire changes between axlesDepending on individual operating condi-
tions, different wear patterns appear on
the front and rear axles. In the interests of
safety and optimized handling characteris-
tics, a change between the axles is not
recommended.
Page 87 of 140

85
OVERVIEW REPAIRSOPERATIONCONTROLS DATA INDEX
WINTER TIRESSNOW CHAINS
*
Choosing the right tire
The manufacturer recommends winter
tires (M+S radial tires) for driving in adverse
winter road conditions. While so-called all-
season tires (M+S designation) provide
better winter traction than summer tires
with the load ratings S, T, H, V, W, they do
not achieve the performance of winter
tires.
In the interest of safe tracking and steering
response, install winter tires made by the
same manufacturer having the same tread
configuration on all four wheels.
Before purchasing winter tires, check
whether your MINI is fitted with safety
tires. You will recognize safety tires by a
circular symbol containing the letters RSC
on the side of the tire, see page 110. In this
case, use only safety tires, as in the event of
a flat tire there is no space-saver spare tire.
Only winter tires recommended by the
manufacturer of your MINI should be
fitted. Any MINI center will be glad to
advise you on the selection of the right
winter tires for the relevant operating
conditions.
Observing speeds
Never exceed the maximum speed
for which the tires are rated.
Unprofessional attempts by laymen to
service tires can lead to damage and acci-
dents.
Have this work performed by skilled profes-
sionals only. Your MINI center will be glad
to assist you with both their expertise and
the proper equipment for your vehicle.<
Tire condition, tire inflation pressure
Once the tire wears to below 0.16 in
(4 mm), winter tires display a percep-
tible decrease in their ability to cope with
winter driving conditions, and should be
replaced in the interest of safety.<
Comply with the specified tire inflation
pressures and be sure to have the wheel
and tire assemblies balanced every time
you change the tires.
The use of narrow-link snow chains is
permitted in pairs only and only on
the front wheels with the following tires:
175/65 R 15
175/60 R 16
When fitting, comply with the manufac-
turer's instructions.<
With chains, do not exceed a speed
of 30 mph (50 km/h).<
After fitting the snow chains, do not
activate the Flat Tire Monitor.
When driving with snow chains, it can be
helpful to switch off the ASC+T or DSC for
a brief period, see pages 60, 61.<
Page 108 of 140

106
REPAIRING A FLAT TIRE CHANGING TIRES Ð MINI WITH SPACE-SAVER SPARE TIRE
*
Safety measures in the event of a flat
tire:
Stop the vehicle as far as possible from
passing traffic. Switch on the hazard
warning flashers.
Turn the steering wheel to the straight-
ahead wheel position and engage the
steering lock. Engage the parking brake and
shift into 1st or reverse gear (selector lever
in P).
All passengers should be outside the
vehicle and well away from your imme-
diate working area (behind a guardrail, for
instance).
If a warning triangle or portable hazard
warning lamp is available, set it up on the
roadside at an appropriate distance from
the rear of the vehicle. Comply with all
safety guidelines and regulations.<
In the event of a flat tire, different proce-
dures should be followed depending on the
equipment included in your MINI:
>Vehicles with space-saver spare tire, see
next column
>Vehicles with safety tires, see page 110.
Additional safety measures in the
event of a wheel change: change the
wheel only on a level, firm surface which is
not slippery.
Avoid jacking the vehicle on a soft or slip-
pery support surface (snow, ice, loose
gravel, etc.), as either the vehicle or the jack
could slip sideways.
Do not use a wooden block or similar object
as a support base for the jack, as this would
prevent it from extending to its full support
height and reduce its load-carrying
capacity .
Do not lie under the vehicle or start the
engine when the vehicle is supported by
the jack Ð risk of fatal injury.<
To change a space-saver tire, proceed as
follows:
>Remove the space-saver spare tire, see
page 107
>Prepare the vehicle, see page 108
>Jack up the vehicle, see page 108
>Fit the space-saver spare tire, see
page 109
>Tighten the lug bolts, see page 109
>Drive with space-saver spare tire, see
page 109.
Tire change setOn vehicles with a space-saver spare tire,
the tire change set is stored in the luggage
compartment under the floor mat.
1 Chock, folding
2 Hubcap remover
3 Wheel stud wrench
4 Jack
5 Spanner
6 Tow fitting
7 Lifting handle
Page 111 of 140
109
OVERVIEW REPAIRSOPERATION CONTROLS DATA INDEX
CHANGING TIRES Ð MINI WITH SPACE-SAVER SPARE TIRE
*
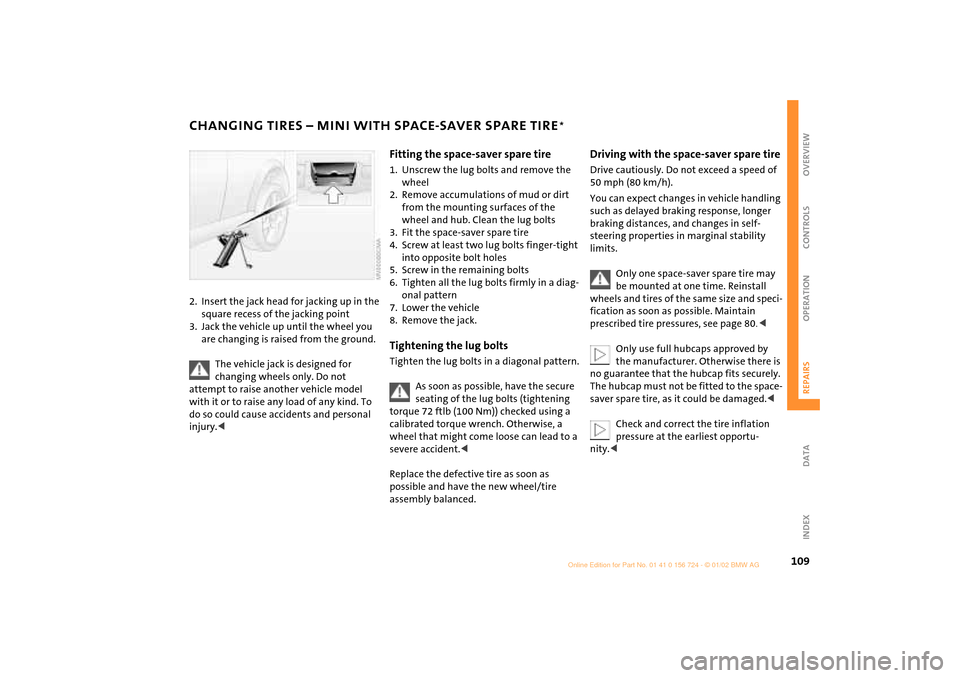
2. Insert the jack head for jacking up in the
square recess of the jacking point
3. Jack the vehicle up until the wheel you
are changing is raised from the ground.
The vehicle jack is designed for
changing wheels only. Do not
attempt to raise another vehicle model
with it or to raise any load of any kind. To
do so could cause accidents and personal
injury.<
Fitting the space-saver spare tire1. Unscrew the lug bolts and remove the
wheel
2. Remove accumulations of mud or dirt
from the mounting surfaces of the
wheel and hub. Clean the lug bolts
3. Fit the space-saver spare tire
4. Screw at least two lug bolts finger-tight
into opposite bolt holes
5. Screw in the remaining bolts
6. Tighten all the lug bolts firmly in a diag-
onal pattern
7. Lower the vehicle
8. Remove the jack.Tightening the lug boltsTighten the lug bolts in a diagonal pattern.
As soon as possible, have the secure
seating of the lug bolts (tightening
torque 72 ftlb (100 Nm)) checked using a
calibrated torque wrench. Otherwise, a
wheel that might come loose can lead to a
severe accident.<
Replace the defective tire as soon as
possible and have the new wheel/tire
assembly balanced.
Driving with the space-saver spare tireDrive cautiously. Do not exceed a speed of
50 mph (80 km/h).
You can expect changes in vehicle handling
such as delayed braking response, longer
braking distances, and changes in self-
steering properties in marginal stability
limits.
Only one space-saver spare tire may
be mounted at one time. Reinstall
wheels and tires of the same size and speci-
fication as soon as possible. Maintain
prescribed tire pressures, see page 80.<
Only use full hubcaps approved by
the manufacturer. Otherwise there is
no guarantee that the hubcap fits securely.
The hubcap must not be fitted to the space-
saver spare tire, as it could be damaged.<
Check and correct the tire inflation
pressure at the earliest opportu-
nity.<
Page 112 of 140

110
FLAT TIRE Ð SAFETY (RUN-FLAT) TIRES
*
You will recognize safety tires by a circular
symbol containing the letters RSC on the
side of the tire.
Safety tires consist of self-contained tires
and special rims. The tire reinforcement
ensures that the tire retains some residual
safety in the event of pressure drop and
driving remains possible to a restricted
degree.
The reinforcement on the flanks of
the safety tires means that it is
usually not possible to detect an air loss
from outside.<
Flat tire The yellow indicator lamp in the instru-
ment cluster lights up to indicate a flat tire.
In addition, a gong sounds, see
pages 17, 62.
1. Reduce vehicle speed carefully to under
50 mph (80 km/h), avoiding hard brake
applications and steering maneuvers
2. Do not exceed a speed of 50 mph
(80 km/h)
3. Identify damaged tires; check tire infla-
tion pressures on all four wheels at the
next opportunity, see page 80
4. Correct the tire inflation pressure if you
wish to continue your journey and this is
permitted, see next column
5. Have damaged tires changed by your
MINI center, see page 84.
Your MINI center has the information
needed for working with safety tires
and is equipped with the necessary special
tools. They provide advice if you wish to
replace the tires on your MINI or wish to
re-equip from summer to winter tires Ð or
vice versa, see also pages 80, 84, 85.<
For safety reasons, do not have a
damaged safety tire repaired.<
Continuing driving with a damaged
tireDriving can continue under certain condi-
tions with safety tires, depending on the
vehicle load and the severity of the tire
damage, at a maximum speed of 50 mph
(80 km/h).
You can determine the possible mileage for
continued driving on the basis of the
following general indications:
>Tire inflation pressure 0 bar (0 psi):
approx. 95 miles (150 km)
>Tire inflation pressure 0.5 bar Ð 1 bar
(7.2 psi Ð 14.5 psi): approx. 300 miles
(500 km)
>Tire inflation pressure greater than 1 bar
(14.5 psi): approx. 600 miles (1,000 km).
Page 132 of 140
EVERYTHING FROM A TO Z
130D
Dashboard 12
Data
dimensions 121
engine 120
weights 122
Data, technical 120
Daytime driving lamps 49
Decommissioning the
vehicle 96
Deep water, see Water on
roadways 77
Defrosting position 66
Defrosting windows 69
air conditioner system 66
automatic climate
control 69
Dimensions 121
Dirt on the paintwork 94
Disc brakes 79
Displacement 120
Display elements 13,
14
coolant temperature
gauge 56
fuel gauge 55
indicator and warning
lamps 15
odometer 55
Service Interval Display 57
with navigation system 14 Display lighting 50
Distance remaining 59
Door keys 22
Doors
locking 24
manual operation 25
remote control 23
unlocking 24
DOT Quality Grades 83
Drink holder, see Beverage
holder 70
Driving lamps 49
Driving notes, general 76
Dry air 65,
68
Dynamic Stability Control
(DSC) 16, 61
E
Easy Entry 33
EBV (Electronic Brake Force
Distribution) 16
Electric power windows 28
Electrical defect
driver's door 25
sliding/tilt sunroof 30
Electrical system 124
Electronic Brake Force
Distribution (EBV) 16 Electronic transmission control
module (EP), Continuously
Variable automatic
Transmission (CVT) 48
Emergency operation
driver's door 25
sliding/tilt sunroof 30
tailgate 27
Engine 76
electronics 17
power output 17
speed 17,
55
starting 42
switching off 43
Engine compartment
MINI COOPER 87
MINI COOPER S 88
Engine oil 89
additives 90
prescribed oils 90
pressure 15
Entry to the rear 33
EP (electronic transmission
control module),
Continuously Variable
automatic Transmission
(CVT) 48
Exterior finish, care 94
Exterior mirrors 36
Eyelets, towing 115
F
Failure, tires 62,
106,
110
Filler cap cover 77
Filling capacities 123
Filling, tank 123
First-aid kit 113
Flat tire 62,
106
Flat Tire Monitor 16,
17,
62
Floor carpets 95
Floor coverings 95
Floor mats 95
Fog lamps 50
Foldable rear backrest 71
"Follow me home" lamps 49
Footbrake 79
Footwell lamps
bulb replacement 105
Front fog lamps 50
bulb replacement 102
Front seat adjustment 31
Fuel consumption 59
Fuel consumption display 55
Fuel gauge 55
Fuel preparation 120
Fuel quality 78
Fuel reserve indicator 55
Fuel tank capacity 123
Fuses 112
Page 135 of 140
EVERYTHING FROM A TO Z
133
OVERVIEW REPAIRS OPERATION CONTROLS DATA INDEX
Recirculation of air 65,
68
Reclining seat 31
Refueling 77
Remaining distance for
service 57
Remote control 23
battery 22
battery changing 22
initialization 22
Removing mist,
windows 66,
69
Removing window mist
air conditioner system 66
automatic climate
control 69
Replacement key 22
Reporting safety defects 9
Restraint system 38
Reverse gear 45, 47
Rod antenna 94
Roller sun blind, rear window
blind 30
Rubber parts 95
Run-flat tire, see Safety
tires 80,
84,
85,
110
S
Safety belts 16,
31,
35,
95
adjusting 35
Safety lock buttons 26
Safety tires 80,
84,
110
winter tires 84, 85
Screwdriver 100
Seats 31
Securing cargo 72
Selector lever shiftlock 42,
46
Service and Warranty Booklet
(US models)/Warranty and
Service Guide Booklet
(Canadian models) 93
Service Interval Display 57, 93
Shiftlock 46
Side airbags 37
Side turn signal indicators
bulb replacement 102
Sitting 31
Sliding/tilt sunroof 29
convenience feature 25
safety function 30
Smoker's equipment
package 70
Snow chains 85
Space-saver spare tire
changing tires 106 Spare key 22
Spark plugs 124
Speed 120
Speeds 85
Split rear backrest 71
Spray jets 52
Standing lamps 49
bulb replacement 102
Starting 42
problems 43,
113,
114,
115
with a discharged
battery 113,
114
Steering lock 42
Storage, tires 84
Sun visors 36
Switches 12
Switching off, engine 43
Symbols 6
T
Tachometer 55
Tail lamps
bulb replacement 103
Tailgate 16,
27
manual unlocking 27
Tank capacity 77
Tank content, filling
capacities 123 Technical data 120
Technical modifications 96
Temperature
automatic climate
control 68
heating and climate
control 65
tires 83
Temperature display 59
engine coolant 56
Temperature layering 66,
69
Temperatures, high 77
The right tires 84
Third brake lamp
bulb replacement 104
Tire change
tire change set 106
Tire changes between axles 84
Tire failure 16
safety tires 110
space-saver spare tire 106
Tire inflation pressure 80, 85
Tires 80
all-season tires 85
break-in 76
changing 106
condition 82,
85
damage 82
Page 136 of 140
EVERYTHING FROM A TO Z
134
inflation pressure 80
M+S tires 85
replacement 83
safety tires 80,
84,
85,
110
snow chains 85
storage 84
temperature 83
the right choice 84
tread 82
winter tires 85
with emergency running
properties, see Safety
tires 80,
84,
85,
110
Tools 100
Torque 120
Tow bar 115
Tow fitting 115
Tow socket for tow
fittings 115
Towing 115
with bar 115
with Continuously Variable
automatic Transmission
(CVT) 116
Towing eyelets 115 Tow-starting 115,
116
with Continuously Variable
automatic Transmission
(CVT) 116
Tow-starting and towing 115
Traction 83
Trailer nose weight 122
Transmission 45
Transmission fault,
Continuously Variable
automatic Transmission
(CVT) 48
Transporting children
safely 38
Tread wear 83
Trip odometer 55
Turn signal indicators 17,
49
bulb replacement 102
U
Uniform Tire Quality
Grading 83
V
Vanity mirror 36
bulb replacement 105
illuminated 36
Vehicle
battery 124
decommissioning 96
dimensions 121
exterior finish 94
operating 42
settings 41
washing 94
weight 122
Vehicle Memory 41
Ventilation 66
draft-free 66,
69
W
Warning lamp 15
Warning triangle 113
Washer systems 89
Washer/wiper system 51
Waste container 70
Water on roadways
deep water 77
Wearing safety belt 16,
35
Weights 122 Wheel and tire
combinations 84
Wheel stud
wrench 100,
106,
107
Wheelbase 121
Width 121
Windows, convenience
feature 25
Windshield heating
automatic climate
control 68
heating and climate
control 65
Windshield washer
system 51,
89
filling 89
Windshield wipers 51,
100
care 95
replacing 100
Winter tires 85
all-season tires 85
safety tires 84,
85
Wiper/washer system 51
Work in the engine
compartment 86
Page 138 of 140
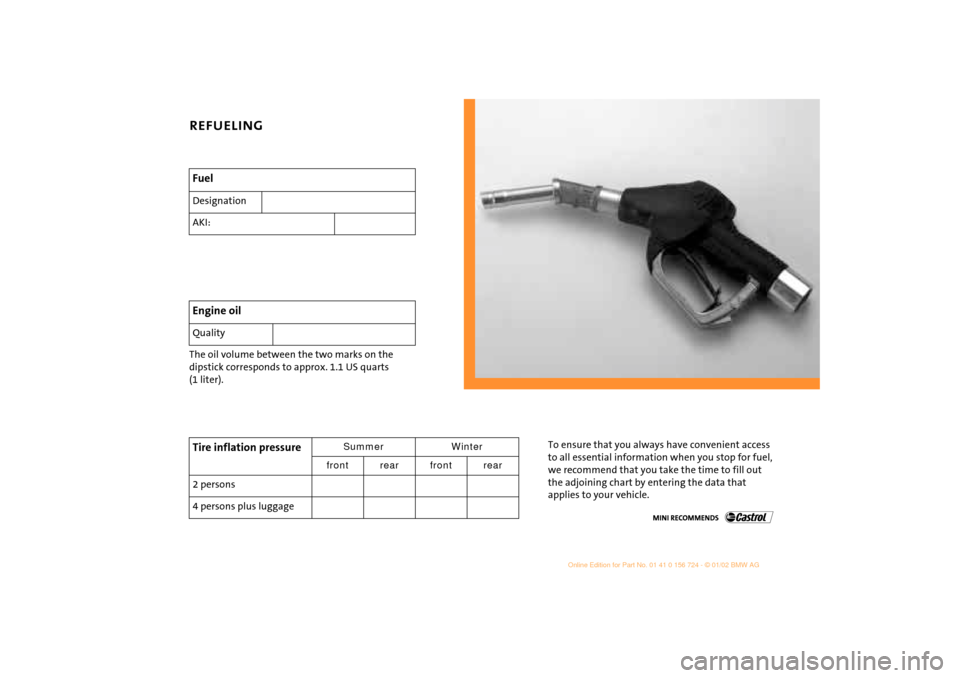
The oil volume between the two marks on the
dipstick corresponds to approx. 1.1 US quarts
(1 liter).FuelDesignation
AKI: Engine oil QualityTire inflation pressure
Summer Winter
front rear front rear
2 persons
4 persons plus luggage
To ensure that you always have convenient access
to all essential information when you stop for fuel,
we recommend that you take the time to fill out
the adjoining chart by entering the data that
applies to your vehicle.
REFUELING