light MINI Hardtop 2 Door 2002 Owner's Guide
[x] Cancel search | Manufacturer: MINI, Model Year: 2002, Model line: Hardtop 2 Door, Model: MINI Hardtop 2 Door 2002Pages: 140, PDF Size: 1.63 MB
Page 96 of 140
94
CARING FOR YOUR VEHICLESuitable car-care products
Use the cleaning and car-care prod-
ucts available at your MINI center.<
Washing your vehicle You can wash your new MINI from the
outset in automatic car washes, though
you should use brushless car washes.
When using steam jets or high-pres-
sure washers, ensure that you keep
the jets sufficiently far away from the
vehicle. If the jet is too close or the pressure
is too high, this can lead to damage or
initial damage that can develop into more
serious damage. Water that enters vehicle
components can lead to damage over the
long term.<
After washing the vehicle, apply the
brakes briefly to dry them, otherwise
water can reduce braking efficiency over
the short term and the brake rotors can
corrode. <
Switch the rain sensor off when
passing through an automatic car
wash, see page 51. Failure to do so could
result in damage caused by undesired
wiper activation.<
Rod antenna
If necessary, before entering a car
wash or garage with elevator ramp
for example, remove the rod antenna. To
do so, grip the rod antenna at the base and
unscrew it from the antenna foot by
turning it to the left.<
Headlamps
When cleaning the headlamps,
please observe the following: do not
clean by wiping with a dry cloth (scratches).
Never use abrasives or strong solvents to
clean the covers. Remove dirt and contami-
nation (such as insects) by soaking with
shampoo and then rinsing with plenty of
water. Always use a deicer spray to remove
accumulated ice and snow Ð never use a
scraper.<
Vehicle paintwork Regular care contributes greatly to driving
safety and value retention.
Environmental influences varying from one
region to the next can affect the vehicle
paintwork. Please base the frequency and
scope of car care on these various influ-
ences.
Care of upholstery Depressions that come about on the uphol-
stery material of the seats in daily use can
be brushed out using a slightly damp brush
against the grain.
The fact that velour lays down is not a
quality defect, but rather is inevitable in
the case of home textiles or clothing mate-
rials.
In the case of strong sunlight and longer
parking periods, cover the seats or all
windows to prevent discoloration.Care of special parts >Light-alloy wheels:
Use wheel cleaner especially during the
winter months, but do not use any
aggressive, acidic, strong alkali or rough
cleansers or steam jets above 140 7
(60 6) (observe the manufacturer's
operating instructions)
>Chrome parts
* such as cooler grille, door
handles, etc.:
Especially if exposed to road salt, care-
fully clean these parts with plenty of
water and possibly with a shampoo addi-
tive. For additional treatment, use
chrome polish
Page 103 of 140
101
OVERVIEW REPAIRSOPERATION CONTROLS DATA INDEX
LAMPS AND BULBSProceed carefully when handling lamps and
bulbs. If you are not familiar with any of
the procedures, consult your MINI center.
Do not touch the glass portion of
a new bulb with your bare hands
since even small amounts of impurities
burn into the surface and reduce the
service life of the bulb. Use a clean cloth,
paper napkin, or a similar material, or hold
the bulb by its metallic base.<
Replacement bulbs are available from your
MINI center.
Whenever working on the electrical
system, switch off the electrical
accessory you are working on or disconnect
the cable from the negative terminal of the
battery. Failure to do this could result in
short circuits.
To prevent injuries and damage, comply
with any instructions provided by the bulb
manufacturer.<
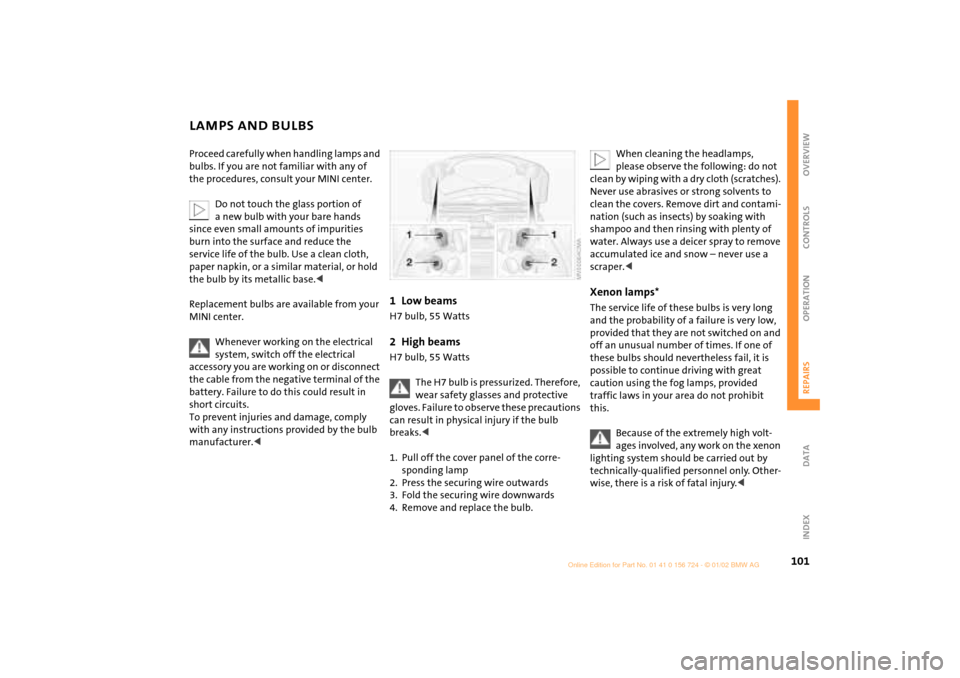
1 Low beams H7 bulb, 55 Watts2 High beamsH7 bulb, 55 Watts
The H7 bulb is pressurized. Therefore,
wear safety glasses and protective
gloves. Failure to observe these precautions
can result in physical injury if the bulb
breaks.<
1. Pull off the cover panel of the corre-
sponding lamp
2. Press the securing wire outwards
3. Fold the securing wire downwards
4. Remove and replace the bulb.
When cleaning the headlamps,
please observe the following: do not
clean by wiping with a dry cloth (scratches).
Never use abrasives or strong solvents to
clean the covers. Remove dirt and contami-
nation (such as insects) by soaking with
shampoo and then rinsing with plenty of
water. Always use a deicer spray to remove
accumulated ice and snow Ð never use a
scraper.<
Xenon lamps* The service life of these bulbs is very long
and the probability of a failure is very low,
provided that they are not switched on and
off an unusual number of times. If one of
these bulbs should nevertheless fail, it is
possible to continue driving with great
caution using the fog lamps, provided
traffic laws in your area do not prohibit
this.
Because of the extremely high volt-
ages involved, any work on the xenon
lighting system should be carried out by
technically-qualified personnel only. Other-
wise, there is a risk of fatal injury.<
Page 109 of 140
107
OVERVIEW REPAIRSOPERATION CONTROLS DATA INDEX
CHANGING TIRES Ð MINI WITH SPACE-SAVER SPARE TIRE
*
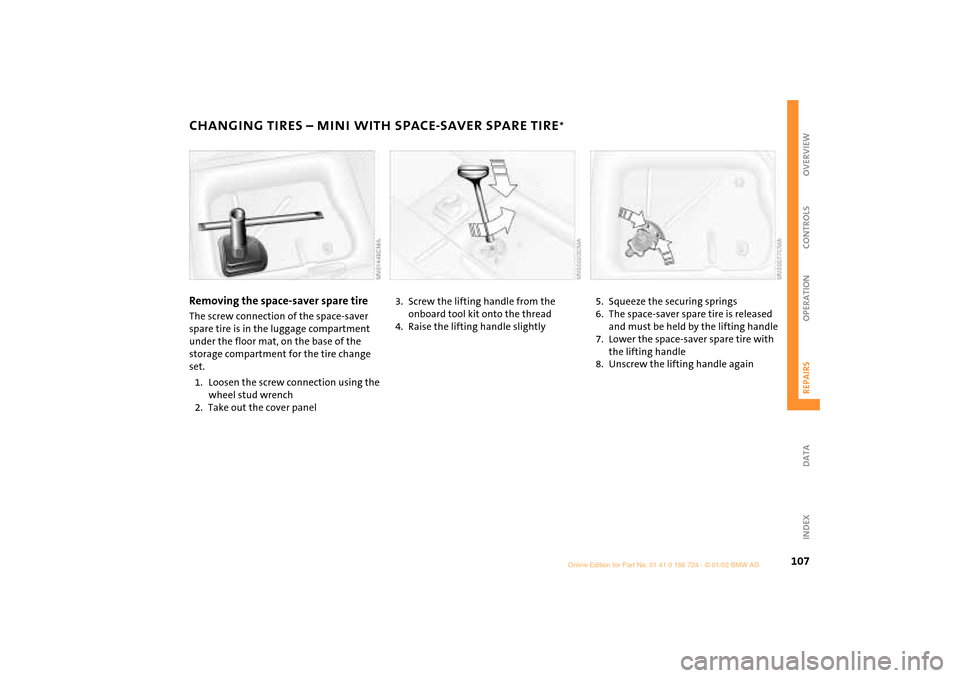
Removing the space-saver spare tire
The screw connection of the space-saver
spare tire is in the luggage compartment
under the floor mat, on the base of the
storage compartment for the tire change
set.
1. Loosen the screw connection using the
wheel stud wrench
2. Take out the cover panel
3. Screw the lifting handle from the
onboard tool kit onto the thread
4. Raise the lifting handle slightly
5. Squeeze the securing springs
6. The space-saver spare tire is released
and must be held by the lifting handle
7. Lower the space-saver spare tire with
the lifting handle
8. Unscrew the lifting handle again
Page 112 of 140

110
FLAT TIRE Ð SAFETY (RUN-FLAT) TIRES
*
You will recognize safety tires by a circular
symbol containing the letters RSC on the
side of the tire.
Safety tires consist of self-contained tires
and special rims. The tire reinforcement
ensures that the tire retains some residual
safety in the event of pressure drop and
driving remains possible to a restricted
degree.
The reinforcement on the flanks of
the safety tires means that it is
usually not possible to detect an air loss
from outside.<
Flat tire The yellow indicator lamp in the instru-
ment cluster lights up to indicate a flat tire.
In addition, a gong sounds, see
pages 17, 62.
1. Reduce vehicle speed carefully to under
50 mph (80 km/h), avoiding hard brake
applications and steering maneuvers
2. Do not exceed a speed of 50 mph
(80 km/h)
3. Identify damaged tires; check tire infla-
tion pressures on all four wheels at the
next opportunity, see page 80
4. Correct the tire inflation pressure if you
wish to continue your journey and this is
permitted, see next column
5. Have damaged tires changed by your
MINI center, see page 84.
Your MINI center has the information
needed for working with safety tires
and is equipped with the necessary special
tools. They provide advice if you wish to
replace the tires on your MINI or wish to
re-equip from summer to winter tires Ð or
vice versa, see also pages 80, 84, 85.<
For safety reasons, do not have a
damaged safety tire repaired.<
Continuing driving with a damaged
tireDriving can continue under certain condi-
tions with safety tires, depending on the
vehicle load and the severity of the tire
damage, at a maximum speed of 50 mph
(80 km/h).
You can determine the possible mileage for
continued driving on the basis of the
following general indications:
>Tire inflation pressure 0 bar (0 psi):
approx. 95 miles (150 km)
>Tire inflation pressure 0.5 bar Ð 1 bar
(7.2 psi Ð 14.5 psi): approx. 300 miles
(500 km)
>Tire inflation pressure greater than 1 bar
(14.5 psi): approx. 600 miles (1,000 km).
Page 116 of 140

114
JUMP-STARTINGPreparation for jump-starting1. Check whether the battery of the support
vehicle has 12 Volts and approximately
the same capacity (Ah) (printed on the
battery)
2. Switch off the engine of the support
vehicle
3. Switch off any electrical systems and
components in both vehicles Ð except
for the hazard warning flashers of the
support vehicle.
>Do not disconnect the discharged
battery from the vehicle electrical
system
>Make certain that there is no contact
between the bodywork of the two
vehicles Ð short circuit hazard!
4. With the battery of the MINI COOPER,
remove the cover panel. To do so, press
both clips at the same time
or
with the MINI COOPER S, open the cover
of the positive terminal connection (for
jump-starting)
*, see arrow 1.
Connect the jumper cables
Adhere to the sequence also when
providing support for other vehicles;
failure to observe this procedure can lead
to sparks at the terminals and pose an
injury hazard.<
1. On the MINI COOPER S, the positive
terminal connection (for jump-starting),
see arrow 1, functions as the positive
battery terminal.
Use the jumper cable (+) to set up a
connection between the positive terminal
of the discharged battery and the positive
terminal of the support battery
2. Use the second jumper cable (Ð) to set
up the connection between the negative
terminals of both vehicles.
To do so:
>Connect one terminal clamp to the
negative terminal and/or to an engine
or body ground of the support vehicle
>Connect the second terminal clamp to
the negative terminal of the battery
and/or to an engine or body ground of
the vehicle to be started. For the MINI,
see arrow 2.
Performing the jump-start1. Start the engine of the vehicle providing
the current and allow to run at a fast idle
speed for several minutes
2. Start the engine on the vehicle with the
discharged battery in the usual manner.
>If the first start attempt is not
successful, wait a few minutes before
another attempt in order to allow the
discharged battery to recharge.
On the MINI:
Before disconnecting the jumper
cables, switch on the lighting, rear window
defroster and the highest blower speed as
well as the engine for at least approx.
10 seconds to prevent a voltage surge from
the regulator to the electrical systems and
components.<
3. Then disconnect the jumper cables in
the reverse order.
Depending on the cause of the
malfunction, have the battery
checked and recharged at your MINI
center.<
Page 131 of 140
EVERYTHING FROM A TO Z
129
OVERVIEW REPAIRS OPERATION CONTROLS DATA INDEX
C
California Proposition 65
Warning 97
Can holder, see Beverage
holder 70
Car wash 94
Car-care products 94
Care
chrome parts 94
floor mats 95
imitation leather 95
leather 95
light-alloy wheels 94
of upholstery 94
plastic parts 95
rubber parts 95
safety belts 95
special parts 94
windshield wipers 95
Cargo 72
securing 72
stowing 72
Caring for your vehicle 94
Cassette player, see separate
Owner's Manual
CD changer, see separate
Owner's Manual CD player, see separate
Owner's Manual
Center (high-mount) brake
lamp
bulb replacement 104
Central locking system 23,
26
Changing tires
space-saver spare tire 106
Child seat 38
Child-restraint systems 38
Chrome parts 94
Cigarette lighter 70
socket 70
Cleaning rear window 52
Cleaning windshield 52
Clock 58
Closing
from inside 26
from outside 23
Clothes hooks 77
Clutch 76
Cockpit 12
Combination of wheels/
tires 84
Compact Disc player, see
separate Owner's Manual
Compression ratio 120 Computer 58
average fuel
consumption 59
average speed 59
cruising range 59
exterior temperature 59
Condensation 65,
68
Consumption 59
Consumption display 55
Contents 2
Continuously Variable
automatic Transmission
(CVT)
electronic transmission
control module (EP) 48
gear display 48
ignition 42
interlock 42
manual mode 47
parking 47
reverse gear 47
selector lever
shiftlock 42,
46
shiftlock 46
Sport program 47
Steptronic 46
towing 116
tow-starting 116
transmission fault 48 Control elements 12
Convenience feature
sliding/tilt sunroof 25
windows 25
Convenience operation
via central locking
system 26
Coolant 91
Coolant level 91
Coolant temperature
gauge 56
Cooling 65,
68
Copyright notice 6
Correct sitting posture with
airbags 31
safety belt 31
Cruise control 17,
18,
53
Cruising range 59
Cup holder, see Beverage
holder 70
Curb weight 122
Currency of the Owner's
Manual 7
Cylinders 120
Page 132 of 140
EVERYTHING FROM A TO Z
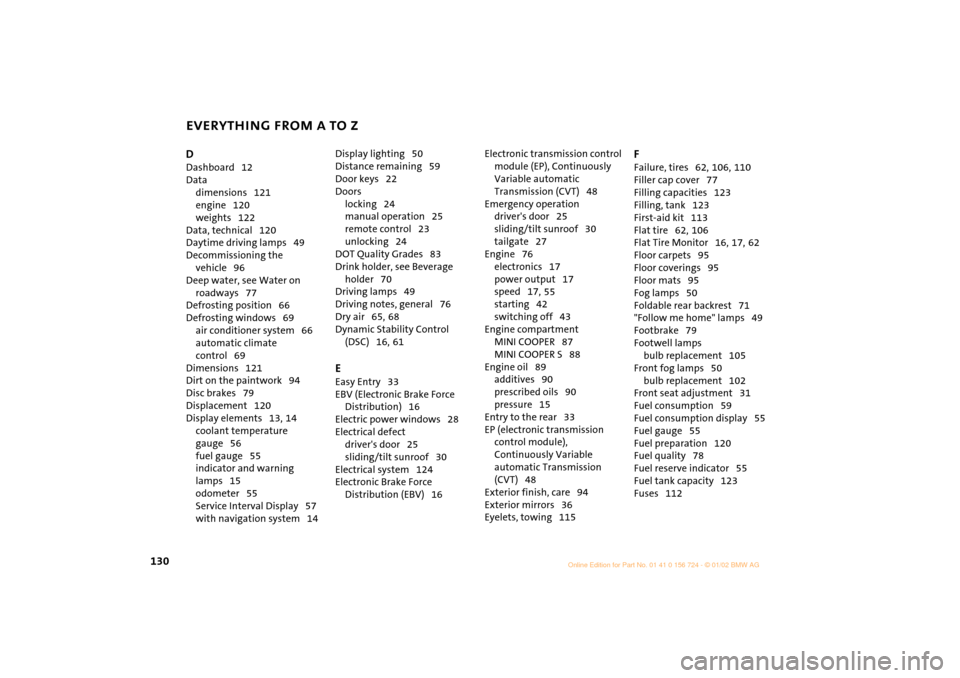
130D
Dashboard 12
Data
dimensions 121
engine 120
weights 122
Data, technical 120
Daytime driving lamps 49
Decommissioning the
vehicle 96
Deep water, see Water on
roadways 77
Defrosting position 66
Defrosting windows 69
air conditioner system 66
automatic climate
control 69
Dimensions 121
Dirt on the paintwork 94
Disc brakes 79
Displacement 120
Display elements 13,
14
coolant temperature
gauge 56
fuel gauge 55
indicator and warning
lamps 15
odometer 55
Service Interval Display 57
with navigation system 14 Display lighting 50
Distance remaining 59
Door keys 22
Doors
locking 24
manual operation 25
remote control 23
unlocking 24
DOT Quality Grades 83
Drink holder, see Beverage
holder 70
Driving lamps 49
Driving notes, general 76
Dry air 65,
68
Dynamic Stability Control
(DSC) 16, 61
E
Easy Entry 33
EBV (Electronic Brake Force
Distribution) 16
Electric power windows 28
Electrical defect
driver's door 25
sliding/tilt sunroof 30
Electrical system 124
Electronic Brake Force
Distribution (EBV) 16 Electronic transmission control
module (EP), Continuously
Variable automatic
Transmission (CVT) 48
Emergency operation
driver's door 25
sliding/tilt sunroof 30
tailgate 27
Engine 76
electronics 17
power output 17
speed 17,
55
starting 42
switching off 43
Engine compartment
MINI COOPER 87
MINI COOPER S 88
Engine oil 89
additives 90
prescribed oils 90
pressure 15
Entry to the rear 33
EP (electronic transmission
control module),
Continuously Variable
automatic Transmission
(CVT) 48
Exterior finish, care 94
Exterior mirrors 36
Eyelets, towing 115
F
Failure, tires 62,
106,
110
Filler cap cover 77
Filling capacities 123
Filling, tank 123
First-aid kit 113
Flat tire 62,
106
Flat Tire Monitor 16,
17,
62
Floor carpets 95
Floor coverings 95
Floor mats 95
Fog lamps 50
Foldable rear backrest 71
"Follow me home" lamps 49
Footbrake 79
Footwell lamps
bulb replacement 105
Front fog lamps 50
bulb replacement 102
Front seat adjustment 31
Fuel consumption 59
Fuel consumption display 55
Fuel gauge 55
Fuel preparation 120
Fuel quality 78
Fuel reserve indicator 55
Fuel tank capacity 123
Fuses 112
Page 133 of 140
EVERYTHING FROM A TO Z
131
OVERVIEW REPAIRS OPERATION CONTROLS DATA INDEX
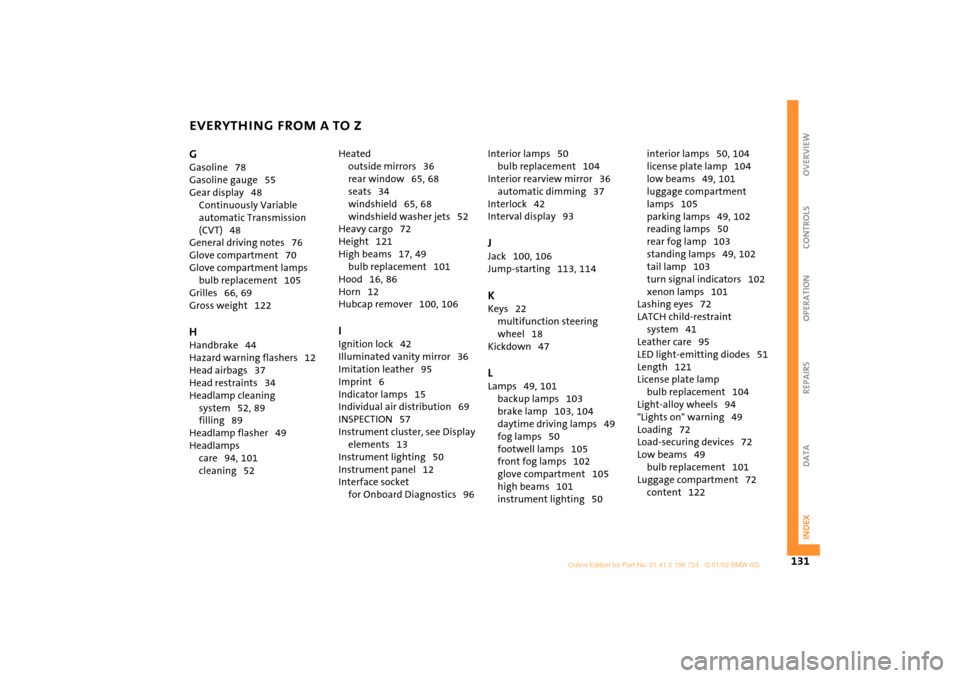
G
Gasoline 78
Gasoline gauge 55
Gear display 48
Continuously Variable
automatic Transmission
(CVT) 48
General driving notes 76
Glove compartment 70
Glove compartment lamps
bulb replacement 105
Grilles 66,
69
Gross weight 122
H
Handbrake 44
Hazard warning flashers 12
Head airbags 37
Head restraints 34
Headlamp cleaning
system 52,
89
filling 89
Headlamp flasher 49
Headlamps
care 94,
101
cleaning 52 Heated
outside mirrors 36
rear window 65,
68
seats 34
windshield 65, 68
windshield washer jets 52
Heavy cargo 72
Height 121
High beams 17, 49
bulb replacement 101
Hood 16,
86
Horn 12
Hubcap remover 100,
106
I
Ignition lock 42
Illuminated vanity mirror 36
Imitation leather 95
Imprint 6
Indicator lamps 15
Individual air distribution 69
INSPECTION 57
Instrument cluster, see Display
elements 13
Instrument lighting 50
Instrument panel 12
Interface socket
for Onboard Diagnostics 96 Interior lamps 50
bulb replacement 104
Interior rearview mirror 36
automatic dimming 37
Interlock 42
Interval display 93
J
Jack 100,
106
Jump-starting 113,
114
K
Keys 22
multifunction steering
wheel 18
Kickdown 47 L
Lamps 49,
101
backup lamps 103
brake lamp 103,
104
daytime driving lamps 49
fog lamps 50
footwell lamps 105
front fog lamps 102
glove compartment 105
high beams 101
instrument lighting 50 interior lamps 50,
104
license plate lamp 104
low beams 49,
101
luggage compartment
lamps 105
parking lamps 49,
102
reading lamps 50
rear fog lamp 103
standing lamps 49, 102
tail lamp 103
turn signal indicators 102
xenon lamps 101
Lashing eyes 72
LATCH child-restraint
system 41
Leather care 95
LED light-emitting diodes 51
Length 121
License plate lamp
bulb replacement 104
Light-alloy wheels 94
"Lights on" warning 49
Loading 72
Load-securing devices 72
Low beams 49
bulb replacement 101
Luggage compartment 72
content 122
Page 134 of 140
EVERYTHING FROM A TO Z
132
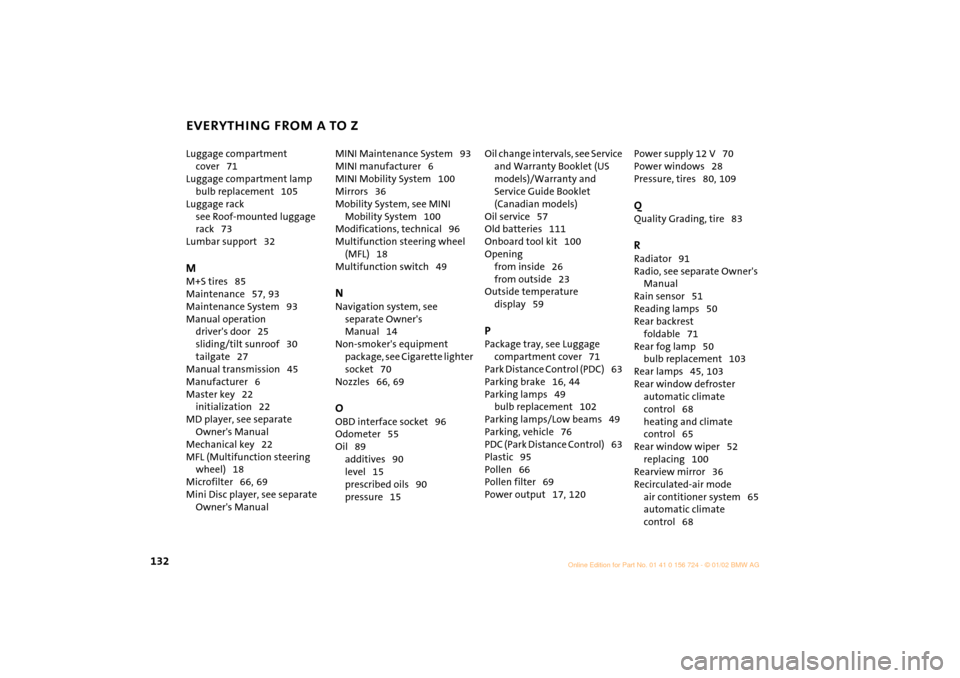
Luggage compartment
cover 71
Luggage compartment lamp
bulb replacement 105
Luggage rack
see Roof-mounted luggage
rack 73
Lumbar support 32 M
M+S tires 85
Maintenance 57,
93
Maintenance System 93
Manual operation
driver's door 25
sliding/tilt sunroof 30
tailgate 27
Manual transmission 45
Manufacturer 6
Master key 22
initialization 22
MD player, see separate
Owner's Manual
Mechanical key 22
MFL (Multifunction steering
wheel) 18
Microfilter 66,
69
Mini Disc player, see separate
Owner's Manual MINI Maintenance System 93
MINI manufacturer 6
MINI Mobility System 100
Mirrors 36
Mobility System, see MINI
Mobility System 100
Modifications, technical 96
Multifunction steering wheel
(MFL) 18
Multifunction switch 49
N
Navigation system, see
separate Owner's
Manual 14
Non-smoker's equipment
package, see Cigarette lighter
socket 70
Nozzles 66,
69
O
OBD interface socket 96
Odometer 55
Oil 89
additives 90
level 15
prescribed oils 90
pressure 15 Oil change intervals, see Service
and Warranty Booklet (US
models)/Warranty and
Service Guide Booklet
(Canadian models)
Oil service 57
Old batteries 111
Onboard tool kit 100
Opening
from inside 26
from outside 23
Outside temperature
display 59
P
Package tray, see Luggage
compartment cover 71
Park Distance Control (PDC) 63
Parking brake 16,
44
Parking lamps 49
bulb replacement 102
Parking lamps/Low beams 49
Parking, vehicle 76
PDC (Park Distance Control) 63
Plastic 95
Pollen 66
Pollen filter 69
Power output 17, 120 Power supply 12 V 70
Power windows 28
Pressure, tires 80,
109
Q
Quality Grading, tire 83 R
Radiator 91
Radio, see separate Owner's
Manual
Rain sensor 51
Reading lamps 50
Rear backrest
foldable 71
Rear fog lamp 50
bulb replacement 103
Rear lamps 45,
103
Rear window defroster
automatic climate
control 68
heating and climate
control 65
Rear window wiper 52
replacing 100
Rearview mirror 36
Recirculated-air mode
air contitioner system 65
automatic climate
control 68