child lock MINI Hardtop 2 Door 2002 Owner's Manual
[x] Cancel search | Manufacturer: MINI, Model Year: 2002, Model line: Hardtop 2 Door, Model: MINI Hardtop 2 Door 2002Pages: 140, PDF Size: 1.63 MB
Page 4 of 140

CONTENTS
2
© 2002 Bayerische Motoren Werke
Aktiengesellschaft
Munich, Germany
Reprinting, including excerpts, only with the
written consent of BMW AG, Munich.
Order No. 01 41 0 156 724
US English II/02
Printed in Germany
Printed on environmentally friendly paper
(bleached without chlorine, suitable for recycling).
Using this Owner's Manual
Notes on the Owner's Manual 6
Symbols used 6
Symbol for vehicle parts 6
Your individual vehicle 6
Editorial notice 7
For your own safety 8
Reporting safety defects 9
At a glance
Cockpit 12
Display elements 13
Display elements with navigation
system 14
Indicator and warning lamps 15
Multifunction steering wheel MFL 18
Controls and features
Opening and closing:
Keys 22
Central locking system 23
Opening and closing Ð from outside 23
Opening and closing Ð from inside 26
Tailgate 27
Electric power windows 28
Sliding/tilt sunroof 29
Roller sun blind 30
Adjustments:
Correct sitting posture 31
Seats 31
Entry to the rear 33
Seat heating 34
Head restraints 34
Safety belts 35
Steering wheel 35
Mirrors 36
Airbags 37
Transporting children safely 38
Vehicle Memory 41
Page 25 of 140

23
OVERVIEW REPAIRS OPERATIONCONTROLS DATA INDEX
CENTRAL LOCKING SYSTEM OPENING AND CLOSING Ð FROM OUTSIDE
The concept
The central locking system is ready for
operation whenever the driver's door is
closed. The doors, the tailgate and the fuel
filler door are unlocked or locked.
The central locking system can be oper-
ated:
>
From outside via the remote control as
well as via the door lock
>
From inside by pressing a button.
If operated from outside, the anti-theft
system is activated at the same time. This
prevents the doors from being unlocked via
safety lock buttons or door handles.
In the event of an accident, the central
locking system unlocks automatically. The
hazard warning system and interior lamps
are also switched on.
Via remote control
The remote control gives you an exception-
ally convenient method for unlocking and
locking your vehicle. It also offers another
function:
To open the tailgate, refer to page 24.
The tailgate will open slightly, regardless of
whether it was locked or unlocked.
Whenever you unlock (lock) the vehicle,
you simultaneously deactivate (activate)
the anti-theft system, and switch the inte-
rior lamps on (off).
If the vehicle has been properly locked
using the remote control, the hazard
warning system lights up once.
When the vehicle is unlocked, the hazard
warning system does not react.
Children might be able to lock the
doors from the inside. Always take
the vehicle keys with you so that the
vehicle can be opened again from the
outside at any time.
<
For US owners only
The transmitter and receiver units comply
with part 15 of the FCC (Federal Communi-
cation Commission) regulations. Operation
is governed by the following:
FCC ID: LX8765S
LX8765E
LX8CAS
Compliance statement:
This device complies with part 15 of the
FCC Rules. Operation is subject to the
following two conditions:
>
This device may not cause harmful inter-
ference, and
>
this device must accept any interference
received, including interference that may
cause undesired operation.
Any unauthorized modifications or
changes to these devices could void
the user's authority to operate this equip-
ment.
<
Page 28 of 140

26
OPENING AND CLOSING Ð FROM INSIDE With this switch, you operate the central
locking system when the doors are closed.
The doors and tailgate are unlocked or
locked only.
The anti-theft system is not activated. Also,
the fuel filler door remains unlocked to
allow refueling.
If the remote control has been used
to unlock only the driver's door, see
page 24, and you touch the switch when
the driver's door is open, the other door,
the tailgate, and the fuel filler door are
unlocked.
If the driver's door is closed, touching the
switch locks it.<
The central locking system can be
locked automatically as soon as you
begin to drive if you desire. This can be
adjusted to be vehicle-specific.<
To unlock and open the doors1. Touch the switch for the central locking
system
2. Pull the door handle above the armrest
or
pull the door handle for each door twice: to
unlock first and then open.Convenience opening modeFrom ignition key position 1:
Hold the switch in the "Unlock" position.
The windows and sliding/tilt sunroof open.
Convenience closing is not possible
by means of the central locking
system. You should therefore close all the
windows and the sliding/tilt sunroof indi-
vidually.<
To lockTouch the switch for the central locking
system
or
press the individual safety lock buttons
down.
Children might be able to lock the
doors from the inside. Always take
the vehicle's keys with you so that you can
open the vehicle again from the outside at
any time.<
Page 30 of 140

28
ELECTRIC POWER WINDOWSOpen and close windowsFrom ignition key position 1:
To open:
Press the switch downwards.
The window opens until you release the
switch
or
briefly press the switch downwards.
The window opens automatically.
Pressing the switch again stops the opera-
tion.
To close:
Press the switch upwards.
The window closes until you release the
switch
or
when the engine is running:
Briefly press the switch upwards.
The window closes automatically.
Pressing the switch again stops the opera-
tion.
The window on the front passenger
side cannot be closed automati-
cally.<
Watch during the closing process to
be sure that no one is injured.<
After the ignition has been switched off:
You can use the electric power windows as
long as no one opens any of the doors.
If a door is opened during operation, the
opening/closing process stops immedi-
ately.
When leaving the vehicle, always
remove the ignition key from the
lock and remember to close the doors to
prevent children from operating the power
windows and injuring themselves, etc.<
For the convenience mode via the door
lock, refer to page 25.
Page 31 of 140

29
OVERVIEW REPAIRS OPERATIONCONTROLS DATA INDEX
SLIDING/TILT SUNROOF
*
To prevent injuries, exercise care
when closing the sliding/tilt sunroof
and keep it in your field of vision until it is
shut.
When leaving the vehicle, always remove
the ignition key from the lock and
remember to close the doors to prevent
children from operating the sunroof and
injuring themselves, etc.
Be sure that adequate clearance is main-
tained for the opening path of the sliding/
tilt sunroof, otherwise damage can occur.<
For the convenience mode via the door
lock, refer to page 25.
Raising Ð Opening Ð ClosingFrom ignition key position 1:To raise:Press the switch
or
push the switch backwards to the resis-
tance point.Opening and closing1. Push the switch in the desired direction
until you feel resistance and hold in this
position
2. Release the switch when the desired
position has been reached.
Do not use force to close the sliding/
tilt sunroof in its raised position, as
damage to the mechanism could result.<
After the ignition has been switched off:
You can still operate the sliding/tilt sunroof
for up to one minute, as long as no one
opens any of the doors.
If a door is opened during operation, the
opening/closing stops immediately.
Automatic opening and closingTo open:
Push the switch past the resistance point:
The sunroof opens completely
To close:
1. Push the switch past the resistance
point:
The sunroof closes to the raised position
2. Push the switch again:
The sunroof closes completely.
Touching the switch briefly during opening
or closing stops the movement immedi-
ately.
Page 33 of 140

31
OVERVIEW REPAIRS OPERATIONCONTROLS DATA INDEX
CORRECT SITTING POSTURE SEAT ADJUSTMENTThe ideal seating position can make a vital
contribution to relaxed, fatigue-free
driving. The correct seating position also
works together with the safety belts and
airbags to provide occupants with
maximum levels of passive safety in an
accident. To ensure that the safety systems
operate with optimal efficiency, we
strongly urge you to observe the instruc-
tions contained in the following section.
For supplementary information on trans-
porting children, refer to page 38. Sitting correctly with airbags
Always maintain an adequate
distance between yourself and all of
the airbags. Always hold the steering wheel
by the rim with the hands at the 9 and
3 o'clock positions to keep any chance of
injury to hands or arms to an absolute
minimum, should the airbag be deployed.
No one and nothing is to come between the
airbags and the seat occupant.
Never use the front passenger airbag cover
as a storage surface for objects of any kind,
or as a support for legs or feet, as this will
increase the risk of injury in a collision severe
enough in which the airbag will deploy.<
For airbag locations and additional infor-
mation on airbags, refer to page 37.
Safe with safety belts
Never allow more than one person to
wear a single safety belt. Never allow
infants or small children to ride in a
passenger's lap. Avoid twisting the belt
while routing it firmly across the hips and
shoulder, wear it as snugly against your
body as possible. Do not allow the belt to
rest against hard or fragile objects. Do not
route the belt across your neck, or run it
across sharp edges. Be sure that the belt
does not become caught or jammed.
Avoid wearing bulky clothing that prevents
the belt from fitting properly, and pull on
the belt periodically to retension it over
your shoulders. In the event of a frontal
impact, a loose lap belt could slide over the
hips, leading to abdominal injury. In addi-
tion, the safety belt's restraint effective-
ness is reduced if the belt is worn loosely.
Expectant mothers should always wear
their safety belts, taking care to position
the lap belt against the lower hips, where it
will not exert pressure against the abdom-
inal area.<
For information on using the safety belts,
refer to page 35.
Important adjustment information
Never try to adjust your seat while
operating the vehicle. The seat could
respond with an unexpected movement,
and the ensuing loss of vehicle control
could lead to an accident.
Never ride with the backrest reclined to an
extreme horizontal angle (especially impor-
tant for front passengers to remember).
Keep the backrest relatively upright to
minimize the risk of sliding under the
safety belt and sustaining injury in an acci-
dent.<
Adjusting the seats, see next page.
Page 37 of 140

35
OVERVIEW REPAIRS OPERATIONCONTROLS DATA INDEX
SAFETY BELTS STEERING WHEEL Drive with your safety belt onEven though there is an airbag, wear a
safety belt every time you get in the
vehicle, because airbags enhance safety by
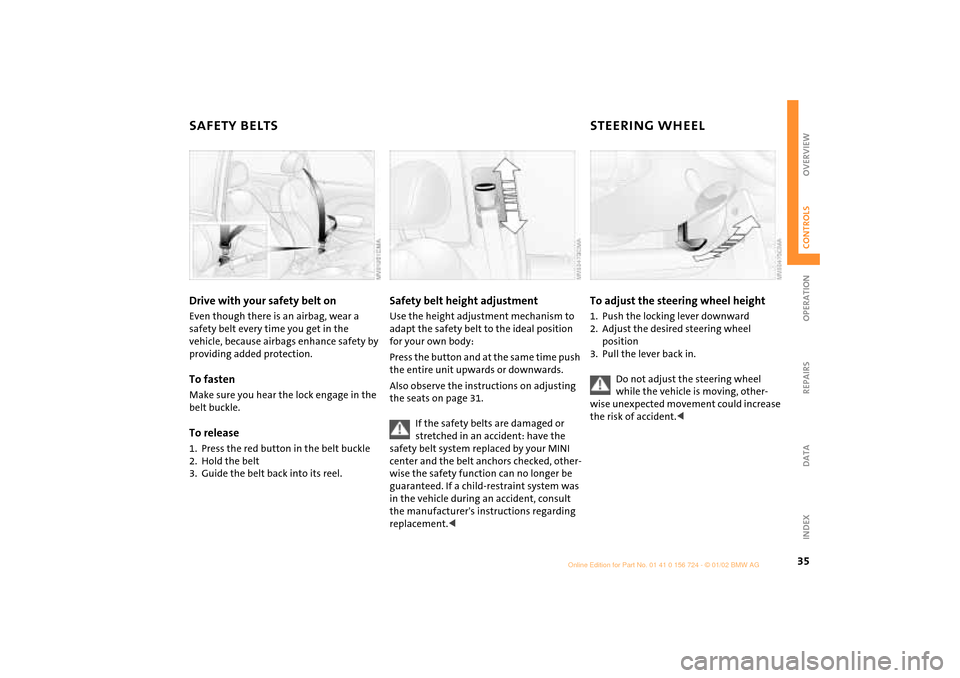
providing added protection.To fastenMake sure you hear the lock engage in the
belt buckle.To release1. Press the red button in the belt buckle
2. Hold the belt
3. Guide the belt back into its reel.
Safety belt height adjustmentUse the height adjustment mechanism to
adapt the safety belt to the ideal position
for your own body:
Press the button and at the same time push
the entire unit upwards or downwards.
Also observe the instructions on adjusting
the seats on page 31.
If the safety belts are damaged or
stretched in an accident: have the
safety belt system replaced by your MINI
center and the belt anchors checked, other-
wise the safety function can no longer be
guaranteed. If a child-restraint system was
in the vehicle during an accident, consult
the manufacturer's instructions regarding
replacement.<
To adjust the steering wheel height1. Push the locking lever downward
2. Adjust the desired steering wheel
position
3. Pull the lever back in.
Do not adjust the steering wheel
while the vehicle is moving, other-
wise unexpected movement could increase
the risk of accident.<
Page 42 of 140

40
TRANSPORTING CHILDREN SAFELYforward-facing child-restraint system that
has first been properly secured with a
safety belt. Never install a rearward-facing
child-restraint system in the front
passenger seat.
We strongly urge you to carefully read and
comply with the instructions for installa-
tion and use provided by the child
restraint's manufacturer whenever you use
such a device.
Be sure that all occupants Ð of all ages Ð
remain properly and securely restrained at
all times.
According to accident statistics, children
are safer when properly restrained in the
rear seats than in the front seating posi-
tions.<
All rear seats in your vehicle conform to the
guidelines defined in SAE J1819, an
industry recommended practice for
securing child-restraint systems in motor
vehicles.
Child seat securityAll of the rear belt retractors and the front
passenger's safety belt can be locked for
mounting and securing child-restraint
systems.
Information regarding this is located near
the buckle latch of each safety belt.
To lock the belt Pull the entire length of the belt from the
belt retractor. Allow the reel to retract the
belt somewhat and engage the buckle,
then tighten the belt against the child-
restraint system. The retraction mecha-
nism is now locked. To unlock the belt Release the buckle, remove the child-
restraint system and allow the belt
retractor to reel the belt completely in.
Page 43 of 140

41
OVERVIEW REPAIRS OPERATIONCONTROLS DATA INDEX
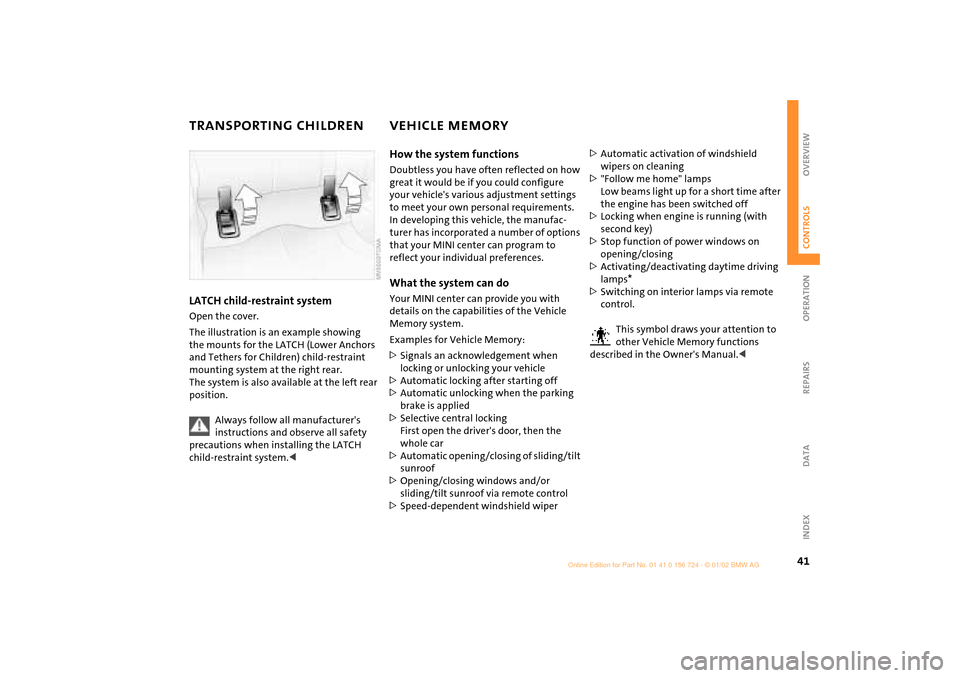
TRANSPORTING CHILDREN VEHICLE MEMORY LATCH child-restraint systemOpen the cover.
The illustration is an example showing
the mounts for the LATCH (Lower Anchors
and Tethers for Children) child-restraint
mounting system at the right rear.
The system is also available at the left rear
position.
Always follow all manufacturer's
instructions and observe all safety
precautions when installing the LATCH
child-restraint system.<
How the system functionsDoubtless you have often reflected on how
great it would be if you could configure
your vehicle's various adjustment settings
to meet your own personal requirements.
In developing this vehicle, the manufac-
turer has incorporated a number of options
that your MINI center can program to
reflect your individual preferences. What the system can doYour MINI center can provide you with
details on the capabilities of the Vehicle
Memory system.
Examples for Vehicle Memory:
>Signals an acknowledgement when
locking or unlocking your vehicle
>Automatic locking after starting off
>Automatic unlocking when the parking
brake is applied
>Selective central locking
First open the driver's door, then the
whole car
>Automatic opening/closing of sliding/tilt
sunroof
>Opening/closing windows and/or
sliding/tilt sunroof via remote control
>Speed-dependent windshield wiper>Automatic activation of windshield
wipers on cleaning
>"Follow me home" lamps
Low beams light up for a short time after
the engine has been switched off
>Locking when engine is running (with
second key)
>Stop function of power windows on
opening/closing
>Activating/deactivating daytime driving
lamps
*
>Switching on interior lamps via remote
control.
This symbol draws your attention to
other Vehicle Memory functions
described in the Owner's Manual.<
Page 93 of 140

91
OVERVIEW REPAIRSOPERATIONCONTROLS DATA INDEX
COOLANT
Do not add coolant to the cooling
system when the engine is hot.
Escaping coolant can cause burns.
To avoid the possibility of damage later on,
never use anything other than factory-
approved, nitrite and amino-free extended-
duty antifreeze with corrosion inhibitor.
Every MINI center is aware of these.
Antifreeze and anti-corrosion agents are
hazardous to health. Always store these
agents in tightly-closed original containers
kept well away from the reach of children.
Extended-duty antifreeze with corrosion
inhibitor contains the flammable
substance ethylene-glycol. For this reason,
do not spill extended-duty antifreeze with
corrosion inhibitor on hot engine parts. It
could catch fire and cause serious burns.<
Comply with the applicable environ-
mental laws regulating the disposal
of extended-duty antifreeze with corrosion
inhibitor.<
The illustration shows an example of the
coolant tank on the MINI COOPER.Checking coolant level Correct coolant level for cold engine
(approx. 68 7/20 6):
Up to the mark "MAX" of the transparent
expansion tank.
Only open the cap of the expansion
tank when the engine has cooled
down. The needle on the coolant tempera-
ture gauge in the instrument cluster must
be no higher than in the first quarter,
otherwise there is a danger of scalding.<
To add coolantMINI COOPER:
1. Slowly open the cap by turning it with
the tab to allow accumulated pressure
toescape.
2. Pull open the cap completely.
3. If the coolant is low, slowly add coolant
until the correct level is reached Ð do not
overfill.
MINI COOPER S:
1. Open the cap by turning it slightly coun-
terclockwise to allow accumulated pres-
sure to escape.
2. Unscrew the cap completely and open.
3. If the coolant is low, slowly add coolant
until the correct level is reached Ð do not
overfill.
The coolant consists of water and
extended-duty antifreeze with corrosion
inhibitor. The mixing ratio of 50 to 50 must
be maintained all the year round due to the
required corrosion resistance. No other
additives are required.
Replace the coolant every 4 years.