instrument cluster MINI Hardtop 2 Door 2002 Owner's Manual
[x] Cancel search | Manufacturer: MINI, Model Year: 2002, Model line: Hardtop 2 Door, Model: MINI Hardtop 2 Door 2002Pages: 140, PDF Size: 1.63 MB
Page 46 of 140

44
PARKING BRAKE The parking brake is designed primarily to
prevent the vehicle from rolling when it is
parked. It operates against the rear wheels.To engageLever automatically locks in position.
The warning lamp in the instrument cluster
comes on when the ignition key is in posi-
tion 2, see page 16.To release1. Pull up slightly
2. Press the button
3. Push the lever downwards.
If, in exceptional circumstances,
it should be necessary to engage the
parking brake while the vehicle is
in motion, do not pull the lever with
excessive pressure. Keep your thumb
pressed against the release button while
carefully pulling the lever up to apply
moderate pressure.
Excessive pressure can lead to overbraking
and loss of traction (fishtailing) at the rear
axle.
The brake lamps do not come on when the
parking brake is engaged.
Vehicles with manual transmission:
Always engage the parking brake when
parking on hills and inclined surfaces, as
first gear or reverse may not provide
adequate resistance to rolling.
Vehicles with CVT:
Place the selector lever in P.<
Page 55 of 140

53
OVERVIEW REPAIRS OPERATIONCONTROLS DATA INDEX
CRUISE CONTROL
*
Starting at about 25 mph (40 km/h), the
vehicle maintains and stores any vehicle
speed that you specify.
Do not use cruise control on twisting
roads, when high traffic density
prevents driving at a constant speed, when
the road surface is slick (snow, rain, ice), or
when the road surface is loose (rocks,
sand).<
To activate the system From ignition key position 1:
Press button 2.
The indicator lamp in the instrument
cluster lights up.
Cruise control is active.To maintain and store speed or to
acceleratePress button 3.
The system maintains and stores the
current vehicle speed. Every time you tap
the button, the speed increases by approx.
1 mph (2 km/h).
Press and hold button 3.
The vehicle accelerates without pressure on
the accelerator pedal. When you release
the button, the system maintains and
stores the current speed.
If, on a downhill gradient, the engine
braking effect is not sufficient, the
controlled speed may be exceeded. Speed
can drop on uphill grades if the engine
output is insufficient.<
To deceleratePress button 4.
If you are already driving with active cruise
control, the speed is decreased by approx.
1 mph (2 km/h) every time you briefly tap
the button.
Press and hold button 4.
With the cruise control active, the system
automatically reduces the throttle opening
to slow the vehicle. When you release the
button, the system maintains and stores
the current speed.
Page 64 of 140

62
FLAT TIRE MONITORThe conceptThe tire inflation pressure is determined
from the signals of the ABS sensors.
The system provides an alert whenever the
tire inflation pressure drops below the
pressure in any other tire. RequirementSo that the system can "familiarize" itself
with the correct inflation pressure, please
do the following:
1. Check the tire inflation pressure in all
tires
2. Compare them with the inflation pres-
sure table, see page 81, and adjust the
pressures if necessary
3. Initialize the system.
Check the tire inflation pressure
regularly and correct it if necessary,
see page 80.<
Flat tire
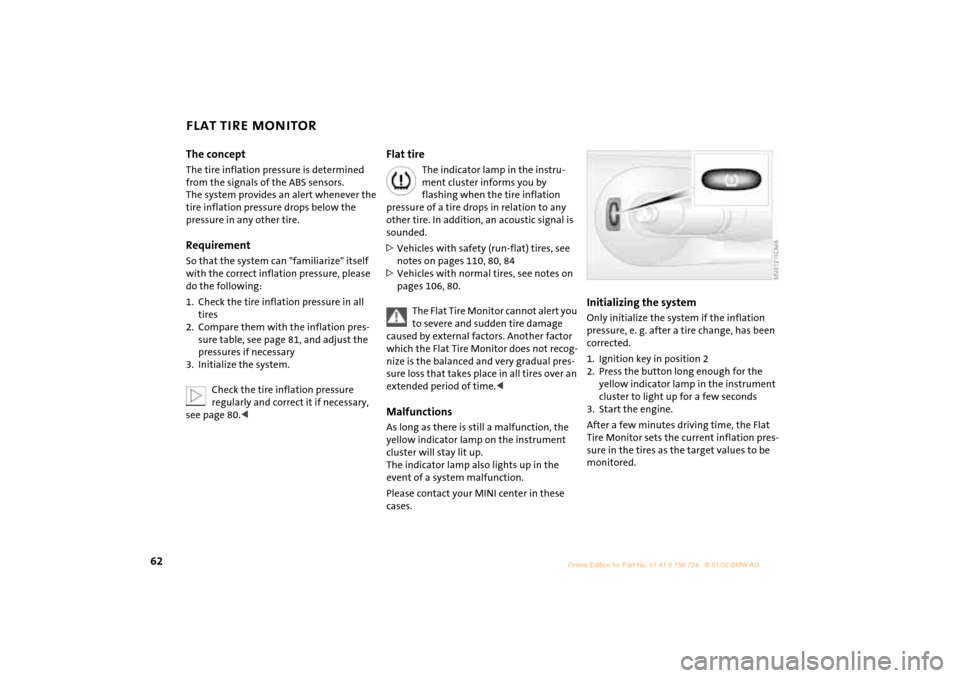
The indicator lamp in the instru-
ment cluster informs you by
flashing when the tire inflation
pressure of a tire drops in relation to any
other tire. In addition, an acoustic signal is
sounded.
>Vehicles with safety (run-flat) tires, see
notes on pages 110, 80, 84
>Vehicles with normal tires, see notes on
pages 106, 80.
The Flat Tire Monitor cannot alert you
to severe and sudden tire damage
caused by external factors. Another factor
which the Flat Tire Monitor does not recog-
nize is the balanced and very gradual pres-
sure loss that takes place in all tires over an
extended period of time.<
MalfunctionsAs long as there is still a malfunction, the
yellow indicator lamp on the instrument
cluster will stay lit up.
The indicator lamp also lights up in the
event of a system malfunction.
Please contact your MINI center in these
cases.
Initializing the systemOnly initialize the system if the inflation
pressure, e. g. after a tire change, has been
corrected.
1. Ignition key in position 2
2. Press the button long enough for the
yellow indicator lamp in the instrument
cluster to light up for a few seconds
3. Start the engine.
After a few minutes driving time, the Flat
Tire Monitor sets the current inflation pres-
sure in the tires as the target values to be
monitored.
Page 93 of 140

91
OVERVIEW REPAIRSOPERATIONCONTROLS DATA INDEX
COOLANT
Do not add coolant to the cooling
system when the engine is hot.
Escaping coolant can cause burns.
To avoid the possibility of damage later on,
never use anything other than factory-
approved, nitrite and amino-free extended-
duty antifreeze with corrosion inhibitor.
Every MINI center is aware of these.
Antifreeze and anti-corrosion agents are
hazardous to health. Always store these
agents in tightly-closed original containers
kept well away from the reach of children.
Extended-duty antifreeze with corrosion
inhibitor contains the flammable
substance ethylene-glycol. For this reason,
do not spill extended-duty antifreeze with
corrosion inhibitor on hot engine parts. It
could catch fire and cause serious burns.<
Comply with the applicable environ-
mental laws regulating the disposal
of extended-duty antifreeze with corrosion
inhibitor.<
The illustration shows an example of the
coolant tank on the MINI COOPER.Checking coolant level Correct coolant level for cold engine
(approx. 68 7/20 6):
Up to the mark "MAX" of the transparent
expansion tank.
Only open the cap of the expansion
tank when the engine has cooled
down. The needle on the coolant tempera-
ture gauge in the instrument cluster must
be no higher than in the first quarter,
otherwise there is a danger of scalding.<
To add coolantMINI COOPER:
1. Slowly open the cap by turning it with
the tab to allow accumulated pressure
toescape.
2. Pull open the cap completely.
3. If the coolant is low, slowly add coolant
until the correct level is reached Ð do not
overfill.
MINI COOPER S:
1. Open the cap by turning it slightly coun-
terclockwise to allow accumulated pres-
sure to escape.
2. Unscrew the cap completely and open.
3. If the coolant is low, slowly add coolant
until the correct level is reached Ð do not
overfill.
The coolant consists of water and
extended-duty antifreeze with corrosion
inhibitor. The mixing ratio of 50 to 50 must
be maintained all the year round due to the
required corrosion resistance. No other
additives are required.
Replace the coolant every 4 years.
Page 97 of 140

95
OVERVIEW REPAIRSOPERATIONCONTROLS DATA INDEX
CARING FOR YOUR VEHICLE>Rubber parts:
Treat only with water or rubber care
products
>Plastic parts, imitation leather surfaces,
headliner, lamp glass, covering glass for
the instrument cluster, as well as matt
black molded parts:
Clean with water and, if necessary,
plastic care products. Do not dampen
seats and the headliner. Never use
solvents such as lacquer thinner, heavy-
duty grease remover, fuel or similar
>Safety belts:
Only clean using mild soap, leaving the
belts fitted; do not dry clean, as the
fabric can be destroyed.
Always unroll automatic safety belts
when dry. Dirty safety belts prevent
unrolling and thus negatively affect
safety
>Floor carpets and floor mats
*:
If heavily soiled, clean using interior
cleaner. Floor mats can be removed to
allow the interior to be cleaned
>Wiper blades:
Clean with soapy water. Replace wiper
blades twice a year, before and after the
cold season. This is particularly impor-
tant on vehicles fitted with a rain sensor.Use only wiper blades which have
been approved by the manufac-
turer.<
Leather care The leather
* used by the manufacturer is a
high-quality natural product processed
using state-of-the-art methods, and it will
retain its quality level for many years if
cared for appropriately.
Regular cleaning and care are necessary, as
dust and road dirt scratches in pores and
creases and lead to heavy wear as well as
premature brittleness of the leather
surface. This is why you should use a cloth
or vacuum cleaner to remove dust from the
leather on a regular basis.
As dirt and grease can slowly affect the
protective layer of the leather, the cleaned
leather surfaces must be treated with
leather care agent. This also helps to avoid
electrostatic charges.
Cleaning agents can contain
hazardous or health-damaging
substances. For this reason, always observe
the warnings on the package.
For interior cleaning, always open the doors
or windows of the vehicle. Do not use any
products (e.g. solvents) that are not
intended for cleaning the vehicle.<
Page 133 of 140

EVERYTHING FROM A TO Z
131
OVERVIEW REPAIRS OPERATION CONTROLS DATA INDEX
G
Gasoline 78
Gasoline gauge 55
Gear display 48
Continuously Variable
automatic Transmission
(CVT) 48
General driving notes 76
Glove compartment 70
Glove compartment lamps
bulb replacement 105
Grilles 66,
69
Gross weight 122
H
Handbrake 44
Hazard warning flashers 12
Head airbags 37
Head restraints 34
Headlamp cleaning
system 52,
89
filling 89
Headlamp flasher 49
Headlamps
care 94,
101
cleaning 52 Heated
outside mirrors 36
rear window 65,
68
seats 34
windshield 65, 68
windshield washer jets 52
Heavy cargo 72
Height 121
High beams 17, 49
bulb replacement 101
Hood 16,
86
Horn 12
Hubcap remover 100,
106
I
Ignition lock 42
Illuminated vanity mirror 36
Imitation leather 95
Imprint 6
Indicator lamps 15
Individual air distribution 69
INSPECTION 57
Instrument cluster, see Display
elements 13
Instrument lighting 50
Instrument panel 12
Interface socket
for Onboard Diagnostics 96 Interior lamps 50
bulb replacement 104
Interior rearview mirror 36
automatic dimming 37
Interlock 42
Interval display 93
J
Jack 100,
106
Jump-starting 113,
114
K
Keys 22
multifunction steering
wheel 18
Kickdown 47 L
Lamps 49,
101
backup lamps 103
brake lamp 103,
104
daytime driving lamps 49
fog lamps 50
footwell lamps 105
front fog lamps 102
glove compartment 105
high beams 101
instrument lighting 50 interior lamps 50,
104
license plate lamp 104
low beams 49,
101
luggage compartment
lamps 105
parking lamps 49,
102
reading lamps 50
rear fog lamp 103
standing lamps 49, 102
tail lamp 103
turn signal indicators 102
xenon lamps 101
Lashing eyes 72
LATCH child-restraint
system 41
Leather care 95
LED light-emitting diodes 51
Length 121
License plate lamp
bulb replacement 104
Light-alloy wheels 94
"Lights on" warning 49
Loading 72
Load-securing devices 72
Low beams 49
bulb replacement 101
Luggage compartment 72
content 122