parking brake MINI Hardtop 2 Door 2002 Owner's Manual
[x] Cancel search | Manufacturer: MINI, Model Year: 2002, Model line: Hardtop 2 Door, Model: MINI Hardtop 2 Door 2002Pages: 140, PDF Size: 1.63 MB
Page 5 of 140

3
OVERVIEW REPAIRS OPERATION CONTROLS DATA INDEX
Driving:
Ignition lock 42
Starting the engine 42
Switching off the engine 43
Parking brake 44
Manual transmission 45
Continuously Variable automatic
Transmission (CVT) 46
Parking lamps/Low beams 49
Indicator/Headlamp flasher 49
Instrument lighting 50
Fog lamps 50
Interior lamps 50
Light-emitting diodes 51
Washer/Wiper system 51
Cruise control 53
Everything under control:
Odometer 55
Tachometer 55
Fuel gauge 55
Coolant temperature gauge 56
Service Interval Display 57
Clock 57
Computer 58
Technology for safety and driving
convenience:
Automatic Stability Control plus Traction
(ASC+T) 60
Dynamic Stability Control (DSC) 61
Flat Tire Monitor 62
Park Distance Control (PDC) 63
Controlling the climate for pleasant
driving:
Air conditioner system 64
Automatic climate control 67
Interior conveniences:
Glove compartment 70
Ashtray/Beverage holder 70
Cigarette lighter 70
Loading and transporting cargo:
Luggage compartment cover 71
Foldable rear backrest 71
Loading cargo 72
Roof-mounted luggage rack 73
Care and maintenance
Special operating instructions:
Break-in procedures 76
General driving notes 76
Refueling 77
Fuel specifications 78
Antilock Brake System (ABS) 78
Brake system 79
Wheels and tires:
Tire inflation pressure 80
Tire condition 82
Tire replacement 83
Wheel and tire combinations 84
Winter tires 85
Snow chains 85
Page 17 of 140

15
OVERVIEW REPAIRS OPERATION CONTROLS DATA INDEX
INDICATOR AND WARNING LAMPS
Technology
that monitors itself
The system runs a check on the warning
and indicator lamps marked by "
l
" each
time you switch on the ignition. They each
light up once for different periods of time.
If a malfunction should occur in one of
these systems, the corresponding lamp
does not go out after the engine is started
or it lights up while the vehicle is moving.
You will see how to react correctly to this
below.
Red: stop immediately
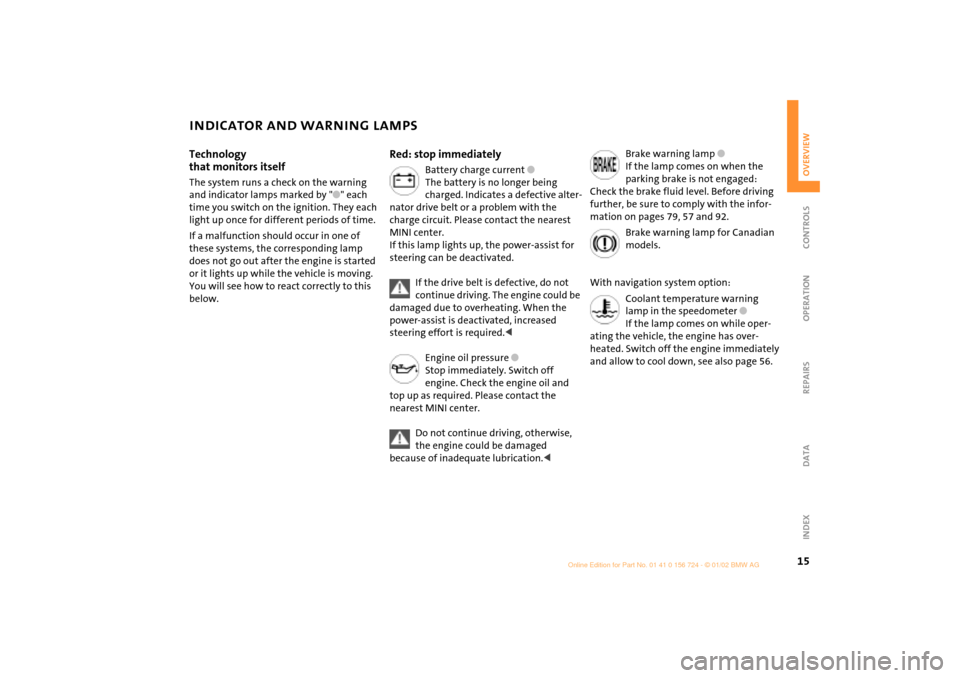
Battery charge current
l
The battery is no longer being
charged. Indicates a defective alter-
nator drive belt or a problem with the
charge circuit. Please contact the nearest
MINI center.
If this lamp lights up, the power-assist for
steering can be deactivated.
If the drive belt is defective, do not
continue driving. The engine could be
damaged due to overheating. When the
power-assist is deactivated, increased
steering effort is required.
<
Engine oil pressure
l
Stop immediately. Switch off
engine. Check the engine oil and
top up as required. Please contact the
nearest MINI center.
Do not continue driving, otherwise,
the engine could be damaged
because of inadequate lubrication.
<
Brake warning lamp
l
If the lamp comes on when the
parking brake is not engaged:
Check the brake fluid level. Before driving
further, be sure to comply with the infor-
mation on pages 79, 57 and 92.
Brake warning lamp for Canadian
models.
With navigation system option:
Coolant temperature warning
lamp in the speedometer
l
If the lamp comes on while oper-
ating the vehicle, the engine has over-
heated. Switch off the engine immediately
and allow to cool down, see also page 56.
Page 18 of 140

16
INDICATOR AND WARNING LAMPS
Yellow: stop immediately
Flat Tire Monitor
l
Flashes: tire failure.
Reduce speed immediately and
stop the vehicle.
With safety (run-flat) tires:
Reduce vehicle speed carefully to under
50 mph (80 km/h).
In both cases, avoid hard brake applications
and steering maneuvers. Check the tire
inflation pressures.
Conduct in the event of a flat tire, see
pages 106, 110.
General information on the system, see
page 62
Red and yellow: continue to drive;
drive cautiously
Brake warning lamp together with
yellow indicator lamps for ABS, EBV
and ASC+T/DSC:
The control system ABS, EBV and
ASC+T/DSC has failed. Drive
cautiously and defensively. Avoid
full brake applications. Please have
the system checked by your MINI
center as soon as possible.
More information on pages 60, 61
Brake warning lamp together with
the yellow indicator warning lamps
ABS, EBV and ASC+T/DSC for Cana-
dian models.
Red: an important reminder
Brake warning lamp
with parking brake applied.
More information on the parking
brake on page 44
Parking brake lamp for Canadian
models.
Fasten safety belts
l
Depending on model, with acoustic
signal
*
. Lights up either for several
seconds or until the belt is engaged, de-
pending on version.
More information on page 35
Depending on the level of equipment,
the indicator lamp is in the vicinity of
the navigation system.
<
Airbags
l
Please have the system inspected
at your MINI center.
More information on pages 31, 37
Depending on the level of equipment,
the indicator lamp is in the vicinity of
the navigation system.
<
Hood/tailgate
Lights up when the hood and/or
tailgate are open.
More information on pages 27, 86
Page 43 of 140

41
OVERVIEW REPAIRS OPERATIONCONTROLS DATA INDEX
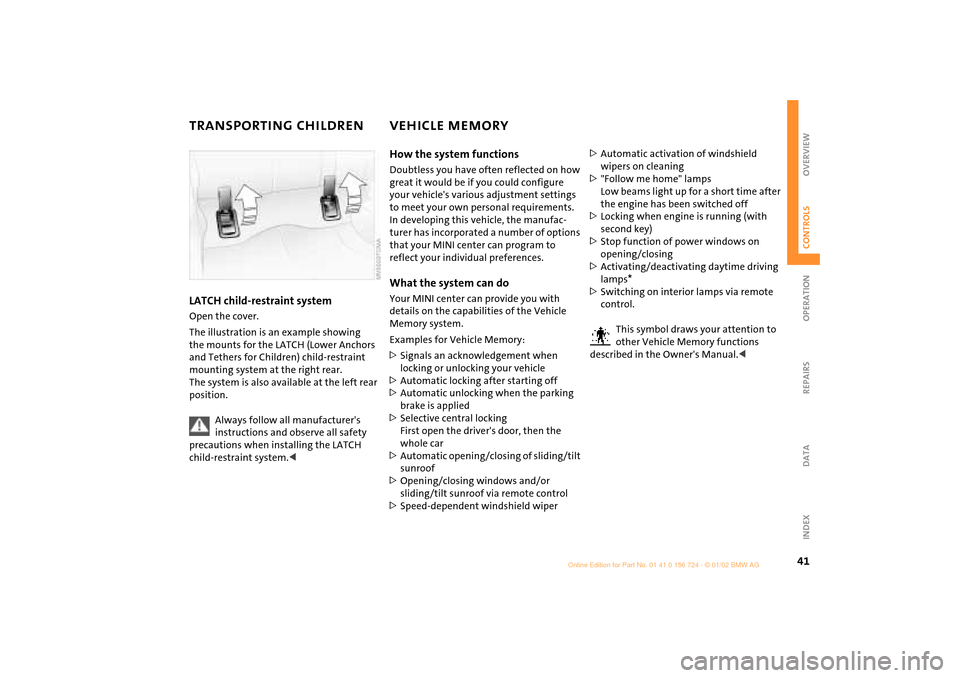
TRANSPORTING CHILDREN VEHICLE MEMORY LATCH child-restraint systemOpen the cover.
The illustration is an example showing
the mounts for the LATCH (Lower Anchors
and Tethers for Children) child-restraint
mounting system at the right rear.
The system is also available at the left rear
position.
Always follow all manufacturer's
instructions and observe all safety
precautions when installing the LATCH
child-restraint system.<
How the system functionsDoubtless you have often reflected on how
great it would be if you could configure
your vehicle's various adjustment settings
to meet your own personal requirements.
In developing this vehicle, the manufac-
turer has incorporated a number of options
that your MINI center can program to
reflect your individual preferences. What the system can doYour MINI center can provide you with
details on the capabilities of the Vehicle
Memory system.
Examples for Vehicle Memory:
>Signals an acknowledgement when
locking or unlocking your vehicle
>Automatic locking after starting off
>Automatic unlocking when the parking
brake is applied
>Selective central locking
First open the driver's door, then the
whole car
>Automatic opening/closing of sliding/tilt
sunroof
>Opening/closing windows and/or
sliding/tilt sunroof via remote control
>Speed-dependent windshield wiper>Automatic activation of windshield
wipers on cleaning
>"Follow me home" lamps
Low beams light up for a short time after
the engine has been switched off
>Locking when engine is running (with
second key)
>Stop function of power windows on
opening/closing
>Activating/deactivating daytime driving
lamps
*
>Switching on interior lamps via remote
control.
This symbol draws your attention to
other Vehicle Memory functions
described in the Owner's Manual.<
Page 45 of 140

43
OVERVIEW REPAIRS OPERATIONCONTROLS DATA INDEX
STARTING THE ENGINE SWITCHING OFF THE ENGINE StartingWhen starting the engine, do not press the
accelerator pedal.
Do not actuate the starter for too
short a time. Do not turn it for more
than approx. 20 seconds. Release the igni-
tion key immediately when the engine
starts.
Extended starting attempts, characterized
by excessively frequent or long periods
with the starter engaged, can lead to
damage in the catalytic converter.<
If the engine does not start on the first
attempt (the engine is very hot or cold, for
instance):
>Press the accelerator pedal halfway
down while engaging the starter.
Cold starts at extremely low temperatures
(as of approx. +5 7(Ð15 6)):
>Press the accelerator pedal halfway
down while engaging the starter
>For the initial start attempt, allow the
starter to remain engaged somewhat
longer (approx. 10 seconds).
Manual transmission1. Engage the parking brake
2. Put the manual gearshift lever in neutral
3. Press the clutch pedal
4. Start the engine.Continuously Variable automatic
Transmission (CVT)*1. Press the footbrake
2. Put the selector lever in position P or N
3. Starting the engine.
Move the selector lever to position N
and engage the parking brake before
leaving your vehicle with the engine
running.
Do not leave the vehicle with the engine
running. An unattended vehicle with a
running engine represents a potential
safety hazard.<
You should never remove the ignition
key when the vehicle is in motion, as
the steering lock could engage.
When you leave the vehicle, always remove
the ignition key and engage the steering
lock.
When you park on downward slopes,
engage the parking brake.<
Manual transmissionTurn the ignition key to position 1 or 0.Continuously Variable automatic
Transmission (CVT)*Engage selector lever position P, turn the
ignition key to position 1 or 0.
Page 46 of 140

44
PARKING BRAKE The parking brake is designed primarily to
prevent the vehicle from rolling when it is
parked. It operates against the rear wheels.To engageLever automatically locks in position.
The warning lamp in the instrument cluster
comes on when the ignition key is in posi-
tion 2, see page 16.To release1. Pull up slightly
2. Press the button
3. Push the lever downwards.
If, in exceptional circumstances,
it should be necessary to engage the
parking brake while the vehicle is
in motion, do not pull the lever with
excessive pressure. Keep your thumb
pressed against the release button while
carefully pulling the lever up to apply
moderate pressure.
Excessive pressure can lead to overbraking
and loss of traction (fishtailing) at the rear
axle.
The brake lamps do not come on when the
parking brake is engaged.
Vehicles with manual transmission:
Always engage the parking brake when
parking on hills and inclined surfaces, as
first gear or reverse may not provide
adequate resistance to rolling.
Vehicles with CVT:
Place the selector lever in P.<
Page 47 of 140

45
OVERVIEW REPAIRS OPERATIONCONTROLS DATA INDEX
MANUAL TRANSMISSION The manual gearshift lever neutral plane
lies in the gear plane of the 3rd/4th gear.
When shifting from each gear into
"Neutral", the manual gearshift lever
springs back automatically into the gear-
shift lever neutral plane.6-speed transmission*
When changing gear in the 5th/6th
gear plane, press the gearshift lever
to the right to prevent shifting to a gear of
the 3rd/4th gear plane.<
Reverse Before selecting reverse gear, ensure the
vehicle is stationary; then, fully press the
clutch pedal and pause briefly before
moving the gearshift lever into position.
As you do this, the backup lamps will turn
on automatically when the ignition key is
in position 2.
5-speed transmission:
Press the gearshift lever to the right and to
the back.
6-speed transmission:
Press the gearshift lever to the left to over-
come the slight resistance and press
forwards.
As you do this, the backup lamps will turn
on automatically when the ignition key is
in position 2.
Do not hold the vehicle in place on
slopes by slipping or "riding" the
clutch. Use the parking brake instead.
Riding the clutch causes the clutch
assembly to wear out sooner.<
Page 48 of 140

46
CONTINUOUSLY VARIABLE AUTOMATIC TRANSMISSION (CVT)
*
You can drive with a steplessly shifting CVT.
In addition, you can also shift manually.
When you move the selector lever from the
D position to the right into the M/S + Ð
range, the performance-oriented shift
programs of the CVT are engaged. Step-
tronic enters the manual selection mode
and executes the desired shift whenever
you tap the selector lever in the direction
indicated by "+" or "Ð" .
Whenever you want to use automatic
again, just move the selector lever toward
the left to position D.
In positition D, you achieve the
lowest fuel consumption for average
driving.<
Selector lever positions
P R N D M/S + Ð
Range selectionInadvertent engaging of certain selector
lever positions is prevented by a lock.
Press the button on the front side of the
selector lever knob. The lock is released.
While the vehicle is stationary and
before shifting out of P or N, press
the brake pedal in order to disengage the
selector lever lock mechanism (Shiftlock).
If the engine speed is too high when the
vehicle is at a standstill, the selector lever
is also blocked to protect the transmission.
Hold the brake pedal down until starting
off. Otherwise the vehicle will "creep" when
a drive position is engaged.<
To prevent the vehicle from starting
off on its own, always move the
selector lever to position P or N and engage
the parking brake before leaving your
vehicle with the engine running.
Do not leave the vehicle unattended with
the engine running. An unattended vehicle
with a running engine represents a poten-
tial safety hazard.<
If the selector lever is not placed in
position P when the vehicle is parked,
the position display of the selector lever
stays on. This can lead to battery
discharge.<
Page 78 of 140

76
BREAK-IN PROCEDURES GENERAL DRIVING NOTES To ensure that your vehicle provides
maximum economy throughout a long
service life, we request that you comply
with the following information: EngineUp to 1,200 miles (2,000 km):
Attempt to constantly vary both vehicle
and engine speed during these initial miles
while remembering to avoid engine speeds
in excess of 4,500 rpm and/or vehicle
speeds of over 95 mph (150 km/h).
Absolutely avoid using the full-throttle or
kickdown position for the accelerator.
Once you have driven 1,200 miles
(2,000 km), both the engine and vehicle
speed can be gradually increased.
You should also comply with these break-in
procedures if the engine has to be replaced
at a later point.
TiresDue to technical factors associated with
their manufacture, tires do not achieve
their full traction potential until after an
initial break-in period. We therefore ask
you to drive with extra care during the first
200 miles (300 km).Brake systemApprox. 300 miles (500 km) must be driven
before the brake pads and rotors achieve
the optimum pad-surface and wear
patterns required for trouble-free opera-
tion and an extended service life.ClutchRoughly 300 miles (500 km) must be driven
before the clutch starts to operate at
optimum efficiency. Remember to engage
the clutch carefully during this initial
period.
Parking the vehicleCondensation forms in the air conditioner
system during operation, and then exits
under the vehicle. Traces of condensed
water under the vehicle are therefore
normal.Brakes
Do not rest your foot on the brake
pedal while driving. Even light but
consistent pedal pressure can lead to high
temperatures, brake wear and possibly
even brake failure.<
Hydroplaning
When driving on wet or slushy roads,
reduce road speed. If you do not, a
wedge of water can form between tires and
road surface. This phenomenon is charac-
terized by a partial or complete loss of
contact between the tires and the road
surface. The ultimate results are loss of
steering and braking control.<
Page 94 of 140

92
BRAKE FLUIDWarning lamp
If the brake warning lamp comes
on with the parking brake released:
The brake fluid level is too low, see
page 15.
Brake warning lamp for Canadian
models.
Adding brake fluidTo add brake fluid or to determine and
correct the cause of brake fluid loss, consult
your MINI center. Your MINI center is
familiar with the specifications for factory-
approved brake fluids (DOT 4).
Brake fluid loss may result in extended
brake pedal travel. If this occurs, refer to
the information on page 79.
Brake fluid is hygroscopic, that is, it
absorbs moisture from the air over
time.
In order to ensure the brake system's
safety and reliability, have the brake fluid
changed every two years by a MINI center,
see also page 57 and the Service and
Warranty Information Booklet (US models)/
Warranty and Service Guide Booklet (Cana-
dian models). Brake fluid is toxic and also
damages vehicle paintwork. Always store
brake fluid in tightly-closed original
containers kept well away from the reach
of children.
Do not spill the brake fluid and do not fill
the brake fluid reservoir beyond the "MAX"
mark. The brake fluid could ignite upon
contact with hot engine parts and cause
serious burns.<
Comply with the applicable environ-
mental laws regulating the disposal
of brake fluid.<