engine MINI Hardtop 2 Door 2005 Owner's Guide
[x] Cancel search | Manufacturer: MINI, Model Year: 2005, Model line: Hardtop 2 Door, Model: MINI Hardtop 2 Door 2005Pages: 165, PDF Size: 2.32 MB
Page 68 of 165
66
ONBOARD COMPUTER
*
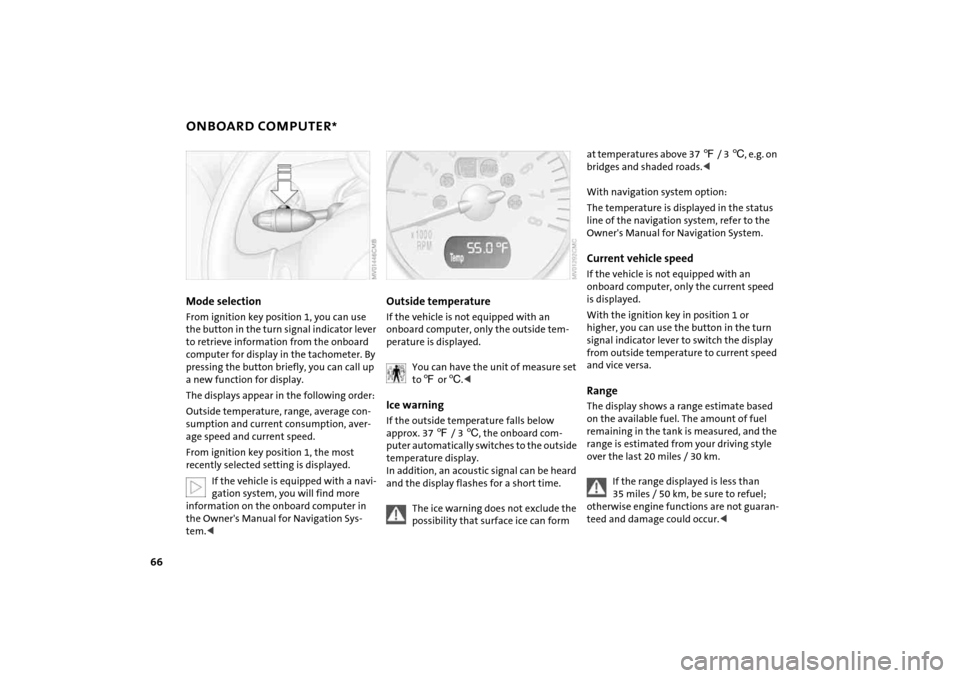
Mode selectionFrom ignition key position
1, you can use
the button in the turn signal indicator lever
to retrieve information from the onboard
computer for display in the tachometer. By
pressing the button briefly, you can call up
a new function for display.
The displays appear in the following order:Outside temperature, range, average con
-
sumption and current consumption, aver
-
age speed and current speed.From ignition key position
1, the most
recently selected setting is displayed.
If the vehicle is equipped with a navi
-
gation system, you will find more
information on the onboard computer in
the Owner's Manual for Navigation Sys
-
tem.<
Outside temperature If the vehicle is not equipped with an
onboard computer, only the outside tem
-
perature is displayed.
You can have the unit of measure set to 7 or
6.<
Ice warning If the outside temperature falls below
approx. 37
7 / 3
6, the onboard com
-
puter automatically switches to the outside
temperature display.
In addition, an acoustic signal can be heard
and the display flashes for a short time.
The ice warning does not exclude the possibility that surface ice can form
at temperatures above 37
7 / 3
6, e.g. on
bridges and shaded roads.<
With navigation system option:The temperature is displayed in the status
line of the navigation system, refer to the
Owner's Manual for Navigation System.Current vehicle speedIf the vehicle is not equipped with an
onboard computer, only the current speed
is displayed.With the ignition key in position
1 or
higher, you can use the button in the turn
signal indicator lever to switch the display
from outside temperature to current speed
and vice versa.
RangeThe display shows a range estimate based
on the available fuel. The amount of fuel
remaining in the tank is measured, and the
range is estimated from your driving style
over the last 20
miles
/ 30 km.
If the range displayed is less than 35 miles
/ 50 km, be sure to refuel;
otherwise engine functions are not guaran
-
teed and damage could occur.<
Page 69 of 165
67
OVERVIEW REPAIRS OPERATIONCONTROLS DATA INDEX
ONBOARD COMPUTER
*
Average speed, average fuel
consumption Press the button in the turn signal indicator
lever for a longer period.The displayed average values for speed and
consumption are recalculated.Any time spent with the vehicle stationary
and the engine shut off is ignored for the
calculation.
If the vehicle is equipped with a navi
-
gation system, the displays are
shown in the area of the navigation sys
-
tem.<
You can have a different unit of mea
-
sure set.<
Current fuel consumptionThe current consumption value is calcu
-
lated and displayed on the basis of your
driving style.
You can have a different unit of mea
-
sure set.<
Page 70 of 165
68
ALL SEASON TRACTION CONTROL (ASC)
*
The conceptThis system optimizes driving stability and
traction, especially when just starting off,
when accelerating or when cornering. ASC recognizes the danger present in trac
-
tion loss and will increase driving stability
and traction by reducing the engine's out
-
put and, if necessary, by applying the
brakes to the front wheels. ASC is operational each time you start the
engine. It contains the following functions:>Antilock Brake System (ABS)>Cornering Brake Control (CBC)>Electronic Brake Force Distribution (EBD).
The laws of physics cannot be repealed, even with ASC. An appropri
-
ate driving style always remains the
responsibility of the driver. Avoid using the
additional safety margin provided by the
system as an excuse for taking unnecessary
risks.
Do not make any modifications to the ASC
system. Allow only authorized technicians
to perform service procedures on the
ASC.<
Indicator lamp
The indicator lamp will go out shortly after the ignition has been
switched on, refer to pages
17, 18
.
If the indicator lamp flashes:
ASC controls the drive and braking forces.The indicator lamp stays lit:
The system is defective or was turned off
using the button. Have the system checked
as soon as possible.
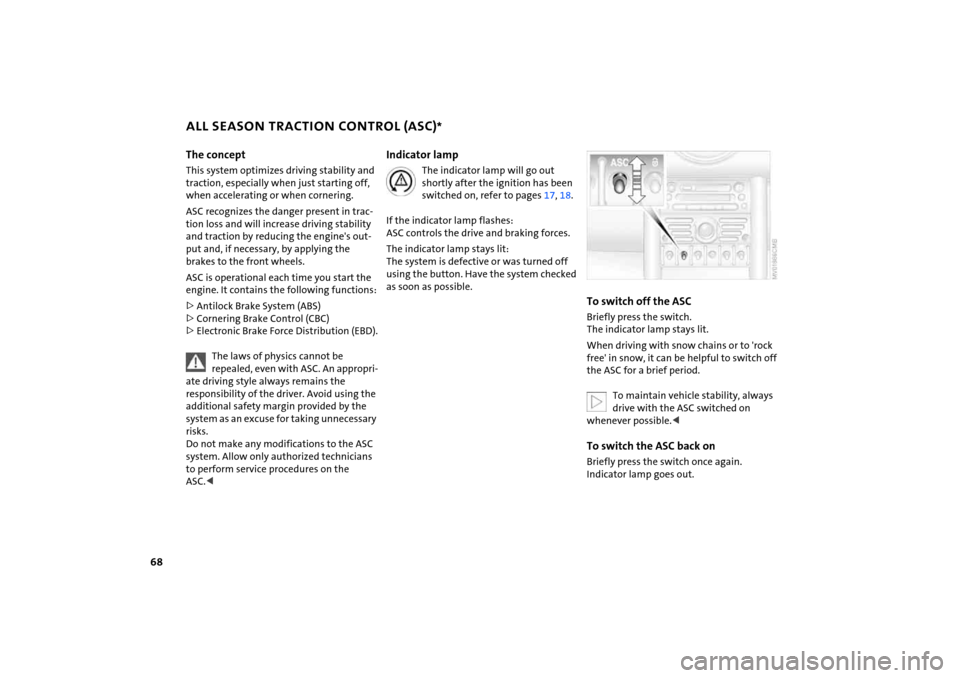
To switch off the ASCBriefly press the switch.
The indicator lamp stays lit.When driving with snow chains or to 'rock
free' in snow, it can be helpful to switch off
the ASC for a brief period.
To maintain vehicle stability, always drive with the ASC switched on
whenever possible.<
To switch the ASC back onBriefly press the switch once again.
Indicator lamp goes out.
Page 71 of 165
69
OVERVIEW REPAIRS OPERATIONCONTROLS DATA INDEX
DYNAMIC STABILITY CONTROL (DSC)
*
The conceptThis system optimizes driving stability and
traction, especially when just starting off,
when accelerating or when cornering. It
also maintains driving stability even in crit
-
ical driving situations.DSC recognizes unstable vehicle conditions,
such as understeering or oversteering, and,
as far as is possible within the laws of phys
-
ics, helps keep the vehicle on a steady
course by reducing the rpms and by brake
applications to the individual wheels.The DSC is operational every time you start
the engine. It contains the following func
-
tions:>All Season traction Control (ASC)>Antilock Brake System (ABS)>Cornering Brake Control (CBC)>Electronic Brake Force Distribution (EBD).
The laws of physics cannot be repealed, even with DSC. An appro
-
priate driving style always remains the
responsibility of the driver. Avoid using the
additional safety margin provided by the
system as an excuse for taking unnecessary
risks.
Do not make any modifications to the DSC
system. Allow only authorized technicians
to perform service procedures on the
DSC.
switched on, refer to pages
17, 18
.
If the indicator lamp flashes:
DSC controls the drive and braking forces. The indicator lamp stays lit:
The system is defective or was turned off
using the button. Have the system checked
as soon as possible.
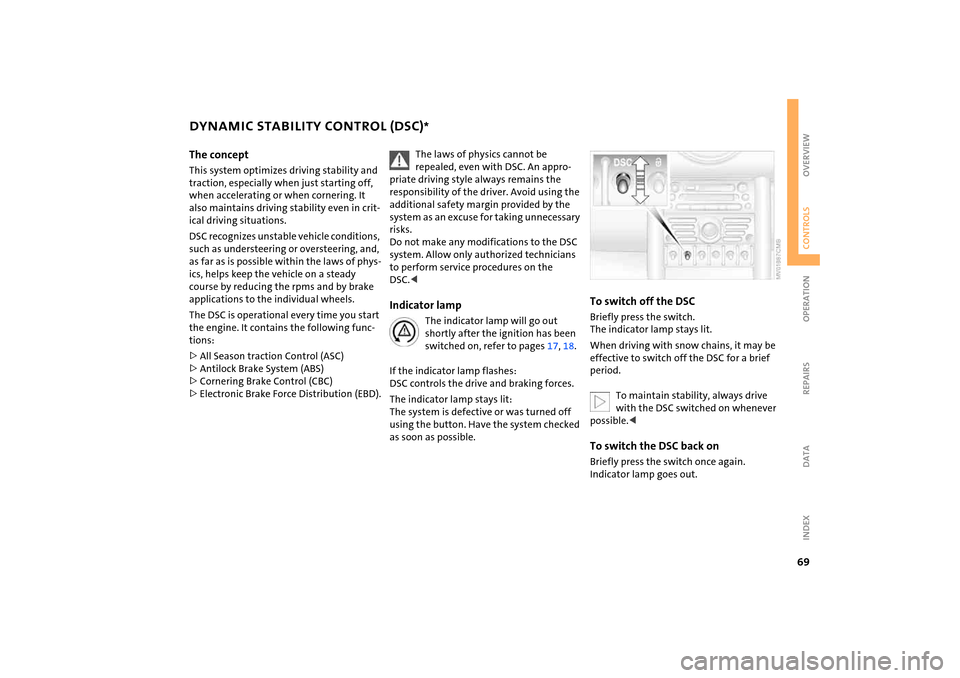
To switch off the DSCBriefly press the switch.
The indicator lamp stays lit.When driving with snow chains, it may be
effective to switch off the DSC for a brief
period.
To maintain stability, always drive with the DSC switched on whenever
possible.<
To switch the DSC back onBriefly press the switch once again.
Indicator lamp goes out.
Page 73 of 165
71
OVERVIEW REPAIRS OPERATIONCONTROLS DATA INDEX
FLAT TIRE MONITOR The conceptAs you drive, the Flat Tire Monitor keeps
track of the tire inflation pressure in all four
tires. The system alerts you when there is a
substantial pressure loss in one of the tires
relative to another.The tire inflation pressures are monitored
based on the speeds of the four wheels in
relation to one another. A flat tire is
detected as the result of differences in cer
-
tain speed ratios, and a warning is gener
-
ated.System requirementsSo that the system can 'familiarize' itself
with the correct inflation pressure, please
do the following:1. Check the tire inflation pressure in all
tires2. Compare them with the inflation pres
-
sure table, refer to page
98, and adjust
the pressures if necessary
3. Initialize the system.
System limitations
The Flat Tire Monitor cannot alert you to severe and sudden tire damage
caused by external factors, nor does it
detect the gradual and minor loss of pres
-
sure in all four tires.
-
sure loss or to the system not functioning:>Driving on snow-covered or slippery
roads>Performance-oriented driving: slip at the
drive wheels, high rates of lateral accel
-
eration>When driving with snow chains, false
warnings and undetected pressure loss
may occur>When driving with a space-saver spare
tire, the Flat Tire Monitor cannot func
-
tion.
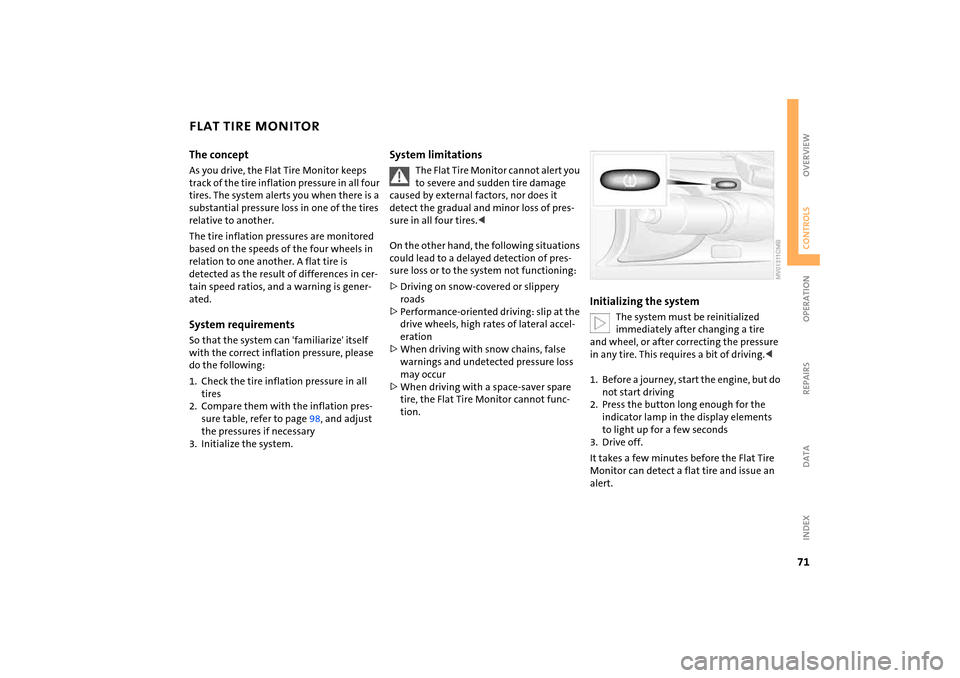
Initializing the system
The system must be reinitialized immediately after changing a tire
and wheel, or after correcting the pressure
in any tire. This requires a bit of driving.<
1. Before a journey, start the engine, but do
not start driving2. Press the button long enough for the
indicator lamp in the display elements
to light up for a few seconds3. Drive off.It takes a few minutes before the Flat Tire
Monitor can detect a flat tire and issue an
alert.
Page 78 of 165
76
AIR CONDITIONING SYSTEM
*
Air volume/Blower
You can select blower speeds from 1 to 4. Position
0: fan is
turned off. The button for recir
-
culated air mode fully blocks the
supply of air from outside.
The heating, ventilation and air condition
-
ing operate in position 1 or higher.Temperature
Turn to the right, red, to increase the temperature of the passen
-
ger compartment.Rapid heating: turn to the
extreme right. Then select a pleasant inte
-
rior temperature.Air distribution
Air distribution in upper body region
, upper body region
and footwell
, footwell
,
footwell and windows
, and
windows
.
All intermediate positions are possible,
refer to illustration and overview on
page
75.
Rear window defroster
Rear window defroster switched on:
Indicator lamp lights up.
As long as the indicator lamp is lit, the win
-
dow heater is operating.
The heater switches off automatically after
a short time.Windshield heating*
Windshield heating switched on:
Indicator lamp lights up.
As long as the indicator lamp is
lit, the window heater is operating.
The heater switches off automatically after
a short time.
Air conditioning
Air conditioning switched on: indicator lamp lights up.
The air is cooled and dehumidi
-
fied and, depending on the temperature
setting, rewarmed.
After the engine has started, the wind
-
shield can temporarily fog over. Condensa
-
tion on the windows is reduced when the
air conditioning is turned on.
When the air conditioning is on, con
-
densation is formed which then exits
under the vehicle. Traces of condensed
water on the ground are therefore nor
-
mal.
Indicator lamp lights up.
The air within the vehicle is recirculated.
If the windows fog up in the recircu
-
lated air mode, turn the recirculated
air mode off and if necessary increase the
air supply. The recirculated air mode should
not be constantly used over a longer period
of time, as the air quality in the vehicle's
interior will otherwise gradually deterio
-
rate.<
Page 81 of 165
79
OVERVIEW REPAIRS OPERATIONCONTROLS DATA INDEX
AUTOMATIC CLIMATE CONTROL
*
Automatic air distribution and volume
Automatic program (AUTO):
Indicator lamp lights up.
Automatic adjustment of the air distribu
-
tion and volume, and adaptation of the
specified temperatures to external influ
-
ences, i.e. outside temperature and sun
-
light.In the automatic program (AUTO), the air
conditioning is activated automatically. To
create a pleasant air climate, the air tem
-
perature coming from the vents in the
upper body area is lower than the air tem
-
perature in the footwell.Air volume/Blower
Switching automatic climate control
off/on
Air volume/Blower.
Press the left or right half of the
button. The air volume varies. Automatic
adjustment of the air volume is deacti
-
vated.Switching air conditioner on/off.
Press the left half of the button while the
blower is at the lowest setting. The blower,
heating and air conditioning are switched
off. All displays go out.
Switch the automatic climate control back
on by pressing any button.Air conditioning
Indicator lamp lights up.
The air is cooled and dehumidified
and, depending on the temperature set
-
ting, rewarmed.In the automatic program (AUTO), the air
conditioning is activated automatically. After the engine has started, the wind
-
shield can temporarily fog over. In the air
conditioning mode, there is less condensa
-
tion on the windows.
When the air conditioning is on, con
-
densation is formed which then exits
under the vehicle. Traces of condensed
water on the ground are therefore nor
-
mal.
-
cle is blocked. indicator lamp lights
up.
The air within the vehicle is recirculated.In the automatic program (AUTO) in hot
weather conditions, the recirculated air
mode is activated temporarily to enable
faster cooling.
The indicator lamp for the recirculated air
button is not lit.
The recirculated air mode should not be constantly used over a longer period of
time, as the air quality in the vehicle's interior
will otherwise gradually deteriorate. If the
windows fog up in the recirculated air mode,
turn the recirculated air mode off and if nec
-
essary increase the air supply.
<
Rear window defroster and windshield
heating*
Indicator lamp lights up.
As long as the indicator lamp is lit,
the window heater is operating.
The heater switches off automatically after a
short time. Temperature
Tap or turn the wheel in the appro
-
priate direction to change the tem
-
perature step by step.The figures in the display provide a
general indication of interior temperature.
When you start the vehicle, the system
ensures that the selected temperature is
achieved as quickly as possible and then main
-
tained.
Page 94 of 165
92
BREAK-IN PROCEDURES To ensure that your vehicle provides maxi
-
mum economy throughout a long service
life, we request that you comply with the
following information: EngineUp to 1,250
miles
/ 2,000
km:
Drive at varying engine and road speeds,
but do not exceed the following engine or
road speeds:4,500
rpm or
95 mph
/ 150
km/h.
Comply with the local speed limits.Absolutely avoid putting the accelerator in
full-throttle or kickdown position.After having driven 1,250
miles
/ 2,000
km,
engine and road speeds can be gradually
increased.
TiresDue to technical factors associated with
their manufacture, tires do not achieve
their full traction potential until after an
initial break-in period. Therefore drive care
-
fully during the first 200
miles
/ 300
km.
Brake systemApprox. 300
miles
/ 500
km must be driven
before the brake pads and rotors achieve
the optimum pad-surface and wear pat
-
terns required for trouble-free operation
and an extended service life.ClutchRoughly 300
miles
/ 500
km must be driven
before the clutch starts to operate at opti
-
mum efficiency. Remember to engage the
clutch carefully during this initial period.After a part replacementYou should again comply with these break-
in procedures if parts mentioned above
have to be replaced later in the vehicle's
life.
Page 95 of 165
93
OVERVIEW REPAIRSOPERATIONCONTROLS DATA INDEX
GENERAL DRIVING NOTESParking the vehicle Condensation forms in the air conditioner
system during operation, and then exits
under the vehicle. Traces of condensed
water on the ground are therefore normal.Safe braking Your vehicle is equipped with ABS as a stan
-
dard feature. The best way to brake the
vehicle in critical situations requiring brak
-
ing is to apply maximum pressure to the
brake pedal: panic stop. Since the vehicle
remains maneuverable, you can still go
around any obstacles with the smallest
possible steering movements. The pulsation of the brake pedal, together
with the sound of hydraulic regulation,
indicates to you that ABS is actively taking
effect. Hydroplaning
When driving on wet or slushy roads, reduce road speed. If you do not, a
wedge of water can form between tires
and road surface. This phenomenon is char
-
acterized by a partial or complete loss of
contact between the tires and the road sur
-
face. The ultimate results are loss of steer
-
ing and braking control.<
Mobile communications in the vehicle
The manufacturer of your MINI
recommends that you do not use
mobile devices, e.g. cellular phones, inside
the vehicle without directly connecting
them to an outside antenna. Otherwise,
interference between the vehicle electron
-
ics and the mobile device cannot be ruled
out. In addition, it is not ensured that the
radiation emitted during mobile transmis
-
sion will be directed outside of the vehi
-
cle.
ft / 30 cm,
and then only at walking speed at the
most. Otherwise, the vehicle's engine, the
electrical systems and the transmission
may be damaged.<
Clothes hooks
When suspending clothing from the hooks, ensure that they will not
obstruct the driver's vision. Do not hang
heavy objects on the hooks. If you do, they
could injure the occupants during braking
or evasive maneuvers.<
Hot exhaust system
High temperatures occur in any vehi
-
cle equipped with a catalytic con
-
verter. Do not remove the heat protection
plates fitted in the area of the exhaust sys
-
tem and do not apply body-cavity pro
-
tectant to this area. When driving, standing
at idle, and parking the vehicle, take care to
avoid contact between the hot exhaust sys
-
tem and flammable materials, e.g. hay,
grass, leaves, etc. Such contact could lead
to a fire resulting in serious personal injury
and property damage.<
Page 96 of 165

94
REFUELING
Always switch off the engine before refueling. If you do not, fuel cannot
be filled into the tank and the SERVICE
ENGINE SOON lamp may come on.<
1. Open the fuel filler door2. Turn the gas cap counterclockwise3. Put the gas cap in the bracket attached
to the fuel filler door.
Always observe all applicable precau
-
tions and regulations when handling
fuels. Never carry spare fuel containers in
your vehicle. Whether empty or full, these
containers can leak, cause an explosion,
and lead to fire in the event of a collision.<
Observe the following when refueling
Always observe all safety precautions posted at the service station when
handling fuel.<
When refueling, insert the filler nozzle
completely into the filler pipe. Pulling the
nozzle out of the pipe during refueling:>Results in premature pump shutoff>Will reduce the effect of the fuel vapor
recovery system on the pump.As long as the filler nozzle is used properly,
the fuel tank is full whenever the nozzle
shuts off the first time.Closing the gas cap1. Put on gas cap 2. Turn gas cap clockwise until it clicks3. Close fuel filler door.
Close the gas cap carefully after
refuelling until a click is heard.
While closing, be sure not to squeeze the
strap which is fastened to the cap.<
US models only:
The warning lamp
* comes on.
The gas cap is not correctly closed
or missing. Check if the gas cap is
correctly closed.
Fuel tank volumeApprox. 13.2
gallons
/ 50
liters, of which
approx. 2.1
gallons
/ 8
liters are reserve
capacity.
Do not drive until the fuel tank is totally empty. Otherwise engine
operations are not guaranteed and damage
could occur.<
Fuel specification The engine uses lead-free gasoline only.Required fuel Premium Unleaded Gasoline,
Minimum Octane Rating: 91.Minimum Octane Rating corresponds to
the Anti Knock Index (AKI) and is deter
-
mined according to the so-called (R+M)/2
method.