automatic transmission MINI Hardtop 2 Door 2005 Owner's Manual
[x] Cancel search | Manufacturer: MINI, Model Year: 2005, Model line: Hardtop 2 Door, Model: MINI Hardtop 2 Door 2005Pages: 165, PDF Size: 2.32 MB
Page 5 of 165
3OVERVIEW REPAIRS OPERATION CONTROLS DATA INDEX
Driving:Ignition lock
51
Starting the engine
51
Switching off the engine
52
Parking brake
53
Manual transmission
53
Continuously Variable automatic
Transmission (CVT)
54
Parking lamps/Low beams
57
signal/Headlamp flasher
58
Instrument lighting
58
Fog lamps
58
Interior lamps
59
Washer/wiper system
59
Cruise control
61
Everything under control:Odometer
63
Clock
63
Fuel gauge
63
Coolant temperature gauge
64
Tachometer
65
Service interval display
65
Onboard computer
66
Technology for safety and driving
convenience:All Season traction Control (ASC)
68
Dynamic Stability Control (DSC)
69
Antilock Brake System (ABS)
70
Flat Tire Monitor
71
Airbags
72
Park Distance Control (PDC)
74
Controlling the climate for pleasant
driving:Air conditioning system
75
Automatic climate control
78
Interior conveniences:Glove compartment
81
Ashtray, drinks holders
81
Cigarette lighter, 12 V power supply
82
Integrated universal remote control
83
Loading and transporting cargo:Luggage compartment in the MINI
85
Luggage compartment in the MINI Convertible
86
Loading cargo
86
Roof-mounted luggage rack
89
OPERATION, CARE, MAINTENANCESpecial operating instructions:Break-in procedures
92
General driving notes
93
Refueling
94
Brake system
96
Wheels and tires:Tire inflation pressure
97
Tire coding
99
Tire condition
100
Run Flat tires
101
New wheels and tires
102
Snow chains
104
Page 15 of 165
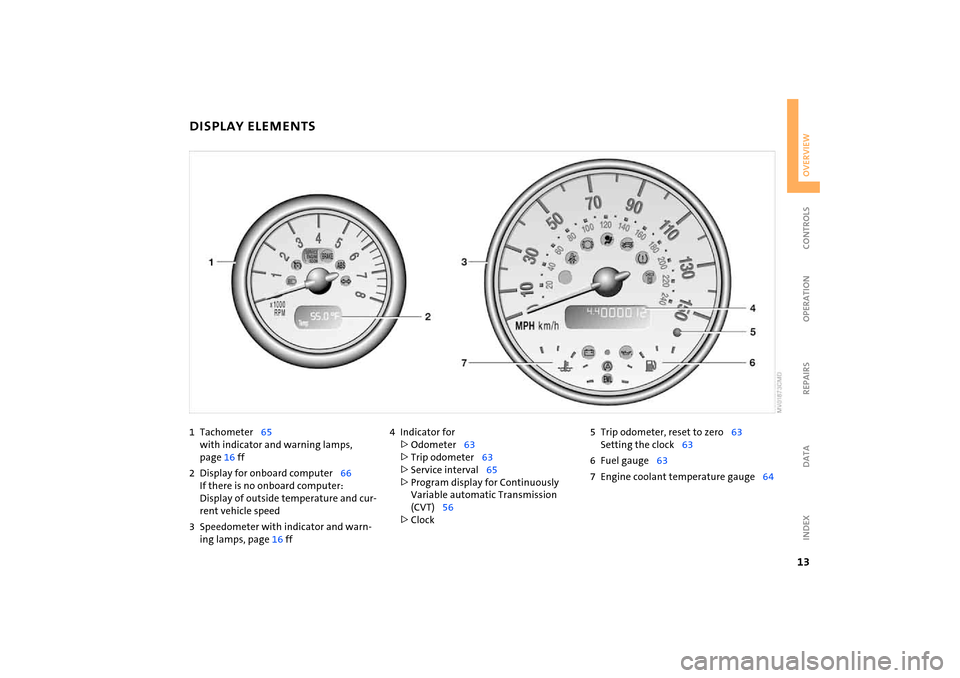
13
OVERVIEW REPAIRS OPERATION CONTROLS DATA INDEX
1 Tachometer
65
with indicator and warning lamps,
page
16 ff
2 Display for onboard computer
66
If there is no onboard computer:
Display of outside temperature and cur
-
rent vehicle speed3 Speedometer with indicator and warn
-
ing lamps, page
16 ff
4 Indicator for>Odometer
63
>Trip odometer
63
>Service interval
65
>Program display for Continuously
Variable automatic Transmission
(CVT)
56
>Clock
5 Trip odometer, reset to zero
63
Setting the clock
63
6 Fuel gauge
63
7 Engine coolant temperature gauge
64
DISPLAY ELEMENTS
Page 16 of 165
14
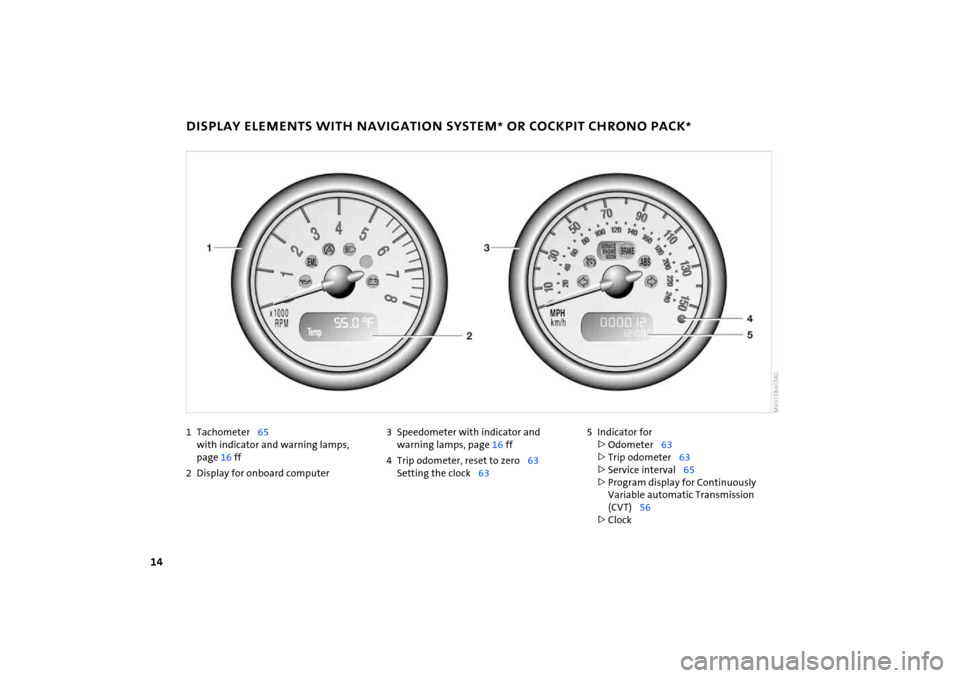
1Tachometer
65
with indicator and warning lamps,
page
16 ff
2 Display for onboard computer
3 Speedometer with indicator and
warning lamps, page
16 ff
4 Trip odometer, reset to zero
63
Setting the clock
63
5 Indicator for>Odometer
63
>Trip odometer
63
>Service interval
65
>Program display for Continuously
Variable automatic Transmission
(CVT)
56
>Clock
DISPLAY ELEMENTS WITH NAVIGATION SYSTEM
* OR COCKPIT CHRONO PACK
*
Page 54 of 165
52
STARTING THE ENGINE
SWITCHING OFF THE ENGINE
StartingWhen starting the engine, do not press the
accelerator pedal.
Do not stop the starting procedure too early, and do not continue it for
more than approx. 20
seconds. Release the
ignition key immediately when the engine
starts.
Extended starting attempts, characterized
by excessively frequent or long periods
with the starter engaged, can lead to dam
-
age in the catalytic converter.
hot or cold:When starting the engine, press the gas
pedal down halfway.Cold start at very low temperatures, above
approx. +5
7
/ –15
6, at high altitudes
above 3,300
ft / 1,000 m:
>For the initial start attempt, allow the
starter to remain engaged somewhat
longer, approx. 10
seconds.
>When starting the engine, press the gas
pedal down halfway.
Manual transmission1. Engage the parking brake2. Put the manual gearshift lever in neutral3. Depress the clutch pedal, especially at
low temperatures4. Start the engine.
Move the gearshift lever to neutral position and engage the parking
brake before leaving your vehicle with the
engine running.
Do not leave the vehicle unattended with
the engine running. This is a safety haz
-
ard.
P or N
3. Start the engine.
Move the selector lever to position
P
and engage the parking brake before
leaving your vehicle with the engine run
-
ning.
Do not leave the vehicle unattended with
the engine running. This is a safety haz
-
ard.<
You should never remove the ignition key when the vehicle is in motion, as
the steering lock could engage.
When you leave the vehicle, always remove
the ignition key and engage the steering
lock.
When parking on inclines, engage the park
-
ing brake, or the vehicle could roll.
Continuously Variable automatic
Transmission (CVT)Engage selector lever position
P, turn the
ignition key to position
1 or 0.
Page 55 of 165
53
OVERVIEW REPAIRS OPERATIONCONTROLS DATA INDEX
PARKING BRAKE
MANUAL TRANSMISSION
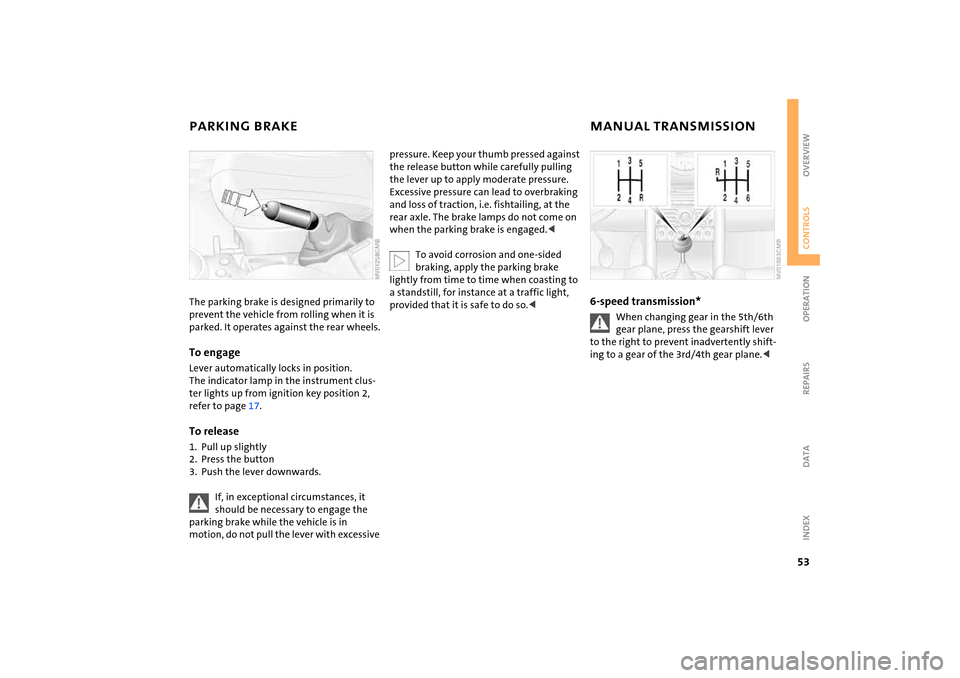
The parking brake is designed primarily to prevent the vehicle from rolling when it is
parked. It operates against the rear wheels.To engageLever automatically locks in position.
The indicator lamp in the instrument clus
-
ter lights up from ignition key position
2,
refer to page
17.
To release1. Pull up slightly2. Press the button3. Push the lever downwards.
If, in exceptional circumstances, it should be necessary to engage the
parking brake while the vehicle is in
motion, do not pull the lever with excessive
pressure. Keep your thumb pressed against
the release button while carefully pulling
the lever up to apply moderate pressure.
Excessive pressure can lead to overbraking
and loss of traction, i.e. fishtailing, at the
rear axle. The brake lamps do not come on
when the parking brake is engaged.<
To avoid corrosion and one-sided braking, apply the parking brake
lightly from time to time when coasting to
a standstill, for instance at a traffic light,
provided that it is safe to do so.<
6-speed transmission*
When changing gear in the 5th/6th gear plane, press the gearshift lever
to the right to prevent inadvertently shift
-
ing to a gear of the
3rd/4th gear plane.<
Page 56 of 165
54
MANUAL TRANSMISSION
CONTINUOUSLY VARIABLE AUTOMATIC TRANSMISSION (CVT)
*
Reverse gearBefore selecting reverse gear, ensure the
vehicle is stationary; then, fully depress the
clutch pedal and pause briefly before mov
-
ing the gearshift lever into position.5-speed transmission: Press the gearshift lever to the right and to
the back.6-speed transmission: Press the gearshift lever towards the left.
Thereby overcome the slight resistance and
press forward.As you do this, the backup lamps will come
on automatically when the ignition key is
in position
2.
Do not hold the vehicle in place on slopes by slipping or 'riding' the
clutch. Use the parking brake instead. Oth
-
erwise, a high degree of clutch wear could
result.<
In addition to the fully automatic mode,
you can shift gears manually using Step
-
tronic, refer to page
55.
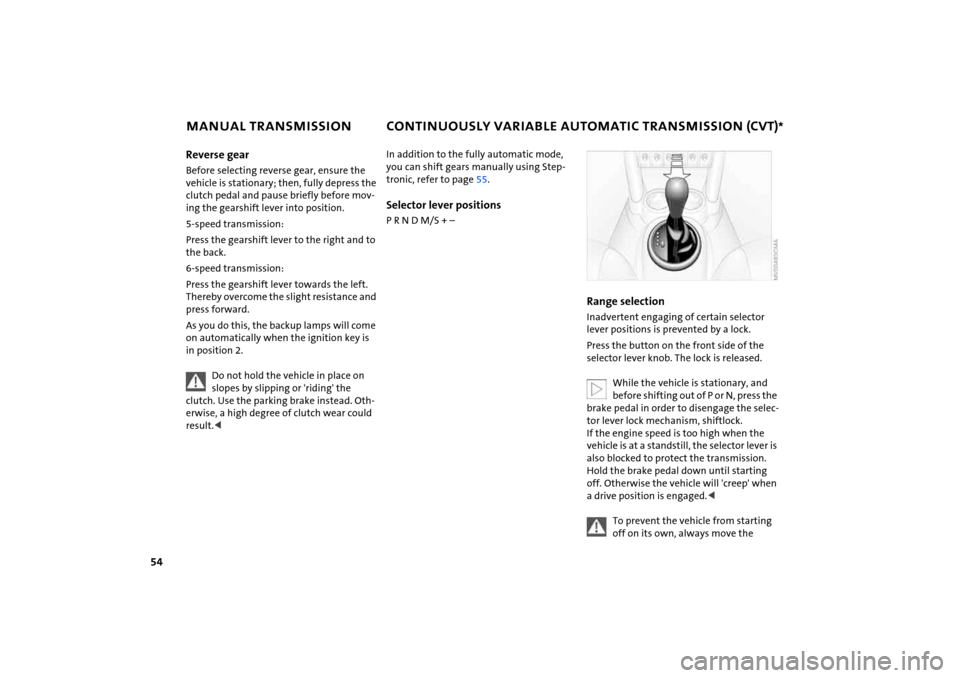
Selector lever positionsP R N D M/S
+ –
Range selection Inadvertent engaging of certain selector
lever positions is prevented by a lock.Press the button on the front side of the
selector lever knob. The lock is released.
While the vehicle is stationary, and before shifting out of P or N, press the
brake pedal in order to disengage the selec
-
tor lever lock mechanism, shiftlock.
If the engine speed is too high when the
vehicle is at a standstill, the selector lever is
also blocked to protect the transmission.
Hold the brake pedal down until starting
off. Otherwise the vehicle will 'creep' when
a drive position is engaged.<
To prevent the vehicle from starting off on its own, always move the
Page 57 of 165
55
OVERVIEW REPAIRS OPERATIONCONTROLS DATA INDEX
CONTINUOUSLY VARIABLE AUTOMATIC TRANSMISSION (CVT)
*
selector lever to position
P and engage the
parking brake before getting out of your
vehicle with the engine running.
Do not leave the vehicle unattended with
the engine running. This is a safety haz
-
ard.<
If the selector lever is not placed in position
P when the vehicle is parked,
the position display of the selector lever
stays on. This can lead to battery dis
-
charge.<
P Park
Select only when the vehicle is completely
stopped. The transmission locks to prevent
the rear wheels from turning.R Reverse
Select only when the vehicle is completely
stopped.N Neutral Idle
Engage this gear, for example, when you
are in a car wash. The vehicle can roll.D Drive: CVT driving position
This position is designed for driving under
all normal operating conditions. Kickdown Kickdown can be used to achieve maxi
-
mum vehicle performance.
Press the accelerator pedal past the
increased resistance point at the full-throt
-
tle position.
M/S
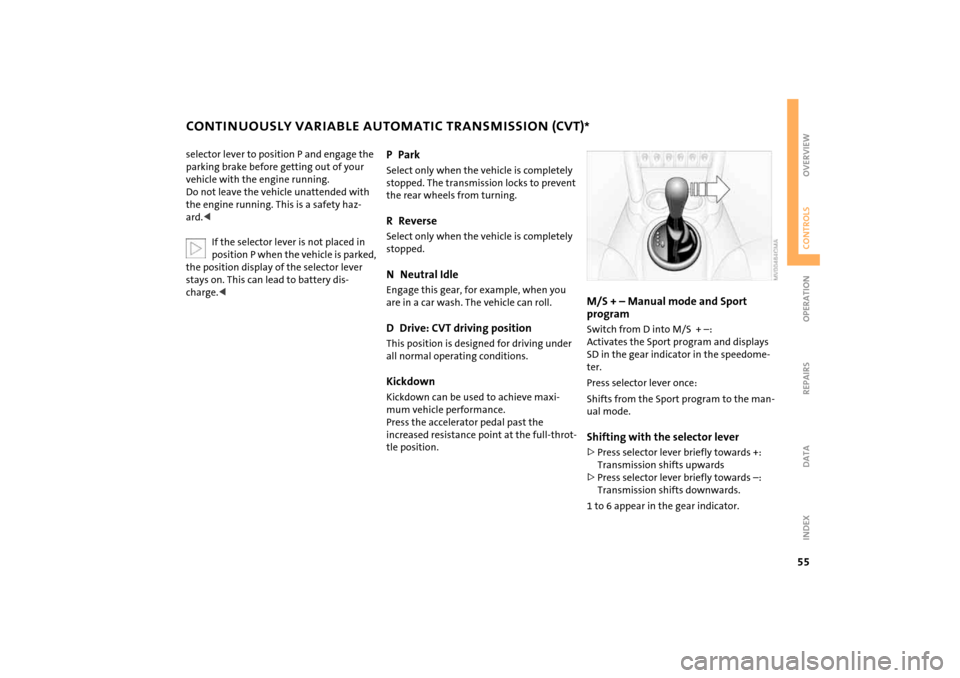
+ – Manual mode and Sport
program Switch from D into M/S
+ –:
Activates the Sport program and displays
SD in the gear indicator in the speedome
-
ter. Press selector lever once:Shifts from the Sport program to the man
-
ual mode.Shifting with the selector lever>Press selector lever briefly towards +:
Transmission shifts upwards>Press selector lever briefly towards –:
Transmission shifts downwards.1 to 6 appear in the gear indicator.
Page 58 of 165
56
CONTINUOUSLY VARIABLE AUTOMATIC TRANSMISSION (CVT)
*
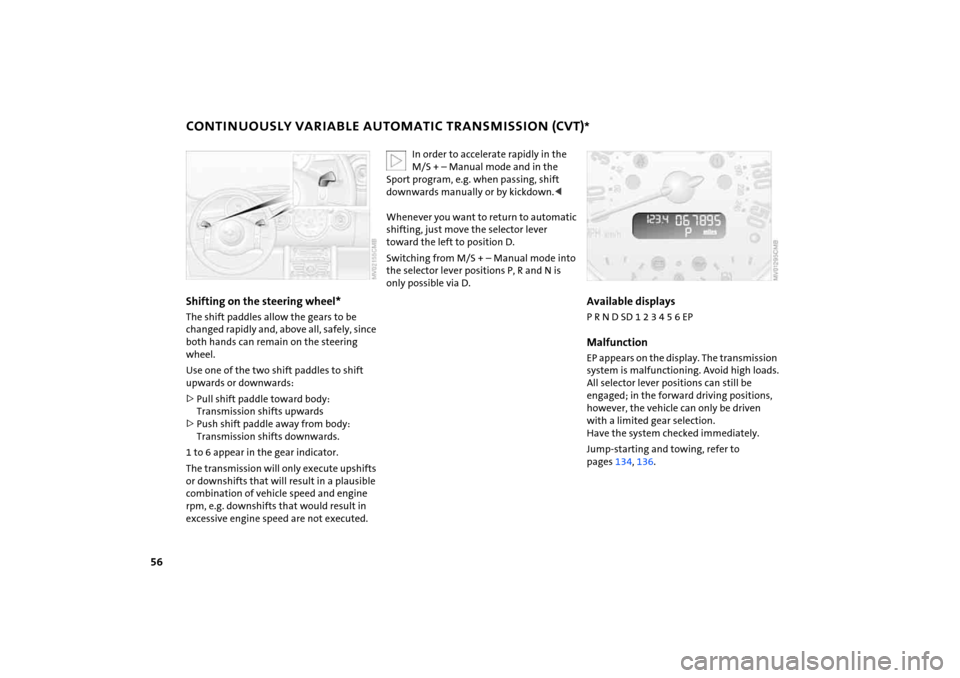
Shifting on the steering wheel* The shift paddles allow the gears to be
changed rapidly and, above all, safely, since
both hands can remain on the steering
wheel.Use one of the two shift paddles to shift
upwards or downwards:>Pull shift paddle toward body:
Transmission shifts upwards>Push shift paddle away from body:
Transmission shifts downwards.1 to 6 appear in the gear indicator.
The transmission will only execute upshifts
or downshifts that will result in a plausible
combination of vehicle speed and engine
rpm, e.g. downshifts that would result in
excessive engine speed are not executed.
In order to accelerate rapidly in the M/S
+ – Manual mode and in the
Sport program, e.g. when passing, shift
downwards manually or by kickdown.<
Whenever you want to return to automatic
shifting, just move the selector lever
toward the left to position D.Switching from M/S
+ – Manual mode into
the selector lever positions P, R and N is
only possible via D.
Available displaysP R N D SD 1 2 3 4 5 6 EPMalfunctionEP appears on the display. The transmission
system is malfunctioning. Avoid high loads.
All selector lever positions can still be
engaged; in the forward driving positions,
however, the vehicle can only be driven
with a limited gear selection.
Have the system checked immediately.Jump-starting and towing, refer to
pages
134
, 136
.
Page 138 of 165

136
TOWING AND TOW-STARTINGUsing the towing eyelet The screw-in towing eyelet is stored in the
onboard tool kit, refer to page
120
; be sure
that it remains with the vehicle at all times.
It can be attached at the front or rear of
your vehicle.
To prevent damage to the towing eyelet and the vehicle, please observe
the following instructions:
Use only the towing eyelet supplied with
the vehicle and screw it in firmly until it
stops. Use the towing eyelet for towing on
paved roads only. Avoid subjecting the
towing eyelet to lateral loads, e.g. do not
lift the vehicle using the towing eyelet.<
Access to the threaded socket The illustration shows by way of example
the MINI COOPER and the MINI COOPER
Convertible.Pry out the cover in the front or rear
bumper by inserting a screwdriver into the
recess.Being towed
Make sure that the ignition key is in position
1; otherwise the steering
lock could engage and prevent the vehicle
from being steered. There is no power
assist while the engine is off. Therefore,
you will need to exert more force to brake
and steer the vehicle.<
Turn on the hazard warning flashers, if
required by national regulations. If the
electrical system has failed, clearly identify
the vehicle being towed, e.g. by placing a
sign or a warning triangle in the rear win
-
dow.MINI or MINI Convertible with manual
transmission:Put the manual gearshift lever in Neutral.MINI or MINI Convertible with Continu
-
ously Variable automatic Transmission
(CVT):
Only tow vehicles with Continuously Variable automatic Transmission
(CVT) with a tow truck, otherwise the trans
-
mission can be damaged, refer to
page
137
.<
Towing methodsIn some countries, it is not permitted to
tow the vehicle with a tow bar or tow rope
on public roads.Familiarize yourself with the applicable
towing regulations for the country in which
you are driving.
Page 139 of 165

137
OVERVIEW REPAIRSOPERATION CONTROLS DATA INDEX
TOWING AND TOW-STARTINGWith a tow bar:
The towing vehicle must not be lighter than the vehicle being towed;
otherwise, vehicle handling can no longer
be controlled.<
The towing eyelets of both vehicles should
be on the same side. If the tow bar can only
be used in a diagonal position, please note
the following:>Clearance and maneuverability will be
strictly limited in corners>The inclination of the tow bar produces
lateral force.
Only attach the tow bar to the towing eyelets. Other parts of the vehicles
could otherwise be damaged.<
With a tow rope: When the towing vehicle is driving off,
make sure that the tow rope is taut.
Use nylon ropes or straps for towing because they prevent sudden jerking
movements. Attach the tow rope only to
the towing eyelets. Other parts of the vehi
-
cles could otherwise be damaged.<
With a tow truck:Have the MINI or MINI Convertible trans
-
ported by a tow truck with a lift sling, or on
a flatbed.
Only tow vehicles with Continuously Variable automatic Transmission
(CVT) with the front wheels raised or on a
special transport vehicle, otherwise the
transmission can be damaged.
Do not lift the vehicle by the towing eyelet,
nor by parts of the body or chassis. Other
-
wise damage could result.<
Tow-starting
Do not tow-start vehicles with Con
-
tinuously Variable automatic Trans
-
mission (CVT).
Jump-starting, refer to page
134
.<
Only tow-start vehicles with catalytic con
-
verters if the engine is cold. It is better to
have the engine jump-started, refer to
page
134
.
1. Turn on the hazard warning flashers;
comply with national regulations2. Turn the ignition key to position
2
3. Engage the 3rd
gear
4. Have the vehicle towed with the clutch
pedal completely depressed and then
slowly release the clutch pedal. After the
engine has started, immediately depress
the clutch pedal again completely5. Pull over at a suitable location, remove
the tow bar or tow rope, and turn off the
hazard warning flashers6. Have the vehicle checked.