spare tire MINI Hardtop 2 Door 2006 Owner's Manual
[x] Cancel search | Manufacturer: MINI, Model Year: 2006, Model line: Hardtop 2 Door, Model: MINI Hardtop 2 Door 2006Pages: 168, PDF Size: 2.22 MB
Page 6 of 168
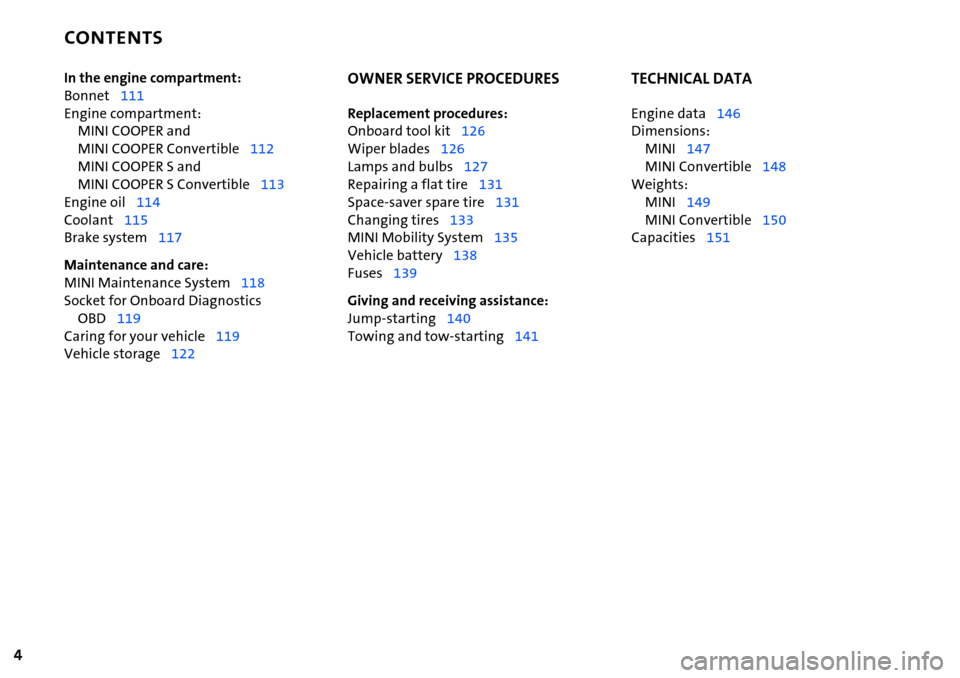
CONTENTS
4
In the engine compartment:
Bonnet111
Engine compartment:
MINI COOPER and
MINI COOPER Convertible112
MINI COOPER S and
MINI COOPER S Convertible113
Engine oil114
Coolant115
Brake system117
Maintenance and care:
MINI Maintenance System118
Socket for Onboard Diagnostics
OBD119
Caring for your vehicle119
Vehicle storage122OWNER SERVICE PROCEDURES
Replacement procedures:
Onboard tool kit126
Wiper blades126
Lamps and bulbs127
Repairing a flat tire131
Space-saver spare tire131
Changing tires133
MINI Mobility System135
Vehicle battery138
Fuses139
Giving and receiving assistance:
Jump-starting140
Towing and tow-starting141
TECHNICAL DATA
Engine data146
Dimensions:
MINI147
MINI Convertible148
Weights:
MINI149
MINI Convertible150
Capacities151
Page 75 of 168
73
OVERVIEW REPAIRS OPERATIONCONTROLS DATA INDEX
FLAT TIRE MONITOR
The concept
As you drive, the Flat Tire Monitor keeps
track of the tire inflation pressure in all four
tires. The system alerts you when there is a
substantial pressure loss in one of the tires
relative to another.
In the event of tire pressure loss, the rolling
radius of the tire changes, thereby affect-
ing the rotational speed of the wheels. This
change is detected, and a flat tire warning
is issued to the driver.
System requirements
To ensure the reliability of flat tire warn-
ings, the system must be initialized with
the correct tire inflation pressures.
Each time you correct the pressure in
a tire, or change a wheel or tire, the
system must be reinitialized.<
System limitations
The Flat Tire Monitor cannot alert you
to severe and sudden tire damage
caused by external factors, nor does it
detect the gradual and minor loss of pres-
sure in all four tires.<
The system could issue a false warning or
function in a delayed manner in the follow-
ing situations:
>System was not initialized
>You are driving on a snow-covered or
slippery road surface
>Performance-oriented driving: slip at the
drive wheels, high rates of lateral accel-
eration
>You are driving with snow chains.
When driving with a space-saver spare tire,
the Flat Tire Monitor cannot function.
Initializing the system
Initialization is completed while you
are driving, but you can stop the car
at any time. Initialization is automatically
continued when you continue driving. Do
not initialize the system if you are driving
with snow chains or a space-saver spare
tire.<
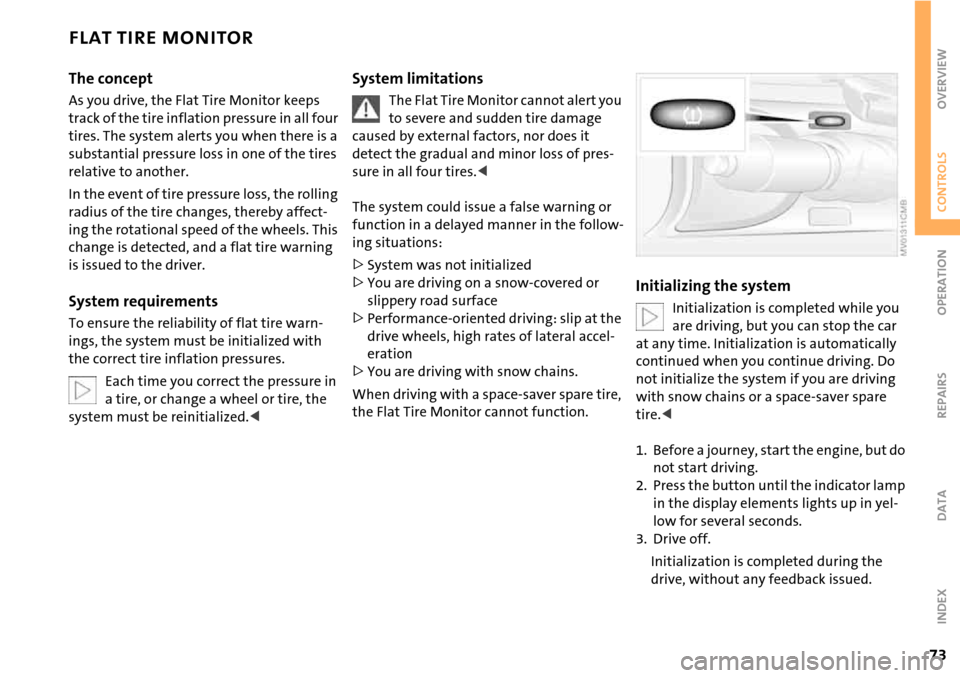
1. Before a journey, start the engine, but do
not start driving.
2. Press the button until the indicator lamp
in the display elements lights up in yel-
low for several seconds.
3. Drive off.
Initialization is completed during the
drive, without any feedback issued.
Page 103 of 168
101
OVERVIEW REPAIRSOPERATIONCONTROLS DATA INDEX
TIRE INFLATION PRESSURE
Information for your safety
It is not merely the tire's service life, but
also driving safety and driving comfort that
depend on the condition of the tires and
the maintenance of the specified tire pres-
sure.
Checking tire inflation pressures
Check the tire inflation pressures only on
cold tires. This means after driving a maxi-
mum of 1.25 miles/2 km or when the vehi-
cle has been parked for at least 2 hours.
Warm tires have higher pressures.
Check tire inflation pressures regu-
larly and correct them if necessary,
including the space-saver spare tire: at
least twice a month and before long jour-
neys. Otherwise, incorrect tire pressures
can cause driving instability or tire damage,
ultimately resulting in accidents. Do not
drive with deflated, i.e. flat, tires except if
Run Flat tires are fitted. A flat tire greatly
impairs steering and braking response, and
can lead to complete loss of control over
the vehicle.<
After correcting the tire inflation
pressure, reinitialize the Flat Tire
Monitor, refer to page73.<
Tire inflation pressures for original
tires
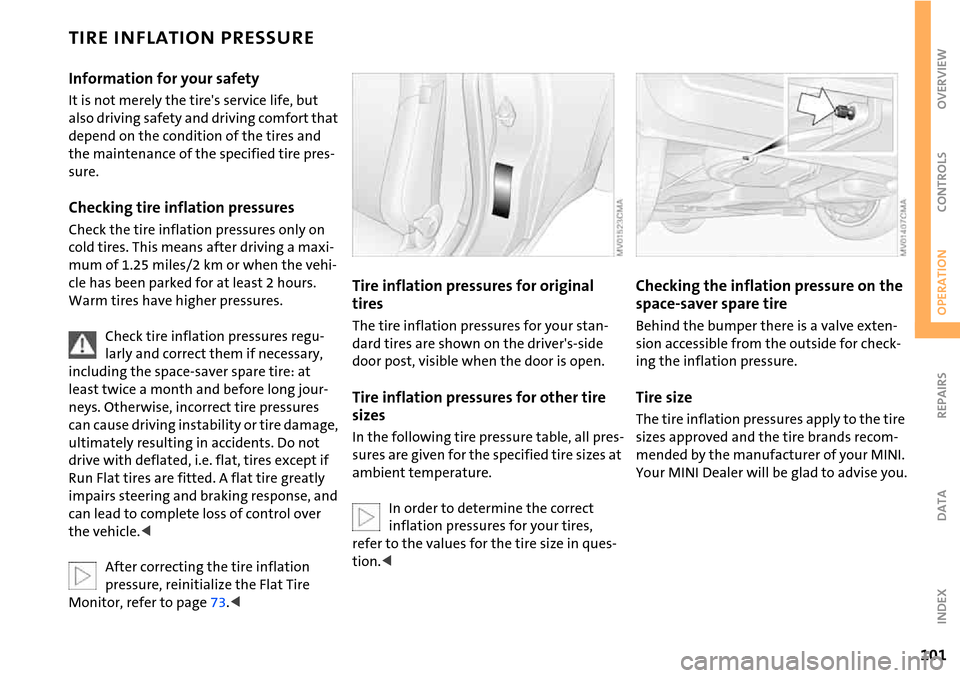
The tire inflation pressures for your stan-
dard tires are shown on the driver's-side
door post, visible when the door is open.
Tire inflation pressures for other tire
sizes
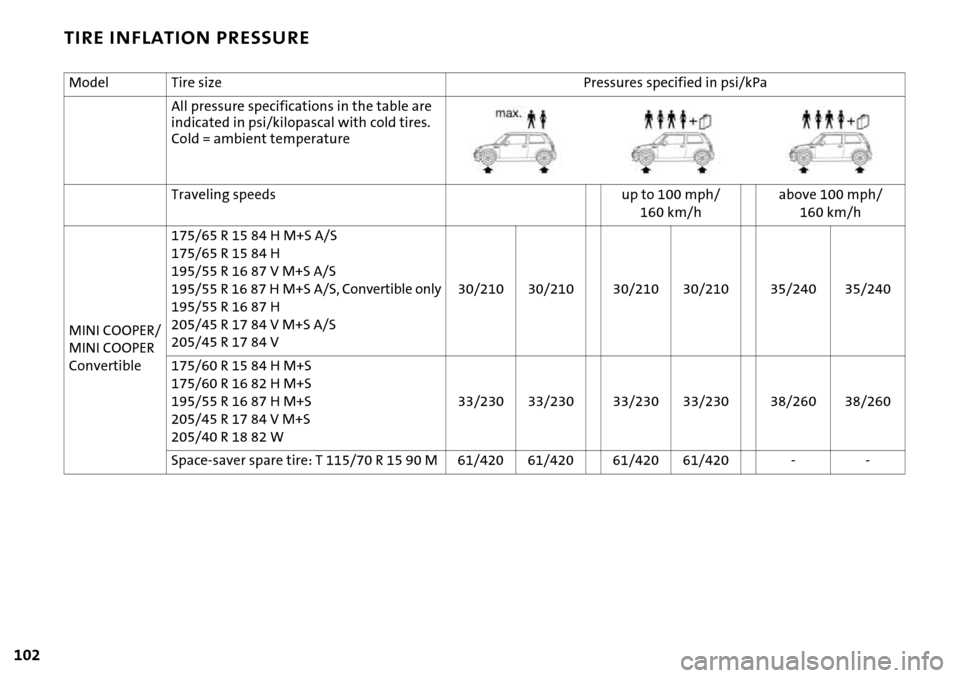
In the following tire pressure table, all pres-
sures are given for the specified tire sizes at
ambient temperature.
In order to determine the correct
inflation pressures for your tires,
refer to the values for the tire size in ques-
tion.<
Checking the inflation pressure on the
space-saver spare tire
Behind the bumper there is a valve exten-
sion accessible from the outside for check-
ing the inflation pressure.
Tire size
The tire inflation pressures apply to the tire
sizes approved and the tire brands recom-
mended by the manufacturer of your MINI.
Your MINI Dealer will be glad to advise you.
Page 104 of 168
102
TIRE INFLATION PRESSURE
Model Tire size Pressures specified in psi/kPa
All pressure specifications in the table are
indicated in psi/kilopascal with cold tires.
Cold = ambient temperature
Traveling speeds up to 100 mph/
160 km/habove 100 mph/
160 km/h
MINI COOPER/
MINI COOPER
Convertible175/65 R 15 84 H M+S A/S
175/65 R 15 84 H
195/55 R 16 87 V M+S A/S
195/55 R 16 87 H M+S A/S, Convertible only
195/55 R 16 87 H
205/45 R 17 84 V M+S A/S
205/45 R 17 84 V30/210 30/210 30/210 30/210 35/240 35/240
175/60 R 15 84 H M+S
175/60 R 16 82 H M+S
195/55 R 16 87 H M+S
205/45 R 17 84 V M+S
205/40 R 18 82 W33/230 33/230 33/230 33/230 38/260 38/260
Space-saver spare tire: T 115/70 R 15 90 M 61/420 61/420 61/420 61/420 - -
Page 111 of 168

109
OVERVIEW REPAIRSOPERATIONCONTROLS DATA INDEX
NEW WHEELS AND TIRES
The correct wheels and tires
The manufacturer of your MINI rec-
ommends mounting only wheels and
tires that it has specifically approved for
use on your particular model. Although
other wheels and tires may theoretically
have the same dimensions, variations in
factors such as manufacturing tolerances
can result in contact between tire and
bodywork, ultimately leading to serious
accidents. The manufacturer of your MINI
cannot evaluate non-approved wheels and
tires to determine if they are suited for use,
and therefore cannot ensure the operating
safety of the vehicle if they are mounted.<
Your MINI Dealer will be glad to inform you
about the correct wheel and tire combina-
tion for your vehicle.
The correct wheel and tire combination is
also important for various systems that
would otherwise be impaired, e.g. ABS or
DSC.
To maintain good handling and vehicle
response, use only tires of a single brand
and tread configuration. In the event of tire
damage, remount the previous wheel and
tire combination as soon as possible.
Run Flat tires
For your own safety, use Run Flat tires
when mounting new tires or replacing
summer tires with winter tires or vice
versa. Keep in mind that no spare wheel is
available in the event of a flat. Your MINI
Dealer will be glad to advise you.
For safety reasons, the manufacturer
of your MINI recommends having
Run Flat tires replaced, not repaired, if they
are damaged.<
Tire designation
For each tire size, the manufacturer of your
MINI recommends certain tire brands. You
can recognize these by the clearly visible
designation on the tire's sidewall.
When used properly these tires meet the
highest standards regarding safety and
handling characteristics.
Page 128 of 168

126
ONBOARD TOOL KIT WIPER BLADES
The picture shows as an example the tire
change set with onboard tools for vehicles
with the space-saver spare tire.
Depending on the equipment version, your
vehicle is equipped with a special onboard
tool kit stored at the locations described
below:
Tire change set with onboard tools for
space-saver spare tire
In the luggage compartment under the
floor mat.
MINI Mobility System with tire change
set and onboard tools
In the luggage compartment under the
floor mat.
Tire change set and onboard tool kit
with Run Flat tires
MINI COOPER and MINI COOPER Convert-
ible:
>In the luggage compartment under the
floor mat.
MINI COOPER S and MINI COOPER S Con-
vertible:
>Tire change set:
In the luggage compartment in a sepa-
rate pouch
>Onboard tool kit:
In the luggage compartment under the
floor mat.
Windshield wiper
1. Rotate the wiper arm completely out
from the windshield
2. Set the wiper blade at an angle
3. Press the securing spring, see arrow
4. Unhook the wiper blade towards the
windshield
5. Pull the wiper blade past the wiper arm
toward the top
6. Insert the new wiper blade
7. Press into position until you hear it
engage.
Page 132 of 168

130
LAMPS AND BULBS
Rear fog lamp*
With the space-saver spare tire option:
Access to the lamp via the back or under-
side of the bumper.
1. Press the clips together
2. Push the lamp out of the bumper
3. Apply gentle pressure to the bulb while
turning it to the left
4. Remove and replace the bulb.
Other equipment:
In the event of a malfunction, please
contact your MINI Dealer or a work-
shop that has specially trained personnel
working in accordance with the specifica-
tions of your MINI manufacturer.<
License plate lamps
5watt bulb
As an example, the illustration shows the
license plate lamp of the MINI.
1. Apply a screwdriver to the recess and
lever out the lamp cover
2. Replace the bulb.
Light-emitting diodes (LEDs)
Light-emitting diodes installed behind
translucent lenses serve as the light
sources for many of the controls and dis-
plays in your vehicle. These light-emitting
diodes are related to conventional lasers,
and legislation defines them as light-emit-
ting diodes, Class 1.
Do not remove the protective lenses
and avoid staring directly at the unfil-
tered beam for several hours, as inflamma-
tion of the retina could result.<
Page 133 of 168

131
OVERVIEW REPAIRSOPERATION CONTROLS DATA INDEX
REPAIRING A FLAT TIRE SPACE-SAVER SPARE TIRE*
Safety measures in the event of a flat
tire:
Stop the vehicle as far as possible from
passing traffic. Switch on the hazard warn-
ing flashers.
Turn the steering wheel to the straight-
ahead wheel position and engage the
steering lock. Engage the parking brake and
shift into 1st or reverse gear – selector lever
in P.
All passengers should be outside the vehi-
cle and well away from your immediate
working area – behind a guardrail, for
instance.
If a portable hazard warning lamp is avail-
able, set it up on the roadside at an appro-
priate distance from the rear of the vehicle.
Comply with all safety guidelines and regu-
lations.<
In the event of a flat tire, different proce-
dures should be followed depending on the
equipment included in your vehicle:
>Vehicles with Run Flat tires, refer to
page108
>Vehicles with a space-saver spare tire,
refer to the following section
>Vehicles with MINI Mobility System,
refer to page135.To change a space-saver spare tire, proceed
as follows:
>Remove space-saver spare tire, refer to
the section after the next one
>Prepare for tire change, refer to page133
>Jack up the vehicle, refer to page134
>Mount the space-saver spare tire, refer
to page134
>Tighten the lug bolts, refer to page134
>Drive with space-saver spare tire, refer to
page133.
Tire change set
On vehicles with a space-saver spare tire,
the tire change set with onboard tools is
stored in the luggage compartment under
the floor mat.
1 Chock, folding
2 Hubcap remover
3 Wheel stud wrench
4Jack
5 Special wrench for removing the space-
saver spare tire
6 Towing eyelet
7 Lifting handle
The onboard tool kit includes a pouch with
a plastic bag in which you can place the
damaged wheel.
Page 134 of 168

132
SPACE-SAVER SPARE TIRE*
Removing the space-saver spare tire
The screw connection of the space-saver
spare tire is in the luggage compartment
under the floor mat, on the base of the
storage compartment for the tire change
set.
1. Loosen the screw connection using the
special wrench
2. Take out the cover panel
3. Screw the lifting handle from the
onboard tool kit onto the thread
4. Raise the lifting handle slightly5. Squeeze the securing spring
6. The space-saver spare tire is released
and must be held by the lifting handle
7. Lower the space-saver spare tire with
the lifting handle
8. Unscrew the lifting handle
Page 135 of 168
133
OVERVIEW REPAIRSOPERATION CONTROLS DATA INDEX
SPACE-SAVER SPARE TIRE*CHANGING TIRES
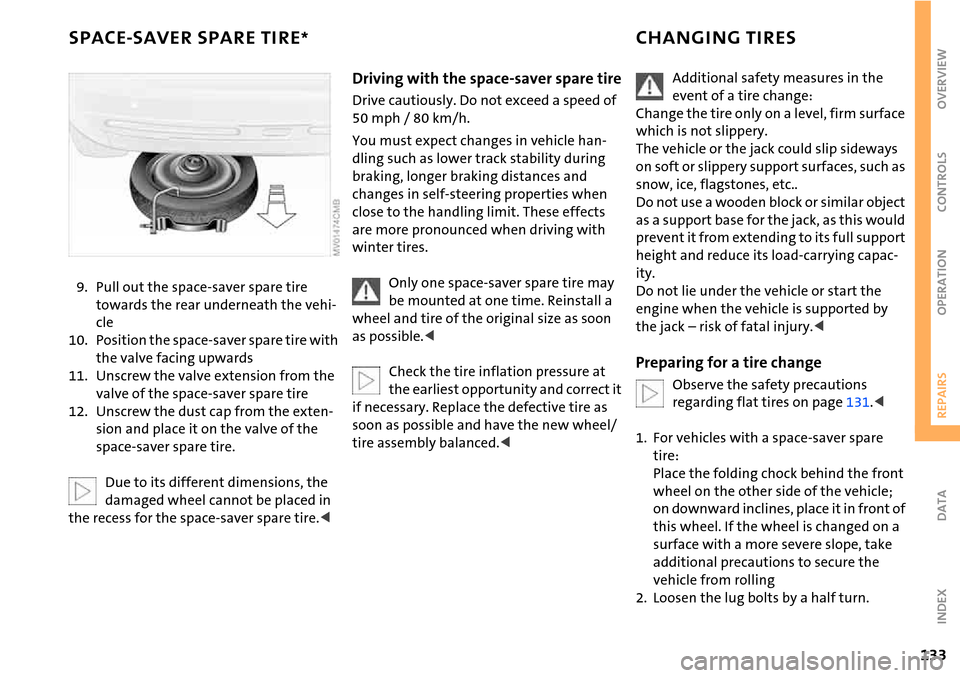
9. Pull out the space-saver spare tire
towards the rear underneath the vehi-
cle
10. Position the space-saver spare tire with
the valve facing upwards
11. Unscrew the valve extension from the
valve of the space-saver spare tire
12. Unscrew the dust cap from the exten-
sion and place it on the valve of the
space-saver spare tire.
Due to its different dimensions, the
damaged wheel cannot be placed in
the recess for the space-saver spare tire.<
Driving with the space-saver spare tire
Drive cautiously. Do not exceed a speed of
50 mph / 80 km/h.
You must expect changes in vehicle han-
dling such as lower track stability during
braking, longer braking distances and
changes in self-steering properties when
close to the handling limit. These effects
are more pronounced when driving with
winter tires.
Only one space-saver spare tire may
be mounted at one time. Reinstall a
wheel and tire of the original size as soon
as possible.<
Check the tire inflation pressure at
the earliest opportunity and correct it
if necessary. Replace the defective tire as
soon as possible and have the new wheel/
tire assembly balanced.<
Additional safety measures in the
event of a tire change:
Change the tire only on a level, firm surface
which is not slippery.
The vehicle or the jack could slip sideways
on soft or slippery support surfaces, such as
snow, ice, flagstones, etc..
Do not use a wooden block or similar object
as a support base for the jack, as this would
prevent it from extending to its full support
height and reduce its load-carrying capac-
ity.
Do not lie under the vehicle or start the
engine when the vehicle is supported by
the jack – risk of fatal injury.<
Preparing for a tire change
Observe the safety precautions
regarding flat tires on page131.<
1. For vehicles with a space-saver spare
tire:
Place the folding chock behind the front
wheel on the other side of the vehicle;
on downward inclines, place it in front of
this wheel. If the wheel is changed on a
surface with a more severe slope, take
additional precautions to secure the
vehicle from rolling
2. Loosen the lug bolts by a half turn.