display MINI Hardtop 2 Door 2007 User Guide
[x] Cancel search | Manufacturer: MINI, Model Year: 2007, Model line: Hardtop 2 Door, Model: MINI Hardtop 2 Door 2007Pages: 148, PDF Size: 2.43 MB
Page 41 of 148

ReferenceAt a glance Controls Driving tips Mobility
39
transmission automatically returns to D, auto-
matic drive.
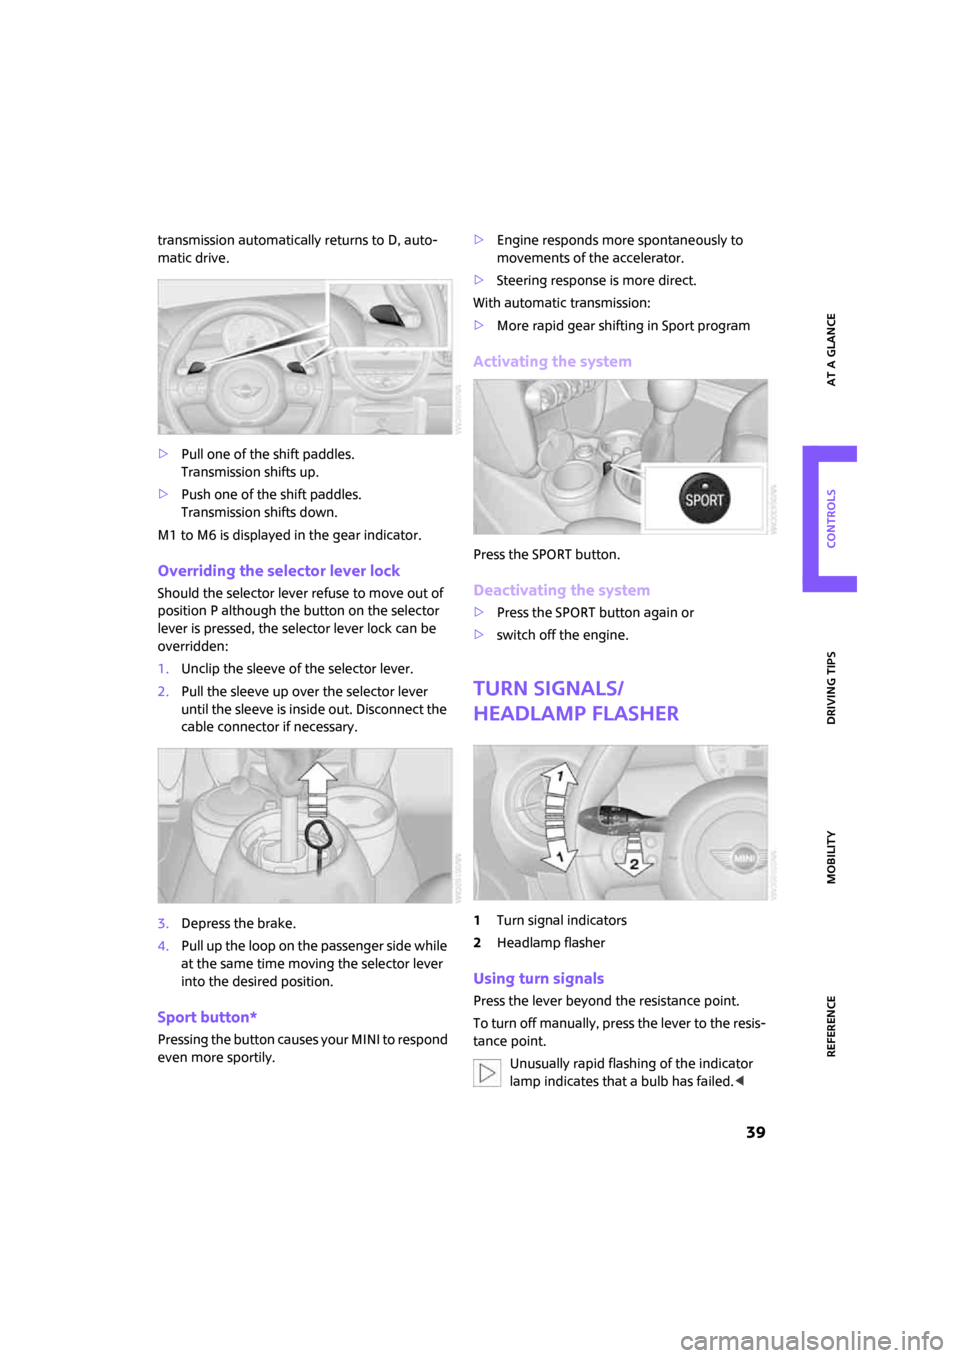
>Pull one of the shift paddles.
Transmission shifts up.
>Push one of the shift paddles.
Transmission shifts down.
M1 to M6 is displayed in the gear indicator.
Overriding the selector lever lock
Should the selector lever refuse to move out of
position P although the button on the selector
lever is pressed, the selector lever lock can be
overridden:
1.Unclip the sleeve of the selector lever.
2.Pull the sleeve up over the selector lever
until the sleeve is inside out. Disconnect the
cable connector if necessary.
3.Depress the brake.
4.Pull up the loop on t he passeng er side w hile
at the same time moving the selector lever
into the desired position.
Sport button*
Pressing the button causes your MINI to respond
even more sportily.>Engine responds more spontaneously to
movements of the accelerator.
>Steering response is more direct.
With automatic transmission:
>More rapid gear shifting in Sport program
Activating the system
Press the SPORT button.
Deactivating the system
>Press the SPORT button again or
>switch off the engine.
Turn signals/
headlamp flasher
1Turn signal indicators
2Headlamp flasher
Using turn signals
Press the lever beyond the resistance point.
To turn off manually, press the lever to the resis-
tance point.
Unusually rapid flashing of the indicator
lamp indicates that a bulb has failed.<
Page 42 of 148

Driving
40
Indicating a turn briefly
Press the lever as far as the resistance point for
as long as you wish to indicate a turn.
Triple turn signal activation
Press the lever as far as the resistance point.
Turn signal flashes once.
You can set whether the turn signal is to flash
once or three times.
1.Switch on the ignition, refer to page35.
2.Briefly press the button in the turn indicator
lever repeatedly until "SET/INFO" is dis-
played.
3.Press and hold the button until the display
changes.
4.Briefly press the button repeatedly until the
symbol and "SET" are displayed.
5.Press and hold the button until the display
changes.6.Briefly press the button repeatedly until the
display shows the illustrated symbol, arrow.
7.Press and hold the button until the display
changes.
8.Briefly press the button to select:
>
Brief indication of a turn.
>
Triple turn signal.
9.Press and hold the button until the display
changes. The setting is stored.
Wiper system
0Wipers parked
1Intermittent wipe or rain sensor
*
2Normal wiper speed
3Fast wiper speed
4Switching off wipers or brief wipe
5Cleaning windshield and headlamps
*
Intermittent wipe or rain sensor*
If the car is not equipped with a rain sensor, the
intermittent-wipe time is a preset.
Page 46 of 148

Everything under control
44
Everything under control
Odometer, outside tem-
perature display, clock
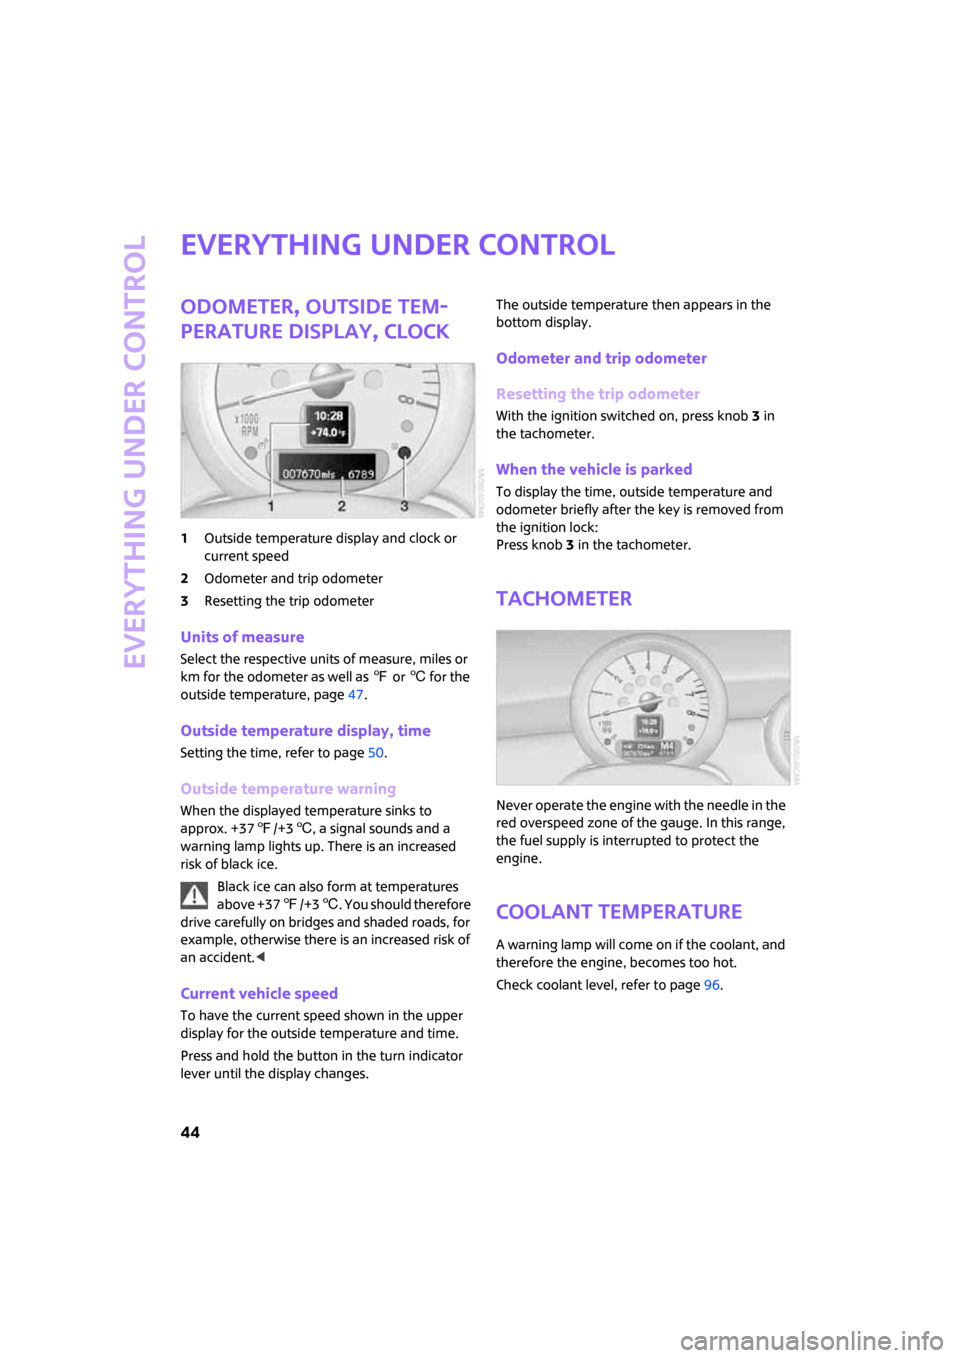
1Outside temperature display and clock or
current speed
2Odometer and trip odometer
3Resetting the trip odometer
Units of measure
Select the respective units of measure, miles or
km for the odometer as well as 7 or 6 for the
outside temperature, page47.
Outside temperature display, time
Setting the time, refer to page50.
Outside temperature warning
When the displayed temperature sinks to
approx. +377/+36, a signal sounds and a
warning lamp lights up. There is an increased
risk of black ice.
Black ice can also form at temperatures
above +377/+36. You should therefore
drive carefully on bridges and shaded roads, for
example, otherwise there is an increased risk of
an accident.<
Current vehicle speed
To have the current speed shown in the upper
display for the outside temperature and time.
Press and hold the button in the turn indicator
lever until the display changes.The outside temperature then appears in the
bottom display.
Odometer and trip odometer
Resetting the trip odometer
With the ignition switched on, press knob 3 in
the tachometer.
When the vehicle is parked
To display the time, outside temperature and
odometer briefly after the key is removed from
the ignition lock:
Press knob 3 in the tachometer.
Tachometer
Never operate the engine with the needle in the
red overspeed zone of the gauge. In this range,
the fuel supply is interrupted to protect the
engine.
Coolant temperature
A warning lamp will come on if the coolant, and
therefore the engine, becomes too hot.
Check coolant level, refer to page96.
Page 47 of 148

ReferenceAt a glance Controls Driving tips Mobility
45
Fuel gauge
Fuel tank capacity
You can find information on refueling on
page84.
If the tilt of the vehicle varies for a longer period,
when you are driving in mountainous areas, for
example, the indicator may fluctuate slightly.
MINI Cooper
Approx. 10.6 US gallons/40 liters.
MINI Cooper S
Approx. 13.2 US gallons/50 liters.
Reserve
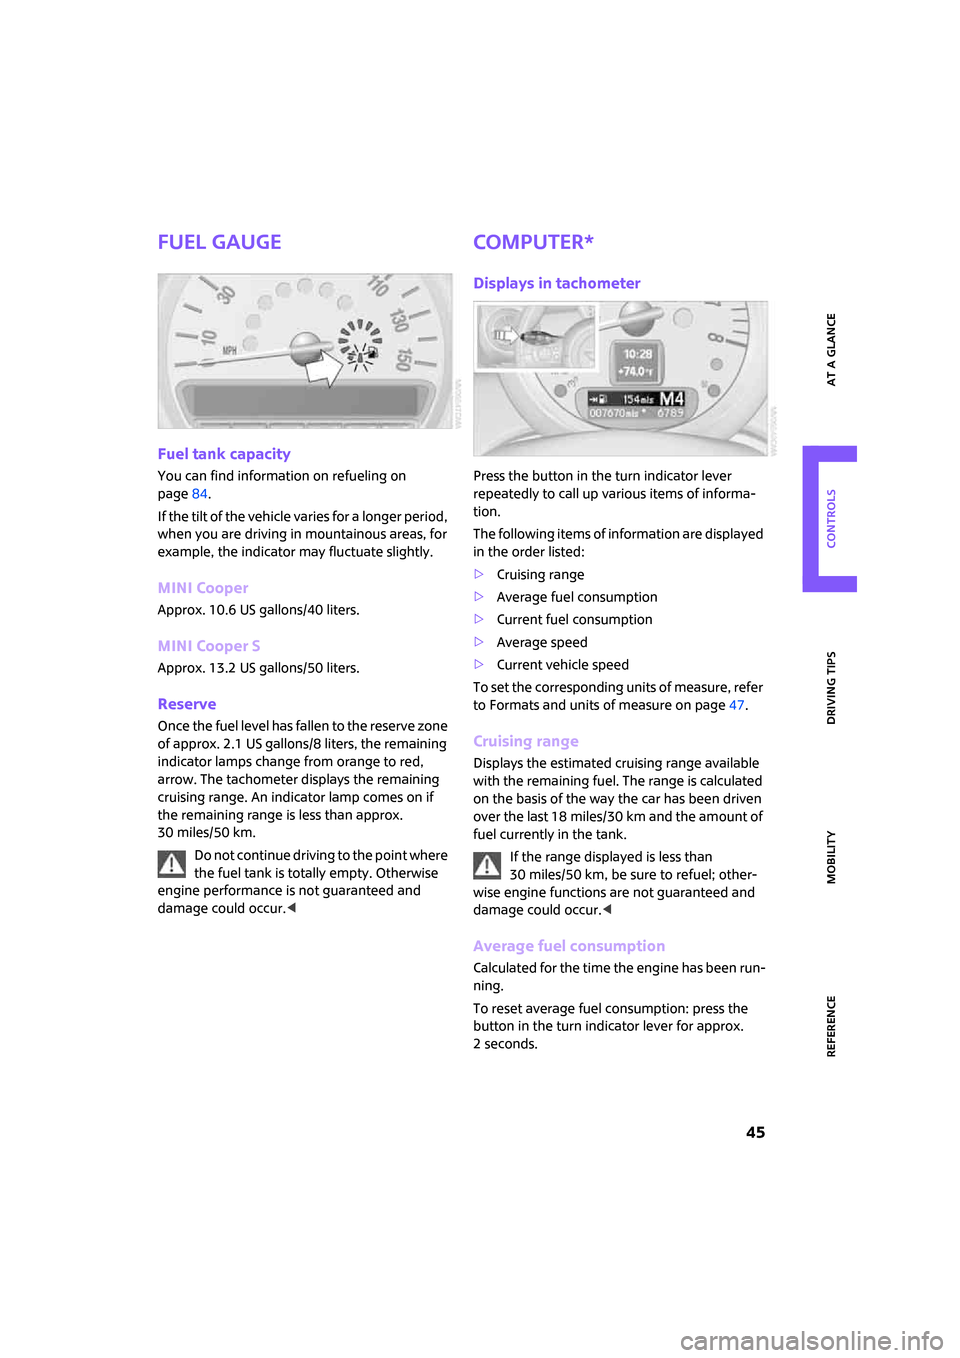
Once the fuel level has fallen to the reserve zone
of approx. 2.1 US gallons/8 liters, the remaining
indicator lamps change from orange to red,
arrow. The tachometer displays the remaining
cruising range. An indicator lamp comes on if
the remaining range is less than approx.
30 miles/50 km.
Do not continue driving to the point where
the fuel tank is totally empty. Otherwise
engine performance is not guaranteed and
damage could occur.<
Computer*
Displays in tachometer
Press the button in the turn indicator lever
repeatedly to call up various items of informa-
tion.
The following items of information are displayed
in the order listed:
>Cruising range
>Average fuel consumption
>Current fuel consumption
>Average speed
>Current vehicle speed
To set the corresponding units of measure, refer
to Formats and units of measure on page47.
Cruising range
Displays the estimated cruising range available
with the remaining fuel. The range is calculated
on the basis of the way the car has been driven
over the last 18 miles/30 km and the amount of
fuel currently in the tank.
If the range displayed is less than
30 miles/50 km, be sure to refuel; other-
wise engine functions are not guaranteed and
damage could occur.<
Average fuel consumption
Calculated for the time the engine has been run-
ning.
To reset average fuel consumption: press the
button in the turn indicator lever for approx.
2seconds.
Page 48 of 148

Everything under control
46
Current fuel consumption
Displays the current fuel consumption to allow
you to see whether your current driving style is
conducive to fuel economy with minimum
exhaust emissions.
Average speed
Periods with the vehicle parked and the engine
switched off are not included in the calculations
of average speed.To reset average speed: press the button in the
turn indicator lever for approx. 2 seconds.
Current vehicle speed
To have the current speed shown in the upper
display for the outside temperature and time.
Press and hold the button in the turn indicator
lever until the display changes.
The outside temperature then appears in the
bottom display of the computer.
Settings and information
Operating principle
Certain settings and information are only avail-
able when the ignition is switched on and the
vehicle is at a standstill.
1Button for:
>Selecting display
>Setting values
>Confirming selected display or set values
>Calling up computer information45
2Calling up Check Control51
3Displaying vehicle check524Initializing Flat Tire Monitor55
5Setting formats and units of measure, reset-
ting to factory settings48
Page 49 of 148

ReferenceAt a glance Controls Driving tips Mobility
47
6Adjusting settings
>Confirmation signals when locking and
unlocking the vehicle20
>Response during unlocking
procedure19
>Automatic locking22
>Pathway lighting59
>Daytime running lamps60
>Triple turn signal activation407Setting the time50
8Setting the date51
9Exiting the menu
Exiting displays
1.Briefly press the button in the turn indicator
lever repeatedly until "HOME" is displayed.
2.Press the button for a longer period.
The display again shows the outside tempera-
ture and the time.
Displays are also exited if no entries are made
for approx. 8 seconds.
Next setting or item of information
1.Within a setting or item of information,
briefly press the button in the turn indicator
lever repeatedly until "NEXT" is displayed.
2.Press the button for a longer period.
The display changes directly to the next setting
or item of information.
Formats and units of
measure
To set the formats and units of measure. The set-
tings are stored for the remote control currently
in use, refer also to Personal Profile on page18.
1.Switch on the ignition, refer to page35.
2.Briefly press the button in the turn indicator
lever repeatedly until "SET/INFO" is dis-
played.
3.Press and hold the button until the display
changes.
4.Briefly press the button repeatedly until the
symbol and "SET" are displayed.
Page 50 of 148

Everything under control
48
5.Press and hold the button until the display
changes.
6.Briefly press the button repeatedly until the
display shows the illustrated symbol, arrow.
> Fuel consumption: l/100 km, mpg,
km/l
*
> Distance covered: mls, km
> Time: 12h, 24h mode
> Date: day.month dd.mm,
month/day mm/dd
> Temperature: 7, 6
7.Press and hold the button until the display
changes.
8.Press the button briefly to change the for-
mat or unit of measure.
9.Press and hold the button until the display
changes.
The settings are stored.
Resetting to factory settings
The settings for formats and units of measure
can be reset to the factory settings. The settings
are stored for the remote control currently in
use, refer also to Personal Profile on page18.1.Briefly press the button in the turn indicator
lever repeatedly until "SET/INFO" is dis-
played.
2.Press and hold the button until the display
changes.
3.Briefly press the button repeatedly until the
symbol and "SET" are displayed.
4.Press and hold the button until the display
changes.
5.Briefly press the button repeatedly until
"RESET" is displayed.
6.Press and hold the button until the display
changes to the first setting.
The settings are reset.
Page 51 of 148

ReferenceAt a glance Controls Driving tips Mobility
49
Service requirements
The remaining driving distance and the date of
the next scheduled service are briefly displayed
immediately after you start the engine or switch
on the ignition.
The extent of service work required can be
read out from the remote control by your
MINI Dealer.<
Displaying vehicle check
For certain maintenance operations, you can
view the respective distance remaining or due
date individually in the tachometer.
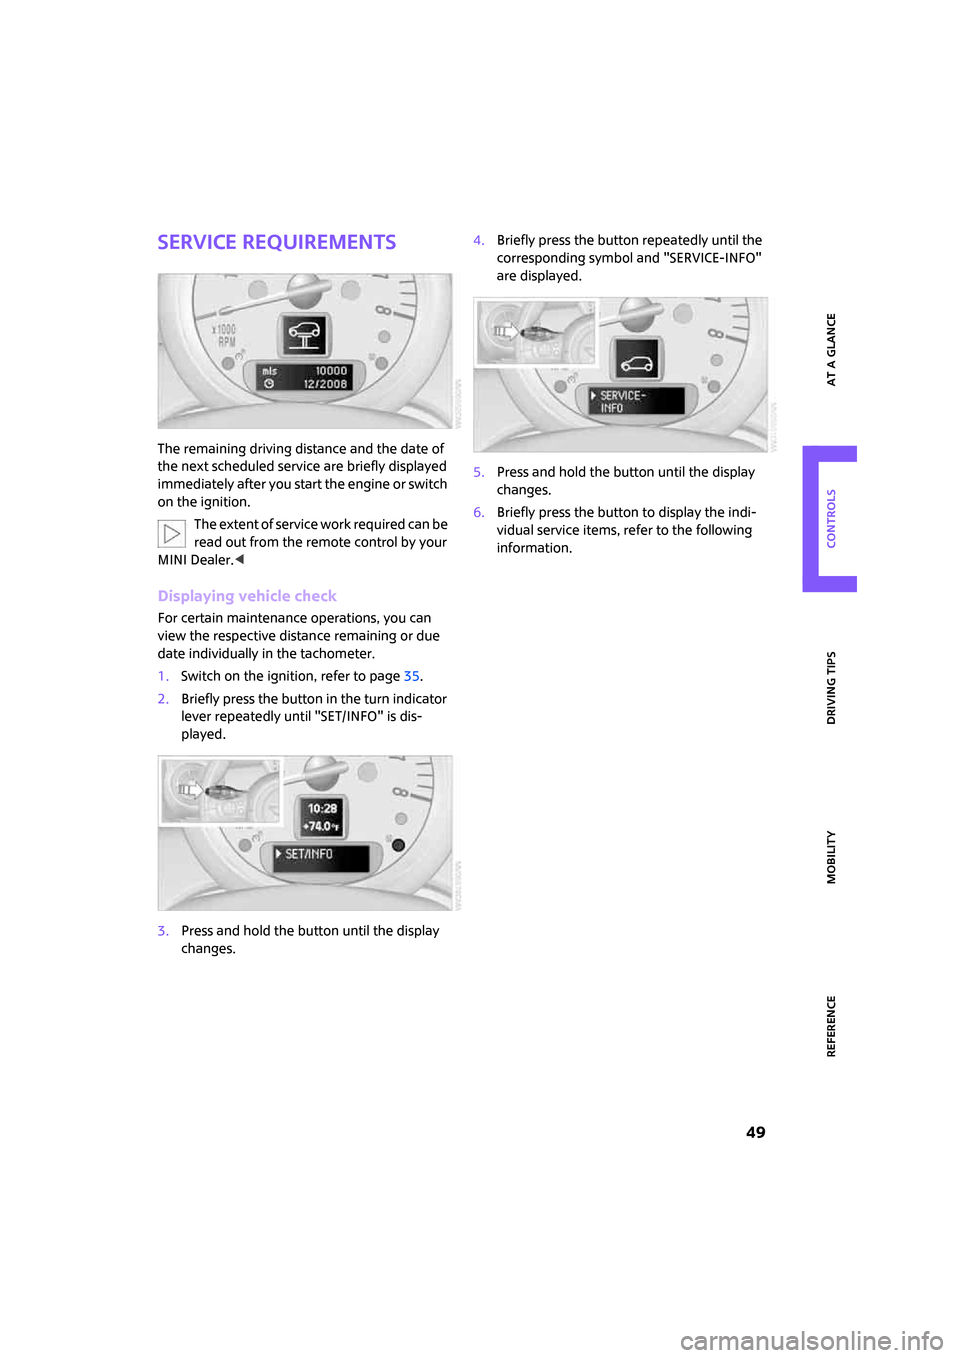
1.Switch on the ignition, refer to page35.
2.Briefly press the button in the turn indicator
lever repeatedly until "SET/INFO" is dis-
played.
3.Press and hold the button until the display
changes.4.Briefly press the button repeatedly until the
corresponding symbol and "SERVICE-INFO"
are displayed.
5.Press and hold the button until the display
changes.
6.Briefly press the button to display the indi-
vidual service items, refer to the following
information.
Page 52 of 148

Everything under control
50
Possible displays
1Button for selecting information
2Engine oil
3Front brakes
4Rear brakes
5Vehicle check6Roadworthiness test
7Brake fluid
8Exit display47
9Next setting or item of information47
More information on the MINI Maintenance Sys-
tem can be found on page98.
Clock
Setting the time
To set the 12h/24h mode, refer to Formats and
units of measure on page47.
1.Briefly press the button in the turn indicator
lever repeatedly until "SET/INFO" is dis-
played.2.Press and hold the button until the display
changes.
3.Briefly press the button repeatedly until the
symbol and "SET" are displayed.
4.Press and hold the button until the display
changes.
5.Press the button to set the hours.
Page 53 of 148

ReferenceAt a glance Controls Driving tips Mobility
51
6.Wait for the display to change to minutes.
7.Press the button to set the minutes.
8.Wait for the display to change.
The settings are stored.
Date
Setting the date
To set the dd/mm or mm/dd date format, refer
to Formats and units of measure on page47.
1.Briefly press the button in the turn indicator
lever repeatedly until "SET/INFO" is dis-
played.
2.Press and hold the button until the display
changes.
3.Briefly press the button repeatedly until the
symbol and "SET" are displayed.
4.Press and hold the button until the display
changes.
5.Press the button to set the day of the month.
6.Wait for the display to change to month.
7.Set the month and year in the same way.
8.Wait for the display to change.
The settings are stored.
Check Control
The concept
The Check Control monitors vehicle functions
and alerts you to any malfunctions in the sys-
tems monitored. Such a Check Control message
includes indicator or warning lamps in the dis-
plays and, in some circumstances, an acoustic
signal.
Indicator and warning lamps can light up in var-
ious combinations and colors in the indicator
areas 1 and2.
What to do in case of a malfunction
The meaning of each lamp in the event of a mal-
function and tips on how to respond are listed
starting on page116.
Hiding Check Control messages
Press the button in the turn indicator lever.
Some Check Control messages remain visible
until the respective malfunction has been recti-
fied. They cannot be hidden. If several malfunc-
tions occur at the same time, they are displayed
in succession.