ECU MINI Hardtop 2 Door 2010 (Mini Connected) User Guide
[x] Cancel search | Manufacturer: MINI, Model Year: 2010, Model line: Hardtop 2 Door, Model: MINI Hardtop 2 Door 2010Pages: 230, PDF Size: 4.02 MB
Page 107 of 230
MOBILITYAT A GLANCE CONTROLS DRIVING TIPS ENTERTAINMENT
105
NAVIGATION REFERENCE
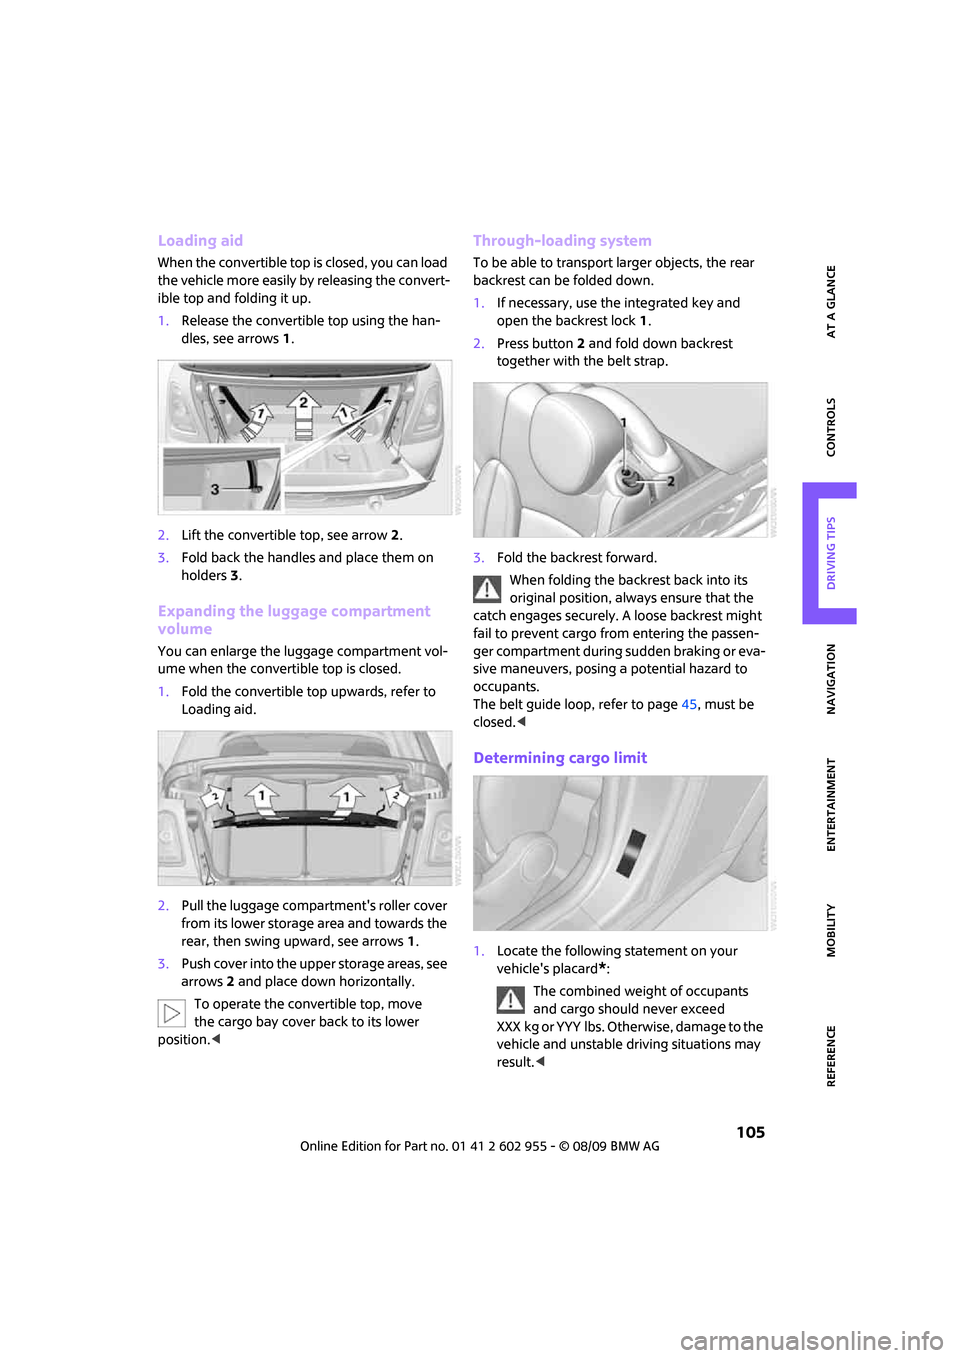
Loading aid
When the convertible top is closed, you can load
the vehicle more easily by releasing the convert-
ible top and folding it up.
1.Release the convertible top using the han-
dles, see arrows 1.
2.Lift the convertible top, see arrow 2.
3.Fold back the handles and place them on
holders3.
Expanding the luggage compartment
volume
You can enlarge the luggage compartment vol-
ume when the convertible top is closed.
1.Fold the convertible top upwards, refer to
Loading aid.
2.Pull the luggage compartment's roller cover
from its lower storage area and towards the
rear, then swing upward, see arrows 1.
3.Push cover into the upper storage areas, see
arrows 2 and place down horizontally.
To operate the convertible top, move
the cargo bay cover back to its lower
position.<
Through-loading system
To be able to transport larger objects, the rear
backrest can be folded down.
1.If necessary, use the integrated key and
open the backrest lock 1.
2.Press button2 and fold down backrest
together with the belt strap.
3.Fold the backrest forward.
When folding the backrest back into its
original position, always ensure that the
catch engages securely. A loose backrest might
fail to prevent cargo from entering the passen-
ger compartment during sudden braking or eva-
sive maneuvers, posing a potential hazard to
occupants.
The belt guide loop, refer to page45, must be
closed.<
Determining cargo limit
1.Locate the following statement on your
vehicle's placard
*:
The combined weight of occupants
and cargo should never exceed
X X X k g o r Y Y Y l b s . O t h e r w i s e , d a m a g e t o t h e
vehicle and unstable driving situations may
result.<
Page 108 of 230
Things to remember when driving
106
2.Determine the combined weight of the
driver and passengers that will be riding in
your vehicle.
3.Subtract the combined weight of the driver
and passengers from XXX kilograms or YYY
pounds.
4.The resulting figure equals the available
amount of cargo and luggage load capacity.
For example, if the XXX amount equals
1,400 lbs. and there will be four 150 lbs. pas-
sengers in your vehicle, the amount of avail-
able cargo and luggage load capacity is
650 lbs:
1,400 lbs. minus 750 lbs. = 650 lbs.
5.Determine the combined weight of luggage
and cargo being loaded on the vehicle. That
weight may not safely exceed the available
cargo and luggage load capacity calculated
in step 4.
6.I f y o u r v e h icl e w i ll be t o w i n g a t r a il e r , pa r t o f
the load from your trailer will be transferred
to your vehicle. Consult the manual for
transporting a trailer to determine how this
may reduce the available cargo and luggage
load capacity of your vehicle.
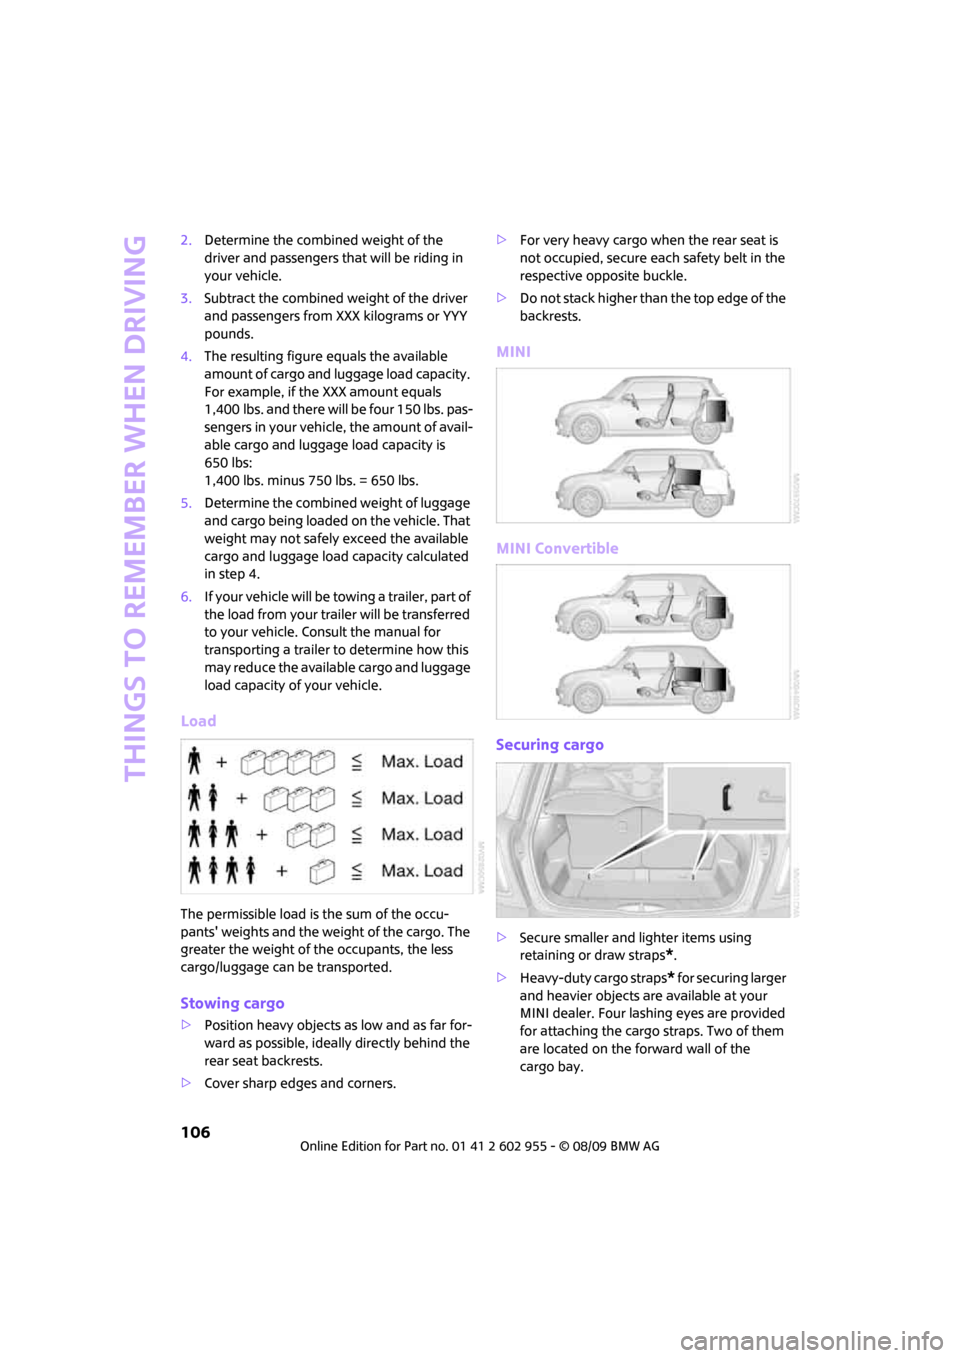
Load
The permissible load is the sum of the occu-
pants' weights and the weight of the cargo. The
greater the weight of the occupants, the less
cargo/luggage can be transported.
Stowing cargo
>Position heavy objects as low and as far for-
ward as possible, ideally directly behind the
rear seat backrests.
>Cover sharp edges and corners.>For very heavy cargo when the rear seat is
not occupied, secure each safety belt in the
respective opposite buckle.
>Do not stack higher than the top edge of the
backrests.
MINI
MINI Convertible
Securing cargo
>Secure smaller and lighter items using
retaining or draw straps
*.
>Heavy-duty cargo straps
* for securing larger
and heavier objects are available at your
MINI dealer. Four lashing eyes are provided
for attaching the cargo straps. Two of them
are located on the forward wall of the
cargo bay.
Page 109 of 230
MOBILITYAT A GLANCE CONTROLS DRIVING TIPS ENTERTAINMENT
107
NAVIGATION REFERENCE
Comply with the information enclosed with
the load-securing devices.
Always position and secure the cargo as
described above, so that it cannot endan-
ger the car's occupants, for example if sudden
braking or swerves are necessary.
Do not exceed the approved gross weight and
axle loads, page 205; otherwise, the vehicle's
operating safety is no longer assured and the
vehicle will not be in compliance with the certifi-
cation regulations.
Heavy or hard objects should not be carried
loose inside the car, since they could be thrown
around, for example as a result of heavy braking,
sudden swerves, etc., and endanger the occu-
pants. Do not secure cargo using the fastening
points for the tether strap, page49; they may
become damaged.<
MINI: Roof-mounted
luggage rack*
A special rack system is available as an option for
your MINI. Your MINI dealer will be glad to
advise you. Comply with the installation instruc-
tions supplied with the rack system.
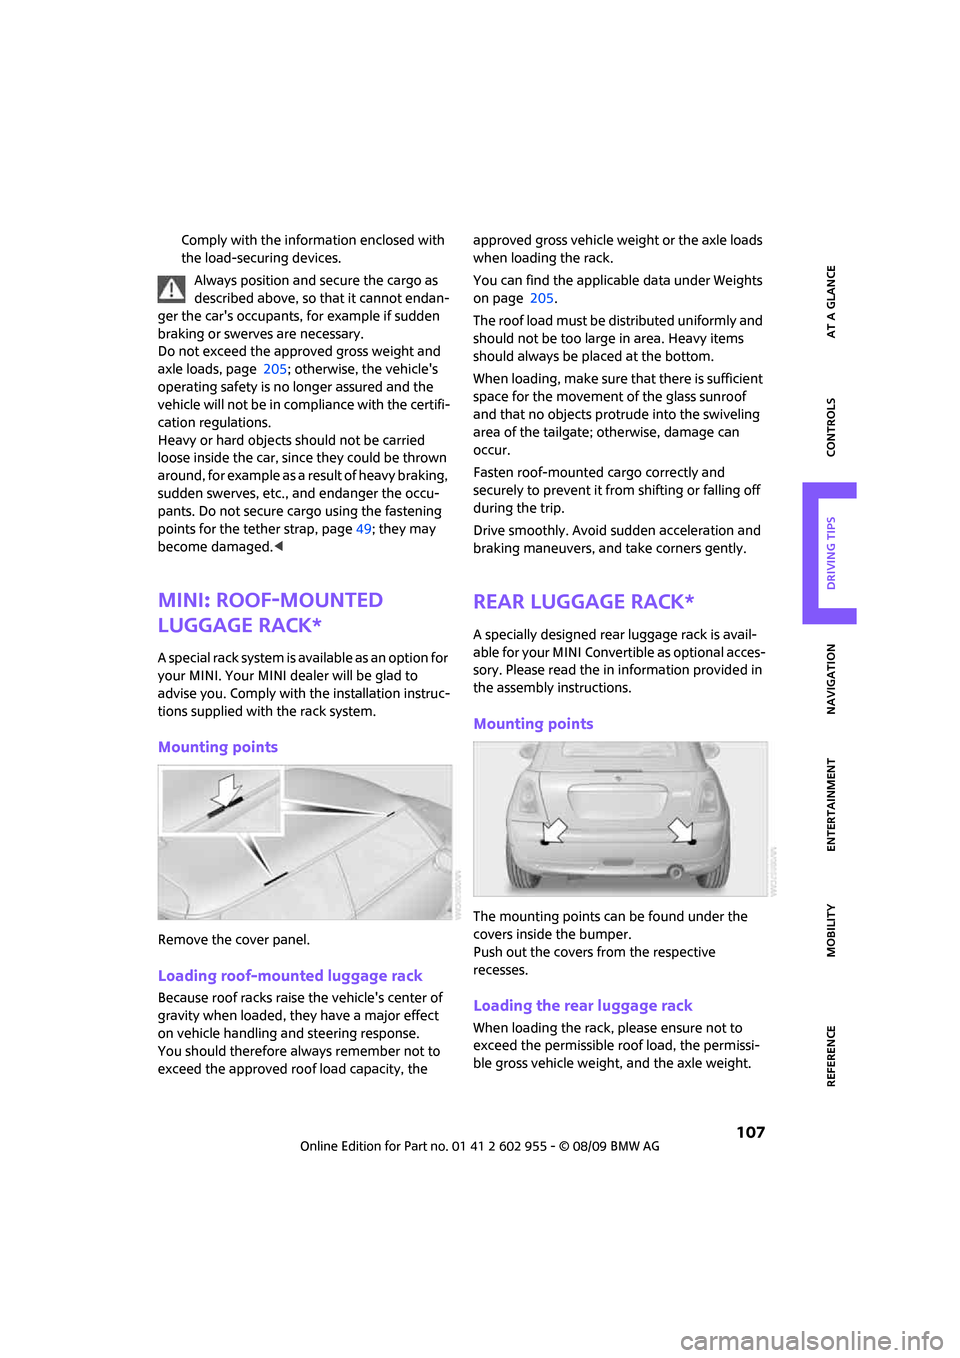
Mounting points
Remove the cover panel.
Loading roof-mounted luggage rack
Because roof racks raise the vehicle's center of
gravity when loaded, they have a major effect
on vehicle handling and steering response.
You should therefore always remember not to
exceed the approved roof load capacity, the approved gross vehicle weight or the axle loads
when loading the rack.
You can find the applicable data under Weights
on page 205.
The roof load must be distributed uniformly and
should not be too large in area. Heavy items
should always be placed at the bottom.
When loading, make sure that there is sufficient
space for the movement of the glass sunroof
and that no objects protrude into the swiveling
area of the tailgate; otherwise, damage can
occur.
Fasten roof-mounted cargo correctly and
securely to prevent it from shifting or falling off
during the trip.
Drive smoothly. Avoid sudden acceleration and
braking maneuvers, and take corners gently.
Rear luggage rack*
A specially designed rear luggage rack is avail-
able for your MINI Convertible as optional acces-
sory. Please read the in information provided in
the assembly instructions.
Mounting points
The mounting points can be found under the
covers inside the bumper.
Push out the covers from the respective
recesses.
Loading the rear luggage rack
When loading the rack, please ensure not to
exceed the permissible roof load, the permissi-
ble gross vehicle weight, and the axle weight.
Page 178 of 230

Under the bonnet
176
Under the bonnet
Do not work on the car unless you possess
the necessary technical knowledge. If you
are not familiar with the regulations to be
observed, have the necessary work on your
vehicle carried out only by a MINI dealer or a
workshop that has specially trained personnel
working in accordance with the specifications of
the MINI manufacturer. If this work is not carried
out properly, there is a danger of subsequent
damage and related safety hazards.<
Bonnet
Releasing
Pull the lever.
Do not clean the windshield and head-
lamps if the bonnet is unlocked as this
may damage the headlamp washer system
*.<
Opening
To avoid damage, make sure that the
wiper arms are against the windshield
before you open the bonnet.<
Press the release handle and open the bonnet.
Closing
Close the bonnet from a height of approx. 16 in/
40 cm with momentum. It must be clearly heard
to engage.
If you notice any signs while driving your
vehicle that the bonnet is not completely
closed, stop at once and close it securely.
Make sure that the closing path of the bonnet is
clear; otherwise, injuries may result.<
Page 187 of 230
MOBILITYAT A GLANCE CONTROLS DRIVING TIPS ENTERTAINMENT
185
NAVIGATION REFERENCE
Replacing components
Onboard vehicle tool kit
Your vehicle comes with an onboard vehicle tool
kit that varies with the equipment version; it is
stored underneath the level load floor.
>Mobility System with onboard vehicle tool
kit and tire change set
*190
>Tire change set with onboard vehicle tool kit
for space-saver spare tire192
Wiper blades
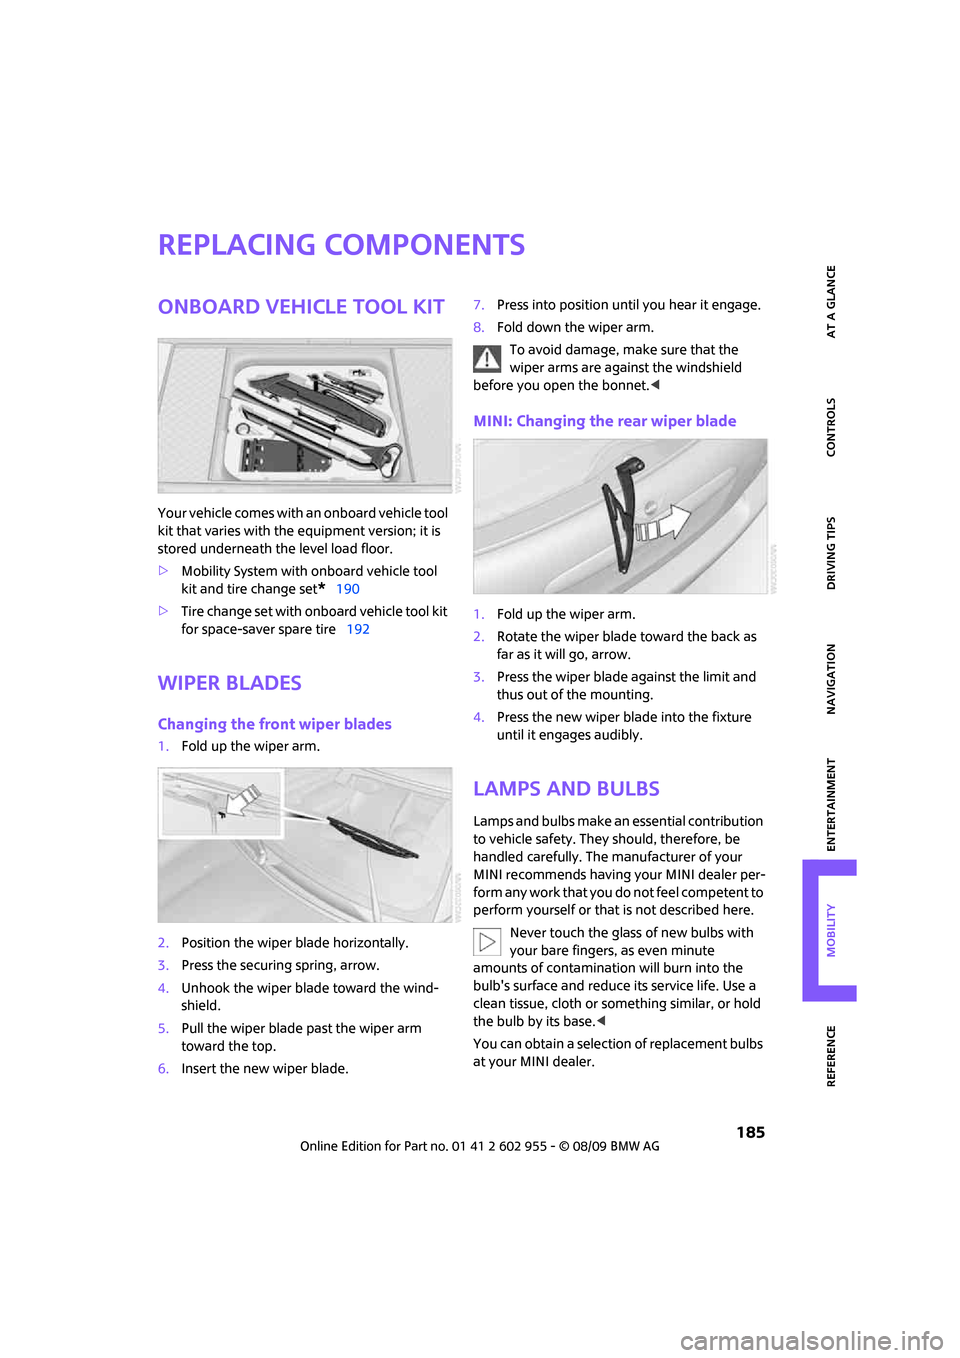
Changing the front wiper blades
1.Fold up the wiper arm.
2.Position the wiper blade horizontally.
3.Press the securing spring, arrow.
4.Unhook the wiper blade toward the wind-
shield.
5.Pull the wiper blade past the wiper arm
toward the top.
6.Insert the new wiper blade.7.Press into position until you hear it engage.
8.Fold down the wiper arm.
To avoid damage, make sure that the
wiper arms are against the windshield
before you open the bonnet.<
MINI: Changing the rear wiper blade
1.Fold up the wiper arm.
2.Rotate the wiper blade toward the back as
far as it will go, arrow.
3.Press the wiper blade against the limit and
thus out of the mounting.
4.Press the new wiper blade into the fixture
until it engages audibly.
Lamps and bulbs
Lamps and bulbs make an essential contribution
to vehicle safety. They should, therefore, be
handled carefully. The manufacturer of your
MINI recommends having your MINI dealer per-
f o r m a n y w o r k t h a t y o u d o n o t f e e l c o m p e t e n t t o
perform yourself or that is not described here.
Never touch the glass of new bulbs with
your bare fingers, as even minute
amounts of contamination will burn into the
bulb's surface and reduce its service life. Use a
clean tissue, cloth or something similar, or hold
the bulb by its base.<
You can obtain a selection of replacement bulbs
at your MINI dealer.
Page 195 of 230

MOBILITYAT A GLANCE CONTROLS DRIVING TIPS ENTERTAINMENT
193
NAVIGATION REFERENCE
Removing the space-saver spare tire
The screw connection of the space-saver spare
tire is under the floor mat in the cargo bay, on
the base of the storage compartment for the tire
change set.
1.Unscrew the screw connection with the spe-
cial wrench.
2.Take out the cover panel.
3.Screw the lifting handle from the onboard
vehicle tool kit onto the thread.
4.Raise the lifting handle slightly.
5.Squeeze the securing spring.
6.The space-saver spare tire is released and
must be held by the lifting handle.
7.Lower the space-saver spare tire with the
lifting handle.
8.Unscrew the lifting handle.9.Pull the space-saver spare tire underneath
the vehicle out towards the rear.
10.Position the space-saver spare tire with the
valve facing upward.
11.Unscrew the valve extension from the valve
of the space-saver spare tire.
12.Unscrew the dust cap from the extension
and place it on the valve of the space-saver
spare tire.
Due to its different dimensions, the dam-
aged wheel cannot be placed in the recess
for the space-saver spare tire.<
Driving with the space-saver spare tire
Drive cautiously and do not exceed a
speed of 50 mph/80 km/h. Changes may
occur in vehicle handling such as lower track sta-
bility during braking, longer braking distances
and changes in self-steering properties when
close to the handling limit. These properties are
more noticeable with winter tires.<
Only one space-saver spare tire may be
mounted at one time. Mount a wheel and
tire of the original size as soon as possible, to
avoid any safety risks.<
Check the tire inflation pressure at the ear-
liest opportunity and correct it if neces-
sary. Replace the defective tire as soon as possi-
ble and have the new wheel/tire assembly
balanced.<
Preparing for a tire change
Observe the safety precautions regarding
flat tires on page190.<
Additional safety measures when chang-
ing tires:
Page 196 of 230
Replacing components
194
Only change the tire when parked on a surface
that is level, firm and not slippery.
The vehicle or the jack could slip sideways on
soft or slippery support surfaces, such as snow,
ice, flagstones, etc.
Do not use a wooden block or similar object as a
support base for the jack, as this would prevent
it from extending to its full support height and
reduce its load-carrying capacity.
Do not lie under the vehicle or start the engine
when the vehicle is supported by the jack; other-
wise, there is a risk of fatal injury.<
1.Place the foldable chock
* behind the front
wheel on the other side of the vehicle or in
front of the wheel if the vehicle is on an
incline. If the wheel is changed on a surface
with a more severe slope, take additional
precautions to secure the vehicle from
rolling.
2.Uncover the lug bolts if necessary.
If the wheel is equipped with a hub cover,
pry it off using the screwdriver from the tire
change kit.
3.Loosen the lug bolts by a half turn.
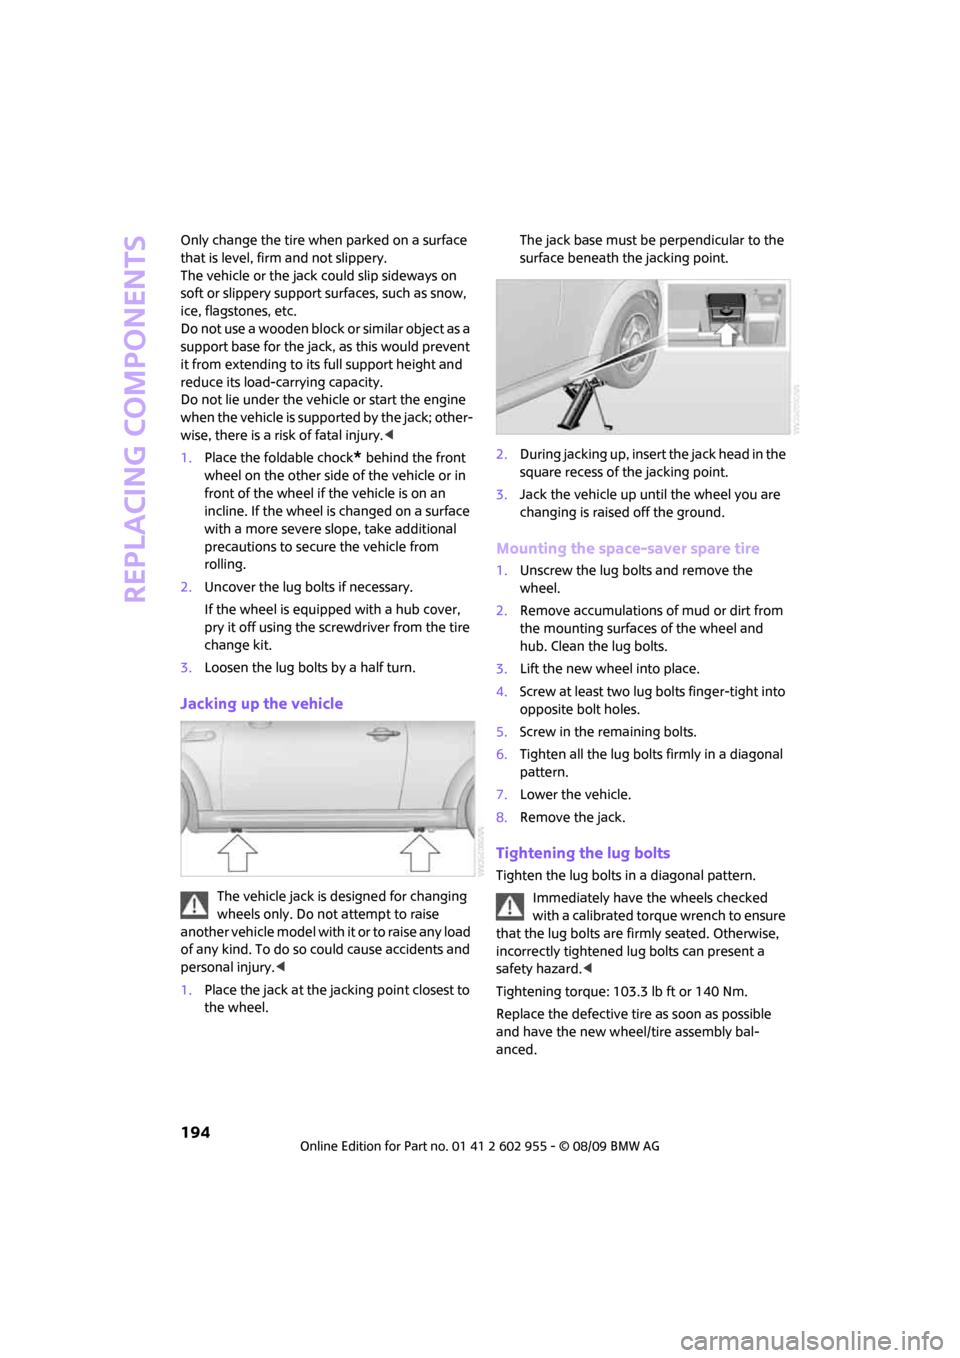
Jacking up the vehicle
The vehicle jack is designed for changing
wheels only. Do not attempt to raise
another vehicle model with it or to raise any load
of any kind. To do so could cause accidents and
personal injury.<
1.Place the jack at the jacking point closest to
the wheel.The jack base must be perpendicular to the
surface beneath the jacking point.
2.During jacking up, insert the jack head in the
square recess of the jacking point.
3.Jack the vehicle up until the wheel you are
changing is raised off the ground.
Mounting the space-saver spare tire
1.Unscrew the lug bolts and remove the
wheel.
2.Remove accumulations of mud or dirt from
the mounting surfaces of the wheel and
hub. Clean the lug bolts.
3.Lift the new wheel into place.
4.Screw at least two lug bolts finger-tight into
opposite bolt holes.
5.Screw in the remaining bolts.
6.Tighten all the lug bolts firmly in a diagonal
pattern.
7.Lower the vehicle.
8.Remove the jack.
Tightening the lug bolts
Tighten the lug bolts in a diagonal pattern.
Immediately have the wheels checked
with a calibrated torque wrench to ensure
that the lug bolts are firmly seated. Otherwise,
incorrectly tightened lug bolts can present a
safety hazard.<
Tightening torque: 103.3 lb ft or 140 Nm.
Replace the defective tire as soon as possible
and have the new wheel/tire assembly bal-
anced.
Page 197 of 230
MOBILITYAT A GLANCE CONTROLS DRIVING TIPS ENTERTAINMENT
195
NAVIGATION REFERENCE
Vehicle battery
Maintenance
The battery is 100 % maintenance-free, the
electrolyte will last for the life of the battery
when the vehicle is operated in a temperate
climate.
Battery replacement
Only use vehicle batteries that have been
approved for your vehicle by the manu-
facturer; otherwise, the vehicle could be dam-
aged and systems or functions may not be fully
available.<
After a battery replacement, have the battery
registered on the vehicle by your dealer to
ensure that all comfort functions are fully
available.
Charging the battery
Only charge the battery in the vehicle when the
engine is off. Connections, refer to Jump-start-
ing on page196.
Disposal
After replacing old batteries, return the
used batteries to your MINI dealer or to a
recycling point. Maintain the battery in an
upright position for transport and storage.
Always secure the battery against tipping over
during transport.<
Power failure
After a temporary power loss, some equipment
may not be fully functional and may require ini-
tialization. Individual settings are also lost and
must be reprogrammed:
>Time and date
These values must be updated, page68.
>Radio
In some cases, stations may have to be
stored again, page143.
>Navigation system
Operability must be waited for, page112.>Glass sunroof
*, electric
It may only be possible to raise the sunroof,
if applicable. The system must be initialized.
Contact your nearest MINI dealer.
Fuses
Do not attempt to repair a blown fuse or
replace it with a fuse of a different color or
Ampere rating. To do this could cause a fire in
the vehicle resulting from a circuit overload.
Have the fuse changed only by a MINI dealer or
a workshop that has specially trained personnel
working in accordance with the specifications of
the MINI manufacturer.<
A fuse allocation diagram is located on the inside
of the fuse box cover panels.
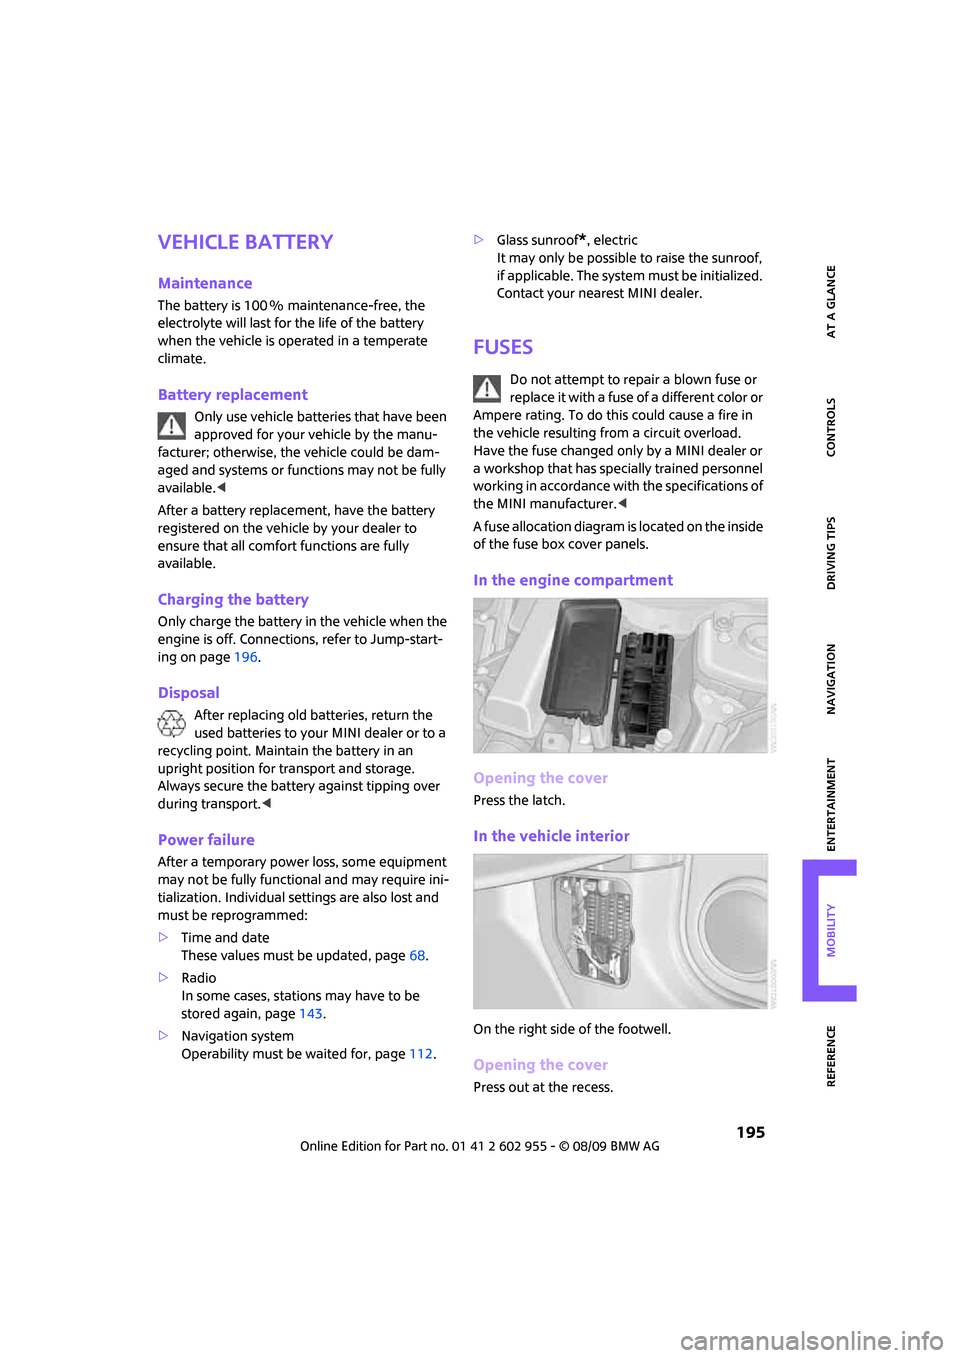
In the engine compartment
Opening the cover
Press the latch.
In the vehicle interior
On the right side of the footwell.
Opening the cover
Press out at the recess.
Page 215 of 230
213
MOBILITYAT A GLANCE CONTROLS DRIVING TIPS ENTERTAINMENT NAVIGATION REFERENCE
"Avoid highways" in
navigation124
Avoid highways in
navigation124
"Avoid tollroads" in
navigation124
Axle loads, refer to
Weights205
B
Background lighting, refer to
Ambient lighting90
Backrests, refer to Seats42
Backup lamps
– replacing bulb188,189
Balance, tone control139
Band-aids, refer to First aid
pouch196
Bar, refer to Tow-starting,
towing away198
Bass sounds, refer to Tone
control139
Bass sounds, refer to Treble
and bass139
Bass, tone control139
Battery195
– charging195
– disposal35,195
– jump-starting196
– temporary power failure195
Battery renewal
– remote control35
Being towed198
Belt tensioner, refer to Safety
belts45
Belts, refer to Safety belts45
Beverage holders, refer to
Cupholders97
Blower, refer to Air flow rate92
Bonnet176
Bottle holders, refer to
Cupholders97
Brake Assist76
Brake fluid, refer to Service
requirements65Brake lamps
– replacing bulbs189
Brake pads, breaking in102
Brake rotors103
– brakes102
– breaking in102
Brake system102
– breaking in102
– disc brakes103
– MINI Maintenance
System179
Brakes
– ABS76
– breaking in102
– MINI Maintenance
System179
– parking brake52
– service requirements65
Brakes, refer to Braking
safely103
Breakdown service, refer to
Roadside Assistance196
Break-in period
102
Breaking in the clutch102
"Brightness"on the Control
Display74
Bulb changing, refer to Lamps
and bulbs185
Button for starting the
engine51
Buttons on the steering
wheel11
C
California Proposition 65
warning5
Can holders, refer to
Cupholders97
Capacities206
Car battery, refer to Vehicle
battery195
Car care181
"Car Data"63
Car key, refer to Keys/remote
controls26Car phone
– installation location, refer to
Center armrest96
– refer to separate Owner's
Manual
Car radio, refer to Radio141
Car wash, care181
Car washes181
Care181
– car washes181
– car-care products181
– CD/DVD drives184
– external181
– high-pressure washers182
– internal183
– leather183
– manual washing182
– upholstery and fabrics183
– windows182
– wiper blades182
Cargo area
– capacity205
Cargo bay104
– Comfort Access34
– cover104
– lamp89
– opening from outside31
Cargo bay, expanding104
Cargo bay lamp89
Cargo bay lid, refer to
Tailgate31
Cargo loading105
– securing cargo106
– stowing cargo106
– vehicle104
Cargo, securing106
Carpets, care183
Catalytic converter, refer to
Hot exhaust system102
"Categories"147
"CD"138,149
Page 220 of 230
From A to Z
218
Information
– on another location120
– on country120
– on current position120
– on destination location120
"Information" in
navigation120
"Information on
destination"121
Initializing
– Flat Tire Monitor FTM79
– glass sunroof, electric36
Installation location
– drive for navigation DVD and
audio CD112
Instructions for navigation
system, refer to Voice
instructions129
Instrument cluster, refer to
Displays12
Instrument lighting89
Instrument panel, refer to
Cockpit10
Instrument panel, refer to
Displays12
Integrated key26
Integrated universal remote
control94
Interesting destination for
navigation120
"Interim time"73
Interior lamps89
– remote control29
Interior rearview mirror46
– automatic dimming
feature47
Interlock53
Intermittent mode of the
wipers56
Internet page4
J
Jacking points194
Jets, refer to Window washer
nozzles57Joystick, refer to Onboard
monitor16
Jumpering, refer to Jump-
starting196
Jump-starting196
K
Key Memory, refer to Personal
Profile26
Key, refer to Keys/remote
controls26
Keyless go, refer to Comfort
Access33
Keyless opening and closing,
refer to Comfort Access33
Kickdown54
– automatic transmission with
Steptronic54
Knock control163
L
Lamps and bulbs, replacing
bulbs185
Lamps, refer to Parking lamps/
Low beams87
"Language" in navigation129
"Languages" in
navigation112
Lashing eyes, refer to Securing
cargo106
Last destinations, refer to
Destination list121
LATCH child-restraint fixing
system49
Leather care183
LEDs light-emitting diodes186
Length, refer to
Dimensions203
License plate lamp
– bulb replacement189
Light switch87
Light-alloy wheels, care183
Light-emitting diodes
LEDs186Lighter97
– socket98
"Lighting"88
Lighting
– lamps and bulbs185
– of the instruments89
– of vehicle, refer to Lamps87
"Limit"73
Limit, refer to Speed limit72
Load105
Load securing equipment,
refer to Securing cargo106
Lock buttons of doors, refer to
Locking30
Locking
– adjusting confirmation
signal28
– from inside30
– from outside28
– without remote control, refer
to Comfort Access33
Locking and unlocking doors
– confirmation signals28
– from inside30
– from outside27
Low beams87
– automatic87
– replacing bulb186
Lower back support, refer to
Lumbar support43
Luggage compartment
– emergency operation, refer
to Manual release31
– increasing the capacity105
– opening from the inside31
Luggage compartment lid
– emergency operation, refer
to Manual release31
Luggage compartment lid,
refer to Tailgate31
Luggage compartment, refer
to Cargo bay31
Luggage rack, refer to Roof-
mounted luggage rack107
Lumbar support43