lock MINI Hardtop 2 Door 2010 (Mini Connected) Owner's Guide
[x] Cancel search | Manufacturer: MINI, Model Year: 2010, Model line: Hardtop 2 Door, Model: MINI Hardtop 2 Door 2010Pages: 230, PDF Size: 4.02 MB
Page 64 of 230

Controls overview
62
To reset average fuel consumption: press the
button in the turn indicator lever for approx.
2seconds.
Current fuel consumption
Displays the current fuel consumption to allow
you to see whether your current driving style is
conducive to fuel economy with minimum
exhaust emissions.
Average speed
Periods with the vehicle parked and the engine
switched off are not included in the calculations
of average speed.
With the trip computer, page63, you can have
the average speed for another trip displayed.
To reset average speed: press the button in the
turn indicator lever for approx. 2 seconds.
Current vehicle speed
To have the current speed shown in the upper
display otherwise serving for the outside tem-
perature display and clock.
1.Press the button in the turn indicator lever
repeatedly until the current speed appears
in the lower display.
2.Wait for the speed display to automatically
move to the upper display.
The outside temperature then appears in the
lower display of the computer.
Always Open Timer
If driving the MINI Convertible with its soft top
down, the driving times are displayed digitally
on the tachometer.
The following driving times are displayed:1Total driving time
2Current driving time
To reset the display2:
Press the button on the turn signal lever or the
button to reset the trip odometer, page 12, for
approx. 2 seconds.
To reset the total driving time, contact your MINI
dealer.
Analog to Always Open Timer
The analog Always Open Timer indicates the
number of hours and minutes that you drove
with the convertible top down. A maximum of
6 hours and 59 minutes can be displayed.
The total driving time is displayed digitally in the
tachometer.
1LED hour display
2Minute display
Displays on the Control Display
To open the computer via the onboard monitor,
basic operation on page16.
1.Press the button.
This opens the start menu.
2.Move the MINI joystick to highlight "Naviga-
tion" and press the MINI joystick.
Page 70 of 230

Controls overview
68
Clock
In the tachometer
Setting the time
1.Briefly press the button in the turn indicator
lever repeatedly until "SET/INFO" is dis-
played.
2.Press and hold the button until the display
changes.
3.Briefly press the button repeatedly until the
symbol and "SET" are displayed.
4.Press and hold the button until the display
changes.
5.Press the button to set the hours.
6.Wait for the display to change to minutes.
7.Press the button to set the minutes.
8.Wait for the display to change.
The settings are stored.
On the onboard monitor
Setting the time
1.Press the button once or twice until the
start menu appears.
2.Move the MINI joystick to highlight "Setup"
and press the MINI joystick.
3.Turn the MINI joystick until "Settings" is
selected and press the MINI joystick.
4.Turn the MINI joystick until "Time / Date" is
selected and press the MINI joystick.
Page 78 of 230
Technology for driving comfort and safety
76
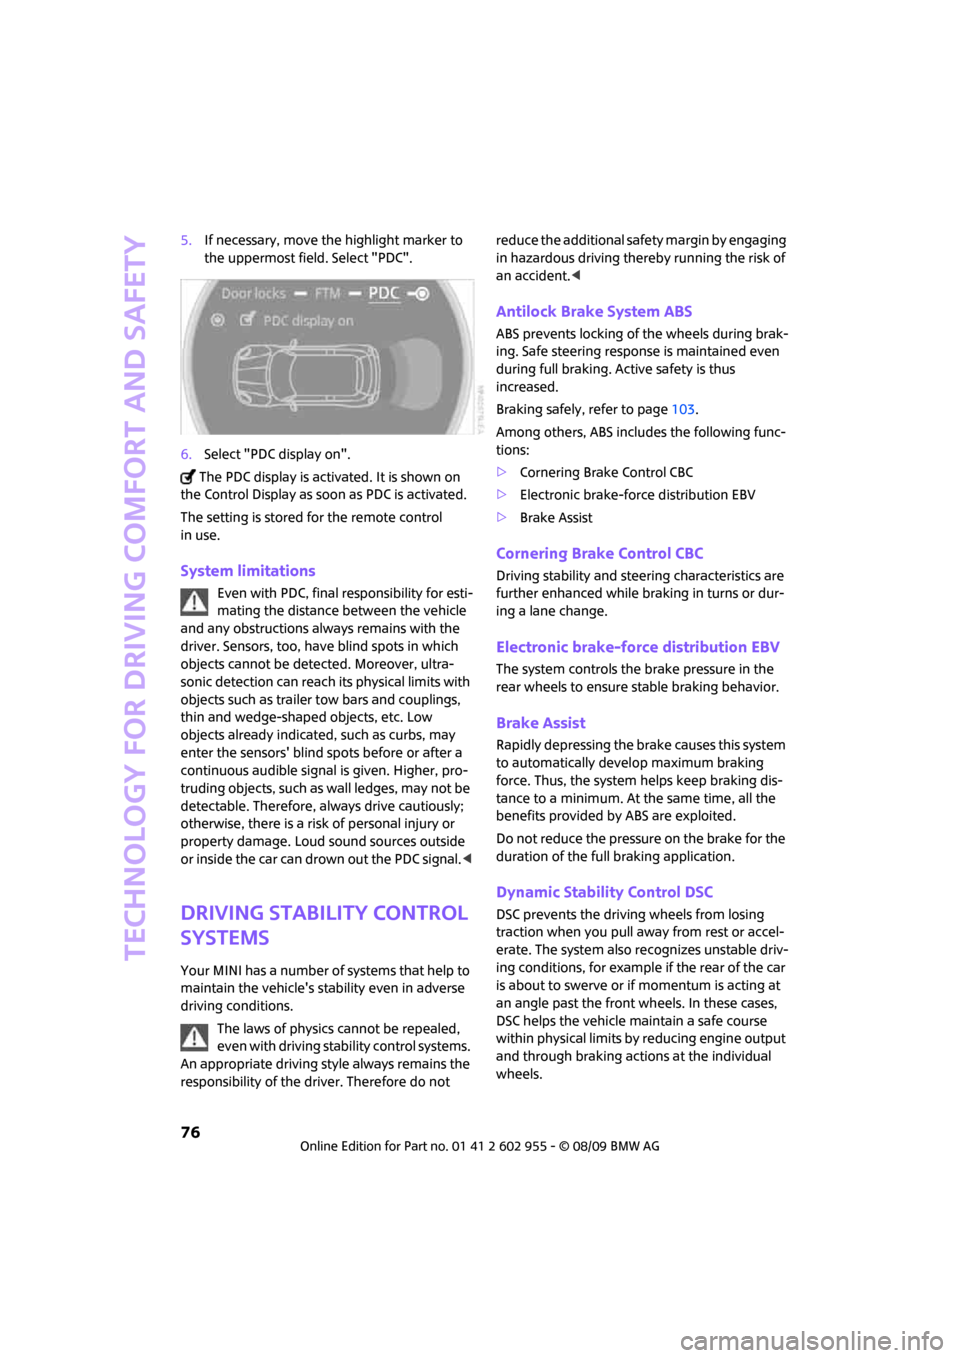
5.If necessary, move the highlight marker to
the uppermost field. Select "PDC".
6.Select "PDC display on".
The PDC display is activated. It is shown on
the Control Display as soon as PDC is activated.
The setting is stored for the remote control
in use.
System limitations
Even with PDC, final responsibility for esti-
mating the distance between the vehicle
and any obstructions always remains with the
driver. Sensors, too, have blind spots in which
objects cannot be detected. Moreover, ultra-
sonic detection can reach its physical limits with
objects such as trailer tow bars and couplings,
thin and wedge-shaped objects, etc. Low
objects already indicated, such as curbs, may
enter the sensors' blind spots before or after a
continuous audible signal is given. Higher, pro-
truding objects, such as wall ledges, may not be
detectable. Therefore, always drive cautiously;
otherwise, there is a risk of personal injury or
property damage. Loud sound sources outside
or inside the car can drown out the PDC signal.<
Driving stability control
systems
Your MINI has a number of systems that help to
maintain the vehicle's stability even in adverse
driving conditions.
The laws of physics cannot be repealed,
even with driving stability control systems.
An appropriate driving style always remains the
responsibility of the driver. Therefore do not reduce the additional safety margin by engaging
in hazardous driving thereby running the risk of
an accident.<
Antilock Brake System ABS
ABS prevents locking of the wheels during brak-
ing. Safe steering response is maintained even
during full braking. Active safety is thus
increased.
Braking safely, refer to page103.
Among others, ABS includes the following func-
tions:
>Cornering Brake Control CBC
>Electronic brake-force distribution EBV
>Brake Assist
Cornering Brake Control CBC
Driving stability and steering characteristics are
further enhanced while braking in turns or dur-
ing a lane change.
Electronic brake-force distribution EBV
The system controls the brake pressure in the
rear wheels to ensure stable braking behavior.
Brake Assist
Rapidly depressing the brake causes this system
to automatically develop maximum braking
force. Thus, the system helps keep braking dis-
tance to a minimum. At the same time, all the
benefits provided by ABS are exploited.
Do not reduce the pressure on the brake for the
duration of the full braking application.
Dynamic Stability Control DSC
DSC prevents the driving wheels from losing
traction when you pull away from rest or accel-
erate. The system also recognizes unstable driv-
ing conditions, for example if the rear of the car
is about to swerve or if momentum is acting at
an angle past the front wheels. In these cases,
DSC helps the vehicle maintain a safe course
within physical limits by reducing engine output
and through braking actions at the individual
wheels.
Page 79 of 230

MOBILITYAT A GLANCE CONTROLS DRIVING TIPS ENTERTAINMENT
77
NAVIGATION REFERENCE
DSC also encompasses the following functions:
>Antilock Brake System ABS
>Electronic brake-force distribution EBV
>Brake Assist
>Cornering Brake Control CBC
>Hill Assist
Deactivating DSC
Press the button repeatedly until the DSC indica-
tor lamps come on. DSC is deactivated. Stabiliz-
ing and propulsion promoting actions are no
longer executed.
When driving with snow chains or to 'rock free'
in snow, it can be helpful to switch off DSC for a
brief period.
To increase vehicle stability, activate DSC again
as soon as possible.
Activating DSC
Press the button again: the DSC indicator lamps
go out.
For better control
If the indicator lamp flashes:
The DSC controls the driving and break-
ing forces.
If the indicator lamps are on:
DSC is deactivated.
Dynamic Traction Control DTC*
DTC is a type of DSC that is propulsion optimized
for special road conditions such as uncleared
snowy roads. The system ensures maximum
propulsion though with restricted driving stabil-
ity. You therefore need to drive with suitable
caution.
In the following exceptional situations, it can be
useful to briefly activate DTC:
>when driving on snow-covered inclines, in
slush, or on uncleared snowy roads
>when rocking the vehicle free, driving out of
deep snow or on loose surfaces
>when driving with snow chains
Activating DTC
Press the button: the DTC indicator lamps
come on.
For better control
If the indicator lamp flashes:
DTC controls the driving and breaking
forces.
If the indicator lamps are on:
DTC is activated.
Deactivating DTC
Press the button again: the DSC indicator lamps
go out.
Page 80 of 230
Technology for driving comfort and safety
78
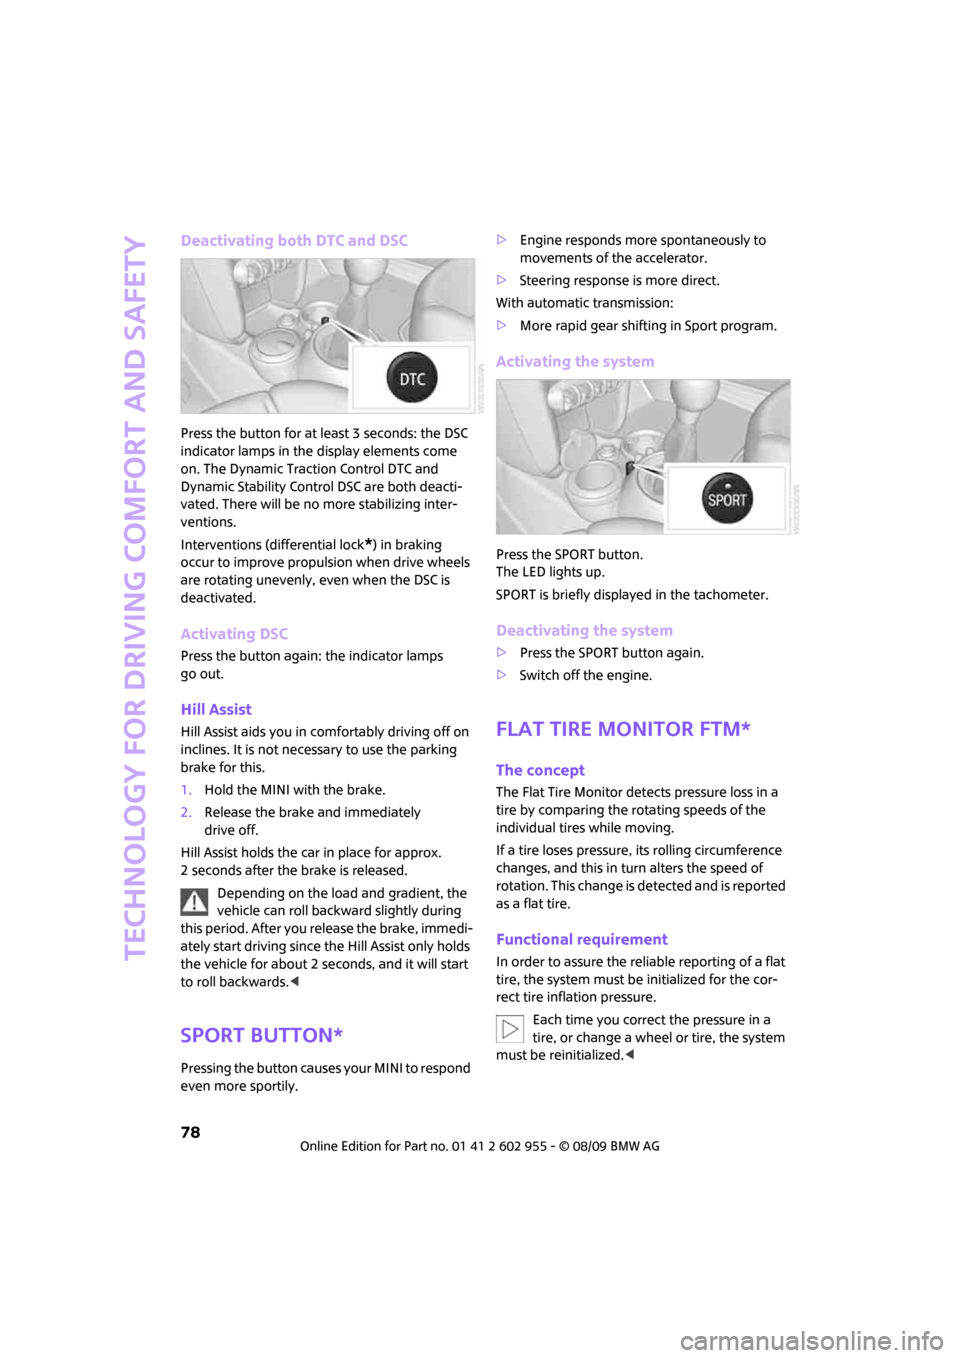
Deactivating both DTC and DSC
Press the button for at least 3 seconds: the DSC
indicator lamps in the display elements come
on. The Dynamic Traction Control DTC and
Dynamic Stability Control DSC are both deacti-
vated. There will be no more stabilizing inter-
ventions.
Interventions (differential lock
*) in braking
occur to improve propulsion when drive wheels
are rotating unevenly, even when the DSC is
deactivated.
Activating DSC
Press the button again: the indicator lamps
go out.
Hill Assist
Hill Assist aids you in comfortably driving off on
inclines. It is not necessary to use the parking
brake for this.
1.Hold the MINI with the brake.
2.Release the brake and immediately
drive off.
Hill Assist holds the car in place for approx.
2 seconds after the brake is released.
Depending on the load and gradient, the
vehicle can roll backward slightly during
this period. After you release the brake, immedi-
ately start driving since the Hill Assist only holds
the vehicle for about 2 seconds, and it will start
to roll backwards.<
Sport button*
Pressing the button causes your MINI to respond
even more sportily.>Engine responds more spontaneously to
movements of the accelerator.
>Steering response is more direct.
With automatic transmission:
>More rapid gear shifting in Sport program.
Activating the system
Press the SPORT button.
The LED lights up.
SPORT is briefly displayed in the tachometer.
Deactivating the system
>Press the SPORT button again.
>Switch off the engine.
Flat Tire Monitor FTM*
The concept
The Flat Tire Monitor detects pressure loss in a
tire by comparing the rotating speeds of the
individual tires while moving.
If a tire loses pressure, its rolling circumference
changes, and this in turn alters the speed of
rotation. This change is detected and is reported
as a flat tire.
Functional requirement
In order to assure the reliable reporting of a flat
tire, the system must be initialized for the cor-
rect tire inflation pressure.
Each time you correct the pressure in a
tire, or change a wheel or tire, the system
must be reinitialized.<
Page 88 of 230

Technology for driving comfort and safety
86
Operational readiness of airbag system
As of radio readiness, page51, the warning
lamp comes on briefly to indicate that the entire
airbag system and the belt tensioners are oper-
ational.
Airbag system malfunction
>The warning lamp does not come on
when radio readiness or the ignition is
switched on.
>The warning lamp stays lit continuously.
In the event of a fault in the airbag system,
have it checked without delay; otherwise,
there is the risk that the system will not function
as intended even if a severe accident occurs.<
MINI Convertible:
Rollover protection
system
The rollover system is automatically activated
during an accident or dangerous driving situa-
tion, during extreme tilt of the longitudinal axis,
or during loss of ground contact. The roll bar
located behind the rear seat headrest is pro-
jected within a fraction of a second.
In addition to the reinforced windshield frame,
the rollover protection system ensures the nec-
essary head clearance for all occupants of the
vehicle.
Never block the travel path of the rollover
protection system with any objects.
Always wear your safety belt, it protects you in a
minor car accident and, depending on the
severity of the accident, the seat belt tensioner and the multilevel airbag system will
protect you.<
Lowering
If the rollover protection system releases acci-
dentally, have your MINI Service check it.
If the rollover protective system is
extended, do not operate the conver-
tible top.
Never attempt to modify the individual compo-
nents or the electrical wiring of the rollover pro-
tective system.
Have the necessary work on the rollover protec-
tion system of your MINI only carried out by an
authorized MINI dealer.
Faulty repair may lead to the failure of the sys-
tem or malfunctions.
Check the system regularly and in order to
ensure a long service life of all functions, it is
mandatory to maintain the service intervals,
refer to page65.<
Page 89 of 230
MOBILITYAT A GLANCE CONTROLS DRIVING TIPS ENTERTAINMENT
87
NAVIGATION REFERENCE
Lamps
Parking lamps/low beams
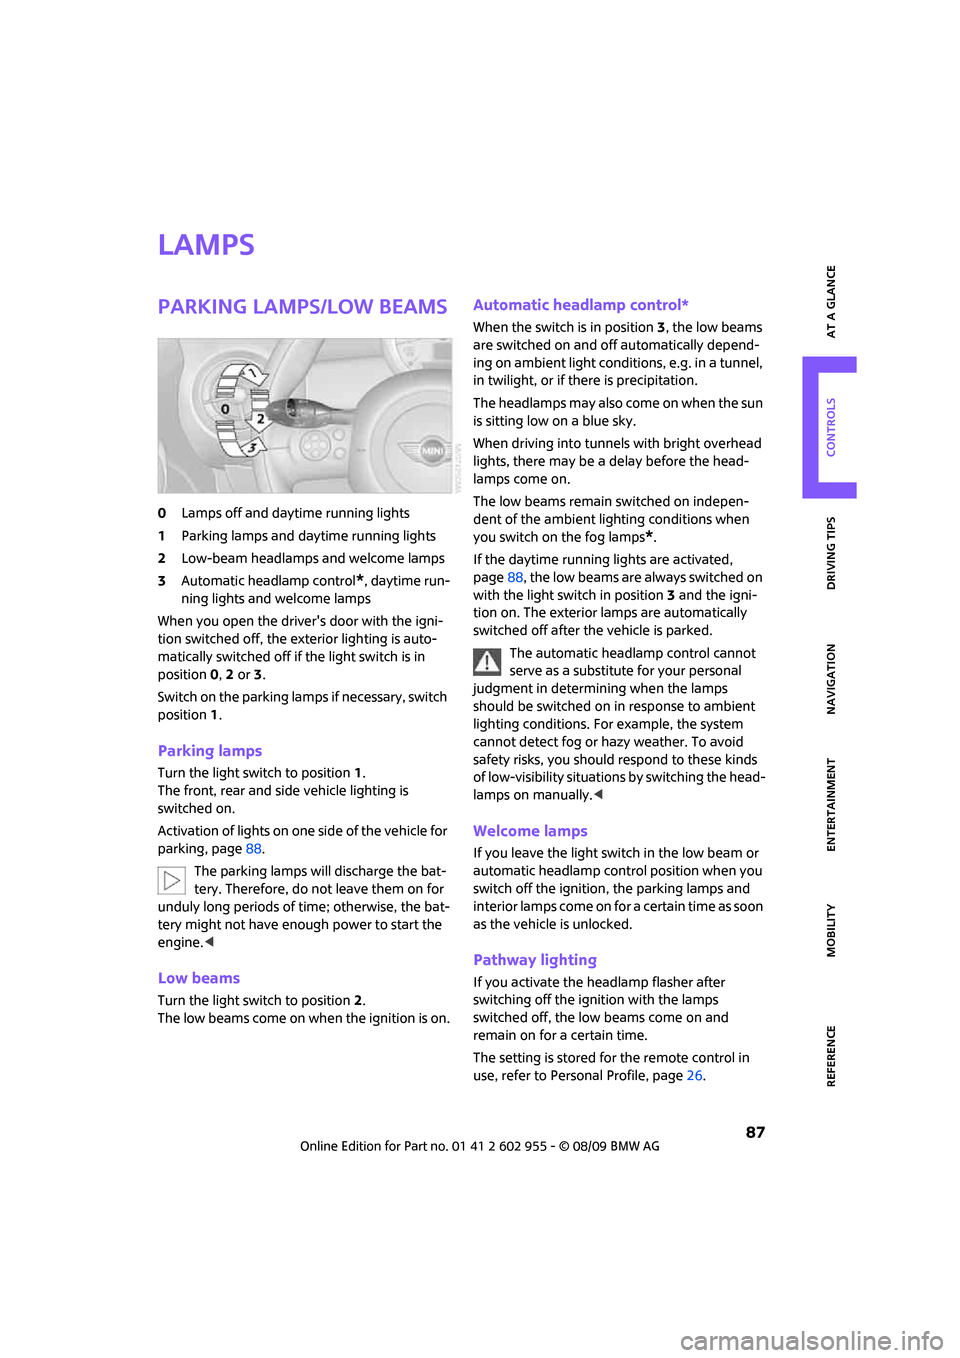
0Lamps off and daytime running lights
1Parking lamps and daytime running lights
2Low-beam headlamps and welcome lamps
3Automatic headlamp control
*, daytime run-
ning lights and welcome lamps
When you open the driver's door with the igni-
tion switched off, the exterior lighting is auto-
matically switched off if the light switch is in
position 0, 2 or 3.
Switch on the parking lamps if necessary, switch
position 1.
Parking lamps
Turn the light switch to position 1.
The front, rear and side vehicle lighting is
switched on.
Activation of lights on one side of the vehicle for
parking, page88.
The parking lamps will discharge the bat-
tery. Therefore, do not leave them on for
unduly long periods of time; otherwise, the bat-
tery might not have enough power to start the
engine.<
Low beams
Turn the light switch to position 2.
The low beams come on when the ignition is on.
Automatic headlamp control*
When the switch is in position3, the low beams
are switched on and off automatically depend-
ing on ambient light conditions, e.g. in a tunnel,
in twilight, or if there is precipitation.
The headlamps may also come on when the sun
is sitting low on a blue sky.
When driving into tunnels with bright overhead
lights, there may be a delay before the head-
lamps come on.
The low beams remain switched on indepen-
dent of the ambient lighting conditions when
you switch on the fog lamps
*.
If the daytime running lights are activated,
page88, the low beams are always switched on
with the light switch in position 3 and the igni-
tion on. The exterior lamps are automatically
switched off after the vehicle is parked.
The automatic headlamp control cannot
serve as a substitute for your personal
judgment in determining when the lamps
should be switched on in response to ambient
lighting conditions. For example, the system
cannot detect fog or hazy weather. To avoid
safety risks, you should respond to these kinds
of low-visibility situations by switching the head-
lamps on manually.<
Welcome lamps
If you leave the light switch in the low beam or
automatic headlamp control position when you
switch off the ignition, the parking lamps and
interior lamps come on for a certain time as soon
as the vehicle is unlocked.
Pathway lighting
If you activate the headlamp flasher after
switching off the ignition with the lamps
switched off, the low beams come on and
remain on for a certain time.
The setting is stored for the remote control in
use, refer to Personal Profile, page26.
Page 98 of 230
Practical interior accessories
96
To prevent injury in the event of an acci-
dent, close the glove compartment after
use while the vehicle is being driven.<
MINI Convertible: Locking
Use the integrated key to lock the remote con-
trol system, refer to page26.
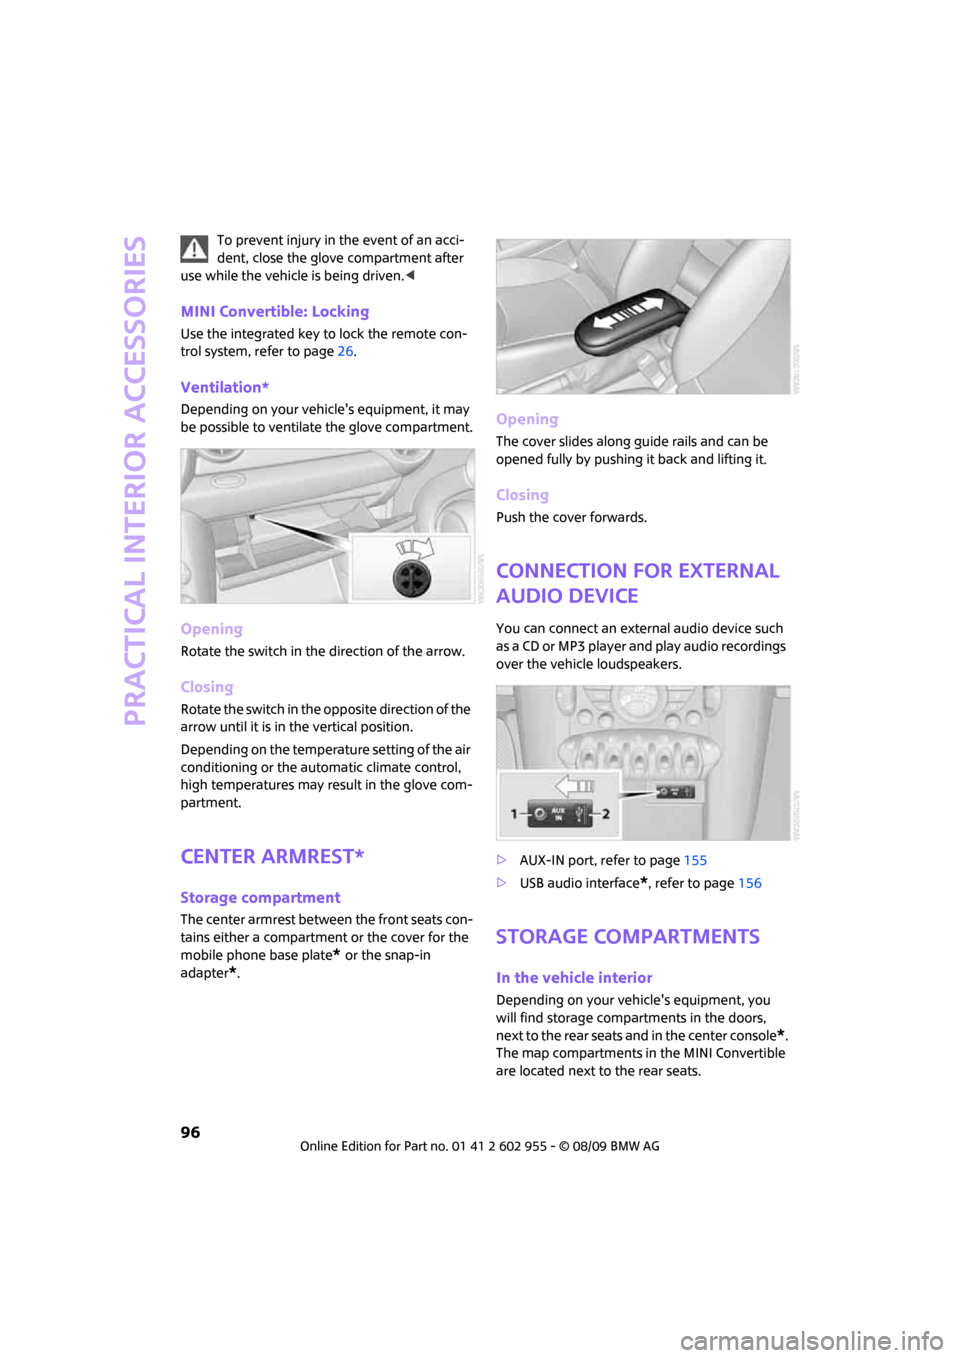
Ventilation*
Depending on your vehicle's equipment, it may
be possible to ventilate the glove compartment.
Opening
Rotate the switch in the direction of the arrow.
Closing
Rotate the switch in the opposite direction of the
arrow until it is in the vertical position.
Depending on the temperature setting of the air
conditioning or the automatic climate control,
high temperatures may result in the glove com-
partment.
Center armrest*
Storage compartment
The center armrest between the front seats con-
tains either a compartment or the cover for the
mobile phone base plate
* or the snap-in
adapter
*.
Opening
The cover slides along guide rails and can be
opened fully by pushing it back and lifting it.
Closing
Push the cover forwards.
Connection for external
audio device
You can connect an external audio device such
as a CD or MP3 player and play audio recordings
over the vehicle loudspeakers.
>AUX-IN port, refer to page155
>USB audio interface
*, refer to page156
Storage compartments
In the vehicle interior
Depending on your vehicle's equipment, you
will find storage compartments in the doors,
next to the rear seats and in the center console
*.
The map compartments in the MINI Convertible
are located next to the rear seats.
Page 99 of 230
MOBILITYAT A GLANCE CONTROLS DRIVING TIPS ENTERTAINMENT
97
NAVIGATION REFERENCE
Nets* are located in the passenger footwell and
on the backs of the front seat backrests.
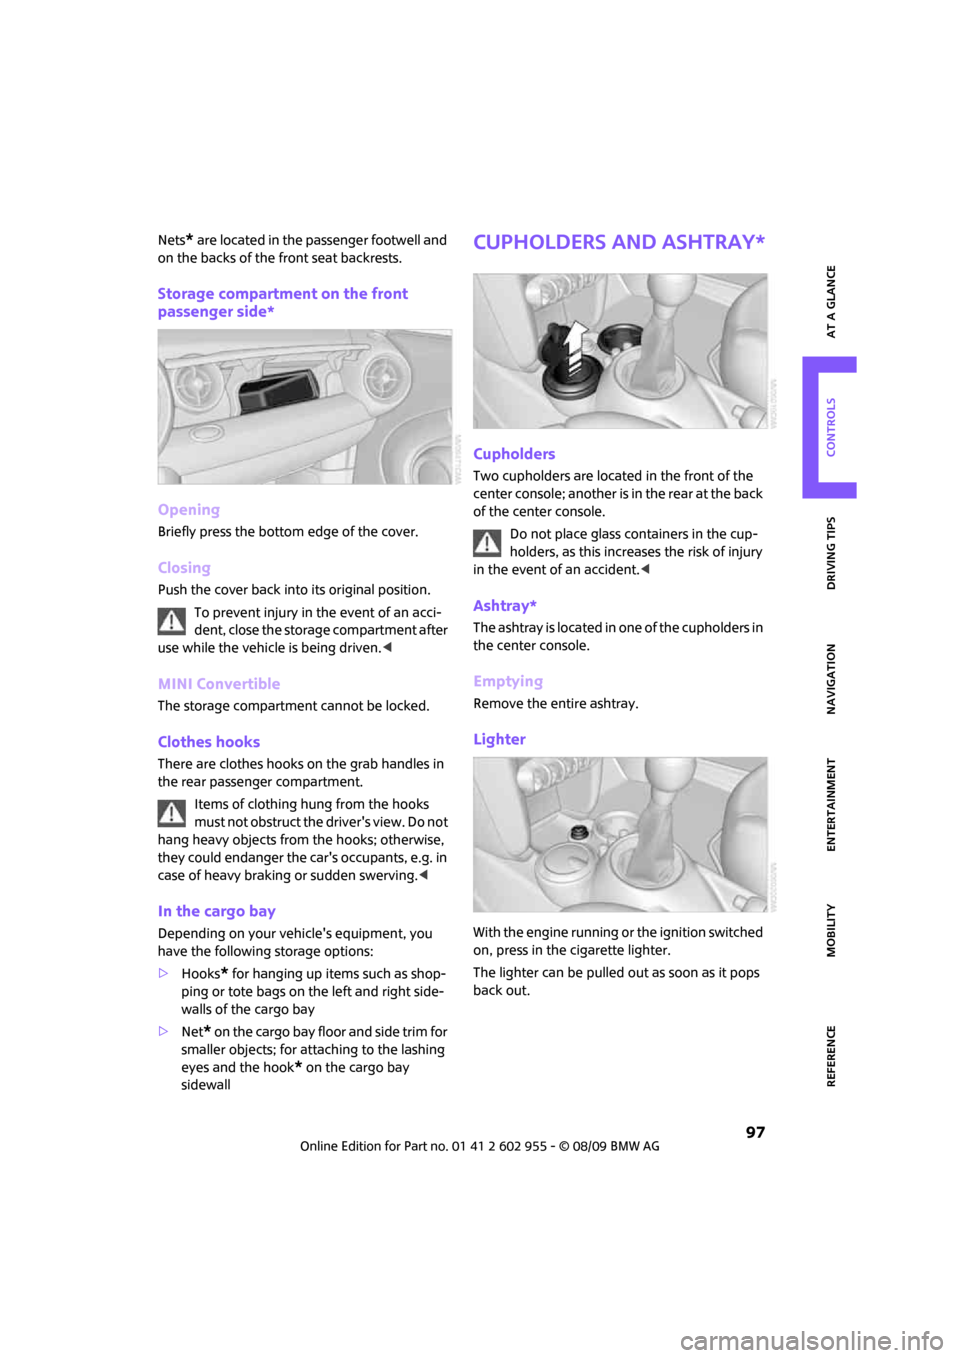
Storage compartment on the front
passenger side*
Opening
Briefly press the bottom edge of the cover.
Closing
Push the cover back into its original position.
To prevent injury in the event of an acci-
dent, close the storage compartment after
use while the vehicle is being driven.<
MINI Convertible
The storage compartment cannot be locked.
Clothes hooks
There are clothes hooks on the grab handles in
the rear passenger compartment.
Items of clothing hung from the hooks
must not obstruct the driver's view. Do not
hang heavy objects from the hooks; otherwise,
they could endanger the car's occupants, e.g. in
case of heavy braking or sudden swerving.<
In the cargo bay
Depending on your vehicle's equipment, you
have the following storage options:
>Hooks
* for hanging up items such as shop-
ping or tote bags on the left and right side-
walls of the cargo bay
>Net
* on the cargo bay floor and side trim for
smaller objects; for attaching to the lashing
eyes and the hook
* on the cargo bay
sidewall
Cupholders and ashtray*
Cupholders
Two cupholders are located in the front of the
center console; another is in the rear at the back
of the center console.
Do not place glass containers in the cup-
holders, as this increases the risk of injury
in the event of an accident.<
Ashtray*
The ashtray is located in one of the cupholders in
the center console.
Emptying
Remove the entire ashtray.
Lighter
With the engine running or the ignition switched
on, press in the cigarette lighter.
The lighter can be pulled out as soon as it pops
back out.
Page 106 of 230
Things to remember when driving
104
Cargo loading
To avoid loading the tires beyond their
approved carrying capacity, never over-
load the vehicle. Overloading can lead to over-
heating and increases the rate at which damage
develops inside the tires. The ultimate result can
assume the form of a sudden blowout.<
Avoid fluid spills in the cargo bay as they
could damage the vehicle.<
MINI: Cargo bay
Cargo bay cover
Do not place any objects on the cover;
otherwise, they could endanger the car's
occupants, e.g. in the case of braking or sudden
swerving, or they may damage the cover.<
When you open the tailgate, the cargo bay cover
is raised.
To load bulky luggage, the cover can be
removed.
1.Unhook the lift straps from the tailgate.
2.Pull the cover out of the holders toward
the rear.
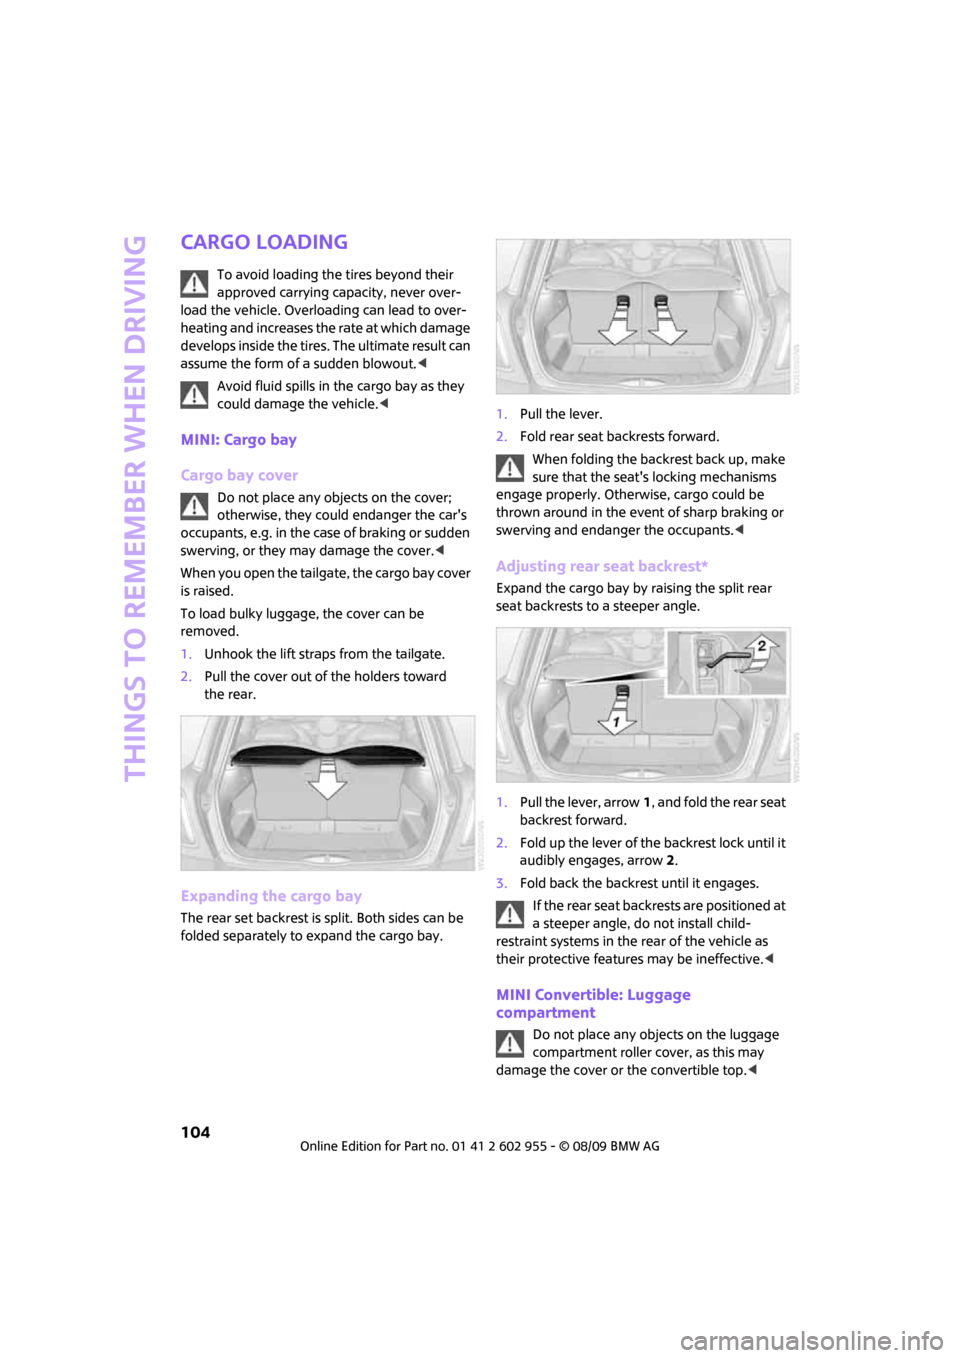
Expanding the cargo bay
The rear set backrest is split. Both sides can be
folded separately to expand the cargo bay.1.Pull the lever.
2.Fold rear seat backrests forward.
When folding the backrest back up, make
sure that the seat's locking mechanisms
engage properly. Otherwise, cargo could be
thrown around in the event of sharp braking or
swerving and endanger the occupants.<
Adjusting rear seat backrest*
Expand the cargo bay by raising the split rear
seat backrests to a steeper angle.
1.Pull the lever, arrow1, and fold the rear seat
backrest forward.
2.Fold up the lever of the backrest lock until it
audibly engages, arrow2.
3.Fold back the backrest until it engages.
If the rear seat backrests are positioned at
a steeper angle, do not install child-
restraint systems in the rear of the vehicle as
their protective features may be ineffective.<
MINI Convertible: Luggage
compartment
Do not place any objects on the luggage
compartment roller cover, as this may
damage the cover or the convertible top.<