display MINI Hardtop 2 Door 2010 (Mini Connected) Service Manual
[x] Cancel search | Manufacturer: MINI, Model Year: 2010, Model line: Hardtop 2 Door, Model: MINI Hardtop 2 Door 2010Pages: 230, PDF Size: 4.02 MB
Page 83 of 230
MOBILITYAT A GLANCE CONTROLS DRIVING TIPS ENTERTAINMENT
81
NAVIGATION REFERENCE
Status indicator on the onboard monitor
The tire and system condition is indicated by the
color of the tires.
TPM takes into account the fact that tire pres-
sure changes while the vehicle is being driven.
The tire pressure does not need to be corrected
unless the TPM instructs you to do so by means
of color indicators.
Green
The tire inflation pressure corresponds to the
established target value.
"TPM active" is displayed on the onboard
monitor.
One wheel yellow
There is a flat tire or substantial loss of tire pres-
sure in the indicated tire. A message appears on
the onboard monitor.
All wheels yellow
There is a flat tire or substantial loss of tire pres-
sure in several tires. A message appears on the
onboard monitor.
Gray
The system cannot detect a puncture.
Possible reasons for this:
>TPM is being reset
>Temporary malfunction caused by systems
or devices using the same radio frequency
>Malfunction
Resetting the system
Each time a tire inflation pressure has
been corrected or a wheel or tire has been
changed, reset the system.<
Using the onboard monitor
Onboard monitor, for operating principle refer
to page16.
1.Press the button.
This opens the start menu.
2.Move the MINI joystick to highlight "Setup"
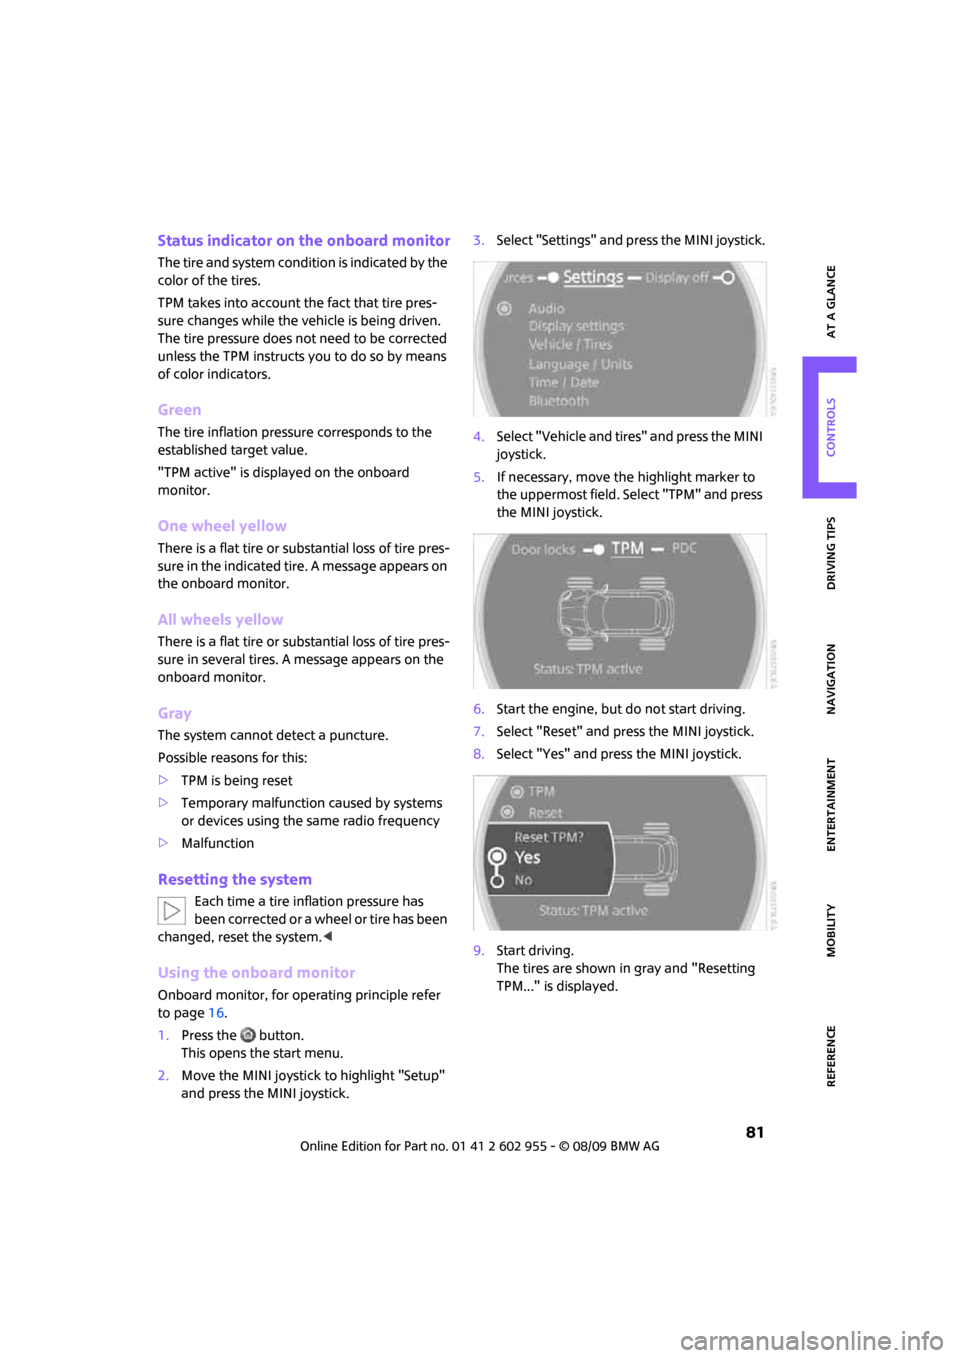
and press the MINI joystick.3.Select "Settings" and press the MINI joystick.
4.Select "Vehicle and tires" and press the MINI
joystick.
5.If necessary, move the highlight marker to
the uppermost field. Select "TPM" and press
the MINI joystick.
6.Start the engine, but do not start driving.
7.Select "Reset" and press the MINI joystick.
8.Select "Yes" and press the MINI joystick.
9.Start driving.
The tires are shown in gray and "Resetting
TPM..." is displayed.
Page 84 of 230
Technology for driving comfort and safety
82
After driving a few minutes, the set inflation
pressures in the tires are accepted as the target
values to be monitored. The system reset is
completed during your drive, and can be inter-
rupted at any time. When driving resumes, the
reset is continued automatically. On the
onboard monitor, the tires are shown in green
and "Status: TPM active" is displayed again.
If a flat tire is detected while the system is
being reset and while it is determining the
inflation pressures, all tires on the onboard mon-
itor are displayed in yellow. The message "Tire
low!" is shown.<
Message for low tire inflation pressure
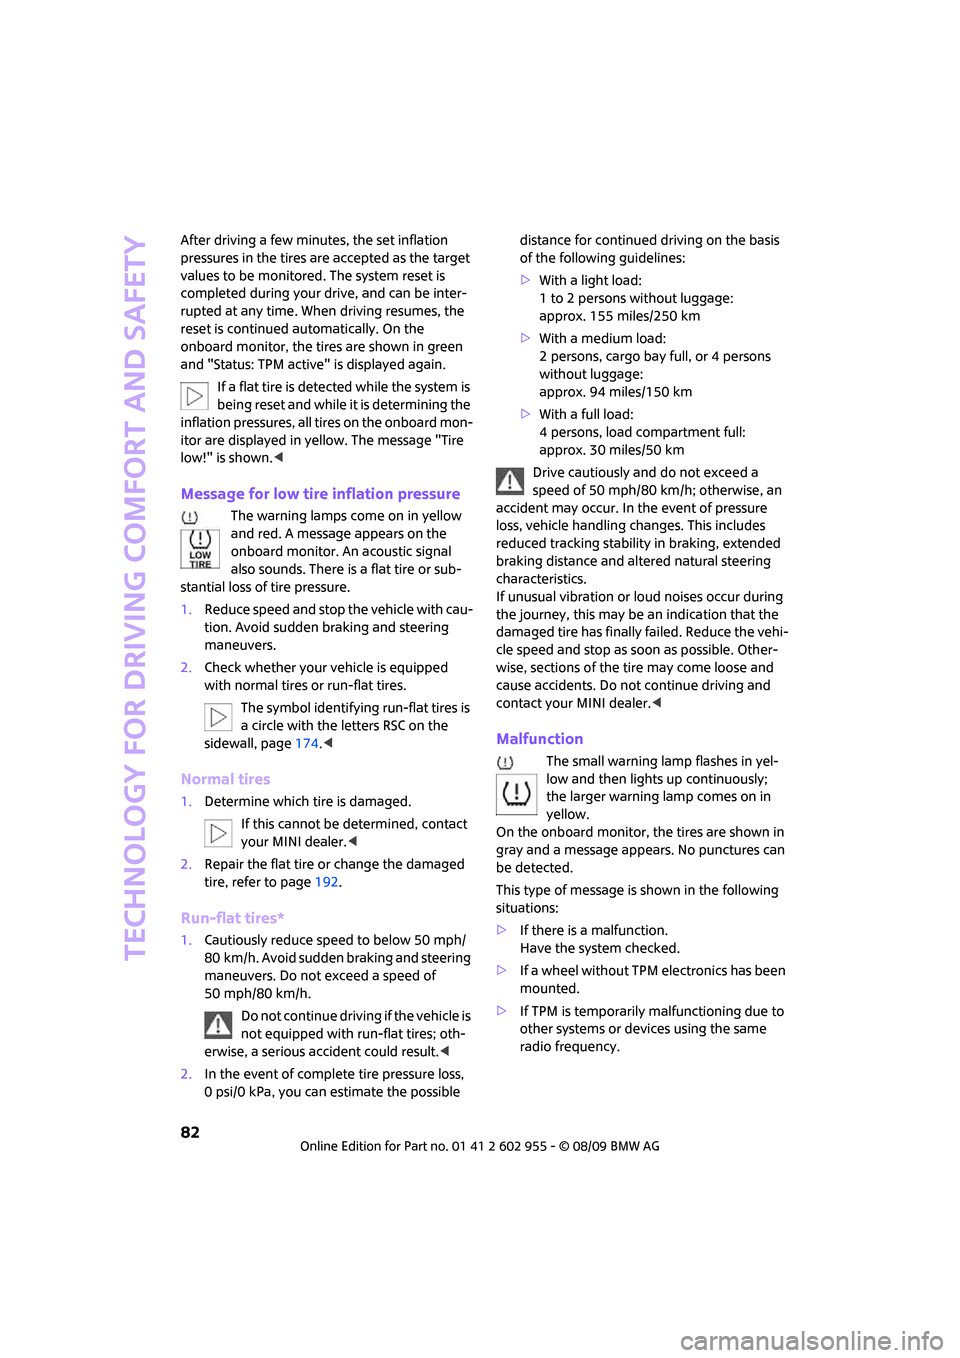
The warning lamps come on in yellow
and red. A message appears on the
onboard monitor. An acoustic signal
also sounds. There is a flat tire or sub-
stantial loss of tire pressure.
1.Reduce speed and stop the vehicle with cau-
tion. Avoid sudden braking and steering
maneuvers.
2.Check whether your vehicle is equipped
with normal tires or run-flat tires.
The symbol identifying run-flat tires is
a circle with the letters RSC on the
sidewall, page174.<
Normal tires
1.Determine which tire is damaged.
If this cannot be determined, contact
your MINI dealer.<
2.Repair the flat tire or change the damaged
tire, refer to page192.
Run-flat tires*
1.Cautiously reduce speed to below 50 mph/
80 km/h. Avoid sudden braking and steering
maneuvers. Do not exceed a speed of
50 mph/80 km/h.
Do not continue driving if the vehicle is
not equipped with run-flat tires; oth-
erwise, a serious accident could result.<
2.In the event of complete tire pressure loss,
0 psi/0 kPa, you can estimate the possible distance for continued driving on the basis
of the following guidelines:
>With a light load:
1 to 2 persons without luggage:
approx. 155 miles/250 km
>With a medium load:
2 persons, cargo bay full, or 4 persons
without luggage:
approx. 94 miles/150 km
>With a full load:
4 persons, load compartment full:
approx. 30 miles/50 km
Drive cautiously and do not exceed a
speed of 50 mph/80 km/h; otherwise, an
accident may occur. In the event of pressure
loss, vehicle handling changes. This includes
reduced tracking stability in braking, extended
braking distance and altered natural steering
characteristics.
If unusual vibration or loud noises occur during
the journey, this may be an indication that the
damaged tire has finally failed. Reduce the vehi-
cle speed and stop as soon as possible. Other-
wise, sections of the tire may come loose and
cause accidents. Do not continue driving and
contact your MINI dealer.<
Malfunction
The small warning lamp flashes in yel-
low and then lights up continuously;
the larger warning lamp comes on in
yellow.
On the onboard monitor, the tires are shown in
gray and a message appears. No punctures can
be detected.
This type of message is shown in the following
situations:
>If there is a malfunction.
Have the system checked.
>If a wheel without TPM electronics has been
mounted.
>If TPM is temporarily malfunctioning due to
other systems or devices using the same
radio frequency.
Page 94 of 230
Climate
92
Automatic climate
control
Comfortable interior climate
AUTO program6 offers the ideal air distribution
and air flow rate for almost all conditions, refer
to AUTO program below. All you need to do is
select an interior temperature which is comfort-
able for you.
The following sections inform you in detail about
how to adjust the settings.
Most settings are stored for the remote control
currently in use, refer also to Personal Profile set-
tings on page26.
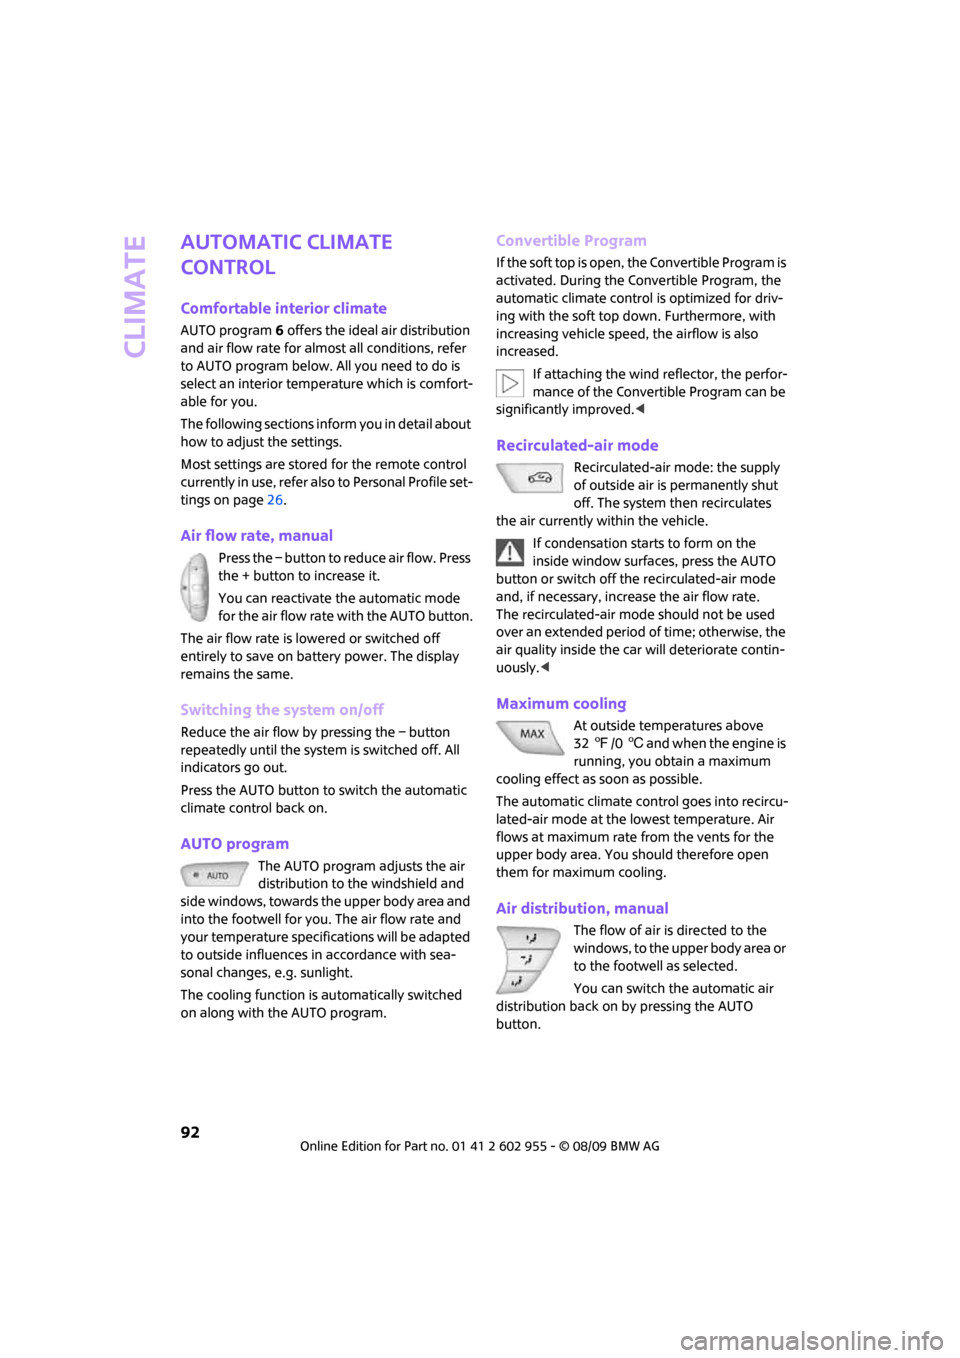
Air flow rate, manual
Press the – button to reduce air flow. Press
the + button to increase it.
You can reactivate the automatic mode
for the air flow rate with the AUTO button.
The air flow rate is lowered or switched off
entirely to save on battery power. The display
remains the same.
Switching the system on/off
Reduce the air flow by pressing the – button
repeatedly until the system is switched off. All
indicators go out.
Press the AUTO button to switch the automatic
climate control back on.
AUTO program
The AUTO program adjusts the air
distribution to the windshield and
side windows, towards the upper body area and
into the footwell for you. The air flow rate and
your temperature specifications will be adapted
to outside influences in accordance with sea-
sonal changes, e.g. sunlight.
The cooling function is automatically switched
on along with the AUTO program.
Convertible Program
If the soft top is open, the Convertible Program is
activated. During the Convertible Program, the
automatic climate control is optimized for driv-
ing with the soft top down. Furthermore, with
increasing vehicle speed, the airflow is also
increased.
If attaching the wind reflector, the perfor-
mance of the Convertible Program can be
significantly improved.<
Recirculated-air mode
Recirculated-air mode: the supply
of outside air is permanently shut
off. The system then recirculates
the air currently within the vehicle.
If condensation starts to form on the
inside window surfaces, press the AUTO
button or switch off the recirculated-air mode
and, if necessary, increase the air flow rate.
The recirculated-air mode should not be used
over an extended period of time; otherwise, the
air quality inside the car will deteriorate contin-
uously.<
Maximum cooling
At outside temperatures above
327/06 and when the engine is
running, you obtain a maximum
cooling effect as soon as possible.
The automatic climate control goes into recircu-
lated-air mode at the lowest temperature. Air
flows at maximum rate from the vents for the
upper body area. You should therefore open
them for maximum cooling.
Air distribution, manual
The flow of air is directed to the
windows, to the upper body area or
to the footwell as selected.
You can switch the automatic air
distribution back on by pressing the AUTO
button.
Page 95 of 230
MOBILITYAT A GLANCE CONTROLS DRIVING TIPS ENTERTAINMENT
93
NAVIGATION REFERENCE
Temperature
Set the desired temperature individually.
The automatic climate control achieves
this temperature as quickly as possible
regardless of the season, using maximum
cooling or heating power if necessary, and then
maintains it.
If you switch between different tempera-
ture settings in quick succession, the auto-
matic climate control does not have enough
time to achieve the set temperature.<
Rear window defroster
The defroster is switched off auto-
matically after a certain time.
Depending on your vehicle's equip-
ment, the upper wires serve as an
antenna and are not part of the rear window
defroster.
Defrosting windows and removing
condensation
Quickly removes ice and condensa-
tion from the windshield and front
side windows.
For this purpose, also switch on the
cooling function.
The windshield heating
* is switched on auto-
matically.
Windshield heating*
The windshield heating is switched
off automatically after a certain
time.
Cooling function
When the cooling function is on,
the air is cooled, dried, then
reheated according to the temper-
ature setting. This function is only
available while the engine is running.
The cooling function helps prevent condensa-
tion on the windows or removes it quickly.Depending on the weather, the windshield may
fog over briefly when the engine is started. The
recirculated-air mode may be switched on auto-
matically.
The cooling function is automatically switched
on along with the AUTO program. The passenger
compartment can only be cooled while the
engine is running.
Microfilter/activated-charcoal filter
The microfilter captures dust and pollen. The
activated-charcoal filter provides additional pro-
tection by filtering gaseous pollutants from the
outside air. Your MINI dealer replaces this com-
bined filter as a standard part of your scheduled
maintenance.
You can call up further information in the service
requirements display, page65.
Ventilation
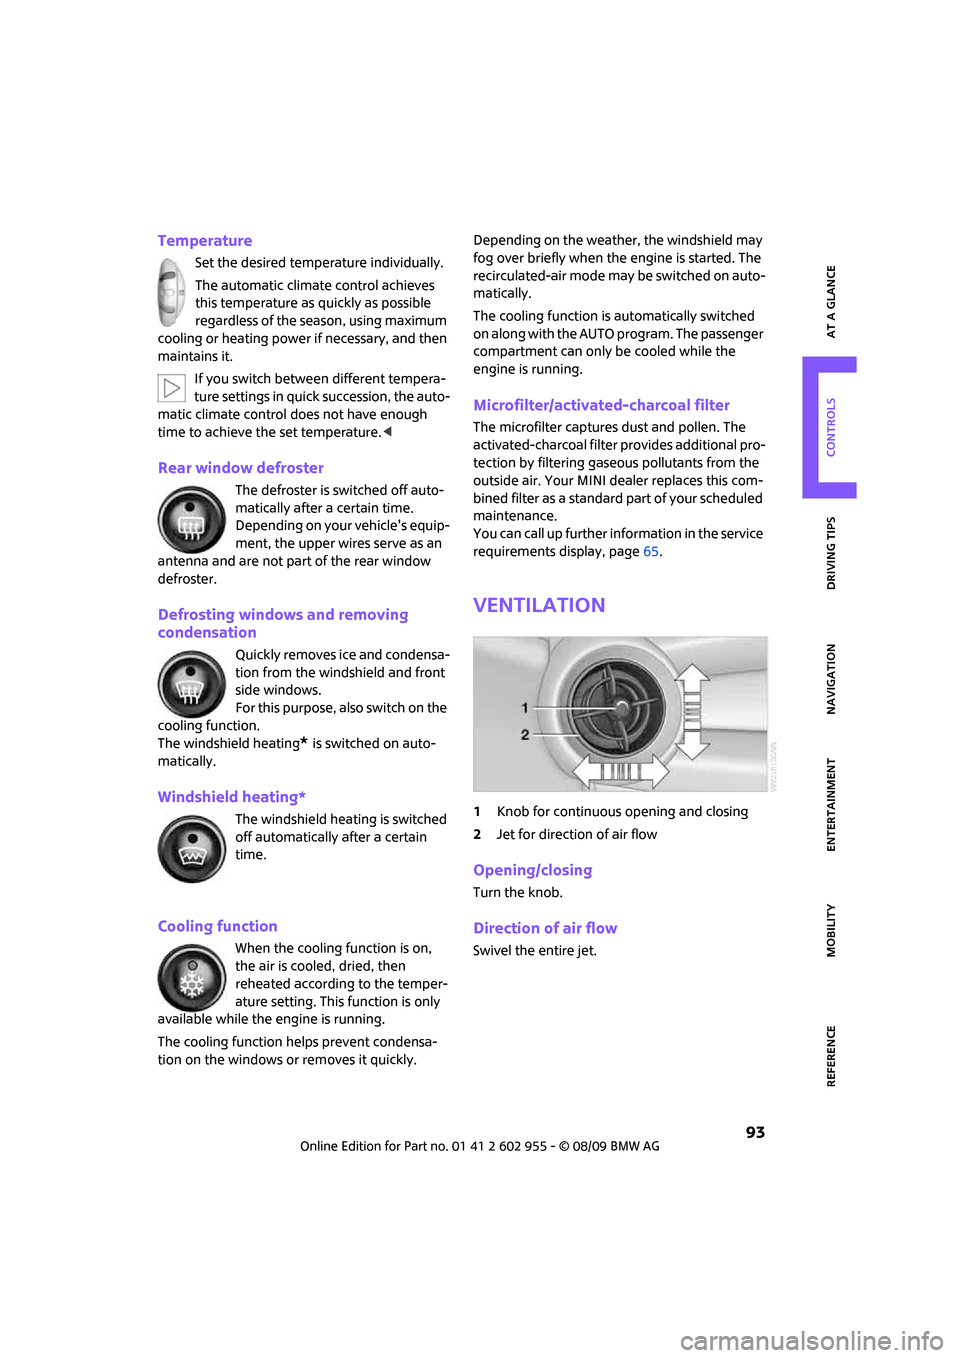
1Knob for continuous opening and closing
2Jet for direction of air flow
Opening/closing
Turn the knob.
Direction of air flow
Swivel the entire jet.
Page 114 of 230
Starting the navigation system
112
Starting the navigation system
Your navigation system can use satellites to
ascertain the precise position of your vehicle
and guide you reliably to any destination you
enter.
Navigation DVD
The navigation system requires a special naviga-
tion DVD. You can obtain the latest version from
your MINI dealer.
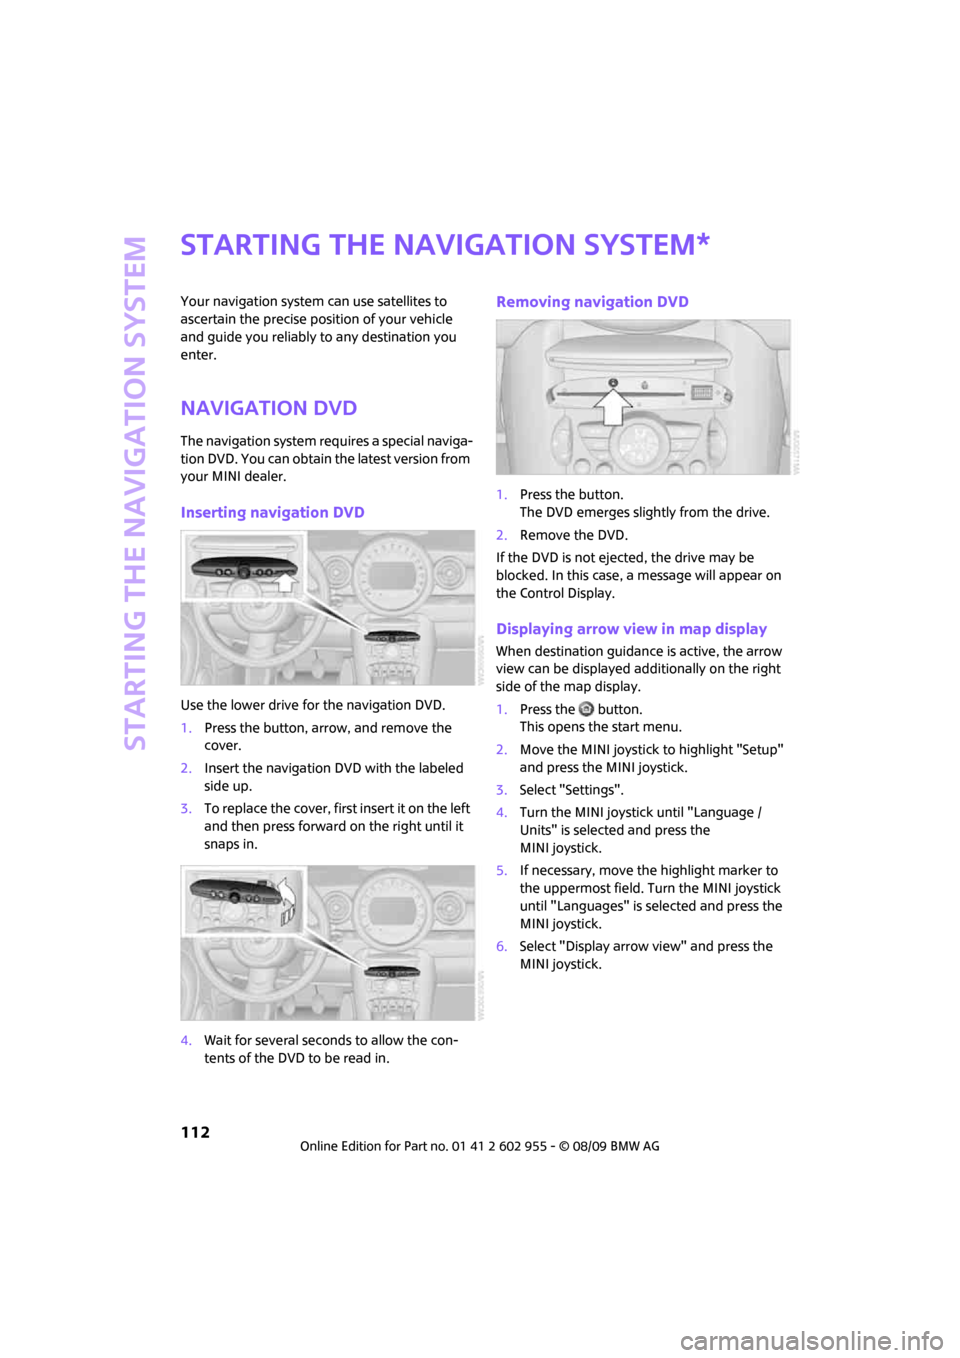
Inserting navigation DVD
Use the lower drive for the navigation DVD.
1.Press the button, arrow, and remove the
cover.
2.Insert the navigation DVD with the labeled
side up.
3.To replace the cover, first insert it on the left
and then press forward on the right until it
snaps in.
4.Wait for several seconds to allow the con-
tents of the DVD to be read in.
Removing navigation DVD
1.Press the button.
The DVD emerges slightly from the drive.
2.Remove the DVD.
If the DVD is not ejected, the drive may be
blocked. In this case, a message will appear on
the Control Display.
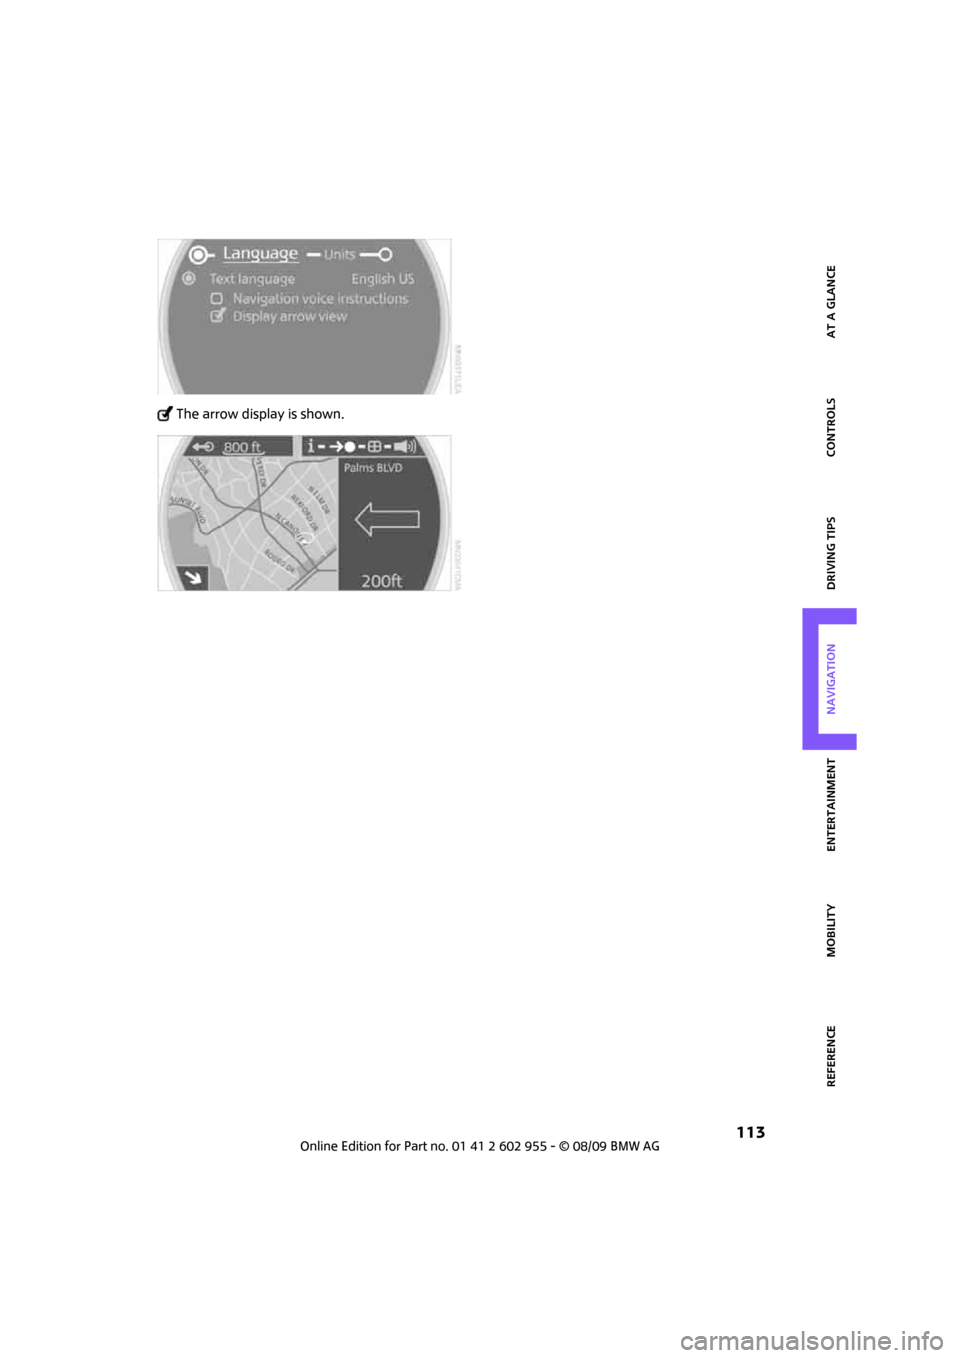
Displaying arrow view in map display
When destination guidance is active, the arrow
view can be displayed additionally on the right
side of the map display.
1.Press the button.
This opens the start menu.
2.Move the MINI joystick to highlight "Setup"
and press the MINI joystick.
3.Select "Settings".
4.Turn the MINI joystick until "Language /
Units" is selected and press the
MINI joystick.
5.If necessary, move the highlight marker to
the uppermost field. Turn the MINI joystick
until "Languages" is selected and press the
MINI joystick.
6.Select "Display arrow view" and press the
MINI joystick.
*
Page 115 of 230
MOBILITYAT A GLANCE CONTROLS DRIVING TIPS ENTERTAINMENT
113
NAVIGATION REFERENCE
The arrow display is shown.
Page 116 of 230
Destination entry
114
Destination entry
In entering your destination you can select from
the following options:
>Entering a destination manually, see below
>Entering a destination by voice commands*,
page117
>Selecting destination using information,
page120
>Selecting destination from a list, Destination
list, page121
>Selecting destination from address book,
page121
>Storing home address, page123
After selecting your destination you can proceed
to start the destination guidance, page126.
Enter data only when the vehicle is sta-
tionary, and always give priority to the
applicable traffic regulations in the event of any
contradiction between traffic and road condi-
tions and the instructions issued by the naviga-
tion system. If you do not observe this precau-
tion, you may be in violation of the law, and can
endanger vehicle occupants and other road
users.<
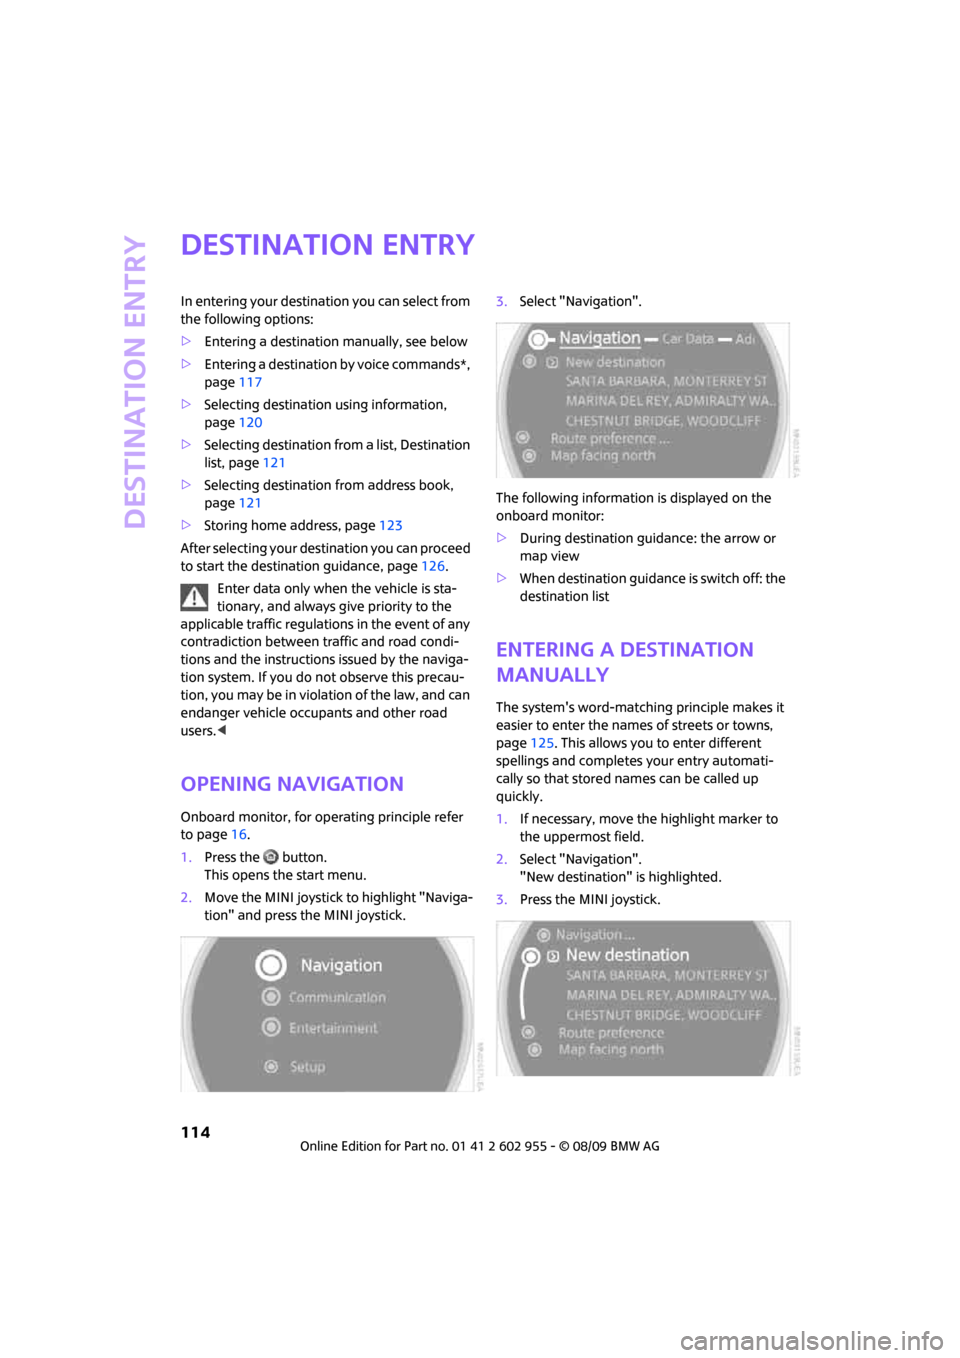
Opening navigation
Onboard monitor, for operating principle refer
to page16.
1.Press the button.
This opens the start menu.
2.Move the MINI joystick to highlight "Naviga-
tion" and press the MINI joystick.3.Select "Navigation".
The following information is displayed on the
onboard monitor:
>During destination guidance: the arrow or
map view
>When destination guidance is switch off: the
destination list
Entering a destination
manually
The system's word-matching principle makes it
easier to enter the names of streets or towns,
page125. This allows you to enter different
spellings and completes your entry automati-
cally so that stored names can be called up
quickly.
1.If necessary, move the highlight marker to
the uppermost field.
2.Select "Navigation".
"New destination" is highlighted.
3.Press the MINI joystick.
Page 117 of 230
MOBILITYAT A GLANCE CONTROLS DRIVING TIPS ENTERTAINMENT
115
NAVIGATION REFERENCE
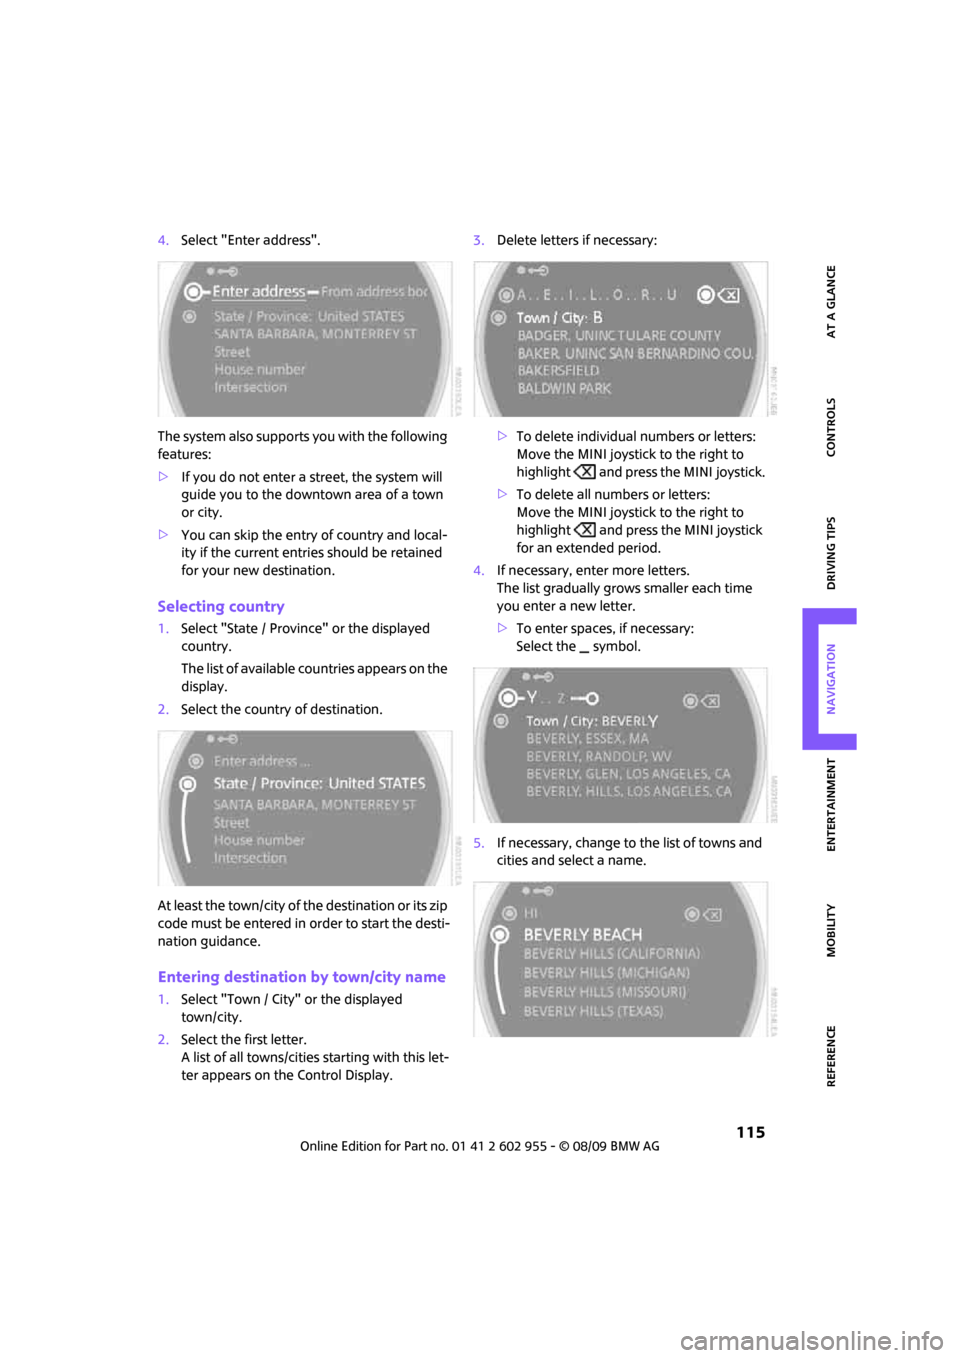
4.Select "Enter address".
The system also supports you with the following
features:
>If you do not enter a street, the system will
guide you to the downtown area of a town
or city.
>You can skip the entry of country and local-
ity if the current entries should be retained
for your new destination.
Selecting country
1.Select "State / Province" or the displayed
country.
The list of available countries appears on the
display.
2.Select the country of destination.
At least the town/city of the destination or its zip
code must be entered in order to start the desti-
nation guidance.
Entering destination by town/city name
1.Select "Town / City" or the displayed
town/city.
2.Select the first letter.
A list of all towns/cities starting with this let-
ter appears on the Control Display.3.Delete letters if necessary:
>To delete individual numbers or letters:
Move the MINI joystick to the right to
highlight and press the MINI joystick.
>To delete all numbers or letters:
Move the MINI joystick to the right to
highlight and press the MINI joystick
for an extended period.
4.If necessary, enter more letters.
The list gradually grows smaller each time
you enter a new letter.
>To enter spaces, if necessary:
Select the symbol.
5.If necessary, change to the list of towns and
cities and select a name.
Page 118 of 230
Destination entry
116
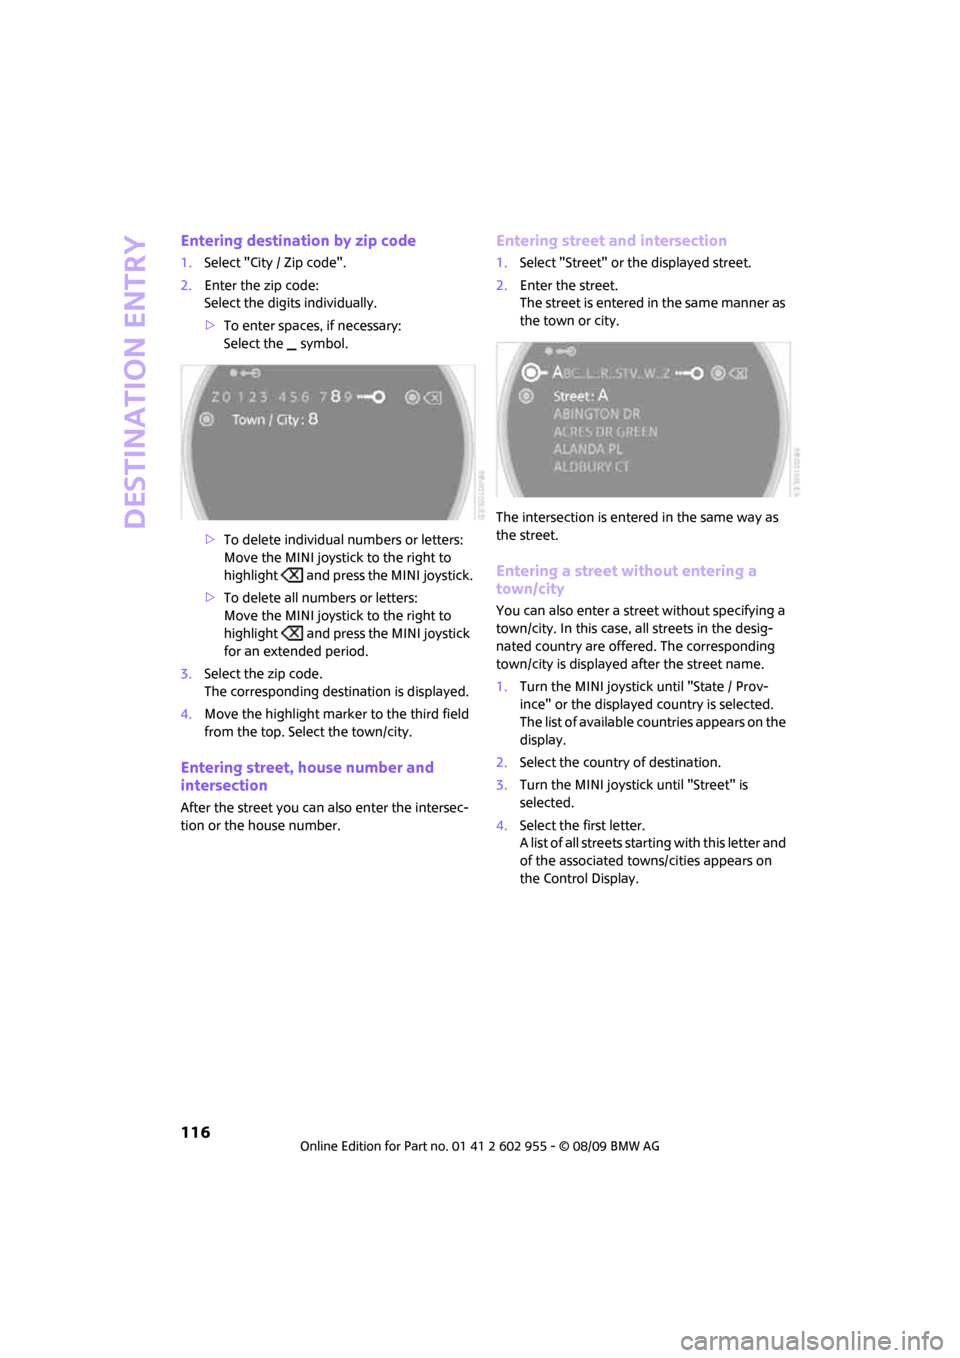
Entering destination by zip code
1.Select "City / Zip code".
2.Enter the zip code:
Select the digits individually.
>To enter spaces, if necessary:
Select the symbol.
>To delete individual numbers or letters:
Move the MINI joystick to the right to
highlight and press the MINI joystick.
>To delete all numbers or letters:
Move the MINI joystick to the right to
highlight and press the MINI joystick
for an extended period.
3.Select the zip code.
The corresponding destination is displayed.
4.Move the highlight marker to the third field
from the top. Select the town/city.
Entering street, house number and
intersection
After the street you can also enter the intersec-
tion or the house number.
Entering street and intersection
1.Select "Street" or the displayed street.
2.Enter the street.
The street is entered in the same manner as
the town or city.
The intersection is entered in the same way as
the street.
Entering a street without entering a
town/city
You can also enter a street without specifying a
town/city. In this case, all streets in the desig-
nated country are offered. The corresponding
town/city is displayed after the street name.
1.Turn the MINI joystick until "State / Prov-
ince" or the displayed country is selected.
The list of available countries appears on the
display.
2.Select the country of destination.
3.Turn the MINI joystick until "Street" is
selected.
4.Select the first letter.
A list of all streets starting with this letter and
of the associated towns/cities appears on
the Control Display.
Page 120 of 230
Destination entry
118
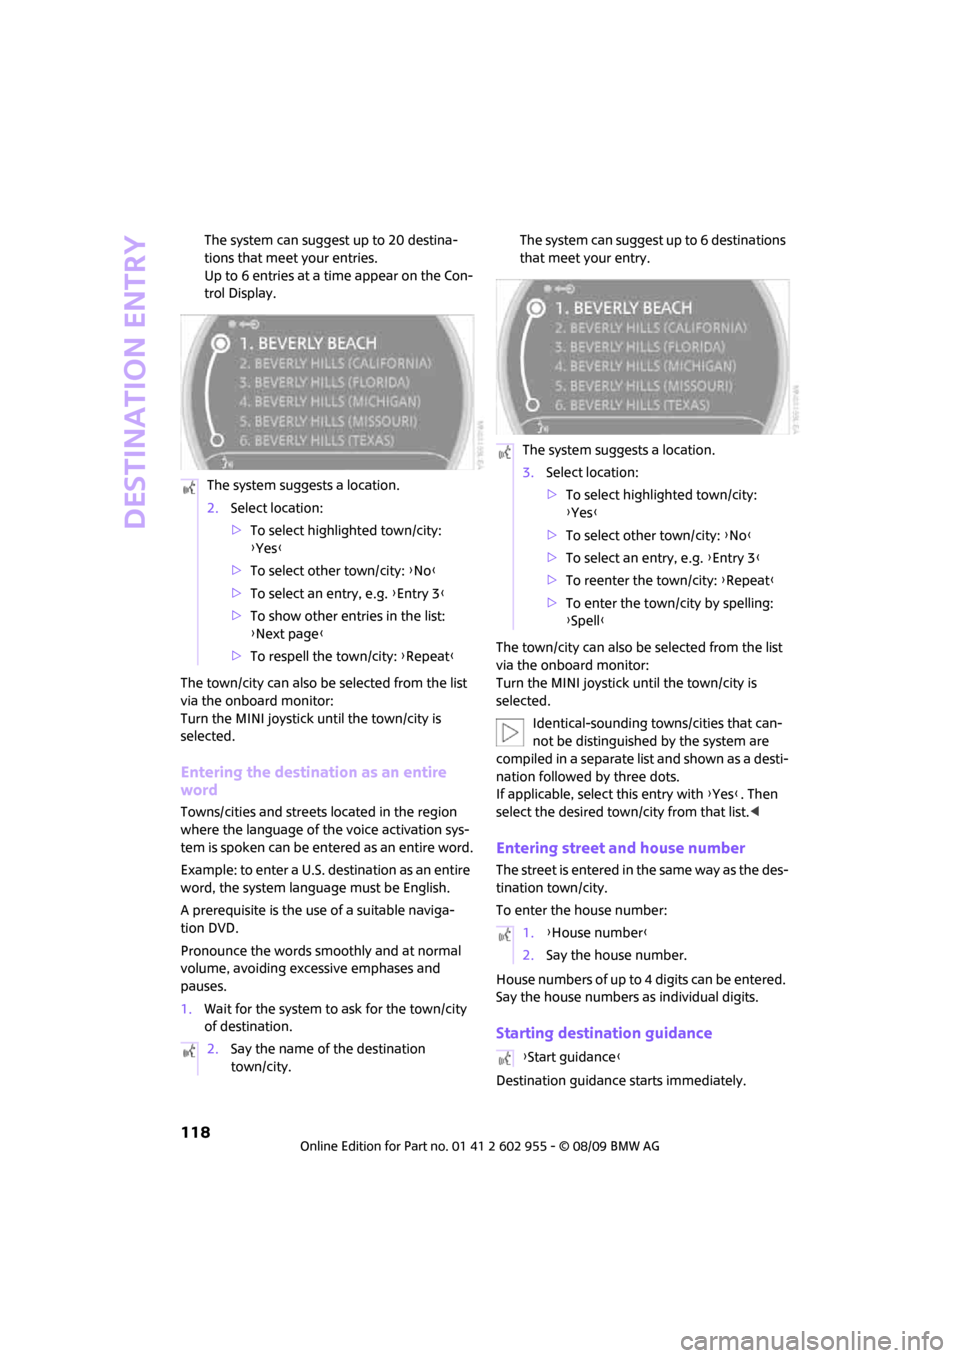
The system can suggest up to 20 destina-
tions that meet your entries.
Up to 6 entries at a time appear on the Con-
trol Display.
The town/city can also be selected from the list
via the onboard monitor:
Turn the MINI joystick until the town/city is
selected.
Entering the destination as an entire
word
Towns/cities and streets located in the region
where the language of the voice activation sys-
tem is spoken can be entered as an entire word.
Example: to enter a U.S. destination as an entire
word, the system language must be English.
A prerequisite is the use of a suitable naviga-
tion DVD.
Pronounce the words smoothly and at normal
volume, avoiding excessive emphases and
pauses.
1.Wait for the system to ask for the town/city
of destination.The system can suggest up to 6 destinations
that meet your entry.
The town/city can also be selected from the list
via the onboard monitor:
Turn the MINI joystick until the town/city is
selected.
Identical-sounding towns/cities that can-
not be distinguished by the system are
compiled in a separate list and shown as a desti-
nation followed by three dots.
If applicable, select this entry with {Yes}. Then
select the desired town/city from that list.<
Entering street and house number
The street is entered in the same way as the des-
tination town/city.
To enter the house number:
House numbers of up to 4 digits can be entered.
Say the house numbers as individual digits.
Starting destination guidance
Destination guidance starts immediately. The system suggests a location.
2.Select location:
>To select highlighted town/city:
{Yes}
>To select other town/city: {No}
>To select an entry, e.g. {Entry 3}
>To show other entries in the list:
{Next page}
>To respell the town/city: {Repeat}
2.Say the name of the destination
town/city.
The system suggests a location.
3.Select location:
>To select highlighted town/city:
{Yes}
>To select other town/city: {No}
>To select an entry, e.g. {Entry 3}
>To reenter the town/city: {Repeat}
>To enter the town/city by spelling:
{Spell}
1.{House number}
2.Say the house number.
{Start guidance}