manual radio set MINI Hardtop 2 Door 2015 Owner's Manual
[x] Cancel search | Manufacturer: MINI, Model Year: 2015, Model line: Hardtop 2 Door, Model: MINI Hardtop 2 Door 2015Pages: 251, PDF Size: 11.4 MB
Page 23 of 251

FunctionsAudio functions and vehicle functions can be
operated, adjusted and displayed on the radio.▷Radio.▷Multimedia.▷Telephone.▷Vehicle settings.▷Check Control messages.
Menu navigation
All functions of the radio can be called up via
the main menu. Some menus can also be called
up directly via the buttons on the radio.
Selecting menu items
Menu items can be selected if they are high‐
lighted.
1. Press button.2.Turn the right-hand knob until the desired
menu item is highlighted, e.g.,"Radio".3.Press the right-hand knob again to confirm
the highlighted menu item.
Representation in the Owner's Manual
In the Owner's Manual, menu items that can be
selected are set in quotation marks, e.g.,
"Radio".
Symbols in the status field
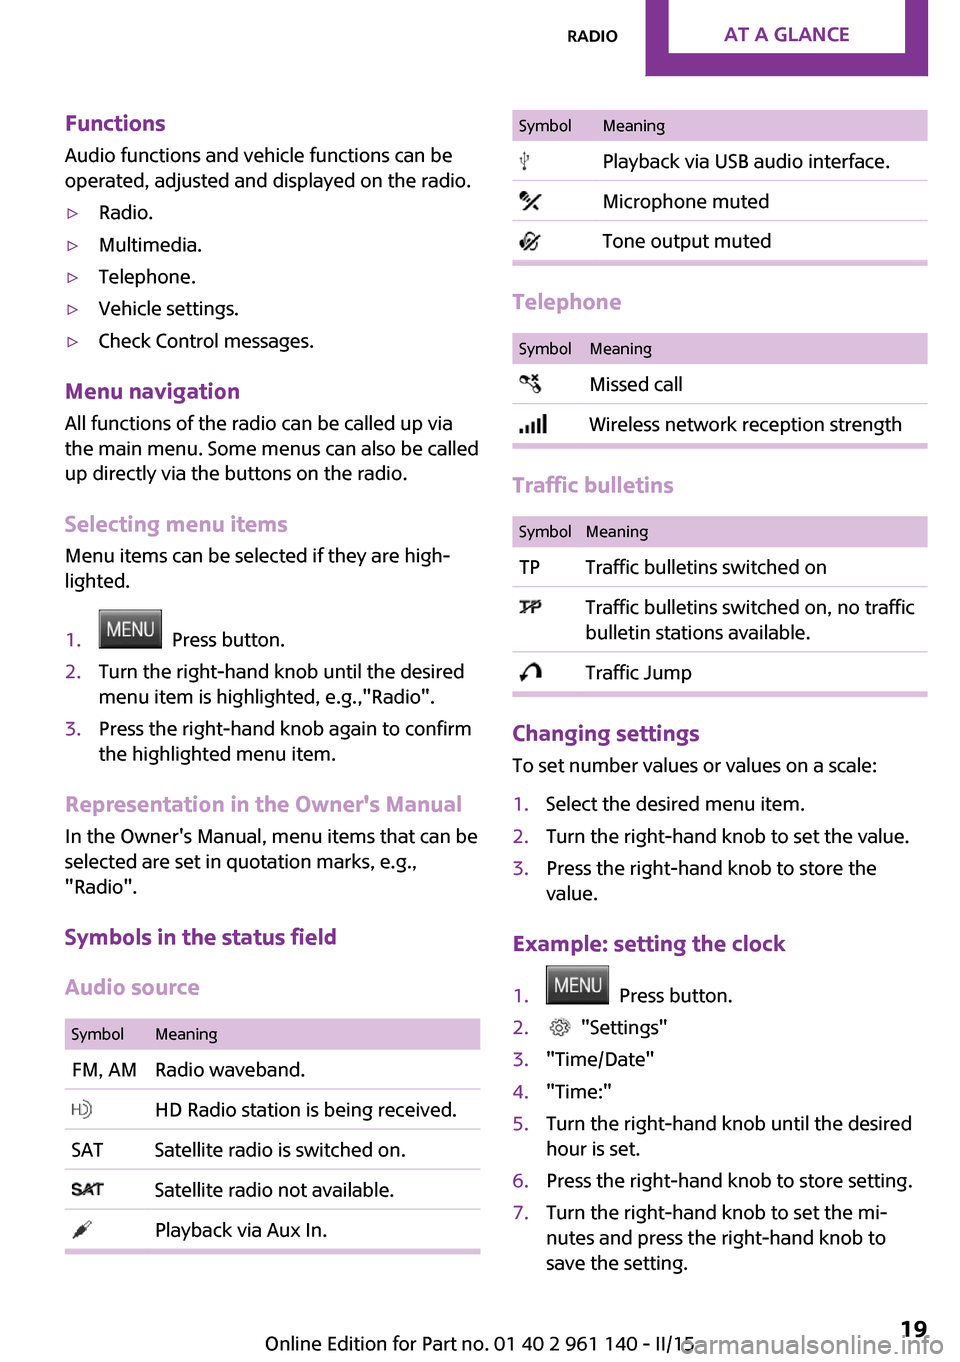
Audio source
SymbolMeaningFM, AMRadio waveband. HD Radio station is being received.SATSatellite radio is switched on. Satellite radio not available. Playback via Aux In.SymbolMeaning Playback via USB audio interface. Microphone muted Tone output muted
Telephone
SymbolMeaning Missed call Wireless network reception strength
Traffic bulletins
SymbolMeaningTPTraffic bulletins switched on Traffic bulletins switched on, no traffic
bulletin stations available. Traffic Jump
Changing settings
To set number values or values on a scale:
1.Select the desired menu item.2.Turn the right-hand knob to set the value.3.Press the right-hand knob to store the
value.
Example: setting the clock
1. Press button.2. "Settings"3."Time/Date"4."Time:"5.Turn the right-hand knob until the desired
hour is set.6.Press the right-hand knob to store setting.7.Turn the right-hand knob to set the mi‐
nutes and press the right-hand knob to
save the setting.Seite 19RadioAT A GLANCE19
Online Edition for Part no. 01 40 2 961 140 - II/15
Page 27 of 251

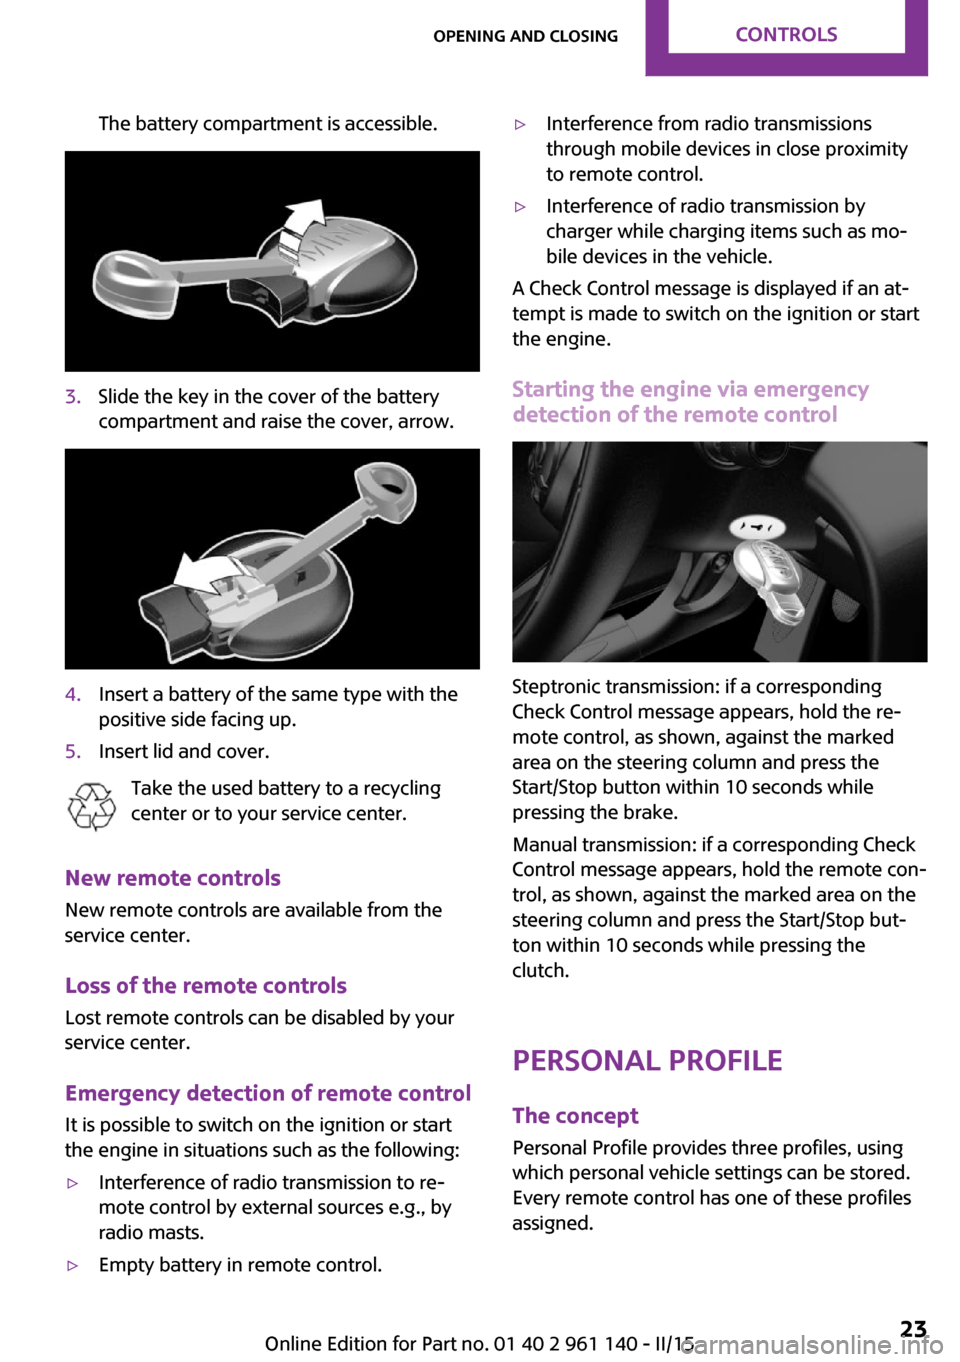
The battery compartment is accessible.3.Slide the key in the cover of the battery
compartment and raise the cover, arrow.4.Insert a battery of the same type with the
positive side facing up.5.Insert lid and cover.
Take the used battery to a recycling
center or to your service center.
New remote controls
New remote controls are available from the
service center.
Loss of the remote controls Lost remote controls can be disabled by your
service center.
Emergency detection of remote control
It is possible to switch on the ignition or start
the engine in situations such as the following:
▷Interference of radio transmission to re‐
mote control by external sources e.g., by
radio masts.▷Empty battery in remote control.▷Interference from radio transmissions
through mobile devices in close proximity
to remote control.▷Interference of radio transmission by
charger while charging items such as mo‐
bile devices in the vehicle.
A Check Control message is displayed if an at‐
tempt is made to switch on the ignition or start
the engine.
Starting the engine via emergencydetection of the remote control
Steptronic transmission: if a corresponding
Check Control message appears, hold the re‐
mote control, as shown, against the marked
area on the steering column and press the
Start/Stop button within 10 seconds while
pressing the brake.
Manual transmission: if a corresponding Check
Control message appears, hold the remote con‐
trol, as shown, against the marked area on the
steering column and press the Start/Stop but‐
ton within 10 seconds while pressing the
clutch.
Personal Profile The concept
Personal Profile provides three profiles, using
which personal vehicle settings can be stored.
Every remote control has one of these profiles
assigned.
Seite 23Opening and closingCONTROLS23
Online Edition for Part no. 01 40 2 961 140 - II/15
Page 28 of 251

If the vehicle is unlocked using a remote con‐
trol, the assigned personal profile will be acti‐
vated. All settings stored in the profile are auto‐
matically applied.
If several drivers use their own remote control,
the vehicle will adjust the personal settings dur‐
ing unlocking. These settings are also restored,
if the vehicle has been used in the meantime
by a person with a different remote control.
Changes to the settings are automatically saved
in the personal profile.
Adjusting
The settings for the following systems and func‐
tions are saved in the active profile. The scope
of storable settings is country- and equipment-
dependable.▷Unlocking and locking.▷Lights.▷Radio.▷Instrument cluster.▷Climate control.▷Park Distance Control PDC.▷Driving Dynamics Control.▷Cruise control.▷Intelligent Safety.
Using the remote con‐
trol
Note Take the remote control with you
People or animals left unattended in a
parked vehicle can lock the doors from the in‐
side. Always take the remote control with you
when leaving the vehicle so that the vehicle
can then be opened from the outside. ◀
Unlocking
Press button on the remote control.▷The vehicle is unlocked.▷Interior lamps and courtesy lamps are acti‐
vated. This function is not available, if the
interior lamps were switched off manually.▷The welcome lamps are switched on, if this
function was activated.▷Exterior mirrors folded through convenient
closing are folded open.
You can set how the vehicle is to be unlocked.
Create the settings, refer to page 29.
The alarm system, refer to page 30, is dis‐
armed.
Convenient opening Press and hold this button on the re‐
mote control after unlocking.
The windows and the glass sunroof are opened,
as long as the button on the remote control is
pressed.
Locking Locking from the outside
Do not lock the vehicle from the outside
with people inside the car, as the vehicle can‐
not be unlocked from inside without special
knowledge. ◀
The driver's door must be closed. Press button on the remote control.
The alarm system, refer to page 30, is armed.
If the vehicle horn honks twice when you lock
the car, this means that the engine or ignition is
still switched on. In this case, the engine or ig‐
nition must be switched off by means of the
Start/Stop button.
Seite 24CONTROLSOpening and closing24
Online Edition for Part no. 01 40 2 961 140 - II/15
Page 29 of 251

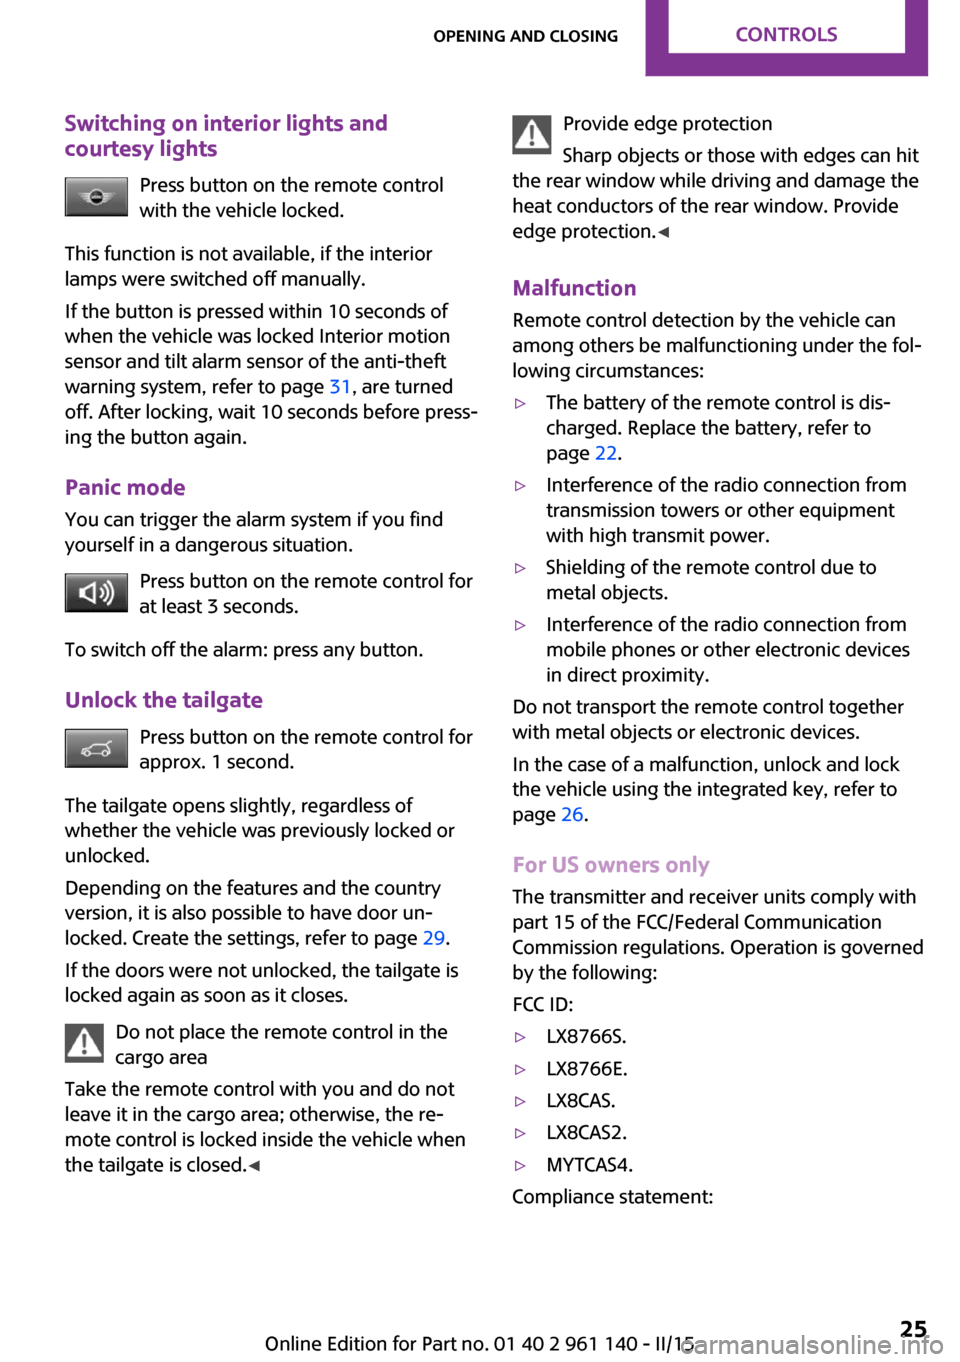
Switching on interior lights and
courtesy lights
Press button on the remote control
with the vehicle locked.
This function is not available, if the interior
lamps were switched off manually.
If the button is pressed within 10 seconds of
when the vehicle was locked Interior motion
sensor and tilt alarm sensor of the anti-theft
warning system, refer to page 31, are turned
off. After locking, wait 10 seconds before press‐
ing the button again.
Panic mode
You can trigger the alarm system if you find
yourself in a dangerous situation.
Press button on the remote control for
at least 3 seconds.
To switch off the alarm: press any button.
Unlock the tailgate Press button on the remote control forapprox. 1 second.
The tailgate opens slightly, regardless of
whether the vehicle was previously locked or
unlocked.
Depending on the features and the country
version, it is also possible to have door un‐
locked. Create the settings, refer to page 29.
If the doors were not unlocked, the tailgate is
locked again as soon as it closes.
Do not place the remote control in the
cargo area
Take the remote control with you and do not
leave it in the cargo area; otherwise, the re‐
mote control is locked inside the vehicle when
the tailgate is closed. ◀Provide edge protection
Sharp objects or those with edges can hit
the rear window while driving and damage the
heat conductors of the rear window. Provide
edge protection. ◀
Malfunction Remote control detection by the vehicle can
among others be malfunctioning under the fol‐
lowing circumstances:▷The battery of the remote control is dis‐
charged. Replace the battery, refer to
page 22.▷Interference of the radio connection from
transmission towers or other equipment
with high transmit power.▷Shielding of the remote control due to
metal objects.▷Interference of the radio connection from
mobile phones or other electronic devices
in direct proximity.
Do not transport the remote control together
with metal objects or electronic devices.
In the case of a malfunction, unlock and lock
the vehicle using the integrated key, refer to
page 26.
For US owners only The transmitter and receiver units comply with
part 15 of the FCC/Federal Communication
Commission regulations. Operation is governed by the following:
FCC ID:
▷LX8766S.▷LX8766E.▷LX8CAS.▷LX8CAS2.▷MYTCAS4.
Compliance statement:
Seite 25Opening and closingCONTROLS25
Online Edition for Part no. 01 40 2 961 140 - II/15
Page 52 of 251

▷After approx. 8 minutes.▷When the vehicle is locked using the central
locking system.▷Shortly before the battery is discharged
completely, so that the engine can still be
started.
The radio-ready state remains active if, e.g., the
ignition is automatically switched off for the fol‐
lowing reasons:
▷Opening or closing the driver's door.▷Unfastening of the driver's safety belt.▷When automatically switching from low
beams to parking lights.
If the engine is switched off and the ignition is
switched on, the system automatically switches
to the radio-ready state if the lights are turned
off or, if correspondingly equipped, the day‐
time running lights are activated.
Starting the engine
Hints Enclosed areas
Do not let the engine run in enclosed
areas, since breathing in exhaust fumes may
lead to loss of consciousness and death. The
exhaust gases contain carbon monoxide, an
odorless and colorless but highly toxic gas. ◀
Unattended vehicle
Do not leave the vehicle unattended with
the engine running; doing so poses a risk of
danger.
Before leaving the vehicle with the engine run‐
ning, set the parking brake and place the trans‐
mission in selector lever position P or N to pre‐
vent the vehicle from moving. ◀
Repeated starting in quick succession
Avoid trying to start the vehicle repeat‐
edly and in quick succession. Otherwise, the
fuel is not burned or is inadequately burned,
posing a risk of overheating and damage to the
catalytic converter. ◀
Do not wait for the engine to warm-up while
the vehicle remains stationary. Start driving at
moderate engine speeds.
Steptronic transmission
Starting the engine1.Depress the brake pedal.2.Engage selector lever position P or N.3.Press the Start/Stop button.
The ignition is activated automatically for a cer‐
tain time and is stopped as soon as the engine
starts.
Manual transmission
Starting the engine
1.Depress the brake pedal.2.Press on the clutch pedal and shift to neu‐
tral.3.Press the Start/Stop button.
The ignition is activated automatically for a cer‐
tain time and is stopped as soon as the engine
starts.
Engine stop
Hints Take the remote control with you
Take the remote control with you when
leaving the vehicle so that children, e.g., cannot
start the engine. ◀
Apply parking brake and further secure
the vehicle if needed.
Set the parking brake firmly when parking; oth‐
erwise, the vehicle could roll. On steep upward
and downward inclines, further secure the ve‐
Seite 48CONTROLSDriving48
Online Edition for Part no. 01 40 2 961 140 - II/15
Page 53 of 251

hicle, e.g., by turning the steering wheel in the
direction of the curb. ◀
Before driving into a car wash So that the vehicle can roll into a car wash ob‐
serve instructions for going into an automatic
car wash, refer to page 216.
Steptronic transmission
Switching off the engine1.Engage selector lever position P with the
vehicle stopped.2.Press the Start/Stop button.
The engine is switched off.
The radio-ready state is switched on.3.Set the parking brake.
Manual transmission
Switching off the engine
1.With the vehicle at a standstill, press the
Start/Stop button.
The engine is switched off.
The radio-ready state is switched on.2.Shift into first gear or reverse.3.Set the parking brake.
Auto Start/Stop function
The concept
The Auto Start/Stop function helps save fuel.
The system switches off the engine during a
stop, e.g., in traffic congestion or at traffic
lights. The ignition remains switched on. The
engine starts again automatically for driving off.
Automatic operation
After every start of the engine using the Start/
Stop button, the Auto Start/Stop function is in
the last selected state, refer to page 50. When
the Auto Start/Stop function is active, it is avail‐
able when the vehicle is traveling faster than
about 3 mph, approx. 5 km/h.
Engine stop
The engine is switched off automatically during
a stop under the following conditions:
Manual transmission:▷Neutral is engaged and the clutch pedal is
not pressed.▷The driver's safety belt is buckled or the
driver's door is closed.
Steptronic transmission:
▷The selector lever is in selector lever posi‐
tion D.▷Brake pedal remains depressed while the
vehicle is stopped.▷The driver's safety belt is buckled or the
driver's door is closed.
In order to be able to release the brake pedal,
engage lever in position P. The engine remains
off.
To continue driving depress the brake pedal.
When a gear is engaged, the engine starts au‐
tomatically.
The air flow from the air conditioner is reduced
when the engine is switched off.
Displays in the instrument cluster The display indicates that theAuto Start/Stop function is ready
for an Automatic engine start.
The display indicates that the
conditions for an automatic en‐
gine stop have not been met.
Seite 49DrivingCONTROLS49
Online Edition for Part no. 01 40 2 961 140 - II/15
Page 56 of 251

Turn signal, high beams,
headlight flasher
Turn signal
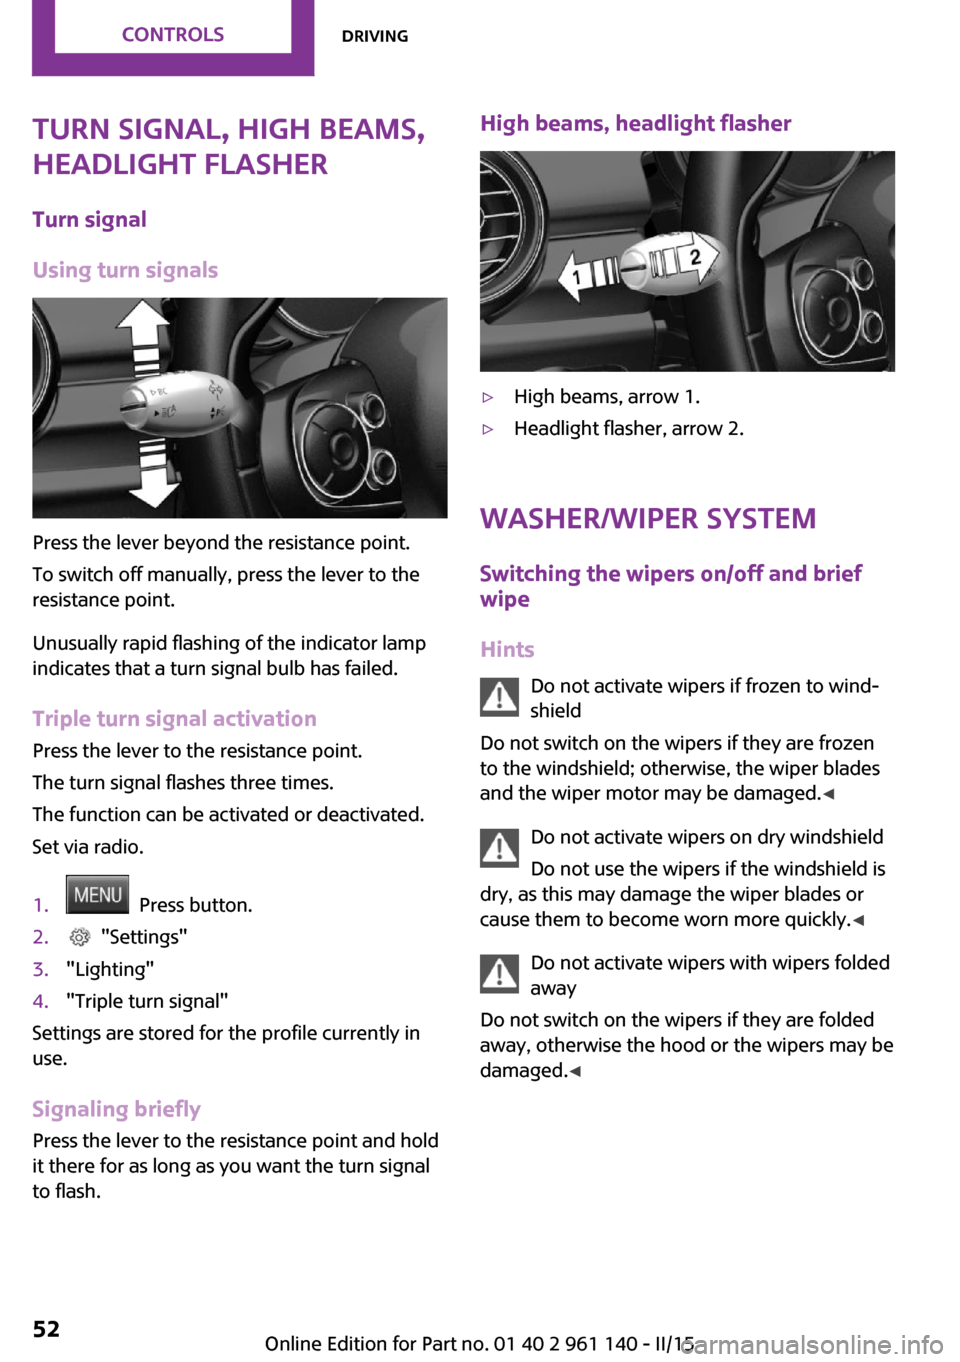
Using turn signals
Press the lever beyond the resistance point.
To switch off manually, press the lever to the
resistance point.
Unusually rapid flashing of the indicator lamp
indicates that a turn signal bulb has failed.
Triple turn signal activation Press the lever to the resistance point.
The turn signal flashes three times.
The function can be activated or deactivated.
Set via radio.
1. Press button.2. "Settings"3."Lighting"4."Triple turn signal"
Settings are stored for the profile currently in
use.
Signaling briefly
Press the lever to the resistance point and hold
it there for as long as you want the turn signal
to flash.
High beams, headlight flasher▷High beams, arrow 1.▷Headlight flasher, arrow 2.
Washer/wiper system
Switching the wipers on/off and brief
wipe
Hints Do not activate wipers if frozen to wind‐
shield
Do not switch on the wipers if they are frozen
to the windshield; otherwise, the wiper blades
and the wiper motor may be damaged. ◀
Do not activate wipers on dry windshield
Do not use the wipers if the windshield is
dry, as this may damage the wiper blades or
cause them to become worn more quickly. ◀
Do not activate wipers with wipers folded
away
Do not switch on the wipers if they are folded
away, otherwise the hood or the wipers may be
damaged. ◀
Seite 52CONTROLSDriving52
Online Edition for Part no. 01 40 2 961 140 - II/15
Page 69 of 251

Displaying the cruising range1. Press button.2. "Settings"3."Instrument cluster display"4."Range"
Current fuel consump‐
tion
The concept
Displays the current fuel consumption. Check
whether you are currently driving in an efficient
and environmentally-friendly manner.
Service requirements
The concept
After the ignition is turned on the instrument
cluster briefly displays available driving distance
or time to the next scheduled maintenance.
Your service specialist can read the current
service requirements from your remote control.
Display
Detailed information on service
requirements
The radio will display detailed information
about service requirements.
1. Press button.2. "Vehicle Info"3."Vehicle status"4."Service required"5.Select the desired entry to view detailed in‐
formation.SymbolsSymbolsDescriptionNo service is currently required.The deadline for scheduled
maintenance or a legally man‐
dated inspection is approach‐
ing.The service deadline has al‐
ready passed.
Entering appointment dates
Enter the dates for the required inspections.
Make sure that the vehicle's date and time are
set correctly.
1. Press button.2. "Vehicle Info"3."Vehicle status"4."Service required"5."§ Vehicle inspection" or"§ Emission
inspection"6."Change date"7.Enter the desired appointment.
Gear shift indicator
The concept
The system recommends the most fuel efficient
gear for the current driving situation.
Depending on the vehicle's features and coun‐
try version of the vehicle, the gear shift indica‐
tor is active in the manual mode of the Step‐
tronic transmission and with manual
transmission.
Suggestions to shift gear up or down are dis‐
played in the instrument cluster.
Seite 65DisplaysCONTROLS65
Online Edition for Part no. 01 40 2 961 140 - II/15
Page 72 of 251

Calling up information in the radioInformation is also shown on the radio display.1. Press button.2. "Vehicle Info"3."Onboard info"
Resetting values
1.Select the desired value.2."Reset?"
Information at a glance
Info display Repeatedly pressing the button
on the turn signal lever calls up the following information in the
info display:
▷Range.▷GREEN Info.
When GREEN Mode is activated.▷Average fuel consumption.▷Current fuel consumption.▷Average speed.▷Date.▷Engine temperature display.▷Speed limit detection.▷Speed.
Radio
Selected information is shown on the radio.
▷Range.▷Average fuel consumption.▷Average speed.Adjusting the info display
You can select what information from the com‐
puter is to be displayed on the info display of
the instrument cluster.1. Press button.2. "Settings"3."Instrument cluster display"4.Select the desired displays.
Information in detail
Range
Displays the estimated cruising range available
with the remaining fuel.
It is calculated based on your driving style over
the last 20 miles/30 km.
GREEN info Description of GREEN info, refer to page 143.
Average fuel consumption
This is calculated for the period while the en‐
gine is running.
The average fuel consumption is calculated for
the distance traveled since the last reset by the
on-board comupter.
Average speed
Periods in which the vehicle is parked with the
engine manually stopped are not included in
the calculation of the average speed.
Resetting average valuesPress and hold the onboard computer button
on the turn signal lever.
Engine temperature display Displays the current engine temperature, based
on a combination of coolant and motor oil tem‐
perature. As soon as the optimum operating
temperature has been attained, the indicator is
in the center position.
Seite 68CONTROLSDisplays68
Online Edition for Part no. 01 40 2 961 140 - II/15
Page 78 of 251

Switching on
With the ignition switched off, press the lever
either up or down past the resistance point for
approx. 2 seconds.
Switch off Briefly press the lever to the resistance point in
the opposite direction.
Welcome lights and
headlight courtesy de‐
lay feature
Welcome lights When the vehicle is parked, leave the switch in
position
or : parking and interior lights
come on briefly when the vehicle is unlocked
depending on the ambient brightness.
Activating/deactivating
Set via radio.
1. Press button.2. "Settings"3."Lighting"4."Welcome light"
Settings are stored for the profile currently in
use.
Headlight courtesy delay feature
The low beams stay lit for a short while after
the radio-ready state is switched off if the lights
are turned off and the headlight flasher is
switched on.
Setting the duration Set via radio.
1. Press button.2. "Settings"3."Lighting"4."Pathway lighting:"5.Set length of time.
Settings are stored for the profile currently in
use.
Automatic headlight
control
Position of switch
: the low beams are acti‐
vated and off automatically, e.g., in tunnels, in
twilight or if there is precipitation. The indicator
lamp in the instrument cluster lights up.
A blue sky with the sun low on the horizon can
cause the lights to be switched on.
The low beams always stay on when the fog
lights are activated.
Personal responsibility
The automatic headlight control cannot
serve as a substitute for your personal judg‐
ment in determining when to turn the lights on
in response to ambient lighting conditions.
E. g. the sensors are unable to detect fog or
hazy weather. To avoid safety risks under these
conditions, you should always switch on the
lights manually. ◀
Daytime running lights
With the ignition switched on, the daytime run‐
ning lights light up in position
, or
. After the ignition is switched off, the park‐
ing lights light up in position
.
Activating/deactivating
In some countries, daytime running lights are
mandatory, so it may not be possible to deacti‐
vate the daytime running lights.
Seite 74CONTROLSLights74
Online Edition for Part no. 01 40 2 961 140 - II/15