service MINI Paceman 2013 Owner's Guide
[x] Cancel search | Manufacturer: MINI, Model Year: 2013, Model line: Paceman, Model: MINI Paceman 2013Pages: 275, PDF Size: 4.23 MB
Page 213 of 275

MOBILITYWheels and tires
212
Otherwise, tire damage can be extremely dan-
gerous for vehicle occupants and other road
users. <
Tire age
The manufacturing date of tires is contained in
the tire coding:
DOT ... 1012 means that the tire was manufac-
tured during the 10th week of 2012.
For various reasons, such as the development of
brittleness, the manufacturer of your MINI rec-
ommends tire replacemen t after no more than
6 years, regardless of the actual wear of the
tires.
Run-flat tires
The symbol identifying run-flat tires is a circle
with the letters RSC on the sidewall.
Run-flat tires comprise a conditionally self-sup-
porting tire and a special rim. The reinforcement
in the sidewalls ensures that the tire can con-
tinue to be used subject to certain restrictions,
even if depressurized.
For information on continui ng to drive with a flat
tire, refer to Indication of a flat tire, page 76.
New wheels and tires
Have new wheels and tires mounted only
by your MINI dealer or a specialized tire
shop that has specially trained personnel work-
ing in accordance with the specifications of the
MINI manufacturer. If this work is not carried out properly, there is a dang
er of subsequent dam-
age and related safety haza rds. Make sure that
the new wheels are balanced.<
Retreaded tires
The manufacturer of your MINI recom-
mends that you avoid using retreaded
tires, as this could impair driving safety. The
causes for this include potentially different tire
casing structures and often wide variations in
tire age, which can resu lt in a limited service
life. <
Correct wheels and tires
The manufacturer of your MINI recom-
mends mounting only wheels and tires
that it has specifically approved for use on your
particular model. Although other wheels and
tires may theoretically have the same dimen-
sions, variations in factors such as manufactur-
ing tolerances can result in contact between tire
and bodywork, ultimately leading to serious
accidents. The manufacturer of your MINI can-
not evaluate non-approved wheels and tires to
determine if they are suited for use, and there-
fore cannot ensure the operating safety of the
vehicle if they are mounted. <
Your MINI dealer will be glad to inform you
about the correct wheel an d tire combination for
your vehicle.
The correct combin ation of wheels and tires is
also necessary to ensure reliable operation of
various vehicle systems such as ABS and DSC.
To maintain good handling and vehicle
response, use only tires of a single brand and
tread configuration. Afte r a tire has been dam-
aged, mount the previous wheel and tire combi-
nation again as soon as possible.
Wheels with Tire Pr essure Monitor TPM
electronics
When mounting new tires or changing over from
summer to winter tires, or vice versa, only use
wheels with TPM electronics; otherwise, the Tire
Pressure Monitor may not be able to detect a
00320051004F004C00510048000300280047004C0057004C005200510003
Page 215 of 275
MOBILITYEngine compartment
214
Engine compartment
Vehicle equipment
In this chapter, all production, country, and
optional equipment that is offered in the model
range is described. Equipment is also described
that is not available because of, for example,
selected options or coun try version. This also
applies to safety relate d functions and systems.
General information
Never attempt to perform any service or
repair operations on your vehicle without
the required professional technical training. If
you do not know how to follow the specified
instructions, then have the work carried out by
your MINI dealer. If this work is not carried out
properly, there is a dang er of subsequent dam-
age and related safety hazards. <
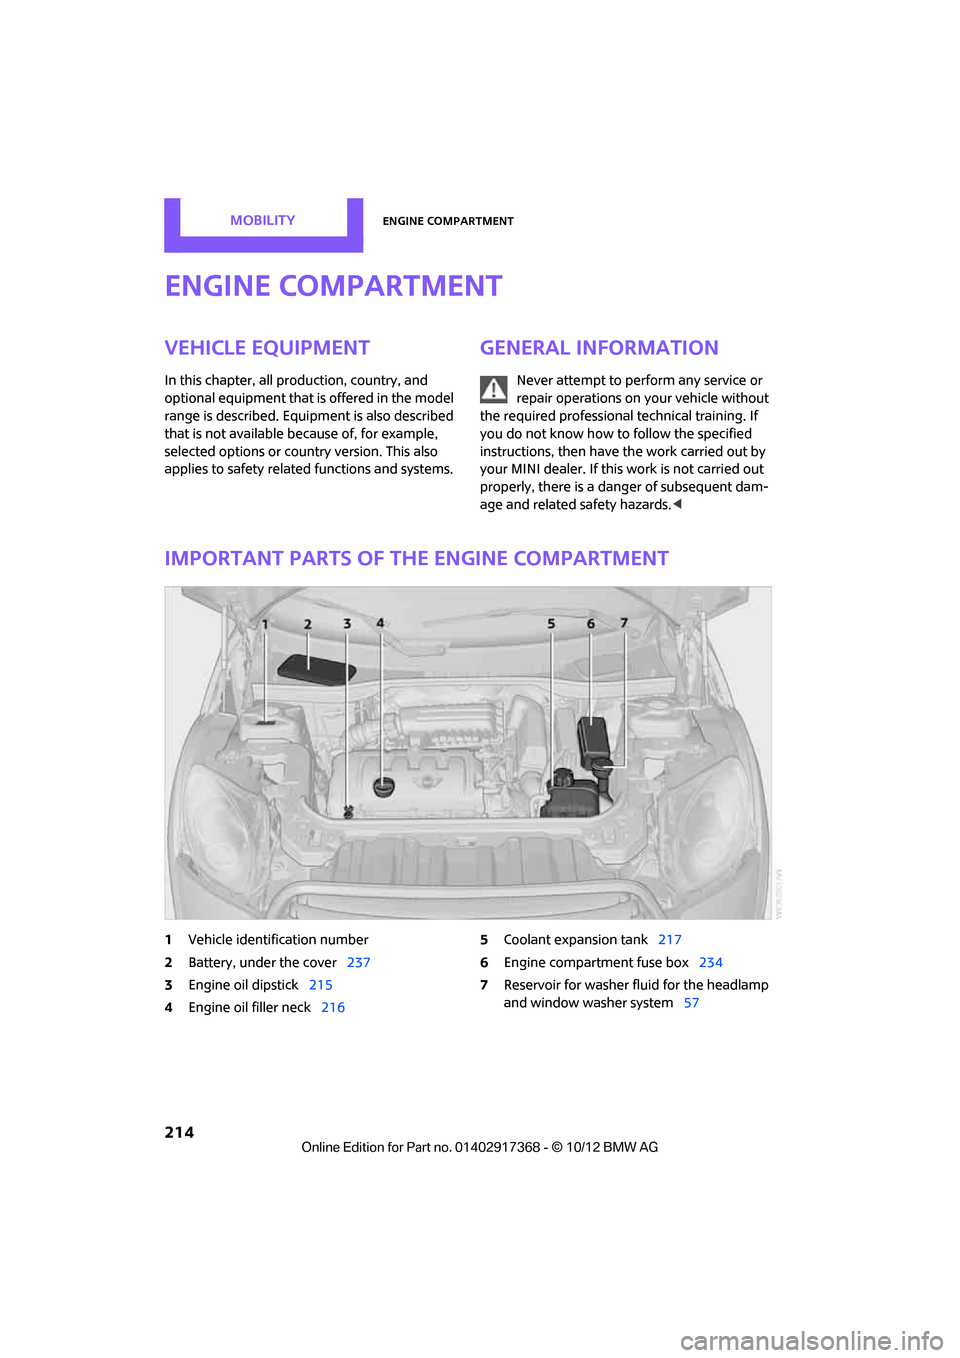
Important parts of the engine compartment
1Vehicle identification number
2 Battery, under the cover 237
3 Engine oil dipstick 215
4 Engine oil filler neck 216 5
Coolant expansion tank 217
6 Engine compartment fuse box 234
7 Reservoir for washer fluid for the headlamp
and window washer system 57
00320051004F004C00510048000300280047004C0057004C005200510003
Page 219 of 275

MOBILITYMaintenance
218
Maintenance
Vehicle equipment
In this chapter, all production, country, and
optional equipment that is offered in the model
range is described. Equipment is also described
that is not available because of, for example,
selected options or coun try version. This also
applies to safety relate d functions and systems.
MINI Maintenance System
The MINI Maintenance System supports the
preservation of the traffic and operating safety
of your MINI. The objectiv e is to optimize efforts
with respect to minimal vehicle maintenance
costs.
If and when you come to sell your MINI, a com-
prehensive record of serv icing will prove a signif-
icant benefit.
Condition Based Service CBS
Sensors and special algorithms take the different
driving conditions of your MINI into account.
Condition Based Service uses this to determine
the current and future se rvice requirements. By
letting you define a service and maintenance
regimen that reflects your own individual
requirements, the system builds the basis for
trouble-free driving. On the Control Display, you can have the
remaining times or distan
ces for selected main-
tenance tasks and any legally prescribed dates
displayed, page 64.
Service data in the remote control
Your vehicle continuously stores service-
requirement information in the remote control
while you are driving. Your MINI dealer can read
out this data from the remote control unit, and
propose an optimized maintenance approach.
Whenever you take your car in for servicing you
should therefore hand your MINI dealer the
remote control unit that you last used.
Make sure that the date is always set cor-
rectly, page 67; otherwise, the effective-
ness of Condition Based Service CBS is not
assured. <
Service and Warranty Information
Booklet for US mode ls and Warranty and
Service Guide Booklet for Canadian
models
Please consult your Service and Warranty Infor-
mation Booklet for US models and Warranty and
Service Guide Booklet for Canadian models for
additional information on service requirements.
The manufacturer of the MINI recom-
mends that you have service and repair
operations performed at your MINI dealer.
Take the time to ensure that these service pro-
cedures are confirmed by entries in your vehi-
cle's Service and Warran ty Information Booklet
for US models and Warranty and Service Guide
Booklet for Canadian models. These entries ver-
ify that your vehicle has received the specified
regular maintenance. <
00320051004F004C00510048000300280047004C0057004C005200510003
Page 221 of 275
MOBILITYCare
220
Care
Vehicle equipment
In this chapter, all production, country, and
optional equipment that is offered in the model
range is described. Equipment is also described
that is not available because of, for example,
selected options or coun try version. This also
applies to safety relate d functions and systems.
Car-care products
Regular cleaning and care helps to maintain the
value of your MINI.
The manufacturer of your MINI recommends
using manufacturer-approved products to clean
and care for your vehicle.
Your MINI dealer would be pleased to advise
you on cleaning and care products and services
for your MINI.
The ingredients of original MINI Care Prod-
ucts have been tested, and the products
have been tested in the laboratory and in prac-
tice. They offer optimum care and protection for
your vehicle. <
Do not use any cleansers containing alco-
hol or solvents as these may cause dam-
age. <
Cleaning agents may contain hazardous
or health-damaging substances. Follow
the warning and hazard instructions on the
packaging. For interior cleaning, always open
the doors or windows of the vehicle.
Do not use any products that are not intended
for cleaning the vehicle. <
External care
Washing your vehicle
Especially during the winter months the
vehicle should be frequently washed. Dirt
and road salt can damage the vehicle. <
After washing the vehicle, apply the
brakes briefly to dry them; otherwise,
water can reduce braking efficiency over the
short term and the brake rotors can corrode. <
Regularly open the hood and clear out any
debris such as leaves th at may have collected in
the region of the windshield.
Car washes
Preference should be given to cloth car washes.
Do not use automatic high-pressure car
washes; otherwise, water may drip into
the vehicle around the windows. <
Before driving in to the car wash, check if the sys-
tem is suitable for your MINI. Observe the fol-
lowing points:
> Vehicle dimensions, page 246
> If necessary: fold in the outside mirrors,
page 44
> Maximum permissible tire width
Avoid car washes with tracks higher than
4 in/10 cm; otherwise, the chassis could
be damaged. <
Preparations for driving into the car wash:
> Unscrew the rod antenna.
> Deactivate the rain sensor to prevent unin-
tentional wiping.
> Deactivate rear window wiper and protect it
from damage. Ask the car wash operator
about measures that can be taken to protect
the wipers.
00320051004F004C00510048000300280047004C0057004C005200510003
Page 226 of 275

Replacing componentsMOBILITY
225
Never touch the glass of new bulbs with
your bare fingers, as even minute
amounts of contaminatio n will burn into the
bulb's surface and reduce its service life. Use a
clean tissue, cloth or some thing similar, or hold
the bulb by its base. <
You can obtain a selection of replacement bulbs
at your MINI dealer. Only replace bulbs after they have cooled
down; otherwise, you may burn your fin-
gers. <
When working on electrical systems,
always begin by switching off the con-
sumer in question; otherwise, short circuits
could result. To avoid possible injury or equip-
ment damage when replacing bulbs, observe
any instructions provided by the bulb manufac-
turer. <
Caring for headlamps, refer to page 221.
For any bulb replacement not described
below, contact a MINI dealer or a work-
shop that has specially trained personnel work-
ing in accordance with th e specifications of the
MINI manufacturer. <
For checking and adjusting headlamp aim,
please contact your MINI dealer. <
Light-emitting diodes LEDs
Light-emitting diodes installed behind translu-
cent lenses serve as the light sources for many of
the controls and displays in your vehicle. These
light-emitting diodes are related to conven-
tional laser diodes, and legislation de fines them
as Class 1 light-emitting diodes.
Do not remove the covers or expose the
eyes directly to the unfiltered light source
for several hours; otherw ise, this could cause
irritation of the retina. <
Headlamp glass lens
In cool or humid weather, condensation may
occur on the interiors of the headlamps. During
trips with the headlamps on, the condensation
disappears after a short time. The headlamps do
not need to be changed.
Do not remove the condensation from head-
lamps, despite driving with lights on, and if con-
densation increases, e.g., because of water
droplets, have this checked by your MINI dealer.
Xenon lamps
The service life of these bulbs is very long and
the probability of failure very low, provided that
they are not switched on and off an excessive
number of times. If a xenon lamp fails neverthe-
less, switch on the fog lamps and continue the
journey with great care, provided that local leg-
islation does not prohibit this.
Work on the xenon lighting system,
including lamp replacement, is only to be
carried out only by your MINI dealer. Due to high
voltage, there is a risk of fatal injury if work on
the xenon lamps is carried out improperly. <
Halogen low beams and high beams
H13 bulb, 60/55 watts
The H13 bulb is pressurized. Therefore,
wear safety glasses and protective gloves.
Otherwise, there is a risk of injury if the bulb is
damaged. <
Be careful when insta lling the cover; oth-
erwise, leaks could occur and cause dam-
age to the headlamp system. <
00320051004F004C00510048000300280047004C0057004C005200510003
Page 235 of 275
MOBILITYReplacing components
234
Check Control messages are no longer dis-
played.
Charging the battery
Note
Do not connect battery chargers to the
sockets installed in the vehicle at the fac-
tory; otherwise you may cause damage to the
battery. <
Only charge the battery in the vehicle when the
engine is off. Connectio ns, refer to Jump-start-
ing on page 236.
General information
To guarantee the full service life of the battery,
make sure that the battery is always properly
charged.
It may be necessary to charge the battery in the
following situations:
>If frequent short trips are taken.
> If the vehicle is frequently parked for more
than a month.
Disposal
After replacing old ba tteries, return the
used batteries to your MINI dealer or to a
recycling center. Maintain the battery in an
upright position for transport and storage.
Always secure the battery against tipping over
during transport. <
Power failure
After a temporary power loss, some equipment
may not be fully function al and may require ini-
tialization. Individual settings are also lost and
must be reprogrammed:
> Time and date
These values must be updated, page 66.
> Radio
In some cases, statio ns may have to be
stored again, page 143.
> Onboard monitor
Operability must be waited for, page118.>
Glass sunroof, electric
It may only be possible to tilt the sunroof, if
applicable. The system must be initialized.
Contact your near est MINI dealer.
Indicator and warning lamps
Lights up in red:
Battery is no longer being charged.
Alternator malfunction.
Switch off all unnecessary electrical consumers.
Have the battery checked without delay. Lights up in yellow:
Battery charge level very low, battery
aged, or battery not securely con-
nected.
Charge it by taking a long er drive or by using an
external charger. If th e display appears again,
have the battery checked as soon as possible.
Fuses
Do not attempt to repair a blown fuse or
replace it with a fuse of a different color or
Ampere rating. To do this could cause a fire in
the vehicle resulting from a circuit overload.
Have fuses replaced by your MINI dealer. <
A fuse assignment diag ram is located on the
inside of the fuse box cover panels.
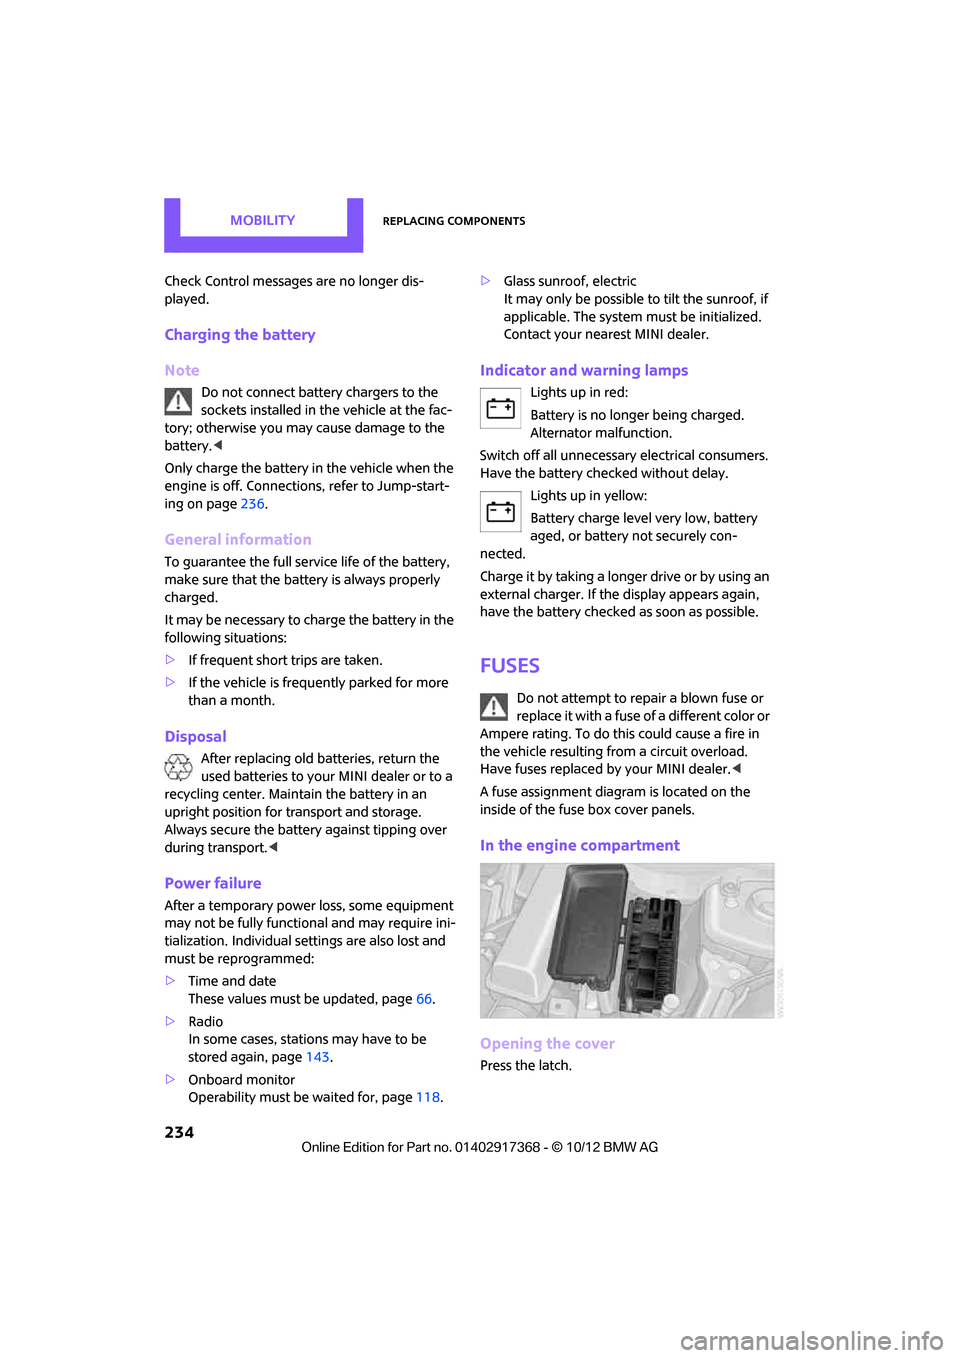
In the engine compartment
Opening the cover
Press the latch.
00320051004F004C00510048000300280047004C0057004C005200510003
Page 237 of 275

MOBILITYGiving and receiving assistance
236
Giving and receiving assistance
Vehicle equipment
In this chapter, all production, country, and
optional equipment that is offered in the model
range is described. Equipment is also described
that is not available because of, for example,
selected options or coun try version. This also
applies to safety relate d functions and systems.
Roadside Assistance
Roadside Assistance is available by phone
24 hours a day in many countries. You can
obtain assistance there in the event of a vehicle
breakdown.
First aid pouch
Some of the articles co ntained in the first aid
pouch have a limited service life. Therefore,
check the expiration dates of the contents regu-
larly and replace any item s in good time, if nec-
essary.
The first aid pouch is located on the rear cargo
well by the left side trim panel or under the pull-
out floor panel.
Warning triangle
In the cargo area under the loading sill.
To remove, open the two clasps.
Jump-starting
If the car's own battery is flat, your MINI's engine
can be started by connecting two jumper cables
to another vehicle's battery. You can also use
the same method to help start another vehicle.
Only use jumper cables with fully-insulated
clamp handles.
Do not touch any electrically live parts
wh en t he e ngine is run nin g, or a fatal acci-
dent may occur. Carefully adhere to the follow-
ing sequence, both to prevent damage to one or
both vehicles, and to guard against possible per-
sonal injuries. <
Preparation
1.Check whether the battery of the other vehi-
cle has a voltage of 12 volts and approxi-
mately the same capa citance in Ah. This
information can be found on the battery.
2. Switch off the engine of the support vehicle.
3. Switch off any consumers in both vehicles.
There must not be any contact between
the bodies of the two vehicles; otherwise,
there is a danger of shorting. <
00320051004F004C00510048000300280047004C0057004C005200510003
Page 253 of 275

REFERENCEShort commands for the voice activation system
252
Short commands for the voice
activation system
Vehicle equipment
In this chapter, all production, country, and
optional equipment that is offered in the model
range is described. Equipment is also described
that is not available because of, for example,
selected options or coun try version. This also
applies to safety relate d functions and systems.
General information
Instructions for the voice activation system, refer
to page21.
Having the possible sp oken commands read
aloud: {Voice commands }
The following short commands apply to vehicles
with voice activation sy stem. They do not work
for equipment with which only the mobile
phone can be operated by voice.
Useful short commands
FunctionCommand
Accessing tone control {Tone }
Accessing settings {Settings }
Accessing the onboard computer {Onboard info }
Accessing contacts {Contacts }
To display phone book {Phonebook }
Accessing services {Assist }
Selecting destination entry {Enter address}
Selecting route guidance {Guidance }
00320051004F004C00510048000300280047004C0057004C005200510003
Page 262 of 275
Everything from A to ZREFERENCE
261
B
Background lighting, refer to
Ambient lighting 87
Backrests, refer to Seats 39
Backup lamps
– replacing bulb 228
Band-aids, refer to First aid pouch 236
Bar, refer to Tow-starting,
towing away 239
Base plate for telephone or mobile phone
– refer to Snap-in adapter 185
Bass sounds, refer to Tone control 141
Battery 233
– disposal 35,234
– jump-starting 236
– temporary power failure 234
Battery renewal
– remote control 35
Being towed 238
Belts, refer to Safety belts 42
Belt tensioner, refer to Safety
belts 42
Beverage holders, refer to Cupholders 100
Black ice, refer to External temperature warning 61
Blower, refer to Air flow rate 88,90
Bluetooth, activating/
deactivating 165,175
Bluetooth audio 157
– device pairing 158
– disconnecting an audio connection 160
– playback 159
– unpairing device 160
– what to do if... 160
Bottle holders, refer to
Cupholders 100
Brake Assist 72
Brake fluid, refer to Service
requirements 64 Brake lamps
– replacing bulbs
228
Brake pads, breaking in 104
Brake rotors 106
– brakes 104
– breaking in 104
Brakes
– ABS 72
– breaking in 104
– MINI Maintenance
System 218
– parking brake 52
– service requirements 64
Brakes, refer to Braking safely 105
Br ake system
104
– breaki ng
in104
– disc brakes 106
– MINI Maintenance
System 218
Breakdown service, refer to Roadside Assistance 236
Breaking in the clutch 104
Break-in period 104
Brightness of Control
Display 70
Bulb changing, refer to Lamps and bulbs 224
Button for starting the engine 50
Buttons on the steering wheel 11
C
Calendar 191
– displaying appointment 191
– selecting calendar day 191
California Proposition 65
warning 5
Call
– ending 168,180
– muting the microphone 181
Calling, refer to Phone numbers, dialing 168,180
Can holders, refer to Cupholders 100 Capacities
251
Car battery, refer to Vehicle battery 233
Car care 220
Care 220
– car-care products 220
– car washes 220
– CD/DVD drives 223
– high-pressure washers 221
– leather 222
– manual washing 221
– upholstery and fabrics 222
– windows 221
– wiper blades 221
Cargo, securing 112
Cargo area 106
– capacity 249
– Comfort Access 34
– lamp 87
– opening from outside 31
– trunk lid, refer to Tailgate 31
Cargo area, expanding 106
Cargo area lamp 87
Cargo area lid, refer to Tailgate 31
Cargo area partition net, refer to Cargo net 109
Cargo loading 110
– securing cargo 112
– stowing cargo 111
– vehicle 106
Cargo net 109
Car key, refer to Keys/remote
controls 26
Carpets, care 222
Car phone
– installation location, refer to Center armrest 97
Car phone, refer to
Telephone 164,174
Car radio, refer to Radio 143
Car wash
– before driving in 52
Car wa sh, care
220
Car w a
shes220
Catalytic converter, refer to Hot exhaust system 105
00320051004F004C00510048000300280047004C0057004C005200510003
Page 263 of 275
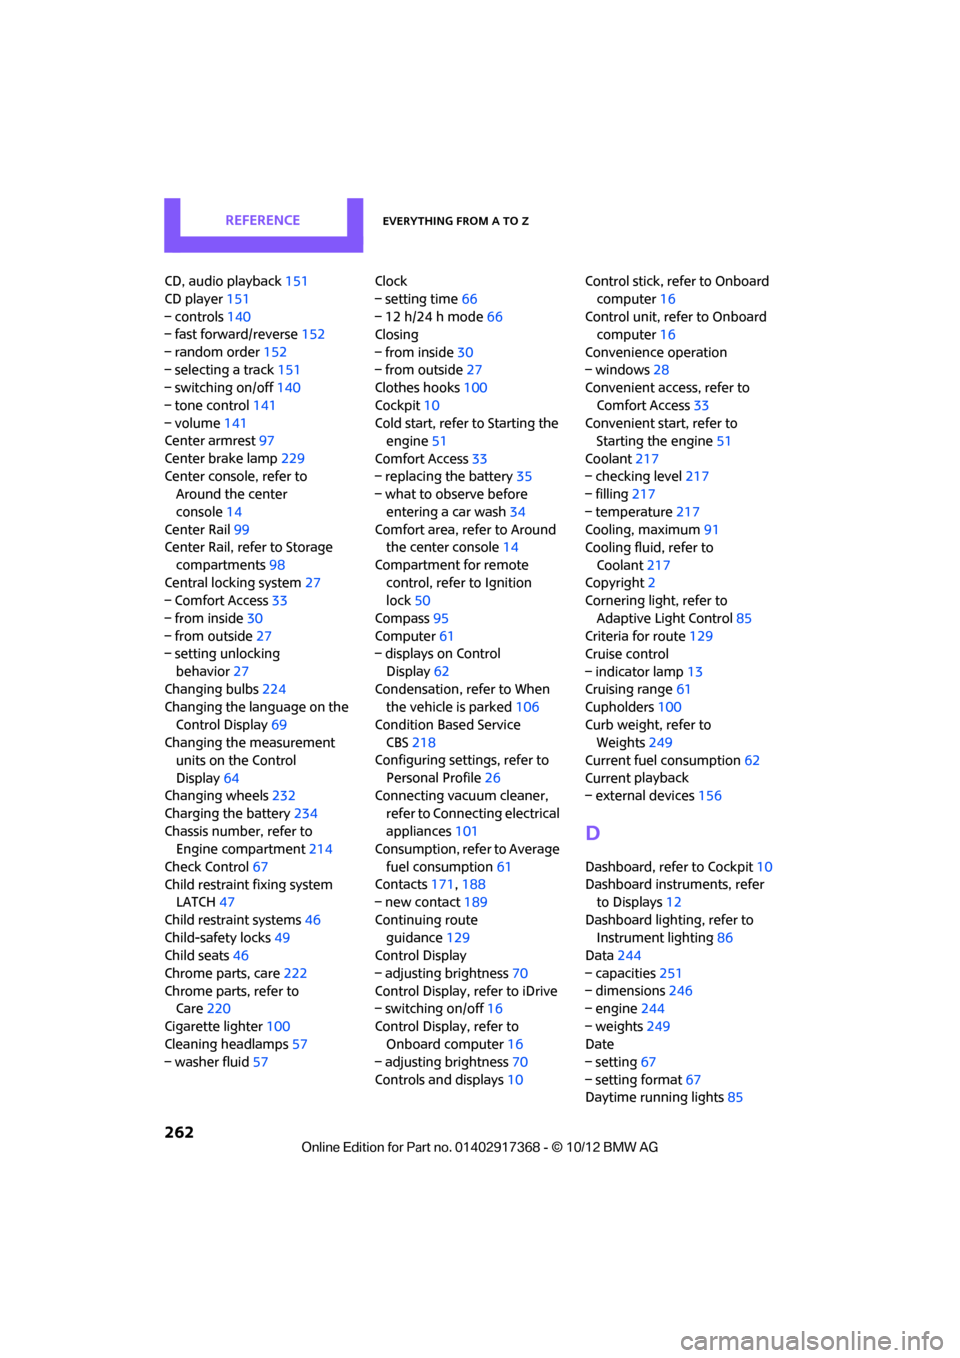
REFERENCEEverything from A to Z
262
CD, audio playback151
CD player 151
– controls 140
– fast forward/reverse 152
– random order 152
– selecting a track 151
– switching on/off 140
– tone control 141
– volume 141
Center armrest 97
Center brake lamp 229
Center console, refer to Around the center
console 14
Center Rail 99
Center Rail, refer to Storage
compartments 98
Central locking system 27
– Comfort Access 33
– from inside 30
– from outside 27
– setting unlocking
behavior 27
Changing bulbs 224
Changing the language on the
Control Display 69
Changing the measurement units on the Control
Display 64
Changing wheels 232
Charging the battery 234
Chassis number, refer to Engine compartment 214
Check Control 67
Child restraint fixing system LATCH 47
Child restraint systems 46
Child-safety locks 49
Child seats 46
Chrome parts, care 222
Chrome parts, refer to Care 220
Cigarette lighter 100
Cleaning headlamps 57
– washer fluid 57 Clock
– setting time
66
– 12 h/24 h mode 66
Closing
– from inside 30
– from outside 27
Clothes hooks 100
Cockpit 10
Cold start, refer to Starting the engine 51
Comfort Access 33
– replacing the battery 35
– what to observe before
enteri ng a car wash
34
C o
mfort area, refer to Around
the center console 14
Compartment for remote control, refer to Ignition
lock 50
Compass 95
Computer 61
– displays on Control
Display 62
Condensation, refer to When the vehicle is parked 106
Condition Based Service CBS 218
Configuring settings, refer to
Personal Profile 26
Connecting vacuum cleaner,
refer to Connecting electrical
appliances 101
Consumption, refer to Average
fuel consumption 61
Contacts 171,188
– new contact 189
Continuing route guidance 129
Control Display
– adjusting brightness 70
Control Display, refer to iDrive
– switching on/off 16
Control Display, refer to Onboard computer 16
– adjusting brightness 70
Controls and displays 10Control stick, refer to Onboard
computer 16
Control unit, refer to Onboard computer 16
Convenience operation
– windows 28
Convenient access, refer to
Comfort Access 33
Convenient star t, refer to
Starting the engine 51
Coolant 217
– checking level 217
– filling 217
– temperature 217
Cooling, maximum 91
Cooling fluid, refer to
Coolant 217
Copyright 2
Cornering light, refer to
Adaptive Light Control 85
Criteria for route 129
Cruise control
– indicator lamp 13
Cruising range 61
Cupholders 100
Curb weight, refer to Weights 249
Current fuel consumption 62
Curren t playback
– external d
evices156
D
Dashboard, refer to Cockpit 10
Dashboard instruments, refer to Displays 12
Dashboard lighting, refer to Instrument lighting 86
Data 244
– capacities 251
– dimensions 246
– engine 244
– weights 249
Date
– setting 67
– setting format 67
Daytime running lights 85
00320051004F004C00510048000300280047004C0057004C005200510003