clock MINI Paceman 2014 (Mini Connected) User Guide
[x] Cancel search | Manufacturer: MINI, Model Year: 2014, Model line: Paceman, Model: MINI Paceman 2014Pages: 282, PDF Size: 6.76 MB
Page 242 of 282

1Turn signal2Parking lamp/roadside parking lamp/fog
lamp
Replacing the turn signal bulb
21-watt bulb, P 21 W, or PY 21 W
1.Turn the wheel.2.Remove cover 1.
To do this, turn the cover counterclockwise.3.Remove the inside cover. To do this, turn
the cover counterclockwise.4.Turn the bulb counterclockwise and re‐
move it.5.Insert the new bulb and attach the covers
in reverse order.Replacing the parking lamp bulb and
roadside parking lamp bulb
5-watt bulb, W 5 W1.Turn the wheel.2.Remove cover 2.
To do this, turn the cover counterclockwise.3.Turn the upper bulb counterclockwise and
remove it.4.Insert the new bulb and attach the cover in
reverse order.
Replacing the front fog lamp bulb
H8 bulb, 35 watt
1.Turn the wheel.2.Remove cover 2.
To do this, turn the cover counterclockwise.3.Pull off the plug-in cable connector.4.Turn the lower bulb counterclockwise and
remove it.5.Insert the new bulb and attach the cover in
reverse order.Seite 242MobilityReplacing components242
Online Edition for Part no. 01 40 2 911 544 - VI/13
Page 248 of 282

Breakdown assistanceVehicle equipment
This chapter describes all series equipment as
well as country-specific and special equipment
offered for this model series.Therefore, it also
describes equipment that may not be found in
your vehicle, for instance due to the selected
special equipment or the country version. This
also applies to safety-related functions and sys‐
tems.
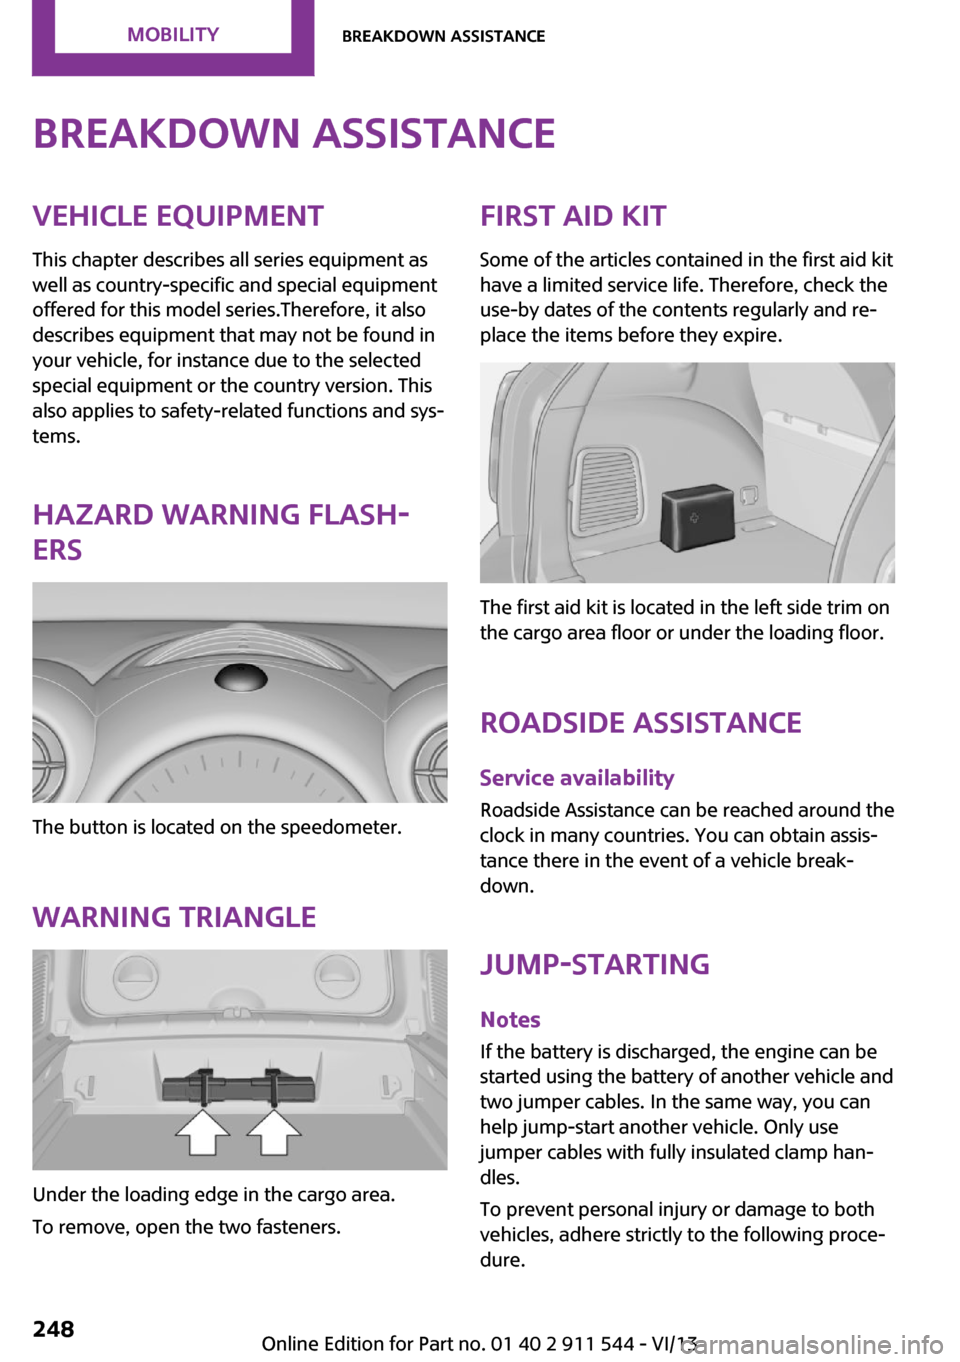
Hazard warning flash‐
ers
The button is located on the speedometer.
Warning triangle
Under the loading edge in the cargo area.
To remove, open the two fasteners.
First aid kit
Some of the articles contained in the first aid kit
have a limited service life. Therefore, check the
use-by dates of the contents regularly and re‐
place the items before they expire.
The first aid kit is located in the left side trim on
the cargo area floor or under the loading floor.
Roadside Assistance Service availability
Roadside Assistance can be reached around the
clock in many countries. You can obtain assis‐
tance there in the event of a vehicle break‐
down.
Jump-starting
Notes If the battery is discharged, the engine can be
started using the battery of another vehicle and
two jumper cables. In the same way, you can
help jump-start another vehicle. Only use
jumper cables with fully insulated clamp han‐
dles.
To prevent personal injury or damage to both
vehicles, adhere strictly to the following proce‐
dure.
Seite 248MobilityBreakdown assistance248
Online Edition for Part no. 01 40 2 911 544 - VI/13
Page 271 of 282

Bluetooth connection, activat‐ing/deactivating 181, 191
Bluetooth hands-free sys‐ tem 180
Brake assistant 93
Brake discs, breaking in 122
Brake fluid, refer to Service re‐ quirements 74
Brake force distribution, elec‐ tronic 93
Brake pads, breaking in 122
Brakes– Handbrake 60
Brakes, MINI maintenance
system 237
Brakes, service require‐ ments 74
Brake system, MINI mainte‐ nance system 237
Braking, notes 123
Breakdown assistance, Road‐ side Assistance 248
Breaking in 122
Brightness on the Control Dis‐ play 74
Buckle tongue, rear
– Height adjustment 48
Button for starting the engine,
refer to Start/Stop button 58
C
Calendar 206
California Proposition 65 Warning 7
Car battery, refer to Vehicle battery 246
Car care products 255
Care, displays 257
Care, vehicle 255
Cargo area
– Comfort Access 39– Flat loading floor 111– Multi-function hook 113– Opening from the out‐
side 37– Partition net 112Cargo area, enlarging– Cargo cover 110
Cargo area lamp, refer to Inte‐
rior lamps 81
Cargo area tailgate, refer to Tailgate 37
Car horn, refer to Horn 14
Carpet, care 257
Car phone, refer to Tele‐ phone 180, 190
Car wash 254
CBC, Cornering Brake Con‐
trol 93
CBS Condition Based Serv‐ ice 237
CD 166
CD/DVD drives, care 257
CD player 166
Center armrest 115
Center console, refer to Around the center con‐
sole 18
Center rail 116
Center rail, refer to Storage compartments 116
Central locking
– Comfort Access 38– From the inside 36– From the outside 34
Central locking system
– Concept 33– From the outside 33
Central screen, see Control
Display 20
Changes, technical, refer to Safety 7
Changing wheels/tires 227
Check Control 75
Children, transporting 53
Child restraint fixing system LATCH 54
Child restraint fixing sys‐ tems 53
Child restraint fixing systems, mounting 53
Child seat, mounting 53
Child seats, refer to Transport‐
ing children safely 53
Chrome parts, care 257
Circulation of air, refer to Re‐ circulated air
mode 100, 102
Cleaning, displays 257
Cleaning, refer to Care 254
Climate 99
Climate mode– Ventilation 103
Clock 68
Clock
– 12h/24h format 72– Setting the time and date 72
Closing
– From the inside 36– From the outside 34
Clutch, breaking in 122
Cockpit 14
Cold start, refer to Starting the engine 59
Combination instrument, refer to Displays 16
Combination switch, refer to Turn signal/high beams/
headlamp flasher 61
Combination switch, refer to Washer/wiper system 61
Comfort Access
– In the car wash 40– Replacing the battery 41
Comfort area, refer to Around
the center console 18
Compartment for remote con‐ trol, refer to Ignition lock 58
Compass, digital 106
Computer 69
Computer, displaying informa‐ tion 69
Condition Based Service CBS 237
Confirmation signals for vehi‐ cle locking/unlocking 35
Connecting, mobile phone, re‐ fer to Pairing the mobile
phone 180, 191
Seite 271Everything from A to ZReference271
Online Edition for Part no. 01 40 2 911 544 - VI/13
Page 278 of 282

Service requirements, CBSCondition Based Service 237
Settings– Changing on the Control Dis‐
play 73– Language 73
Settings and information 71
Settings, configuring, refer to Personal Profile 32
Setting the clock, 12h/24h for‐ mat 72
Shifting
– Automatic transmission with
Steptronic 66
Shifting, manual transmis‐
sion 64
Shift lever
– Automatic transmission with
Steptronic 65
Shift paddles on the steering
wheel 66
Short commands, voice acti‐ vation 264
Side airbags 82
Side windows, refer to Win‐ dows 42
Sliding/tilting sunroof
– Refer to Glass sunroof, elec‐
trical 41
Slot for remote control 58
Snap-in adapter, mobile phone 200
Socket, OBD Onboard Diagno‐ sis 238
Software applications, iPhone 210
Software part num‐ ber 180, 190
Software update 176
Special destinations, naviga‐ tion 140
Special equipment, series equipment 6
Speed, average 70
Speed limit 91
Speed limit
– Setting 91Speedometer 16
Speed, with winter tires 228
Spoken instructions, naviga‐ tion 147
Sport button 95
Sport program, automatic transmission with Step‐
tronic 66
Stability control systems 93
Start/Stop button 58
Start/Stop button, starting the engine 59
Start/Stop button, switching off the engine 60
Starting the engine 59
Start problems, refer to Jump- starting 248
State/province, selecting for navigation 136
Stations, stored 164
Station, storing 159
Status information, onboard monitor 23
Steering wheel 52
Steering wheel– Shift paddles 66
Steering wheel, adjusting 52
Steering wheel lock 58
Stopping, engine 60
Storage, tires 228
Storing the vehicle 257
Street, entering for naviga‐ tion 137
Summer tires, refer to Wheels and tires 220
Summer tires, tread 225
Switches, refer to Cockpit 14
Switching off, engine 60
Switching off, vehicle 60
Symbols 6
T Tachometer 69
Tailgate 37
Tailgate– Comfort Access 39– Opening/closing 37– Opening from the out‐
side 37
Tail lamps 243
Tank gauge, refer to Fuel gauge 69
Tasks 207
Technical changes, refer to Safety 7
Technical data 260
Telephone 180, 190
Telephone, adjusting the vol‐ ume 183, 195
Temperature
– Air conditioner 100– Automatic climate con‐
trol 102– Changing the unit of meas‐
ure 72
Temperature, coolant, refer to
Coolant temperature 69
Temperature display
– External temperature 68– External temperature warn‐
ing 68– Setting the unit 72
Temperature warning 68
Text messages 205
Theft alarm system, refer to Alarm system 41
Time
– Setting the time 72– Setting the time zone 73
Tire age 226
Tire identification marks 224
Tire inflation pressure 220
Tire inflation pressure
– Pressure loss 86, 88
Tire pressure monitor, refer to
Flat Tire Monitor 85
Tire Pressure Monitor TPM
– System limits 87– System reset 88– Warning lamp 89
Tire Quality Grading 224
Seite 278ReferenceEverything from A to Z278
Online Edition for Part no. 01 40 2 911 544 - VI/13