reset MINI Paceman 2014 (Mini Connected) User Guide
[x] Cancel search | Manufacturer: MINI, Model Year: 2014, Model line: Paceman, Model: MINI Paceman 2014Pages: 282, PDF Size: 6.76 MB
Page 90 of 282
For a vehicle containing an average load, the
possible driving distance is ap‐
prox. 50 miles/80 km.
When the vehicle is driven with a damaged tire,
its handling characteristics change, e.g., re‐
duced lane stability during braking, a longer
braking distance, and altered self-steering
properties. Adjust your driving style accord‐
ingly. Avoid abrupt steering maneuvers or driv‐
ing over obstacles, e. g., curbs, potholes, etc.
Because the possible driving distance depends
on how the vehicle is used during the trip, the
actual distance may be smaller or greater de‐
pending on the driving speed, road conditions,
external temperature, cargo load, etc.
Continued driving with a flat tire
Drive moderately and do not exceed a
speed of 50 mph/80 km/h.
A loss of tire inflation pressure results in a
change in the handling characteristics, e.g., re‐
duced lane stability during braking, a longer
braking distance and altered self-steering prop‐
erties. ◀
Final tire failure
Vibrations or loud noises while driving
can indicate the final failure of the tire. Reduce
speed and stop; otherwise, pieces of the tire
could come loose and cause an accident. Do
not continue driving, and contact your service
center. ◀
Message when not reset The yellow warning lamp lights up. A
message is displayed on the onboard
monitor.
The system detected a wheel change but was
not yet reset. Warnings regarding the current
tire inflation pressure are not reliable.
Check the tire inflation pressure and reset the
system, refer to page 88.Malfunction
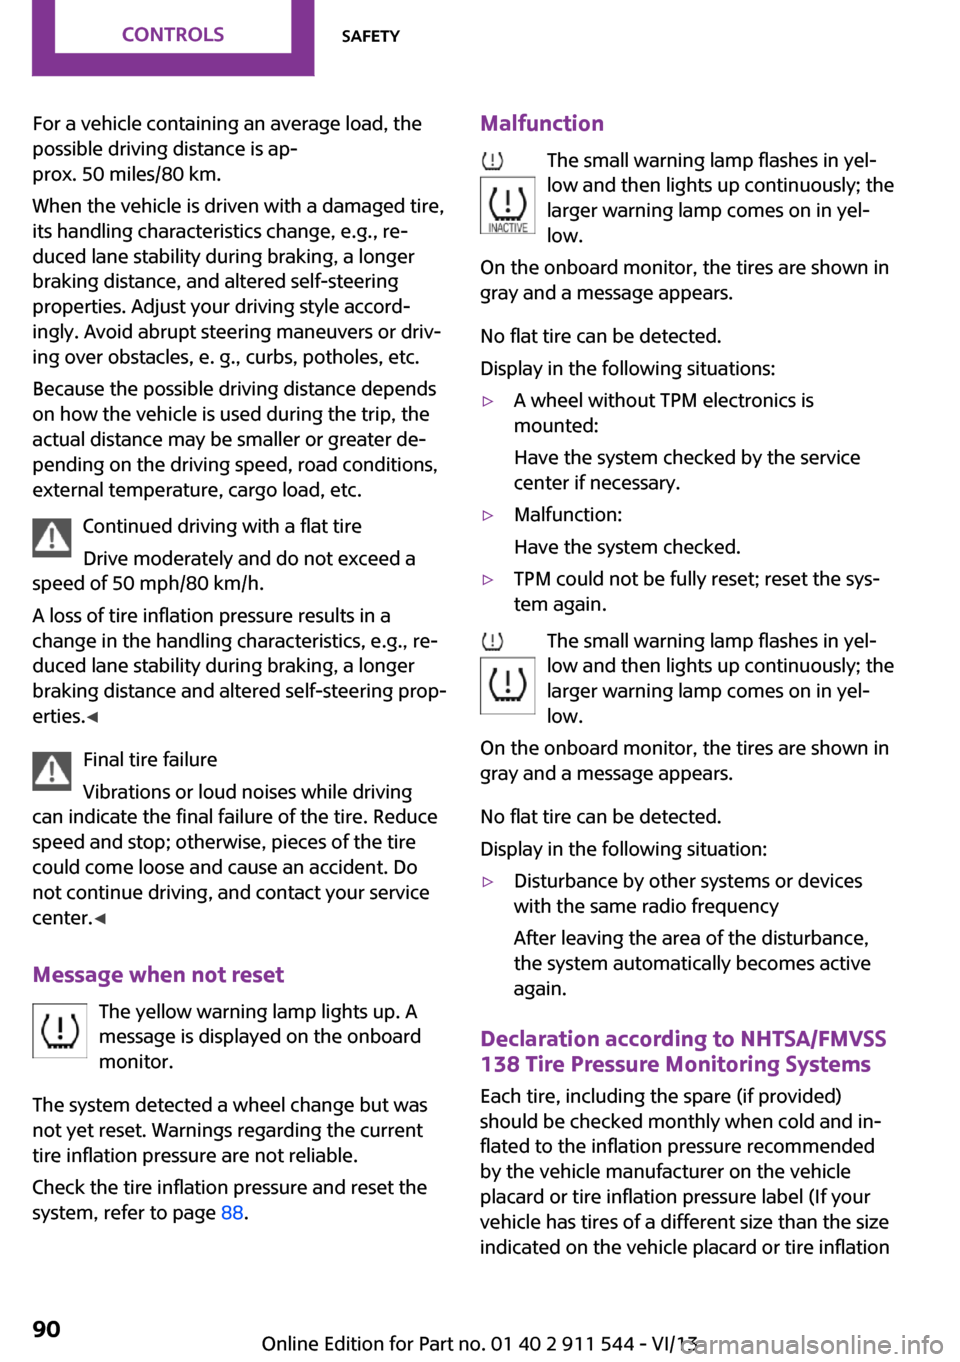
The small warning lamp flashes in yel‐
low and then lights up continuously; the
larger warning lamp comes on in yel‐
low.
On the onboard monitor, the tires are shown in
gray and a message appears.
No flat tire can be detected.
Display in the following situations:▷A wheel without TPM electronics is
mounted:
Have the system checked by the service
center if necessary.▷Malfunction:
Have the system checked.▷TPM could not be fully reset; reset the sys‐
tem again.
The small warning lamp flashes in yel‐
low and then lights up continuously; the
larger warning lamp comes on in yel‐
low.
On the onboard monitor, the tires are shown in
gray and a message appears.
No flat tire can be detected.
Display in the following situation:
▷Disturbance by other systems or devices
with the same radio frequency
After leaving the area of the disturbance,
the system automatically becomes active
again.
Declaration according to NHTSA/FMVSS
138 Tire Pressure Monitoring Systems
Each tire, including the spare (if provided)
should be checked monthly when cold and in‐
flated to the inflation pressure recommended
by the vehicle manufacturer on the vehicle
placard or tire inflation pressure label (If your
vehicle has tires of a different size than the size indicated on the vehicle placard or tire inflation
Seite 90ControlsSafety90
Online Edition for Part no. 01 40 2 911 544 - VI/13
Page 157 of 282
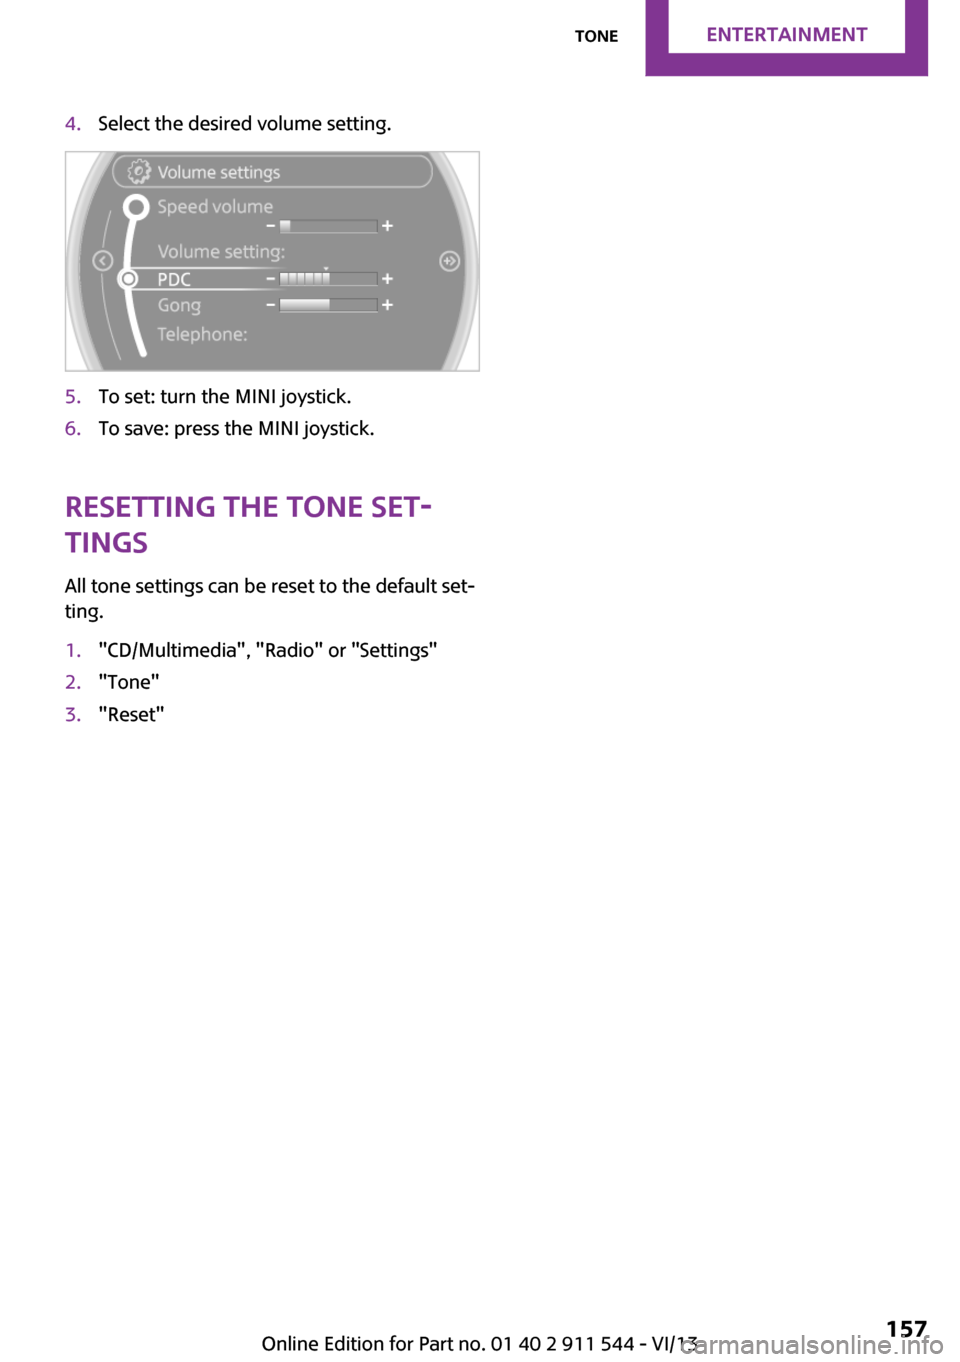
4.Select the desired volume setting.5.To set: turn the MINI joystick.6.To save: press the MINI joystick.
Resetting the tone set‐
tings
All tone settings can be reset to the default set‐
ting.
1."CD/Multimedia", "Radio" or "Settings"2."Tone"3."Reset"Seite 157ToneEntertainment157
Online Edition for Part no. 01 40 2 911 544 - VI/13
Page 164 of 282
Managing the favorites
Activating/deactivating the favorites
Favorites can be activated and deactivated
globally and individually.1."Satellite radio"2. "Manage favorites"3.Select "Activate alert" or the desired favor‐
ites.
The setting is stored for the remote control cur‐
rently in use.
Deleting favorites
1."Satellite radio"2. "Manage favorites"3.Highlight the desired favorite.4.Open "Options".5."Delete entry"
Traffic Jump Traffic and weather information for a selected
region is broadcast every few minutes.
Selecting a region
1."Radio"2."Satellite radio"3.Open "Options".4."Set jump"5.Select the desired region.
The region is stored for the remote control cur‐
rently in use.
Activating/deactivating the jump
1."Radio"2."Satellite radio"3. "Jump to:"
Information for the selected region is broadcast
as soon as it is available.
A new panel opens.
Canceling the Traffic Jump: "Cancel".
SymbolMeaning Information will be broadcast shortly. Information is currently being broad‐
cast.
Select one of the symbols to deactivate Traffic
Jump.
Automatic update About twice a year, Sirius performs an update
of the channel names and positions. The up‐
date takes place automatically and may take
several minutes.
Notes
▷Reception may not be available in some sit‐
uations, such as under certain environmen‐
tal or topographic conditions. The satellite
radio has no influence on this.▷The signal may not be available in tunnels
or underground garages; next to tall build‐
ings; or near trees, mountains or other
powerful sources of radio interference.
Stored stations
General information
It is possible to store up to 40 stations.
Calling up a station
1."Radio"2."Presets"3.Select the desired station.
Storing a stationThe station currently selected is stored.
1."Radio"2."Presets"Seite 164EntertainmentRadio164
Online Edition for Part no. 01 40 2 911 544 - VI/13
Page 165 of 282
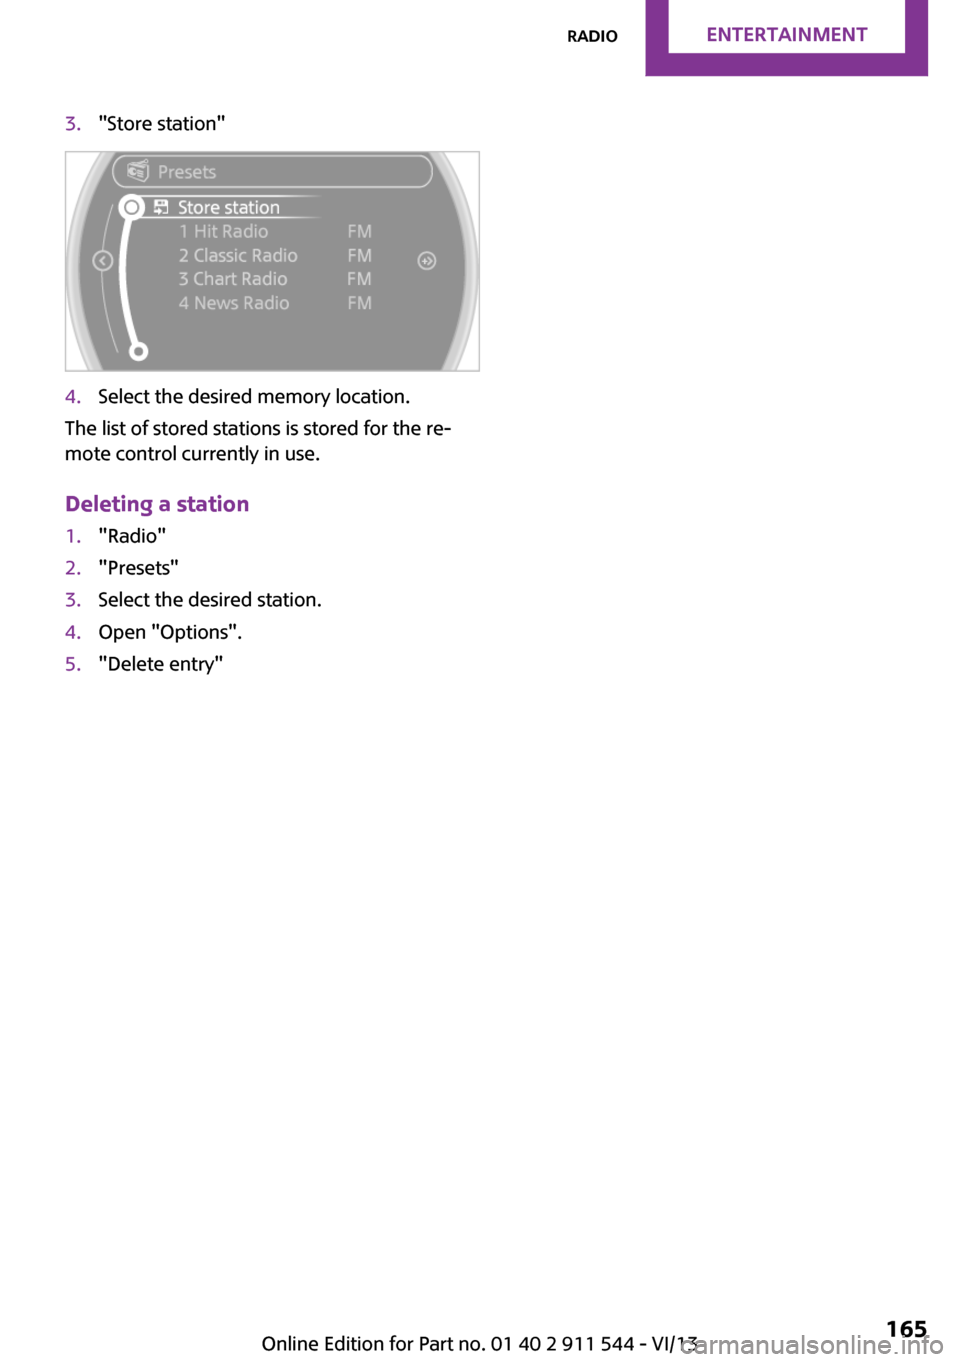
3."Store station"4.Select the desired memory location.
The list of stored stations is stored for the re‐
mote control currently in use.
Deleting a station
1."Radio"2."Presets"3.Select the desired station.4.Open "Options".5."Delete entry"Seite 165RadioEntertainment165
Online Edition for Part no. 01 40 2 911 544 - VI/13
Page 173 of 282
Information on connection▷The connected audio device is supplied
with a max. power of 500 mA if supported
by the device. Therefore, do not addition‐
ally connect the device to a socket in the
vehicle; otherwise, playback may be com‐
promised.▷Do not use force when plugging the con‐
nector into the USB interface.▷Do not connect devices such as fans or
lamps to the USB audio interface.▷Do not connect USB hard drives.▷Do not use the USB audio interface to re‐
charge external devices.
Bluetooth audio
At a glance
▷Music files on external devices such as au‐
dio devices or mobile phones can be played
back via Bluetooth.
Use of a mobile phone as an audio source,
refer to page 192.▷Bluetooth® is a registered trademark of
Bluetooth® SIG, Inc.▷The sound is output on the vehicle loud‐
speakers.▷The volume of the sound output is depend‐
ent on the device. If necessary, adjust the
volume on the device.▷Up to four external devices can be paired
with the vehicle.
Requirements
▷The device is suitable. Information under
www.mini.com/connectivity.▷The device is ready for operation.▷The ignition is switched on.▷Bluetooth is activated on the vehicle, refer
to page 191, and on the device.▷Bluetooth presettings must be made on the
device, such as for a connection withoutconfirmation or visibility; refer to the device
operating instructions.▷A number with at least four and a maxi‐
mum of 16 digits is defined as the Blue‐
tooth passkey. It is only required once for
pairing.
Pairing and connecting
Pairing a device
To avoid becoming distracted and posing
an unnecessary hazard both to your own vehi‐
cle's occupants and to other road users, only
pair the device while the vehicle is stationary. ◀
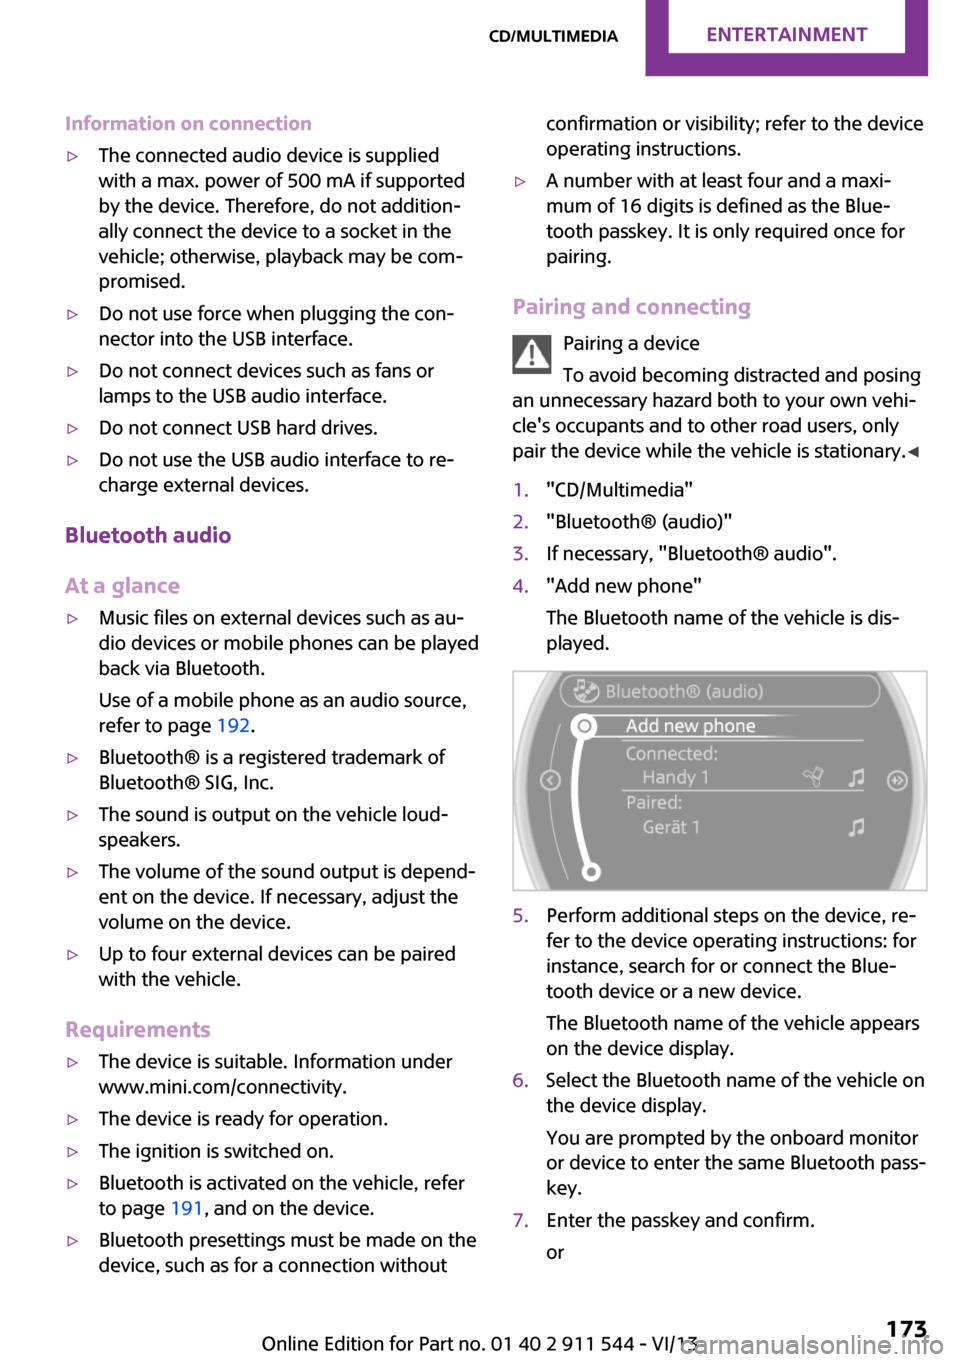
1."CD/Multimedia"2."Bluetooth® (audio)"3.If necessary, "Bluetooth® audio".4."Add new phone"
The Bluetooth name of the vehicle is dis‐
played.5.Perform additional steps on the device, re‐
fer to the device operating instructions: for
instance, search for or connect the Blue‐
tooth device or a new device.
The Bluetooth name of the vehicle appears
on the device display.6.Select the Bluetooth name of the vehicle on
the device display.
You are prompted by the onboard monitor
or device to enter the same Bluetooth pass‐
key.7.Enter the passkey and confirm.
orSeite 173CD/multimediaEntertainment173
Online Edition for Part no. 01 40 2 911 544 - VI/13
Page 181 of 282
▷Bluetooth presettings may need to be
made on the mobile phone, e.g., for a con‐
nection without confirmation or visibility,
refer to the mobile phone operating in‐
structions.▷Deactivate Bluetooth audio if necessary.▷A number with at least four and a maxi‐
mum of 16 digits was defined as the Blue‐
tooth passkey. It is only required once for
pairing.▷Compare the control number on the Control
Display with the control number on the mo‐
bile phone display. Confirm the control
number on the mobile phone and in the
vehicle.▷The radio ready state is switched on.
Activating/deactivating Bluetooth
Bluetooth is not permitted everywhere. Comply
with all safety guidelines and regulations.
1."Telephone"2.Open "Options".3."Bluetooth®"
Pairing and connecting a mobile phone
Pairing the mobile phone
To avoid becoming distracted and posing
an unnecessary hazard both to your own vehi‐
cle's occupants and to other road users, only
pair the mobile phone while the vehicle is sta‐
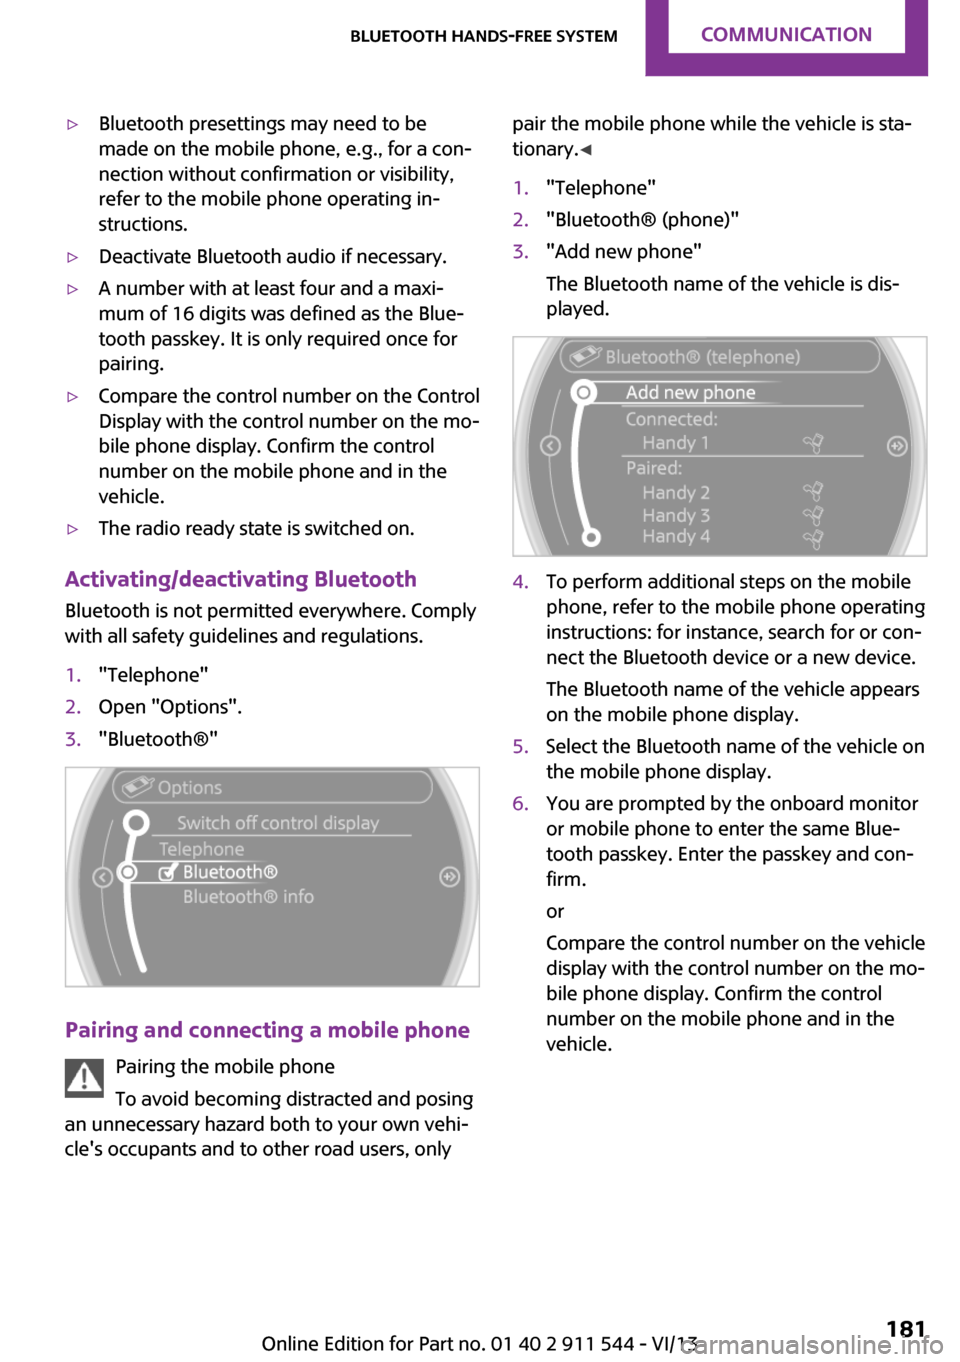
tionary. ◀1."Telephone"2."Bluetooth® (phone)"3."Add new phone"
The Bluetooth name of the vehicle is dis‐
played.4.To perform additional steps on the mobile
phone, refer to the mobile phone operating
instructions: for instance, search for or con‐
nect the Bluetooth device or a new device.
The Bluetooth name of the vehicle appears
on the mobile phone display.5.Select the Bluetooth name of the vehicle on
the mobile phone display.6.You are prompted by the onboard monitor
or mobile phone to enter the same Blue‐
tooth passkey. Enter the passkey and con‐
firm.
or
Compare the control number on the vehicle
display with the control number on the mo‐
bile phone display. Confirm the control
number on the mobile phone and in the
vehicle.Seite 181Bluetooth hands-free systemCommunication181
Online Edition for Part no. 01 40 2 911 544 - VI/13
Page 191 of 282
NotesAt high temperatures, the charging function of
the mobile phone may be limited and functions
may not be executed.
When using the mobile phone via the vehicle,
note the operating instructions of the mobile
phone.
Pairing/unpairing the
mobile phone
General information
The following functions are available:▷Use of a mobile phone as a telephone.▷Use of a mobile phone as an additional te‐
lephone.▷Use of a mobile phone as an audio source.▷Use of an audio device as an audio source,
refer to page 173.
Requirements
▷The mobile phone is suitable, refer to
page 190.▷The mobile phone is ready for operation.▷Bluetooth is activated in the vehicle and on
the mobile phone.▷Bluetooth presettings may need to be
made on the mobile phone, e.g., for a con‐
nection without confirmation or visibility,
refer to the mobile phone operating in‐
structions.▷Deactivate Bluetooth audio if necessary.▷Compare the control number on the Control
Display with the control number on the mo‐
bile phone display. Confirm the control
number on the mobile phone and in the
vehicle.▷A number with at least four and a maxi‐
mum of 16 digits was defined as the Blue‐tooth passkey. It is only required once for
pairing.▷The radio ready state is switched on.
Activating/deactivating Bluetooth
Bluetooth is not permitted everywhere. Comply
with all safety guidelines and regulations.
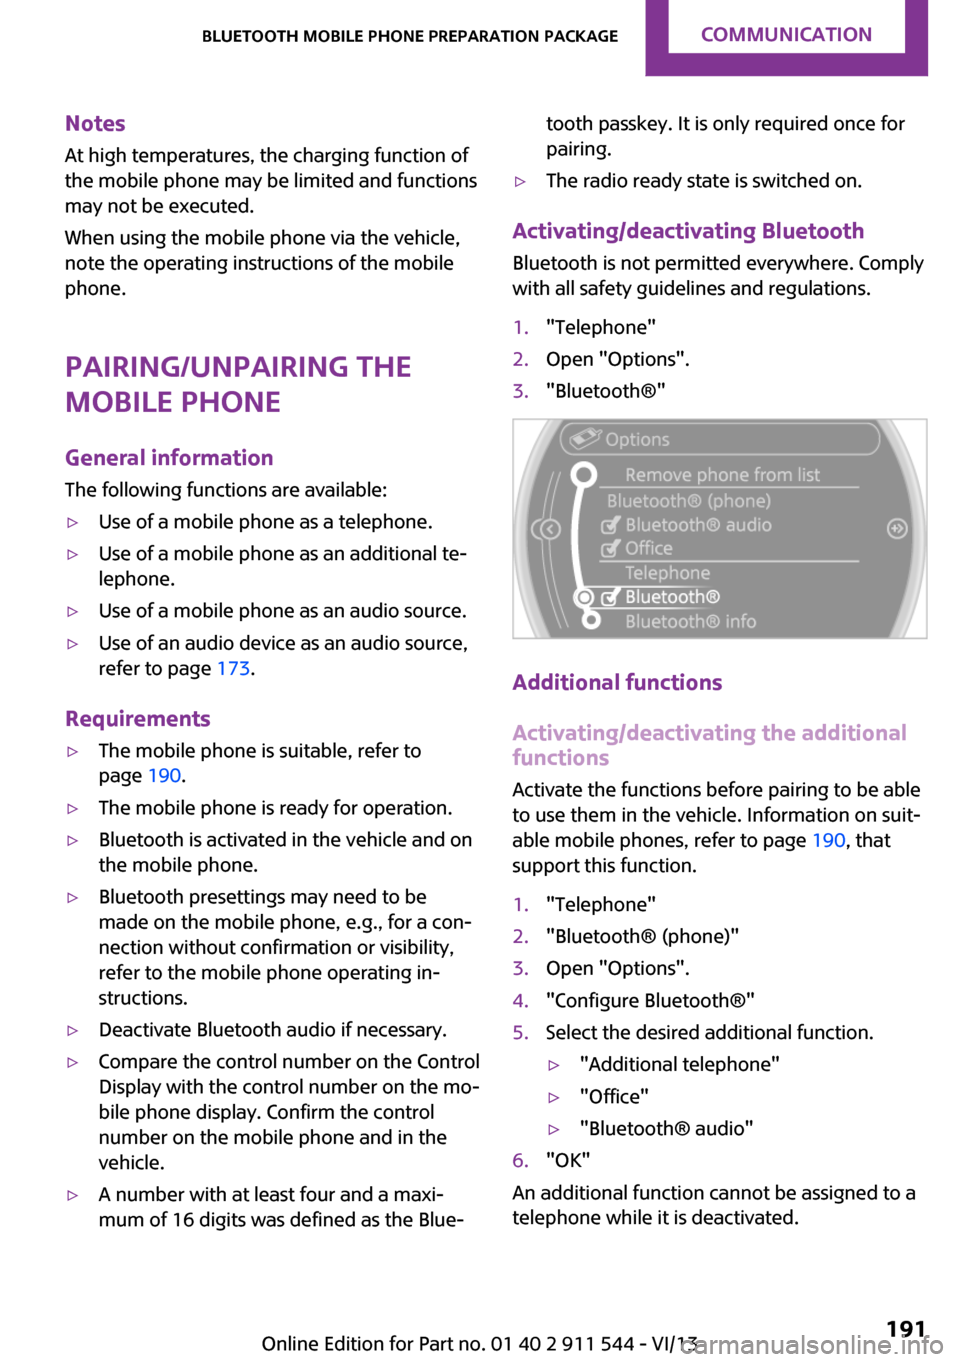
1."Telephone"2.Open "Options".3."Bluetooth®"
Additional functions
Activating/deactivating the additional functions
Activate the functions before pairing to be able
to use them in the vehicle. Information on suit‐
able mobile phones, refer to page 190, that
support this function.
1."Telephone"2."Bluetooth® (phone)"3.Open "Options".4."Configure Bluetooth®"5.Select the desired additional function.▷"Additional telephone"▷"Office"▷"Bluetooth® audio"6."OK"
An additional function cannot be assigned to a
telephone while it is deactivated.
Seite 191Bluetooth mobile phone preparation packageCommunication191
Online Edition for Part no. 01 40 2 911 544 - VI/13
Page 220 of 282
Wheels and tiresVehicle equipment
This chapter describes all series equipment as
well as country-specific and special equipment
offered for this model series.Therefore, it also
describes equipment that may not be found in
your vehicle, for instance due to the selected
special equipment or the country version. This
also applies to safety-related functions and sys‐
tems.
Tire inflation pressure Safety information
It is not merely the tires' service life, but also
driving comfort and, to a great extent, driving
safety that depend on the condition of the tires
and the maintenance of the specified tire pres‐
sure.
Checking the pressure Check the tire inflation pressure regularly
Regularly check the tire inflation pressure
and correct it as needed: at least twice a month
and before a long trip. If you fail to observe this
precaution, you may be driving on tires with in‐
correct tire pressures, a condition that may not
only compromise your vehicle's driving stabil‐
ity, but also lead to tire damage and the risk of
an accident.
Do not drive with depressurized or flat tires, ex‐
cept for run-flat tires. A flat tire will seriously
impair your vehicle's handling and braking re‐
sponse. Attempts to drive on a flat tire can lead
to a loss of control over the vehicle. ◀
Only check the tire inflation pressure when the
tires are cold. This means after a maximum of
1.25 miles/2 km driving or when the vehicle
has been parked for at least 2 hours. When thetires are warm, the tire inflation pressure is
higher.
After correcting the tire inflation pressure, reset
the Tire Pressure Monitor, refer to page 88
or reinitialize the Flat Tire Monitor, refer to
page 86.
To check the inflation pressure, there is a valve
extension behind the bumper.
Pressure specifications
The tables below provide all the correct infla‐
tion pressures for the specified tire sizes at am‐
bient temperature.
The inflation pressures apply to the tire sizes
approved and tire brands recommended by the
manufacturer of the MINI; a list of these is
available from the service center.
For correct identification of the right tire infla‐
tion pressures, observe the following:▷Tire sizes of your vehicle▷Maximum allowable driving speed
Tire inflation pressures for driving up to
100 mph or 160 km/h
For normal driving up to 100 mph/160 km/h,
adjust pressures to the respective tire inflation
pressures listed on the following pages in the
column for traveling speeds up to 100 mph/
160 km/h to achieve optimum driving comfort.
These tire inflation pressures can also be found
on the driver's side door pillar when the driver's
door is open.
Seite 220MobilityWheels and tires220
Online Edition for Part no. 01 40 2 911 544 - VI/13
Page 267 of 282
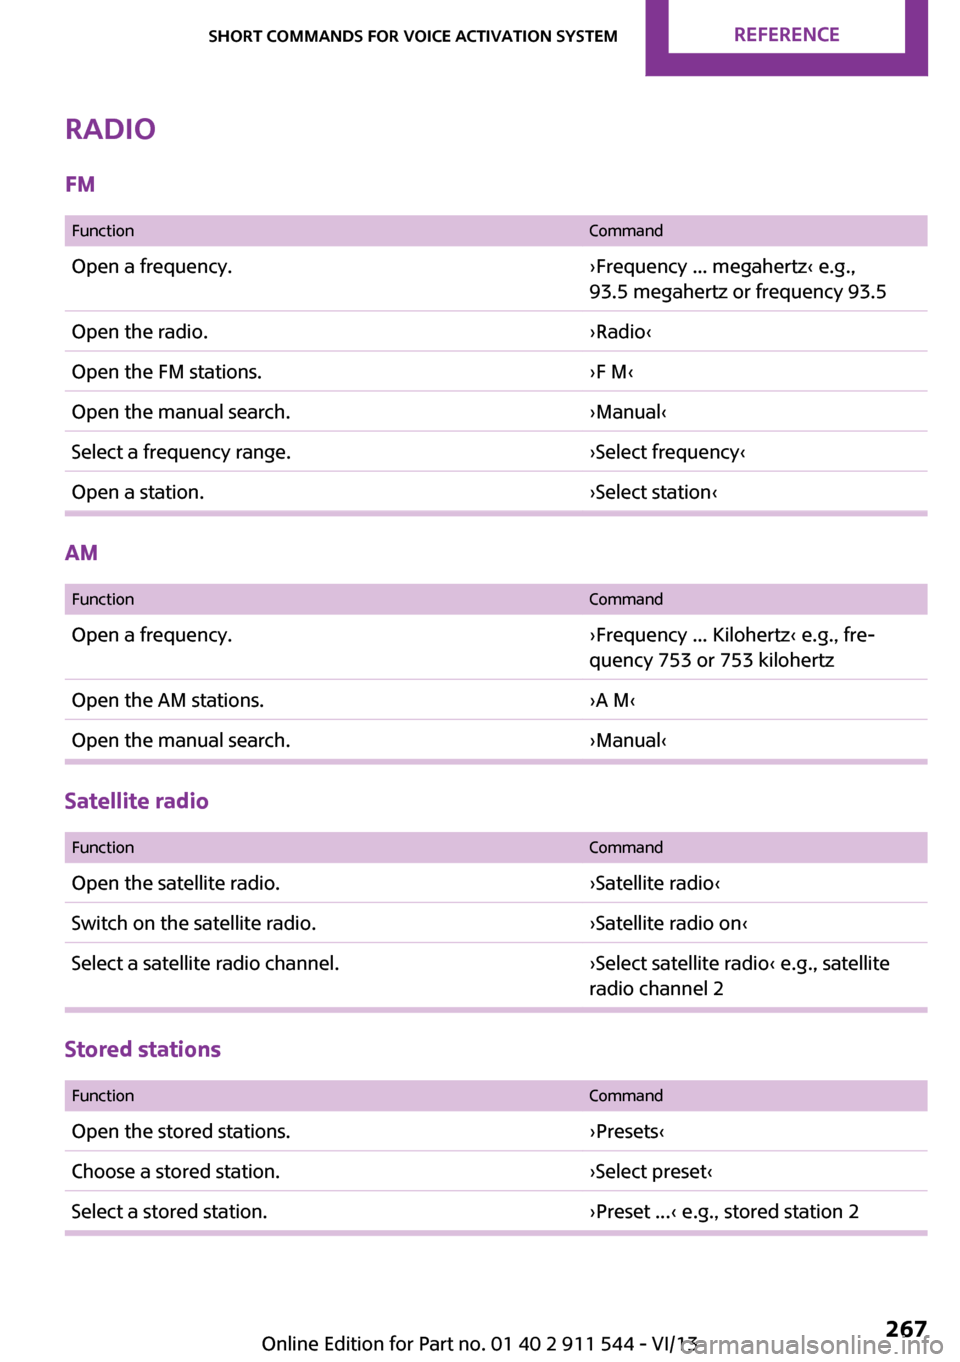
Radio
FM
FunctionCommandOpen a frequency.›Frequency ... megahertz‹ e.g.,
93.5 megahertz or frequency 93.5Open the radio.›Radio‹Open the FM stations.›F M‹Open the manual search.›Manual‹Select a frequency range.›Select frequency‹Open a station.›Select station‹
AM
FunctionCommandOpen a frequency.›Frequency ... Kilohertz‹ e.g., fre‐
quency 753 or 753 kilohertzOpen the AM stations.›A M‹Open the manual search.›Manual‹
Satellite radio
FunctionCommandOpen the satellite radio.›Satellite radio‹Switch on the satellite radio.›Satellite radio on‹Select a satellite radio channel.›Select satellite radio‹ e.g., satellite
radio channel 2
Stored stations
FunctionCommandOpen the stored stations.›Presets‹Choose a stored station.›Select preset‹Select a stored station.›Preset ...‹ e.g., stored station 2Seite 267Short commands for voice activation systemReference267
Online Edition for Part no. 01 40 2 911 544 - VI/13
Page 278 of 282
Service requirements, CBSCondition Based Service 237
Settings– Changing on the Control Dis‐
play 73– Language 73
Settings and information 71
Settings, configuring, refer to Personal Profile 32
Setting the clock, 12h/24h for‐ mat 72
Shifting
– Automatic transmission with
Steptronic 66
Shifting, manual transmis‐
sion 64
Shift lever
– Automatic transmission with
Steptronic 65
Shift paddles on the steering
wheel 66
Short commands, voice acti‐ vation 264
Side airbags 82
Side windows, refer to Win‐ dows 42
Sliding/tilting sunroof
– Refer to Glass sunroof, elec‐
trical 41
Slot for remote control 58
Snap-in adapter, mobile phone 200
Socket, OBD Onboard Diagno‐ sis 238
Software applications, iPhone 210
Software part num‐ ber 180, 190
Software update 176
Special destinations, naviga‐ tion 140
Special equipment, series equipment 6
Speed, average 70
Speed limit 91
Speed limit
– Setting 91Speedometer 16
Speed, with winter tires 228
Spoken instructions, naviga‐ tion 147
Sport button 95
Sport program, automatic transmission with Step‐
tronic 66
Stability control systems 93
Start/Stop button 58
Start/Stop button, starting the engine 59
Start/Stop button, switching off the engine 60
Starting the engine 59
Start problems, refer to Jump- starting 248
State/province, selecting for navigation 136
Stations, stored 164
Station, storing 159
Status information, onboard monitor 23
Steering wheel 52
Steering wheel– Shift paddles 66
Steering wheel, adjusting 52
Steering wheel lock 58
Stopping, engine 60
Storage, tires 228
Storing the vehicle 257
Street, entering for naviga‐ tion 137
Summer tires, refer to Wheels and tires 220
Summer tires, tread 225
Switches, refer to Cockpit 14
Switching off, engine 60
Switching off, vehicle 60
Symbols 6
T Tachometer 69
Tailgate 37
Tailgate– Comfort Access 39– Opening/closing 37– Opening from the out‐
side 37
Tail lamps 243
Tank gauge, refer to Fuel gauge 69
Tasks 207
Technical changes, refer to Safety 7
Technical data 260
Telephone 180, 190
Telephone, adjusting the vol‐ ume 183, 195
Temperature
– Air conditioner 100– Automatic climate con‐
trol 102– Changing the unit of meas‐
ure 72
Temperature, coolant, refer to
Coolant temperature 69
Temperature display
– External temperature 68– External temperature warn‐
ing 68– Setting the unit 72
Temperature warning 68
Text messages 205
Theft alarm system, refer to Alarm system 41
Time
– Setting the time 72– Setting the time zone 73
Tire age 226
Tire identification marks 224
Tire inflation pressure 220
Tire inflation pressure
– Pressure loss 86, 88
Tire pressure monitor, refer to
Flat Tire Monitor 85
Tire Pressure Monitor TPM
– System limits 87– System reset 88– Warning lamp 89
Tire Quality Grading 224
Seite 278ReferenceEverything from A to Z278
Online Edition for Part no. 01 40 2 911 544 - VI/13