remote control MINI Paceman 2016 (Mini Connected) Owner's Guide
[x] Cancel search | Manufacturer: MINI, Model Year: 2016, Model line: Paceman, Model: MINI Paceman 2016Pages: 223, PDF Size: 5.52 MB
Page 142 of 223

If all points in this list have been checked and
the required function is still not available, con‐
tact the hotline or a dealer’s service center or
another qualified service center or repair shop.
Controls▷Accept/reject a call.▷Dial a phone number.▷Dial a phone number from the phone book.▷Dial a stored phone number, such as from
the list of accepted calls.▷End the call.
When the ignition and the radio ready state are
switched off, such as after the remote control is
removed, an existing call can be continued for
up to 25 minutes on the hands-free system.
Adjusting the volume
Turn the knob until the desired volume is se‐
lected. Settings are stored for the remote con‐
trol currently in use.
The ringer volume of incoming calls and the call
volume can be adjusted independently.
When a call is placed using the hands-free sys‐
tem, the audio sources are muted.
Switching the microphone to mute
When a call is active, the microphone can be
muted.
"MUTE"
A microphone that has been switched to mute
is automatically reactivated when a new con‐
nection is established.
Incoming call
Receiving calls If the number of the caller is stored in the
phone book and is transmitted by the network,
the name of the contact is displayed. Other‐
wise, only the phone number is displayed.
Accepting a call Briefly press the button on the steering
wheel or radio.
or
"YES"
Rejecting a call
"NO"
Ending a call Briefly press the button on the steering
wheel or radio.
or
"END"
Entering a phone number
Dialing a number1.Switch on the radio ready state or the igni‐
tion.2. Press the button.3."PHONE"4."#"5.Enter the desired phone number on the
buttons 0–9.Seite 142COMMUNICATIONTelephone142
Online Edition for Part no. 01 40 2 964 433 - VI/15
Page 144 of 223
4.Enter additional digits on the buttons 0–9.5.Press the right knob to dial the phone num‐
ber.
Dialing a phone number from the phone
book using the buttons on the steering
wheel
1. Press and hold the button to dis‐
play the Telephone menu.2.Press the arrow buttons on the steering
wheel to leaf through the phone book.3. Press the button to dial the phone
number.
Dialing a phone number stored in a list
To select an entry and establish a connection:
1.Switch on the radio ready state or the igni‐
tion.2. Press the button.3."PHONE"4.Select a list, for instance "TOP8"5.Turn the right knob to select an entry and
press the knob to dial the phone number.
Deleting an individual entry
1.Select an entry from the list.2."DEL"
DTMF suffix dialing
DTMF suffix dialing can be used for gaining ac‐
cess to network services or for controlling devi‐
ces, e.g., to make a remote inquiry of an an‐
swering machine. The DTMF code is needed for
this purpose.
This function is only available if a connection
exists and if the hands-free system is being
used.
1."KEYPAD"2.Enter the DTMF code on the buttons 0–9.3.If necessary, press and hold the function
button on the right or left to enter special
characters.
Displaying the call duration
During a call:
"DURAT"
Hands-free system
General information
Calls that are being made on the hands-free
system can be continued on the mobile phone
and vice versa.
From the mobile phone to the hands-
free system
Calls that were begun outside of the Bluetoothrange of the vehicle can be continued on the
hands-free system with the ignition switched
on.
Depending on the mobile phone, the system
automatically switches to the hands-free sys‐
tem.
If the system does not switch over automati‐
cally, follow the instructions on the mobile
phone display; refer also to the mobile phone
operating instructions.
From the hands-free system to the
mobile phone
Calls that are made on the hands-free system
can in some cases be continued on the mobile
phone; this depends on the mobile phone.
Follow the instructions on the mobile phone
display; refer also to the mobile phone operat‐
ing instructions.
MINI phone numbers When the ignition is switched on, various serv‐ice phone numbers can be displayed.
Seite 144COMMUNICATIONTelephone144
Online Edition for Part no. 01 40 2 964 433 - VI/15
Page 172 of 223
MaintenanceVehicle features and op‐
tions
This chapter describes all standard, country-
specific and optional features offered with the
series. It also describes features that are not
necessarily available in your car, e. g., due to
the selected options or country versions. This
also applies to safety-related functions and sys‐
tems.
When using the features and systems described
here, adhere to local regulations.
MINI maintenance system
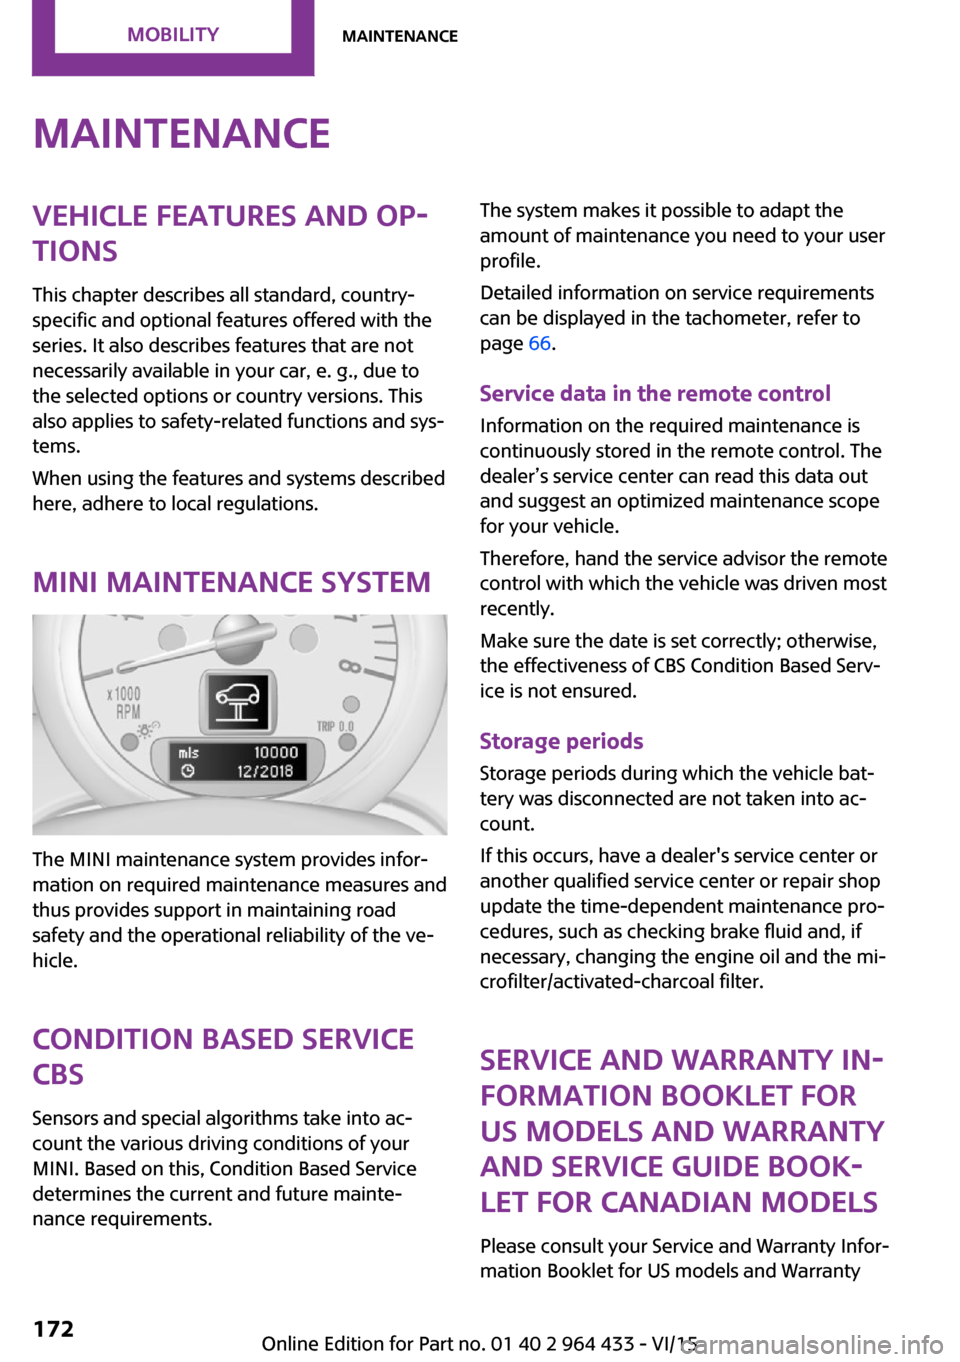
The MINI maintenance system provides infor‐
mation on required maintenance measures and
thus provides support in maintaining road
safety and the operational reliability of the ve‐
hicle.
Condition Based Service
CBS
Sensors and special algorithms take into ac‐
count the various driving conditions of your
MINI. Based on this, Condition Based Service
determines the current and future mainte‐
nance requirements.
The system makes it possible to adapt the
amount of maintenance you need to your user
profile.
Detailed information on service requirements
can be displayed in the tachometer, refer to
page 66.
Service data in the remote control Information on the required maintenance is
continuously stored in the remote control. The
dealer’s service center can read this data out
and suggest an optimized maintenance scope
for your vehicle.
Therefore, hand the service advisor the remote
control with which the vehicle was driven most
recently.
Make sure the date is set correctly; otherwise,
the effectiveness of CBS Condition Based Serv‐
ice is not ensured.
Storage periods
Storage periods during which the vehicle bat‐
tery was disconnected are not taken into ac‐
count.
If this occurs, have a dealer's service center or
another qualified service center or repair shop
update the time-dependent maintenance pro‐
cedures, such as checking brake fluid and, if
necessary, changing the engine oil and the mi‐ crofilter/activated-charcoal filter.
Service and Warranty In‐formation Booklet for
US models and Warranty
and Service Guide Book‐
let for Canadian models
Please consult your Service and Warranty Infor‐
mation Booklet for US models and WarrantySeite 172MOBILITYMaintenance172
Online Edition for Part no. 01 40 2 964 433 - VI/15
Page 179 of 223

Side marker lights
To replace these bulbs, contact a dealer’s serv‐
ice center or another qualified service center or
repair shop.
Tail lights, bulb replacement
Follow the general instructions on lamps and
bulbs, refer to page 175.
Turn signal: 21-watt bulb, PY 21 W
MINI Countryman1Brake/tail light2Turn signal3Brake/tail light4Backup light
MINI Paceman
1Brake light2Tail light3Turn signal4Backup lightReplacing
All bulbs are integrated in a central bulb holder.
MINI Countryman1.Switch off the lights and take the remote
control out of the ignition lock.2.Open the tailgate.3.Press the cover out of the cargo area side
panel at the rear and remove it.4.Detach the emergency release of the fuel
filler flap, refer to page 150, and push it
aside with the foam insert.
Ensure that the emergency release is not
damaged.5.Disengage the bulb holder by pushing
down the clip, arrow 1.6.Take out the bulb holder and detach the
cable, arrow 2.7.Apply gentle pressure to the bulb while
turning it to the left and remove it.8.Insert the new bulb and mount the bulb
holder in reverse order. Ensure that the
bulb holder engages in all fasteners.Seite 179Replacing componentsMOBILITY179
Online Edition for Part no. 01 40 2 964 433 - VI/15
Page 180 of 223

9.Return the foam insert to its original posi‐
tion and reattach the emergency release of
the fuel filler flap.10.Reattach the cover.
MINI Paceman
1.Switch off the lights and take the remote
control out of the ignition lock.2.Open the tailgate.3.Remove the cover from the cargo area side
trim.4.Unlock the fastening elements, arrows 1, by
turning.5.Remove the screws, arrows 2, using the hex
key from the vehicle document portfolio.6.Remove the tail light.7.Disengage the bulb holder by pushing
down the clip, arrows 1.8.Take out the bulb holder and detach the
cable, arrow 2.9.Apply gentle pressure to the bulb while
turning it to the left and remove it.10.Insert the new bulb and mount the bulb
holder in reverse order. Ensure that the
bulb holder engages in all fasteners.
License plate lights
5-watt bulb, C 5 W
Replacing
MINI Countryman
1.Push the light to the left in the catch of the
light housing using the screwdriver, ar‐
row 1.2.Take out the light, arrow 2.3.Replace the bulb.4.Insert the light.Seite 180MOBILITYReplacing components180
Online Edition for Part no. 01 40 2 964 433 - VI/15
Page 191 of 223
▷Insert the remote control into the ignition
lock.
Steptronic transmission
Before driving into the car wash, note the fol‐
lowing to ensure that the vehicle can roll:
1.Insert the remote control into the ignition
lock, even with Comfort Access.2.Move the selector lever to position N.3.Release the parking brake.4.Switch the engine off.5.Leave the remote control in the ignition
lock so that the vehicle can roll.
Hand car wash
If washing the vehicle by hand, use copious
quantities of water and car shampoo if neces‐
sary. Clean the vehicle with a sponge or a
washing brush by applying gentle pressure.
Before cleaning the windshield, deactivate the
rain sensor to avoid unintentional wiper activa‐
tion or switch off the ignition.
Adhere to the local regulations regarding
washing cars by hand.
Headlights Do not rub dry and do not use abrasive or caus‐
tic cleansers. Soak areas that have been soiled,
e.g., due to insects, with shampoo and rinse off
with copious quantities of water.
Thaw ice with a window deicer; do not use an
ice scraper.
Windows
Clean the outside and inside surfaces of the
windows and the mirror glasses with window
cleaner.
Do not clean mirror glass with cleaners contain‐
ing quartz.
Wiper blades
Clean with soapy water and replace regularly to
avoid streaking.
Wax and preservative residue and soiling on
the windows cause streaking during window
wiping and lead to premature wear on the
wiper blades and malfunctions of the rain sen‐
sor.
Vehicle care
Car care products
Regular cleaning and care contributes signifi‐
cantly to vehicle value retention.
The manufacturer of your vehicle recommends using car care and cleaning products from
MINI.
WARNING
Cleansers can contain substances that are
dangerous and harmful to your health. There is
risk of injuries. When cleaning the interior, open
the doors or windows. Only use products in‐
tended for cleaning vehicles. Follow the instruc‐
tions on the container. ◀
Vehicle paint Regular care contributes to vehicle value reten‐
tion and protects the paintwork against the
long-term effects of paint-damaging substan‐
ces.
Environmental influences in areas with higher
air pollution or natural contaminants, such as
tree resin or pollen, can have an impact on the
vehicle paint. Therefore, it is important to tailor
the frequency and extent of your car care to
these influences.
Immediately remove especially aggressive sub‐
stances, such as spilled fuel, oil, grease, or bird
droppings, to prevent damage to the paint‐
work.Seite 191CareMOBILITY191
Online Edition for Part no. 01 40 2 964 433 - VI/15
Page 196 of 223
12CauseHow to respondLights up in yellow:The engine will start the next time the Start/
Stop button is touched, possibly without the
brake or clutch being depressed.The remote control is malfunctioning or, in
cars with Comfort Access, was not detected.The engine cannot be started. Have
the remote control checked, if nec‐
essary.The battery in the remote control is dis‐
charged.Use the remote control for a longer
journey or, in cars with Comfort Ac‐
cess, replace the battery.The belt tensioners and/or airbag system
has failed.Have the system checked immedi‐
ately.
Fasten the safety belts anyway.Steering assistance has failed.You can continue your journey, but
moderate your speed and exercise
due caution. Markedly different
steering response. Have the system
checked as soon as possible.Lights up in red:Engine malfunctionStop the car and switch off the en‐
gine. You cannot continue your
journey. Contact a dealer’s service
center or another qualified service
center or repair shop.Lights up in yellow:Full engine power is no longer available.Further driving at a moderate pace
is possible. Have the engine
checked as soon as possible.Indicator lamp 1 flashes:Engine malfunction under high load. High
engine load will result in damage to the cat‐
alytic converter.Further driving at a moderate pace
is possible. Have the vehicle
checked immediately.Indicator lamp 1 lights up:Seite 196MOBILITYIndicator/warning lamps196
Online Edition for Part no. 01 40 2 964 433 - VI/15
Page 212 of 223

Everything from A to ZIndexA
ABS, Antilock Brake Sys‐ tem 84
Acoustic signal, refer to Check Control 67
Activated charcoal filter with automatic climate con‐
trol 95
Adaptive Light Control 71
Additives, engine oil 169
Airbags 74
Airbags, indicator/warning light 77
Air circulation, refer to Recir‐ culated air mode, air condi‐
tioner 92
Air circulation, refer to Recir‐ culated air mode, automatic
climate control 94
Air conditioning 91
Air conditioning mode, air conditioner 91
Air conditioning mode, auto‐ matic climate control 93
Air distribution, air condi‐ tioner, manual 92
Air distribution, automatic 94
Air distribution, automatic cli‐ mate control, manual 94
Air distribution, individual 92
Air drying, refer to Cooling function 95
Air flow rate for air condi‐ tioner 91
Air flow rate with automatic climate control 94
Air pressure, refer to Tire infla‐ tion pressure 154
Air supply, air conditioner 91 Air supply, automatic climate
control 93
Alarm system 30
Alarm system, avoiding unin‐ tentional alarms 32
Alarm system, ending an alarm 31
Alarm system, interior motion sensor 32
Alarm system, tilt alarm sen‐ sor 31
ALL4 all-wheel system 86
All-wheel drive, refer to ALL4 86
Alternating-code hand-held transmitter 97
Ambient lighting 73
Antifreeze, washer fluid 56
Antilock Brake System, ABS 84
Anti-slip control, refer to Dy‐ namic Stability Control
DSC 84
Anti-theft protection 21
Approved engine oils 169
Ashtray 100
Assistance, roadside 184
Assistance when driving off, refer to Hill drive-off assis‐
tant 86
Assistance with starting en‐ gine, refer to Jump-start‐
ing 184
Automatic air distribution 94
Automatic air flow 94
Automatic car wash 190
Automatic climate control 93
Automatic climate control, au‐ tomatic air distribution 94
Automatic, cruise control 88 Automatic headlight con‐
trol 69
Automatic transmission with Steptronic 57
AUTO program with auto‐ matic climate control 94
AUX-IN port 132
Average fuel consumption 63
Average fuel consumption, setting the unit 64
Average speed 63
Average speed, refer to Com‐ puter 62
B Backrest curvature, refer to Lumbar support 37
Backrests, refer to Seats 36
Backup lights, bulb replace‐ ment 179
Battery disposal 30
Battery, refer to Vehicle bat‐ tery 182
Battery, remote control 20
Battery replacement, remote control 30
Belts, refer to Safety belts 38
Belt tensioners, refer to Safety belts 38
Bi-xenon headlights 175
Brake assistant 84
Brake discs, breaking in 112
Brake fluid, refer to Service re‐ quirements 66
Brake force distribution, elec‐ tronic 84
Brake pads, breaking in 112
Brake, refer to Parking brake 52 Seite 212REFERENCEEverything from A to Z212
Online Edition for Part no. 01 40 2 964 433 - VI/15
Page 213 of 223

Brakes, MINI maintenancesystem 172
Brakes, service require‐ ments 66
Brake system, MINI mainte‐ nance system 172
Braking, notes 113
Braking, parking brake 52
Breakdown assistance, Road‐ side Assistance 184
Breaking in 112
Buckle tongues height adjust‐ ment 39
Button for starting the engine, refer to Start/Stop button 50
C
California Proposition 65 Warning 7
Car battery, refer to Vehicle battery 182
Car care products 191
Care, displays 193
Care, vehicle 191
Cargo area, Comfort Ac‐ cess 29
Cargo area door, refer to Tail‐ gate 27
Cargo area, enlarging, cargo cover 102
Cargo area, flat loading floor 104
Cargo area light, refer to Inte‐ rior lights 72
Cargo area, multi-function hook 105
Cargo area, opening from the outside 27
Cargo area, partition net 104
Car horn, refer to Horn 12
Carpet, care 193
Car phone, refer to Tele‐ phone 138
Car wash 190 CBC, Cornering Brake Con‐
trol 84
CBS Condition Based Serv‐ ice 172
CD/DVD drives, care 193
Center armrest 107
Center console, refer to Around the center con‐
sole 15
Center rail 107
Center rail, refer to Storage compartments 107
Central locking, Comfort Ac‐ cess 28
Central locking from the in‐ side 25
Central locking system, con‐ cept 21
Central locking system, from the outside 21
Changes, technical, refer to Own Safety 6
Changing wheels/tires 160
Check Control 67
Children, transporting 45
Child restraint fixing system LATCH 47
Child restraint fixing sys‐ tems 45
Child restraint fixing systems, mounting 46
Child seat, mounting 46
Child seats, refer to Transport‐ ing children safely 45
Chrome parts, care 192
Circulation of air, refer to Re‐ circulated air mode, air con‐
ditioner 92
Circulation of air, refer to Re‐ circulated air mode, auto‐
matic climate control 94
Cleaning, displays 193
Cleaning, refer to Care 190
Climate 91
Climate mode, ventilation 95
Clock 61 Clock, 12h/24h mode 64
Closing from the inside 25
Closing from the outside 22
Clutch, breaking in 112
Cockpit 12
Cold start, refer to Starting the engine 51
Combination instrument, refer to Displays 14
Combination switch, refer to Turn signal/high-beams/
headlight flasher 53
Combination switch, refer to Washer/wiper system 54
Comfort Access 28
Comfort Access, in the car wash 29
Comfort Access, replacing the battery 30
Comfort area, refer to Around the center console 15
Compartment for remote con‐ trol, refer to Ignition lock 50
Compass, digital 98
Computer 62
Computer, displaying informa‐ tion 62
Condition Based Service CBS 172
Confirmation signals for vehi‐ cle locking/unlocking 23
Consumption, refer to Aver‐ age fuel consumption 63
Control Display, care 193
Controls and displays 12
Control systems, driving stabil‐ ity 84
Convenient operation, win‐ dow 23
Coolant temperature 62
Cooling function, switching on and off 95
Cooling, maximum 94
Cornering Brake Control, CBC 84
Corrosion on brake discs 114 Seite 213Everything from A to ZREFERENCE213
Online Edition for Part no. 01 40 2 964 433 - VI/15
Page 214 of 223
Cradle for telephone or mobilephone, refer to Snap-in
adapter 145
Cruise control 88
Cupholders 100
Current fuel consumption 63
Curve lights, refer to Adaptive Light Control 71
D Dashboard lighting, refer to Instrument lighting 72
Dashboard, refer to Cock‐ pit 12
Dashboard, refer to Dis‐ plays 14
Date, display format 64
Date, setting 65
Daytime running lights 70
Decorative trim, care 193
Defogging windows 92
Defroster, rear window, auto‐ matic climate control 95
Defroster, rear window, with air conditioner 92
Defrosting windows 92
Defrost setting, refer to De‐ frosting windows 92
Digital compass 98
Dip stick, engine oil 168
Directional indicators, refer to Turn signals 53
Display lighting, refer to In‐ strument lighting 72
Displays 14
Displays and controls 12
Displays, care 193
Displays, cleaning 193
Displays, refer to Instrument cluster 14
Disposal, remote control bat‐ tery 30
Distance warning, refer to Park Distance Control
PDC 90 Door key, refer to Remote
control with integrated
key 20
Door lock 25
Door lock, confirmation sig‐ nals 23
Doors, manual operation 25
Doors, unlocking and locking, confirmation signals 23
Doors, unlocking and locking from the inside 25
Doors, unlocking and locking, from the outside 22
DOT Quality Grades 158
Drive-off assistant, refer to Hill drive-off assistant 86
Driving notes, breaking in 112
Driving off on hills, refer to Hill drive-off assistant 86
Driving on poor roads 114
Driving stability control sys‐ tems 84
Driving tips, refer to Driving notes 112
Dry air, refer to Cooling func‐ tion 95
DSC Dynamic Stability Con‐ trol 84
DTC Dynamic Traction Con‐ trol 85
Dynamic Stability Control DSC 84
Dynamic Traction Control DTC 85
E
Electrical malfunction, door lock 25
Electrical malfunction, fuel filler flap 150
Electronic brake-force distri‐ bution 84 Electronic Stability Program
ESP, refer to Dynamic Stabil‐
ity Control DSC 84
Emergency operation, fuel filler flap, unlocking man‐
ually 150
Emergency operation, refer to Manual operation 25
Emergency operation, Step‐ tronic transmission, refer to
Selector lever lock, overrid‐
ing 59
Energy, saving, refer to Saving fuel 120
Engine, breaking in 112
Engine compartment 166
Engine oil, adding 168
Engine oil, additives, refer to Approved engine oils 169
Engine oil, alternative oil types 169
Engine oil change intervals, refer to Service require‐
ments 66
Engine oil, dip stick 168
Engine oil, filling capacity 211
Engine oil, MINI maintenance system 172
Engine oil types, alterna‐ tive 169
Engine oil types, ap‐ proved 169
Engine, overheating, refer to Coolant temperature 62
Engine start, assistance 184
Engine, starting 51
Engine, starting, Comfort Ac‐ cess 28
Engine, starting, Start/Stop button 50
Engine, stopping, Start/Stop button 50
Engine, switching off 52
Equipment, interior 96 Seite 214REFERENCEEverything from A to Z214
Online Edition for Part no. 01 40 2 964 433 - VI/15