warning light MINI Paceman 2016 Owner's Manual (Mini Connected)
[x] Cancel search | Manufacturer: MINI, Model Year: 2016, Model line: Paceman, Model: MINI Paceman 2016Pages: 223, PDF Size: 5.52 MB
Page 14 of 223
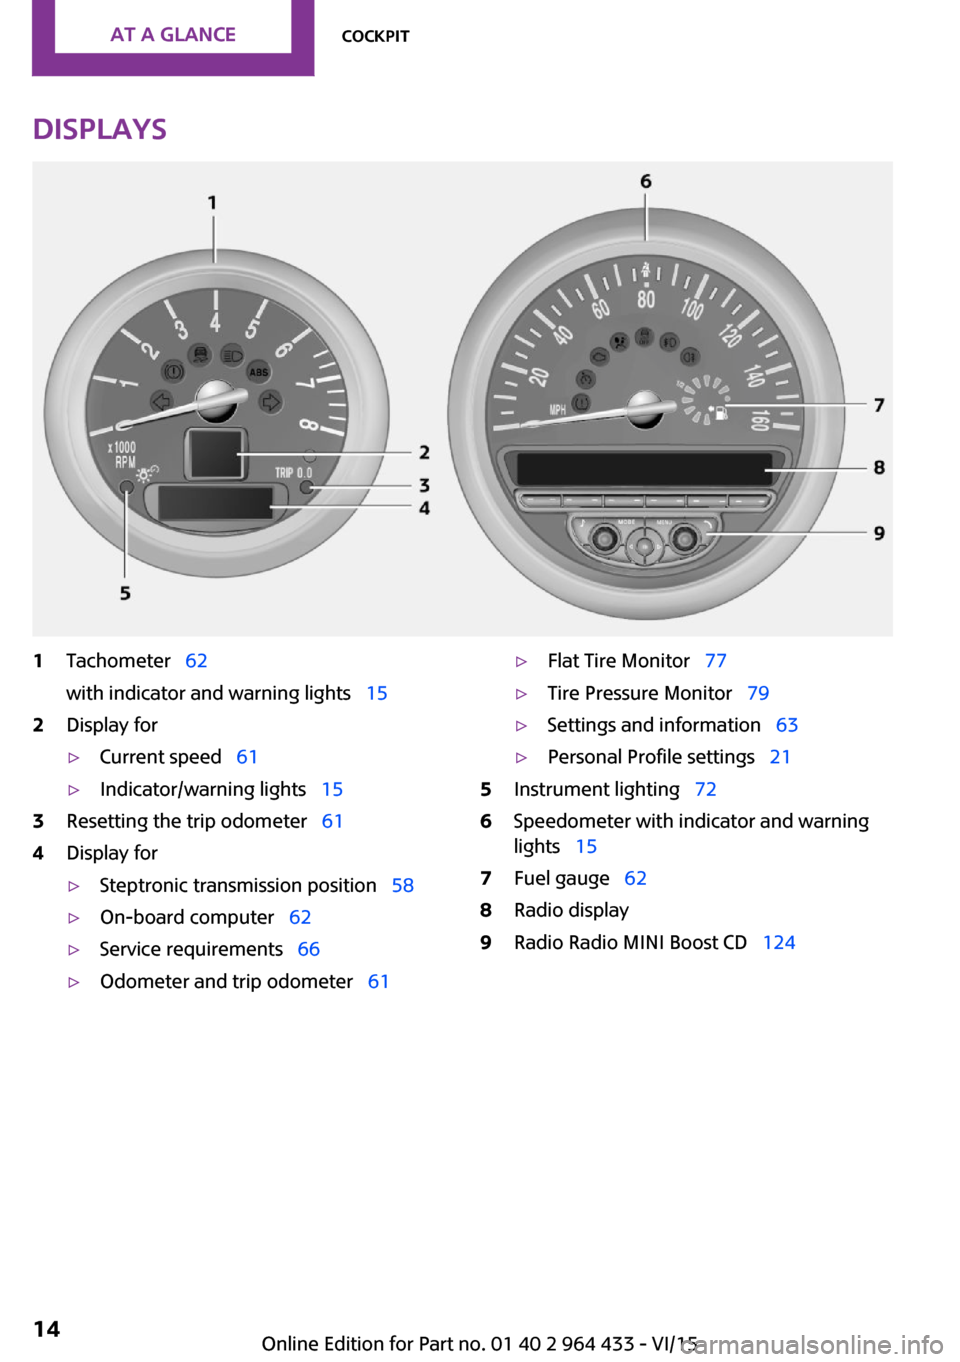
Displays1Tachometer 62
with indicator and warning lights 152Display for▷Current speed 61▷Indicator/warning lights 153Resetting the trip odometer 614Display for▷Steptronic transmission position 58▷On-board computer 62▷Service requirements 66▷Odometer and trip odometer 61▷Flat Tire Monitor 77▷Tire Pressure Monitor 79▷Settings and information 63▷Personal Profile settings 215Instrument lighting 726Speedometer with indicator and warning
lights 157Fuel gauge 628Radio display9Radio Radio MINI Boost CD 124Seite 14AT A GLANCECockpit14
Online Edition for Part no. 01 40 2 964 433 - VI/15
Page 15 of 223
Indicator/warning lights
The principle
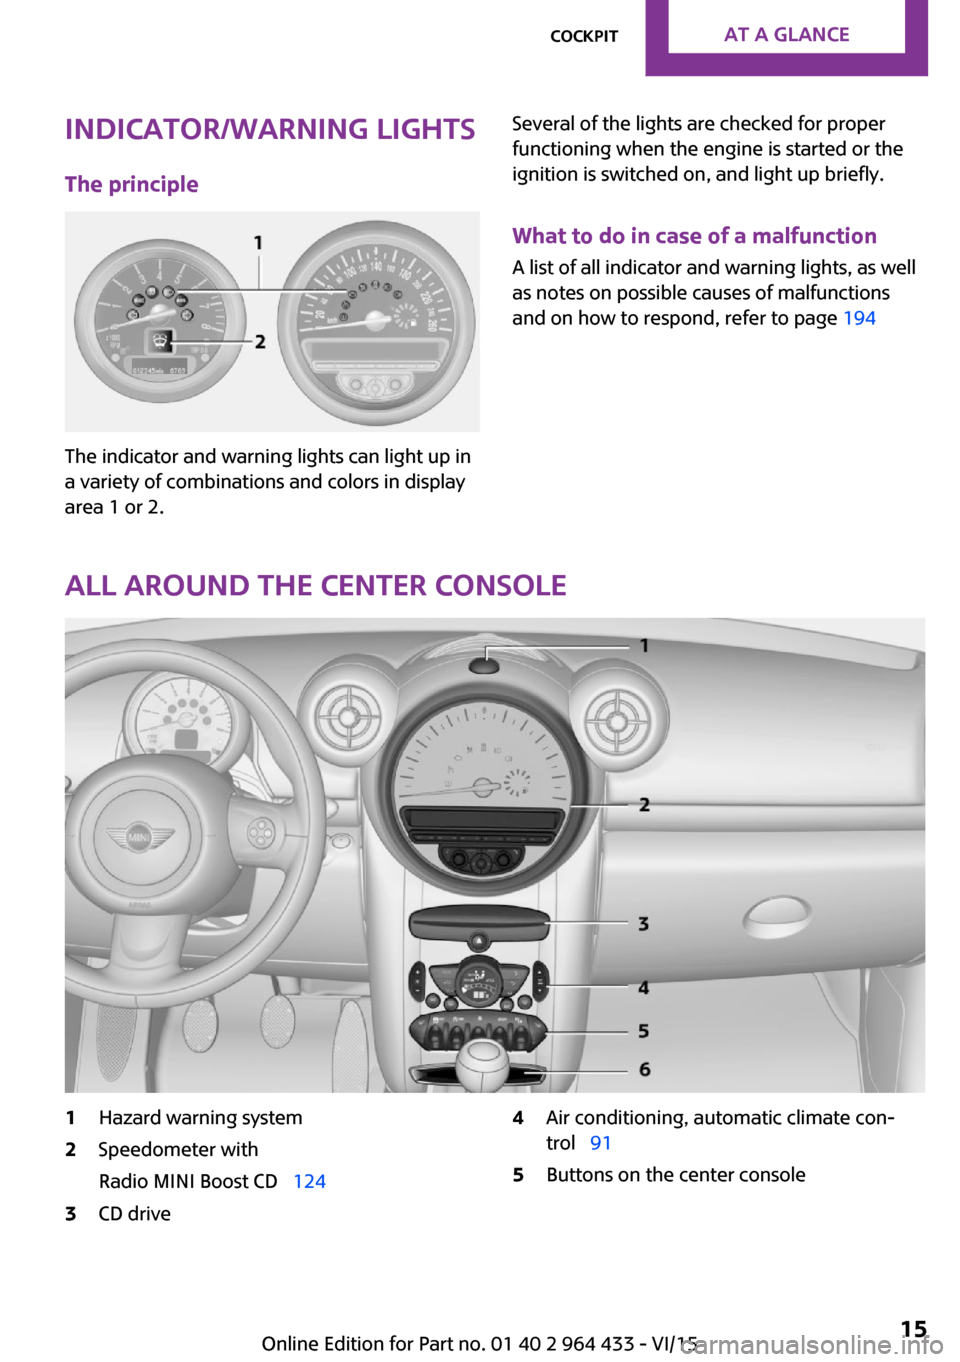
The indicator and warning lights can light up in
a variety of combinations and colors in display
area 1 or 2.
Several of the lights are checked for proper
functioning when the engine is started or the
ignition is switched on, and light up briefly.
What to do in case of a malfunction
A list of all indicator and warning lights, as well
as notes on possible causes of malfunctions
and on how to respond, refer to page 194
All around the center console
1Hazard warning system2Speedometer with
Radio MINI Boost CD 1243CD drive4Air conditioning, automatic climate con‐
trol 915Buttons on the center consoleSeite 15CockpitAT A GLANCE15
Online Edition for Part no. 01 40 2 964 433 - VI/15
Page 16 of 223
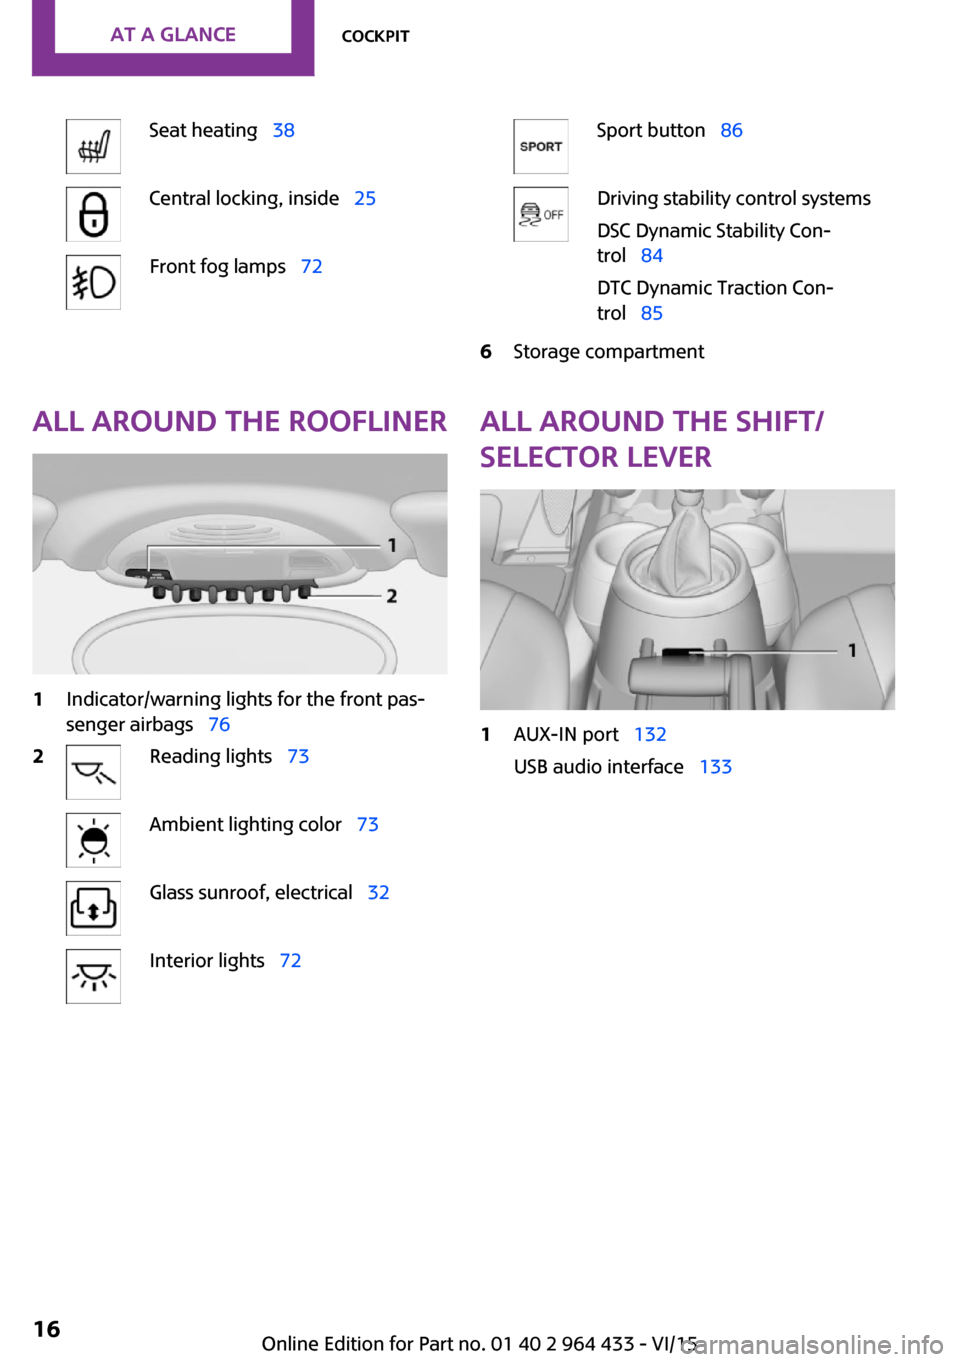
Seat heating 38Central locking, inside 25Front fog lamps 72Sport button 86Driving stability control systems
DSC Dynamic Stability Con‐
trol 84
DTC Dynamic Traction Con‐
trol 856Storage compartmentAll around the roofliner1Indicator/warning lights for the front pas‐
senger airbags 762Reading lights 73Ambient lighting color 73Glass sunroof, electrical 32Interior lights 72All around the shift/
selector lever1AUX-IN port 132
USB audio interface 133Seite 16AT A GLANCECockpit16
Online Edition for Part no. 01 40 2 964 433 - VI/15
Page 22 of 223
▷The welcome lamps, interior lamps, and
ambient lighting are switched on and off.▷The alarm system is armed or disarmed, re‐
fer to page 30.
Operating from the inside
Via the switch/button for the central locking
system, refer to page 25.
In an accident of the necessary severity, the
central locking system unlocks automatically.
The hazard warning system and interior lamps
come on.
Opening and closing:
from the outside
Using the remote control
General information WARNING
People or animals in the vehicle can lock
the doors from the inside and lock themselves
in. The vehicle can then not be opened from
the outside. There is risk of injuries. Take the
remote control along so that the vehicle can be
opened from the outside. ◀
Unlocking
Press the button. The vehicle is un‐
locked.
The welcome lamps and interior lamps are
switched on.
You can set how the vehicle is to be unlocked.
Settings are stored for the remote control cur‐
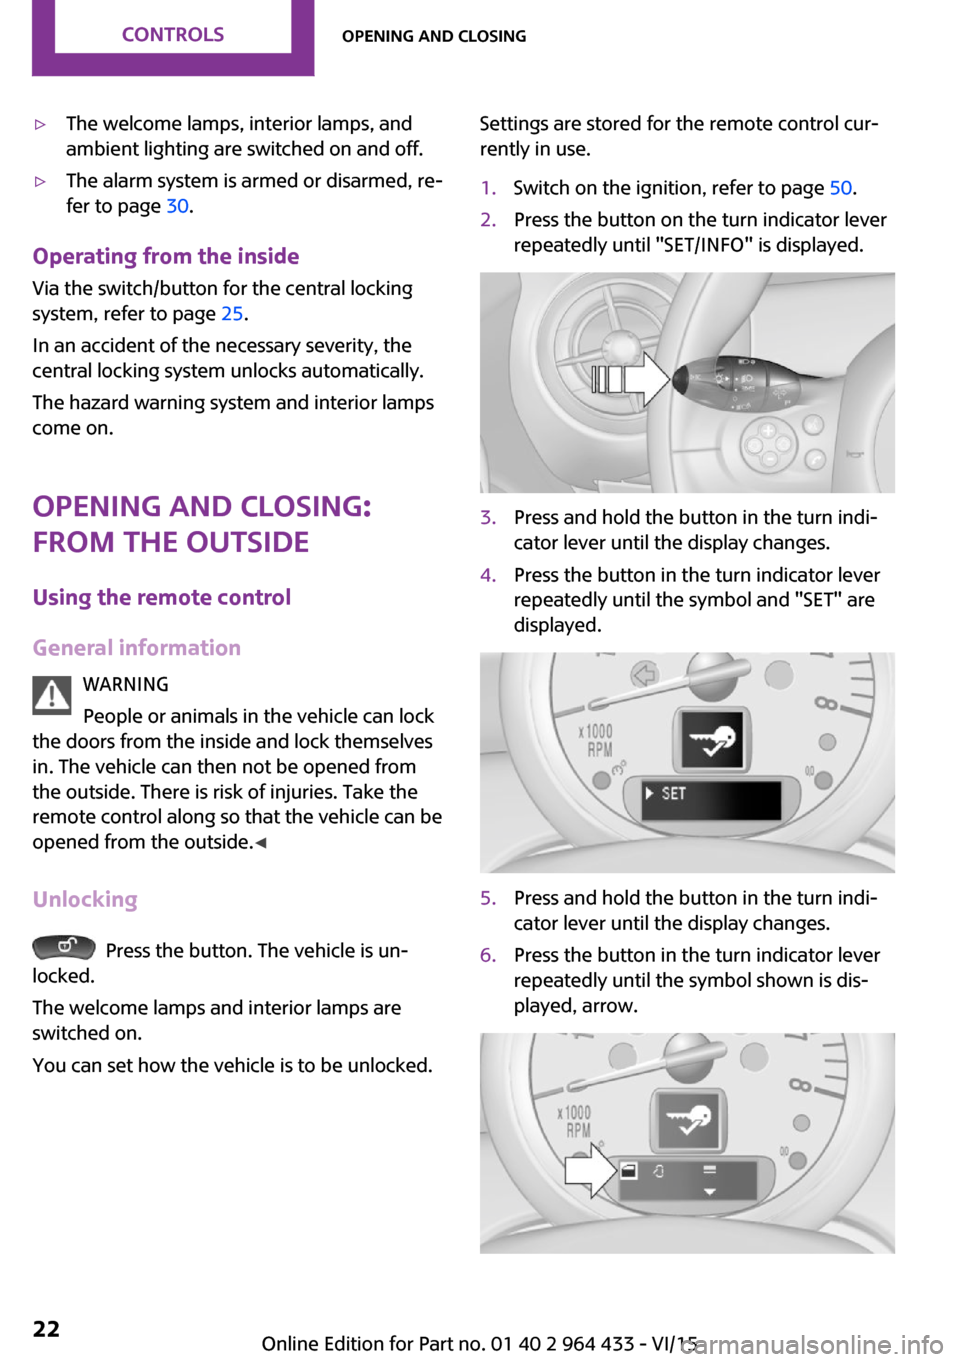
rently in use.1.Switch on the ignition, refer to page 50.2.Press the button on the turn indicator lever
repeatedly until "SET/INFO" is displayed.3.Press and hold the button in the turn indi‐
cator lever until the display changes.4.Press the button in the turn indicator lever
repeatedly until the symbol and "SET" are
displayed.5.Press and hold the button in the turn indi‐
cator lever until the display changes.6.Press the button in the turn indicator lever
repeatedly until the symbol shown is dis‐
played, arrow.Seite 22CONTROLSOpening and closing22
Online Edition for Part no. 01 40 2 964 433 - VI/15
Page 24 of 223
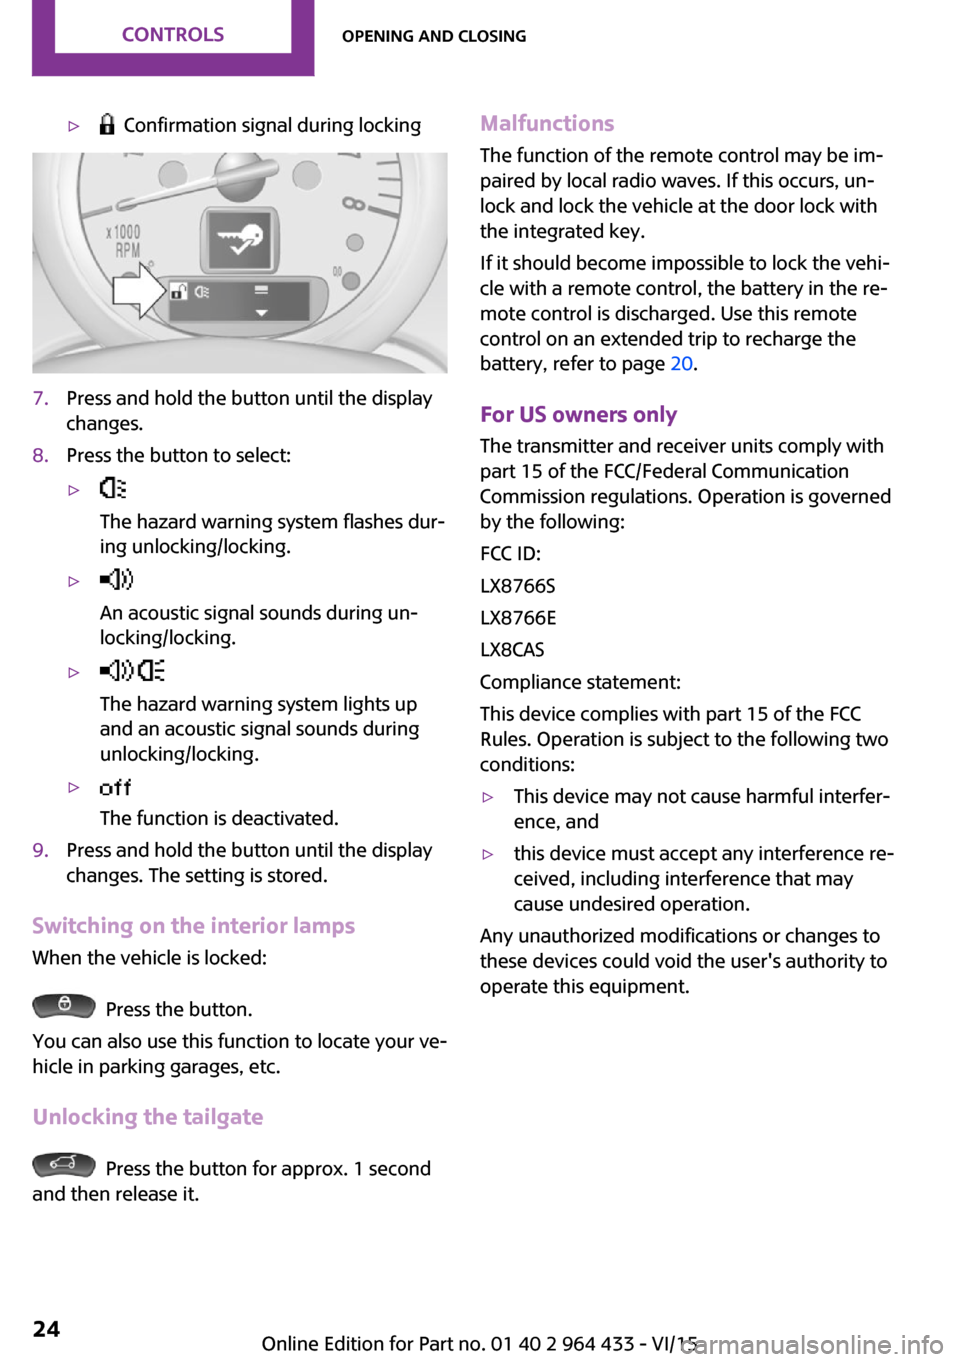
▷ Confirmation signal during locking7.Press and hold the button until the display
changes.8.Press the button to select:▷
The hazard warning system flashes dur‐
ing unlocking/locking.▷
An acoustic signal sounds during un‐
locking/locking.▷
The hazard warning system lights up
and an acoustic signal sounds during
unlocking/locking.▷
The function is deactivated.9.Press and hold the button until the display
changes. The setting is stored.
Switching on the interior lamps
When the vehicle is locked:
Press the button.
You can also use this function to locate your ve‐
hicle in parking garages, etc.
Unlocking the tailgate
Press the button for approx. 1 second
and then release it.
Malfunctions
The function of the remote control may be im‐
paired by local radio waves. If this occurs, un‐ lock and lock the vehicle at the door lock with
the integrated key.
If it should become impossible to lock the vehi‐
cle with a remote control, the battery in the re‐
mote control is discharged. Use this remote control on an extended trip to recharge the
battery, refer to page 20.
For US owners only The transmitter and receiver units comply with
part 15 of the FCC/Federal Communication
Commission regulations. Operation is governed
by the following:
FCC ID:
LX8766S
LX8766E
LX8CAS
Compliance statement:
This device complies with part 15 of the FCC
Rules. Operation is subject to the following two
conditions:▷This device may not cause harmful interfer‐
ence, and▷this device must accept any interference re‐
ceived, including interference that may
cause undesired operation.
Any unauthorized modifications or changes to
these devices could void the user's authority to
operate this equipment.
Seite 24CONTROLSOpening and closing24
Online Edition for Part no. 01 40 2 964 433 - VI/15
Page 29 of 223
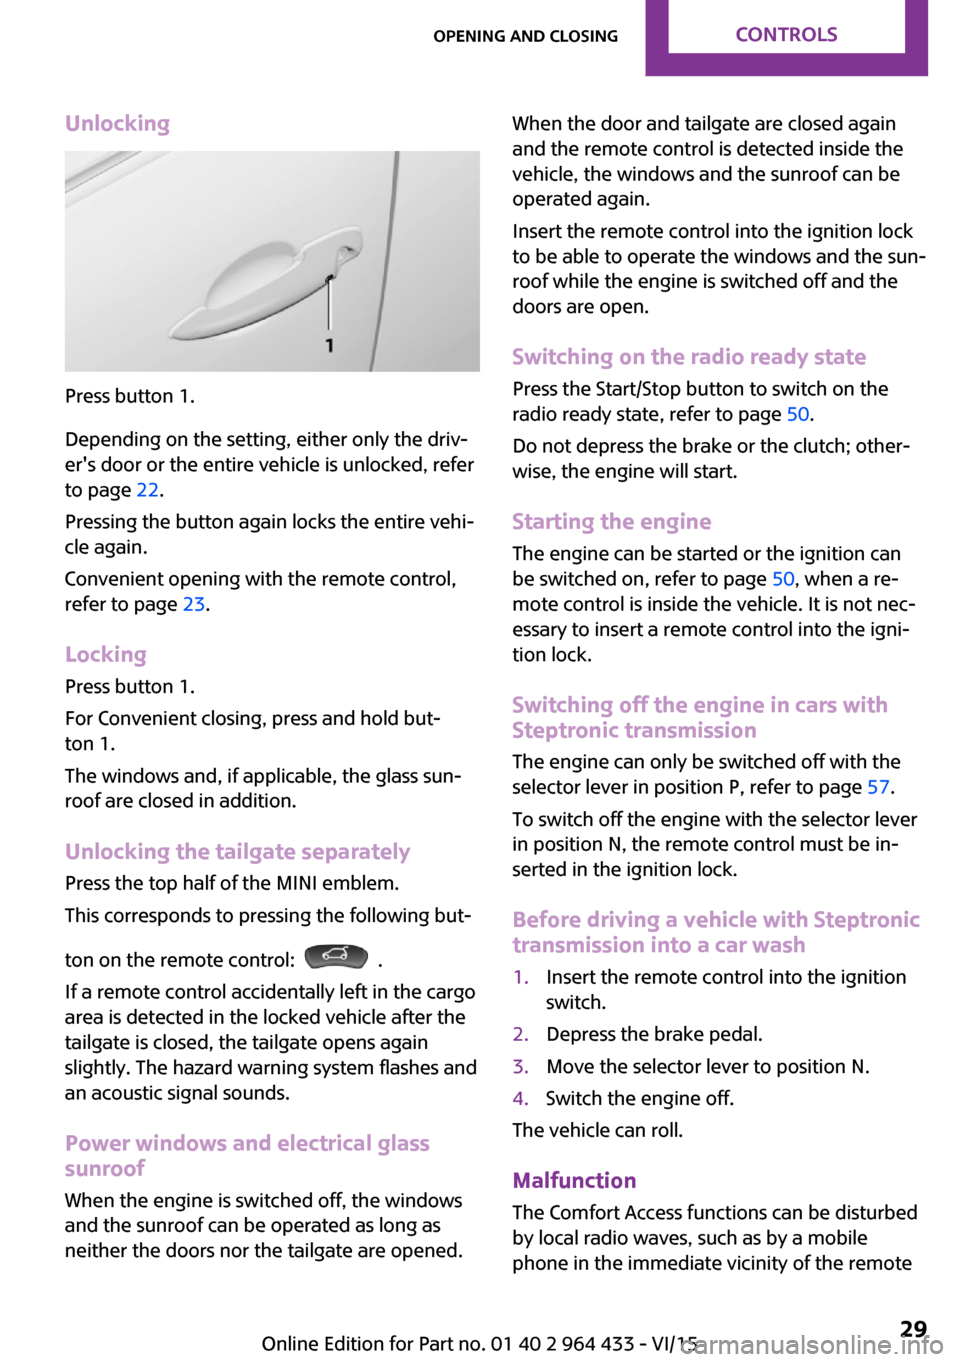
Unlocking
Press button 1.
Depending on the setting, either only the driv‐
er's door or the entire vehicle is unlocked, refer
to page 22.
Pressing the button again locks the entire vehi‐
cle again.
Convenient opening with the remote control,
refer to page 23.
Locking
Press button 1.
For Convenient closing, press and hold but‐
ton 1.
The windows and, if applicable, the glass sun‐
roof are closed in addition.
Unlocking the tailgate separately
Press the top half of the MINI emblem.
This corresponds to pressing the following but‐
ton on the remote control:
.
If a remote control accidentally left in the cargo
area is detected in the locked vehicle after the
tailgate is closed, the tailgate opens again
slightly. The hazard warning system flashes and
an acoustic signal sounds.
Power windows and electrical glass
sunroof
When the engine is switched off, the windows
and the sunroof can be operated as long as
neither the doors nor the tailgate are opened.
When the door and tailgate are closed again
and the remote control is detected inside the
vehicle, the windows and the sunroof can be
operated again.
Insert the remote control into the ignition lock
to be able to operate the windows and the sun‐
roof while the engine is switched off and the
doors are open.
Switching on the radio ready state Press the Start/Stop button to switch on the
radio ready state, refer to page 50.
Do not depress the brake or the clutch; other‐
wise, the engine will start.
Starting the engine The engine can be started or the ignition can
be switched on, refer to page 50, when a re‐
mote control is inside the vehicle. It is not nec‐
essary to insert a remote control into the igni‐
tion lock.
Switching off the engine in cars with
Steptronic transmission
The engine can only be switched off with the
selector lever in position P, refer to page 57.
To switch off the engine with the selector lever
in position N, the remote control must be in‐
serted in the ignition lock.
Before driving a vehicle with Steptronic
transmission into a car wash1.Insert the remote control into the ignition
switch.2.Depress the brake pedal.3.Move the selector lever to position N.4.Switch the engine off.
The vehicle can roll.
Malfunction The Comfort Access functions can be disturbed
by local radio waves, such as by a mobile
phone in the immediate vicinity of the remote
Seite 29Opening and closingCONTROLS29
Online Edition for Part no. 01 40 2 964 433 - VI/15
Page 30 of 223
control or when a mobile phone is being
charged in the vehicle.
If this occurs, open or close the vehicle using
the buttons on the remote control or use the
integrated key in the door lock.
To start the engine afterward, insert the remote
control into the ignition switch.
Warning lights The warning light in the instrument
cluster lights up when you attempt to
start the engine: the engine cannot be
started.
The remote control is not in the vehicle or has a
malfunction. Take the remote control with you
inside the vehicle or have it checked. If neces‐
sary, insert another remote control into the ig‐
nition switch.
The warning lamp in the instrument
cluster lights up while the engine is run‐
ning: the remote control is no longer in‐
side the vehicle.
After switching off the engine, the engine can
only be started again within approx. 10 sec‐
onds if no door has been opened.
The indicator lamp lights up: replace
the remote control battery.Replacing the battery
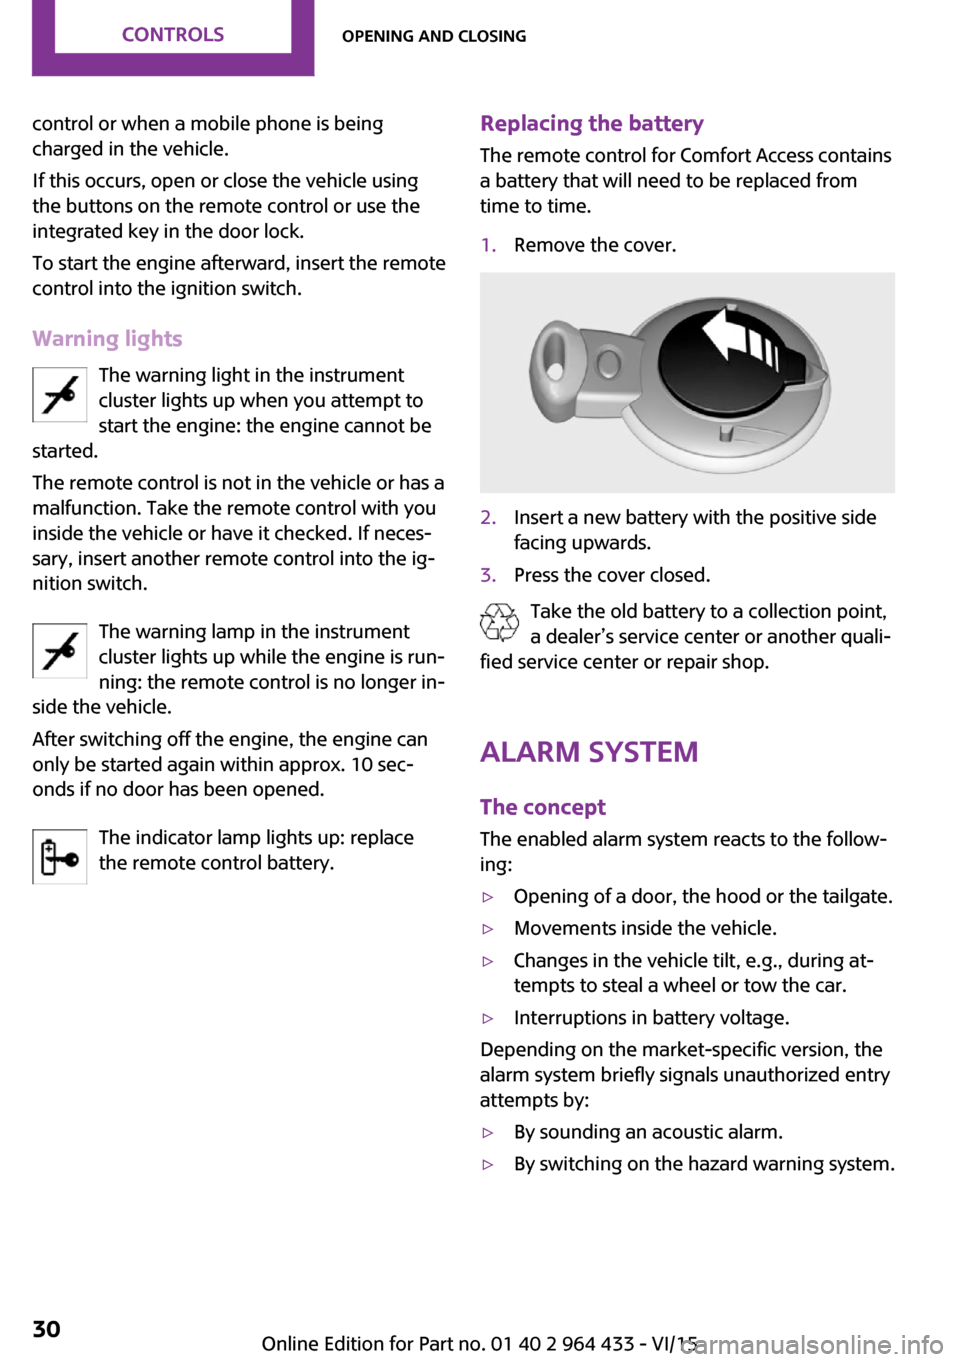
The remote control for Comfort Access contains
a battery that will need to be replaced from
time to time.1.Remove the cover.2.Insert a new battery with the positive side
facing upwards.3.Press the cover closed.
Take the old battery to a collection point,
a dealer’s service center or another quali‐
fied service center or repair shop.
Alarm system
The concept
The enabled alarm system reacts to the follow‐
ing:
▷Opening of a door, the hood or the tailgate.▷Movements inside the vehicle.▷Changes in the vehicle tilt, e.g., during at‐
tempts to steal a wheel or tow the car.▷Interruptions in battery voltage.
Depending on the market-specific version, the
alarm system briefly signals unauthorized entry
attempts by:
▷By sounding an acoustic alarm.▷By switching on the hazard warning system.Seite 30CONTROLSOpening and closing30
Online Edition for Part no. 01 40 2 964 433 - VI/15
Page 34 of 223

▷Press the switch to the resistance point. The
window opens while the switch is held.▷Press the switch beyond the resistance
point. The window opens automatically in
the radio ready state and higher.
Press again briefly to stop the opening pro‐
cedure.
To close:
▷Pull the switch to the resistance point. The
window closes while the switch is held.▷Pull the switch beyond the resistance point.
The window closes automatically.
Pressing the switch stops the motion.
MINI Countryman: rear windows
To open:
▷Press the switch to the resistance point. The
window opens while the switch is held.▷Press the switch beyond the resistance
point. The window opens automatically in
the radio ready state and higher.
To close:
▷Pull the switch to the resistance point. The
window closes while the switch is held.▷Pull the switch beyond the resistance point.
The window closes automatically.
Pressing the switch stops the motion.
After the ignition is switched off
The windows can be operated for approx. 1 mi‐
nute after the remote control is removed or the
ignition is switched off.
Pinch protection system
If the closing force exceeds a specific value as a
window closes, the closing action is inter‐
rupted.
The window reopens slightly.
WARNING
When operating the windows, body parts
and objects can be jammed. There is risk of in‐
juries or risk of property damage. Make sure
that the area of movement of the windows is
clear during opening and closing. ◀
WARNING
Accessories on the windows such as an‐
tennas can impact jam protection. There is risk
of injuries. Do not install accessories in the area of movement of the windows. ◀
Closing without the pinch protection system
WARNING
When operating the windows, body parts
and objects can be jammed. There is risk of in‐
juries or risk of property damage. Make sure
that the area of movement of the windows is
clear during opening and closing. ◀
If there is an external danger or, for example, if
ice on the windows prevents a window from closing normally, the window can be closed
manually.1.Pull the switch past the resistance point and
hold it there. Pinch protection is limited and
the window reopens slightly if the closing
force exceeds a certain value.2.Pull the switch past the resistance point
again within approx. 4 seconds and hold it
there.
The window closes without pinch protec‐
tion.Seite 34CONTROLSOpening and closing34
Online Edition for Part no. 01 40 2 964 433 - VI/15
Page 35 of 223

MINI Countryman: safety switch
With the safety switch, the rear windows are
prevented from being opened or closed via the
switches in the rear passenger area, such as by
children.
Press the button. The LED lights up if the safety
function is switched on.
WARNING
When operating the windows, body parts
and objects can be jammed. There is risk of in‐
juries or risk of property damage. Make sure
that the area of movement of the windows is
clear during opening and closing. ◀
Seite 35Opening and closingCONTROLS35
Online Edition for Part no. 01 40 2 964 433 - VI/15
Page 36 of 223

AdjustingVehicle features and op‐
tions
This chapter describes all standard, country-
specific and optional features offered with the
series. It also describes features that are not
necessarily available in your car, e. g., due to
the selected options or country versions. This
also applies to safety-related functions and sys‐
tems.
When using the features and systems described
here, adhere to local regulations.
Sitting safely
The ideal seating position can make a vital con‐ tribution to relaxed, fatigue-free driving.
The seating position plays an important role in
an accident in combination with:▷Safety belts, refer to page 38▷Head restraints, refer to page 41.▷Airbags, refer to page 74.
Seats
Note before adjusting WARNING
Seat adjustments while driving can lead
to unexpected movements of the seat. Vehicle
control could be lost. There is risk of an acci‐
dent. Only adjust the side on the driver's side
when the vehicle is stationary. ◀
WARNING
With a backrest inclined too far to the
rear, the protective effect of the safety belt
cannot be ensured anymore. There is a danger
of sliding under the safety belt in an accident.
There is risk of injuries or danger to life. Adjust
the seat prior to starting the trip. Adjust the
backrest in an as upright position as possible
and do not adjust again while driving. ◀
WARNING
There is risk of jamming when moving the
seats. There is risk of injuries or risk of property
damage. Make sure that the area of movement
of the seat is clear prior to any adjustment. ◀
Front seat adjustment
Forward/backward
Pull the lever, arrow 1, and slide the seat into
the desired position, arrows 2.
After releasing the lever, move the seat forward
or back slightly to make sure it engages prop‐
erly.
Seite 36CONTROLSAdjusting36
Online Edition for Part no. 01 40 2 964 433 - VI/15