check oil MINI Paceman 2016 Owner's Manual (Mini Connected)
[x] Cancel search | Manufacturer: MINI, Model Year: 2016, Model line: Paceman, Model: MINI Paceman 2016Pages: 223, PDF Size: 5.52 MB
Page 41 of 223
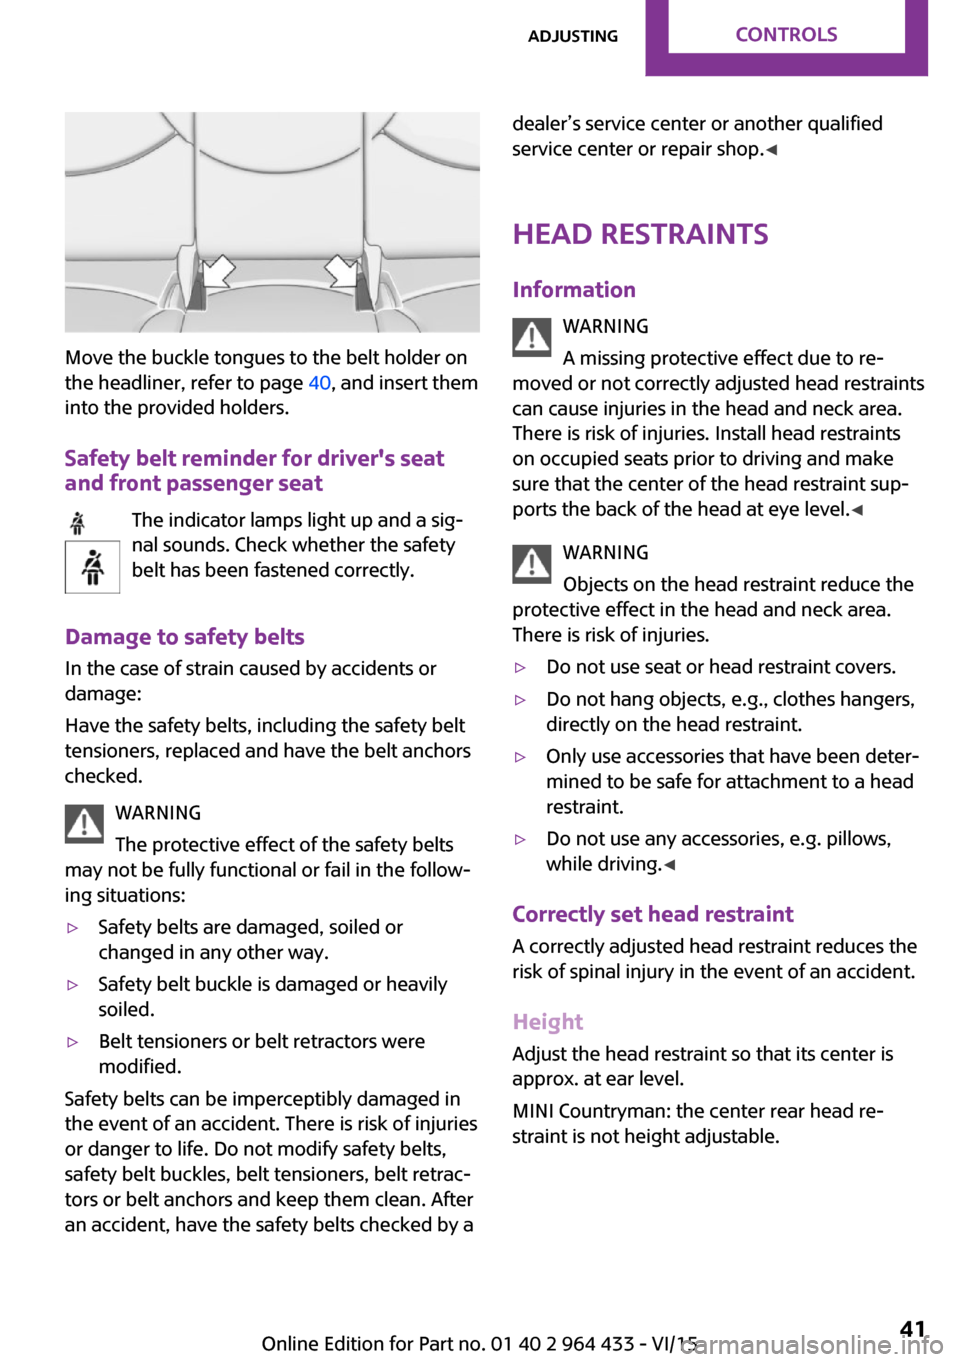
Move the buckle tongues to the belt holder on
the headliner, refer to page 40, and insert them
into the provided holders.
Safety belt reminder for driver's seat
and front passenger seat
The indicator lamps light up and a sig‐
nal sounds. Check whether the safety
belt has been fastened correctly.
Damage to safety belts
In the case of strain caused by accidents or
damage:
Have the safety belts, including the safety belt
tensioners, replaced and have the belt anchors
checked.
WARNING
The protective effect of the safety belts
may not be fully functional or fail in the follow‐
ing situations:
▷Safety belts are damaged, soiled or
changed in any other way.▷Safety belt buckle is damaged or heavily
soiled.▷Belt tensioners or belt retractors were
modified.
Safety belts can be imperceptibly damaged in
the event of an accident. There is risk of injuries
or danger to life. Do not modify safety belts,
safety belt buckles, belt tensioners, belt retrac‐
tors or belt anchors and keep them clean. After
an accident, have the safety belts checked by a
dealer’s service center or another qualified
service center or repair shop. ◀
Head restraints
Information WARNING
A missing protective effect due to re‐
moved or not correctly adjusted head restraints
can cause injuries in the head and neck area.
There is risk of injuries. Install head restraints
on occupied seats prior to driving and make sure that the center of the head restraint sup‐
ports the back of the head at eye level. ◀
WARNING
Objects on the head restraint reduce the
protective effect in the head and neck area.
There is risk of injuries.▷Do not use seat or head restraint covers.▷Do not hang objects, e.g., clothes hangers,
directly on the head restraint.▷Only use accessories that have been deter‐
mined to be safe for attachment to a head
restraint.▷Do not use any accessories, e.g. pillows,
while driving. ◀
Correctly set head restraint
A correctly adjusted head restraint reduces the
risk of spinal injury in the event of an accident.
Height Adjust the head restraint so that its center is
approx. at ear level.
MINI Countryman: the center rear head re‐
straint is not height adjustable.
Seite 41AdjustingCONTROLS41
Online Edition for Part no. 01 40 2 964 433 - VI/15
Page 66 of 223

Service requirements
The remaining driving distance and the date of
the next scheduled service are displayed briefly
immediately after you start the engine or
switch on the ignition.
A service advisor can read out the current serv‐
ice requirements from your remote control.
Displaying the vehicle check
For certain maintenance operations, you can
view the distance remaining or the due date for
that operation in the tachometer.
1.Switch on the ignition, refer to page 50.2.Press the button on the turn indicator lever
repeatedly until "SET/INFO" is displayed.3.Press and hold the button until the display
changes.4.Press the button repeatedly until the corre‐
sponding symbol and "SERVICE-INFO" are
displayed.5.Press and hold the button until the display
changes.6.Press the button to display the individual
service requirement items.
Possible displays
1Button for selecting the information.SymbolFunctionService requirementsEngine oilSeite 66CONTROLSDisplays66
Online Edition for Part no. 01 40 2 964 433 - VI/15
Page 115 of 223
CAUTION
Objects in unpaved areas, e.g. stones or
branches, can damage the vehicle. There is risk
of property damage. Do not drive on unpaved
terrain. ◀
For your own safety and the safety of passen‐
gers and the vehicle, adhere to the following
points:▷Familiarize yourself with the vehicle before
driving; never take risks.▷Adjust speeds according to road conditions.
The steeper and rougher the road surface
is, the lower the speed should be.▷When driving on steep uphill and downhill
grades: the engine oil and coolant should
be filled nearly to the MAX mark.▷Watch for stones, holes, and other obsta‐
cles and drive around these where possible.▷On bumps and rough roads, avoid contact
between the vehicle body and the ground.
The maximum ground clearance is 6 in‐
ches/15 cm and may vary with the loaded
cargo.▷When driving through water, do not exceed
the maximum water height of 12 in‐
ches/30 cm and drive at walking speed.▷After driving through water, press on the
brake pedal several times at low speeds to
dry the brakes.▷Depending on the prevailing terrain, acti‐
vate Dynamic Traction Control DTC briefly,
refer to page 85.▷When the wheels spin, accelerate to enable
the driving stability control systems to dis‐
tribute the drive force to the individual
wheels.
After driving on poor roads
Adhere to the following points to ensure vehi‐
cle safety:
▷Remove excessive accumulations of dirt
and mud from the vehicle body.▷Clear mud, snow, ice, etc., from the wheels
and tires and check for damage.Seite 115Things to remember when drivingDRIVING TIPS115
Online Edition for Part no. 01 40 2 964 433 - VI/15
Page 162 of 223

Run-flat tiresWhen mounting new tires or changing fromsummer to winter tires or vice versa, use run-
flat tires for your own safety. Also, a compact
wheel is not available in case of a flat tire. A
dealer’s service center will be glad to answer
any questions you may have.
Rotating wheels between axles
Different wear patterns occur on the front and
rear axles, depending on the individual condi‐
tions of use.
To ensure even wear on the tires, the wheels
can be rotated between the axles. A dealer’s
service center will be glad to answer any ques‐
tions you may have.
After changing the tires, check the tire inflation
pressure and correct it if necessary.
Storage
Store wheels and tires in a cool, dry place with
as little exposure to light as possible.
Always protect tires against all contact with oil,
grease and fuels.
Do not exceed the maximum tire inflation pres‐
sure indicated on the side wall of the tire.
Run-flat tires
Label
The symbol identifying run-flat tires is a circle
with the letters RSC on the sidewall.
Run-flat tires are tires that support themselves
for a limited period of time, and they may also
come with special rims. The sidewall reinforce‐
ment ensures that the tire can continue to be
used to a limited extent if it has lost pressure
and even if it has become completely depres‐
surized.
For continued driving in the event of a flat tire,
refer to page 78.
Correcting a flat tire
Safety measures▷Park the vehicle as far as possible from
passing traffic and on solid ground. Switch
on the hazard warning system.▷Let the steering wheel lock engage with the
wheels in the straight-ahead position, set
the parking brake, and engage first gear or
reverse, or engage selector lever position P.▷Have all vehicle occupants get out of the
vehicle and ensure that they remain out‐
side the immediate area in a safe place,
such as behind a guardrail.▷If a warning triangle or portable hazard
warning lamp is required, set it up on the
roadside at an appropriate distance from
the rear of the vehicle. Comply with all
safety guidelines and regulations.
The procedure to correct a flat tire depends on
the equipment in the vehicle:
▷Run-flat tires, refer to page 162.▷MINI Mobility System, refer to page 162.
MINI Mobility System
Information
▷Follow the instructions on using the Mobi‐
lity System found on the compressor and
sealant bottle.Seite 162MOBILITYWheels and tires162
Online Edition for Part no. 01 40 2 964 433 - VI/15
Page 168 of 223
Engine oilEngine oil
Vehicle features and options This chapter describes all standard, country-
specific and optional features offered with the series. It also describes features that are notnecessarily available in your car, e. g., due to
the selected options or country versions. This
also applies to safety-related functions and sys‐
tems.
When using the features and systems described
here, adhere to local regulations.
General information
Engine oil consumption depends on the driving
style and the conditions of use. A highly sporty
driving style, for example, results in considera‐
bly higher engine oil consumption.
Therefore, regularly check the engine oil level
after refueling.
Checking the oil level with a dip stick1.Park the vehicle on level ground when the
engine is at operating temperature, i.e., af‐
ter driving continuously for at least
6 2 miles/10 km.2.Switch the engine off.3.After approx. 5 minutes, pull out the dip
stick and wipe it off with a lint-free cloth,
paper towel, etc.4.Carefully insert the dip stick all the way into
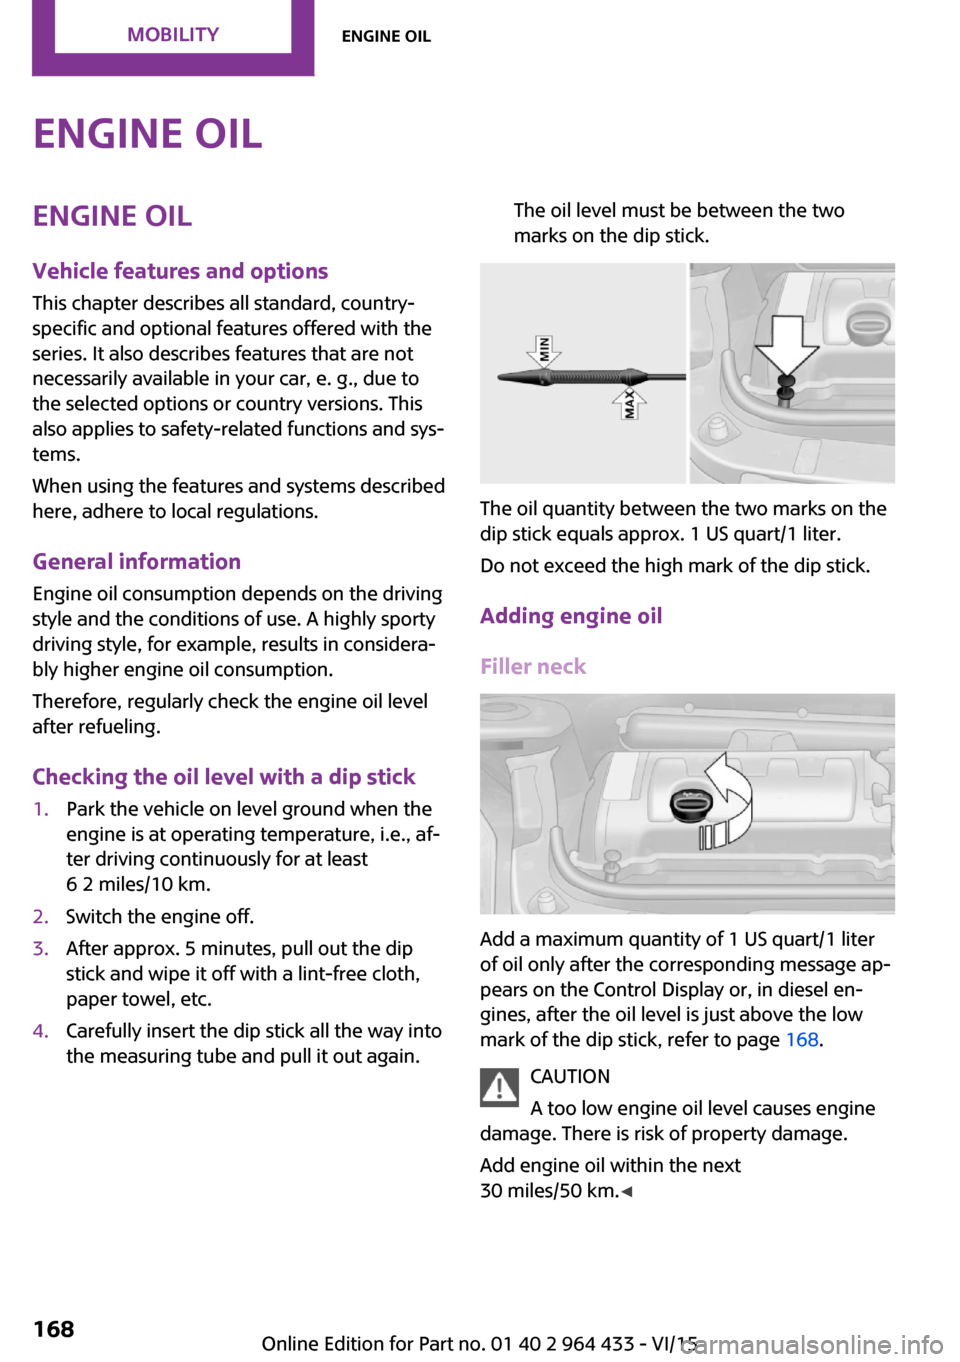
the measuring tube and pull it out again.The oil level must be between the two
marks on the dip stick.
The oil quantity between the two marks on the
dip stick equals approx. 1 US quart/1 liter.
Do not exceed the high mark of the dip stick.
Adding engine oil
Filler neck
Add a maximum quantity of 1 US quart/1 liter
of oil only after the corresponding message ap‐
pears on the Control Display or, in diesel en‐
gines, after the oil level is just above the low
mark of the dip stick, refer to page 168.
CAUTION
A too low engine oil level causes engine
damage. There is risk of property damage.
Add engine oil within the next
30 miles/50 km. ◀
Seite 168MOBILITYEngine oil168
Online Edition for Part no. 01 40 2 964 433 - VI/15
Page 172 of 223
MaintenanceVehicle features and op‐
tions
This chapter describes all standard, country-
specific and optional features offered with the
series. It also describes features that are not
necessarily available in your car, e. g., due to
the selected options or country versions. This
also applies to safety-related functions and sys‐
tems.
When using the features and systems described
here, adhere to local regulations.
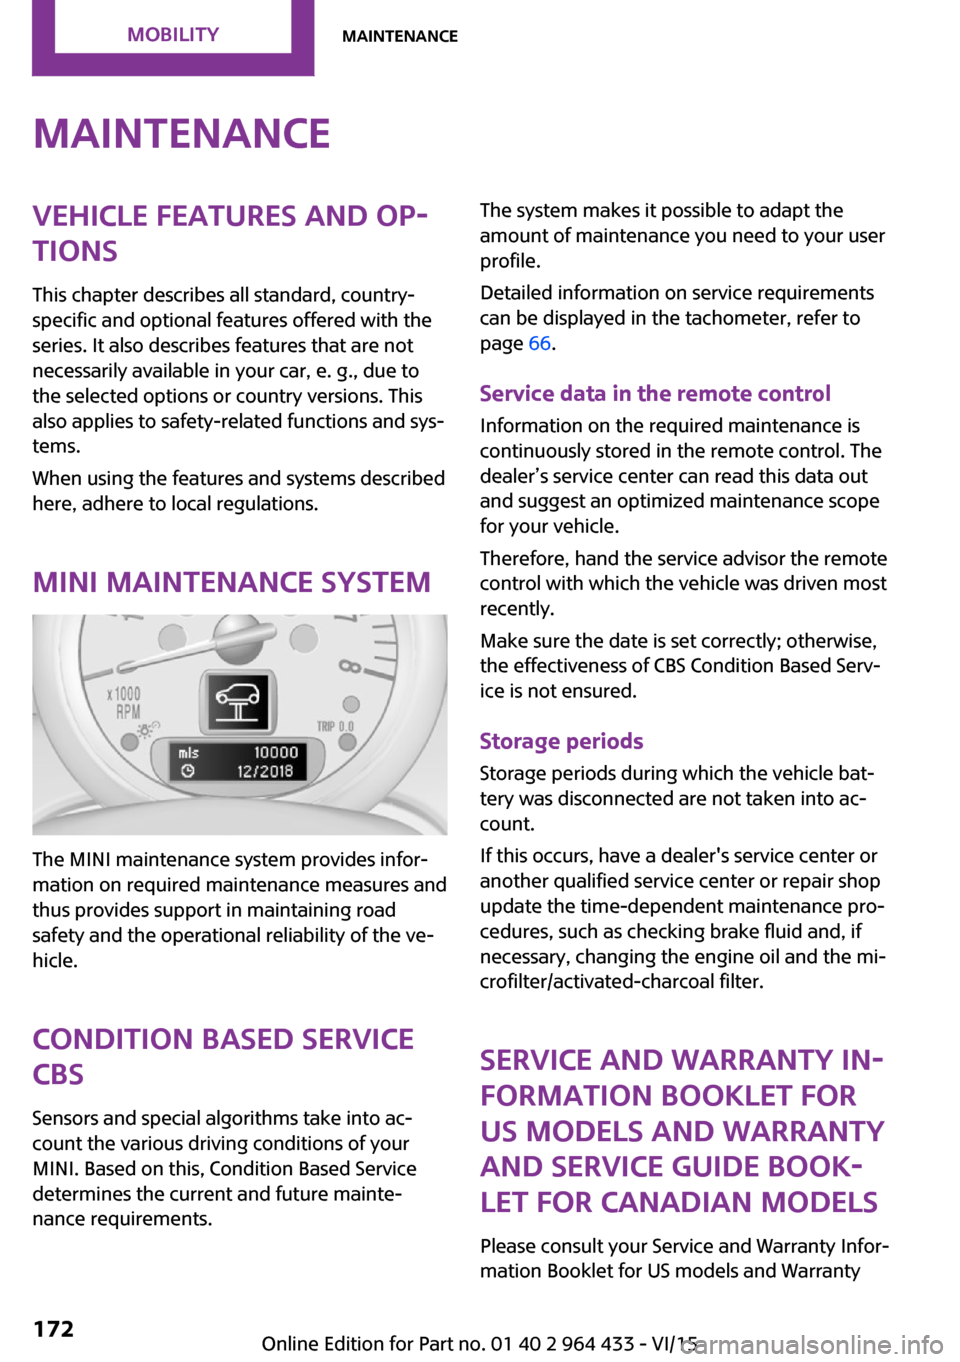
MINI maintenance system
The MINI maintenance system provides infor‐
mation on required maintenance measures and
thus provides support in maintaining road
safety and the operational reliability of the ve‐
hicle.
Condition Based Service
CBS
Sensors and special algorithms take into ac‐
count the various driving conditions of your
MINI. Based on this, Condition Based Service
determines the current and future mainte‐
nance requirements.
The system makes it possible to adapt the
amount of maintenance you need to your user
profile.
Detailed information on service requirements
can be displayed in the tachometer, refer to
page 66.
Service data in the remote control Information on the required maintenance is
continuously stored in the remote control. The
dealer’s service center can read this data out
and suggest an optimized maintenance scope
for your vehicle.
Therefore, hand the service advisor the remote
control with which the vehicle was driven most
recently.
Make sure the date is set correctly; otherwise,
the effectiveness of CBS Condition Based Serv‐
ice is not ensured.
Storage periods
Storage periods during which the vehicle bat‐
tery was disconnected are not taken into ac‐
count.
If this occurs, have a dealer's service center or
another qualified service center or repair shop
update the time-dependent maintenance pro‐
cedures, such as checking brake fluid and, if
necessary, changing the engine oil and the mi‐ crofilter/activated-charcoal filter.
Service and Warranty In‐formation Booklet for
US models and Warranty
and Service Guide Book‐
let for Canadian models
Please consult your Service and Warranty Infor‐
mation Booklet for US models and WarrantySeite 172MOBILITYMaintenance172
Online Edition for Part no. 01 40 2 964 433 - VI/15
Page 190 of 223
CareVehicle features and op‐tions
This chapter describes all standard, country-
specific and optional features offered with the series. It also describes features that are not
necessarily available in your car, e. g., due to
the selected options or country versions. This
also applies to safety-related functions and sys‐
tems.
When using the features and systems described
here, adhere to local regulations.
Car washes General information
Wash your vehicle frequently, particularly in
winter. Intense soiling and road salt can dam‐
age the vehicle.
Information CAUTION
When cleaning with high-pressure wash‐
ers, components can be damaged due to the
pressure or temperatures being too high. There
is risk of property damage. Maintain sufficient
distance and do not spray too long continu‐
ously. Follow the operating instructions for the
high-pressure washer. ◀
Do not direct steam or high-pressure washers
toward the labels applied by the manufacturer;
otherwise, damage may result.
Distances and temperature▷Maximum temperature: 140 ℉/60 ℃.▷Minimum distance from sensors, cameras,
seals: 12 inches/30 cm.After washing the vehicle, apply the brakes
briefly to dry them; otherwise, braking action
can be reduced and corrosion of the brake
discs can occur.
Regularly remove foreign bodies, such as
leaves, from the area of the windshield when
the hood is open.
Washing in automatic car washes Give preference to cloth car washes or those
that use soft brushes in order to avoid paint
damage.
Do not use automatic high-pressure washers;
otherwise, water may drip into the interior in
the area of the windows.
Before driving into the car wash, check whether
the system is suitable for your MINI. Note the
following points:▷Vehicle dimensions, refer to page 208.▷If necessary: fold in the exterior mirrors, re‐
fer to page 42.▷Maximum permissible tire width.
CAUTION
Too high guide rails in car washes can
damage body parts. There is risk of property
damage. Avoid car washes with guide rails
higher than 4 in/10 cm. ◀
Preparations before driving into the car wash:
▷Unscrew the road antenna.▷Deactivate the rain sensor to avoid unin‐
tentional wiper activation.▷Deactivate the rear window wiper and pro‐
tect it from damage. Ask the car wash oper‐
ator about any suitable protective meas‐
ures.▷Remove additional attachments, for in‐
stance a spoiler or telephone antenna, if
there is a risk that these may be damaged.Seite 190MOBILITYCare190
Online Edition for Part no. 01 40 2 964 433 - VI/15
Page 204 of 223

12CauseHow to respondThe cruise control system has failed.Have the system checked.The Park Distance Control has failed.Have the system checked.A bulb of the exterior lighting system has
failed.Have the exterior lighting checked
as soon as possible.A low-beam headlight or front fog light has
failed.Have the lights checked as soon as
possible.A high-beam headlight has failed.Have the high-beam headlights
checked.A rear fog light has failed.Have the rear fog lights checked.The headlight beam throw adjustment has
failed.Have the headlight beam throw ad‐
justment system checked.The Adaptive Light Control has failed.The engine oil pressure is too low.Stop immediately and switch off
the engine. You cannot continue
your journey. Contact a dealer’s
service center or another qualified
service center or repair shop.Lights up in red:The service appointment is overdue.Arrange a service appointment.
Check the service requirements, re‐
fer to page 66.Lights up in yellow:Service is due.Arrange a service appointment.
Check the service requirements, re‐
fer to page 66.Seite 204MOBILITYIndicator/warning lamps204
Online Edition for Part no. 01 40 2 964 433 - VI/15
Page 212 of 223

Everything from A to ZIndexA
ABS, Antilock Brake Sys‐ tem 84
Acoustic signal, refer to Check Control 67
Activated charcoal filter with automatic climate con‐
trol 95
Adaptive Light Control 71
Additives, engine oil 169
Airbags 74
Airbags, indicator/warning light 77
Air circulation, refer to Recir‐ culated air mode, air condi‐
tioner 92
Air circulation, refer to Recir‐ culated air mode, automatic
climate control 94
Air conditioning 91
Air conditioning mode, air conditioner 91
Air conditioning mode, auto‐ matic climate control 93
Air distribution, air condi‐ tioner, manual 92
Air distribution, automatic 94
Air distribution, automatic cli‐ mate control, manual 94
Air distribution, individual 92
Air drying, refer to Cooling function 95
Air flow rate for air condi‐ tioner 91
Air flow rate with automatic climate control 94
Air pressure, refer to Tire infla‐ tion pressure 154
Air supply, air conditioner 91 Air supply, automatic climate
control 93
Alarm system 30
Alarm system, avoiding unin‐ tentional alarms 32
Alarm system, ending an alarm 31
Alarm system, interior motion sensor 32
Alarm system, tilt alarm sen‐ sor 31
ALL4 all-wheel system 86
All-wheel drive, refer to ALL4 86
Alternating-code hand-held transmitter 97
Ambient lighting 73
Antifreeze, washer fluid 56
Antilock Brake System, ABS 84
Anti-slip control, refer to Dy‐ namic Stability Control
DSC 84
Anti-theft protection 21
Approved engine oils 169
Ashtray 100
Assistance, roadside 184
Assistance when driving off, refer to Hill drive-off assis‐
tant 86
Assistance with starting en‐ gine, refer to Jump-start‐
ing 184
Automatic air distribution 94
Automatic air flow 94
Automatic car wash 190
Automatic climate control 93
Automatic climate control, au‐ tomatic air distribution 94
Automatic, cruise control 88 Automatic headlight con‐
trol 69
Automatic transmission with Steptronic 57
AUTO program with auto‐ matic climate control 94
AUX-IN port 132
Average fuel consumption 63
Average fuel consumption, setting the unit 64
Average speed 63
Average speed, refer to Com‐ puter 62
B Backrest curvature, refer to Lumbar support 37
Backrests, refer to Seats 36
Backup lights, bulb replace‐ ment 179
Battery disposal 30
Battery, refer to Vehicle bat‐ tery 182
Battery, remote control 20
Battery replacement, remote control 30
Belts, refer to Safety belts 38
Belt tensioners, refer to Safety belts 38
Bi-xenon headlights 175
Brake assistant 84
Brake discs, breaking in 112
Brake fluid, refer to Service re‐ quirements 66
Brake force distribution, elec‐ tronic 84
Brake pads, breaking in 112
Brake, refer to Parking brake 52 Seite 212REFERENCEEverything from A to Z212
Online Edition for Part no. 01 40 2 964 433 - VI/15
Page 217 of 223
LATCH child restraint fixingsystem 47
Leather care 192
LEDs, light-emitting di‐ odes 175
License plate light, bulb re‐ placement 179
Light-alloy wheels, care 192
Light-emitting diodes, LEDs 175
Lighter, socket 100
Lighting, instruments 72
Lighting, light and bulb re‐ placement 175
Lighting, vehicle, refer to Lamps 69
Lights, parking lamps/low beams 69
Light switch 69
Lock buttons on doors, refer to Locking 26
Locking from the inside 26
Locking, from the outside 23
Locking, setting the confirma‐ tion signal 23
Locking the vehicle from the inside 25
Locking the vehicle from the outside 22
Locking without remote con‐ trol, refer to Comfort Ac‐
cess 28
Longlife oils, alternative oil types 169
Longlife oils, refer to Ap‐ proved engine oils 169
Low beams 69
Low beams, automatic 69
Low beams, bulb replace‐ ment 176
Lower back support, refer to Lumbar support 37
Lumbar support 37 M
Main inspection, refer to Serv‐ ice requirements 66
Maintenance, refer to Service booklet
Maintenance, refer to Service requirements 66
Maintenance require‐ ments 172
Maintenance system MINI 172
Makeup mirror 98
Malfunction, door lock 25
Malfunction, fuel filler flap 150
Malfunction, Steptronic trans‐ mission 59
Malfunction warnings, refer to Check Control 67
Manual air distribution, air conditioner 92
Manual air distribution, auto‐ matic climate control 94
Manual mode, Steptronic transmission 58
Manual operation, door lock 25
Manual operation, fuel filler flap 150
Manual operation, selector lever lock, Steptronic trans‐
mission 59
Marking on approved tires 161
Maximum cooling 94
Maximum speed, winter tires 161
Microfilter 93
Microfilter, with automatic cli‐ mate control 95
MINI Homepage 6
MINI Internet page 6
MINI maintenance sys‐ tem 172
MINI Mobility System 162 Minimum tread, tires 160
Mirrors 42
Mirrors, folding in and out 43
Mirrors, interior mirror 43
Mobile communication devi‐ ces in the vehicle 113
Mobile phone, refer to Tele‐ phone 138
Mobility System 162
Modifications, technical, refer to Own Safety 6
Mounting of child restraint fix‐ ing systems 46
N Neck restraints, refer to Head restraints 41
New wheels and tires 160
Notes 6
Nozzles, refer to Ventila‐ tion 95
O
OBD Onboard Diagnos‐ tics 173
OBD socket, refer to Socket for OBD Onboard Diagno‐
sis 173
Octane number, refer to Fuel quality 152
Octane rating, refer to Recom‐ mended fuel grade 152
Odometer 61
Oil additives 169
Oil level 168
Oil types, alternative 169
Oil types, approved 169
Onboard Diagnostics OBD 173
Opening and closing, Comfort Access 28
Opening and closing from the inside 25 Seite 217Everything from A to ZREFERENCE217
Online Edition for Part no. 01 40 2 964 433 - VI/15