window MINI Paceman 2016 Owner's Guide
[x] Cancel search | Manufacturer: MINI, Model Year: 2016, Model line: Paceman, Model: MINI Paceman 2016Pages: 223, PDF Size: 5.52 MB
Page 95 of 223
mate control does not have sufficient time to
adjust the set temperature.
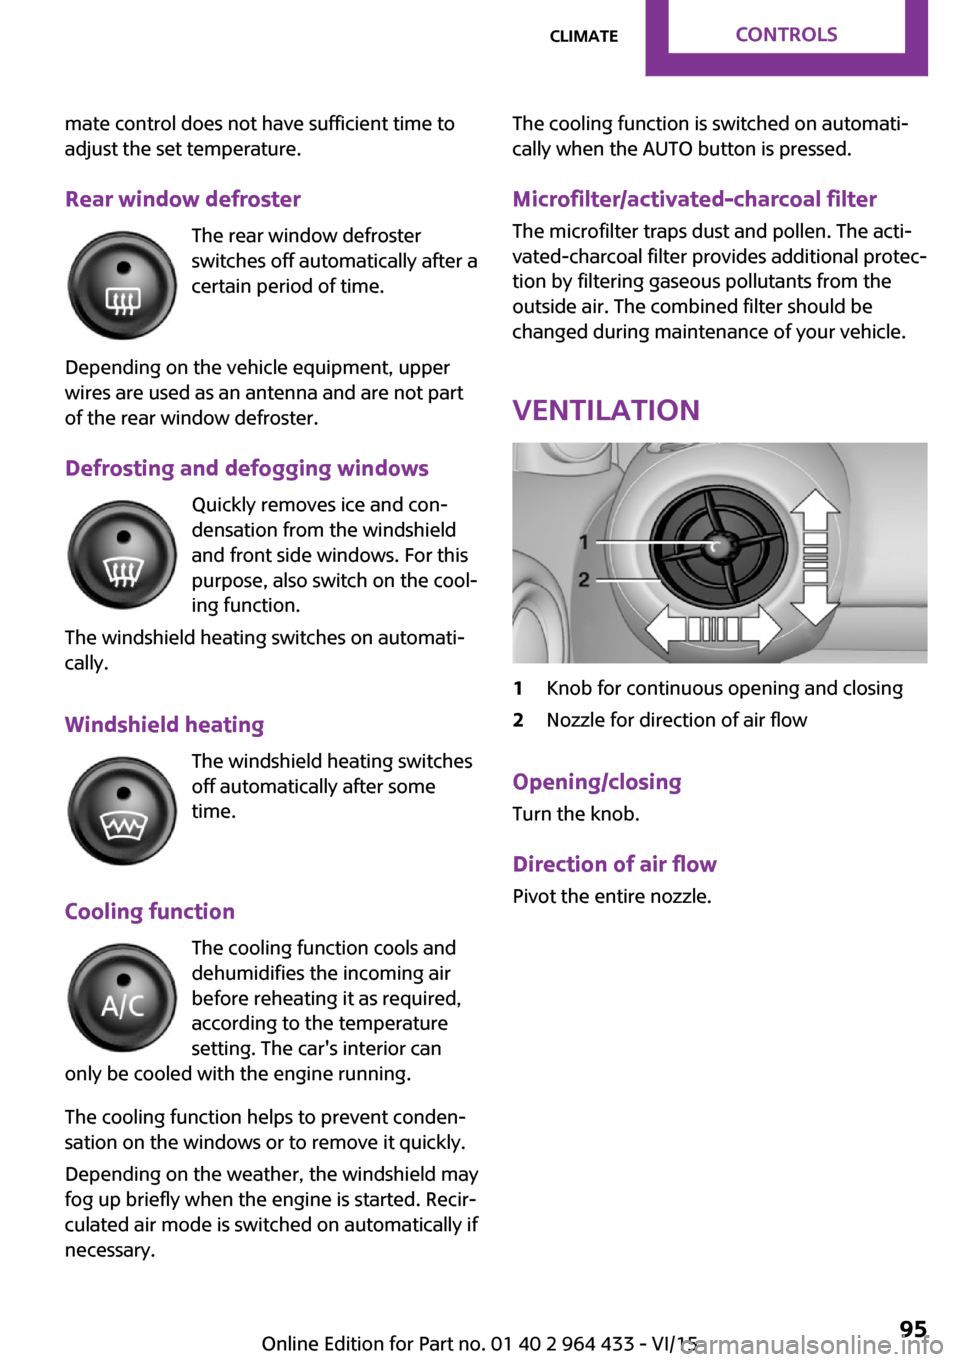
Rear window defroster The rear window defroster
switches off automatically after a
certain period of time.
Depending on the vehicle equipment, upper
wires are used as an antenna and are not part
of the rear window defroster.
Defrosting and defogging windows Quickly removes ice and con‐densation from the windshieldand front side windows. For this
purpose, also switch on the cool‐
ing function.
The windshield heating switches on automati‐
cally.
Windshield heating The windshield heating switches
off automatically after some
time.
Cooling function The cooling function cools and
dehumidifies the incoming air
before reheating it as required,
according to the temperature
setting. The car's interior can
only be cooled with the engine running.
The cooling function helps to prevent conden‐
sation on the windows or to remove it quickly.
Depending on the weather, the windshield may
fog up briefly when the engine is started. Recir‐
culated air mode is switched on automatically if
necessary.The cooling function is switched on automati‐
cally when the AUTO button is pressed.
Microfilter/activated-charcoal filter
The microfilter traps dust and pollen. The acti‐
vated-charcoal filter provides additional protec‐
tion by filtering gaseous pollutants from the
outside air. The combined filter should be
changed during maintenance of your vehicle.
Ventilation1Knob for continuous opening and closing2Nozzle for direction of air flow
Opening/closingTurn the knob.
Direction of air flow Pivot the entire nozzle.
Seite 95ClimateCONTROLS95
Online Edition for Part no. 01 40 2 964 433 - VI/15
Page 98 of 223
Canada: if the LED does not flash rapidly af‐
ter approx. 60 seconds, change the dis‐
tance and repeat the step. If programming
was aborted by the hand-held transmitter,
hold down the memory button and press
and release the button on the hand-held
transmitter several times for 2 seconds.
Controls
WARNING
Body parts can be jammed when operat‐
ing remote-controlled systems, e.g. the garage
door, using the universal garage door opener.
There is risk of injuries or risk of property dam‐
age. Make sure that the area of movement of
the respective system is clear during program‐
ming and operation. Also follow the safety in‐
structions of the hand-held transmitter. ◀
The system, such as the garage door, can be
operated using the button on the interior rear‐
view mirror with the engine running or the igni‐
tion switched on. When you are within the re‐
ception range of the system, press and hold the
button until the function is initiated. The LED on
the interior rearview mirror lights up continu‐
ously while the radio signal is being transmit‐
ted.
Deleting stored functions
Press the right and left buttons on the interior
rearview mirror simultaneously for approx.
20 seconds until the LED flashes rapidly. All
stored functions are deleted. The functions can‐
not be deleted individually.
Sun visor Glare protection
Folding down
Fold the sun visor down.
Folding up
Fold the sun visor up.
Glare protection from the side
Folding down1.Fold the sun visor down.2.Detach from the holder and pivot sideways
to the side window.
Folding up
To close the sun visor, proceed in reverse order.
Vanity mirror A vanity mirror is located behind a cover on
each sun visor.
To open, fold the cover up.
Depending on the vehicle equipment, mirror
lighting comes on when the cover is opened.
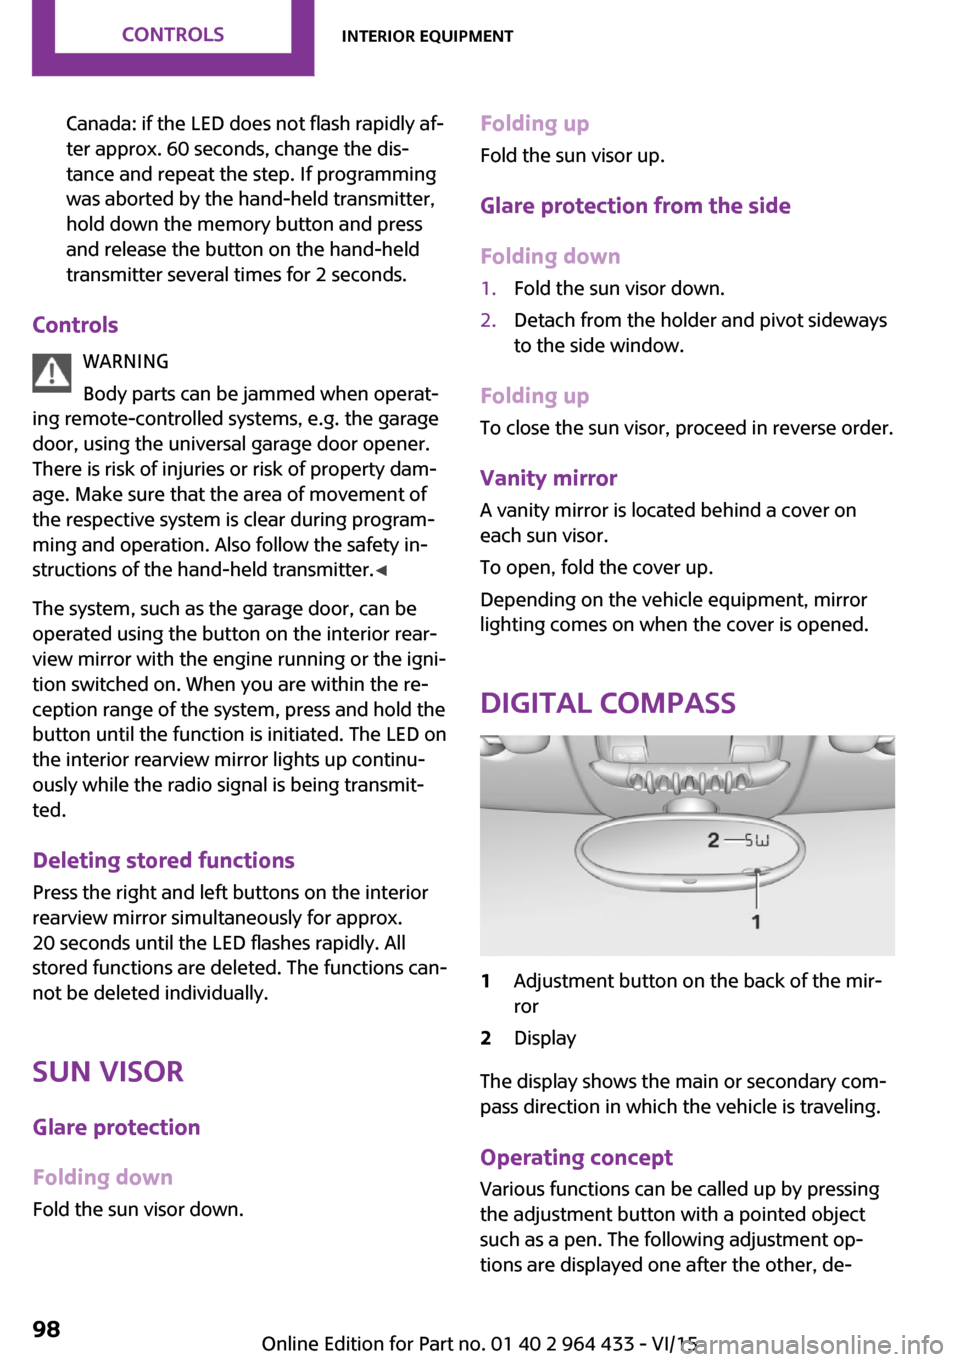
Digital compass
1Adjustment button on the back of the mir‐
ror2Display
The display shows the main or secondary com‐
pass direction in which the vehicle is traveling.
Operating concept
Various functions can be called up by pressing
the adjustment button with a pointed object
such as a pen. The following adjustment op‐
tions are displayed one after the other, de‐
Seite 98CONTROLSInterior equipment98
Online Edition for Part no. 01 40 2 964 433 - VI/15
Page 113 of 223
Closing the tailgateWARNING
An open tailgate protrudes from the vehi‐
cle and can endanger occupants and other traf‐
fic participants or damage the vehicle in the
event of an accident, braking or evasive ma‐
neuvers. In addition, exhaust fumes may enter
the vehicle interior. There is risk of injuries or
risk of property damage. Do not drive with the
tailgate open. ◀
If, despite this, the vehicle must be driven with
the tailgate open:▷Drive moderately.▷Close all windows and the glass sunroof.▷Switch off recirculated air mode and greatly
increase the blower speed.
Hot exhaust system
WARNING
During driving operation, high tempera‐
tures can occur underneath the body, e.g.
caused by the exhaust gas system. If combusti‐
ble materials, such as leaves or grass, come in
contact with hot parts of the exhaust gas sys‐
tem, these materials can ignite. There is risk of
injuries or risk of property damage.
Do not remove the heat shields installed and
never apply undercoating to them. Make sure
that no combustible materials can come in con‐
tact with hot vehicle parts in driving operation,
idle or during parking. Do not touch the hot ex‐
haust system. ◀
Mobile communication devices in the vehicle
WARNING
The vehicle's performance may be af‐
fected by interference from high frequency
radio signals. These signals are emitted by a
series of transmission systems, such as from air
traffic beacons or relay stations for mobile tele‐
communications.
If you have problems of this nature, we recom‐
mend that you consult your dealer’s service
center or another qualified service center or re‐
pair shop. ◀
Hydroplaning On wet or slushy roads, a wedge of water can
form between the tires and road surface.
This phenomenon is referred to as hydroplan‐
ing. It is characterized by a partial or complete
loss of contact between the tires and the road
surface, ultimately undermining your ability to
steer and brake the vehicle.
The risk of hydroplaning increases as the tire
tread depth decreases. Minimum tread depth,
refer to page 160.
Driving through water Drive though calm water only if it is not deeper
than 12 inches/30 cm and at this height, no
faster than walking speed, up to
6 mph/10 km/h.
Using the parking brake on inclines On inclines, do not hold the vehicle stationary
with a slipping clutch for extended period; use
the parking brake instead. Otherwise, the
clutch will be subject to increased wear.
Support from the hill drive-off assistant, refer to
page 86.
Braking safely The vehicle is equipped with ABS as a standardfeature.
Applying the brakes fully is the most effective
way of braking in situations when this is neces‐
sary.
The vehicle maintains steering responsiveness.
You can still avoid any obstacles with a mini‐
mum of steering effort.
Pulsation of the brake pedal and sounds from
the hydraulic circuits indicate that ABS is in its
active mode.Seite 113Things to remember when drivingDRIVING TIPS113
Online Edition for Part no. 01 40 2 964 433 - VI/15
Page 117 of 223
available cargo and luggage load capacity
calculated in Step 4.6.If your vehicle will be towing a trailer, load
from your trailer will be transfered to your
vehicle. Consult the manual for transporting
a trailer to determine how this may reduce
the available cargo and luggage load ca‐
pacity of your vehicle.
Load
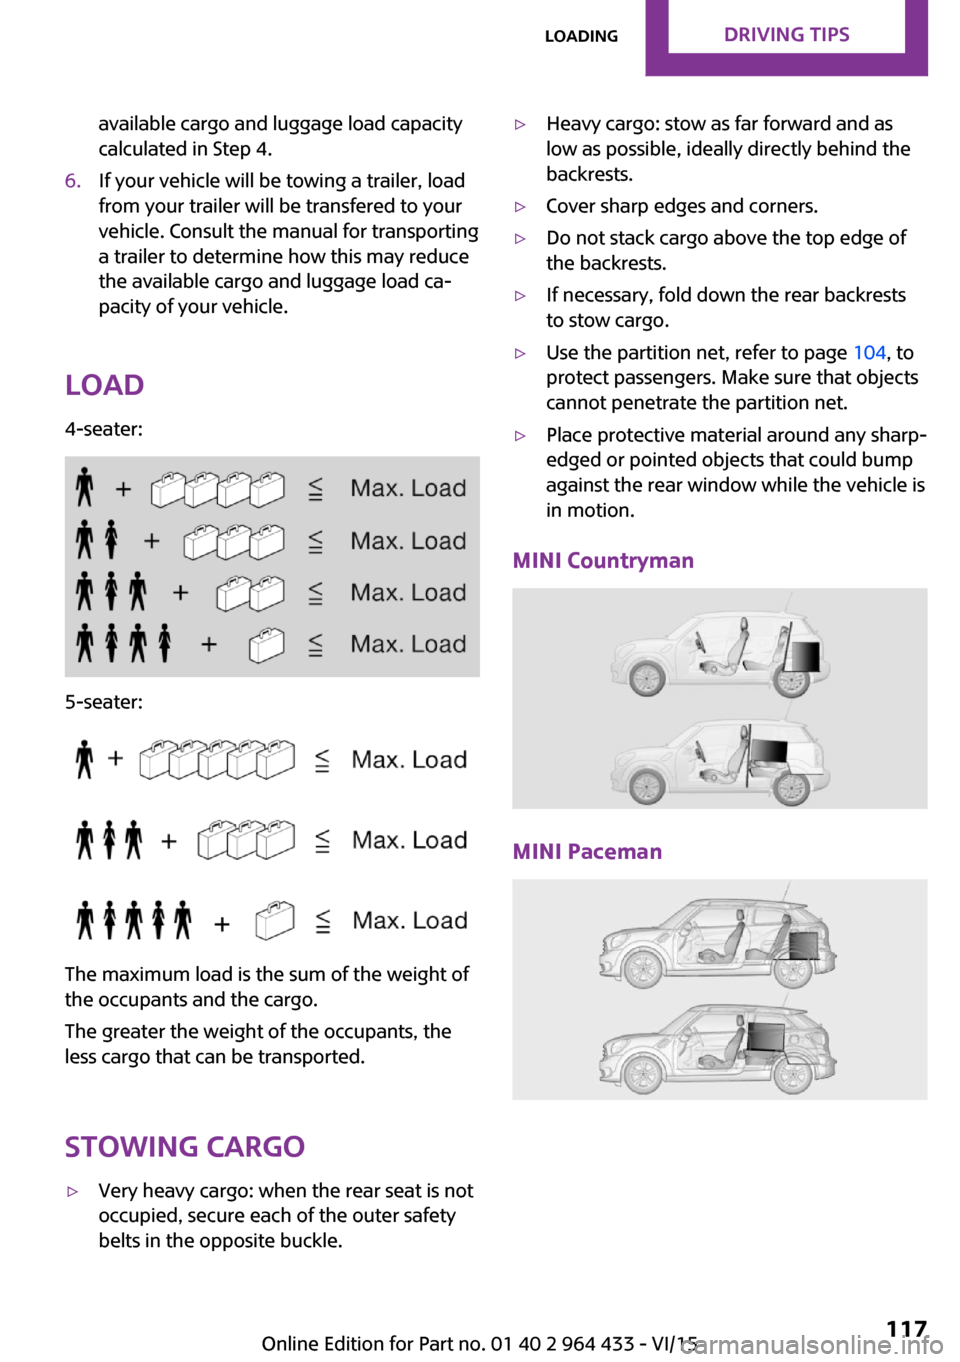
4-seater:
5-seater:
The maximum load is the sum of the weight of
the occupants and the cargo.
The greater the weight of the occupants, the
less cargo that can be transported.
Stowing cargo
▷Very heavy cargo: when the rear seat is not
occupied, secure each of the outer safety
belts in the opposite buckle.▷Heavy cargo: stow as far forward and as
low as possible, ideally directly behind the
backrests.▷Cover sharp edges and corners.▷Do not stack cargo above the top edge of
the backrests.▷If necessary, fold down the rear backrests
to stow cargo.▷Use the partition net, refer to page 104, to
protect passengers. Make sure that objects
cannot penetrate the partition net.▷Place protective material around any sharp-
edged or pointed objects that could bump
against the rear window while the vehicle is
in motion.
MINI Countryman
MINI Paceman
Seite 117LoadingDRIVING TIPS117
Online Edition for Part no. 01 40 2 964 433 - VI/15
Page 120 of 223

Saving fuelVehicle features and op‐tions
This chapter describes all standard, country-
specific and optional features offered with the
series. It also describes features that are not necessarily available in your car, e. g., due to
the selected options or country versions. This
also applies to safety-related functions and sys‐
tems.
When using the features and systems described
here, adhere to local regulations.
General information
Your vehicle contains advanced technology for
the reduction of fuel consumption and emis‐
sions.
Fuel consumption depends on a number of dif‐
ferent factors. The implementation of certain
measures, driving style and regular mainte‐
nance can have an influence on fuel consump‐
tion and on the environmental impact.
Remove unnecessary
cargo
Additional weight increases fuel consumption.
Remove attached partsfollowing use
Remove unneeded auxiliary mirrors, roof or
rear luggage racks after use.
Attached parts on the vehicle impair the aero‐
dynamics and increase the fuel consumption.Close both windows
Open windows causes higher air resistance and
thus increases fuel consumption.
Check the tire inflation
pressure regularly
Check and, if necessary, correct the tire infla‐
tion pressure, refer to page 154, at least twice
a month and before starting on a long trip.
Low tire inflation pressure increases rolling re‐
sistance and thus raises fuel consumption and
tire wear.
Drive away without de‐lay
Do not wait for the engine to warm-up while
the vehicle remains stationary. Start driving right away, but at moderate engine speeds.
This is the fastest way for the cold engine to
reach its operating temperature.
Look well ahead when
driving
Avoid unnecessary acceleration and braking. To
achieve this, maintain a suitable distance to the
vehicle driving ahead of you.
Driving smoothly and looking ahead reduces
fuel consumption.
Avoid high engine speeds
Use 1st gear to get the vehicle in motion. Be‐
ginning with 2nd gear, accelerate rapidly. WhenSeite 120DRIVING TIPSSaving fuel120
Online Edition for Part no. 01 40 2 964 433 - VI/15
Page 121 of 223

accelerating, shift up before reaching high en‐
gine speeds.
When you reach the desired speed, shift into
the highest applicable gear and drive with the
engine speed as low as possible and at a con‐
stant speed.
As a rule: driving at low engine speeds lowers
fuel consumption and reduces wear.
Use coasting conditions When approaching a red light, take your foot
off the accelerator and coast to a halt in the
highest applicable gear.
On a downhill slope, take your foot off the ac‐
celerator and coast in a suitable gear.
The flow of fuel is interrupted while coasting.
Switch off the engine
during longer stops
Switch off the engine during longer stops, e.g.,
at traffic lights, railroad crossings or in traffic
congestion.
Fuel savings are already achieved after the en‐
gine is turned off for as little as 4 seconds.
Switch off any functions
that are not currently
needed
Functions such as seat heating and the rear
window defroster require a lot of energy and
consume additional fuel, especially in city and
stop-and-go traffic.
Therefore, switch off these functions if they are
not actually needed.Have maintenance car‐
ried out
Have vehicles maintained regularly to achieve
optimal vehicle efficiency and service life. MINI
recommends that maintenance work be per‐
formed by a MINI dealer’s service center.
For information on the MINI Maintenance Sys‐
tem, refer to page 172.Seite 121Saving fuelDRIVING TIPS121
Online Edition for Part no. 01 40 2 964 433 - VI/15
Page 166 of 223
Engine compartmentVehicle features and op‐
tions
This chapter describes all standard, country-
specific and optional features offered with the series. It also describes features that are notnecessarily available in your car, e. g., due to
the selected options or country versions. This
also applies to safety-related functions and sys‐
tems.
When using the features and systems described
here, adhere to local regulations.
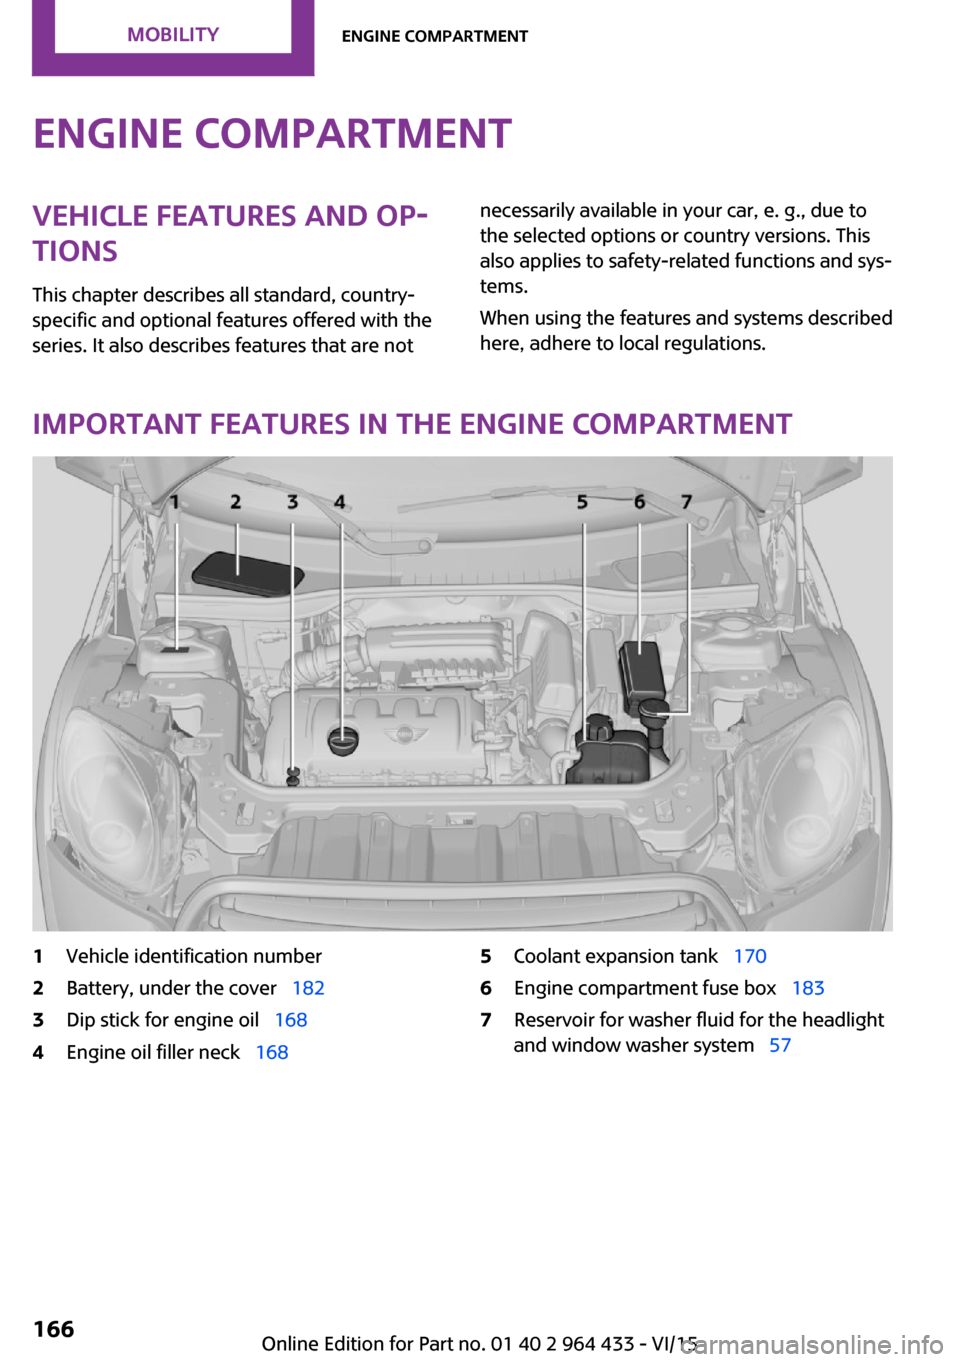
Important features in the engine compartment
1Vehicle identification number2Battery, under the cover 1823Dip stick for engine oil 1684Engine oil filler neck 1685Coolant expansion tank 1706Engine compartment fuse box 1837Reservoir for washer fluid for the headlight
and window washer system 57Seite 166MOBILITYEngine compartment166
Online Edition for Part no. 01 40 2 964 433 - VI/15
Page 190 of 223
CareVehicle features and op‐tions
This chapter describes all standard, country-
specific and optional features offered with the series. It also describes features that are not
necessarily available in your car, e. g., due to
the selected options or country versions. This
also applies to safety-related functions and sys‐
tems.
When using the features and systems described
here, adhere to local regulations.
Car washes General information
Wash your vehicle frequently, particularly in
winter. Intense soiling and road salt can dam‐
age the vehicle.
Information CAUTION
When cleaning with high-pressure wash‐
ers, components can be damaged due to the
pressure or temperatures being too high. There
is risk of property damage. Maintain sufficient
distance and do not spray too long continu‐
ously. Follow the operating instructions for the
high-pressure washer. ◀
Do not direct steam or high-pressure washers
toward the labels applied by the manufacturer;
otherwise, damage may result.
Distances and temperature▷Maximum temperature: 140 ℉/60 ℃.▷Minimum distance from sensors, cameras,
seals: 12 inches/30 cm.After washing the vehicle, apply the brakes
briefly to dry them; otherwise, braking action
can be reduced and corrosion of the brake
discs can occur.
Regularly remove foreign bodies, such as
leaves, from the area of the windshield when
the hood is open.
Washing in automatic car washes Give preference to cloth car washes or those
that use soft brushes in order to avoid paint
damage.
Do not use automatic high-pressure washers;
otherwise, water may drip into the interior in
the area of the windows.
Before driving into the car wash, check whether
the system is suitable for your MINI. Note the
following points:▷Vehicle dimensions, refer to page 208.▷If necessary: fold in the exterior mirrors, re‐
fer to page 42.▷Maximum permissible tire width.
CAUTION
Too high guide rails in car washes can
damage body parts. There is risk of property
damage. Avoid car washes with guide rails
higher than 4 in/10 cm. ◀
Preparations before driving into the car wash:
▷Unscrew the road antenna.▷Deactivate the rain sensor to avoid unin‐
tentional wiper activation.▷Deactivate the rear window wiper and pro‐
tect it from damage. Ask the car wash oper‐
ator about any suitable protective meas‐
ures.▷Remove additional attachments, for in‐
stance a spoiler or telephone antenna, if
there is a risk that these may be damaged.Seite 190MOBILITYCare190
Online Edition for Part no. 01 40 2 964 433 - VI/15
Page 191 of 223
▷Insert the remote control into the ignition
lock.
Steptronic transmission
Before driving into the car wash, note the fol‐
lowing to ensure that the vehicle can roll:
1.Insert the remote control into the ignition
lock, even with Comfort Access.2.Move the selector lever to position N.3.Release the parking brake.4.Switch the engine off.5.Leave the remote control in the ignition
lock so that the vehicle can roll.
Hand car wash
If washing the vehicle by hand, use copious
quantities of water and car shampoo if neces‐
sary. Clean the vehicle with a sponge or a
washing brush by applying gentle pressure.
Before cleaning the windshield, deactivate the
rain sensor to avoid unintentional wiper activa‐
tion or switch off the ignition.
Adhere to the local regulations regarding
washing cars by hand.
Headlights Do not rub dry and do not use abrasive or caus‐
tic cleansers. Soak areas that have been soiled,
e.g., due to insects, with shampoo and rinse off
with copious quantities of water.
Thaw ice with a window deicer; do not use an
ice scraper.
Windows
Clean the outside and inside surfaces of the
windows and the mirror glasses with window
cleaner.
Do not clean mirror glass with cleaners contain‐
ing quartz.
Wiper blades
Clean with soapy water and replace regularly to
avoid streaking.
Wax and preservative residue and soiling on
the windows cause streaking during window
wiping and lead to premature wear on the
wiper blades and malfunctions of the rain sen‐
sor.
Vehicle care
Car care products
Regular cleaning and care contributes signifi‐
cantly to vehicle value retention.
The manufacturer of your vehicle recommends using car care and cleaning products from
MINI.
WARNING
Cleansers can contain substances that are
dangerous and harmful to your health. There is
risk of injuries. When cleaning the interior, open
the doors or windows. Only use products in‐
tended for cleaning vehicles. Follow the instruc‐
tions on the container. ◀
Vehicle paint Regular care contributes to vehicle value reten‐
tion and protects the paintwork against the
long-term effects of paint-damaging substan‐
ces.
Environmental influences in areas with higher
air pollution or natural contaminants, such as
tree resin or pollen, can have an impact on the
vehicle paint. Therefore, it is important to tailor
the frequency and extent of your car care to
these influences.
Immediately remove especially aggressive sub‐
stances, such as spilled fuel, oil, grease, or bird
droppings, to prevent damage to the paint‐
work.Seite 191CareMOBILITY191
Online Edition for Part no. 01 40 2 964 433 - VI/15
Page 214 of 223
Cradle for telephone or mobilephone, refer to Snap-in
adapter 145
Cruise control 88
Cupholders 100
Current fuel consumption 63
Curve lights, refer to Adaptive Light Control 71
D Dashboard lighting, refer to Instrument lighting 72
Dashboard, refer to Cock‐ pit 12
Dashboard, refer to Dis‐ plays 14
Date, display format 64
Date, setting 65
Daytime running lights 70
Decorative trim, care 193
Defogging windows 92
Defroster, rear window, auto‐ matic climate control 95
Defroster, rear window, with air conditioner 92
Defrosting windows 92
Defrost setting, refer to De‐ frosting windows 92
Digital compass 98
Dip stick, engine oil 168
Directional indicators, refer to Turn signals 53
Display lighting, refer to In‐ strument lighting 72
Displays 14
Displays and controls 12
Displays, care 193
Displays, cleaning 193
Displays, refer to Instrument cluster 14
Disposal, remote control bat‐ tery 30
Distance warning, refer to Park Distance Control
PDC 90 Door key, refer to Remote
control with integrated
key 20
Door lock 25
Door lock, confirmation sig‐ nals 23
Doors, manual operation 25
Doors, unlocking and locking, confirmation signals 23
Doors, unlocking and locking from the inside 25
Doors, unlocking and locking, from the outside 22
DOT Quality Grades 158
Drive-off assistant, refer to Hill drive-off assistant 86
Driving notes, breaking in 112
Driving off on hills, refer to Hill drive-off assistant 86
Driving on poor roads 114
Driving stability control sys‐ tems 84
Driving tips, refer to Driving notes 112
Dry air, refer to Cooling func‐ tion 95
DSC Dynamic Stability Con‐ trol 84
DTC Dynamic Traction Con‐ trol 85
Dynamic Stability Control DSC 84
Dynamic Traction Control DTC 85
E
Electrical malfunction, door lock 25
Electrical malfunction, fuel filler flap 150
Electronic brake-force distri‐ bution 84 Electronic Stability Program
ESP, refer to Dynamic Stabil‐
ity Control DSC 84
Emergency operation, fuel filler flap, unlocking man‐
ually 150
Emergency operation, refer to Manual operation 25
Emergency operation, Step‐ tronic transmission, refer to
Selector lever lock, overrid‐
ing 59
Energy, saving, refer to Saving fuel 120
Engine, breaking in 112
Engine compartment 166
Engine oil, adding 168
Engine oil, additives, refer to Approved engine oils 169
Engine oil, alternative oil types 169
Engine oil change intervals, refer to Service require‐
ments 66
Engine oil, dip stick 168
Engine oil, filling capacity 211
Engine oil, MINI maintenance system 172
Engine oil types, alterna‐ tive 169
Engine oil types, ap‐ proved 169
Engine, overheating, refer to Coolant temperature 62
Engine start, assistance 184
Engine, starting 51
Engine, starting, Comfort Ac‐ cess 28
Engine, starting, Start/Stop button 50
Engine, stopping, Start/Stop button 50
Engine, switching off 52
Equipment, interior 96 Seite 214REFERENCEEverything from A to Z214
Online Edition for Part no. 01 40 2 964 433 - VI/15