Maintenance MITSUBISHI ASX 2012 (in English) Service Manual
[x] Cancel search | Manufacturer: MITSUBISHI, Model Year: 2012, Model line: ASX, Model: MITSUBISHI ASX 2012Pages: 378, PDF Size: 18.2 MB
Page 341 of 378
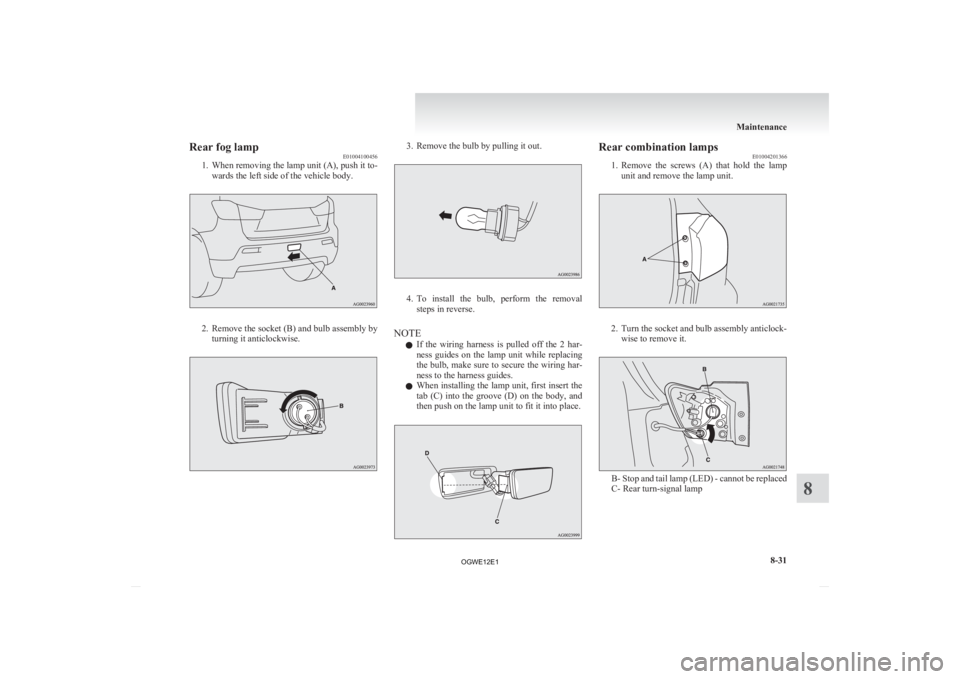
Rear fog lamp
E01004100456
1.
When removing the lamp unit (A), push it to-wards the left side of the vehicle body. 2. Remove
the socket (B) and bulb assembly by
turning it anticlockwise. 3. Remove the bulb by pulling it out.
4. To
install the bulb, perform the removal
steps in reverse.
NOTE l If the wiring harness is pulled off the 2 har-
ness guides on the lamp unit while replacing
the bulb, make sure to secure the wiring har-
ness to the harness guides.
l When installing the lamp unit, first insert the
tab (C) into the groove (D) on the body, and
then push on the lamp unit to fit it into place. Rear combination lamps
E01004201366
1. Remove
the screws (A) that hold the lamp
unit and remove the lamp unit. 2. Turn the socket and bulb assembly anticlock-
wise to remove it. B- Stop and tail lamp (LED) - cannot be replaced
C- Rear turn-signal lamp Maintenance
8-31 8
OGWE12E1
Page 342 of 378
NOTE
l An
LED, not a bulb, is used in the stop lamp/
tail lamp.
Contact a MITSUBISHI MOTORS Author-
ized Service Point when there is a need for re-
pair or replacement.
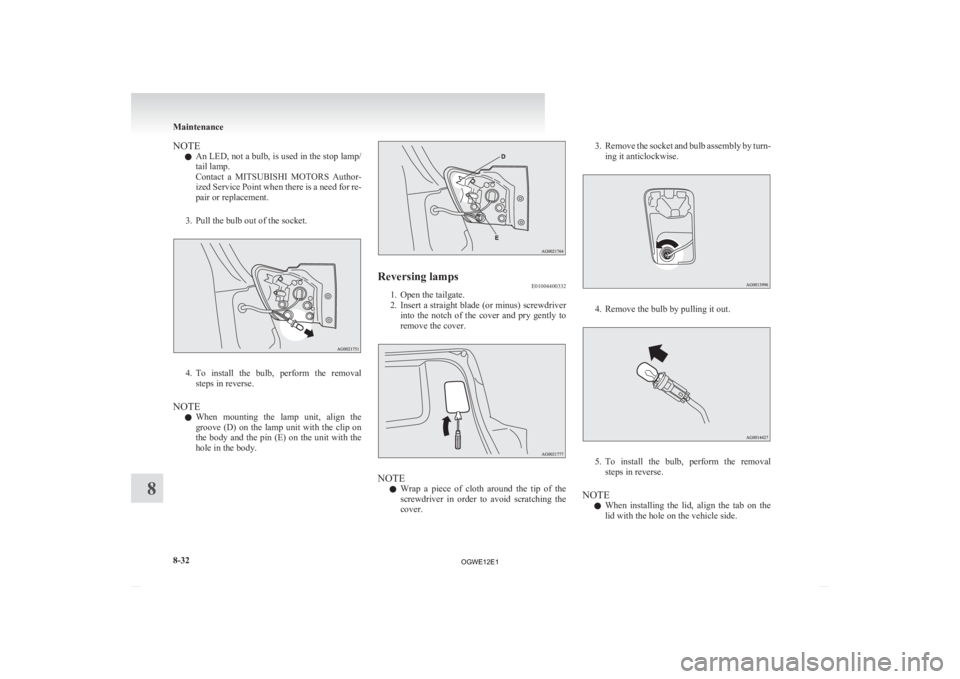
3. Pull the bulb out of the socket. 4. To
install the bulb, perform the removal
steps in reverse.
NOTE l When mounting the lamp unit, align the
groove (D) on the lamp unit with the clip on
the body and the pin (E) on the unit with the
hole in the body. Reversing lamps
E01004400332
1. Open the tailgate.
2. Insert
a straight blade (or minus) screwdriver
into the notch of the cover and pry gently to
remove the cover. NOTE
l Wrap
a piece of cloth around the tip of the
screwdriver in order to avoid scratching the
cover. 3. Remove
the socket and bulb assembly by turn-
ing it anticlockwise. 4. Remove the bulb by pulling it out.
5. To
install the bulb, perform the removal
steps in reverse.
NOTE l When installing the lid, align the tab on the
lid with the hole on the vehicle side. Maintenance
8-32
8
OGWE12E1
Page 343 of 378
Licence plate lamps
E01004600943
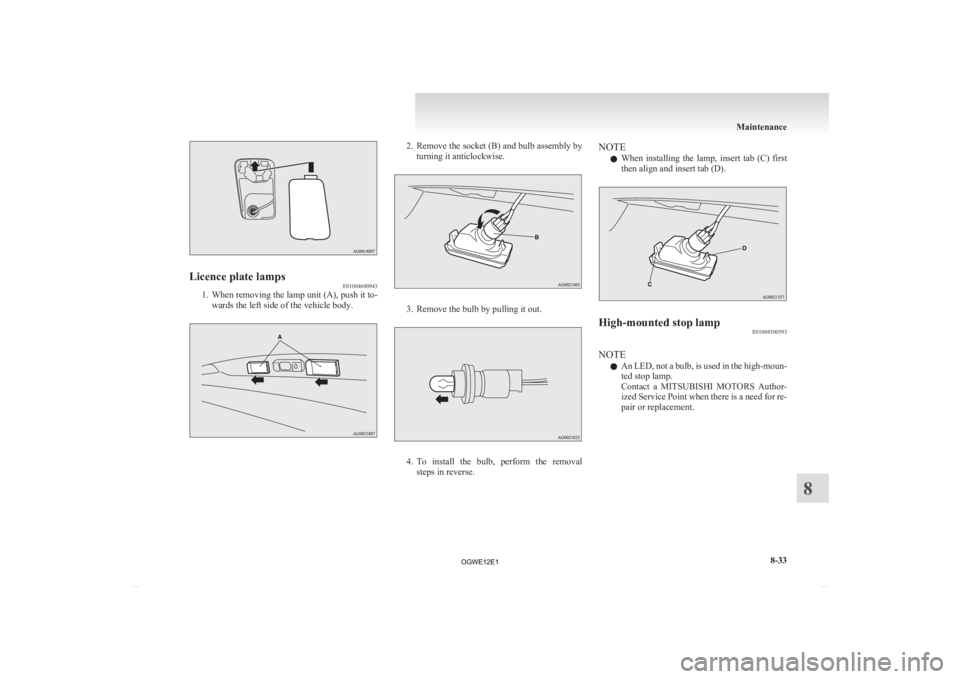
1. When removing the lamp unit (A), push it to-
wards the left side of the vehicle body. 2. Remove the socket (B) and bulb assembly by
turning it anticlockwise. 3. Remove the bulb by pulling it out.
4. To
install the bulb, perform the removal
steps in reverse. NOTE
l When
installing the lamp, insert tab (C) first
then align and insert tab (D). High-mounted stop lamp
E01004500593
NOTE l An
LED, not a bulb, is used in the high-moun-
ted stop lamp.
Contact a MITSUBISHI MOTORS Author-
ized Service Point when there is a need for re-
pair or replacement. Maintenance
8-33 8
OGWE12E1
Page 358 of 378
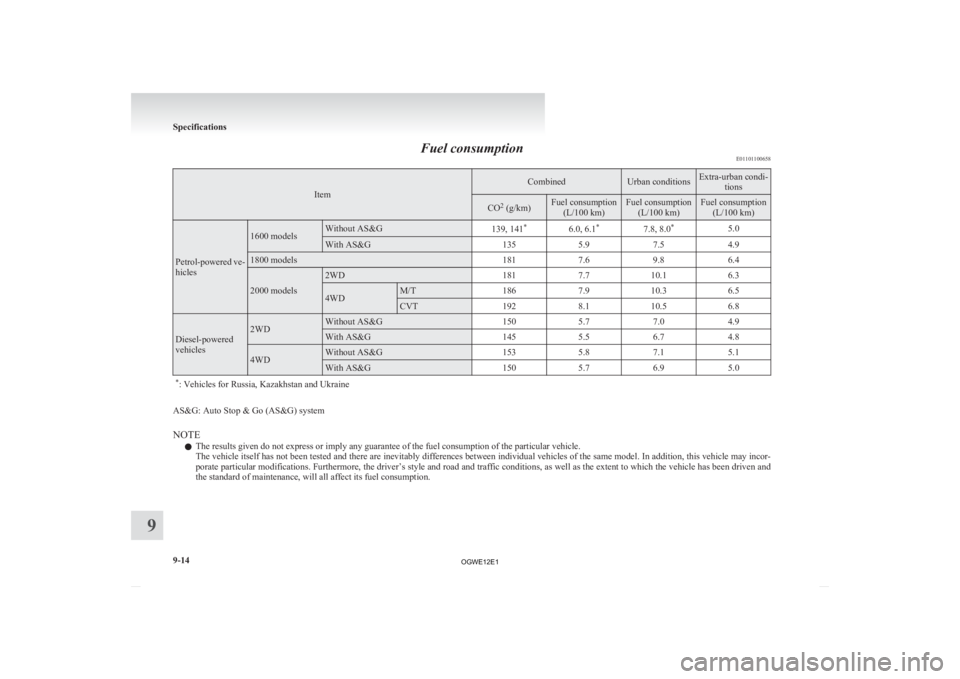
Fuel consumption
E01101100658Item Combined Urban conditions Extra-urban condi-
tions CO
2
(g/km) Fuel consumption
(L/100 km) Fuel consumption
(L/100 km) Fuel consumption
(L/100 km) Petrol-powered ve-
hicles 1600 models Without AS&G
139, 141*
6.0, 6.1*
7.8, 8.0*
5.0 With AS&G
1355.97.54.9 1800 models
1817.69.86.4 2000 models 2WD
1817.710.1 6.3 4WD M/T
1867.910.3 6.5 CVT
1928.110.5 6.8Diesel-powered
vehicles 2WD Without AS&G
1505.77.04.9 With AS&G
1455.56.74.8 4WD Without AS&G
1535.87.15.1 With AS&G
1505.76.95.0
* : Vehicles for Russia, Kazakhstan and Ukraine
AS&G: Auto Stop & Go (AS&G) system
NOTE
l The results given do not express or imply any guarantee of the fuel consumption of the particular vehicle.
The
vehicle itself has not been tested and there are inevitably differences between individual vehicles of the same model. In addition, this vehicle may incor-
porate particular modifications. Furthermore, the driver’s style and road and traffic conditions, as well as the extent to which the vehicle has been driven and
the standard of maintenance, will all affect its fuel consumption. Specifications
9-14
9
OGWE12E1
Page 364 of 378
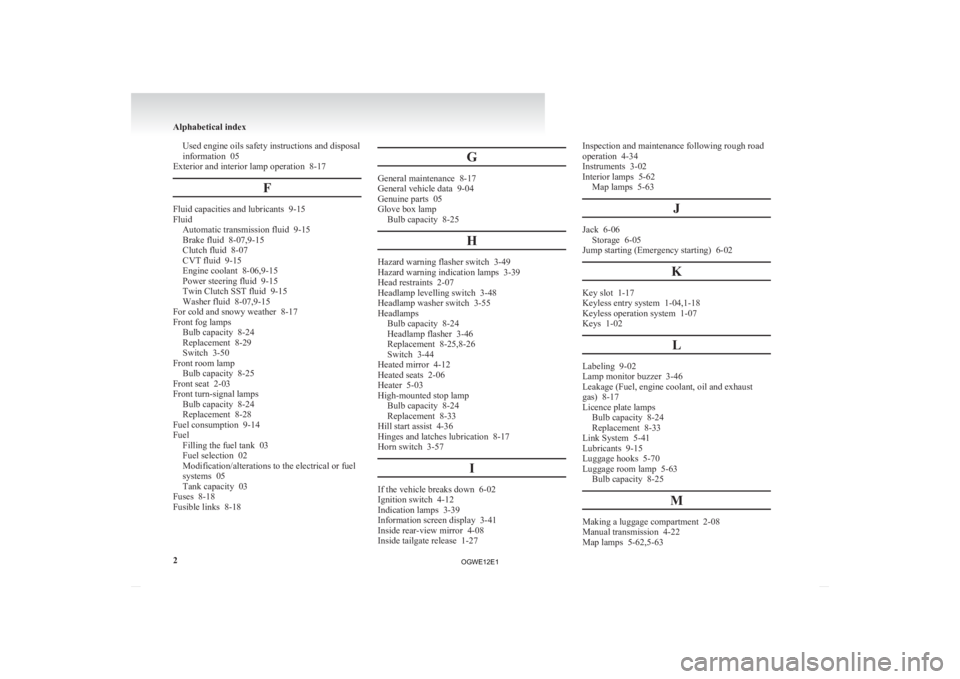
Used engine oils safety instructions and disposal
information 05
Exterior and interior lamp operation
8-17
F Fluid capacities and lubricants 9-15
Fluid
Automatic transmission fluid
9-15
Brake fluid 8-07,9-15
Clutch fluid 8-07
CVT fluid 9-15
Engine coolant 8-06,9-15
Power steering fluid 9-15
Twin Clutch SST fluid 9-15
Washer fluid 8-07,9-15
For cold and snowy weather 8-17
Front fog lamps Bulb capacity 8-24
Replacement 8-29
Switch 3-50
Front room lamp Bulb capacity 8-25
Front seat 2-03
Front turn-signal lamps Bulb capacity 8-24
Replacement 8-28
Fuel consumption 9-14
Fuel Filling the fuel tank 03
Fuel selection 02
Modification/alterations to the electrical or fuel
systems 05
Tank capacity 03
Fuses 8-18
Fusible links 8-18 GGeneral maintenance 8-17
General vehicle data
9-04
Genuine parts 05
Glove box lamp Bulb capacity 8-25
H Hazard warning flasher switch 3-49
Hazard warning indication lamps
3-39
Head restraints 2-07
Headlamp levelling switch 3-48
Headlamp washer switch 3-55
Headlamps Bulb capacity 8-24
Headlamp flasher 3-46
Replacement 8-25,8-26
Switch 3-44
Heated mirror 4-12
Heated seats 2-06
Heater 5-03
High-mounted stop lamp Bulb capacity 8-24
Replacement 8-33
Hill start assist 4-36
Hinges and latches lubrication 8-17
Horn switch 3-57
I If the vehicle breaks down 6-02
Ignition switch 4-12
Indication lamps
3-39
Information screen display 3-41
Inside rear-view mirror 4-08
Inside tailgate release 1-27 Inspection and maintenance following rough road
operation 4-34
Instruments 3-02
Interior lamps 5-62
Map lamps 5-63
J Jack 6-06
Storage 6-05
Jump starting (Emergency starting)
6-02
K Key slot 1-17
Keyless entry system 1-04,1-18
Keyless operation system 1-07
Keys 1-02
L Labeling 9-02
Lamp monitor buzzer
3-46
Leakage (Fuel, engine coolant, oil and exhaust
gas) 8-17
Licence plate lamps Bulb capacity 8-24
Replacement 8-33
Link System 5-41
Lubricants 9-15
Luggage hooks 5-70
Luggage room lamp 5-63 Bulb capacity 8-25
M Making a luggage compartment 2-08
Manual transmission 4-22
Map lamps 5-62,5-63Alphabetical index
2
OGWE12E1