change time MITSUBISHI ASX 2015 (in English) Owner's Guide
[x] Cancel search | Manufacturer: MITSUBISHI, Model Year: 2015, Model line: ASX, Model: MITSUBISHI ASX 2015Pages: 452, PDF Size: 20.1 MB
Page 156 of 452
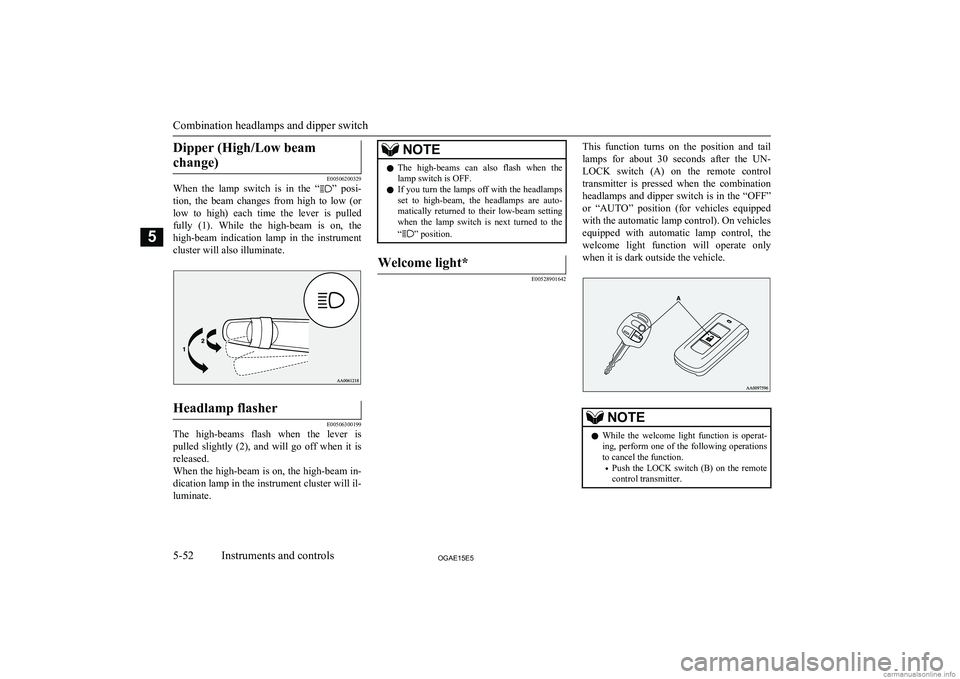
Dipper (High/Low beamchange)
E00506200329
When the lamp switch is in the “” posi-
tion, the beam changes from high to low (or
low to high) each time the lever is pulled fully (1). While the high-beam is on, the
high-beam indication lamp in the instrument
cluster will also illuminate.
Headlamp flasher
E00506300199
The high-beams flash when the lever is pulled slightly (2), and will go off when it is
released.
When the high-beam is on, the high-beam in- dication lamp in the instrument cluster will il-
luminate.
NOTEl The high-beams can also flash when the
lamp switch is OFF.
l If you turn the lamps off with the headlamps
set to high-beam, the headlamps are auto- matically returned to their low-beam setting
when the lamp switch is next turned to the
“
” position.
Welcome light*
E00528901642
This function turns on the position and tail
lamps for about 30 seconds after the UN- LOCK switch (A) on the remote control
transmitter is pressed when the combination
headlamps and dipper switch is in the “OFF”
or “AUTO” position (for vehicles equipped with the automatic lamp control). On vehicles
equipped with automatic lamp control, the welcome light function will operate only
when it is dark outside the vehicle.NOTEl While the welcome light function is operat-
ing, perform one of the following operations to cancel the function.
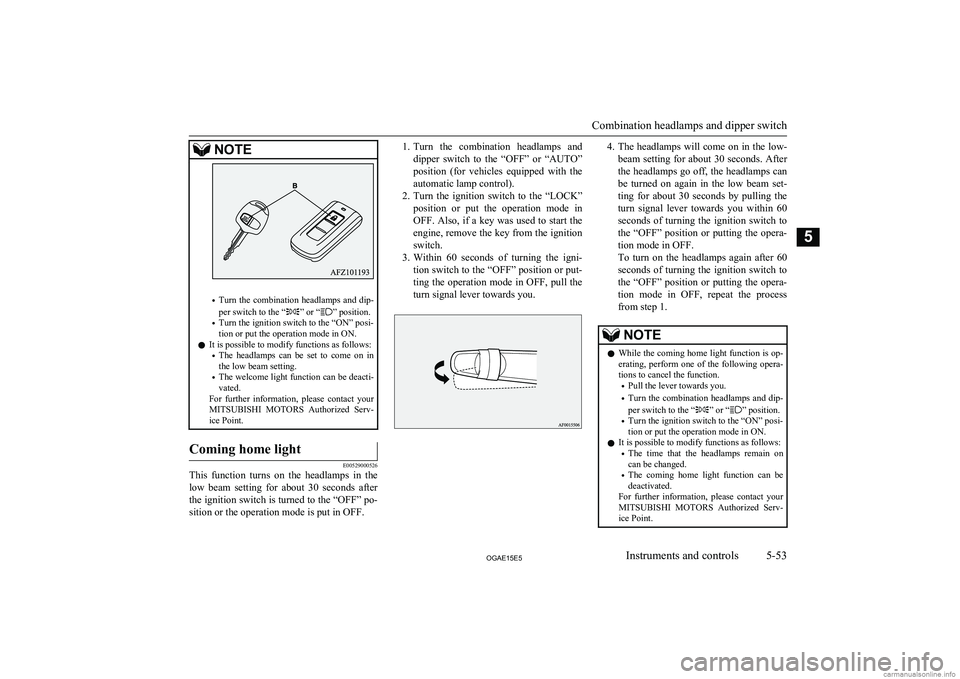
• Push the LOCK switch (B) on the remote
control transmitter.
Combination headlamps and dipper switch
5-52OGAE15E5Instruments and controls5
Page 157 of 452
NOTE
•Turn the combination headlamps and dip-
per switch to the “” or “” position.
• Turn the ignition switch to the “ON” posi-
tion or put the operation mode in ON.
l It is possible to modify functions as follows:
• The headlamps can be set to come on in
the low beam setting.
• The welcome light function can be deacti-
vated.
For further information, please contact your MITSUBISHI MOTORS Authorized Serv-
ice Point.
Coming home light
E00529000526
This function turns on the headlamps in the
low beam setting for about 30 seconds after the ignition switch is turned to the “OFF” po- sition or the operation mode is put in OFF.
1. Turn the combination headlamps and
dipper switch to the “OFF” or “AUTO”
position (for vehicles equipped with the automatic lamp control).
2. Turn the ignition switch to the “LOCK”
position or put the operation mode in
OFF. Also, if a key was used to start the
engine, remove the key from the ignition switch.
3. Within 60 seconds of turning the igni-
tion switch to the “OFF” position or put- ting the operation mode in OFF, pull the
turn signal lever towards you.4. The headlamps will come on in the low-
beam setting for about 30 seconds. After
the headlamps go off, the headlamps can be turned on again in the low beam set-
ting for about 30 seconds by pulling the turn signal lever towards you within 60seconds of turning the ignition switch to
the “OFF” position or putting the opera-
tion mode in OFF.
To turn on the headlamps again after 60 seconds of turning the ignition switch to the “OFF” position or putting the opera-
tion mode in OFF, repeat the process
from step 1.NOTEl While the coming home light function is op-
erating, perform one of the following opera-
tions to cancel the function.
• Pull the lever towards you.
• Turn the combination headlamps and dip-
per switch to the “
” or “” position.
• Turn the ignition switch to the “ON” posi-
tion or put the operation mode in ON.
l It is possible to modify functions as follows:
• The time that the headlamps remain on
can be changed.
• The coming home light function can be
deactivated.
For further information, please contact your MITSUBISHI MOTORS Authorized Serv-
ice Point.
Combination headlamps and dipper switch
5-53OGAE15E5Instruments and controls5
Page 159 of 452
Headlamp automatic levelling
system warning displayType 1Type 2
If there is a fault in the automatic headlamp levelling system, the warning display is dis-
played on the information screen in the multi- information display.
CAUTIONl If a warning is displayed, the system may be
malfunctioning, so we recommend you to
have your vehicle inspected.Turn-signal lever
E00506501592
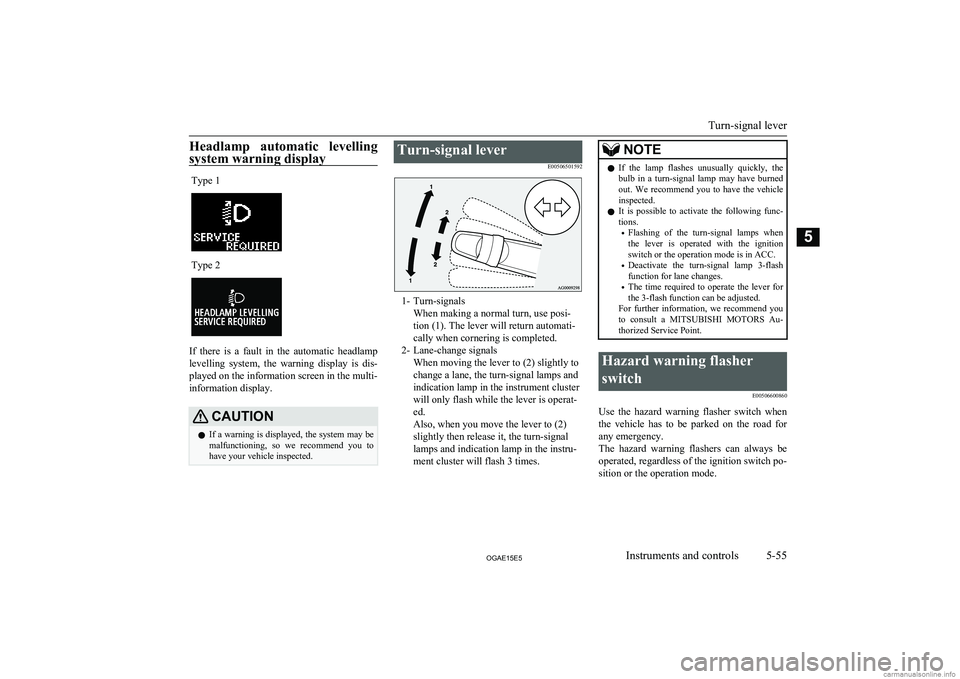
1- Turn-signalsWhen making a normal turn, use posi-
tion (1). The lever will return automati-
cally when cornering is completed.
2- Lane-change signals When moving the lever to (2) slightly to
change a lane, the turn-signal lamps and
indication lamp in the instrument cluster
will only flash while the lever is operat-
ed.
Also, when you move the lever to (2)
slightly then release it, the turn-signal
lamps and indication lamp in the instru-
ment cluster will flash 3 times.
NOTEl If the lamp flashes unusually quickly, the
bulb in a turn-signal lamp may have burned out. We recommend you to have the vehicle
inspected.
l It is possible to activate the following func-
tions.
• Flashing of the turn-signal lamps when
the lever is operated with the ignition
switch or the operation mode is in ACC.
• Deactivate the turn-signal lamp 3-flash
function for lane changes.
• The time required to operate the lever for
the 3-flash function can be adjusted.
For further information, we recommend you
to consult a MITSUBISHI MOTORS Au-
thorized Service Point.Hazard warning flasher
switch E00506600860
Use the hazard warning flasher switch when
the vehicle has to be parked on the road for
any emergency.
The hazard warning flashers can always be operated, regardless of the ignition switch po-
sition or the operation mode.
Turn-signal lever
5-55OGAE15E5Instruments and controls5
Page 164 of 452
To adjust the sensitivity of the rain sensor.
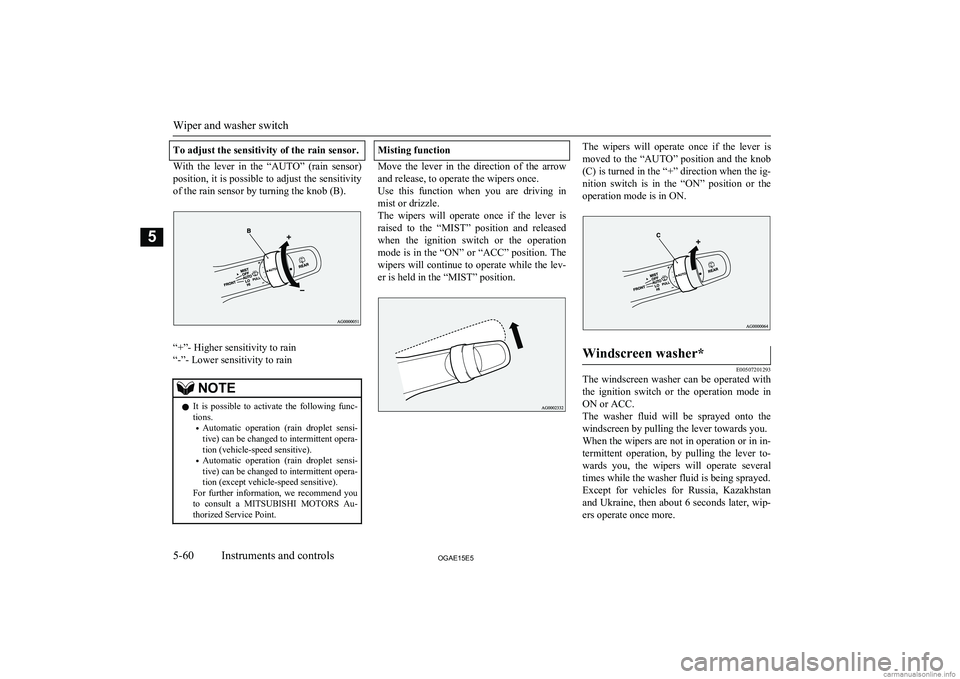
With the lever in the “AUTO” (rain sensor)
position, it is possible to adjust the sensitivity of the rain sensor by turning the knob (B).
“+”- Higher sensitivity to rain
“-”- Lower sensitivity to rain
NOTEl It is possible to activate the following func-
tions.
• Automatic operation (rain droplet sensi-
tive) can be changed to intermittent opera-
tion (vehicle-speed sensitive).
• Automatic operation (rain droplet sensi-
tive) can be changed to intermittent opera-
tion (except vehicle-speed sensitive).
For further information, we recommend you to consult a MITSUBISHI MOTORS Au-
thorized Service Point.Misting function
Move the lever in the direction of the arrow
and release, to operate the wipers once.
Use this function when you are driving in
mist or drizzle.
The wipers will operate once if the lever is raised to the “MIST” position and released
when the ignition switch or the operation
mode is in the “ON” or “ACC” position. The wipers will continue to operate while the lev- er is held in the “MIST” position.
The wipers will operate once if the lever ismoved to the “AUTO” position and the knob
(C) is turned in the “+” direction when the ig- nition switch is in the “ON” position or the operation mode is in ON.Windscreen washer*
E00507201293
The windscreen washer can be operated with the ignition switch or the operation mode in
ON or ACC.
The washer fluid will be sprayed onto the windscreen by pulling the lever towards you.When the wipers are not in operation or in in-
termittent operation, by pulling the lever to- wards you, the wipers will operate several times while the washer fluid is being sprayed.Except for vehicles for Russia, Kazakhstan
and Ukraine, then about 6 seconds later, wip- ers operate once more.
Wiper and washer switch
5-60OGAE15E5Instruments and controls5
Page 181 of 452
ON
The engine is running, and all the vehicle’selectrical devices can be operated.
START
The starter motor operates. After the engine has started, release the key and it will auto-
matically return to the “ON” position.
NOTEl Your vehicle is equipped with an electronic
immobilizer.
To start the engine, the ID code transmitted
by the transponder inside the key must match the code registered in the immobilizer
computer.
Refer to “Electronic immobilizer (Anti-theft
starting system)” on page 3-03.ACC power auto-cutout func-
tion
E00620300224
After about 30 minutes has elapsed with the ignition switch in the “ACC” position, the
function automatically cuts out the power for
the audio system and other electric devices that can be operated with that position.
When the ignition switch is turned from the
“ACC” position, the power is supplied again to those devices.
NOTEl It is possible to modify functions as follows:
• The time until the power cuts out can be
changed to approximately 60 minutes.
• The ACC power auto-cutout function can
be deactivated.
For details, we recommend you to consult
a MITSUBISHI MOTORS Authorized
Service Point.To remove the key
E00620400528
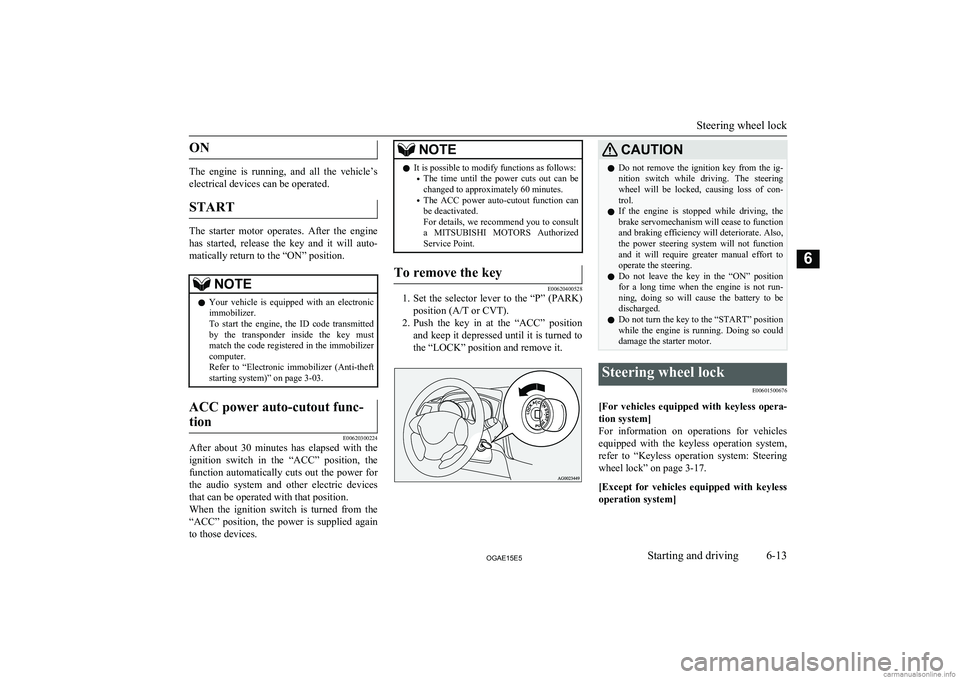
1. Set the selector lever to the “P” (PARK)
position (A/T or CVT).
2. Push the key in at the “ACC” position
and keep it depressed until it is turned tothe “LOCK” position and remove it.
CAUTIONl Do not remove the ignition key from the ig-
nition switch while driving. The steeringwheel will be locked, causing loss of con-
trol.
l If the engine is stopped while driving, the
brake servomechanism will cease to function and braking efficiency will deteriorate. Also,
the power steering system will not function
and it will require greater manual effort to
operate the steering.
l Do not leave the key in the “ON” position
for a long time when the engine is not run-
ning, doing so will cause the battery to be discharged.
l Do not turn the key to the “START” position
while the engine is running. Doing so could damage the starter motor.Steering wheel lock
E00601500676
[For vehicles equipped with keyless opera-tion system]
For information on operations for vehicles equipped with the keyless operation system,
refer to “Keyless operation system: Steering
wheel lock” on page 3-17.
[Except for vehicles equipped with keyless operation system]
Steering wheel lock
6-13OGAE15E5Starting and driving6
Page 189 of 452
NOTElIf the Auto Stop & Go (AS&G) system oper-
ates while the air conditioning is operating, both the engine and the air conditioning
compressor will stop. Therefore, the wind- screen and door windows may mist up be-
cause only the blower will operate.
If the windscreen and door windows mist up,
set the mode selection dial to “
” to restart
the engine.
→ “Mode selection dial” on page 7-03
l If the windscreen and door windows mist up
every time the engine stops, it is recommen-
ded to deactivate the Auto Stop & Go
(AS&G) system by pressing the “Auto Stop & Go (AS&G) OFF” switch.
→ “To deactivate” on page 6-22
l If the air conditioning is operating, set the
temperature control dial higher to lengthen
the time that the engine is stopped automati- cally.
Automatically restarting the
engine
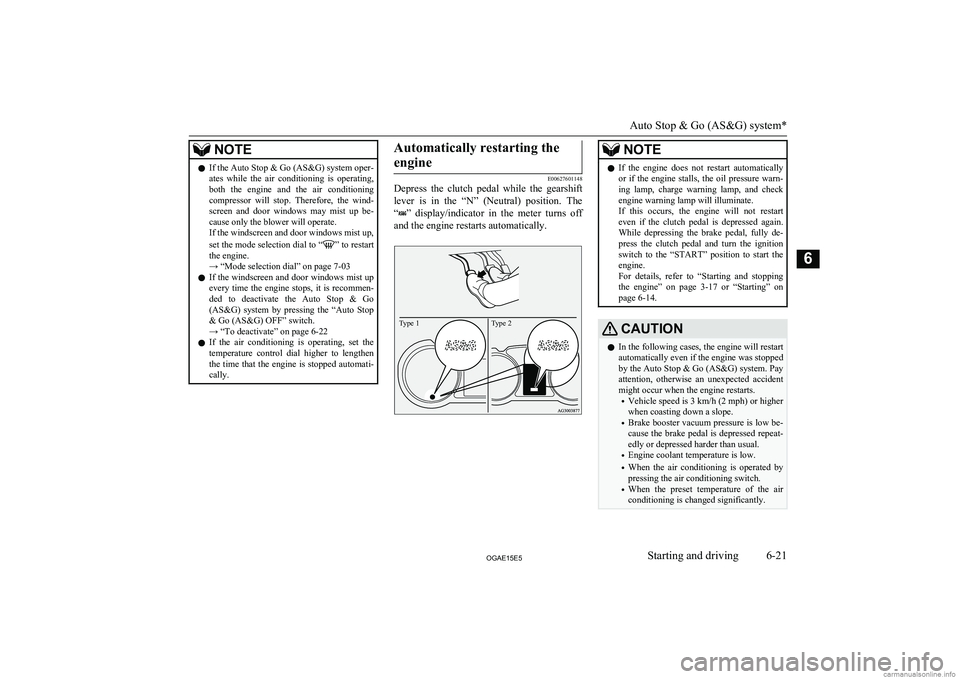
E00627601148
Depress the clutch pedal while the gearshift
lever is in the “N” (Neutral) position. The
“
” display/indicator in the meter turns off
and the engine restarts automatically.
Type 2Type 1
NOTEl If the engine does not restart automatically
or if the engine stalls, the oil pressure warn- ing lamp, charge warning lamp, and check
engine warning lamp will illuminate.
If this occurs, the engine will not restart even if the clutch pedal is depressed again. While depressing the brake pedal, fully de-
press the clutch pedal and turn the ignition switch to the “START” position to start theengine.
For details, refer to “Starting and stopping
the engine” on page 3-17 or “Starting” on
page 6-14.CAUTIONl In the following cases, the engine will restart
automatically even if the engine was stopped
by the Auto Stop & Go (AS&G) system. Pay attention, otherwise an unexpected accidentmight occur when the engine restarts.
• Vehicle speed is 3 km/h (2 mph) or higher
when coasting down a slope.
• Brake booster vacuum pressure is low be-
cause the brake pedal is depressed repeat- edly or depressed harder than usual.
• Engine coolant temperature is low.
• When the air conditioning is operated by
pressing the air conditioning switch.
• When the preset temperature of the air
conditioning is changed significantly.
Auto Stop & Go (AS&G) system*
6-21OGAE15E5Starting and driving6
Page 194 of 452
Automatic transmissionINVECS-II Sports Mode
6A/T (Intelligent &
Innovative Vehicle
Electronic Control System
II)* E00603200866
Automatic transmission will automatically
change its gear depending on road and driv- ing conditions. This helps achieve smooth
driving and excellent fuel efficiency.
Also you can manually shift up and shift down the transaxle. Refer to “Sports mode”
on page 6-29.NOTEl During running-in period or immediately af-
ter reconnection of the battery cable, there may be a case where gear shifts are not
made smoothly. This does not indicate a faulty transmission.
Gear shifts will become smooth after the transmission has been shifted several times
by the electronic control system.Selector lever operation
E00603301200
The transmission has 6 forward gears and 1
reverse gear.
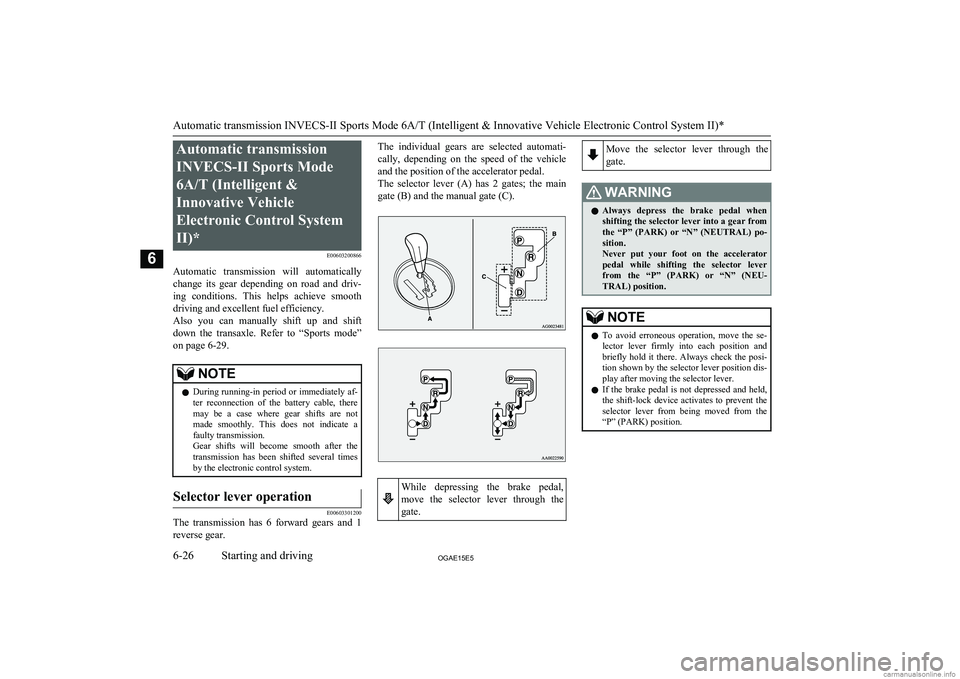
The individual gears are selected automati-cally, depending on the speed of the vehicle
and the position of the accelerator pedal.
The selector lever (A) has 2 gates; the main gate (B) and the manual gate (C).While depressing the brake pedal,
move the selector lever through the gate.Move the selector lever through the
gate.WARNINGl Always depress the brake pedal when
shifting the selector lever into a gear from the “P” (PARK) or “N” (NEUTRAL) po-sition.
Never put your foot on the accelerator
pedal while shifting the selector lever
from the “P” (PARK) or “N” (NEU- TRAL) position.NOTEl To avoid erroneous operation, move the se-
lector lever firmly into each position and
briefly hold it there. Always check the posi- tion shown by the selector lever position dis-
play after moving the selector lever.
l If the brake pedal is not depressed and held,
the shift-lock device activates to prevent the selector lever from being moved from the “P” (PARK) position.
Automatic transmission INVECS-II Sports Mode 6A/T (Intelligent & Innovative Vehicle Electronic Control System II)*
6-26OGAE15E5Starting and driving6
Page 196 of 452
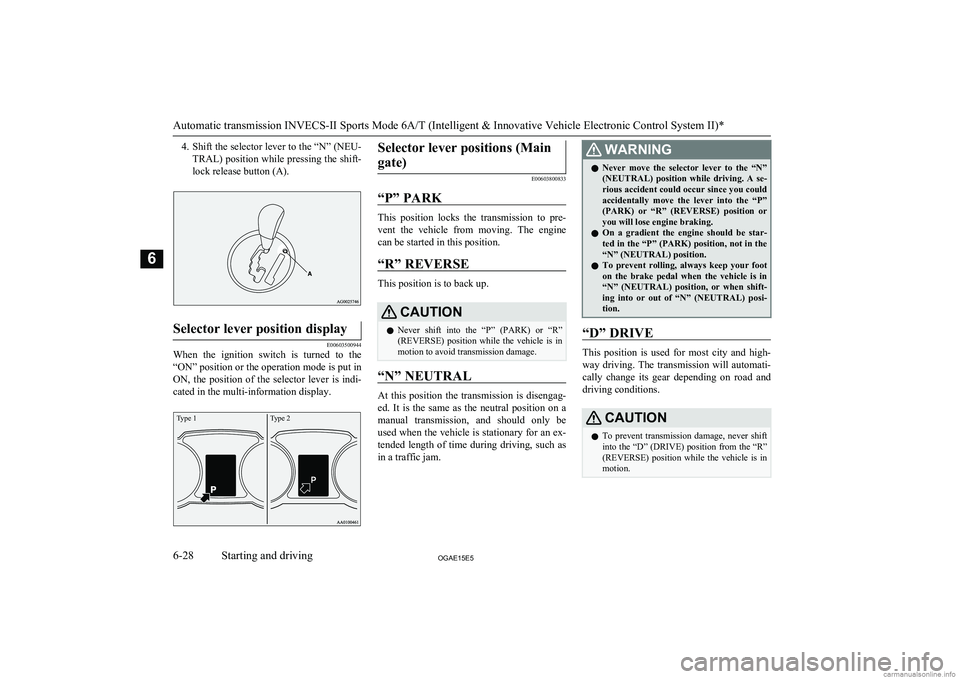
4.Shift the selector lever to the “N” (NEU-
TRAL) position while pressing the shift- lock release button (A).Selector lever position display
E00603500944
When the ignition switch is turned to the
“ON” position or the operation mode is put in ON, the position of the selector lever is indi-
cated in the multi-information display.
Type 1Type 2Selector lever positions (Main
gate)
E00603800833
“P” PARK
This position locks the transmission to pre- vent the vehicle from moving. The engine
can be started in this position.
“R” REVERSE
This position is to back up.
CAUTIONl Never shift into the “P” (PARK) or “R”
(REVERSE) position while the vehicle is in motion to avoid transmission damage.
“N” NEUTRAL
At this position the transmission is disengag-
ed. It is the same as the neutral position on amanual transmission, and should only be
used when the vehicle is stationary for an ex-
tended length of time during driving, such as
in a traffic jam.
WARNINGl Never move the selector lever to the “N”
(NEUTRAL) position while driving. A se-rious accident could occur since you could
accidentally move the lever into the “P”
(PARK) or “R” (REVERSE) position or you will lose engine braking.
l On a gradient the engine should be star-
ted in the “P” (PARK) position, not in the “N” (NEUTRAL) position.
l To prevent rolling, always keep your foot
on the brake pedal when the vehicle is in “N” (NEUTRAL) position, or when shift-
ing into or out of “N” (NEUTRAL) posi- tion.
“D” DRIVE
This position is used for most city and high-
way driving. The transmission will automati-
cally change its gear depending on road and driving conditions.
CAUTIONl To prevent transmission damage, never shift
into the “D” (DRIVE) position from the “R”
(REVERSE) position while the vehicle is in motion.
Automatic transmission INVECS-II Sports Mode 6A/T (Intelligent & Innovative Vehicle Electronic Control System II)*
6-28OGAE15E5Starting and driving6
Page 197 of 452
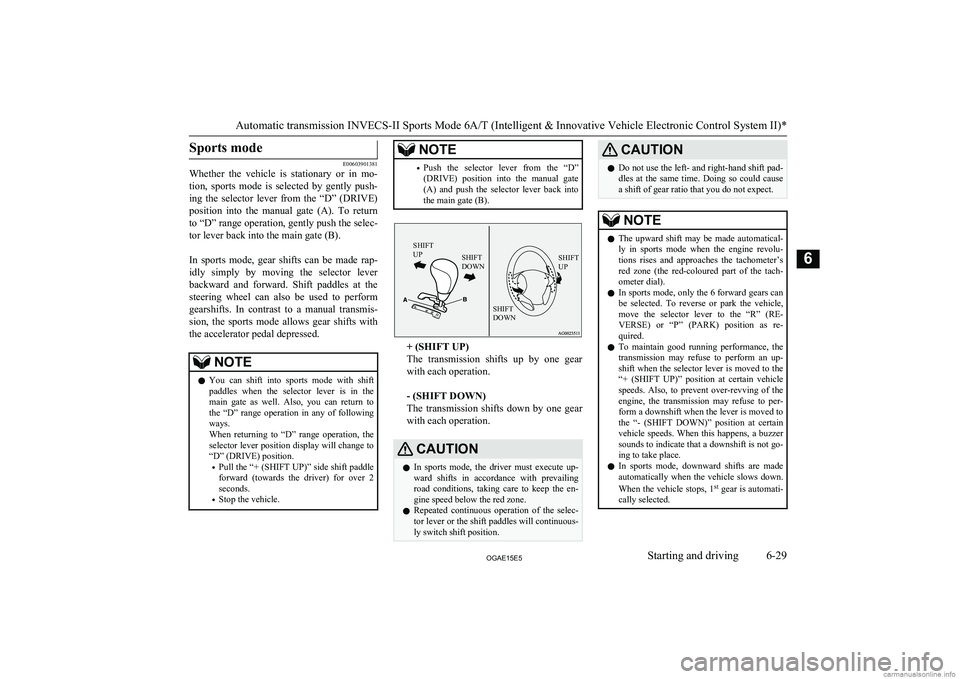
Sports mode
E00603901381
Whether the vehicle is stationary or in mo-
tion, sports mode is selected by gently push-
ing the selector lever from the “D” (DRIVE) position into the manual gate (A). To return
to “D” range operation, gently push the selec- tor lever back into the main gate (B).
In sports mode, gear shifts can be made rap- idly simply by moving the selector leverbackward and forward. Shift paddles at the steering wheel can also be used to perform
gearshifts. In contrast to a manual transmis- sion, the sports mode allows gear shifts with
the accelerator pedal depressed.
NOTEl You can shift into sports mode with shift
paddles when the selector lever is in the main gate as well. Also, you can return to
the “D” range operation in any of following ways.
When returning to “D” range operation, the selector lever position display will change to
“D” (DRIVE) position.
• Pull the “+ (SHIFT UP)” side shift paddle
forward (towards the driver) for over 2 seconds.
• Stop the vehicle.NOTE•Push the selector lever from the “D”
(DRIVE) position into the manual gate
(A) and push the selector lever back into the main gate (B).SHIFT
UPSHIFT
DOWNSHIFT
UPSHIFT
DOWN
+ (SHIFT UP)
The transmission shifts up by one gear
with each operation.
- (SHIFT DOWN)
The transmission shifts down by one gear
with each operation.
CAUTIONl In sports mode, the driver must execute up-
ward shifts in accordance with prevailingroad conditions, taking care to keep the en-
gine speed below the red zone.
l Repeated continuous operation of the selec-
tor lever or the shift paddles will continuous- ly switch shift position.CAUTIONl Do not use the left- and right-hand shift pad-
dles at the same time. Doing so could cause
a shift of gear ratio that you do not expect.NOTEl The upward shift may be made automatical-
ly in sports mode when the engine revolu-
tions rises and approaches the tachometer’s
red zone (the red-coloured part of the tach- ometer dial).
l In sports mode, only the
6 forward gears can
be selected. To reverse or park the vehicle, move the selector lever to the “R” (RE-
VERSE) or “P” (PARK) position as re- quired.
l To maintain good running performance, the
transmission may refuse to perform an up- shift when the selector lever is moved to the“+ (SHIFT UP)” position at certain vehicle
speeds. Also, to prevent over-revving of the engine, the transmission may refuse to per-
form a downshift when the lever is moved to
the “- (SHIFT DOWN)” position at certain vehicle speeds. When this happens, a buzzer
sounds to indicate that a downshift is not go-
ing to take place.
l In sports mode, downward shifts are made
automatically when the vehicle slows down.
When the vehicle stops, 1 st
gear is automati-
cally selected.
Automatic transmission INVECS-II Sports Mode 6A/T (Intelligent & Innovative Vehicle Electronic Control System II)*
6-29OGAE15E5Starting and driving6
Page 203 of 452
If the ambient temperature is low, the selec-
tor lever position display on the multi-infor- mation display may blink when the selector lever is placed in the “D” (DRIVE) or “R”
(REVERSE) position immediately after the engine has been started. This indicates that
the transmission requires warming up.
While the display is blinking, the vehicle will not move, because the transmission keeps
disengaging until the warm-up is completed even if the selector lever is placed in the “D”
or “R” position.
When the selector lever position display is
blinking, perform the following procedure: 1. Depress the brake pedal with your right
foot and place the selector lever in the “N” (NEUTRAL) position for several
seconds.
2. Keep depressing the brake pedal and
then place the selector lever in the “D”
(DRIVE) or “R” (REVERSE) position. If the selector lever position displaystops blinking, the warm-up is comple- ted and the transmission will function
normally.
3. If the display is still blinking, repeat
steps 1 and 2 above.NOTEl While the selector lever position display is
blinking, a buzzer will sound intermittently.Selector lever positions (Main
gate)
E00602400311
“P” PARK
This position locks the transmission to pre- vent the vehicle from moving. The engine
can be started in this position.
“R” REVERSE
This position is to back up.
CAUTIONl Never shift into the “P” (PARK) or “R”
(REVERSE) position while the vehicle is in motion to avoid transmission damage.
“N” NEUTRAL
At this position the transmission is disengag-
ed. It is the same as the neutral position on amanual transmission, and should only be
used when the vehicle is stationary for an ex-
tended length of time during driving, such as
in a traffic jam.
WARNINGl Never move the selector lever to the “N”
(NEUTRAL) position while driving. A se-rious accident could occur since you could
accidentally move the lever into the “P”
(PARK) or “R” (REVERSE) position or you will lose engine braking.
l On a gradient the engine should be star-
ted in the “P” (PARK) position, not in the “N” (NEUTRAL) position.
l To prevent rolling, always keep your foot
on the brake pedal when the vehicle is in “N” (NEUTRAL) position, or when shift-
ing into or out of “N” (NEUTRAL) posi- tion.
“D” DRIVE
This position is used for most city and high-
way driving. The transmission will automati-
cally and continuously change its gear radio depending on road and driving conditions.
CAUTIONl To prevent transmission damage, never shift
into the “D” (DRIVE) position from the “R” (REVERSE) position while the vehicle is inmotion.
Automatic transmission INVECS-III Sports Mode 6CVT (Intelligent & Innovative Vehicle Electronic Control System III)*
6-35OGAE15E5Starting and driving6